
Cosmo Canyon will be the fourth region you adventure through in Final Fantasy VII Rebirth, but you won’t be able to fully explore it until you get your hands on this region’s exclusive Chocobo. Fiend Intel is one of the many world Intel activities available here and there are six to track down and complete. On this page, we’ll navigate you through the necessary steps to finding and defeating all of the Fiend Intel in the Cosmo Canyon.
Fiend Intel 1: Wizards of the Waste
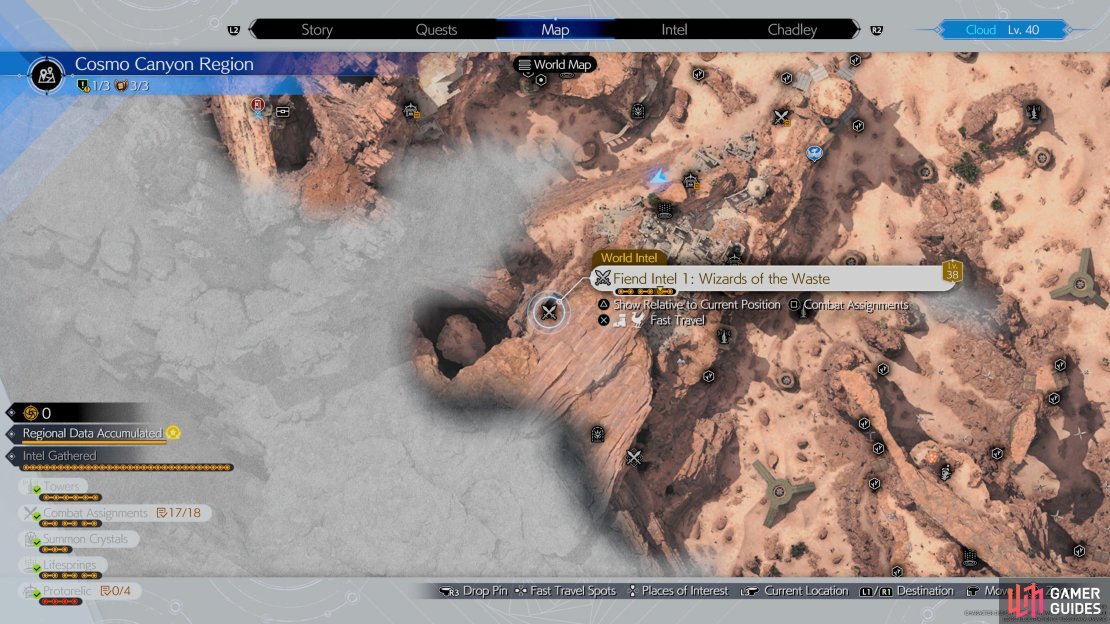

(1 of 3) Head to this location on the map to find the Wizards of the Waste Fiend Intel
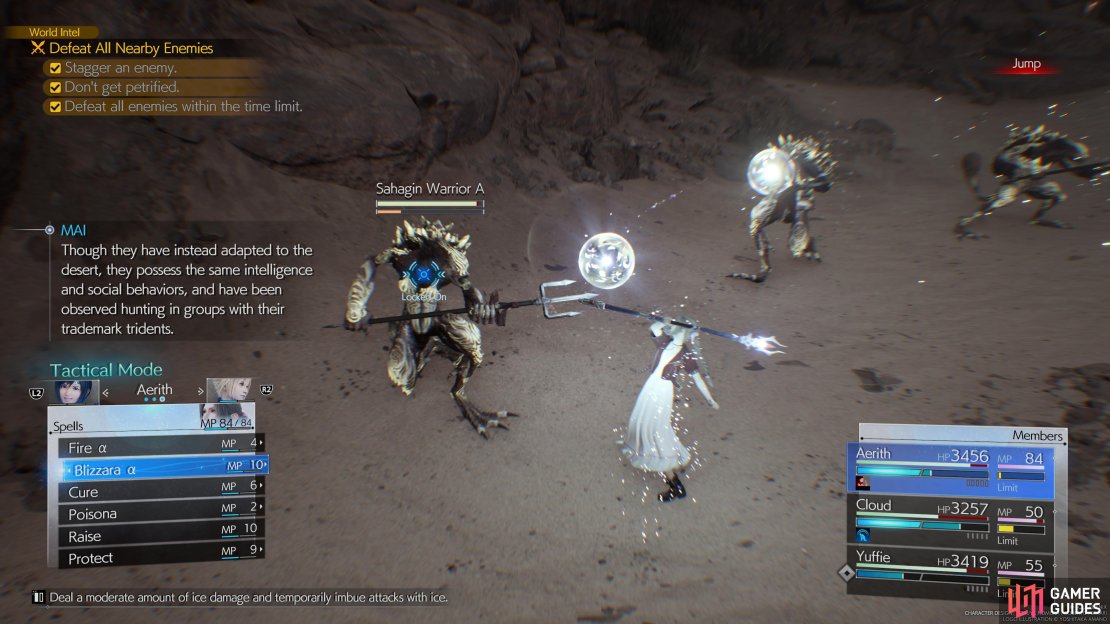
- Stagger an enemy
- Don’t Get Petrified
- Defeat All Enemies within the time limit.
The Wizards of the Waste Fiend Intel can be found to the south of the Crimson Earth Tower, and it can be easily reached by working your way up the steep hill. When you arrive, you’ll be greeted by three ![]() Sahagin Warriors. These enemies shouldn’t cause you too much trouble, but you’ll want to watch out for a skill called Salientian Stone as this will petrify you if it connects. You can avoid this by removing the status effect by using Esuna quickly or you can avoid it entirely by keeping on the move.
Sahagin Warriors. These enemies shouldn’t cause you too much trouble, but you’ll want to watch out for a skill called Salientian Stone as this will petrify you if it connects. You can avoid this by removing the status effect by using Esuna quickly or you can avoid it entirely by keeping on the move.
If you get petrified, then you’ll want to retry that challenge as you’ll need to avoid getting petrified in order to complete all of the objectives. One of the other optional objectives for this Fiend Intel is to stagger an enemy and this can be done by using their weakness against them (![]() Ice). The best way to stagger them quickly is to use high-leveled ice spells such as Blizzara or Blizzaga to pressure them and then switch to Cloud and use his Focused Forest to stagger them.
Ice). The best way to stagger them quickly is to use high-leveled ice spells such as Blizzara or Blizzaga to pressure them and then switch to Cloud and use his Focused Forest to stagger them.
Fiend Intel 2: Fury Takes Flight
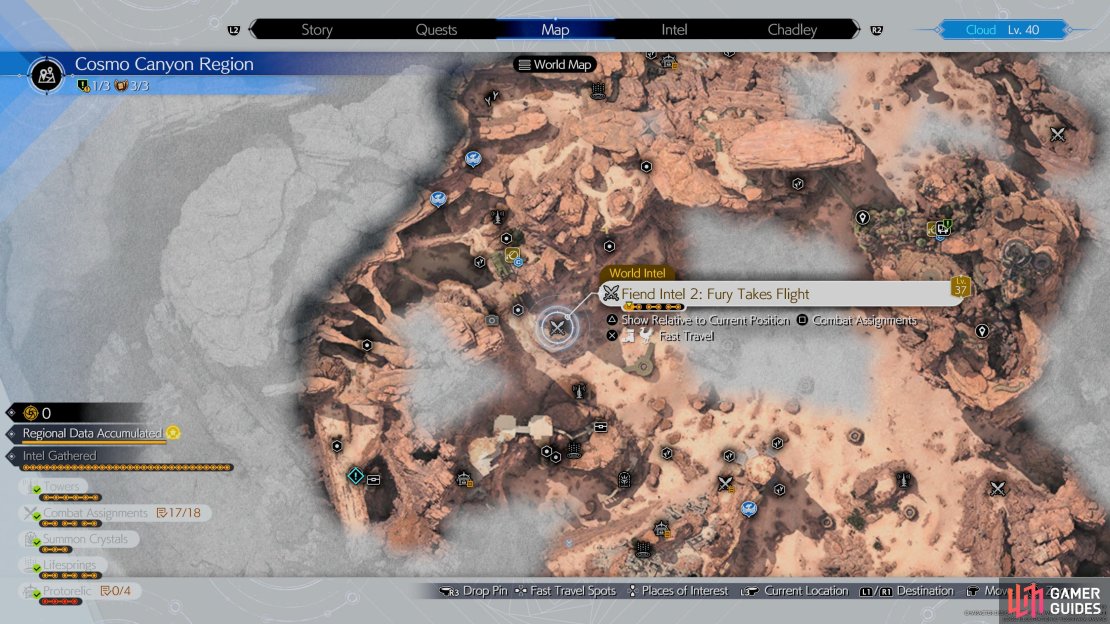
(1 of 3) Head to this location on the map to find the Fury Takes Flight Fiend Intel.
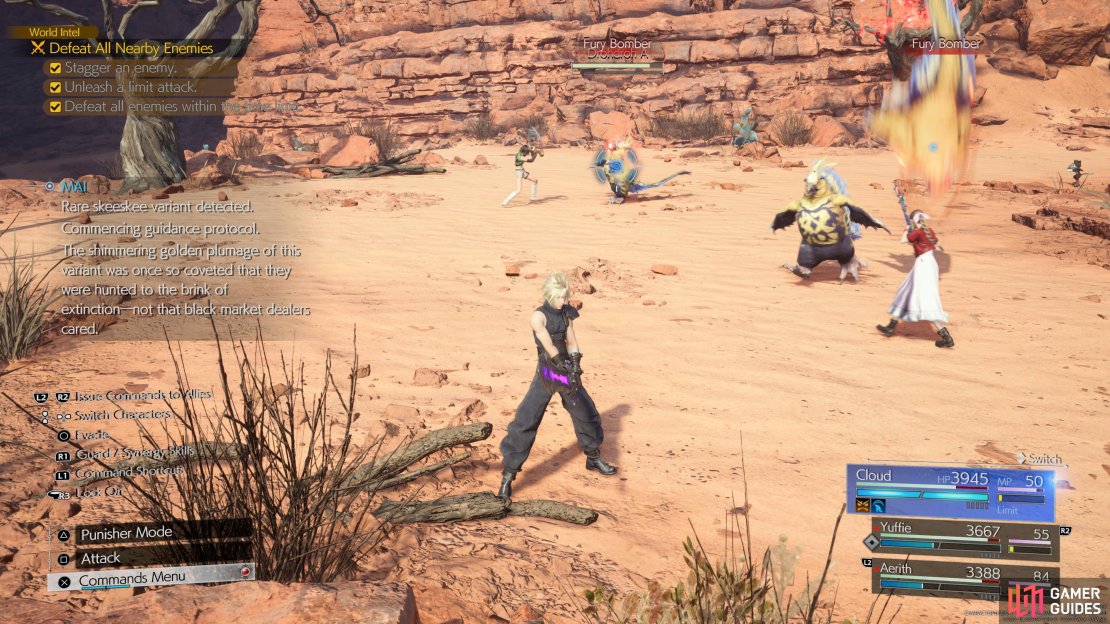
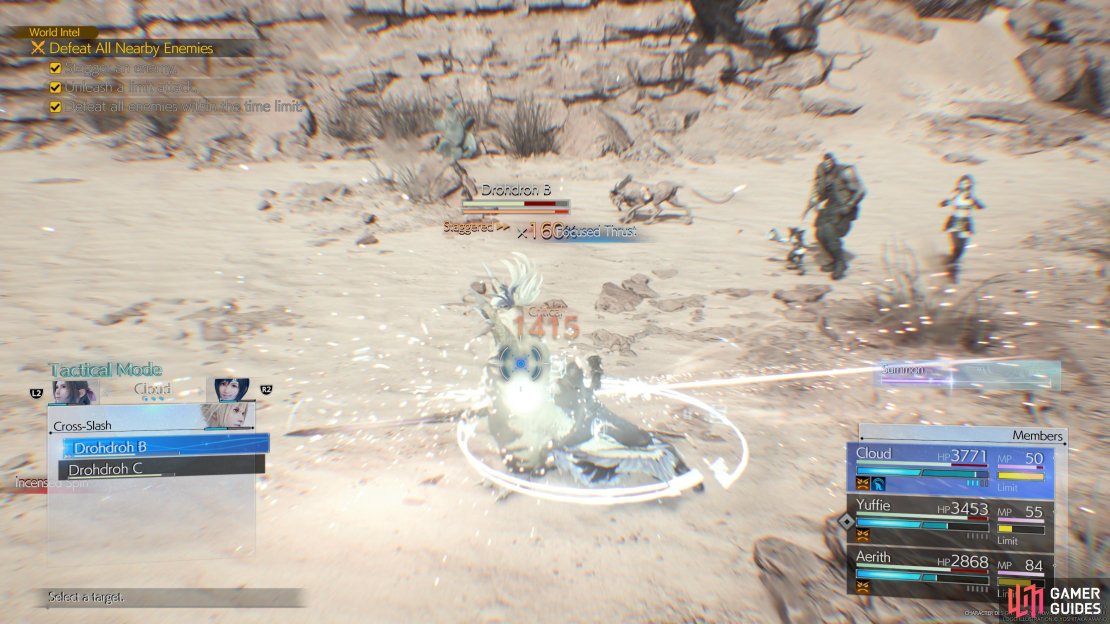
- Stagger an enemy
- Unleash a limit attack
- Defeat all enemies within the time limit
The Fury Takes Flight Fiend Intel can be found to the north of the Crimson Earth Tower, and it can be reached by heading up the hill to the northeast of the tower. For this Fiend Intel you’ll need to stagger the enemy and use a limit break against the ![]() Drohdroh. To do this, you’ll want to wait for it to perform an attack called Fury Bomber and then evade it to cause it to be pressured. You’ll now want to quickly use an attack that says “significantly increases stagger”, such as
Drohdroh. To do this, you’ll want to wait for it to perform an attack called Fury Bomber and then evade it to cause it to be pressured. You’ll now want to quickly use an attack that says “significantly increases stagger”, such as ![]() Focused Thrust and Mind Blast (
Focused Thrust and Mind Blast (![]() Enemy Skill Materia) to stagger it. As for a Limit Break, you can do this by getting hit by the enemy’s attack to get the
Enemy Skill Materia) to stagger it. As for a Limit Break, you can do this by getting hit by the enemy’s attack to get the ![]() Fury Status effect on you as this will charge your Limit gauge quicker. However, you’ll take more damage with this status effect on you, so you’ll want to play more defensively to avoid its attacks.
Fury Status effect on you as this will charge your Limit gauge quicker. However, you’ll take more damage with this status effect on you, so you’ll want to play more defensively to avoid its attacks.
Fiend Intel 3: Guardian of Gold
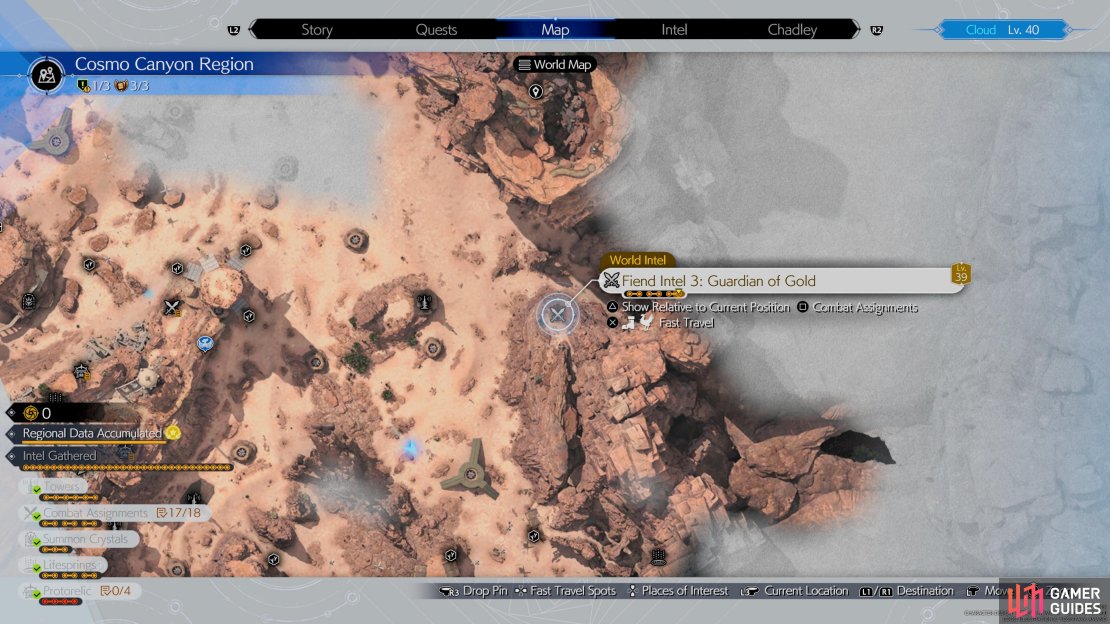
(1 of 3) Head to this location on the map to find the Guardian of Gold Fiend Intel.
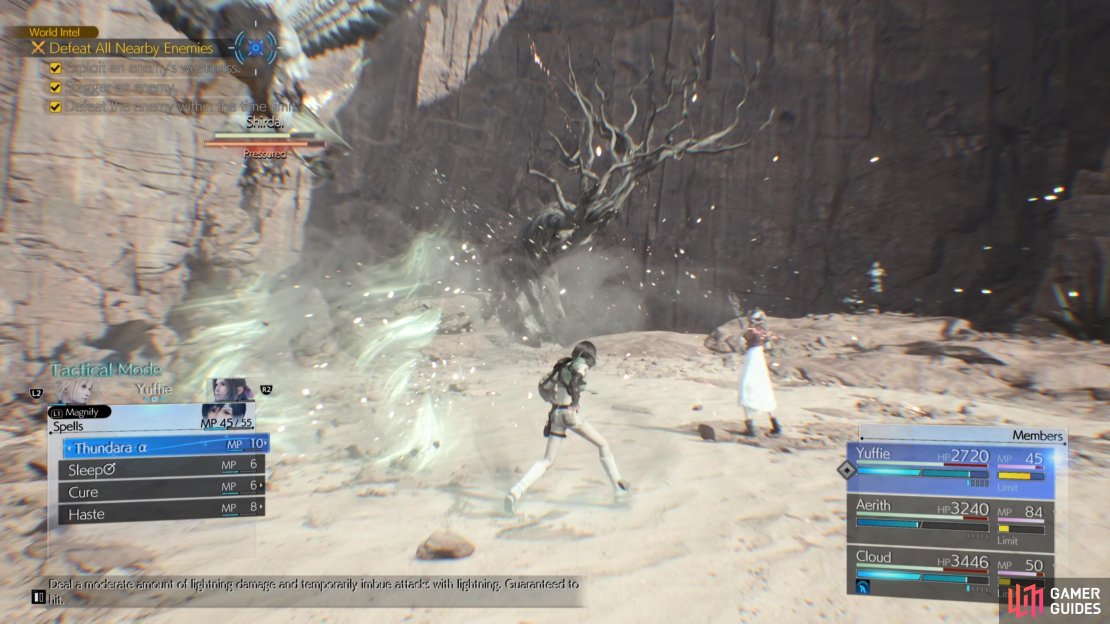
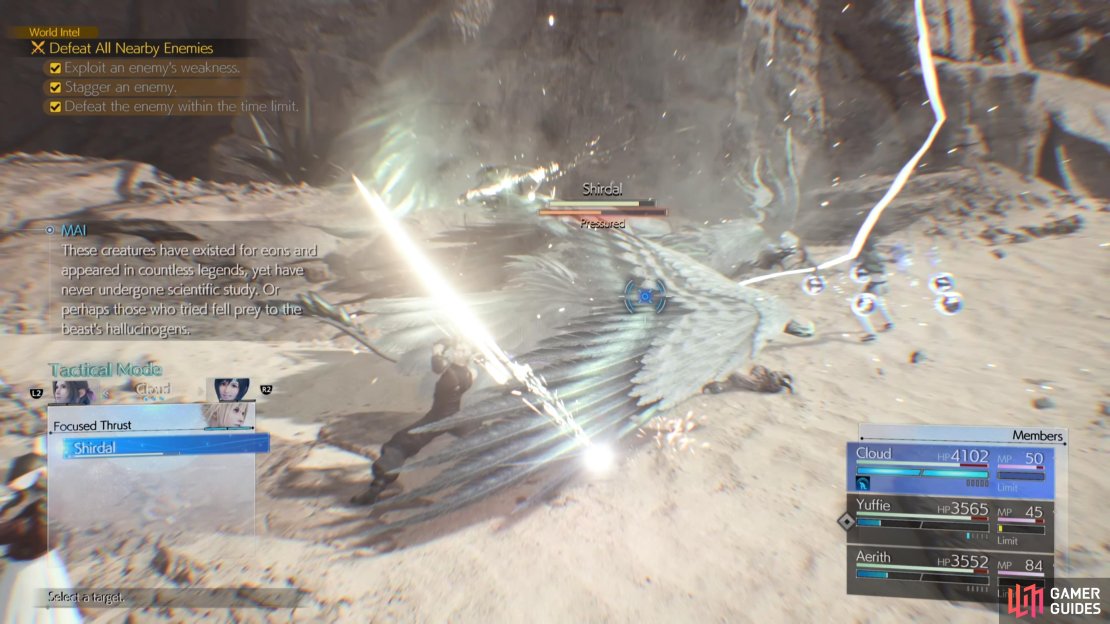
- Exploit an enemy’s weakness
- Stagger an enemy
- Defeat all enemies within the time limit
The Guardian of Gold Fiend Intel can be found to the east of the Dried Oasis Tower, and it can be reached by using the nearby wind current generator, before gliding over to Gliding Range No. 9 - 55 m and taking the left path. You’ll be going up against a ![]() Shirdal which is a large
Shirdal which is a large ![]() Griffon that can cause you a bit of trouble. This battle can be made easier by staggering and exploiting its weakness (
Griffon that can cause you a bit of trouble. This battle can be made easier by staggering and exploiting its weakness (![]() Lightning) which also happens to be the optional objectives.
Lightning) which also happens to be the optional objectives.
You can complete these objectives by equipping a ![]() Lightning Materia and using Thundara and Thundaga against it to deal lots of damage. As for staggering it, you’ll want to wait for it to use Protective
Lightning Materia and using Thundara and Thundaga against it to deal lots of damage. As for staggering it, you’ll want to wait for it to use Protective ![]() Winds as this will cause it to be temporally pressured and you can then use Focused Thrust with Cloud to quickly stagger it. If it performs an attack called Befouling Wind, you’ll want to keep your distance otherwise you will get hit by a large AoE (Area of Effect).
Winds as this will cause it to be temporally pressured and you can then use Focused Thrust with Cloud to quickly stagger it. If it performs an attack called Befouling Wind, you’ll want to keep your distance otherwise you will get hit by a large AoE (Area of Effect).
Fiend Intel 4: Too Hot to Handle
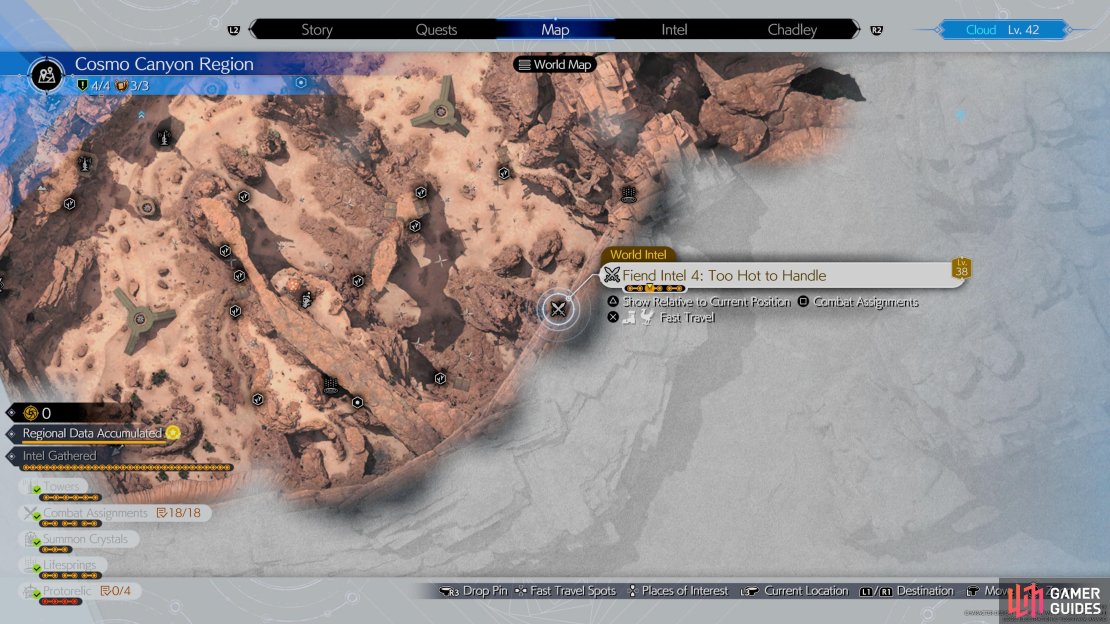

(1 of 3) Head to this location on the map to find the Too Hot To Handle Fiend Intel
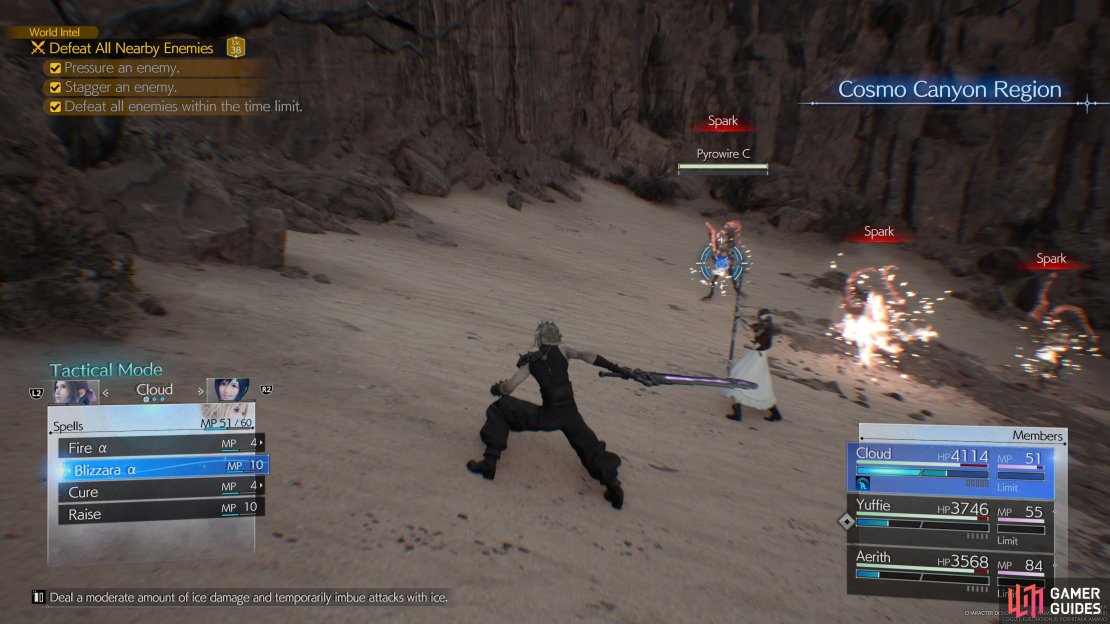
- Pressure an enemy
- Stagger an enemy
- Defeat all enemies within the time limit
The Too Hot to Handle Fiend Intel can be found to the southeast of the Dried Oasis Tower. Here you’ll have to take on two Pyrowires and they aren’t very hard to take down, but the trickiest part of this fiend intel is completing the objectives before you kill them. You’ll want to avoid attacking it and wait for it to perform an attack called Spark and then use their elemental weaknesses against it, such as ice to put it in a pressured state. Now you’ll want to use attacks like Focused Strike or ![]() Focused Shot to stagger it and then finish it off with any available synergy abilities or limit breaks.
Focused Shot to stagger it and then finish it off with any available synergy abilities or limit breaks.
Fiend Intel 5: The Shapeless Assassin
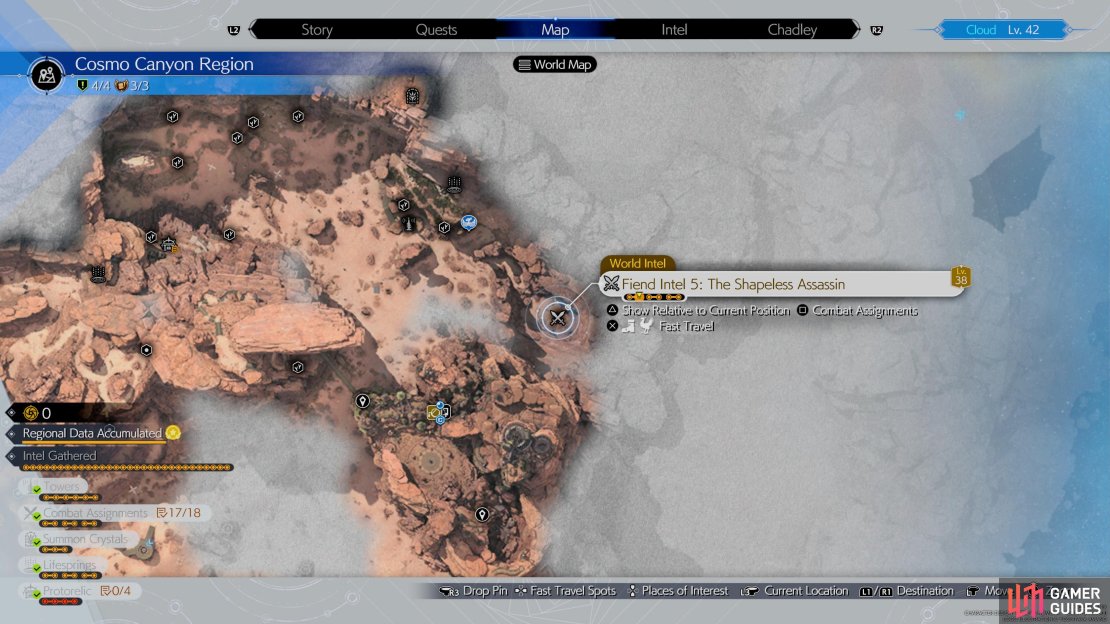

(1 of 3) Head to this location on the map to find the Shapeless Assassin Fiend Intel.
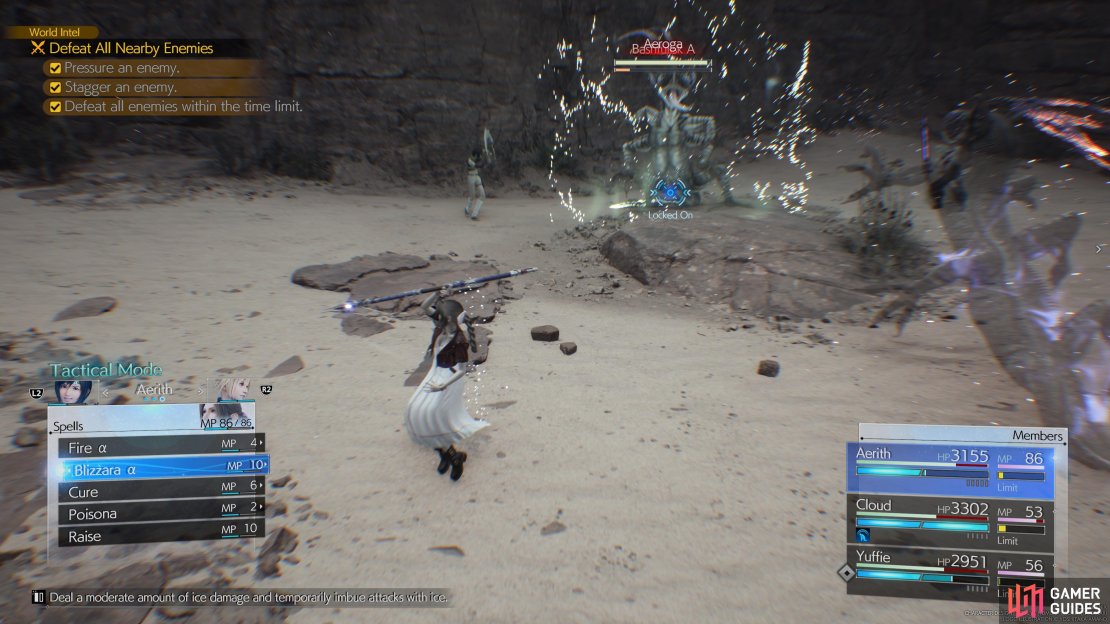
- Pressure an enemy
- Stagger an enemy
- Defeat all enemies within the time limit
The Shapeless Assassin Fiend Intel can be found to the southeast of the Spiritwastes Tower. This time around you’ll be facing multiple Bashfulisks. These aren’t much of a threat by themselves, but having multiple attack you at once can be a risky situation to be in, so you’ll want to focus on one at a time to get them down quicker. You’ll need to Pressure and Stagger them for the Fiend Intel and the best way to do this is by hitting them with their elemental weakness. These are weak to Ice so you’ll want to use any high-level ice spells, such as Blizzara, and then follow up with any of the focused abilities to stagger them when they’re pressured.
Fiend Intel 6: Forgotten Toys
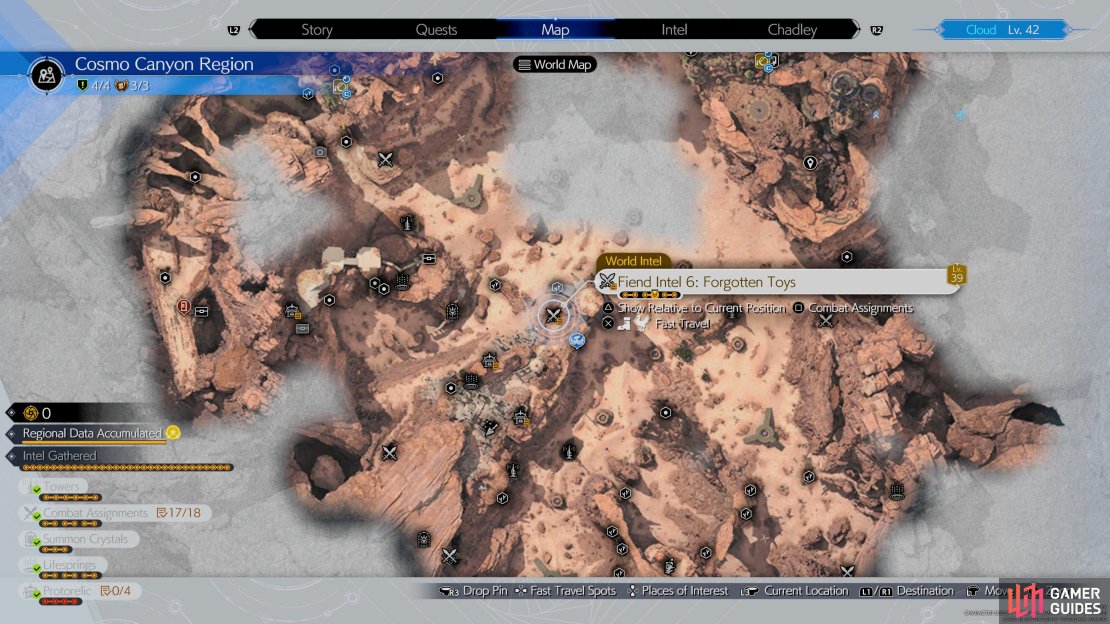
(1 of 3) Head to this location on the map to find the Forgotten Toys Fiend Intel
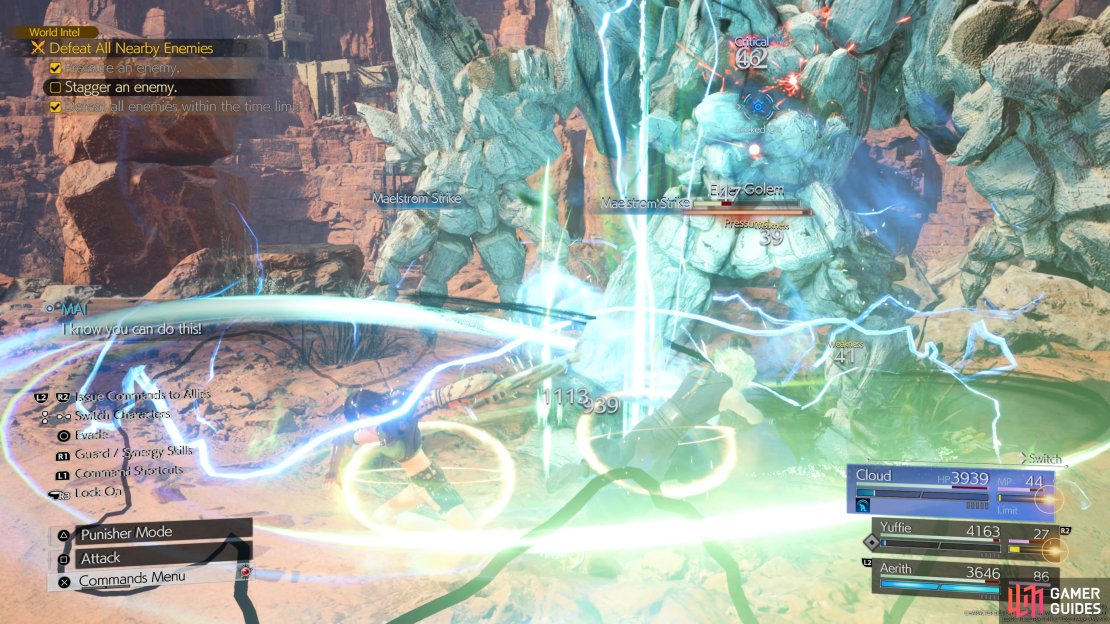
- Pressure an enemy
- Stagger an enemy
- Defeat all enemies within the time limit
The Forgotten Toys Fiend Intel can be found to the northeast of the Ancient Capital Tower. If you haven’t unlocked this yet, then you can easily do so by following the steps on our All Gongaga Activation Intel Locations page. For this Fiend Intel, you’ll be going up against an Elder Golem and it has few attacks you’ll want to be aware of in order to ensure your survival. The Elder Golem will sometimes use Explosive, Detonation Strike, and Landmine Toss attacks against you and if you get hit by any of these then you’ll have the ![]() Petrify Status Effect placed on you.
Petrify Status Effect placed on you.
If you get hit while this status effect is on you then you’ll be turned to stone, and that character will be unable to attack or move which makes you extremely vulnerable. So, you’ll want to quickly remove this by using the Esuna Spell or ![]() Gold Needle and
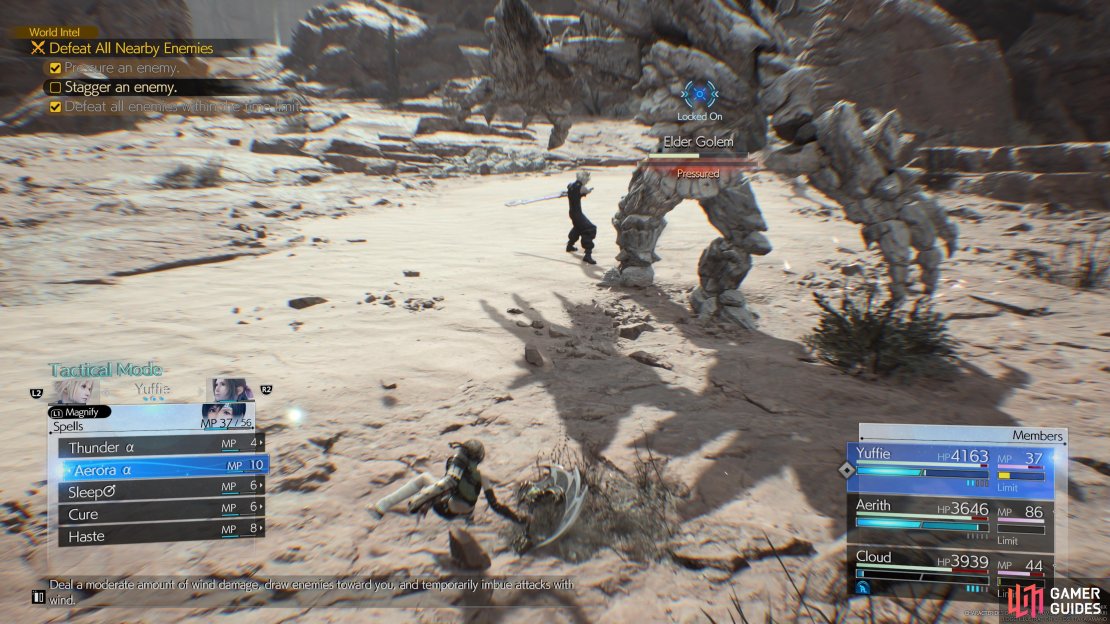
Gold Needle and ![]() Remedy items on the character so they can get back in the fight. During this battle you’ll need to Pressure and Stagger the enemy and you can do this by avoiding the Elder Golem’s attack and hitting it until it’s depleted all of its energy and pressure itself, then hit it with any focused abilities and wind-based spells to stagger it.
Remedy items on the character so they can get back in the fight. During this battle you’ll need to Pressure and Stagger the enemy and you can do this by avoiding the Elder Golem’s attack and hitting it until it’s depleted all of its energy and pressure itself, then hit it with any focused abilities and wind-based spells to stagger it.
More Final Fantasy VII Rebirth Guides
If you’re looking for help in other aspects of Final Fantasy VII Rebirth, then make sure to check out the pages below:
No Comments