
When you make it to the ![]() Cosmo Canyon region in Final Fantasy VII Rebirth, you’ll be tasked with pressing on to Cosmo Canyon -
Cosmo Canyon region in Final Fantasy VII Rebirth, you’ll be tasked with pressing on to Cosmo Canyon - ![]() Red XIII’s hometown. At first glance, it may seem that your ability to explore the Cosmo Canyon region is gated by main story progression, but this actually isn’t the case… not if you wrangle the Cosmo Canyon chocobo, anyways. En route to the settlement of Cosmo Canyon you can find this region’s Chocobo Intel event which, if completed, will allow you to use the native fowl’s gliding abilities to explore Cosmo Canyon. This page will provide a walkthrough for the Cosmo Canyon Chocobo Intel so you can catch the Cosmo Canyon chocobo.
Red XIII’s hometown. At first glance, it may seem that your ability to explore the Cosmo Canyon region is gated by main story progression, but this actually isn’t the case… not if you wrangle the Cosmo Canyon chocobo, anyways. En route to the settlement of Cosmo Canyon you can find this region’s Chocobo Intel event which, if completed, will allow you to use the native fowl’s gliding abilities to explore Cosmo Canyon. This page will provide a walkthrough for the Cosmo Canyon Chocobo Intel so you can catch the Cosmo Canyon chocobo.
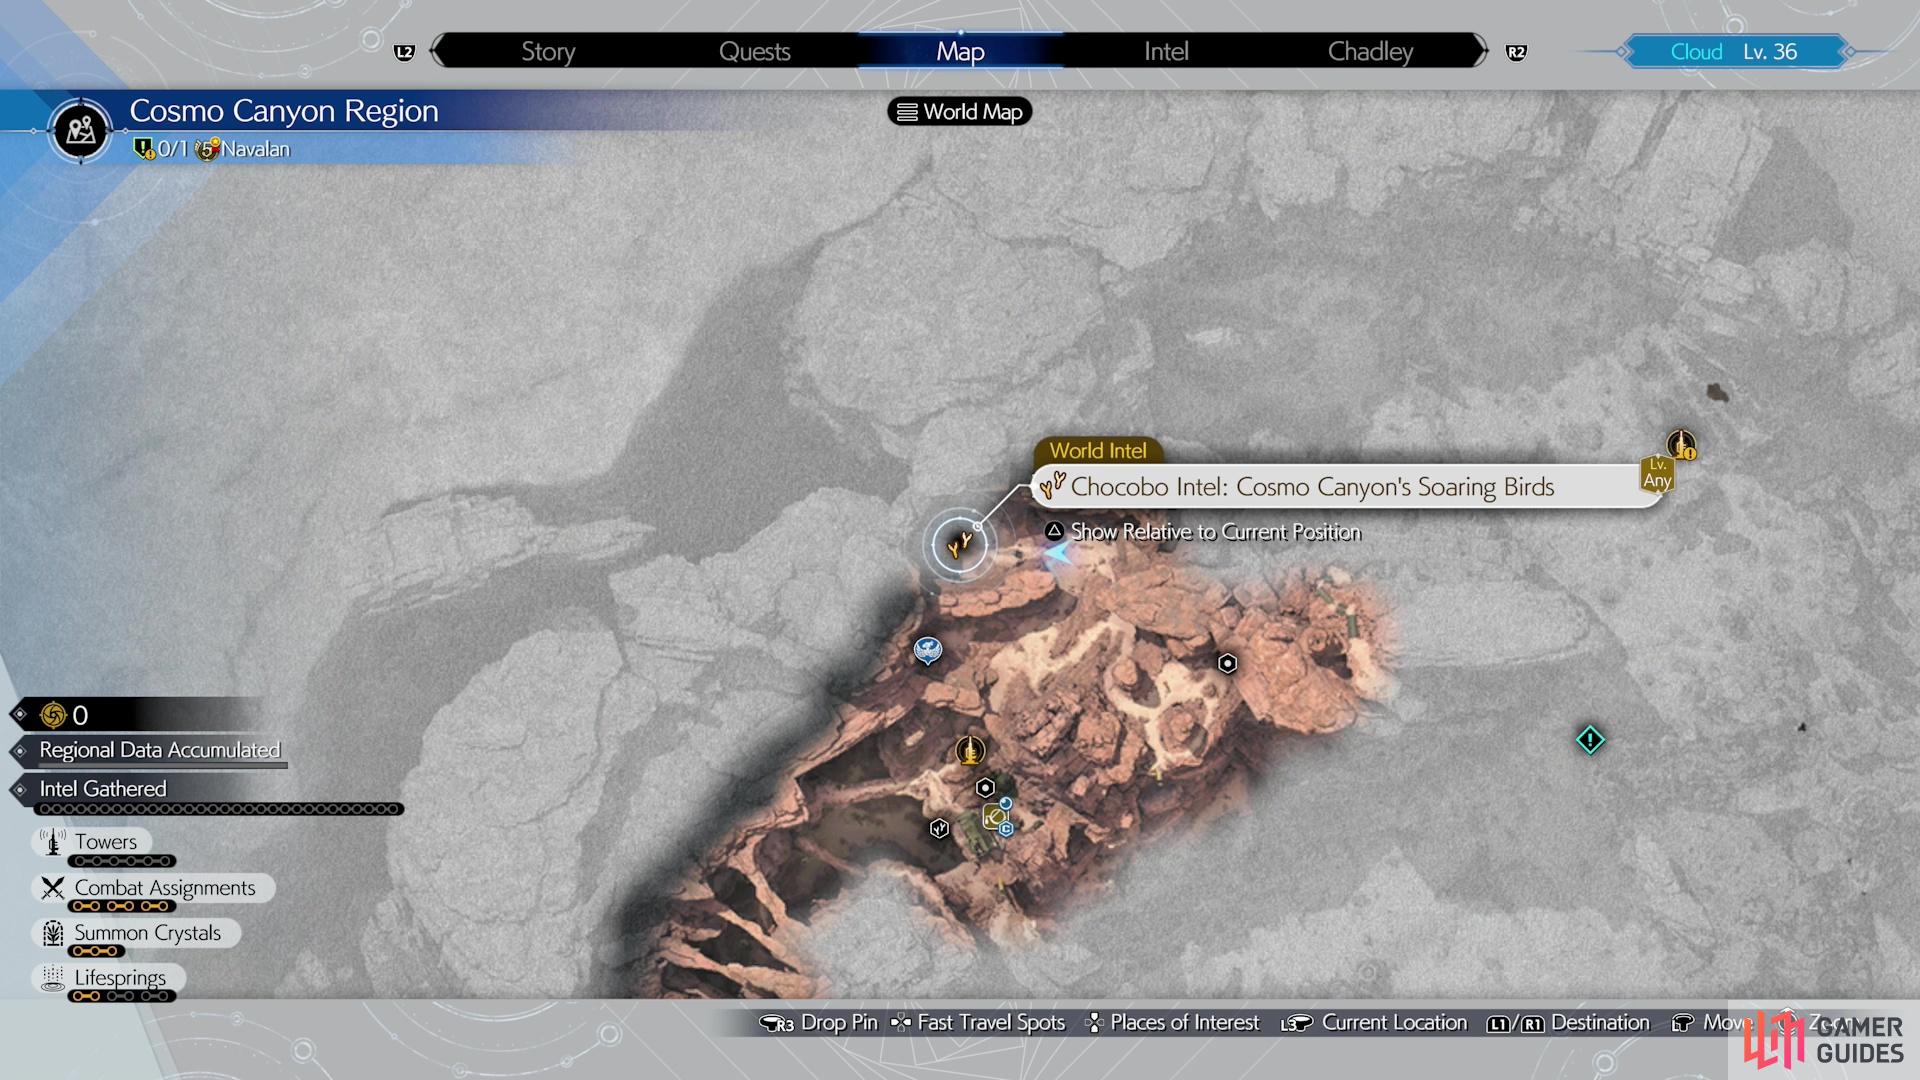
You’ll find the Cosmo Canyon Chocobo Intel event north of Kamaria’s Ranch.
Cosmo Canyon Chocobo Location
From the Cosmo Canyon Airstrip (found along the western edge of the map) you’ll need to make your way north and east until you inevitably come across Kamaria’s Ranch. The Chocobo Intel you’re after is north of here, just head uphill past Activation Tower 1, continue northwest past a pair of ![]() Basilisks and a
Basilisks and a ![]() Skeeskee, then follow some chocobo tracks uphill and to the left. The birds you’re after are in a quarry along with familiar minigame elements like minecarts, tracks, levers, and rocks.
Skeeskee, then follow some chocobo tracks uphill and to the left. The birds you’re after are in a quarry along with familiar minigame elements like minecarts, tracks, levers, and rocks.
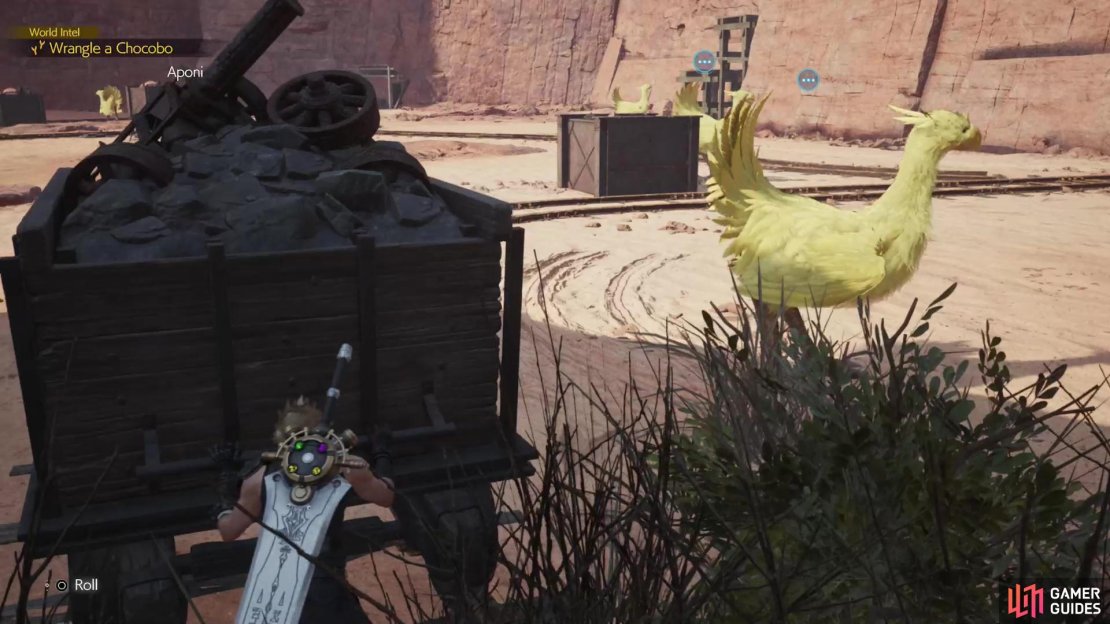
(1 of 3) Wait for the chocobo to look away, then push the cart past the chocobo.
How to Solve the Cosmo Canyon Minecart Puzzle
Like most chocobo wrangling minigames, this is an exercise in prudence and patience. The chocobos here are all stationary and switch between staring in two directions. Your goal is to push minecarts down the track when a chocobo isn’t looking at you while occasionally making a break for some levers that need to be pulled to realign the tracks in a way that allows you to make progress. Throwing rocks to distract chocobos is a later element that you’ll need to use to get past two of the birds.
It should be noted by “when a chocobo isn’t looking at you” we mean Cloud, specifically, and not any minecart he may be pushing. As long as you’re obscured by the minecart itself the birds are too daft to care about the minecart itself, so you can push or pull them even while under scrutiny, as long as Cloud himself isn’t directly seen. Of course, this is wonky and sometimes the chocobo will detect you when you think you’re obscured, but if you react quickly and put the side of the minecart between Cloud and the bird they should calm down eventually. Near misses are probably inevitable here, but fortunately, you’re checkpointed regularly and once you make it past a bird it’ll go to sleep and remove itself from the minigame, so you rarely have to worry about more than one bird at a time, two at the absolute most.
With all that out of the way, let’s go wrangle a chocobo!
Wrangling the Cosmo Canyon Chocobo
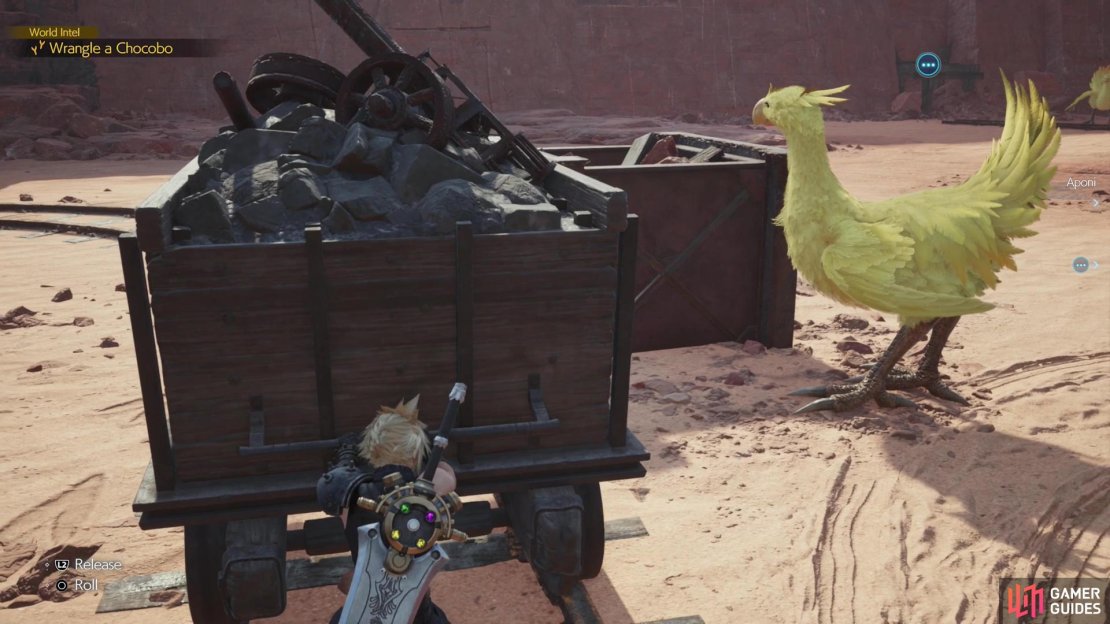
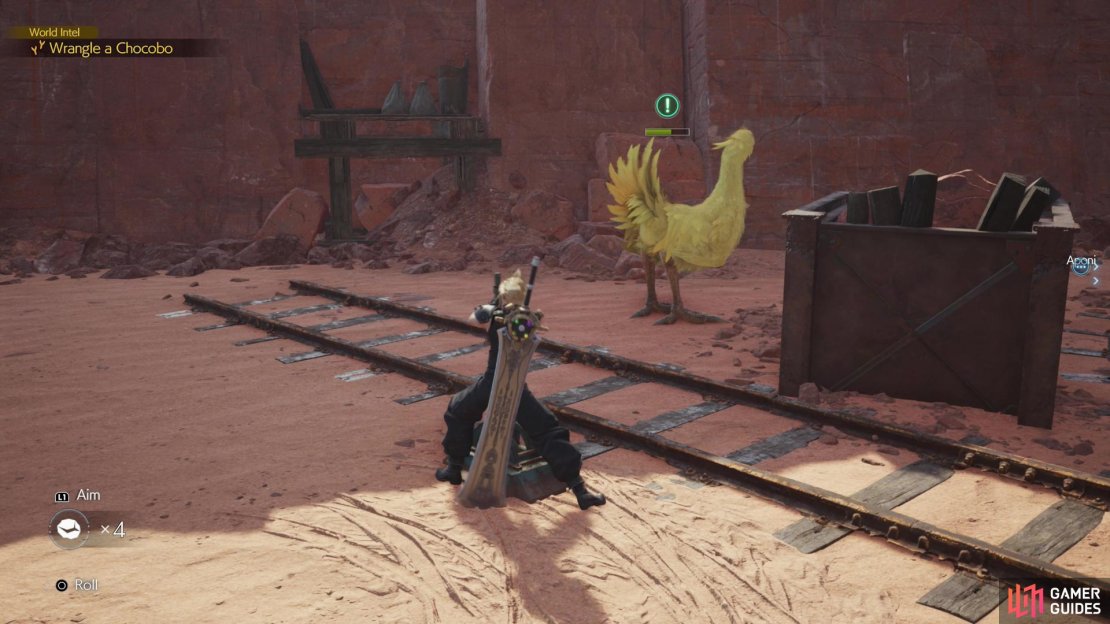
The first phase of this minigame is easy enough, there’s a chocobo who stares toward and away from the track. As soon as it looks away, push the minecart a little (as long as you feel safe - watching the bird’s routine a bit to get a sense for the timing will help) and then stop and hide behind the minecart. You only need to push the minecart past the bird, after which you should switch to the other side and start pulling until you’re near a container, beyond which a second chocobo lurks. Switch sides again and push the cart just to the far edge of the container so it can obscure you from the chocobo’s sight. The first chocobo should take a nap and you’ll get a checkpoint.
(1 of 3) Wait for the chocobo to look away and pull the cart past a junction, near a lever.
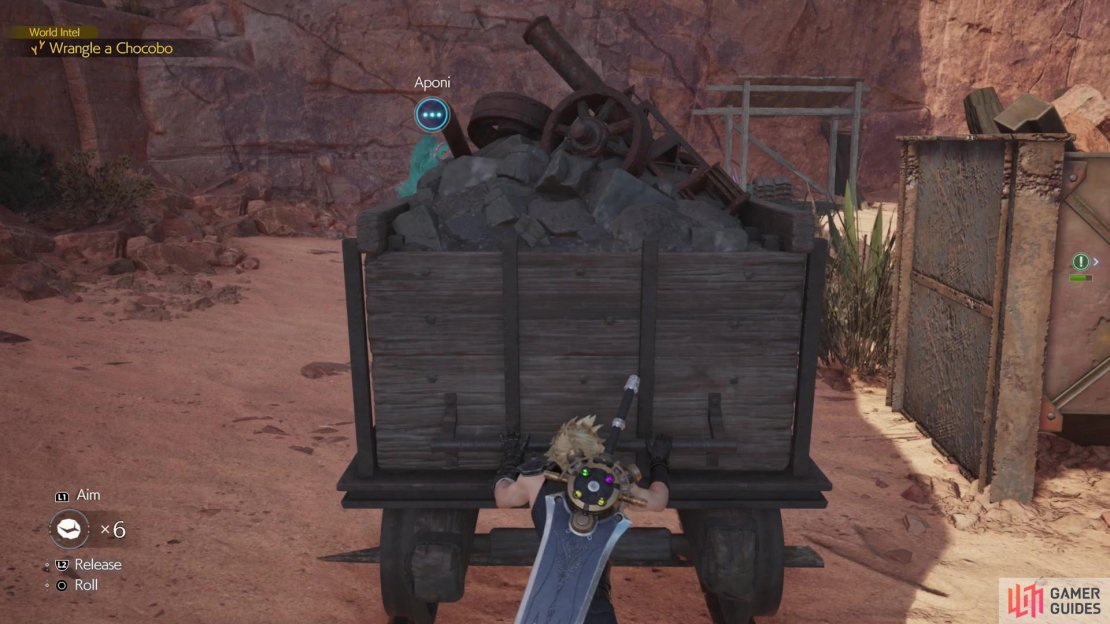
Note the lever down the tracks ahead. Wait for the chocobo to be looking away from the lever, then head to the far side of the cart and pull it over to the lever, past the track junction. Let the chocobo cycle its position and when it’s looking away again, head up to the nearby lever and pull it to switch the tracks, then push the minecart forward. Push the cart far enough and you’ll be visible to the chocobo, so you’ll probably need to wait for it to look away again before you’re safe to push the minecart past it. This should be a pretty simple process, and once you’ve progressed far enough down the track, you’ll get a second checkpoint and the chocobo will go to sleep.
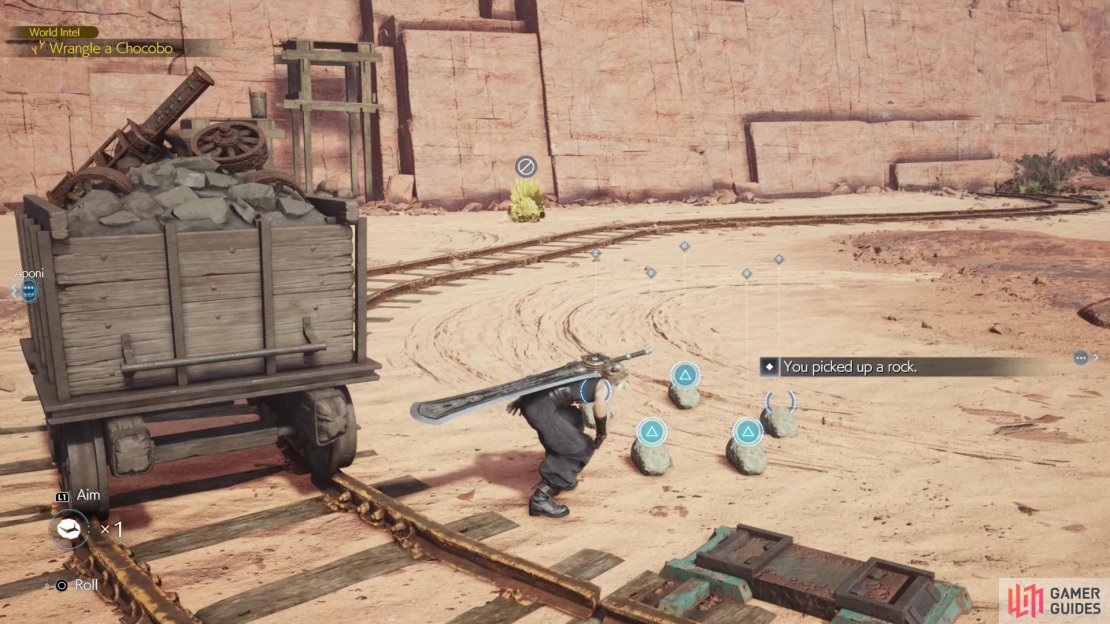

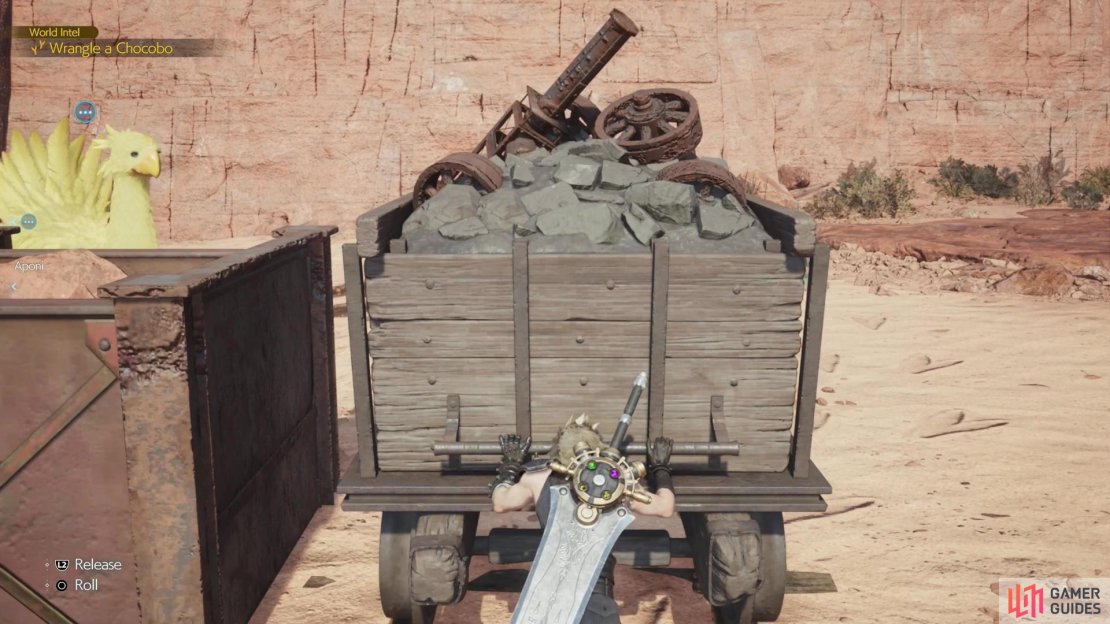
(1 of 3) Be sure to grab some rocks,
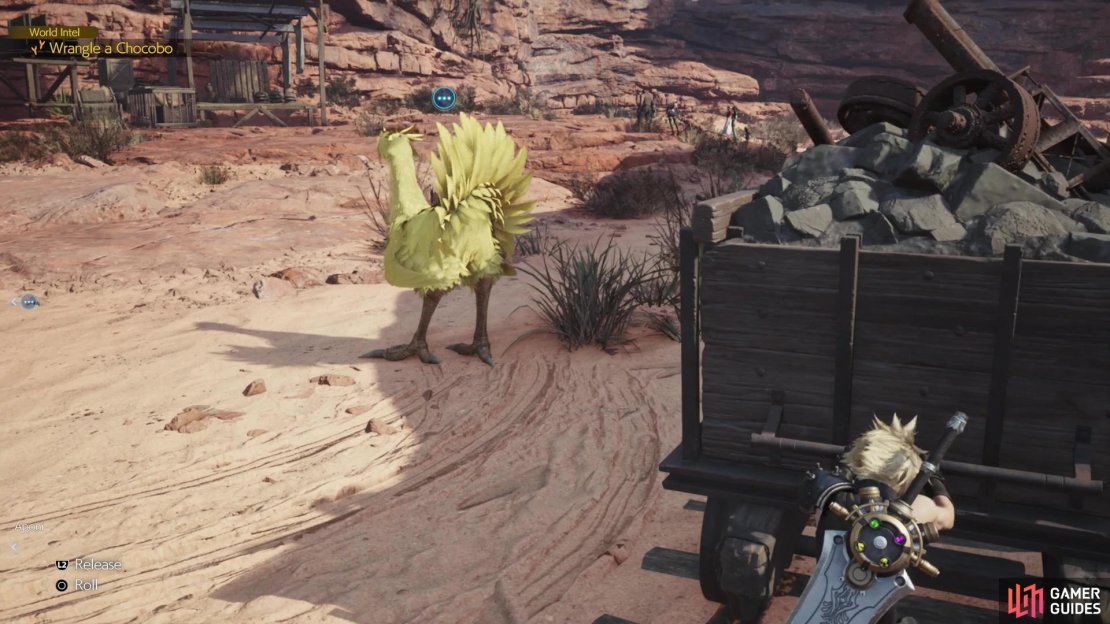
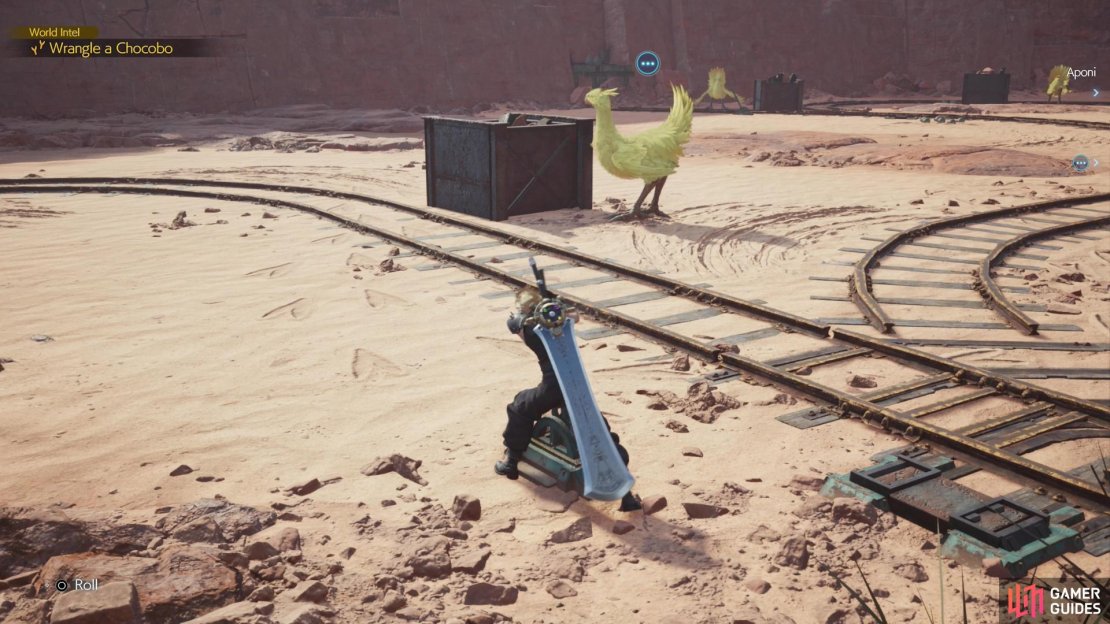
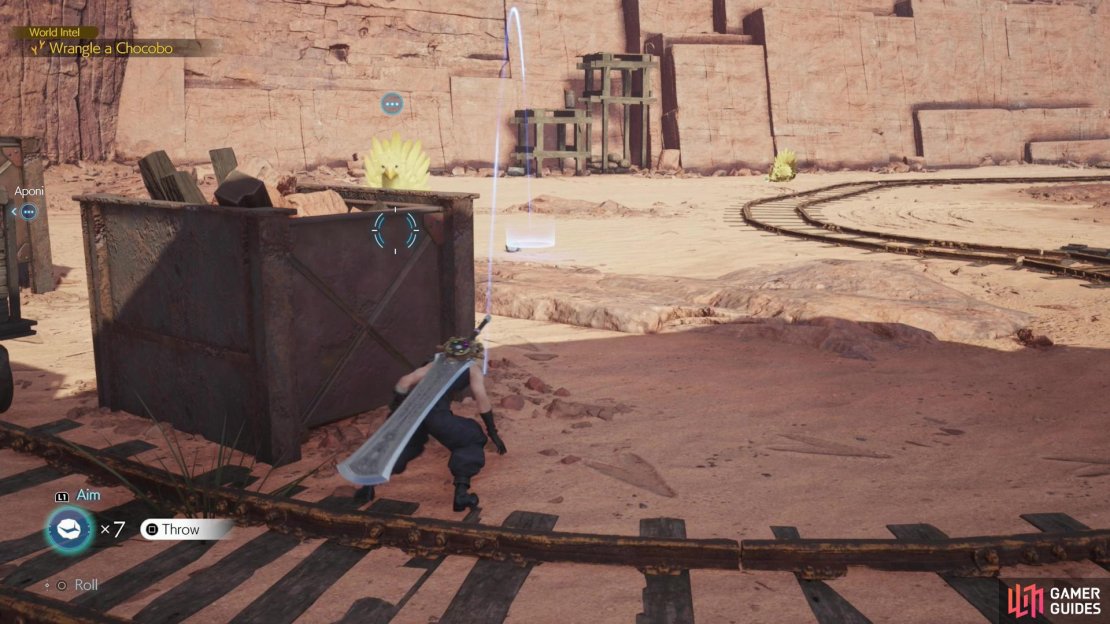
The next stage is simple, you just need to push/pull the minecart past the chocobo to the right of the tracks, waiting for it to look away when necessary. This gets you a third checkpoint and puts the bypassed chocobo into snooze mode. For the fourth phase push the minecart just in front of a function, pick up some rocks, and note the chocobo ahead, past another container. This bird guards a lever, and you’ll need to throw a rock behind it to catch the bird’s attention, then run up and pull the lever to switch the tracks. After this, make it back to the minecart and push it past the chocobo to start the fifth and final phase of this minigame.
(1 of 4) Push the minecart up to the final phase of this minigame,
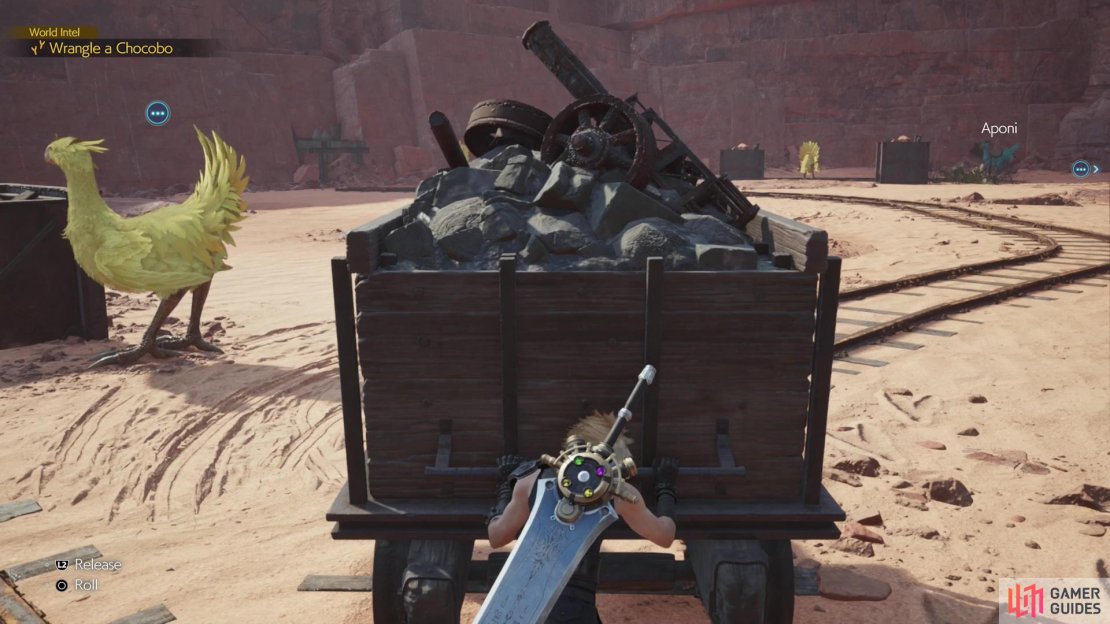
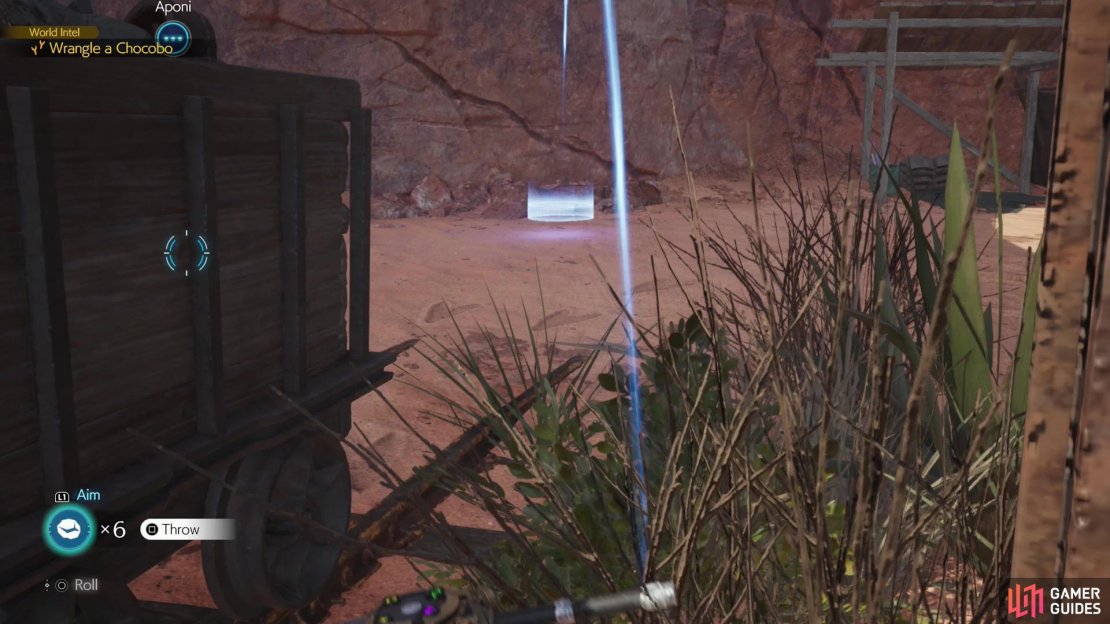
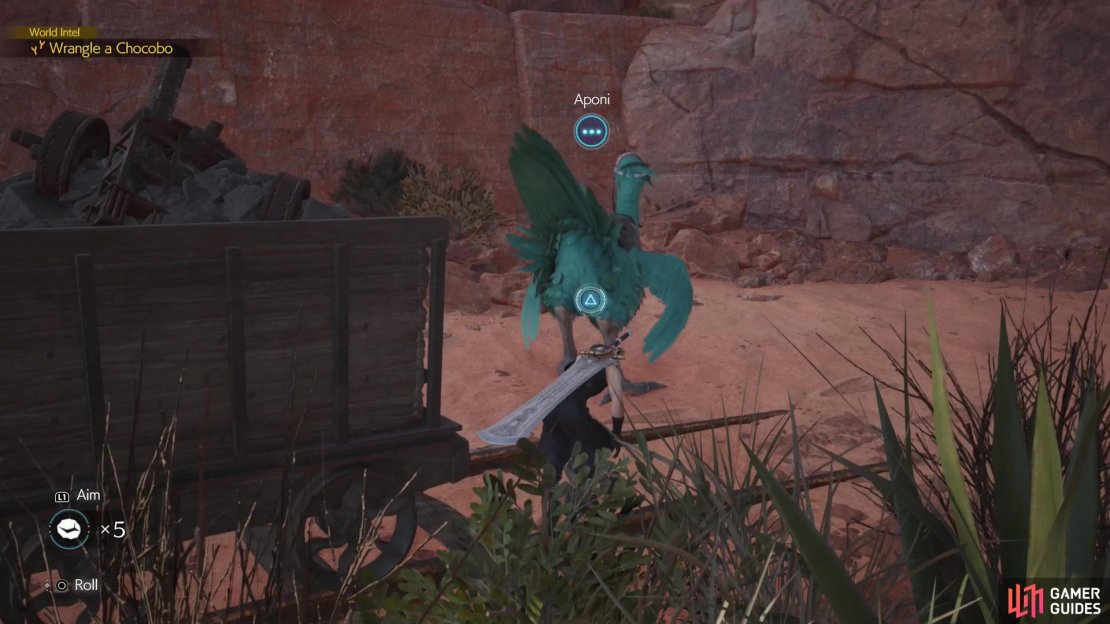
Push the minecart around a corner and path it next to (just past) a container to your right. There are two containers ahead, between which is a wary chocobo and at the end of the track is your target, Aponi. This is the only part of the minigame where you actively need to be wary of two birds at once, and Aponi shouldn’t be able to see you if you stick behind the cart. Of course, you need to get the other chocobo to look away so you can push past the two containers, and this is where rocks come in to play again. Pick up some rocks near the edge of the first container, throw one behind the side chocobo to turn it around, then push the cart forward until you’re obscured by the second container, ahead. Hesitation is for the birds and you’ve plenty of time to push the cart near Aponi if you rush.
Once you’re past the second container, the solution is simple - throw another stone behind Aponi, then sneak up on the bird while it’s distracted and wrangle it. You need to be really quick here, as Aponi’s not going to be distracted long - long enough, however, for you to catch the bird if you hustle!
Now that you have the Cosmo Canyon chocobo you should be free to explore most of the region, you just need to find a ramp extending over the edge of a cliff, which is apparently the launching point these birds require to glide. You can find one such device near Kamaria’s Ranch. Feel free to explore as much as you care to - you can complete every Activation Intel, Expedition Intel, Divine Intel, and Fiend Intel, but you may not be able to find all 15 enemies you need to Assess and Defeat to unlock Biological Intel: That’s the Smell and ![]() Cosmo Canyon Region Intel: Level 1 - you’ll need to progress the main story for that.
Cosmo Canyon Region Intel: Level 1 - you’ll need to progress the main story for that.
No Comments