
Where The Wind Blows is one of the first few side quests that’ll become available in the ![]() Grasslands of Final Fantasy VII Rebirth. It’ll require you to assist Mildred with repairing the windmill by crafting a Windmill Gear. On this page, we’ll provide you with the necessary steps to finding the Windmill Gear Recipe, tracking down the four Lifesprings, and how to obtain a
Grasslands of Final Fantasy VII Rebirth. It’ll require you to assist Mildred with repairing the windmill by crafting a Windmill Gear. On this page, we’ll provide you with the necessary steps to finding the Windmill Gear Recipe, tracking down the four Lifesprings, and how to obtain a ![]() Quetzalcoatl Talon.
Quetzalcoatl Talon.
Broden from Kalm is feeling unwell.
A good friend of mines in need of assistance with a repair job, but with my health troubles, I fear I’d do more harm than good. If you’re willing to lend her a hand in my stead, come and see me at the inn. And quickly, please.
How To Start The Where The Wind Blows Side Quest - FFVII Rebirth
The Where The Wind Blows Side Quest can be unlocked via the noticeboard which is located in the northern portion of ![]() Kalm once you’ve completed the prerequisite side quest Livestock’s Bane . It has a recommended level of 22 so we suggest that you spend some time completing world intel activities to level up before tackling these quests. Additionally, you’ll want to spend some time exploring the Grasslands for chests, as some of these will contain stronger weapons for your party.
Kalm once you’ve completed the prerequisite side quest Livestock’s Bane . It has a recommended level of 22 so we suggest that you spend some time completing world intel activities to level up before tackling these quests. Additionally, you’ll want to spend some time exploring the Grasslands for chests, as some of these will contain stronger weapons for your party.
How to Get the Windmill Gear Recipe
| Name | Recipe |
|---|---|
| Windmill Gear | x1 |


(1 of 2) Head to the Bygone Settlement
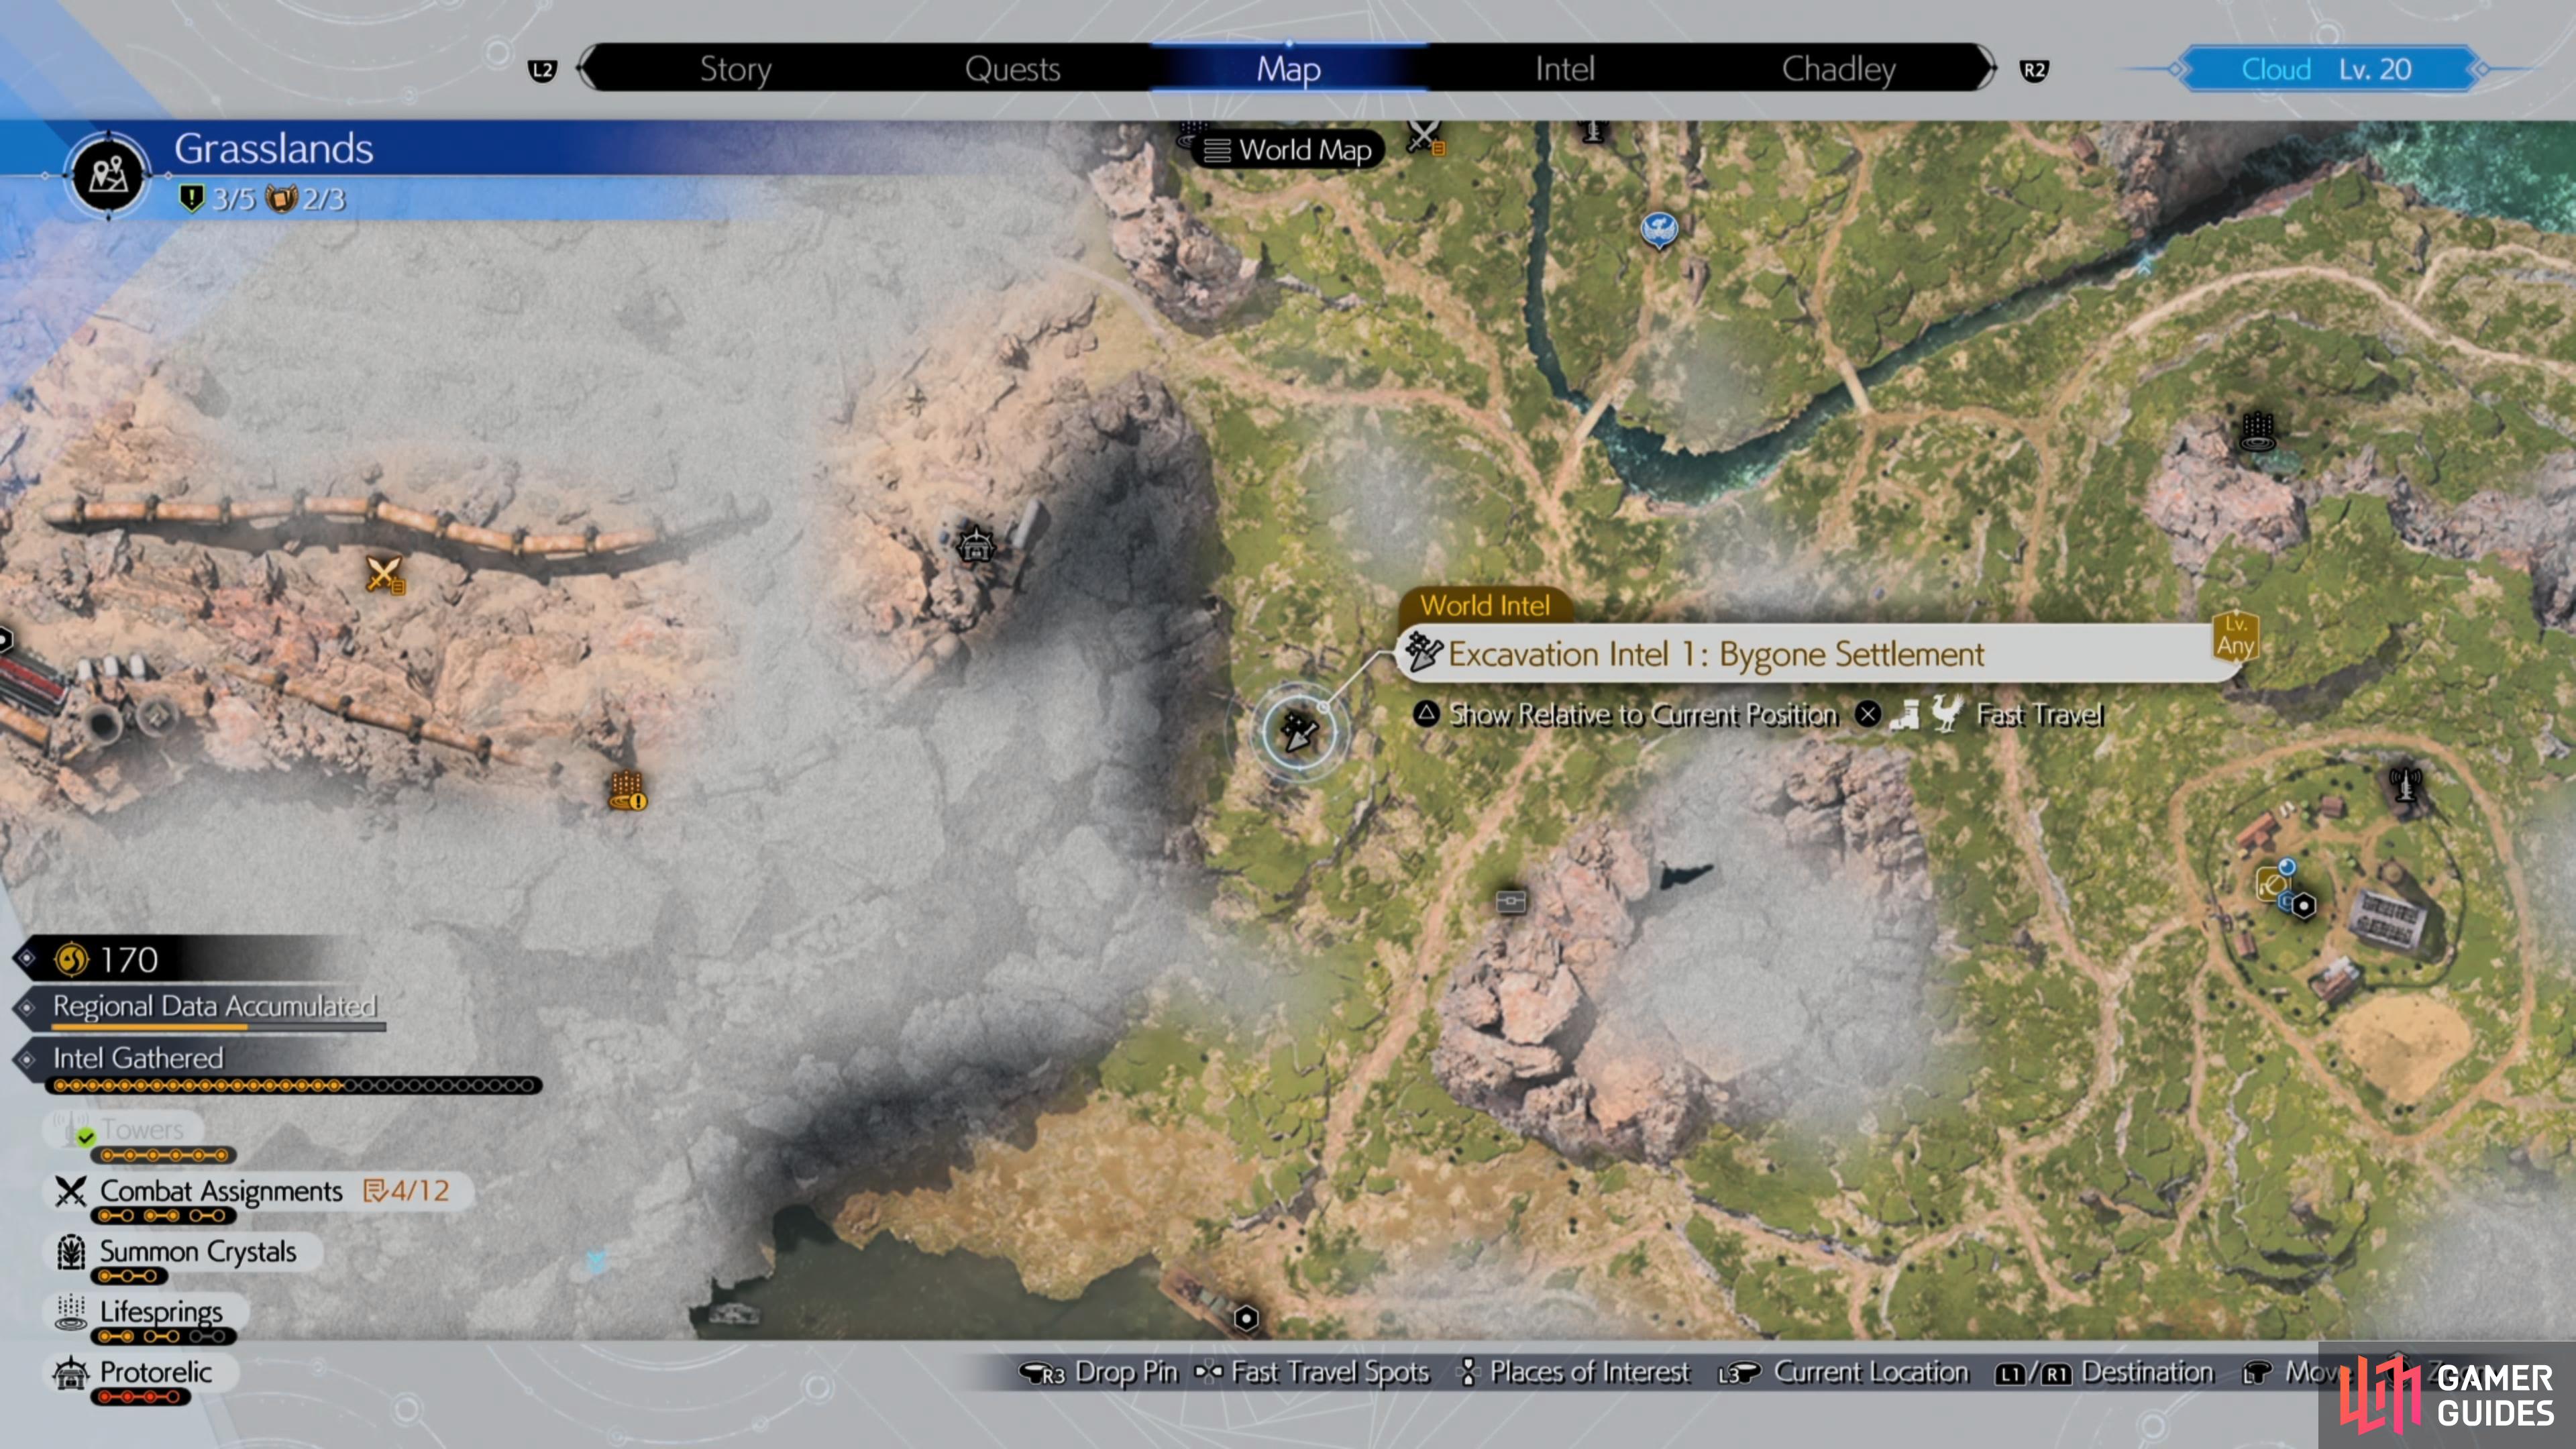
Head to the Bygone Settlement (left), to acquire the Windmill Gear Recipe. (right)
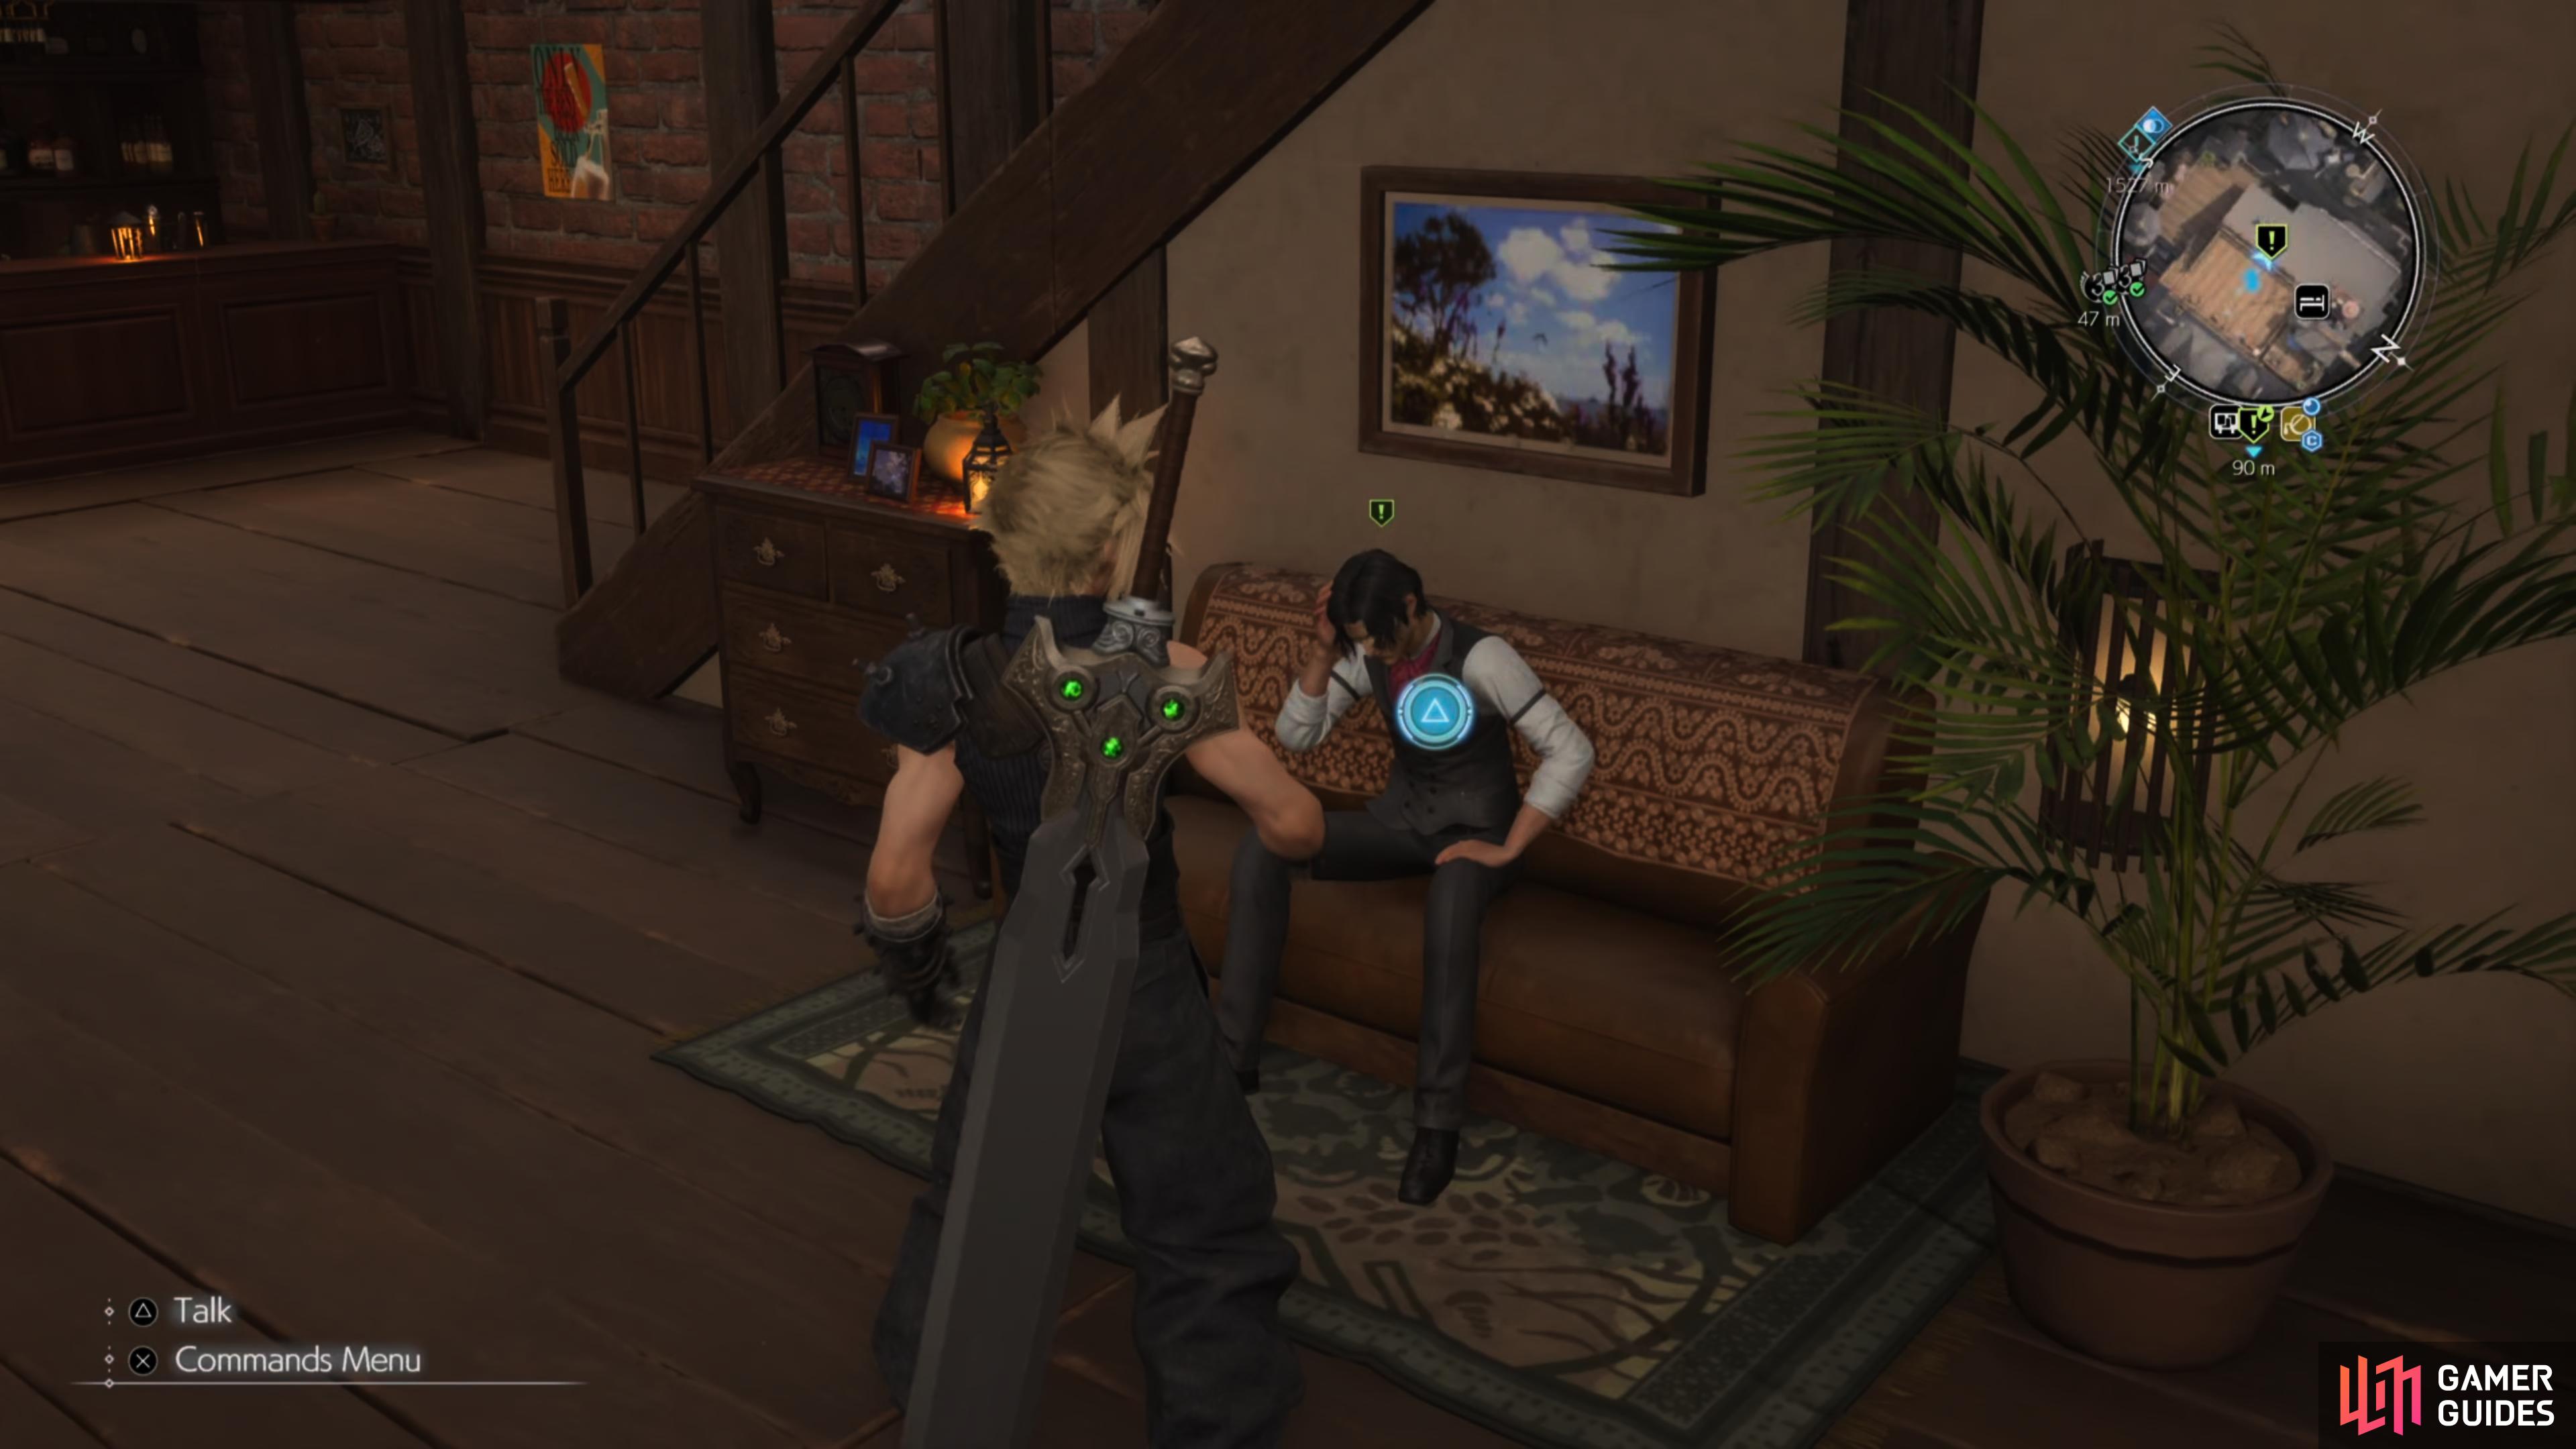
Unfortunately, Broden is feeling quite unwell which means he won’t be able to help his friend fix a windmill at the local settlement so he enlists Cloud’s assistance. From here, you’ll want to fast travel over to the Windmill Settlement which is located to the northeast of Kalm and speak with Mildred. She’ll mention that she wants to get the windmill back up and running again, but she needs you to craft a specific component via the Transmuter Chip as it can no longer be purchased. The first thing on your agenda is to track down and complete the Excavation Intel 1: Bygone Settlement for the Windmill Gear Recipe and this can be found to the north of the abandoned dock.
How to Get a Quetzalcoatl Talon
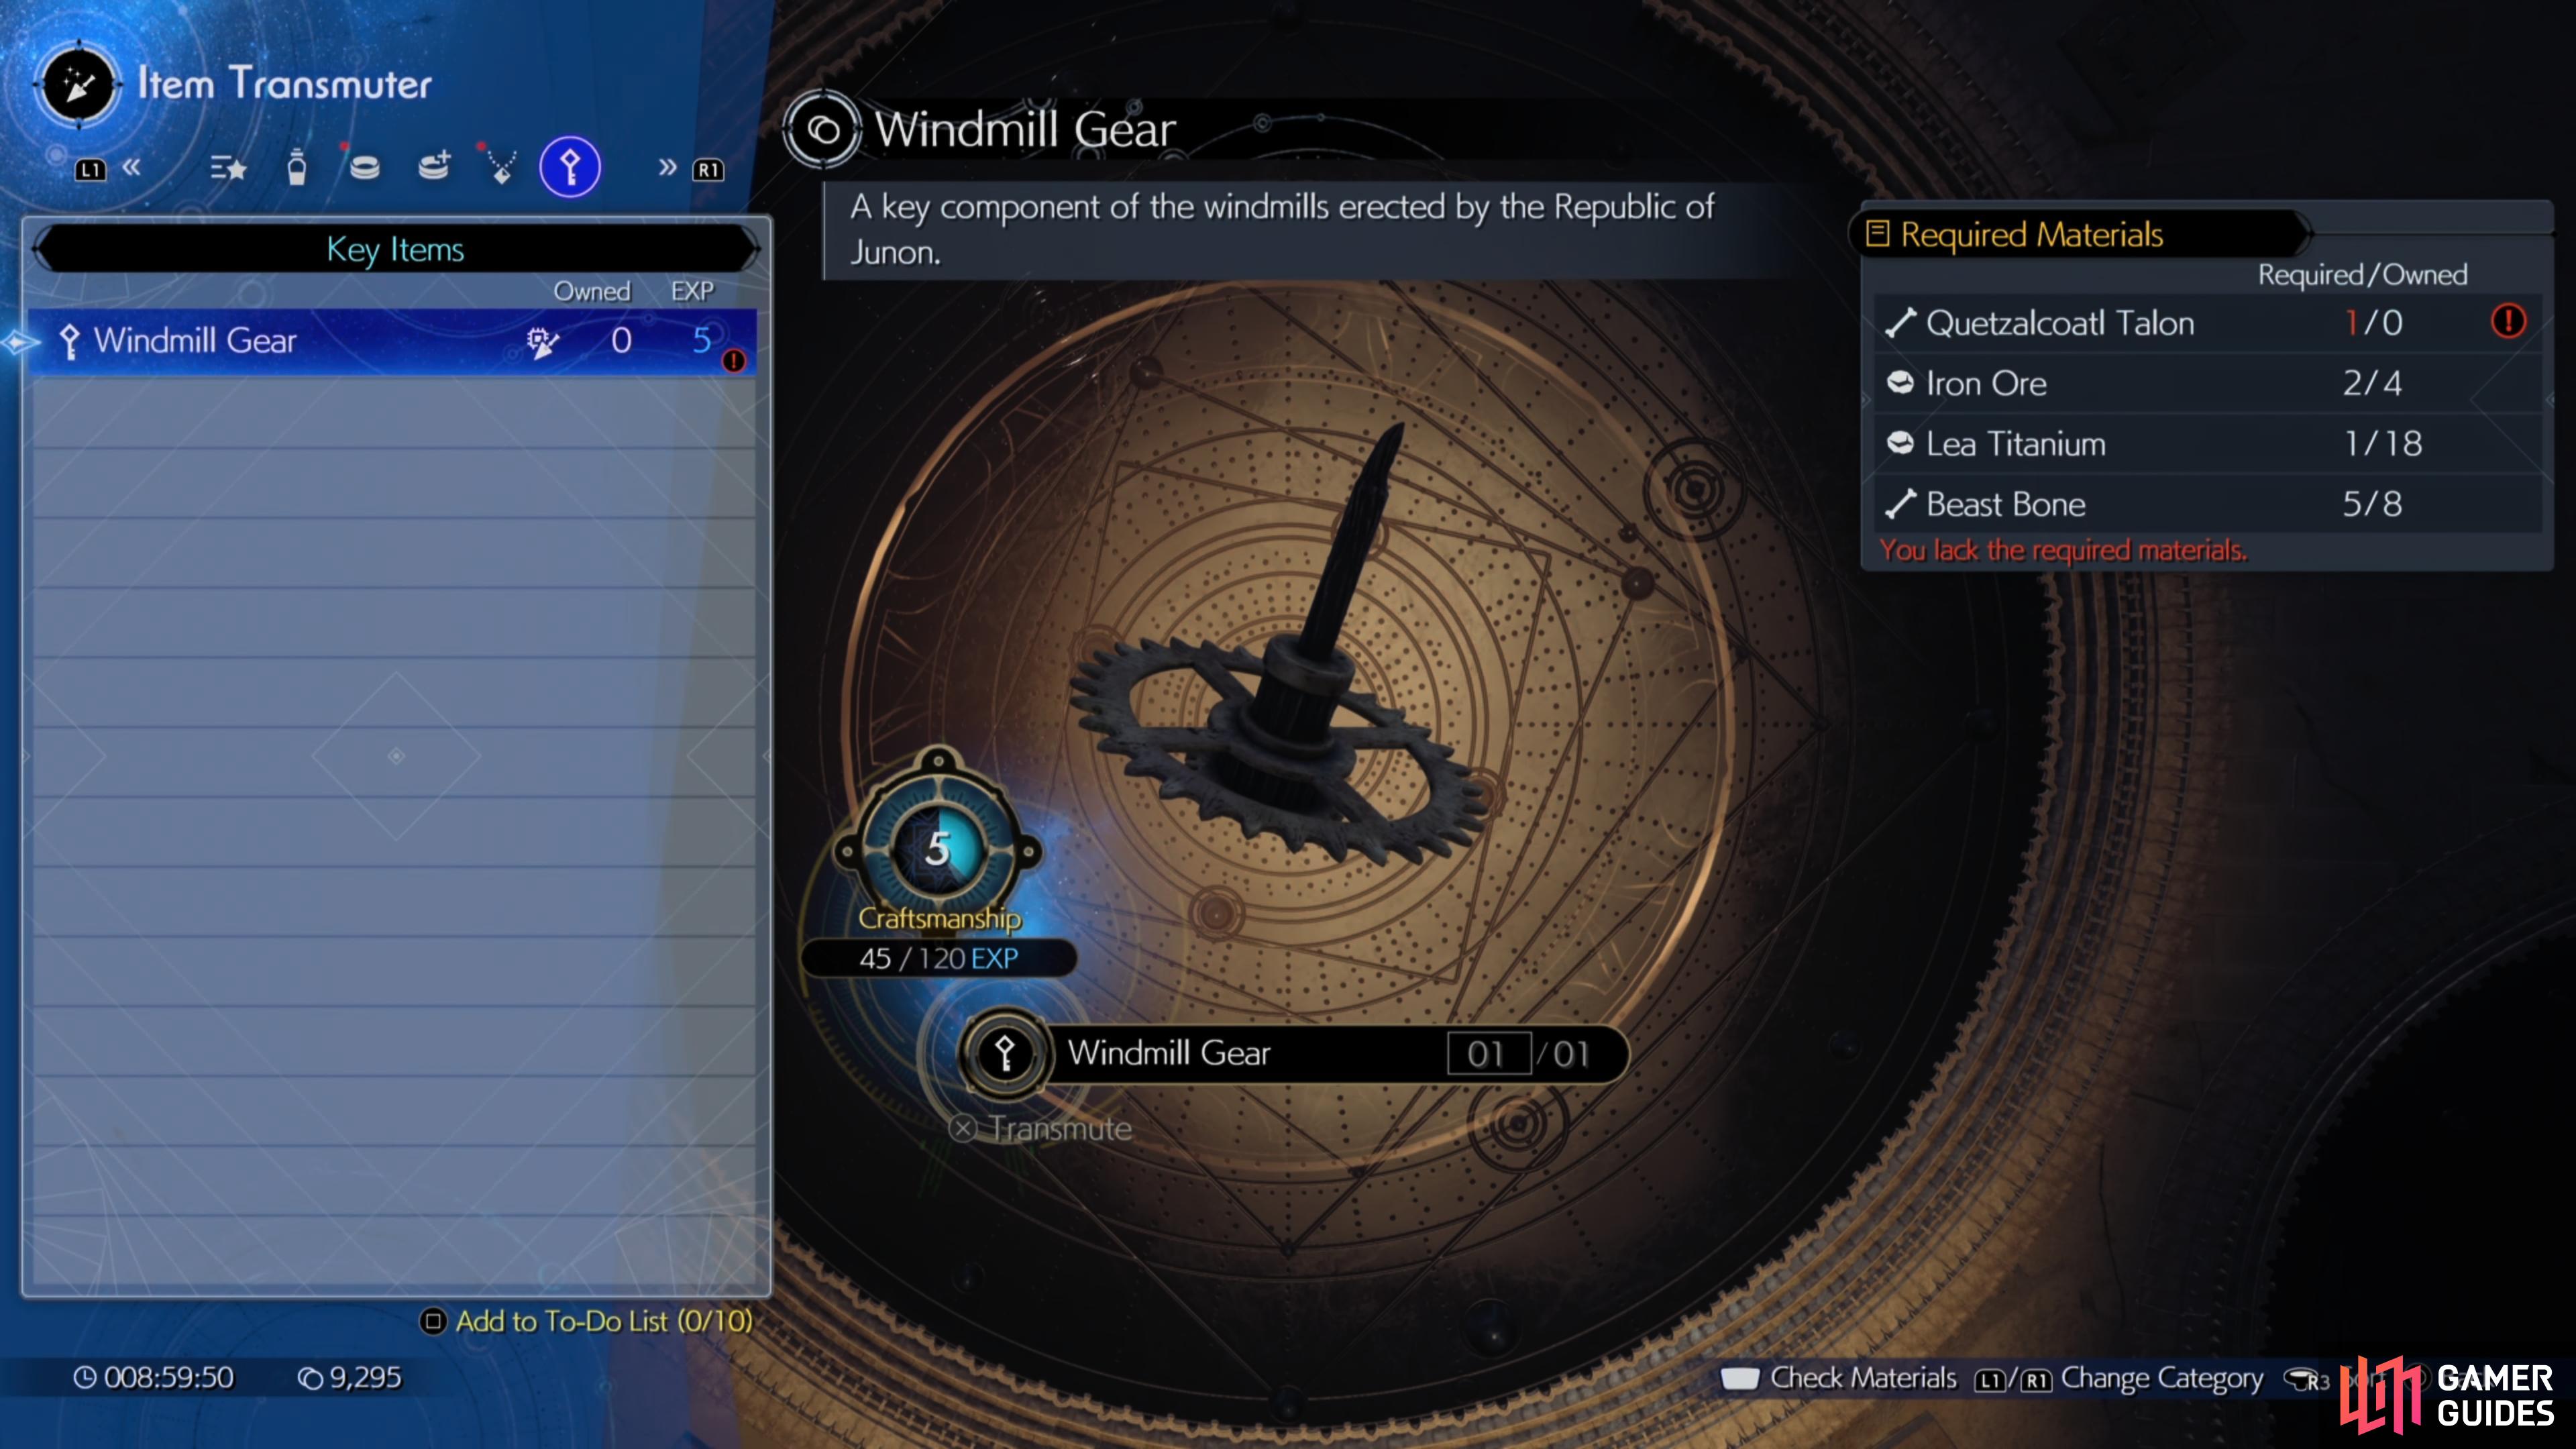
Once you’ve unlocked the Windmill Gear Recipe you’ll notice that you’ll need a ![]() Beast Bone, Lea Titanium,
Beast Bone, Lea Titanium, ![]() Iron Ore, and a
Iron Ore, and a ![]() Quetzalcoatl Talon to craft it. The Beast Bone, Lea Titanium, and Iron Ore can be found naturally by picking up items throughout the Grasslands and fighting enemies whereas in order to track down the location of a Quetzalcoatl you’ll need to scan four of the six Lifesprings for the Classified Intel: Wings of Lacertilian Yore.
Quetzalcoatl Talon to craft it. The Beast Bone, Lea Titanium, and Iron Ore can be found naturally by picking up items throughout the Grasslands and fighting enemies whereas in order to track down the location of a Quetzalcoatl you’ll need to scan four of the six Lifesprings for the Classified Intel: Wings of Lacertilian Yore.
Expedition Intel 4: Grasswastes Lifespring Location
The Expedition Intel 4: Grasswastes Lifespring can be found to the southeast of Kalm.
Expedition Intel 1: Cragshade Lifespring Location
The Expedition Intel 1: Cragshade Lifespring can be found to the northwest of ![]() Bill’s Ranch Tower.
Bill’s Ranch Tower.
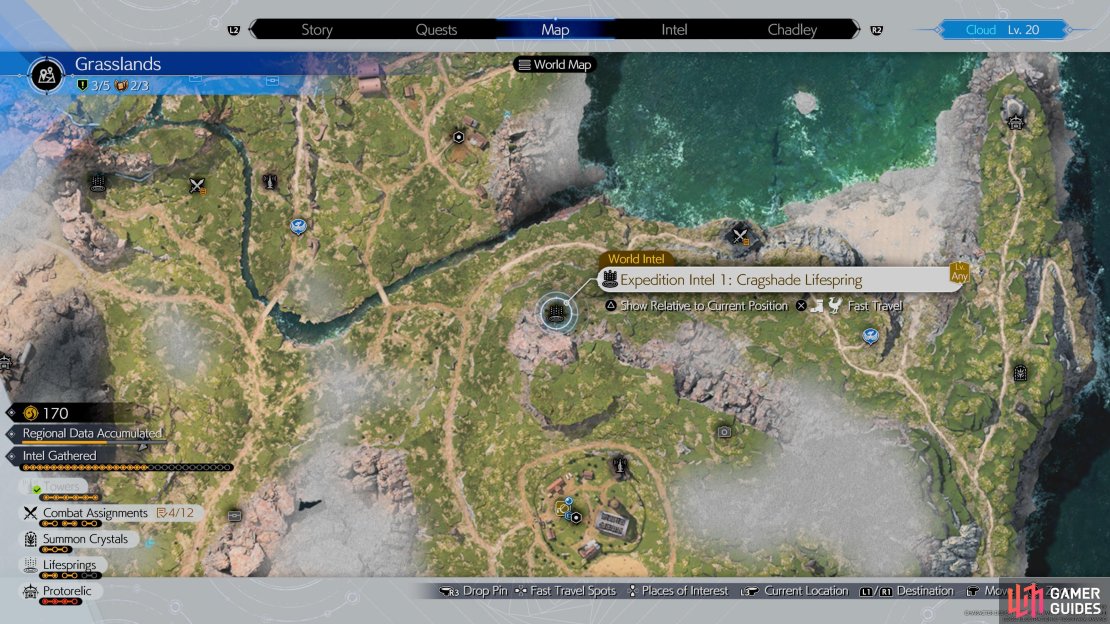

(1 of 4) Cragshade Lifespring Location
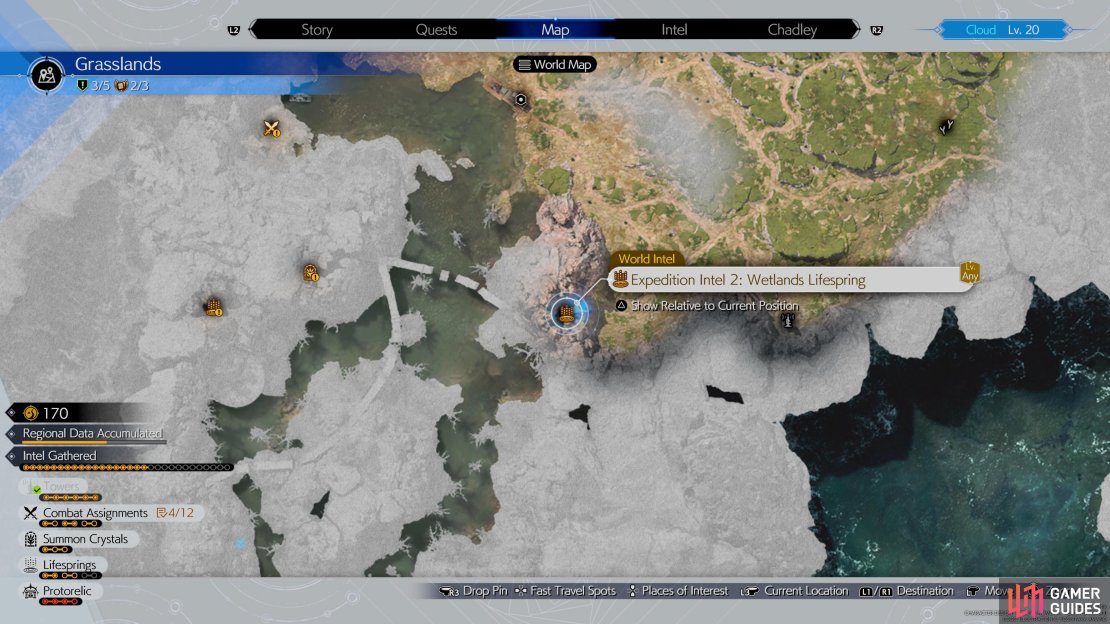
Expedition Intel 2 - Wetlands Lifespring Location
The Expedition Intel 2 - Wetlands Lifespring can be found to the west of the Swamplands Tower.
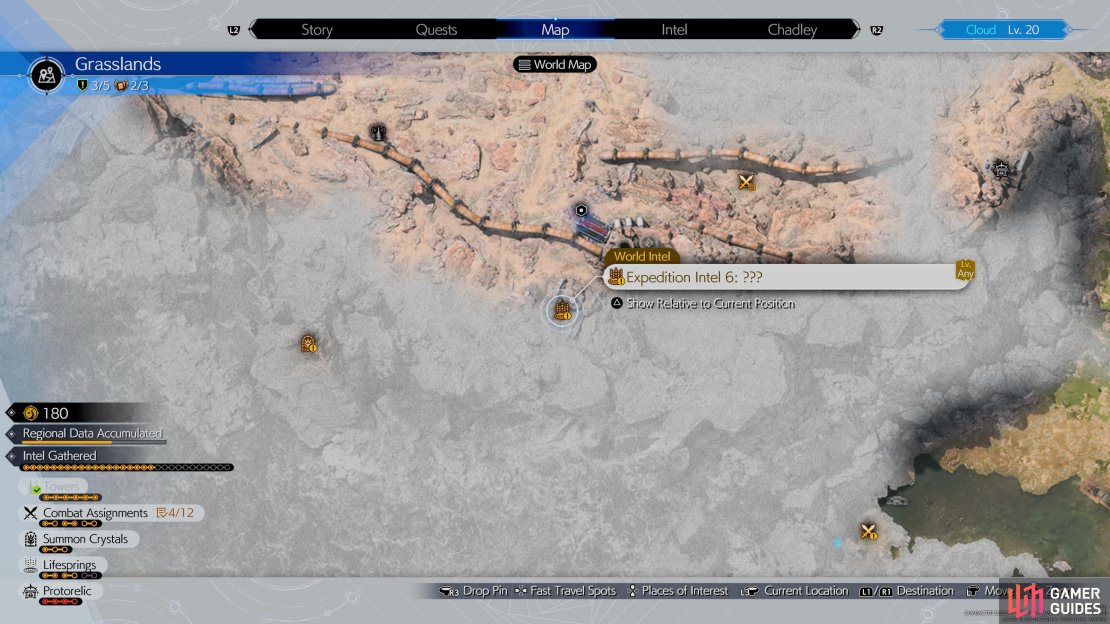
Expedition Intel 6 - Cavern Lifespring Location
The Expedition Intel 6 - Cavern Lifespring can be found to the south of Mako Pipeline Maintenance Warehouse.
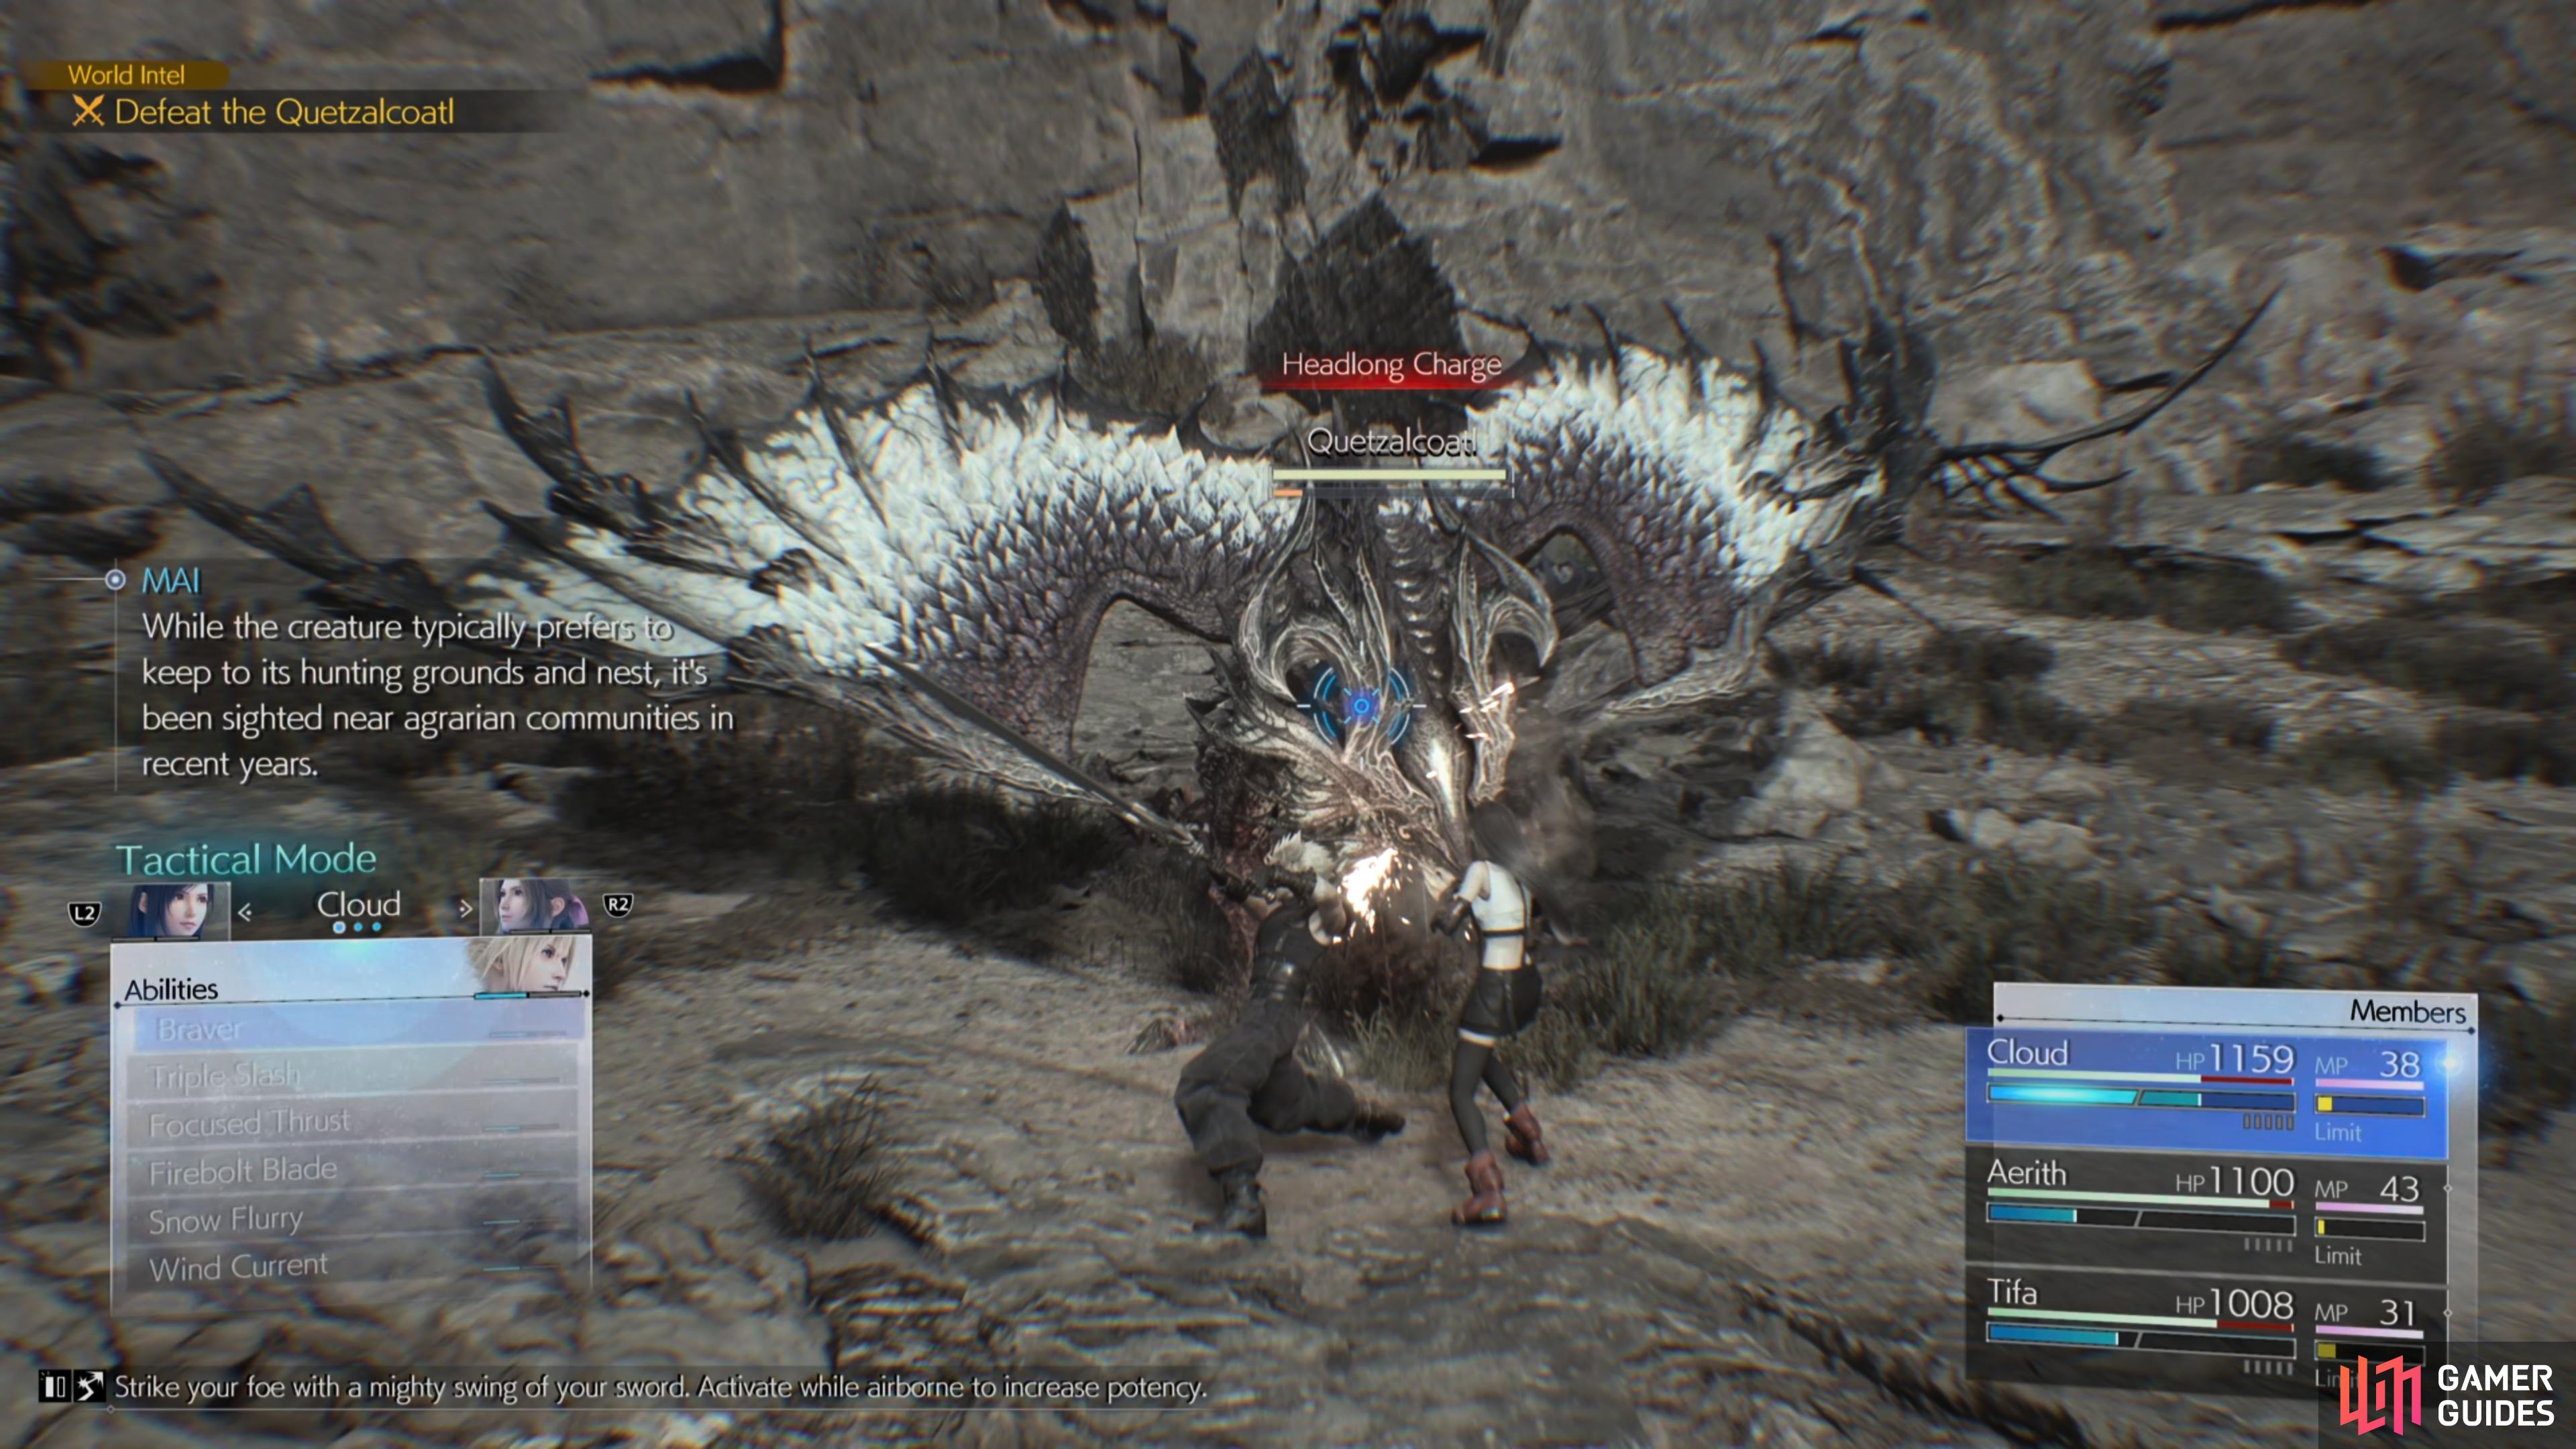
Defeat Quetzalcoatl
Scanning the fourth Lifespring will cause the Classified Intel: Wings of Lacertilian Yore to appear on your map and it can be found to the southeast of the Mako Pipeline Maintenance Warehouse. Here you’ll need to take down the Quetzalcoatl to acquire its talon and you easily do so by following our handy How to Beat Quetzalcoatl Guide.


(1 of 2) Head to this location on the map
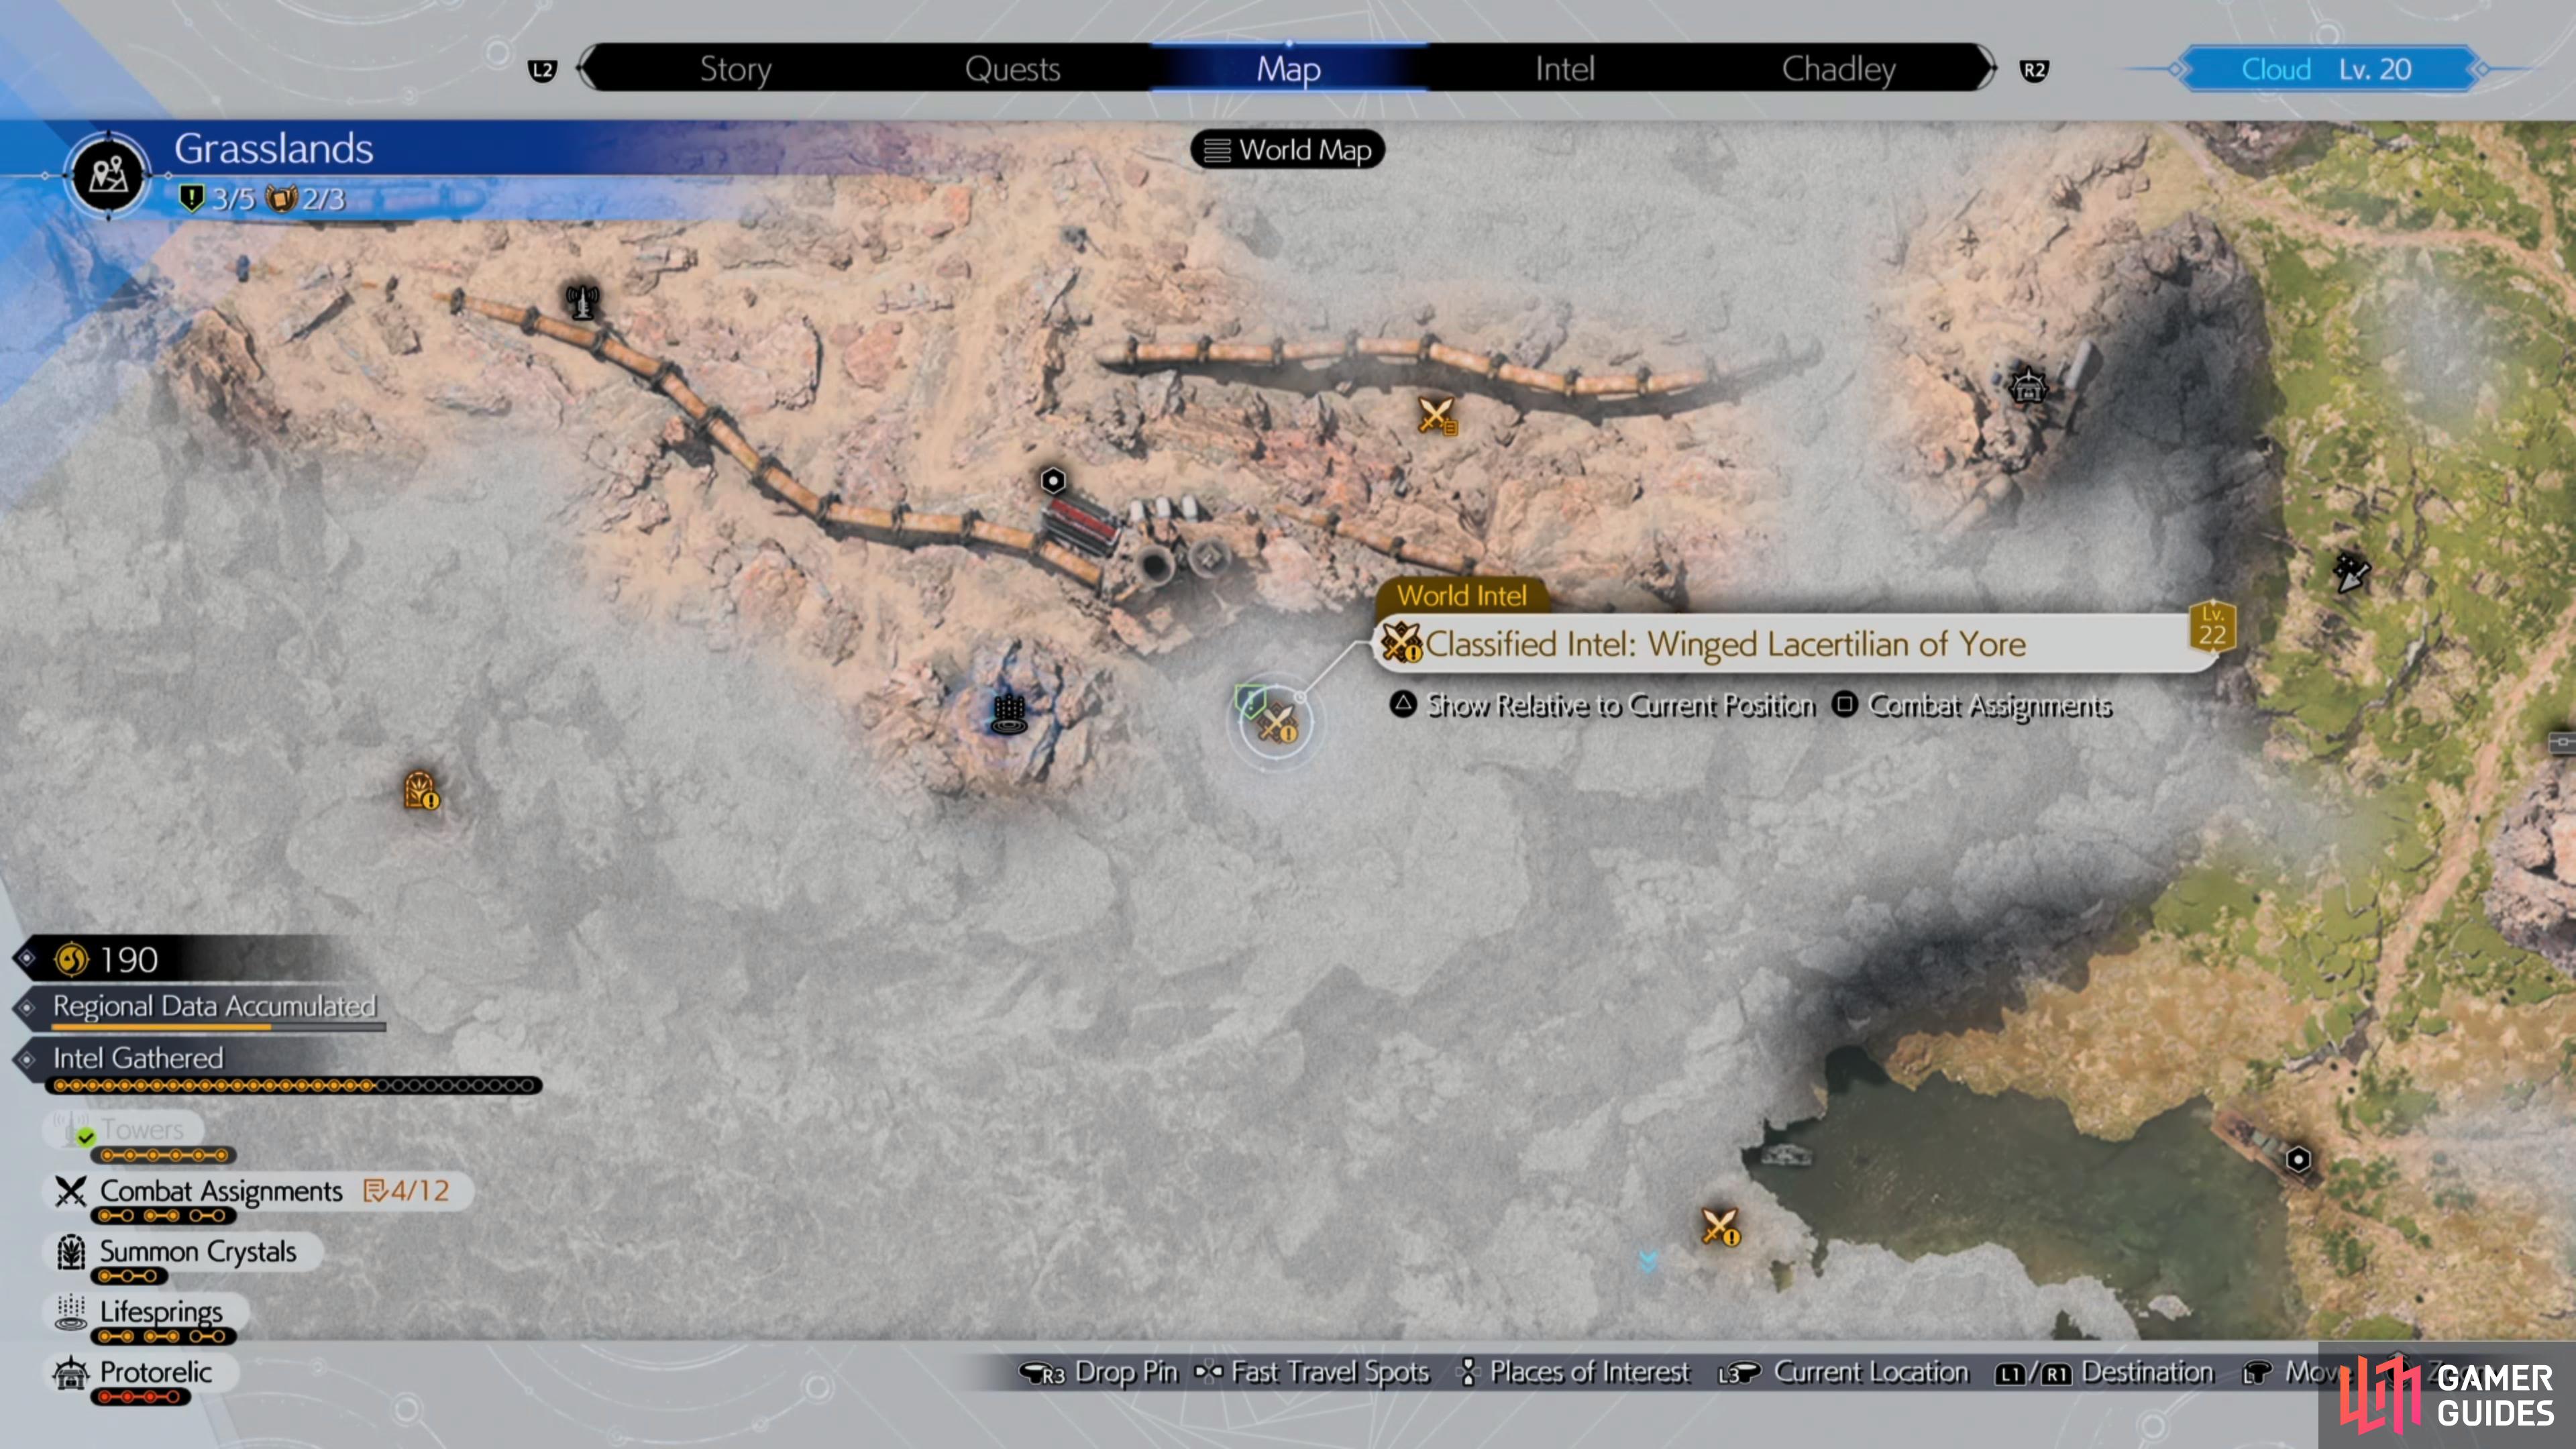
Head to this location on the map (left), to find the Quetzalcoatl. (right)
After Quetzalcoatl has been slain, craft the Windmill Gear via the ![]() Item Transmuter and return to the Windmill Settlement to give the item to Mildred. This will allow her to get the windmill back up and running. Finally, collect the Orb of Cleansing Materia from behind the windmill before making your way back to Kalm and speaking with Broden to bring the quest to a close. Here you’ll be rewarded with the
Item Transmuter and return to the Windmill Settlement to give the item to Mildred. This will allow her to get the windmill back up and running. Finally, collect the Orb of Cleansing Materia from behind the windmill before making your way back to Kalm and speaking with Broden to bring the quest to a close. Here you’ll be rewarded with the ![]() Whistlewind Scarf (slightly fills the ATB gauge at the start of battle), deepen your relationship with
Whistlewind Scarf (slightly fills the ATB gauge at the start of battle), deepen your relationship with ![]() Red XIII, Party EXP, and 400 EXP.
Red XIII, Party EXP, and 400 EXP.
More Final Fantasy VII Rebirth Guides
Rebirth has so much to offer so if you’re feeling lost, or just want to find out more about new features, tips, and tricks on the combat system or how to beat certain minigames, then be sure to check out the links below!
No Comments