
Queen’s Blood is one of Final Fantasy VII Rebirth’s signature minigames, primarily a TCG with vague allusions to Final Fantasy VIII’s Triple Triad with a bit of Tic-Tac-Toe thrown in. Each player assembles decks of 15 cards, and each card has a power score; at its most basic Queen’s Blood is a matter of two players laying down cards on their turn and at the end of the game the player with the most points on the board wins. Once you factor in pawns, lanes and card abilities, however, things get significantly more complicated, and as you encounter more cunning, higher-ranked players, strategies that once worked may no longer bear fruit. Instead of hoping for luck and persistence to carry you to victory, we’ve assembled what we think is the best early game Queen’s Blood deck in Final Fantasy VII Rebirth, and this page will detail the best cards to use and will provide strategies for using these cards effectively.

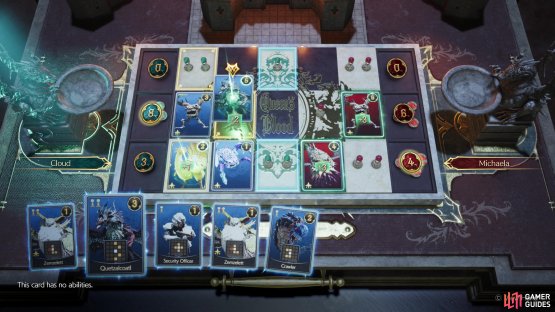
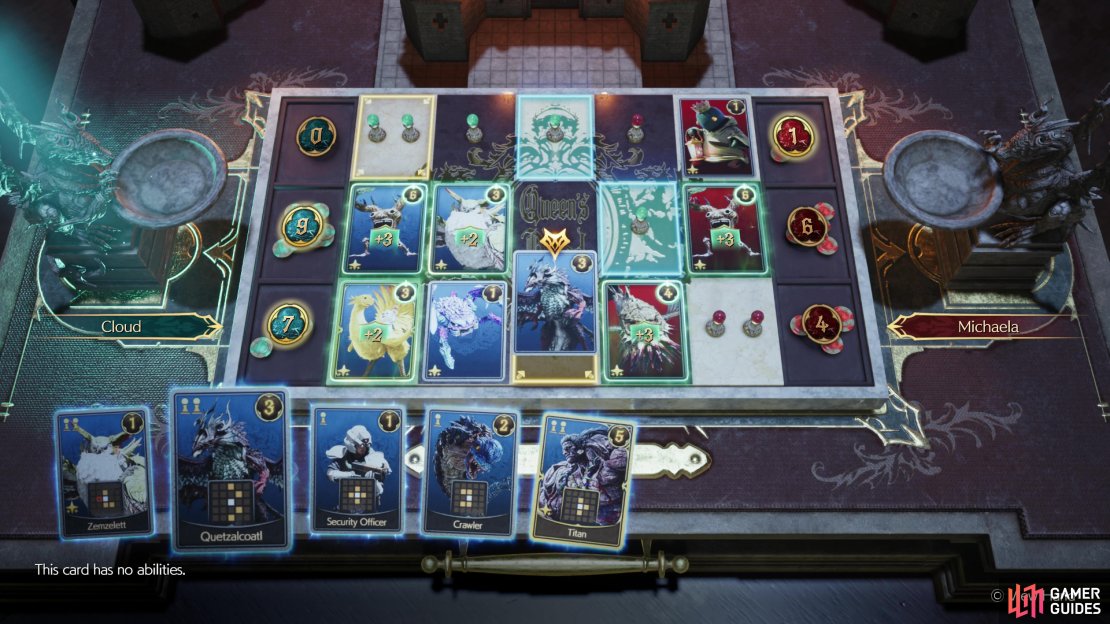
(1 of 2) Early on, simply playing fast and aggressive was enough to defeat your hapless foes. Such crude tactics will need refinement if you want to regularly defeat the card players around Junon.
Early on, simply playing fast and aggressive was enough to defeat your hapless foes. Such crude tactics will need refinement if you want to regularly defeat the card players around Junon. (left), More sophisticated tactics - like using Quetzalcoatl to bait disrupt your opponent and bait them into making poor counters - works wonders. (right)
Early Queen’s Blood Deck Strategies
Before we get to the deck itself, a refresher on some Queen’s Blood basics. When you start playing (presumably as early Chapter 2, in ![]() Kalm) you may find that low rank, low power cards which affect numerous adjacent tiles are the most effective, since these can be used to spread your own green pawns and flip enemy red pawns. And this is true - in Chapter 2 you can usually just steamroll competition by starving them of tiles to play cards. Once you reach Chapter 4, however, you’ll find that the card sharks in the
Kalm) you may find that low rank, low power cards which affect numerous adjacent tiles are the most effective, since these can be used to spread your own green pawns and flip enemy red pawns. And this is true - in Chapter 2 you can usually just steamroll competition by starving them of tiles to play cards. Once you reach Chapter 4, however, you’ll find that the card sharks in the ![]() Junon Region are more savvy, and demand a more measured, sophisticated approach.
Junon Region are more savvy, and demand a more measured, sophisticated approach.
-
Each card costs 1-3 pawns (seen on the upper left of the card). It’s generally harder to play cards that cost more pawns. Think of it as analogous to mana cost in
 Magic: The Gathering - you don’t want too many expensive cards in your deck, else you run the risk of bogging down. In Queen’s Blood this is especially true, as cards don’t just require pawns to play, they generate them, too. Not having enough 1 pawn cards is a surefire way to lose early and often.
 -
Cards generate pawns when placed on the board. Which tiles will gain a pawn when a card is played are indicated on the grid on the bottom center of each card. Generally cards place a single pawn on the indicated tiles.
-
The player has green pawns and the opponent has red pawns. You can only place cards on tiles that have green pawns, and the opponent can only play cards on tiles that have red pawns. If a card you place would add a pawn to a tile with an enemy pawn on it, instead of adding a pawn that tile’s pawns turn green. This works for the enemy, too, turning your pawns red. It doesn’t matter what card is played or how many pawns are on a tile, if a card would place a pawn on a tile occupied by the other player’s pawns, all those pawns on all those tiles are changed.
This is a major strategy in Queen’s Blood, as the fewer tiles an opponent controls, the fewer cards they can play, and the fewer points they can accumulate.
With all that taken into consideration, you want a variety of cards that can place pawns on various different tiles - forwards, up, down, diagonal. Different cards for different situations, so you can claim enemy tiles and/or force them to play defensively in an attempt to try to prevent you from turning their pawns.
Of course, even with good board control, you need to score points, and cards that only require one pawn to play tend to have low power or some significant downside. The opponent can (and will) also start playing conservatively, building up their own side of the board and expanding safely in ways that are hard to exploit without a varied deck of cards capable of competing for contested tiles. Being able to play aggressively and seize control of the board is great, but being forced to do so is not.
That’s where the second key focus of our deck comes into play - card abilities. Namely, ones that buff the power of your own cards. There are numerous decent cards that 1) have a low pawn requirement, 2) claim several adjacent tiles and 3) provide buffs to nearby cards. This helps us rack up power while expanding towards the middle of the board in a safe, measured way. Remember when we compared Queen’s Blade, in part, to Tic-Tac-Toe? More sophisticated, obviously, but there’s bound to be a showdown in the middle of the board, and in these fights a card’s power isn’t as useful as the tiles it can flip. This deck excels at building up a solid foundation on the left side of the board and winning the contested middle, although it can be vulnerable to enemy cards that lower the power of our cards, and due to the fact that opposing players in Chapter 4 will often just have access to better cards.
This Queen’s Blood deck should carry you through all your opponents in Chapter 4, and well into the midgame.
Best Cards - Early Queen’s Blood Deck
Now that we’ve established what we want our deck to excel at - board control and power via card abilities - let’s look at the cards that will make our idle fantasies a reality:
| Card | Number | Location |
|---|---|---|
| x2 | Starter card | |
| x2 | Defeat |
|
| x2 | Purchase QB Booster Pack: |
|
| x1 | Purchase QB Booster Pack: |
|
| x2 | Purchase QB Booster Pack: |
|
| x1 | Defeat Thorin | |
| x2 | Purchase QB Booster Pack: |
|
| x2 | Defeat Zogan ( |
|
| x1 | Defeat Titan ( |
(1 of 4) You’ll get a Queen’s Blood starter deck at the start of Chapter 2.
Having a deck list is all well and good, but now let’s discuss how to best use each card:
-
001 Shinra Security Officer: A no-brainer card with tons of utility. It only has one power, but it adds a pawn to each adjacent tile. Good for spreading your influence quickly and contesting the middle of the board.
-
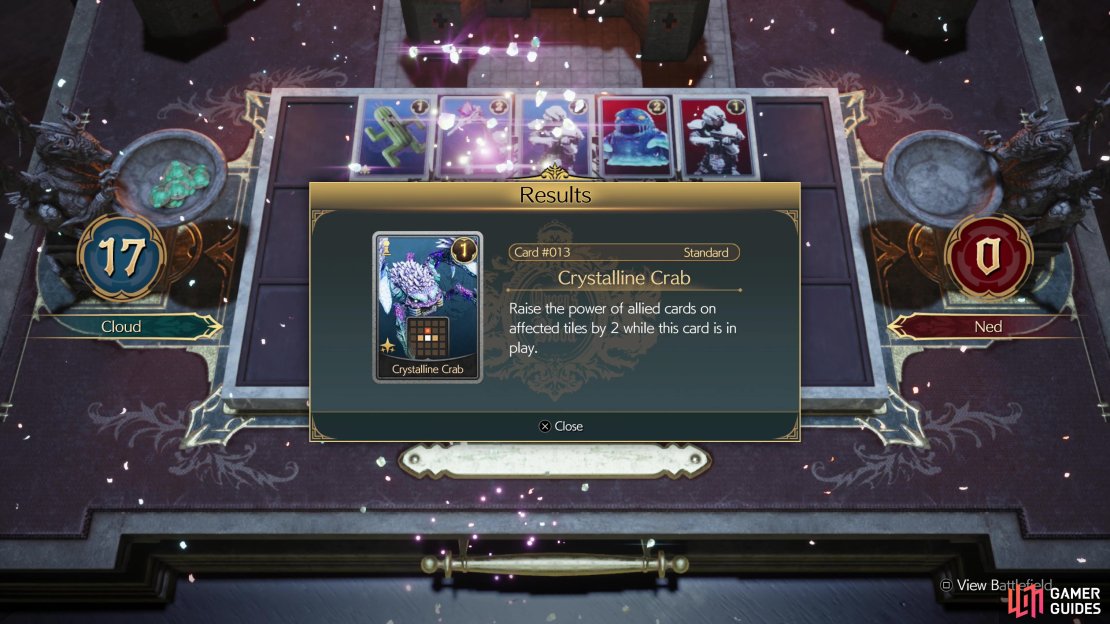
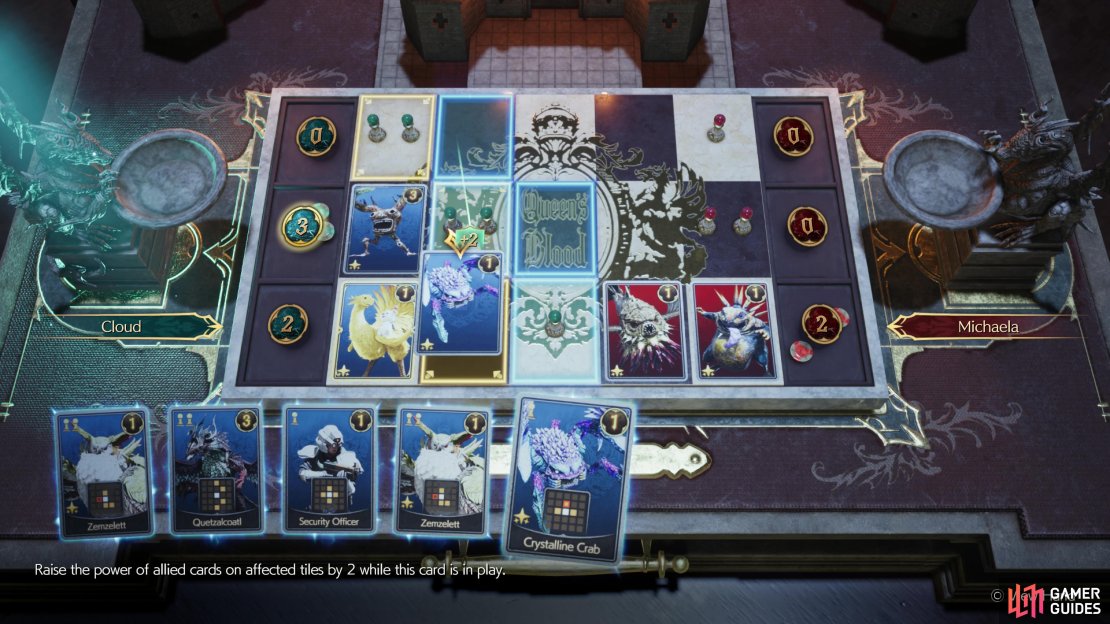
 013 Crystalline Crab: A one power, one pawn cost card that claims the left, right and top tiles, and also boosts the power of the top tile by +2. Place it on the bottom or middle lane and it’s a three power drop that spreads well and costs little. Usually the second card we place, and just great for early match play.
 -
 019 Crawler: Two power, one pawn cost, it’s one of the few cards in our deck that doesn’t add pawns to the right, and honestly it’s of somewhat limited utility. Sometimes you don’t want to claim tiles to the right, or you’re placing this card against another card to the right and dropping it in the middle lane will boost your back ranks. All in all, it’s cheap and has unique utility, but you probably don’t want two and if you play it, it’ll probably be late in the match.
 -
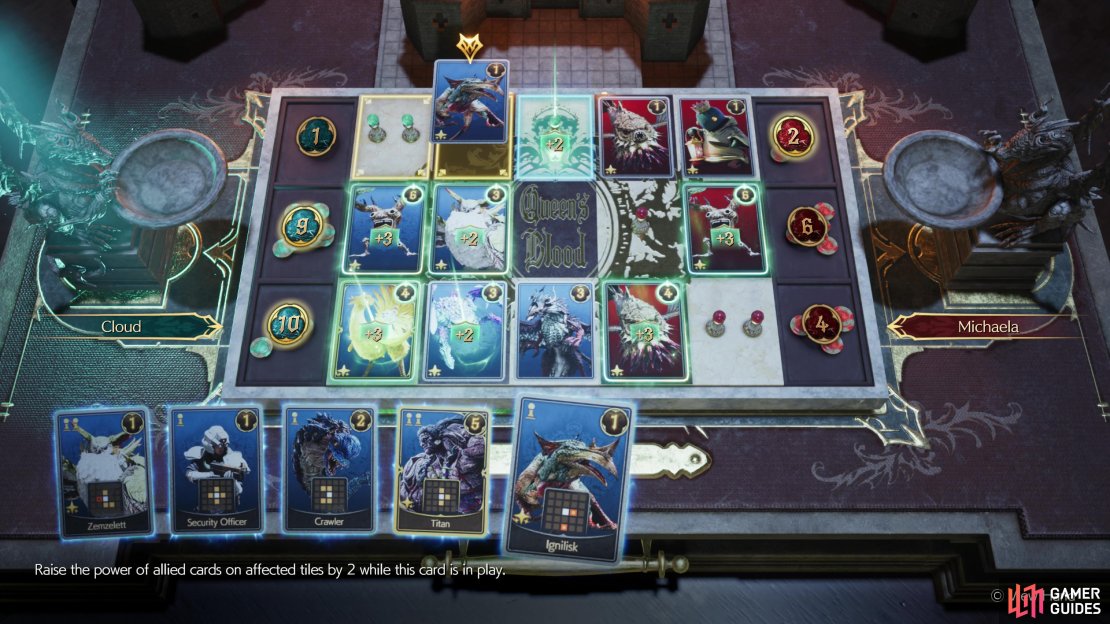
 025 Ignilisk: Claims the tile to the right and two tiles down, and also boosts the power of cards on those tiles by +2. Basically, a better version of Cactuar, it, like Cactuar, wants to be in the upper right corner. If you start the match with one in your hand, great! Use it and you should enjoy a five power play for one pawn cost. You could run two, but two is the absolute most you’d ever need, and its utility is limited, so we’re fine with one. Use Cactuar until you get this card, as it fills a very similar role.
-
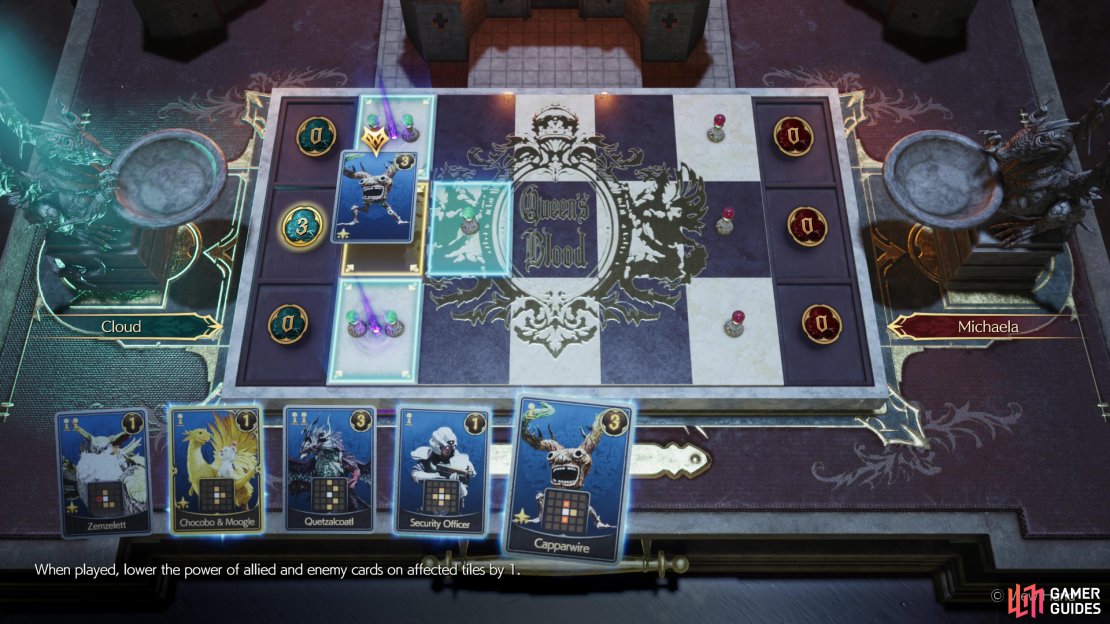
 026 Capparwire: This might seem like a mixed bag at first, as it lowers the power of cards to the top and bottom, while also claiming those tiles and the tile to the right. Shame, because it’s a three power card with a one pawn cost. But it’s worth noting that it only debuffs cards that are on the board when you play this card. If you play this card before you put anything in the tiles above or below it, it won’t negatively affect them. Three power for one pawn cost is always good, and this card is great as an early play or as a late play, and it has optional utility late game as it can damage or destroy enemy cards, or even remove one of your own Security Officers that’s no longer needed.
 -
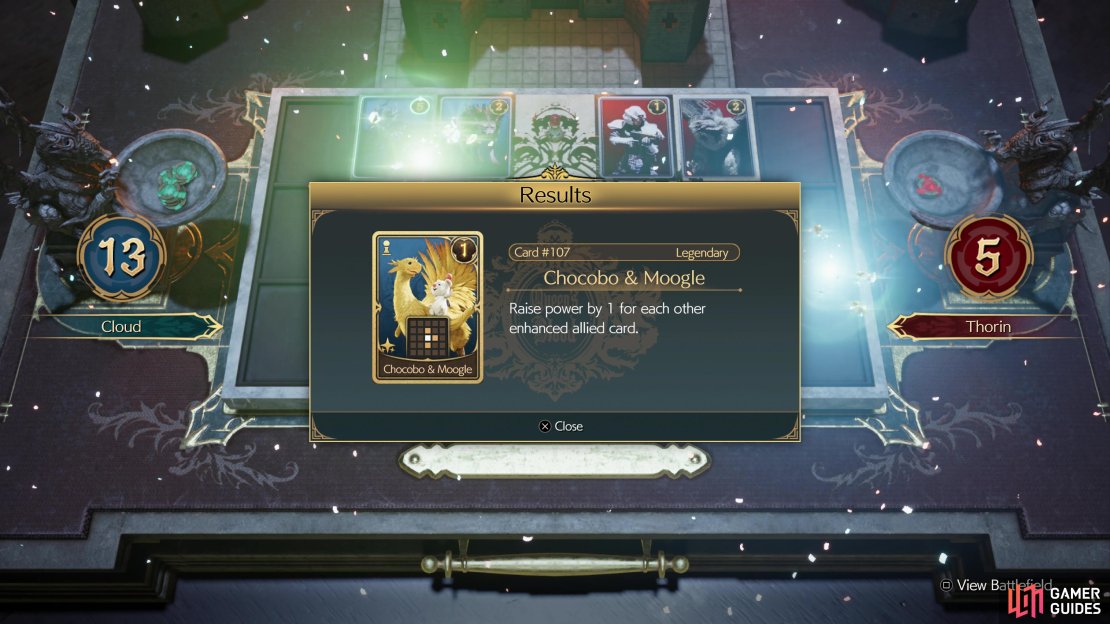
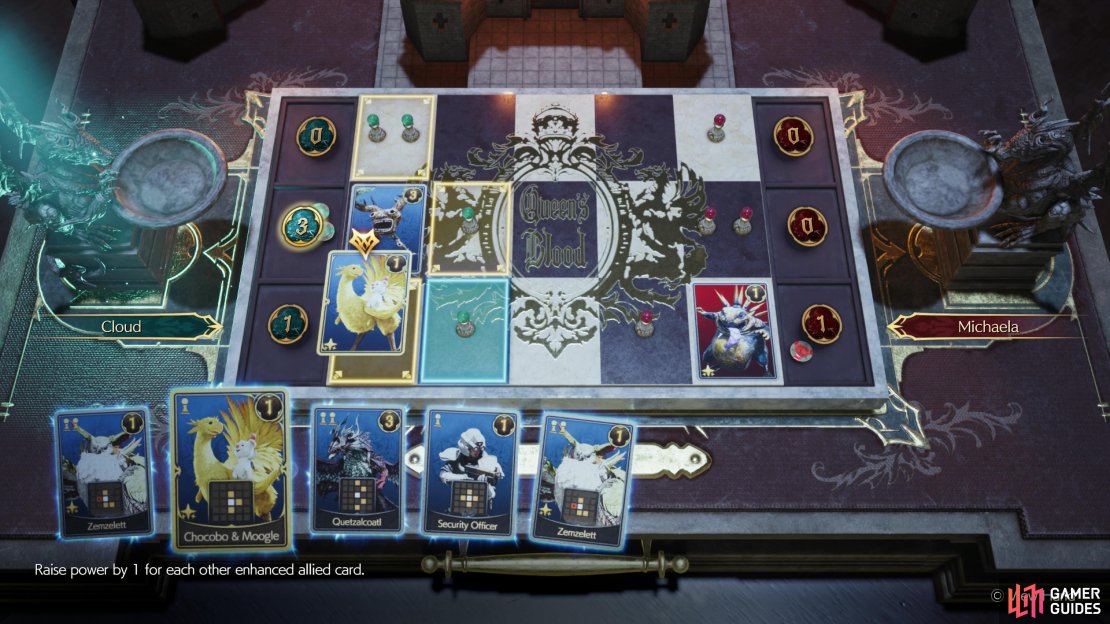
 107 Chocobo & Moogle: Claims tiles to the top, bottom and right, one pawn cost, one power. Nothing special there, but it also has an ability that “Raises power by 1 for each other enhanced allied card”. With
  Crystalline Crab,
  Ignilisk, and
  Zemzelett in our deck, odds are we’ll have at least two cards buffed by the end of the match, which almost always makes this a three power drop for one cost with good spread.
 -
 014 Quetzalcoatl: One of our cards that’ll often be used to secure superiority in the middle of the board, its greatest utility is its ability to strike diagonally (as well as two tiles up and two tiles down). It’s a three power card and costs two pawns to place, so you probably don’t want two in your hand, but when you need to strike at an unconventional angle, this card works well.
 -
 024 Zemzelett: The last card you can get your hands on, chronologically, you have to defeat arguably the most difficult early-game opponent, Zogan, to get these cards. It costs two pawns and only has one power, but it claims tiles to the top, bottom and bottom-right, and boosts the power of the card to the left. Its ability to strike diagonally down (like
  Quetzalcoatl) gives it utility few other cards in our deck have and if you can keep a card to the left of it (usually not that hard) it’s a four power drop.
 -
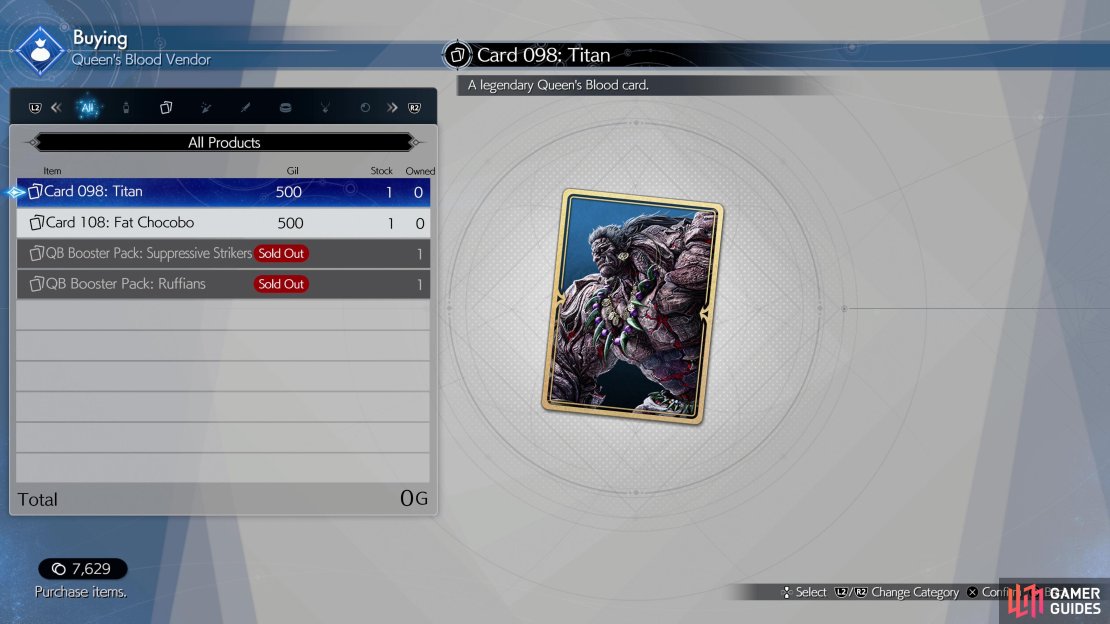
 098 Titan: If you can defeat Titan, buying this card from Thorin comes highly recommended. It’s not hard to see why it’s good - it boosts tiles to the top, bottom and right by two pawns! It also has five power and costs two pawns to place. If you can place this card you’ll be able to play Zemzelett or Quetzalcoatl right next to it, and putting five power on any lane will go a long way toward winning that lane.
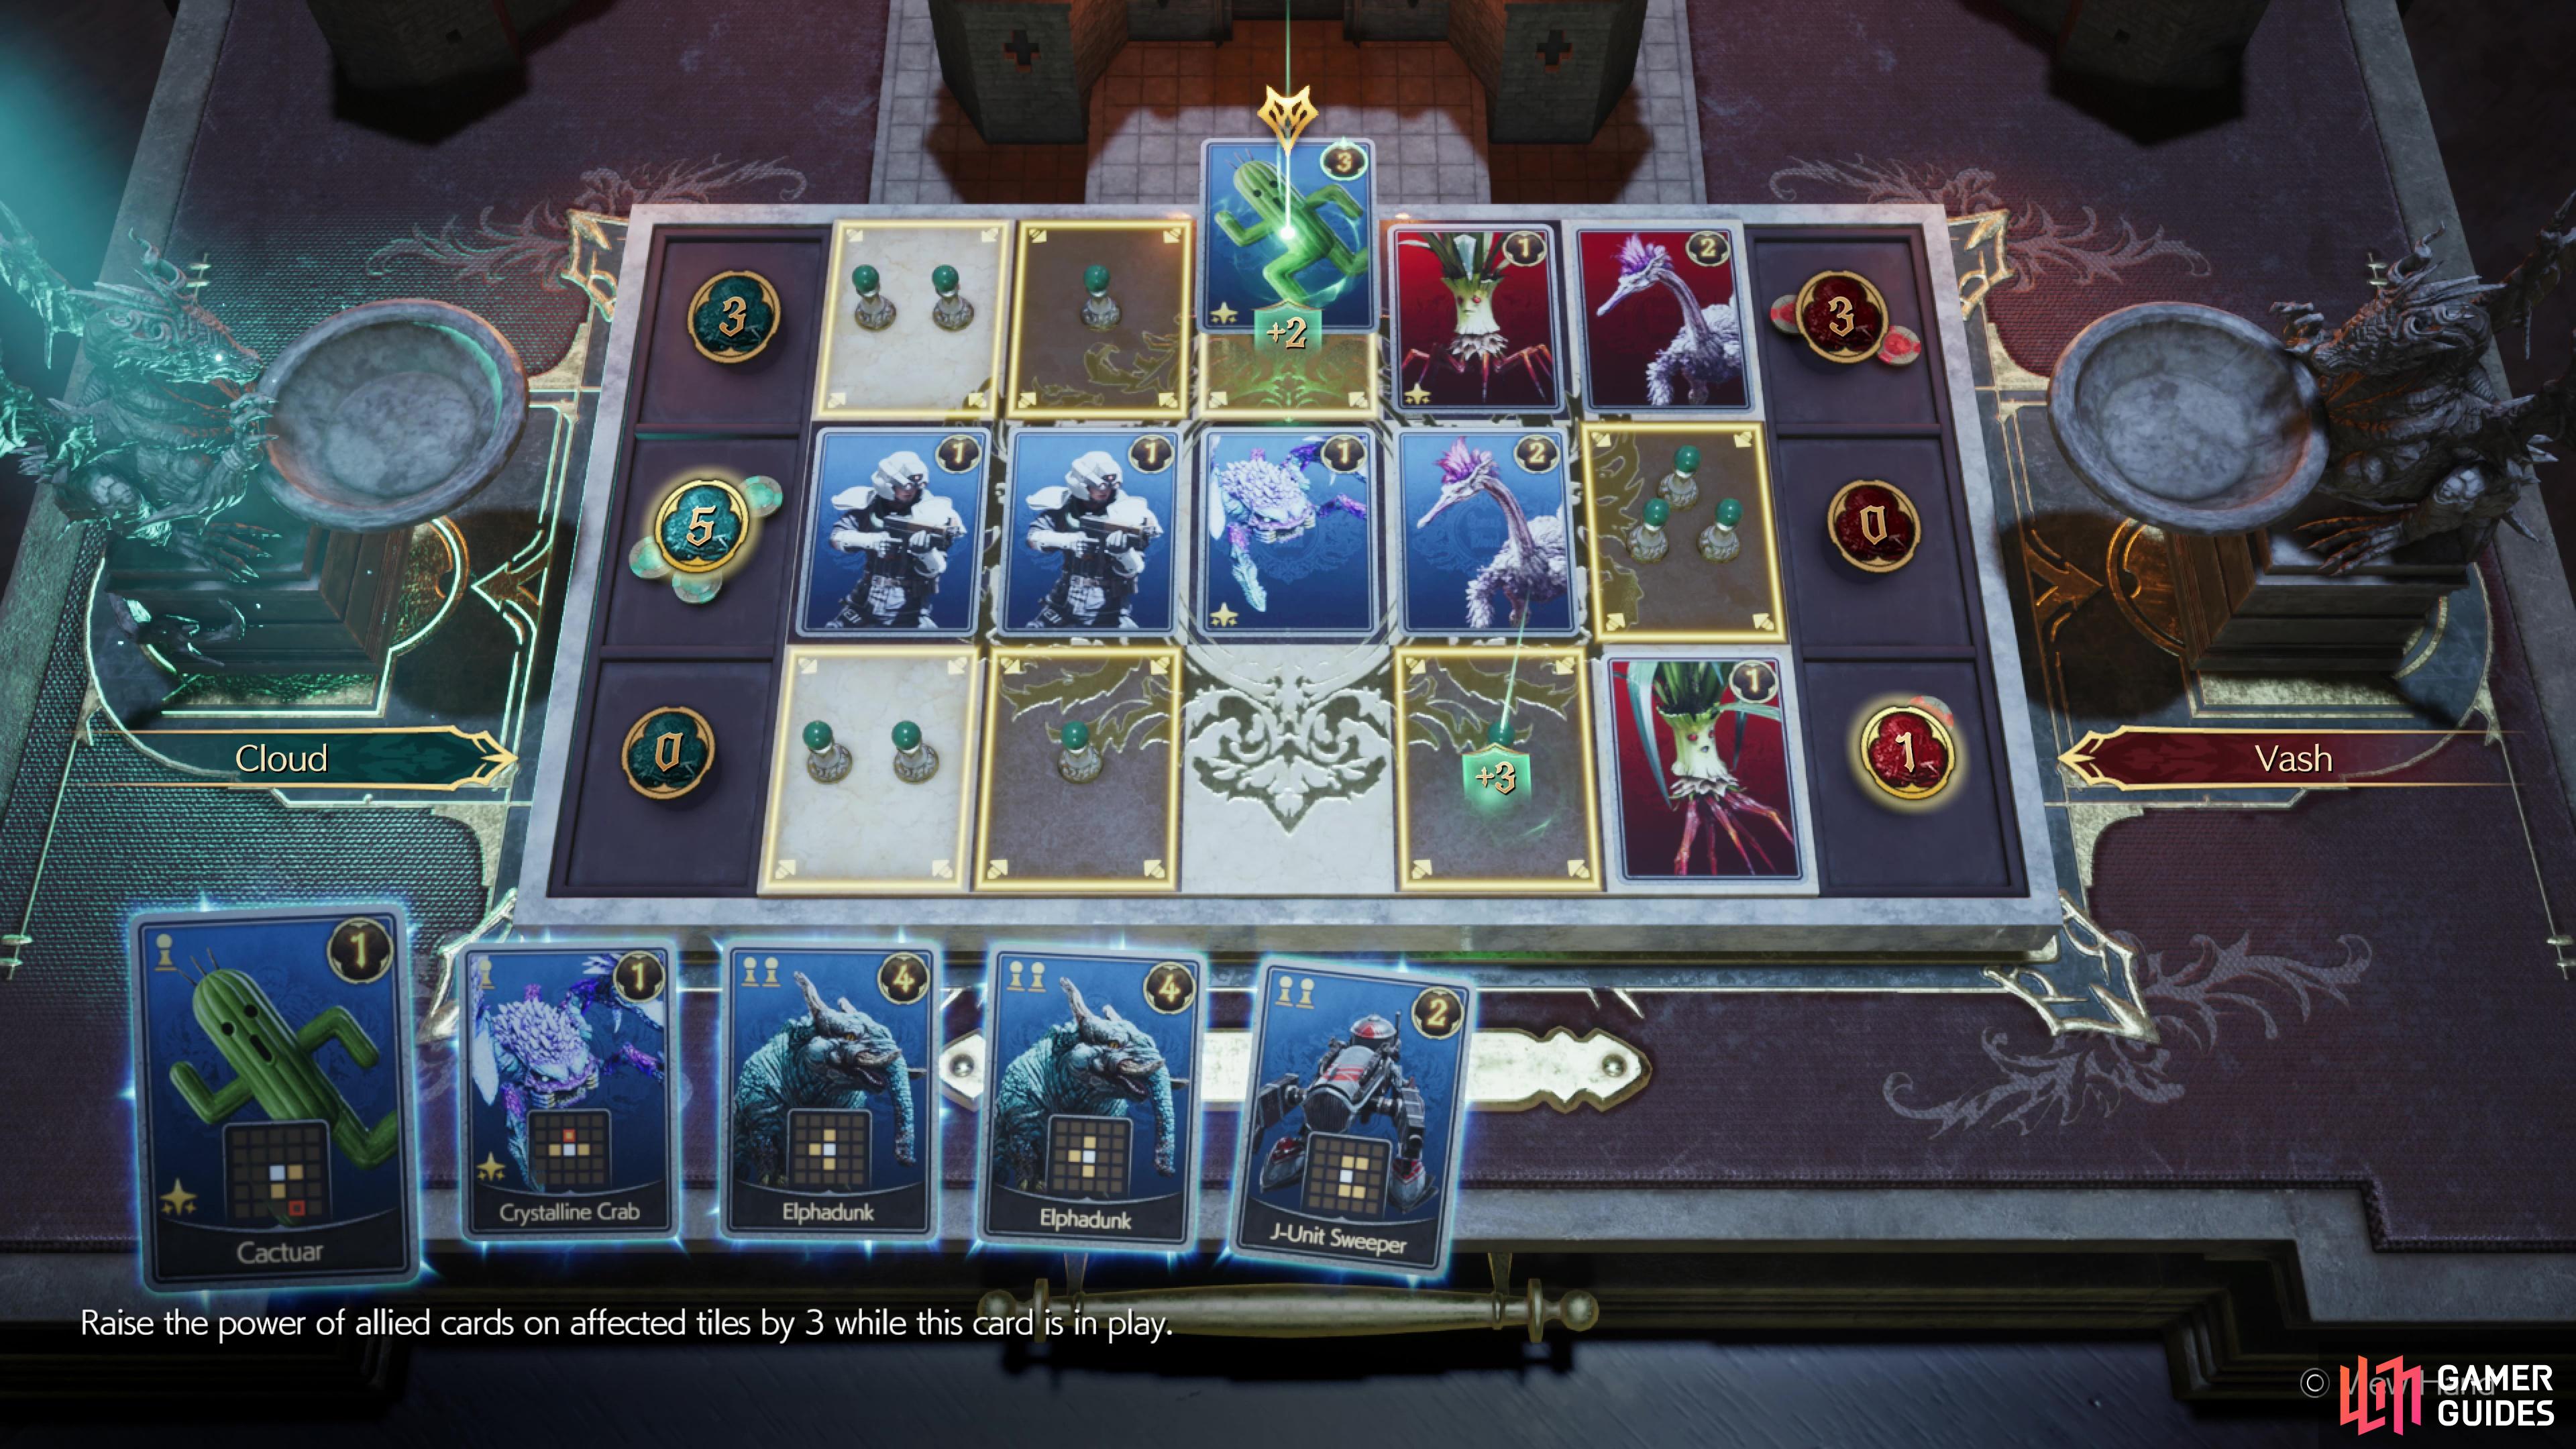
(1 of 7) Capparwire’s downside can be ignored if you play it first, making it a great starter play.
How to Win Queen’s Blood Games in the Junon Region
Now you know what each card does, here’s our general strategy:
-
We’ve no choice but to start out by filling the left side of the board. Dropping a
 Capparwire in the middle left, an Ignilisk in the upper left or a Crystalline Crab in the lower left are great choices for turns 1-3.
 -
Don’t let the perfect be the enemy of the good. With this deck you probably have some good, cheap spreader to drop to the far left. Starting from the middle build down, then right and you should have a two pawn slot in the top left and another just to the right of where you dropped your first card.
-
From here you should be ready to respond to the enemy if they encroach into the middle - drop your own cheap spreader if they put a red pawn adjacent to one of your green pawns. Zemzelett and Quetzalcoatl are also interesting plays here, due to their ability to claim diagonal tiles.
-
If the enemy keeps their distance, keep building (Ignilisk on the top lane is always a good play).
And… that’s pretty much as much as we can micromanage for you. After you drop the first few cards, you’ll need to really keep an eye on how the opponent is advancing and use whatever cards you have to counterplay. You should generally aspire to flip any red pawns adjacent to your green pawns, but it’s hard to overstate how much Quetzalcoatl can confound the opponent. Played in the middle of the board Quetzalcoatl will claim the two diagonal tiles, and this will almost always force the opponent to respond by flipping one, allowing you to put a spreader (Shinra Security Officer, etc.) on the other.
It’s also worth keeping in mind that, as much as this deck seems to put you in a position to contend - if not sweep - by turn 4 or 5, sometimes you’ll get bad RNG. You can mulligan cards, but if those don’t turn out well, there’s no reason not to quit and retry. This isn’t real life; you don’t have to play with a bad hand. Also, sometimes the enemy will just have better cards. You won’t get access to Ifrit yet, which is pretty much a superior Chocobo & Moogle - very likely to win the row if the enemy uses any power buffs. It’s just a fact that sometimes the computer gets cards you don’t have access to, and while they’re not always insurmountable… well, it’s hard to prepare for something you’re unfamiliar with. Still, with this deck, we’re winning around 90% of our matches in the Junon Region, which will clear six opponents and give you something solid to build on for mid and late game Queen’s Blood matches…
No Comments