
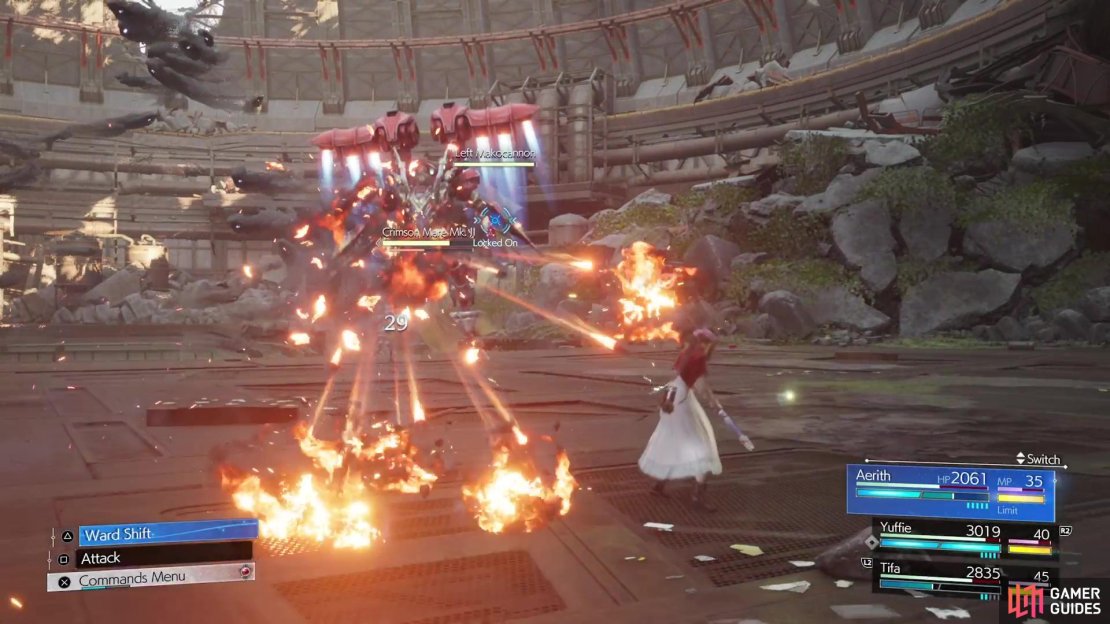
While you’re controlling Tifa in the ![]() Gongaga Region, you will need to visit the Gongaga Reactor to help out your team. Using the grappling gun given to you by Cissnei, the party manages to navigate the flooded reactor and find Cloud and company. However, Scarlet has different plans and decides to use her mech, the Crimson Mare Mk. II, to do battle with you.
Gongaga Region, you will need to visit the Gongaga Reactor to help out your team. Using the grappling gun given to you by Cissnei, the party manages to navigate the flooded reactor and find Cloud and company. However, Scarlet has different plans and decides to use her mech, the Crimson Mare Mk. II, to do battle with you.
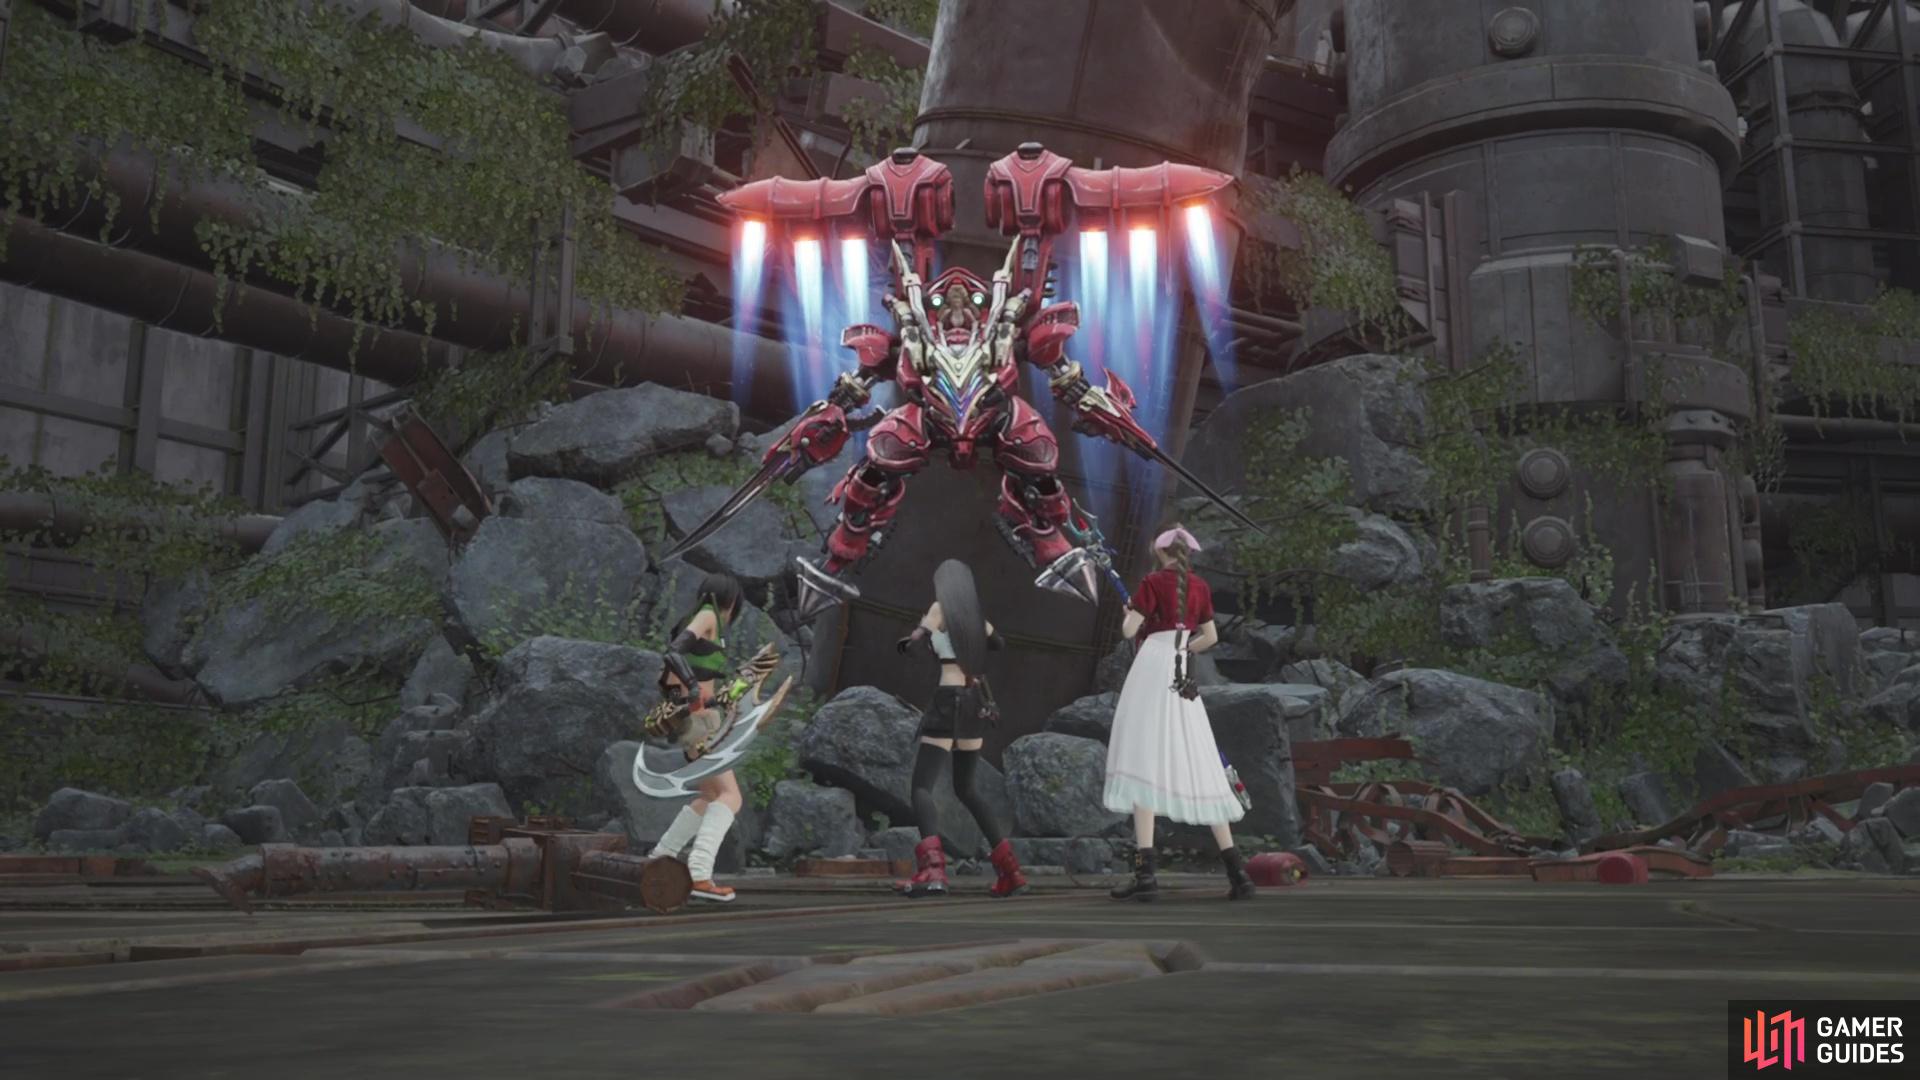
The Crimson Mare will be piloted by Scarlet, and is the final boss of Chapter 9.
All of Crimson Mare’s Attacks
The Crimson Mare will have three different phases, with different moves in each one. The first phase change will happen at around the 75% HP threshold, with the second coming at about 40% or so HP remaining.
First Phase Attacks
For the first phase, the Crimson Mare will be using sword-like arms. It has a few normal attacks, like a double swipe, as well as a machine gun. Only the named moves will be listed below.
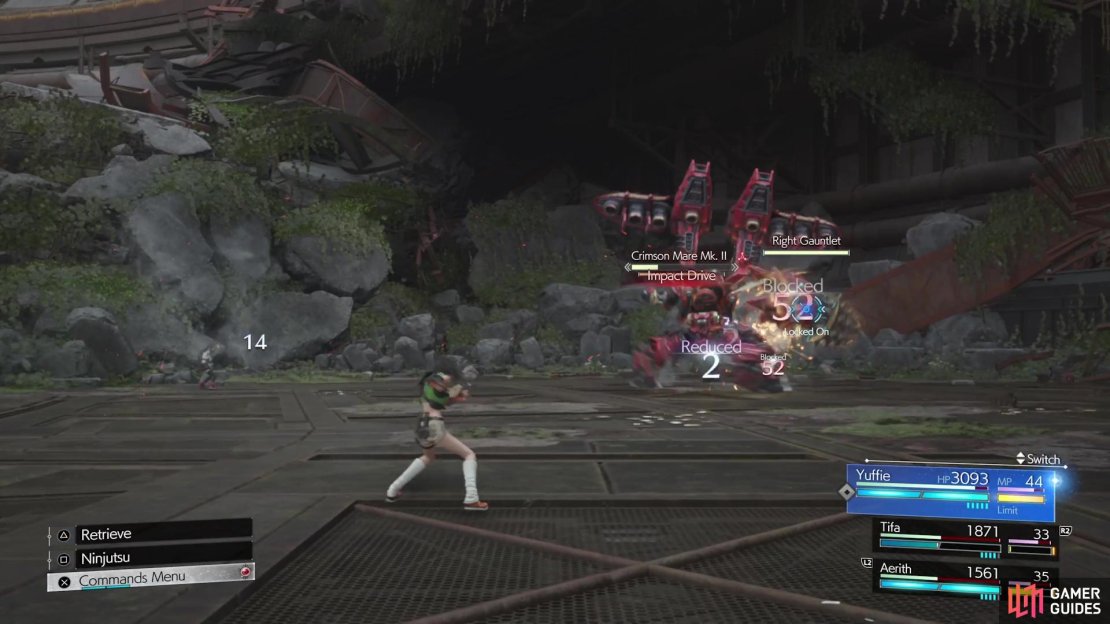
- X-ecution: Crimson Mare will dash forward and quickly perform a X-shaped slash with both arms. Can be a little challenging to dodge, but you are able to block it.

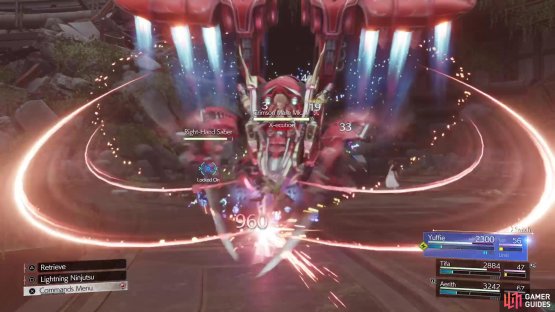
(1 of 2) X-ecution is a quick attack that can be hard to avoid.

X-ecution is a quick attack that can be hard to avoid. (left), Spinning Thrust is unblockable, but try to dodge to the sides. (right)
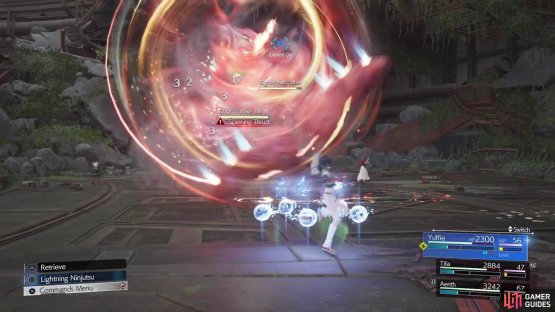
- Spinning Thrust:
 Unblockable. Crimson Mare will do a spinning charge attack. You will need to dodge to either side to avoid this.
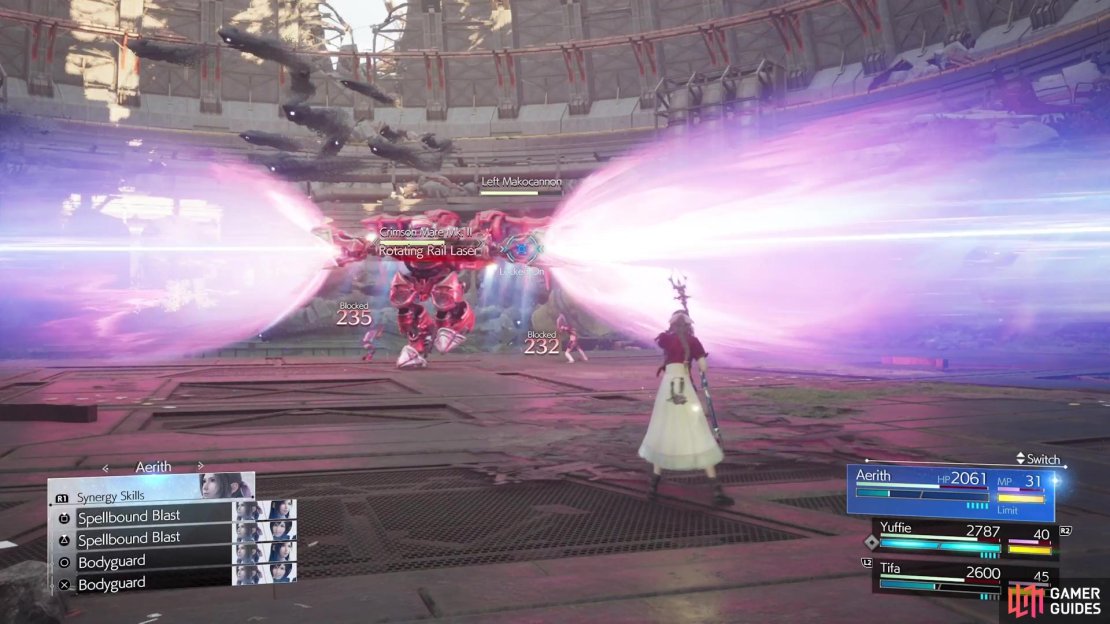
Second Phase Attacks
At around 75% remaining HP, Scarlet will replace the bladed arms on the mech with Makocannons.
-
Double Laser: She will fire two lasers, one from each arm. This is a normal attack and thus, can be blocked.
-
Sweeping Shot: Similar to the lasers, the boss will fire a number of normal projectiles in a sweeping motion, from each arm. Either move away from the boss or block them.
-
Shotgun Blast: Crimson Mare will get close and fire off two rounds of a shotgun-like blast, one from each arm. It is blockable, but if you dodge to the sides, you can probably avoid it.


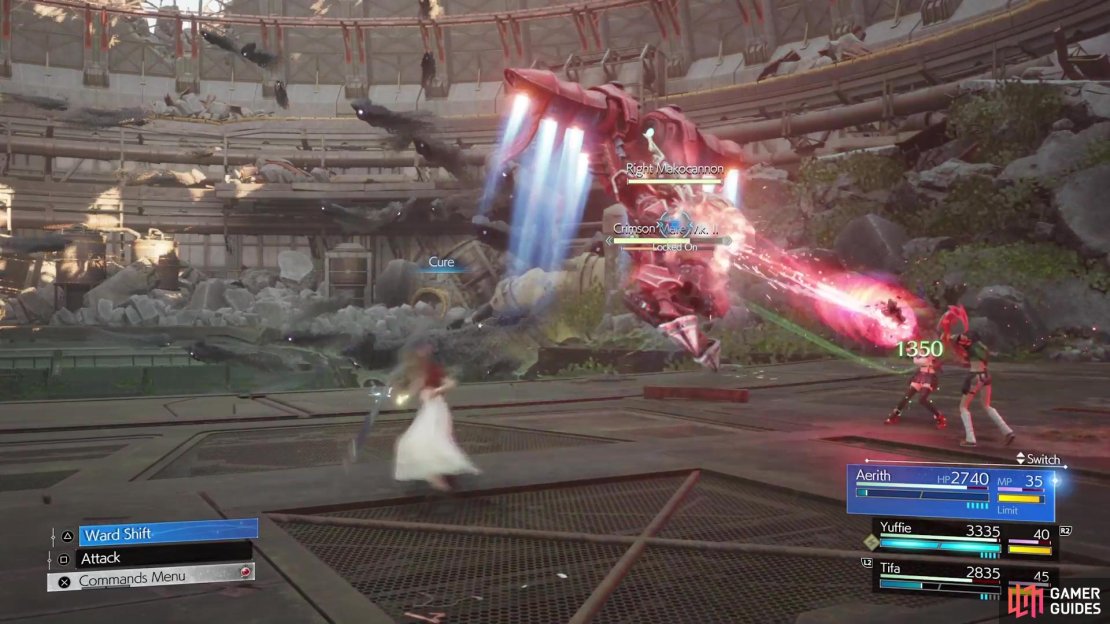
(1 of 4) The Double Laser can be hard to avoid, especially as Aerith.
- Rotating Rail Laser: The only named attack in this phase, Crimson Mare will stretch out both arms and fire a large, consistent laser. While they are shooting, the entire mech will spin around, lasers included. You can block these, but if you time a dodge at the right time, you can avoid the lasers.
Third Phase Attacks
The third phase is the final one and will have Scarlet replace the Makocannons with two Gauntlets, which are kind of like drills.
-
Impact Drive: The Crimson Mare will do a charging punch with each arm, straight at a character. This attack might be a little harder to dodge, but they are blockable.
-
Impact Hook: The Crimson Mare will try to punch you, in an uppercut-like fashion, with both gauntlets. It’s a melee attack, though, so it’s pretty easy to dodge.
-
Impact Eruption: Unblockable. The boss will fly to a position, charge up a little bit, then smack the ground with one of its hands, unleashing a large explosion around the body. Simply move away when you see this move coming to avoid damage.
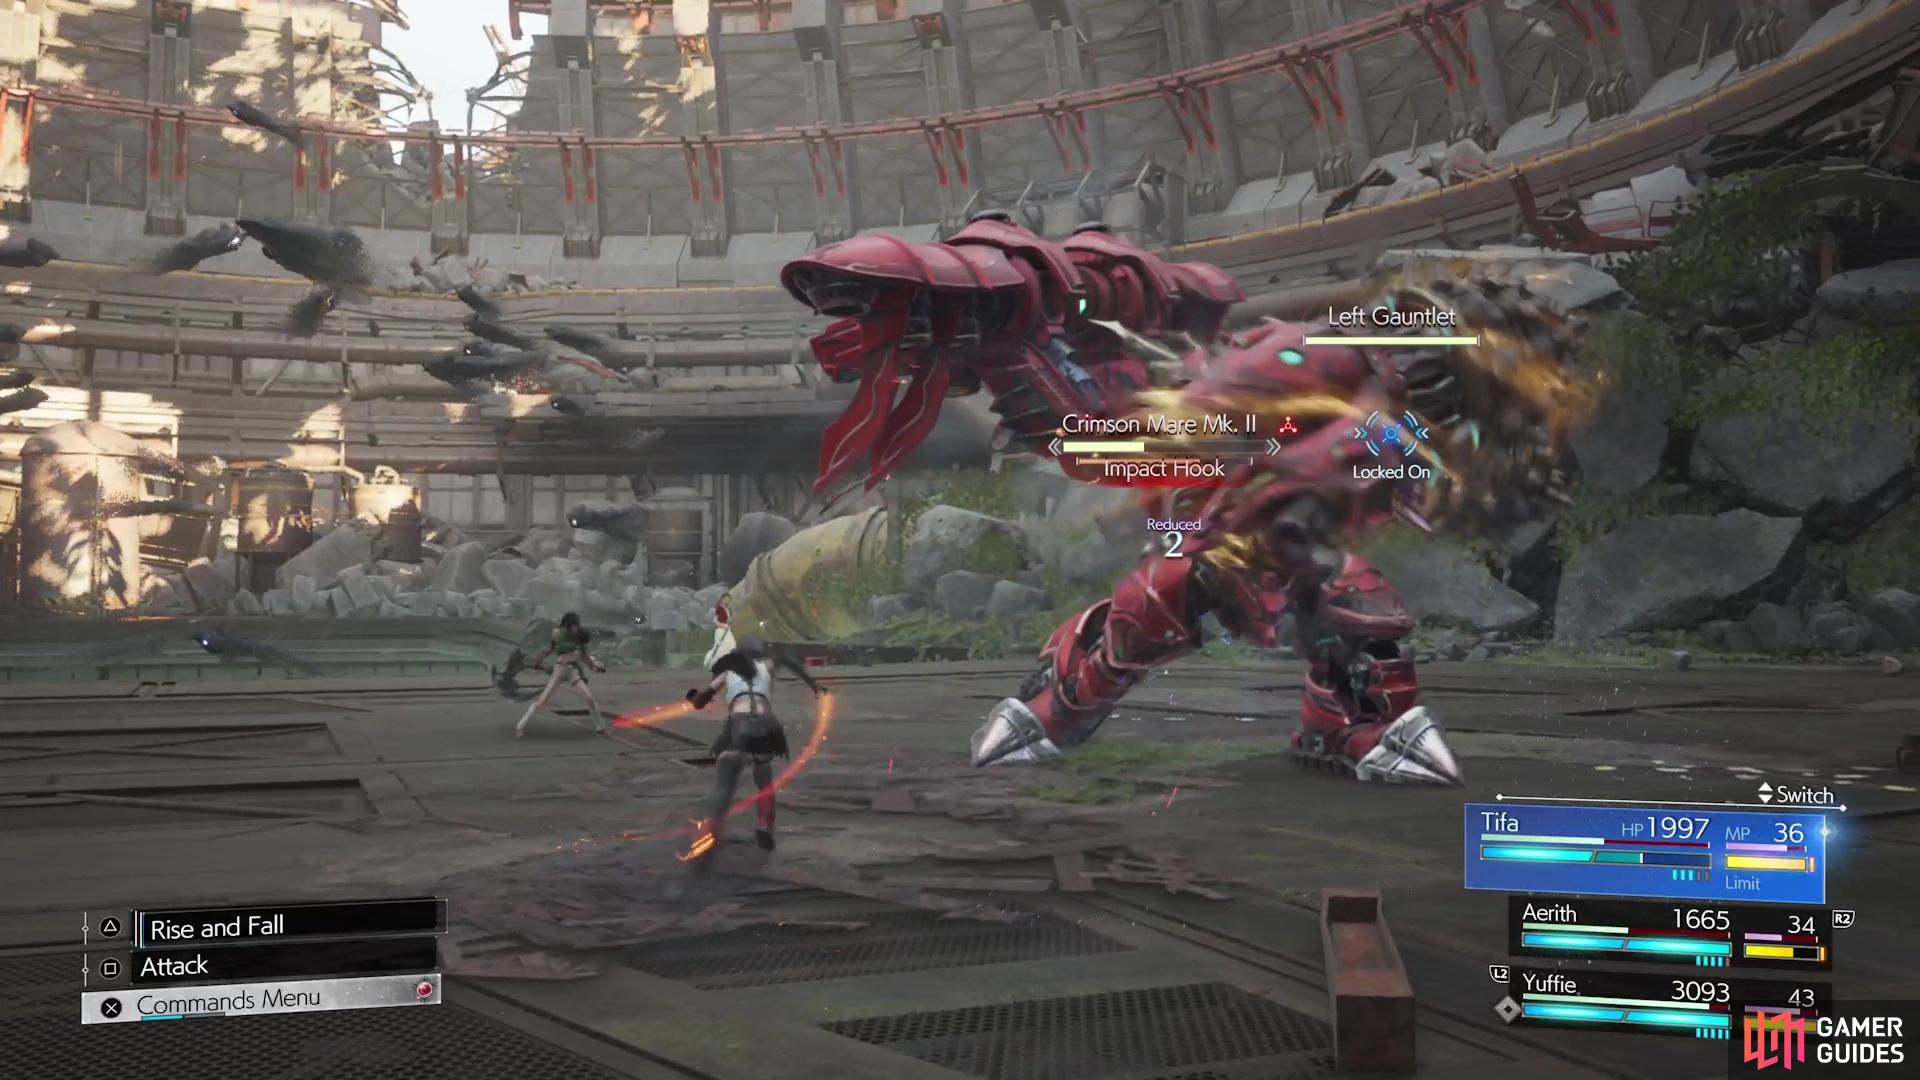
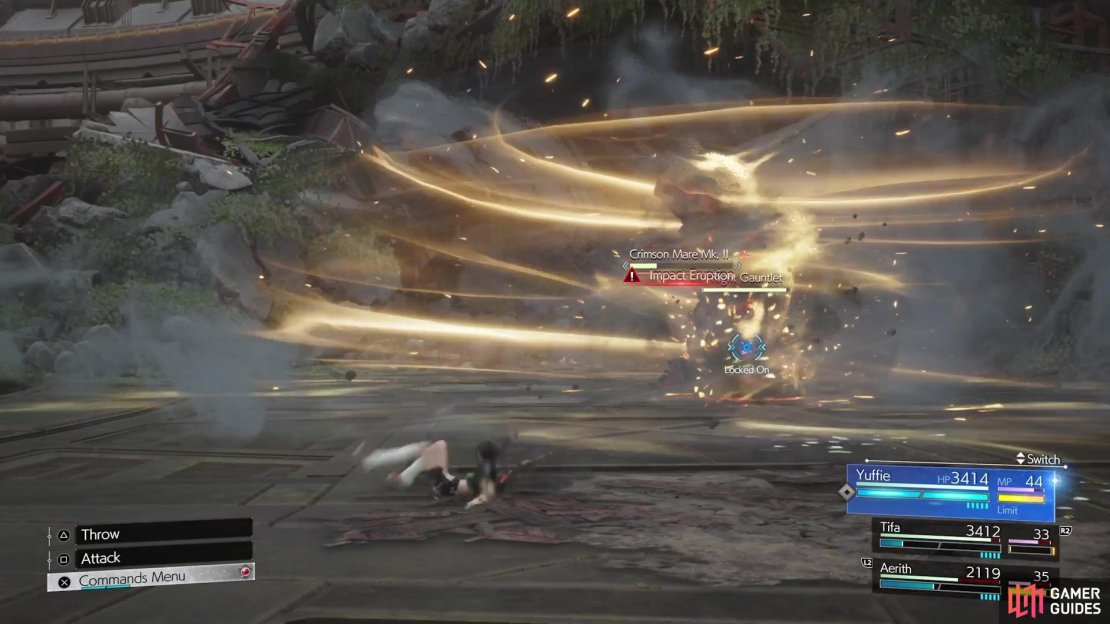
(1 of 4) The final phase will deal with a lot of melee attacks.
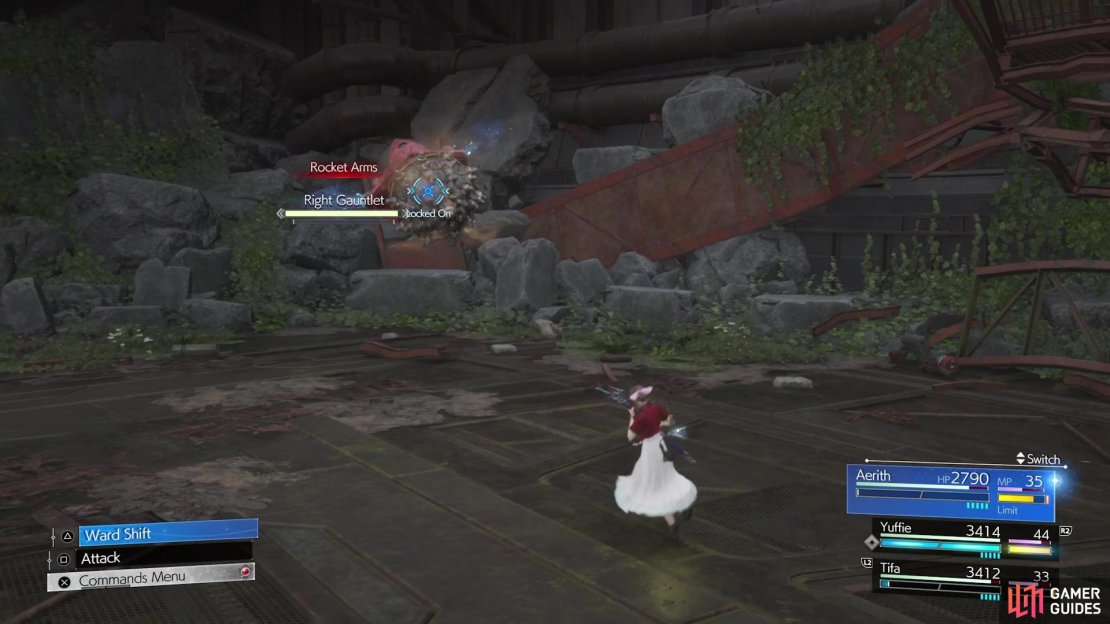
- Rocket Arms: The Crimson Mare will detach its hands from the main body, with them flying around the battlefield. They will eventually stop and do a drilling charge at a character. You can try to dodge it, or simply block it.
Crimson Mare Boss Strategy
As you can see above, there are three distinct phases to this boss fight, with each one having completely different attacks. The first phase will have Scarlet equip the mech with bladed arms. The named attacks here can be annoying, as they are both quick and kind of challenging to dodge completely. X-ecution can be blocked, though, while the Spinning Thrust is unblockable. The regular attacks during this phase aren’t really anything to worry about, since the machine gun can be blocked and the melee attacks are avoided by moving away.
In order to pressure the Crimson Mare, you will first need to destroy both hands. Each of them will have their own health bars and being a machine, the boss will be weak to electric-based attacks. Destroying the arms will also have an added benefit of slightly nerfing some of her attacks. After destroying both arms, you will see that Scarlet will become targetable, with her own HP bar. Deplete this and you will pressure the boss, which will then allow you to fill the stagger bar, like usual. This will extend to all phases of the battle, too.


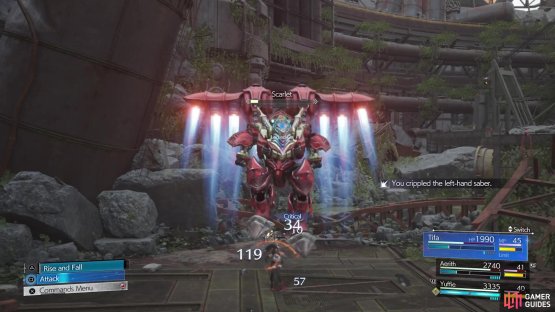
(1 of 2) To pressure the boss, you’ll have to destroy both arms.

To pressure the boss, you’ll have to destroy both arms. (left), This will make Scarlet targetable, so deplete her bar to inflict the pressure. (right)
The second phase will replace the bladed arms with Makocannons, so all of the attacks will be ranged. The two lasers are probably the worst of the bunch, since they can be a little difficult to avoid completely. The Double Lasers can be blocked, though, so that makes it less painful. For the third phase, the arms will be replaced with gauntlets (with drills). All of the moves here can be blocked, with the exception of Impact Eruption, but you generally have a good amount of time to move away from the blast zone for that.
Exploring Gongaga Region
After the battle is over, there will be some scenes, with a little bit of gameplay in between, where you need to do a tiny bit of grappling with Tifa. Once you regain control, start swimming, then you’ll be interrupted by more scenes. The next section is pretty much on-rails, with you just picking certain choices for more cutscenes. The next time you have full control, move toward the thing ahead of you, which will trigger even more scenes. You’ll eventually return to Gongaga, where the next part of your story will be planned.
Your goal is to head to ![]() Cosmo Canyon, but in order to get there, you’ll have to borrow the services of a freeflier pilot. However, with the newly acquired Chocobo, you will finally be able to do pretty much everything there is to do in the Gongaga Region, like the World Intel and the various Quests.
Cosmo Canyon, but in order to get there, you’ll have to borrow the services of a freeflier pilot. However, with the newly acquired Chocobo, you will finally be able to do pretty much everything there is to do in the Gongaga Region, like the World Intel and the various Quests.
World Intel in Gongaga
While you might have been able to do a few pieces of World Intel in Gongaga, you were severely restricted because you needed a Chocobo. With the use of your feathery friend, you can now do everything.

(1 of 2) You might be able to do some of the intel right away

You might be able to do some of the intel right away (left), but you’ll have to wait until you get the Chocobo to finish all other World Intel here. (right)
| World Intel | Amount |
|---|---|
| Divine Intel | 3 |
| Activation Intel | 5 |
| Expedition Intel | 6 |
| Fiend Intel | 6 |
| Excavation Intel | 2 |
| Phenomenon Intel | 4 |
Quests in Gongaga
When you first arrive in the Gongaga Region, you can do one of the below Quests (The Pursuit of Perfection). For all of the other quests below, you will have to wait until you complete the reactor portion of the main story. Note that The Spice of Life requires doing the Teach Me, Great Warrior quest first.
| Quest | Reward |
|---|---|
| The Pursuit of Perfection | |
| Teach Me, Great Warrior | Secrets of the Ninja Vol. IV |
| O Chicken, Where Art Though | Lucky Amulet |
| The Spice of Life |
Gongaga Airstrip
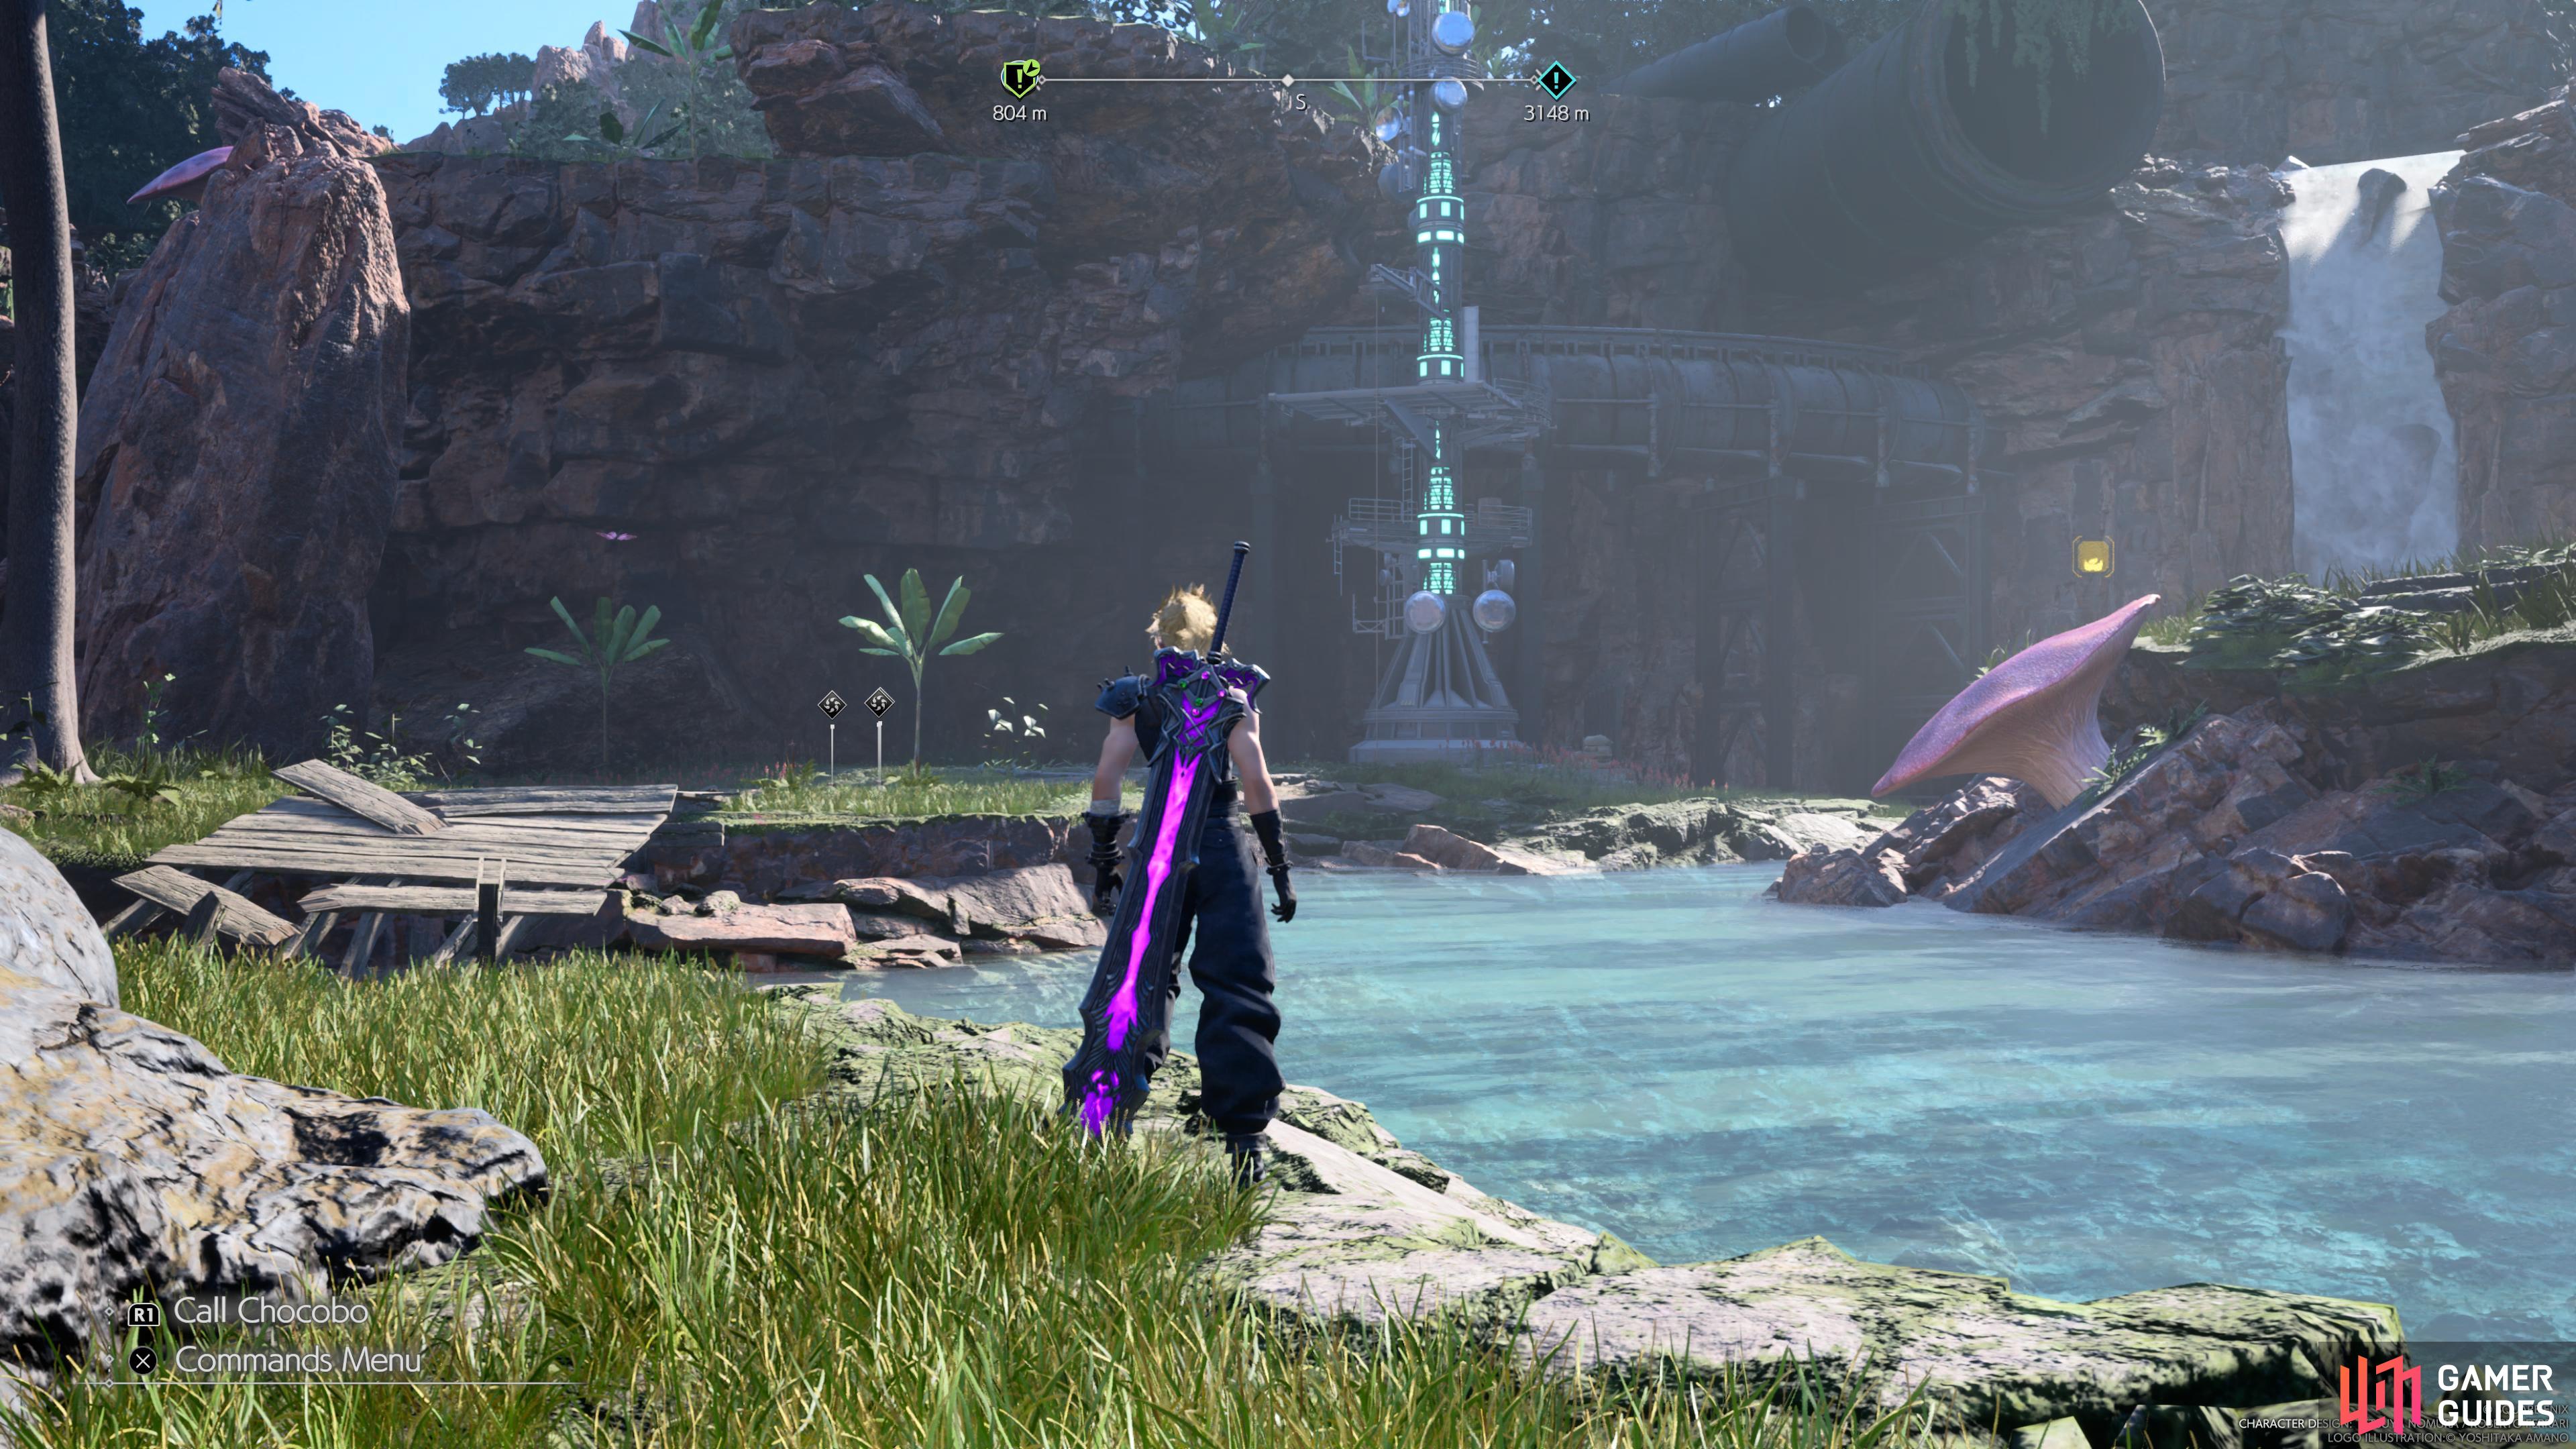
The airstrip is located to the southwest of Gongaga. Take the southern exit out of the town and immediately use the first right. The main path here will bring you to a long bridge and Magon Hill, so climb it and continue past the mushroom. Keep following the trail to some ![]() Grandhorn enemies. The entrance to the airstrip will be just west of them. Go inside and look for the telephone in the middle, which is your goal, but there is a purple chest hidden in the bushes behind it, which contains the Resounding Megaphone weapon for
Grandhorn enemies. The entrance to the airstrip will be just west of them. Go inside and look for the telephone in the middle, which is your goal, but there is a purple chest hidden in the bushes behind it, which contains the Resounding Megaphone weapon for ![]() Cait Sith.
Cait Sith.
Interact with the phone booth now and you’ll witness the plane come and land. The pilot offers to fly you to Cosmo Canyon, but you’ll need to pay him 1,000 Gil first. As soon as you give him the money, you will be airborne and the next stop is Cosmo Canyon!
No Comments