
The Gongaga region Fiend Intel is the main way you can quickly unlock simulation battles. There are several new types of enemies for you to take on that vary in difficulty. While some of these battles are easy, others have harder tasks, like not being turned into a frog. The guide below goes over all the Fiend Intel in the Gongaga region of Final Fantasy VII Rebirth and how to meet all of the objectives.
Gongaga is filled with challenging Fiend Intel.
All Gongaga Fiend Intel
There are six different Fiend Intel locations in the Gongaga region. Like the previous Corel region, Gongaga is split into two separate areas divided by the story. You won’t really be able to explore effectively until you have finished your work at the ruined reactor and are able to use a Chocobo freely. Below is each Intel in the area and how to complete all of the objectives.
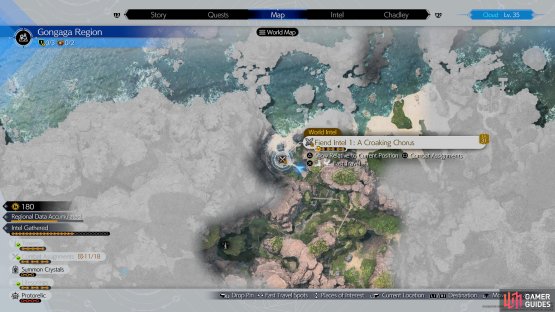
A Croaking Chorus - Amphidex Fiend Intel #1
Objectives:
- Pressure
 Amphidex
 - Don’t let Amphidex turn you into a frog
- Defeat Amphidex within the time limit
A Croaking Chorus can be found in the first part of the Gongaga region before you reach the town of Gongaga. It’s up near the beach from the first Remnawave tower and has you facing off against Amphidex. These are slippery frog enemies whose main attack is to turn you into a frog, leading to an annoying battle. If left unchecked, turning into a frog can cost you both the time limit and not turning into a frog objective. To avoid this, hit the Amphidex with their weakness, ![]() Ice, as soon as the fight starts and stagger them quickly. The White Cape accessory will keep you from turning into a frog, and an
Ice, as soon as the fight starts and stagger them quickly. The White Cape accessory will keep you from turning into a frog, and an ![]() Ice Materia will give you the upper hand. Using a ranged character, like Barret, is also nice, as you don’t have to get too close to them.
Ice Materia will give you the upper hand. Using a ranged character, like Barret, is also nice, as you don’t have to get too close to them.

(1 of 2) A Croaking Chorus Amphidex.
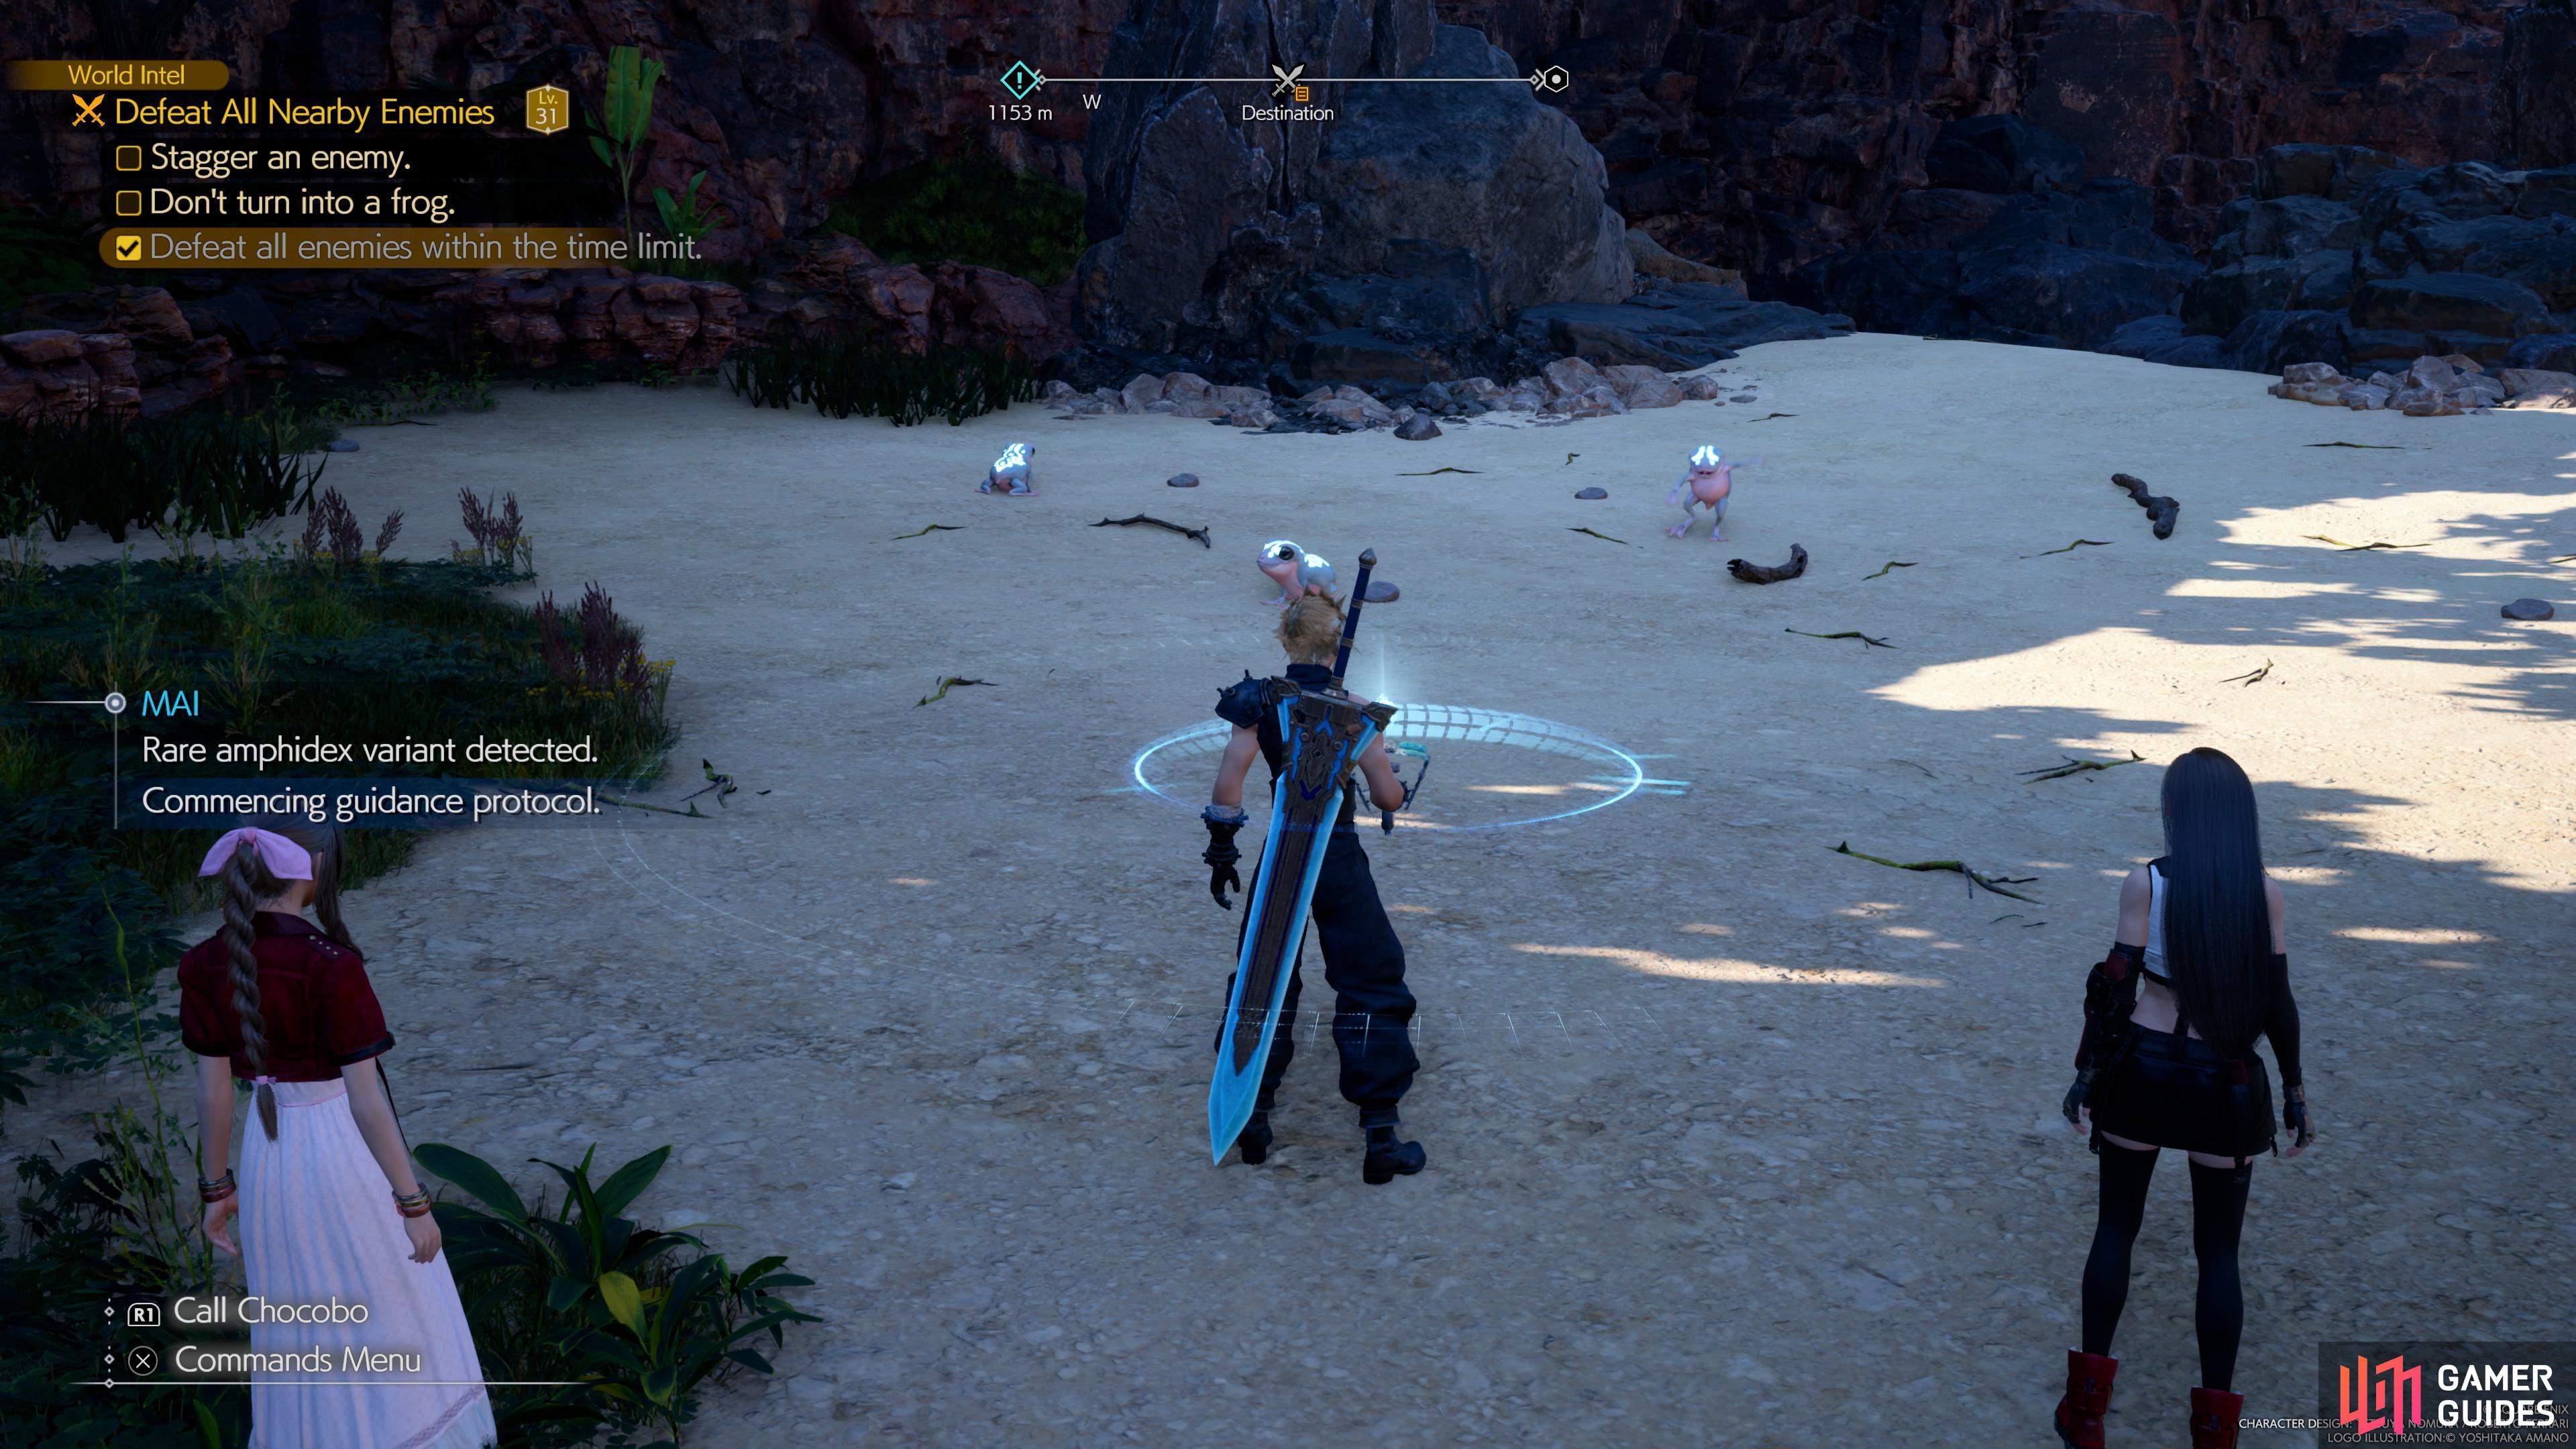
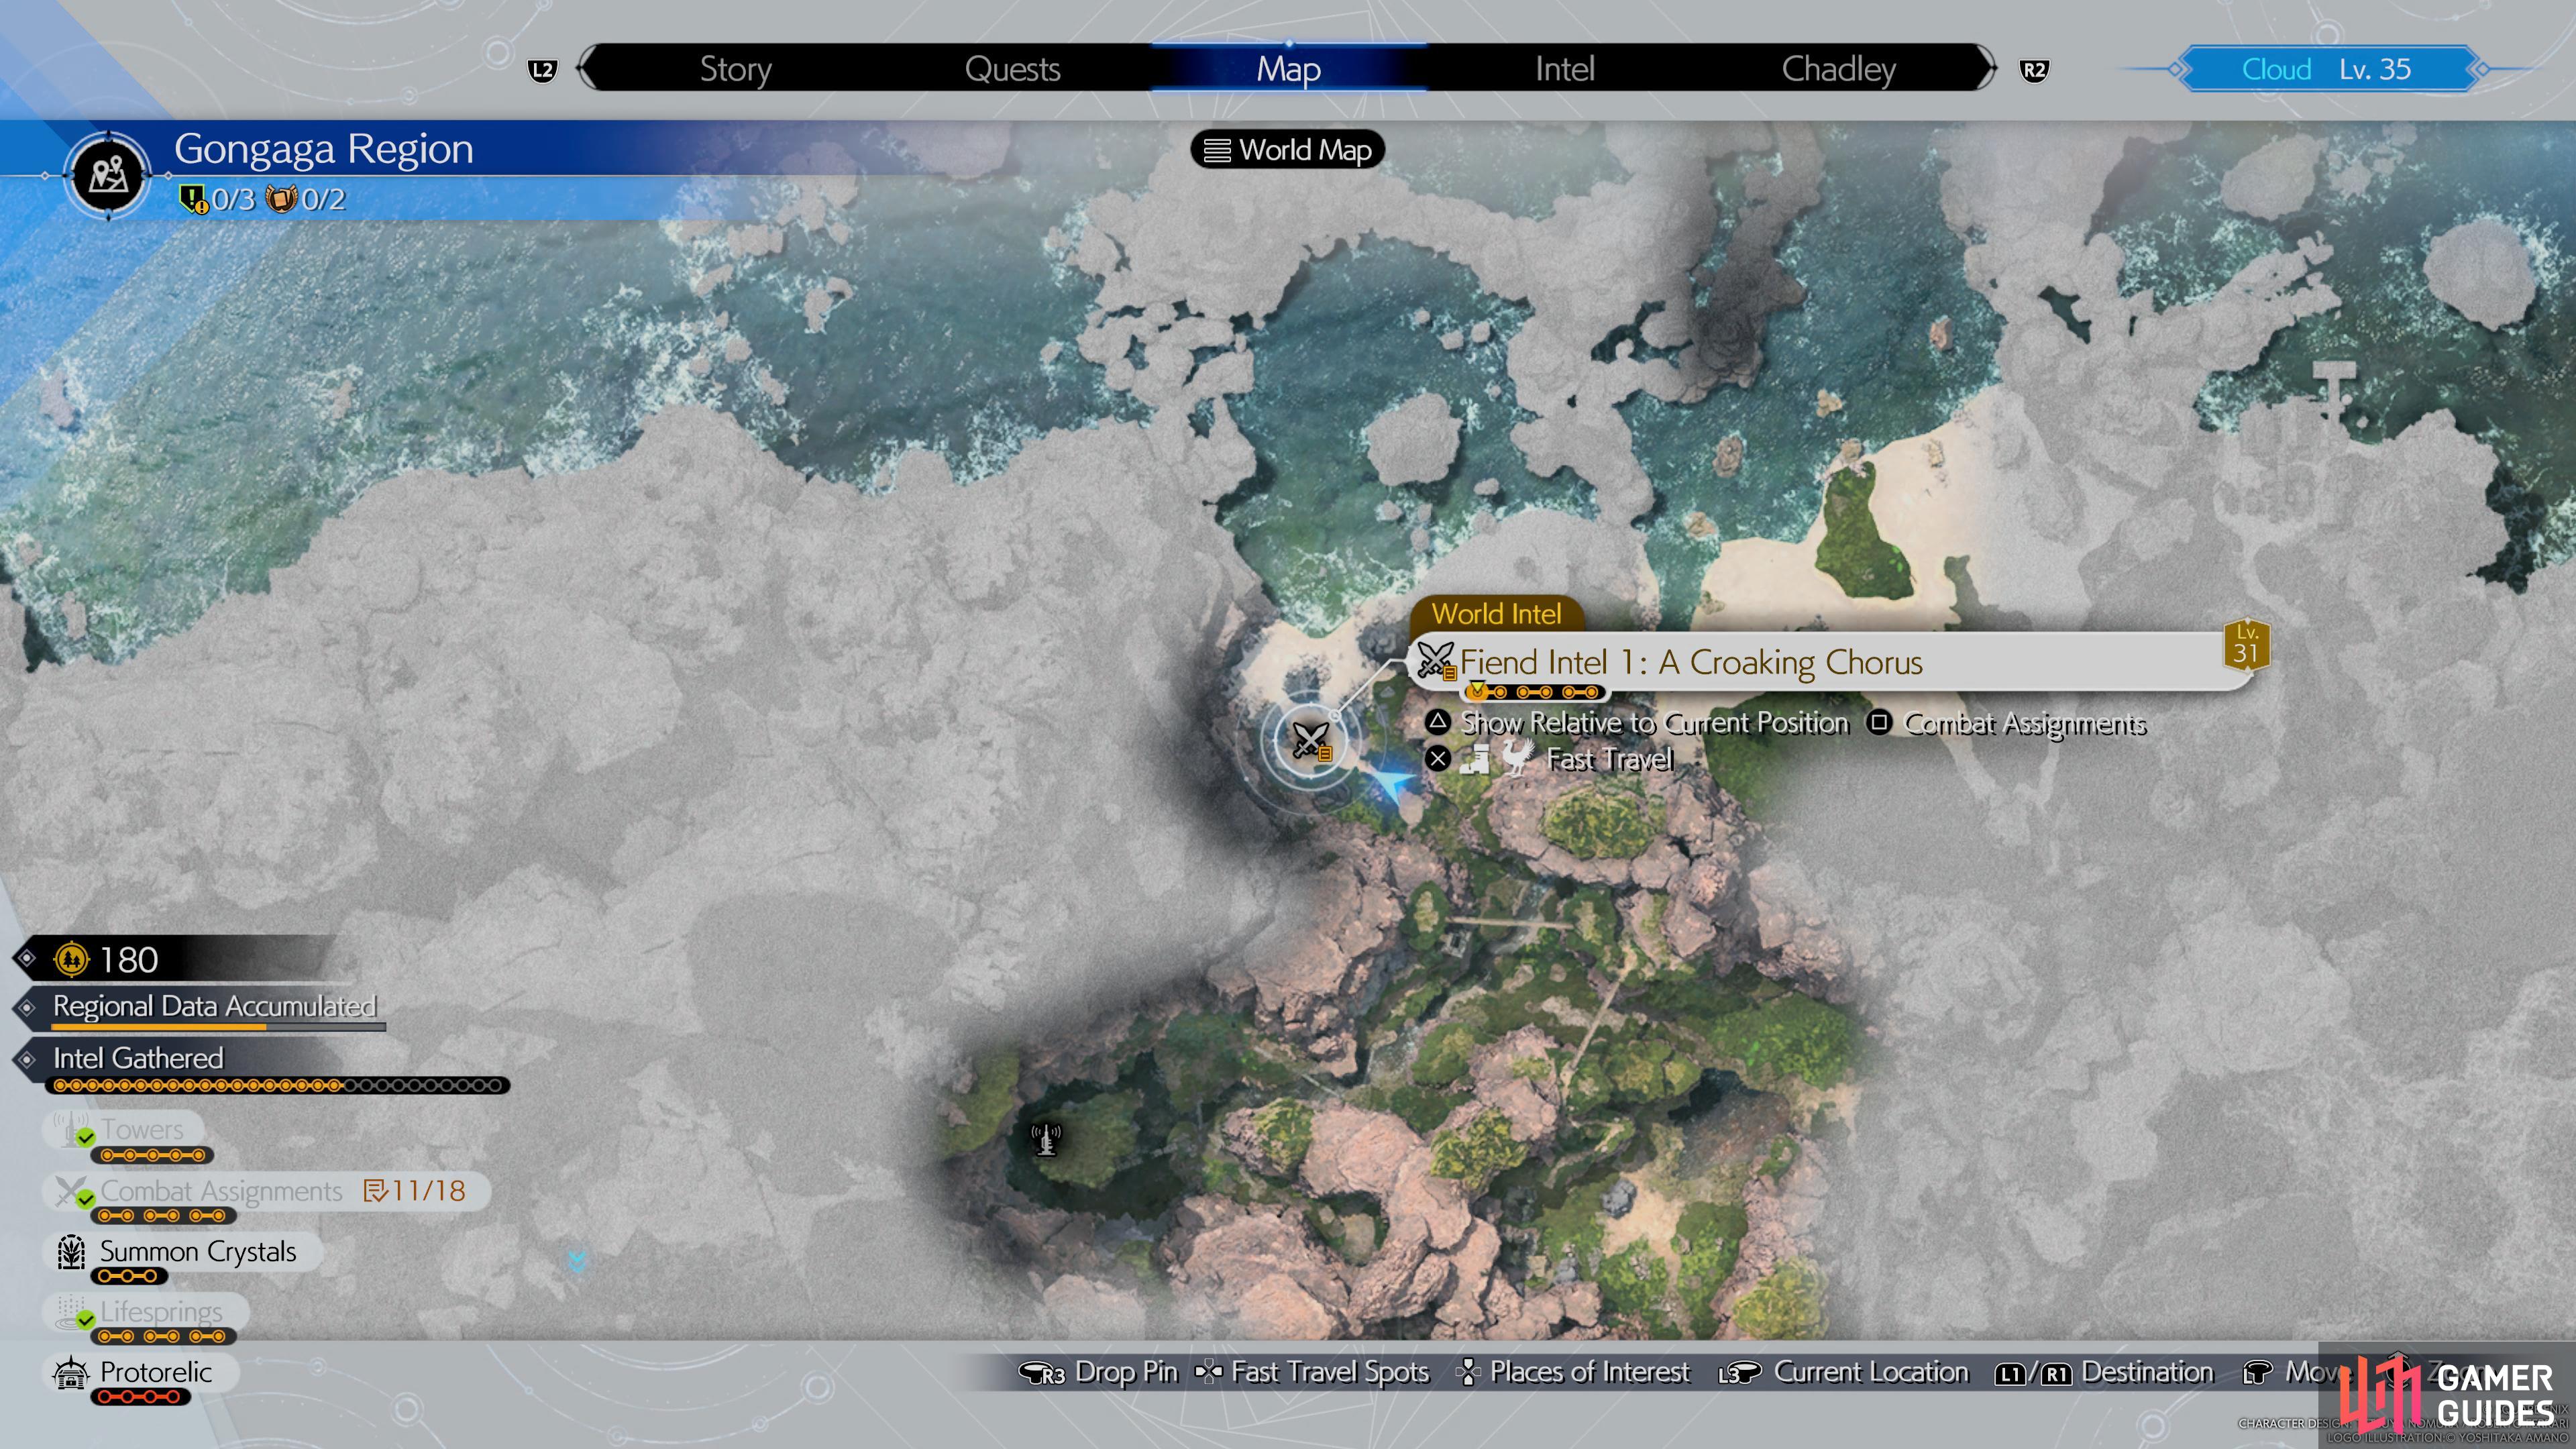
A Croaking Chorus Amphidex. (left), A Croaking Chorus Location. (right)
Mean Green Mother – Brumeflower Fiend Intel #2
Objectives:
- Pressure the
 Brumeflower
 - Don’t let the Brumeflower finish growing.
- Defeat the Brumeflower within the time limit
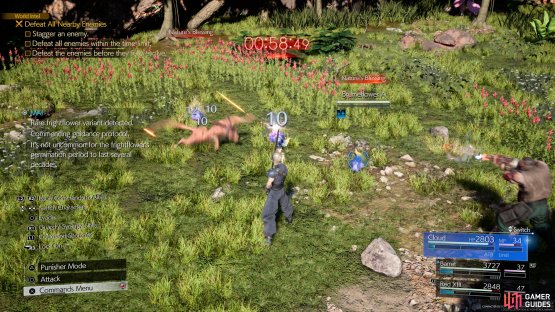
The Mean Green Mother Intel can be found east of the first Remnawave Tower in the second part of the Gongaga region. Brumeflowers are an enemy that evolves quickly as the battle goes on, turning into stronger, larger versions of their baby form. This is easy to stop by beating them quickly, and you can do this by exploiting their weakness to Ice. Throw on an Ice Materia and use Tifa to quickly stagger them, and you will have no problem defeating this enemy within the time limit.
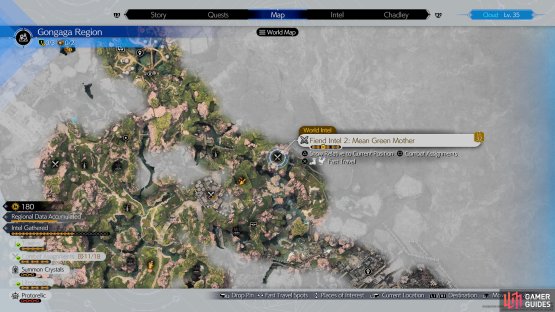
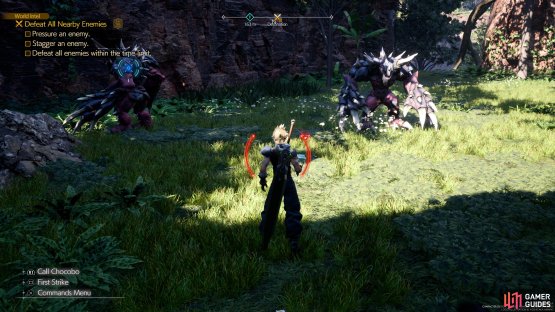
(1 of 2) Mean Green Mother Brumeflower.

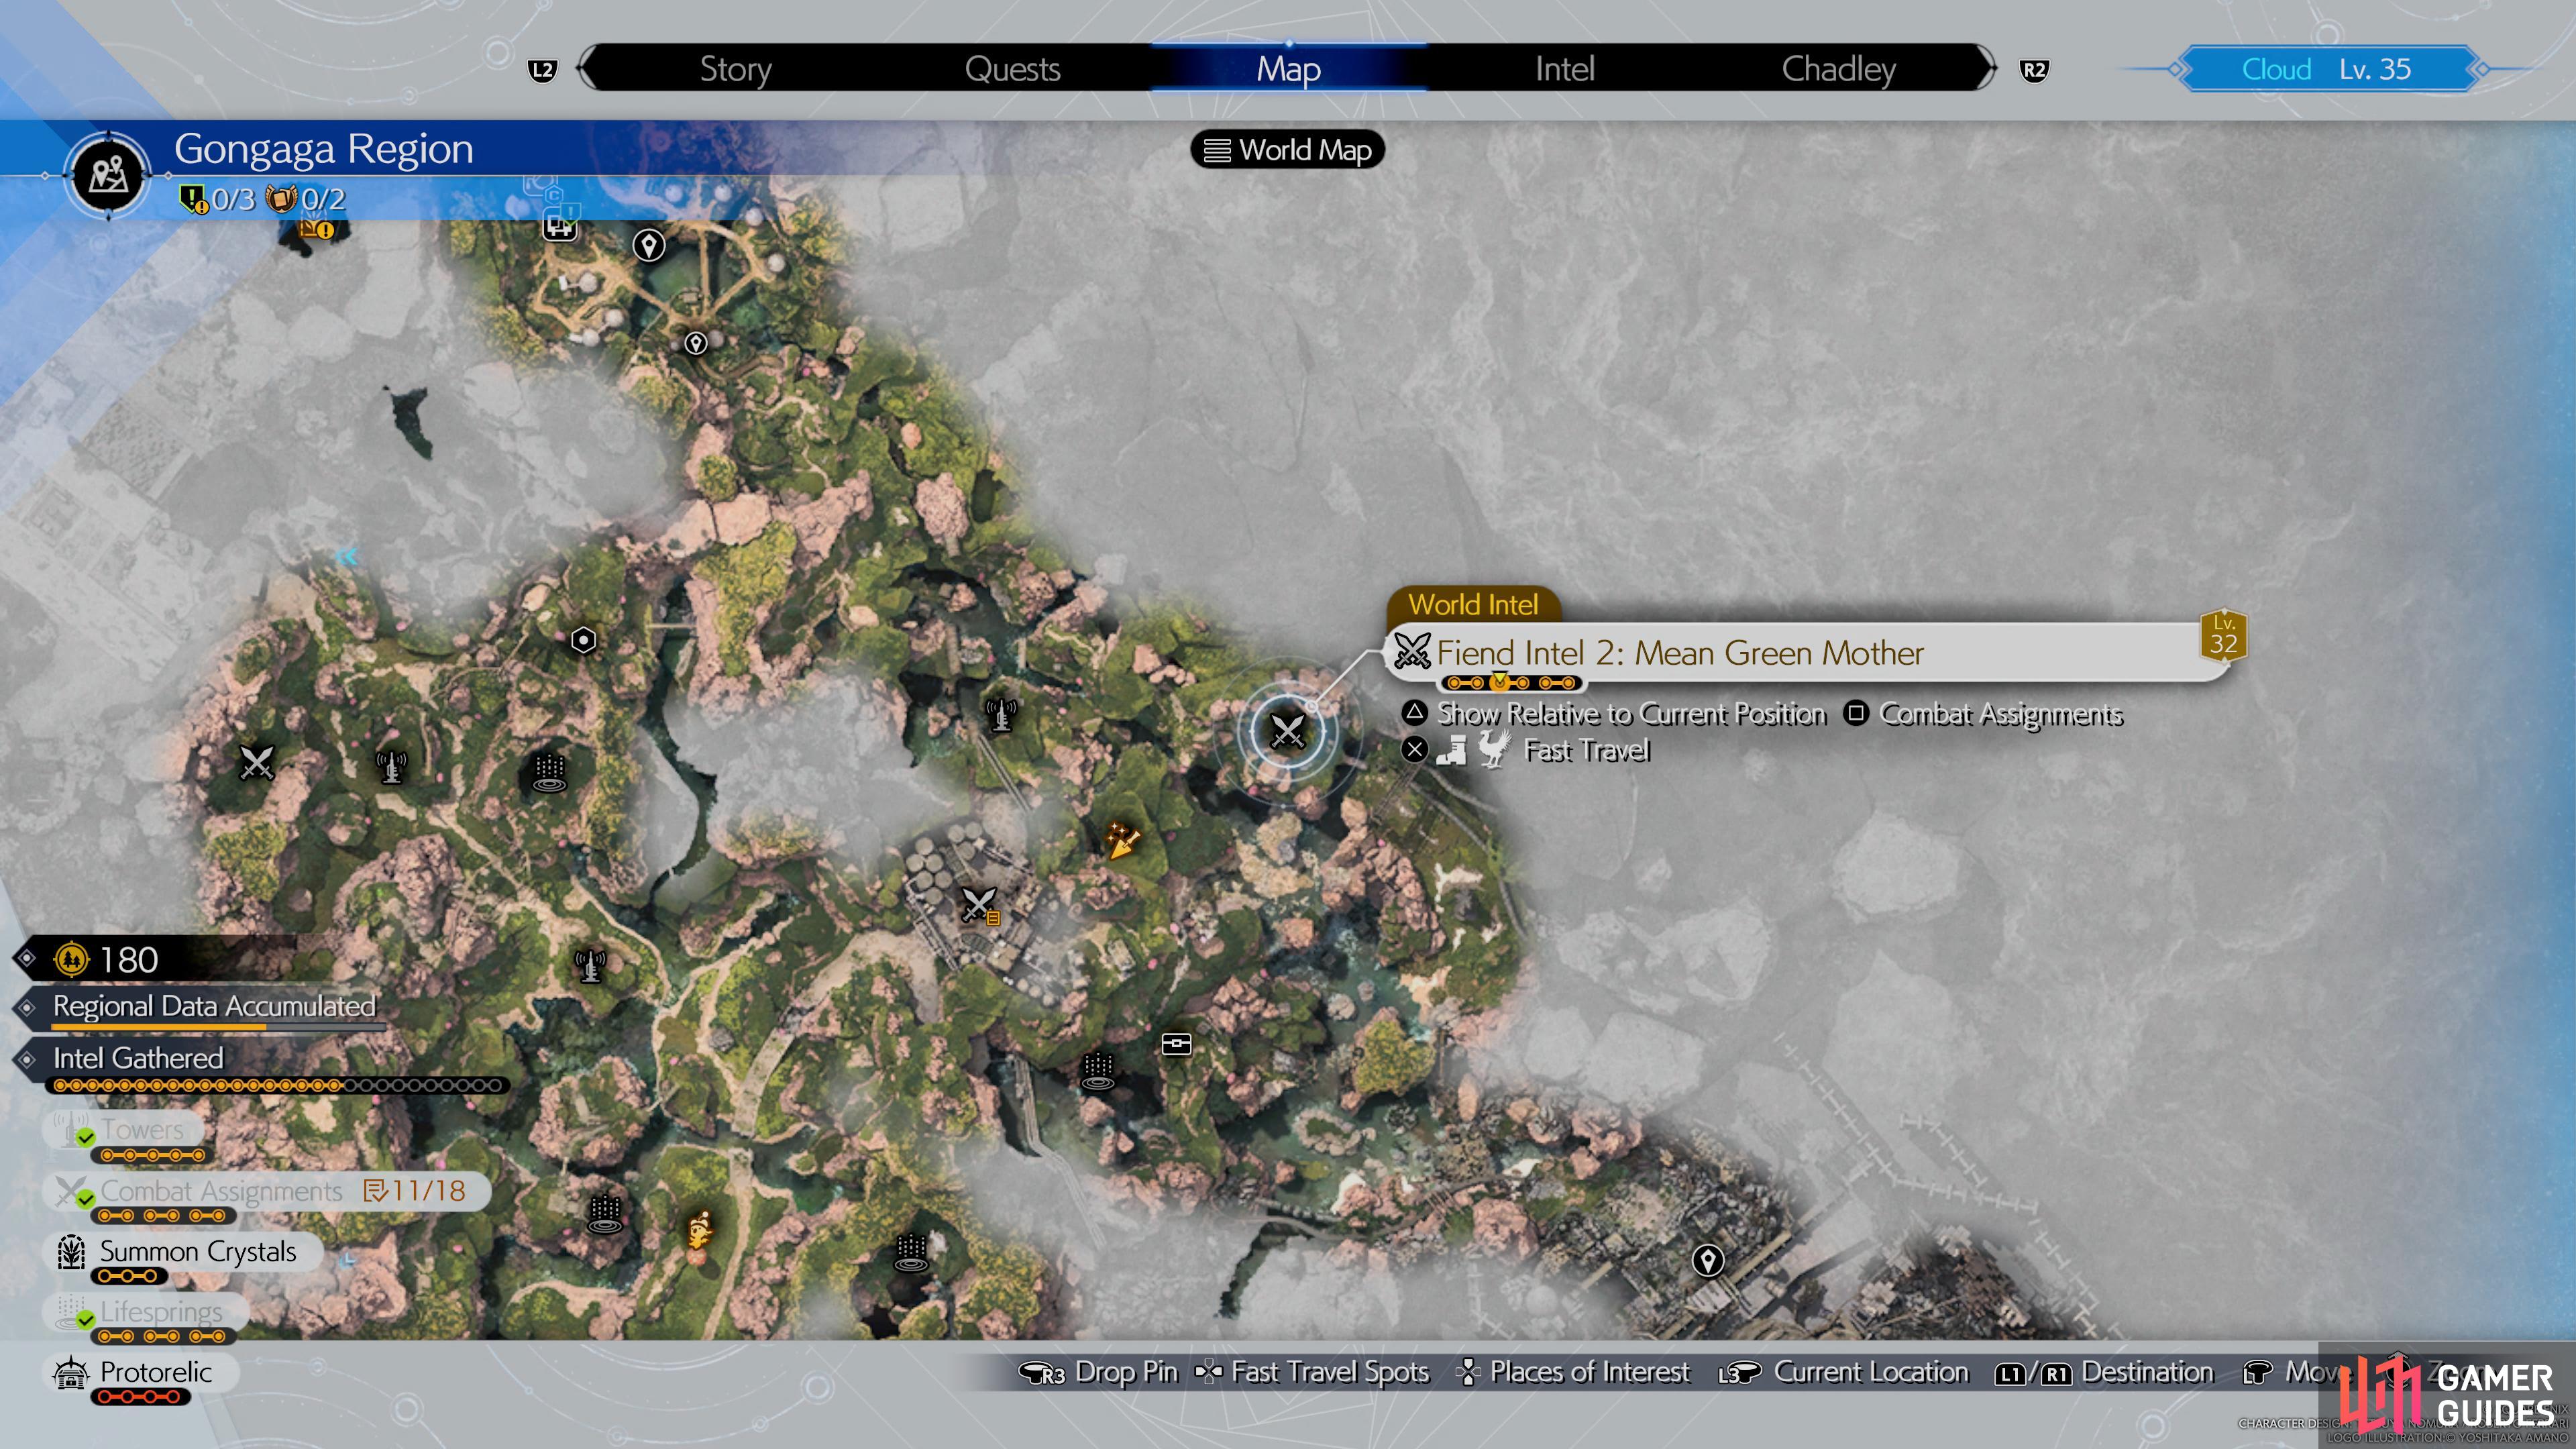
Mean Green Mother Brumeflower. (left), Mean Green Mother Location. (right)
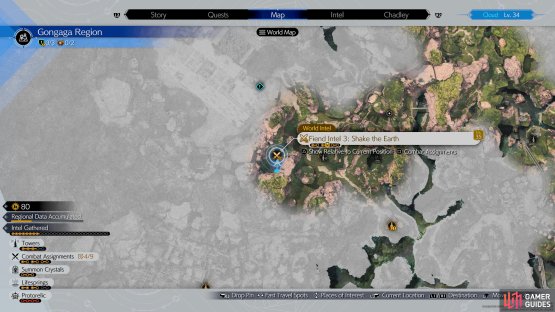
Shake the Earth – Grandhorn Warden Fiend Intel #3
Objectives:
- Pressure the
 Grandhorn Warden
 - Stagger the
 Grandhorn Warden
 - Defeat the Grandhorn Warden within the time limit
This time, the enemy Intel, Shake the Earth, is west of the first Remnawave Tower in the second part of the Gongaga region. The objectives are relatively simple, but the Grandhorn is a tank that deals a decent amount of damage. They also have the ability to guard, which you will need to get around with magic and staggering. The Grandhorn Warden is weak against heavy attacks, so use Cloud’s Braver to pressure them. Doing this should help get them staggered quickly so that you can beat the time limit.
(1 of 2) Shake The Earth Grandhorn Warden.


Shake The Earth Grandhorn Warden. (left), Shake The Earth location. (right)
Maddened by Mako – Savage Grandhorn Fiend Intel #4
Objectives:
- Pressure the
 Savage Grandhorn
 - Stagger the Savage Grandhorn
- Defeat the Savage Grandhorn within the time limit
Maddened by Mako can be found in the Gongaga ruins in the western part of the second Gongaga area. Like the Grandhorn from Fiend Intel 3, this enemy is tanky, can restrict a party member from blocking, and is immune to ranged attacks while also being able to block. This enemy is weak to ![]() Fire, so use a
Fire, so use a ![]() Fire Materia to pressure them. Hard hitters like Cloud and Tifa are a must in this battle to quickly stagger the Savage Grandhorn and defeat them within the time limit.
Fire Materia to pressure them. Hard hitters like Cloud and Tifa are a must in this battle to quickly stagger the Savage Grandhorn and defeat them within the time limit.
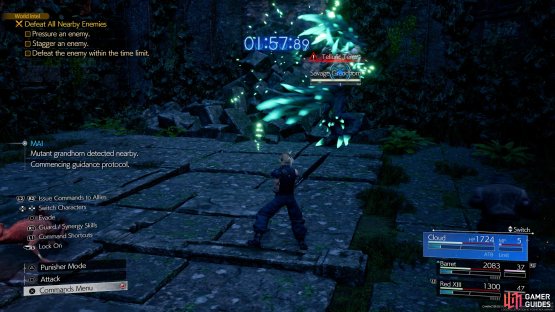

(1 of 2) Maddened by Mako Savage Grandhorn.
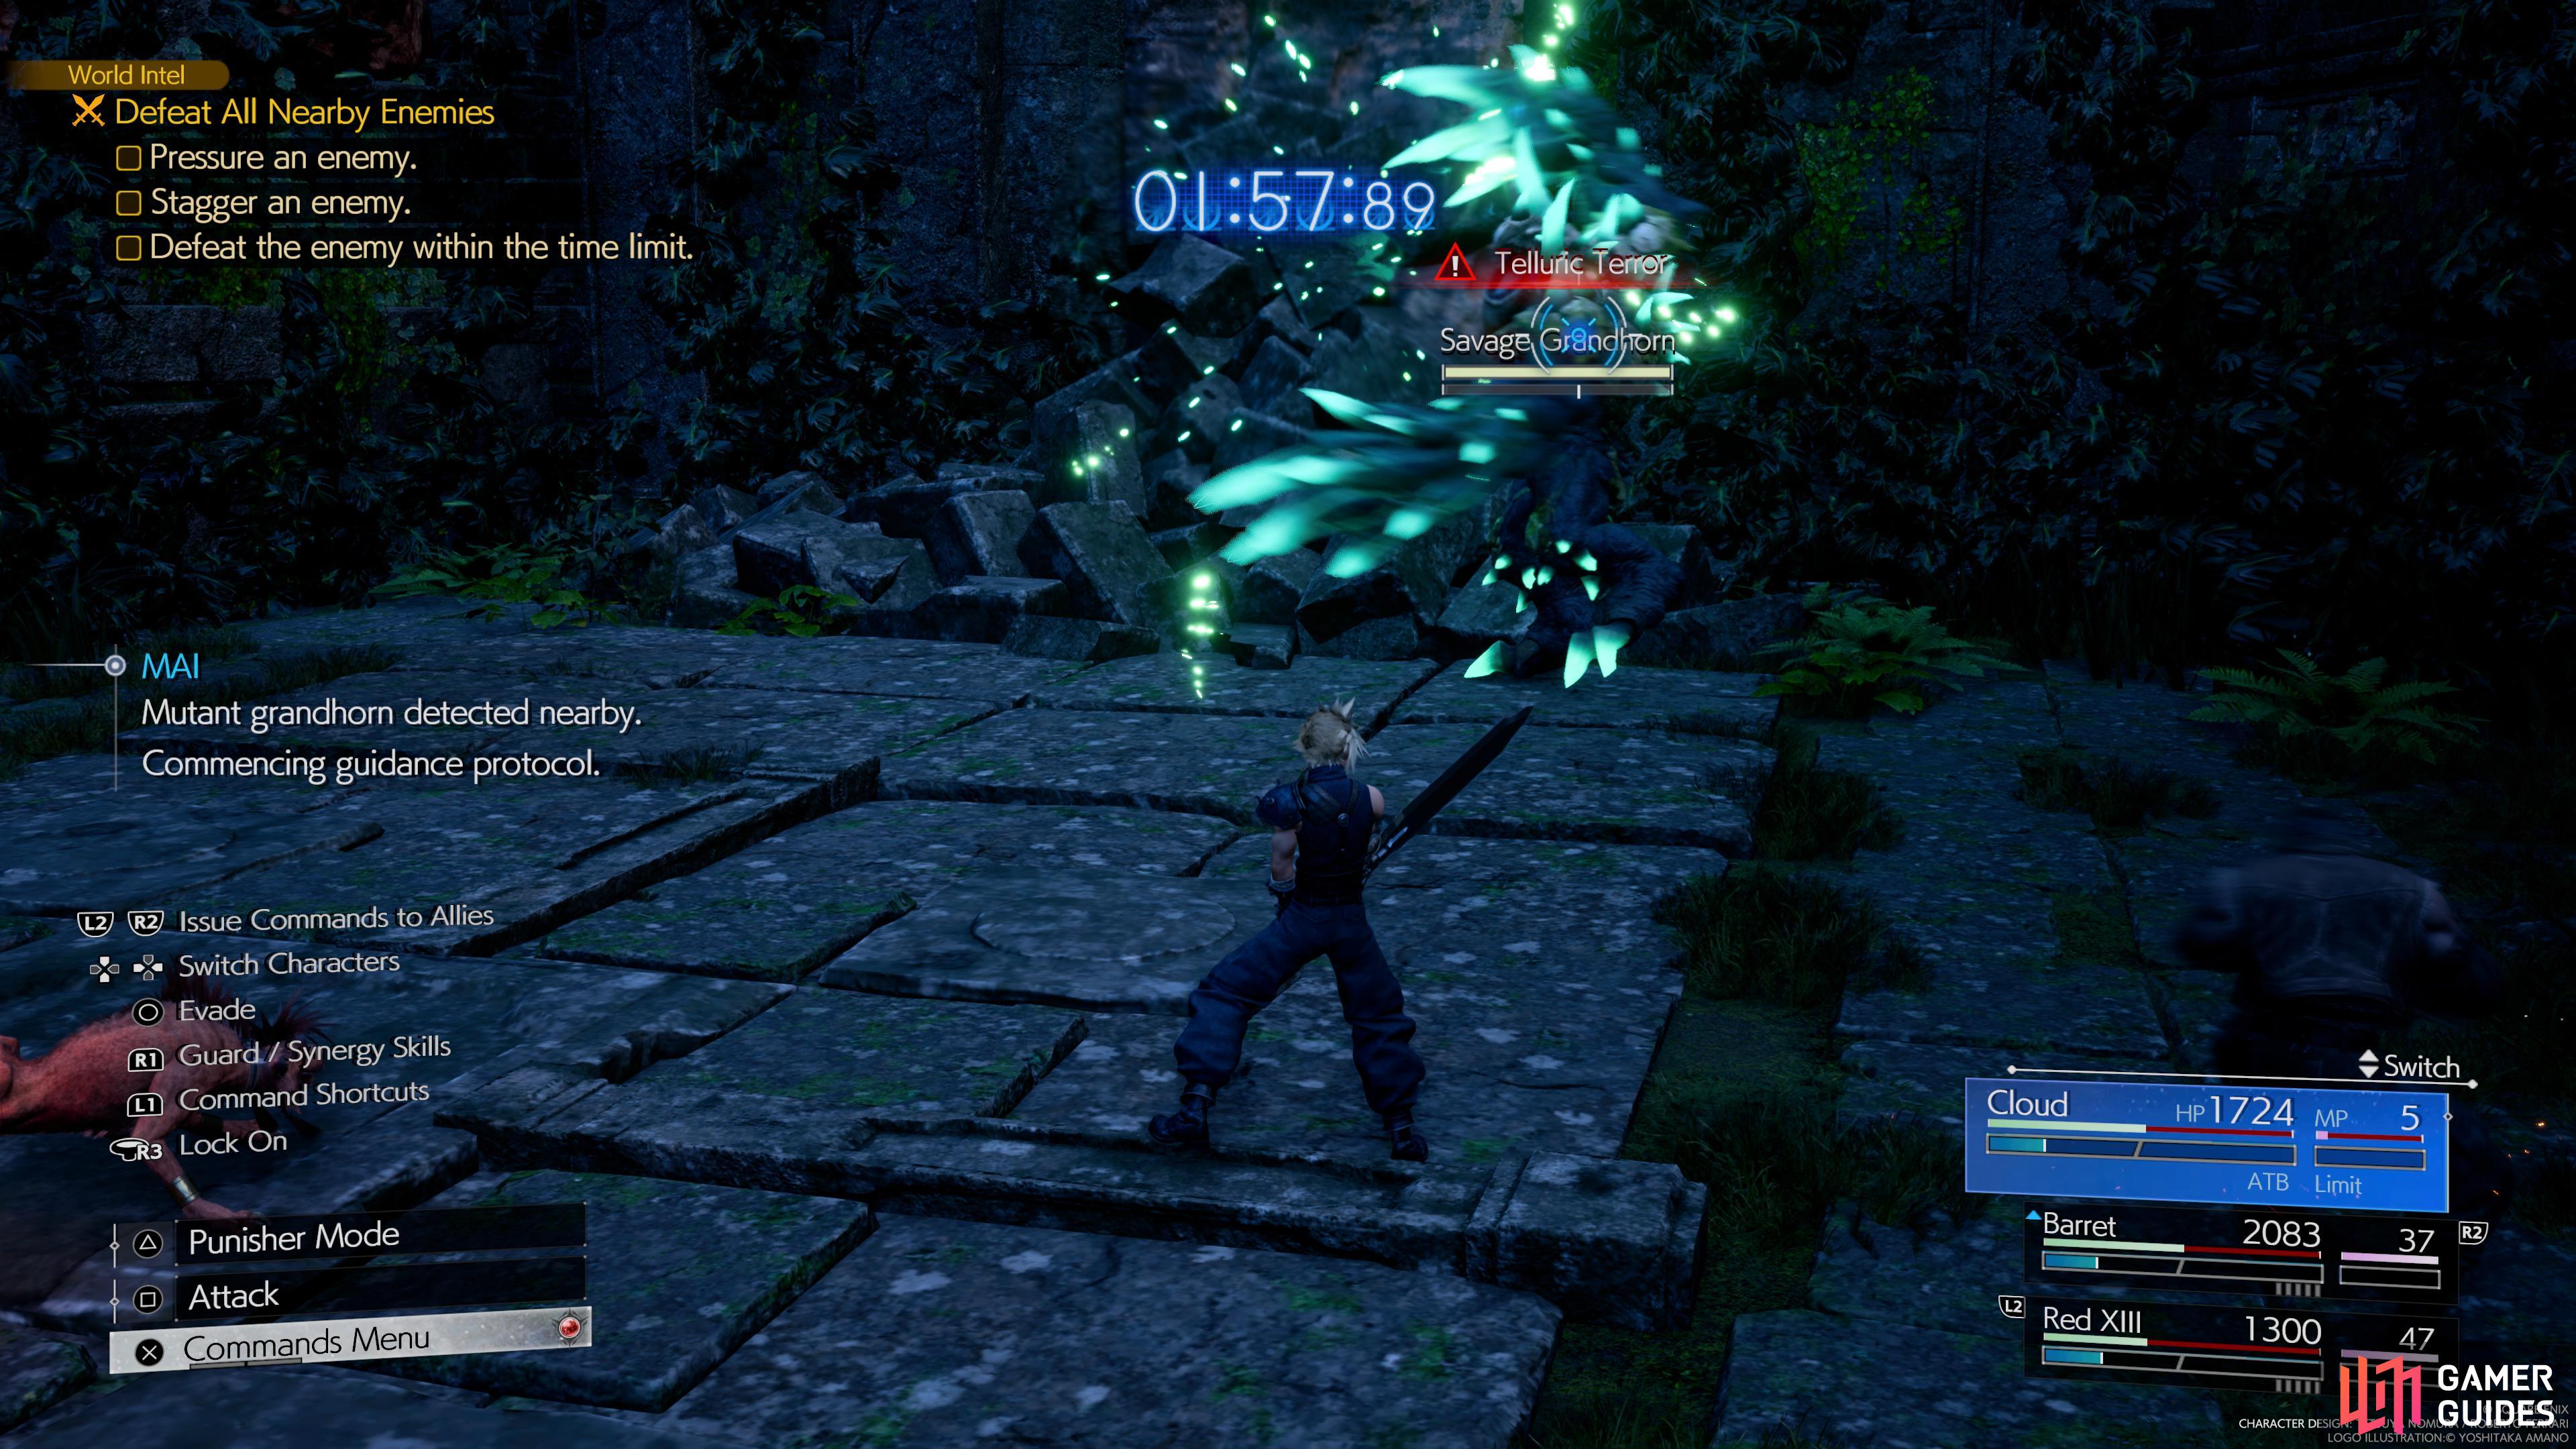
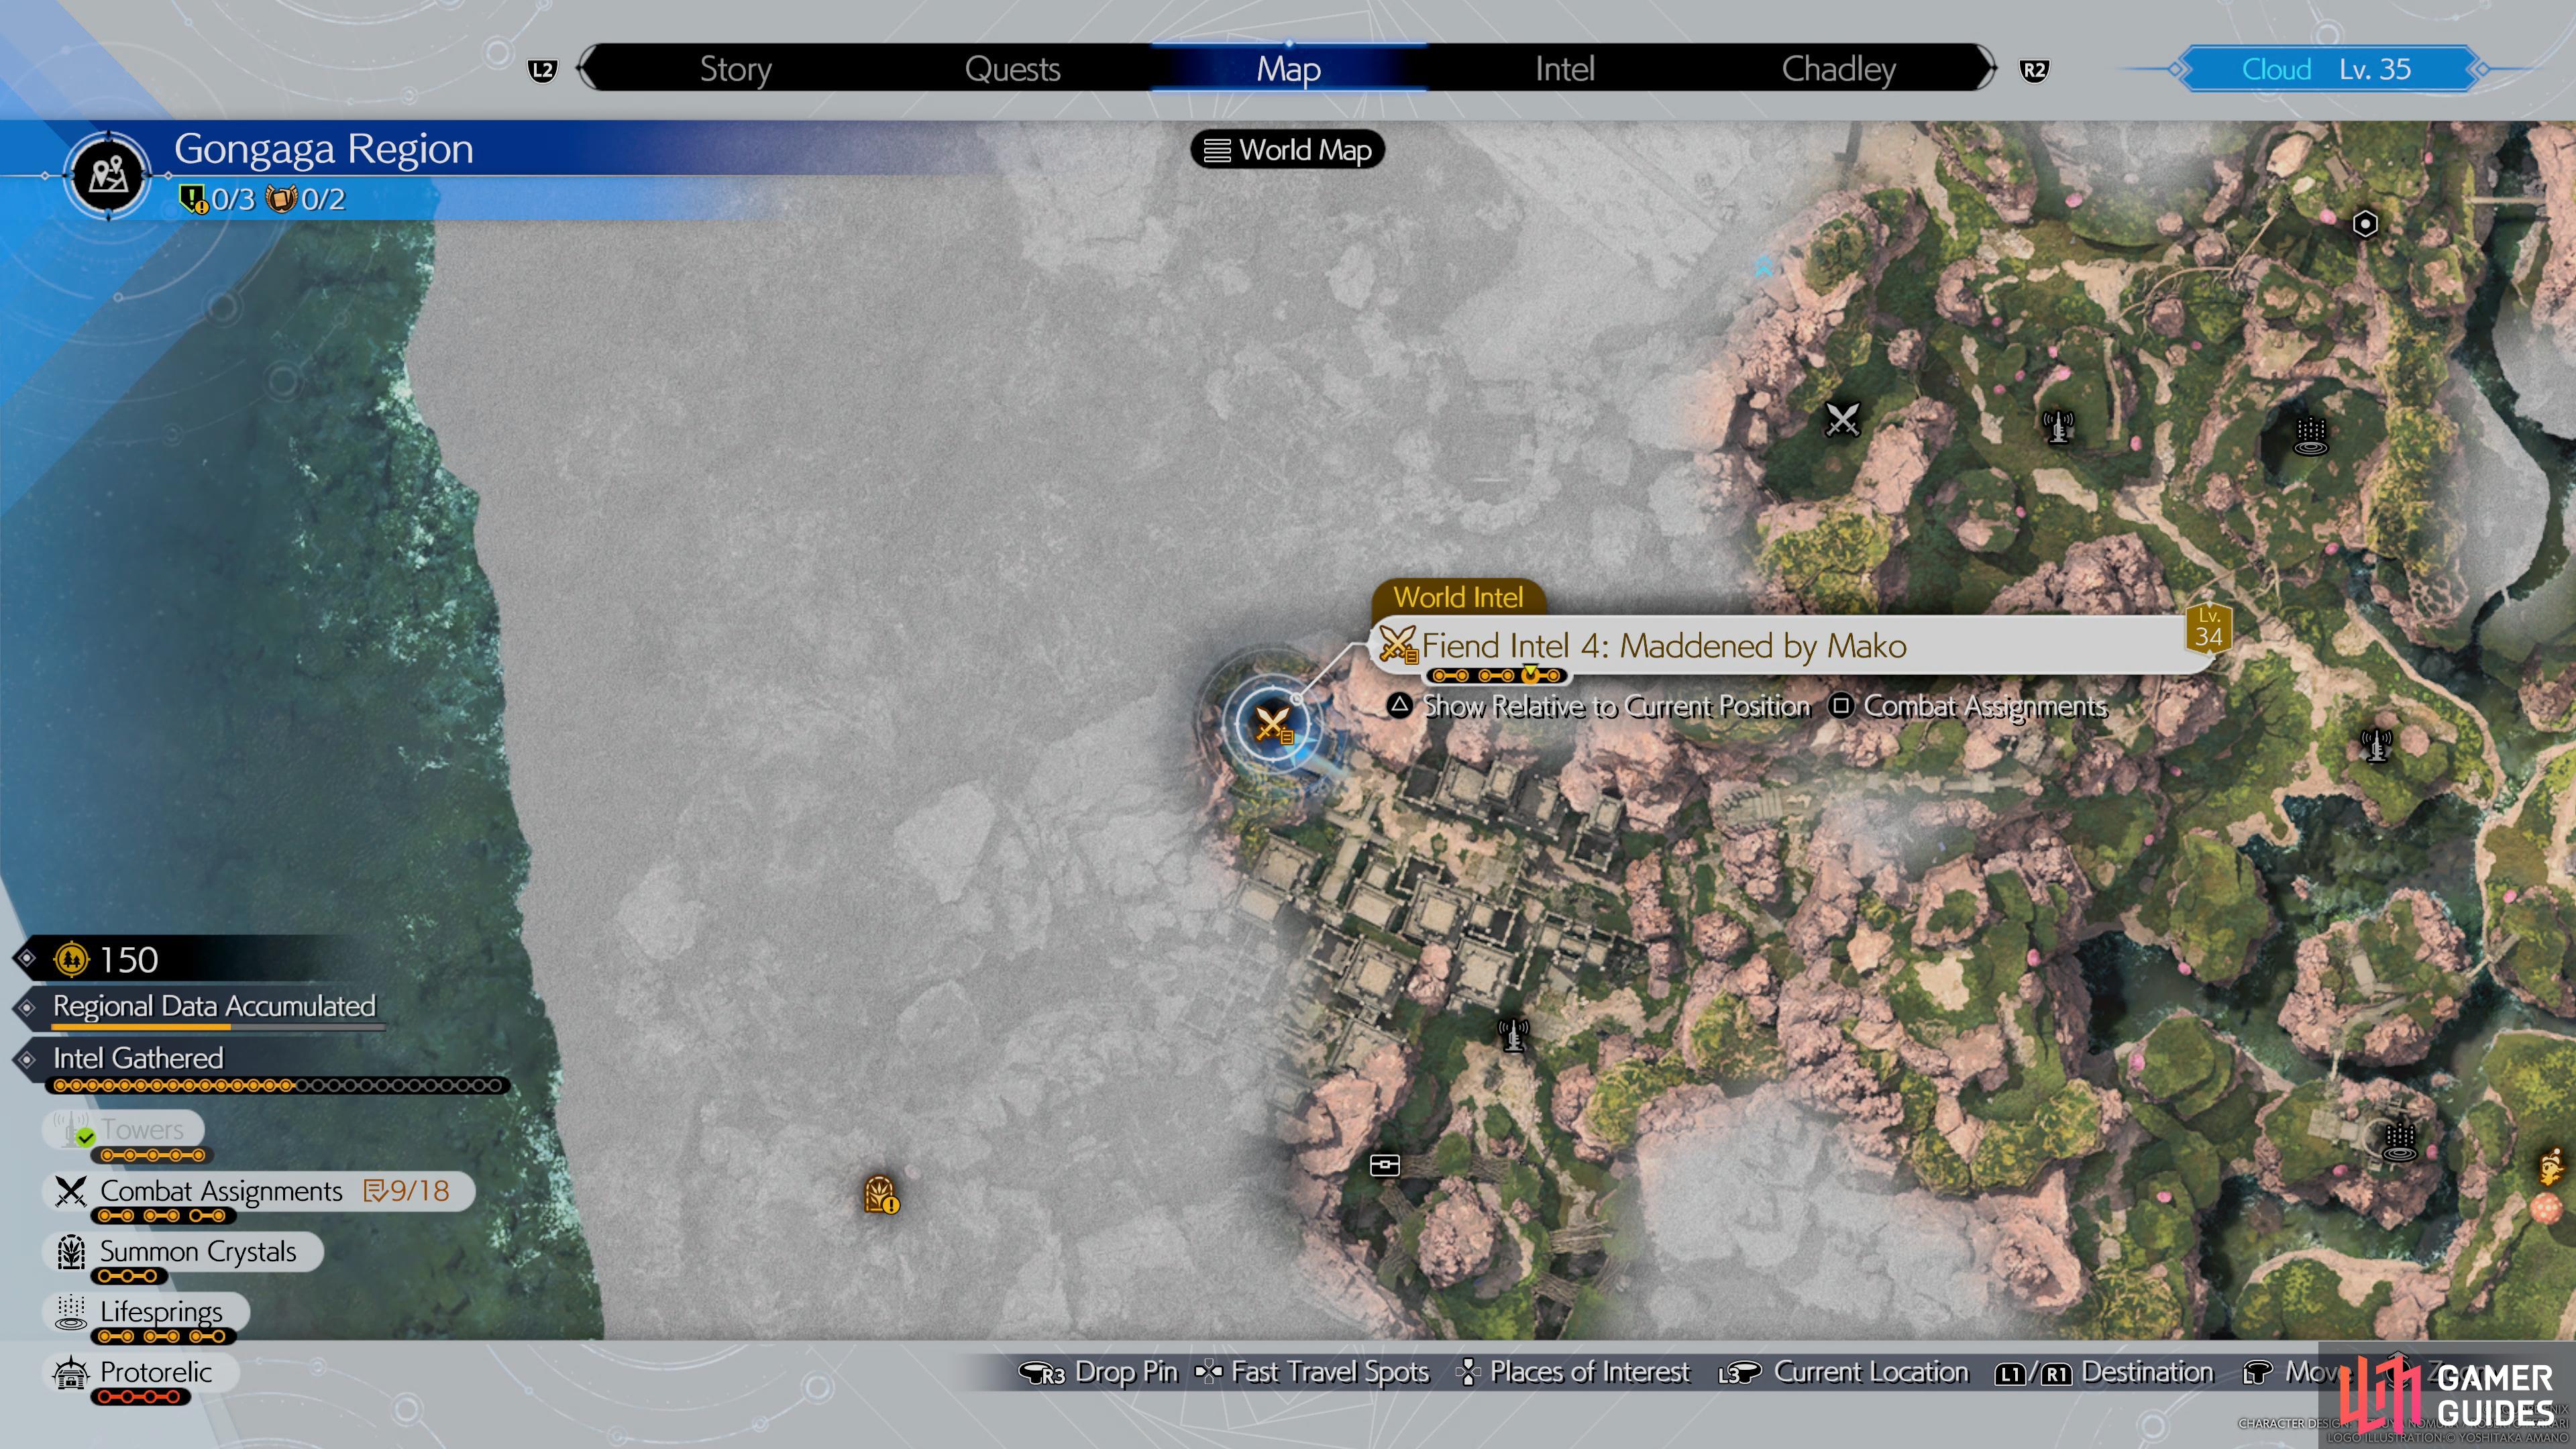
Maddened by Mako Savage Grandhorn. (left), Maddened by Mako location. (right)
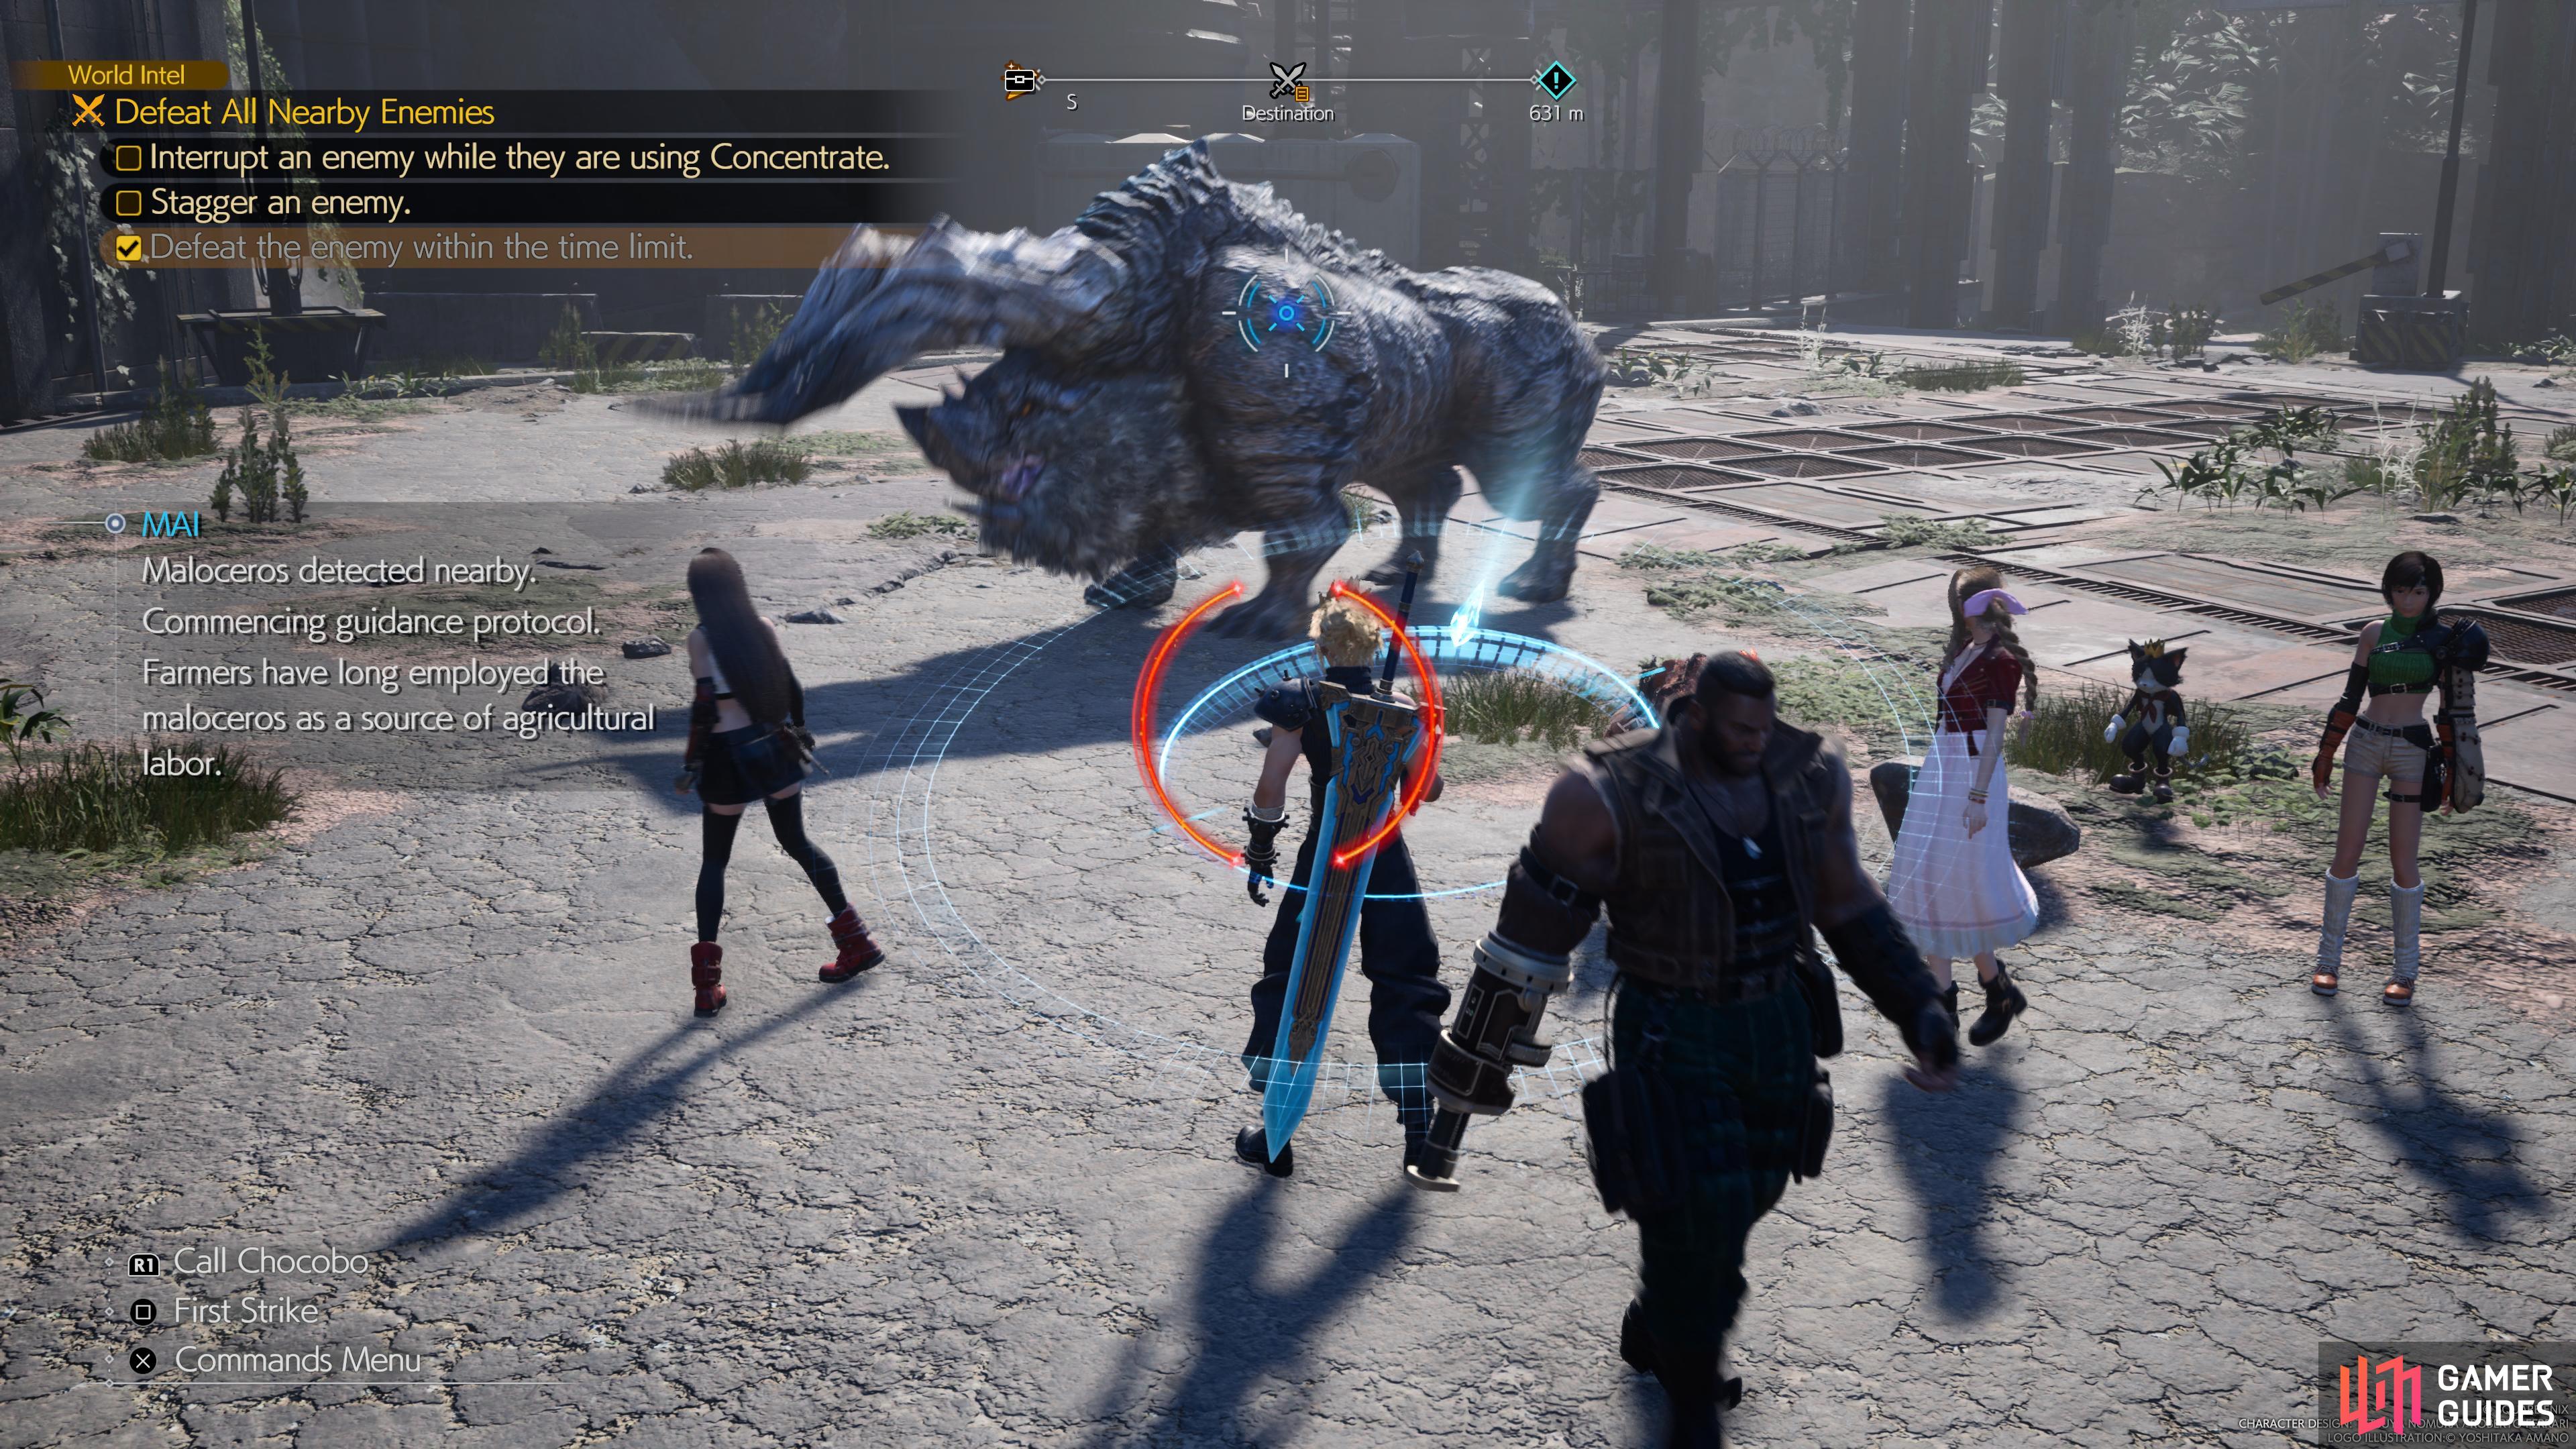
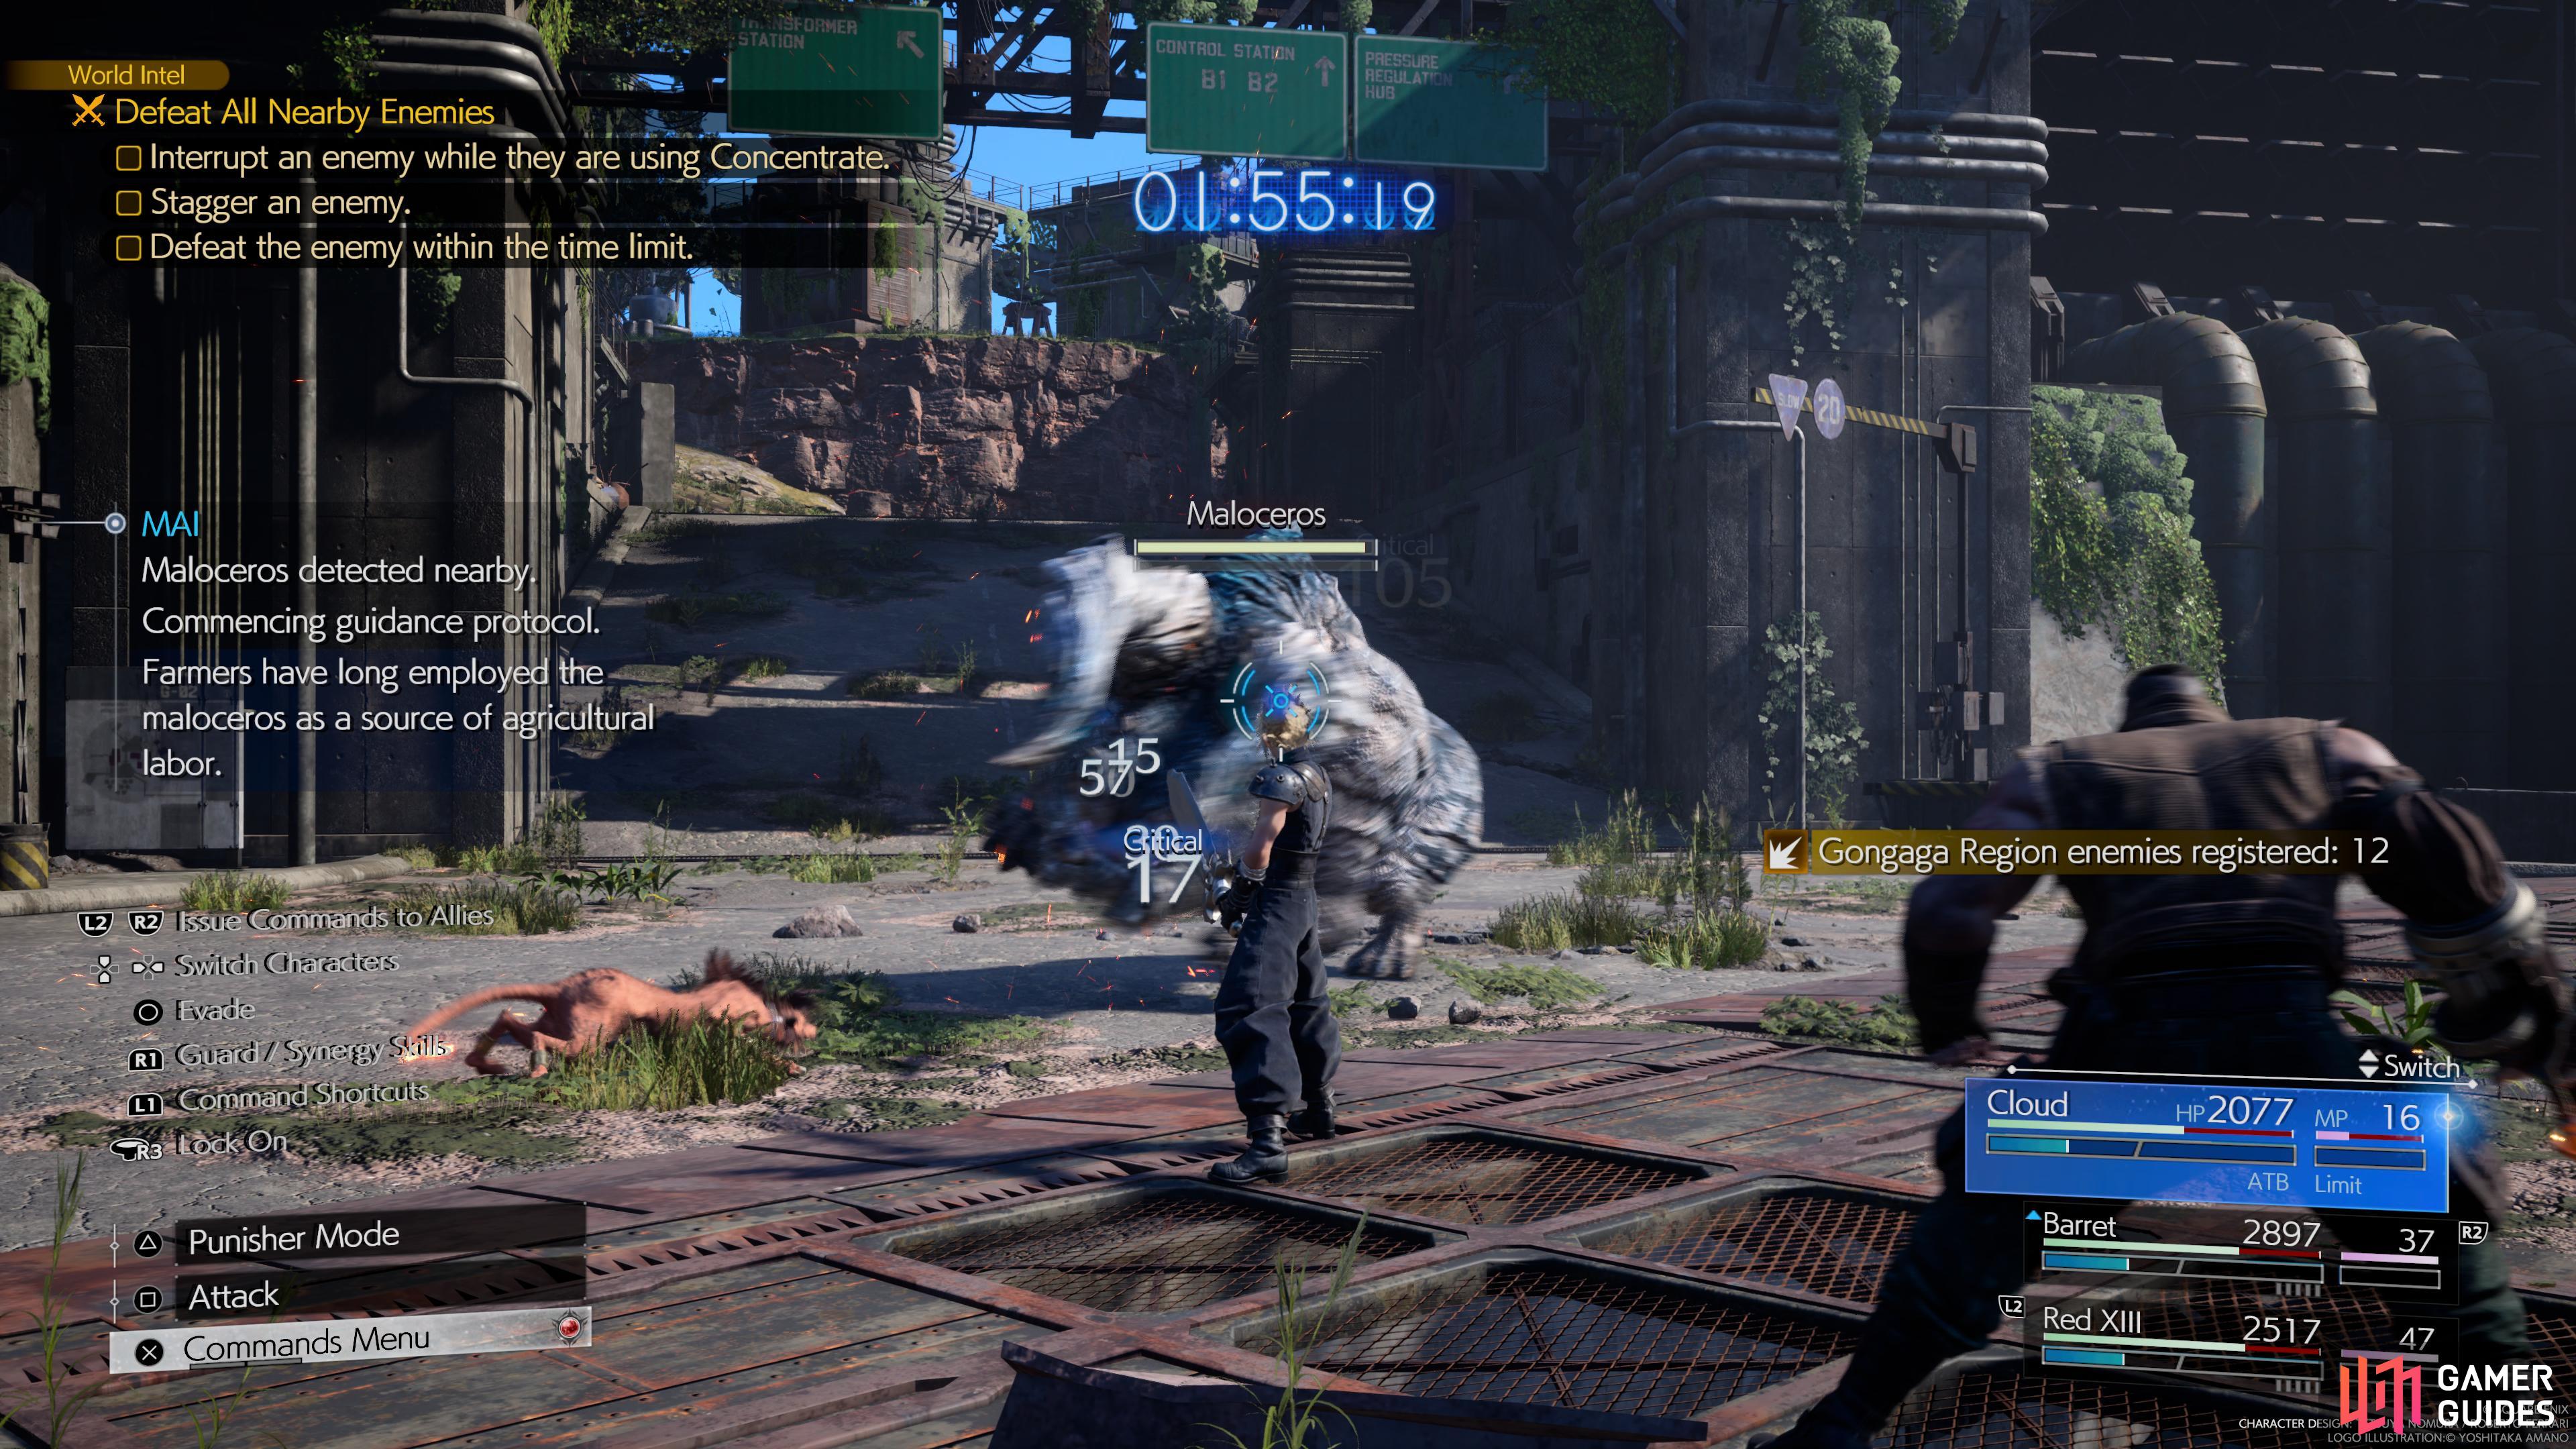
A Two-Pronged Assault – Maloceros Fiend Intel #5
Objectives:
- Interrupt the
 Maloceros when it uses Concentrate
 - Stagger the Maloceros
- Defeat the Maloceros within the time limit
A Two-Pronged Assault is found in the second portion of the Gongaga region near the ruined reactor. Maloceros are annoying at best as Concentrate brings down their stagger meter. This is due to the fact that they pressure themselves and can be extremely confusing the first time you fight them. Essentially, you just need to stop Concentrate by using two back-to-back heavy attacks like Cloud’s Braver to stop Concentrate, and the rest of the objectives will fall into place.


(1 of 2) A Two Pronged Assault Maloceros.

A Two Pronged Assault Maloceros. (left), A Two-Pronged Assault Location. (right)
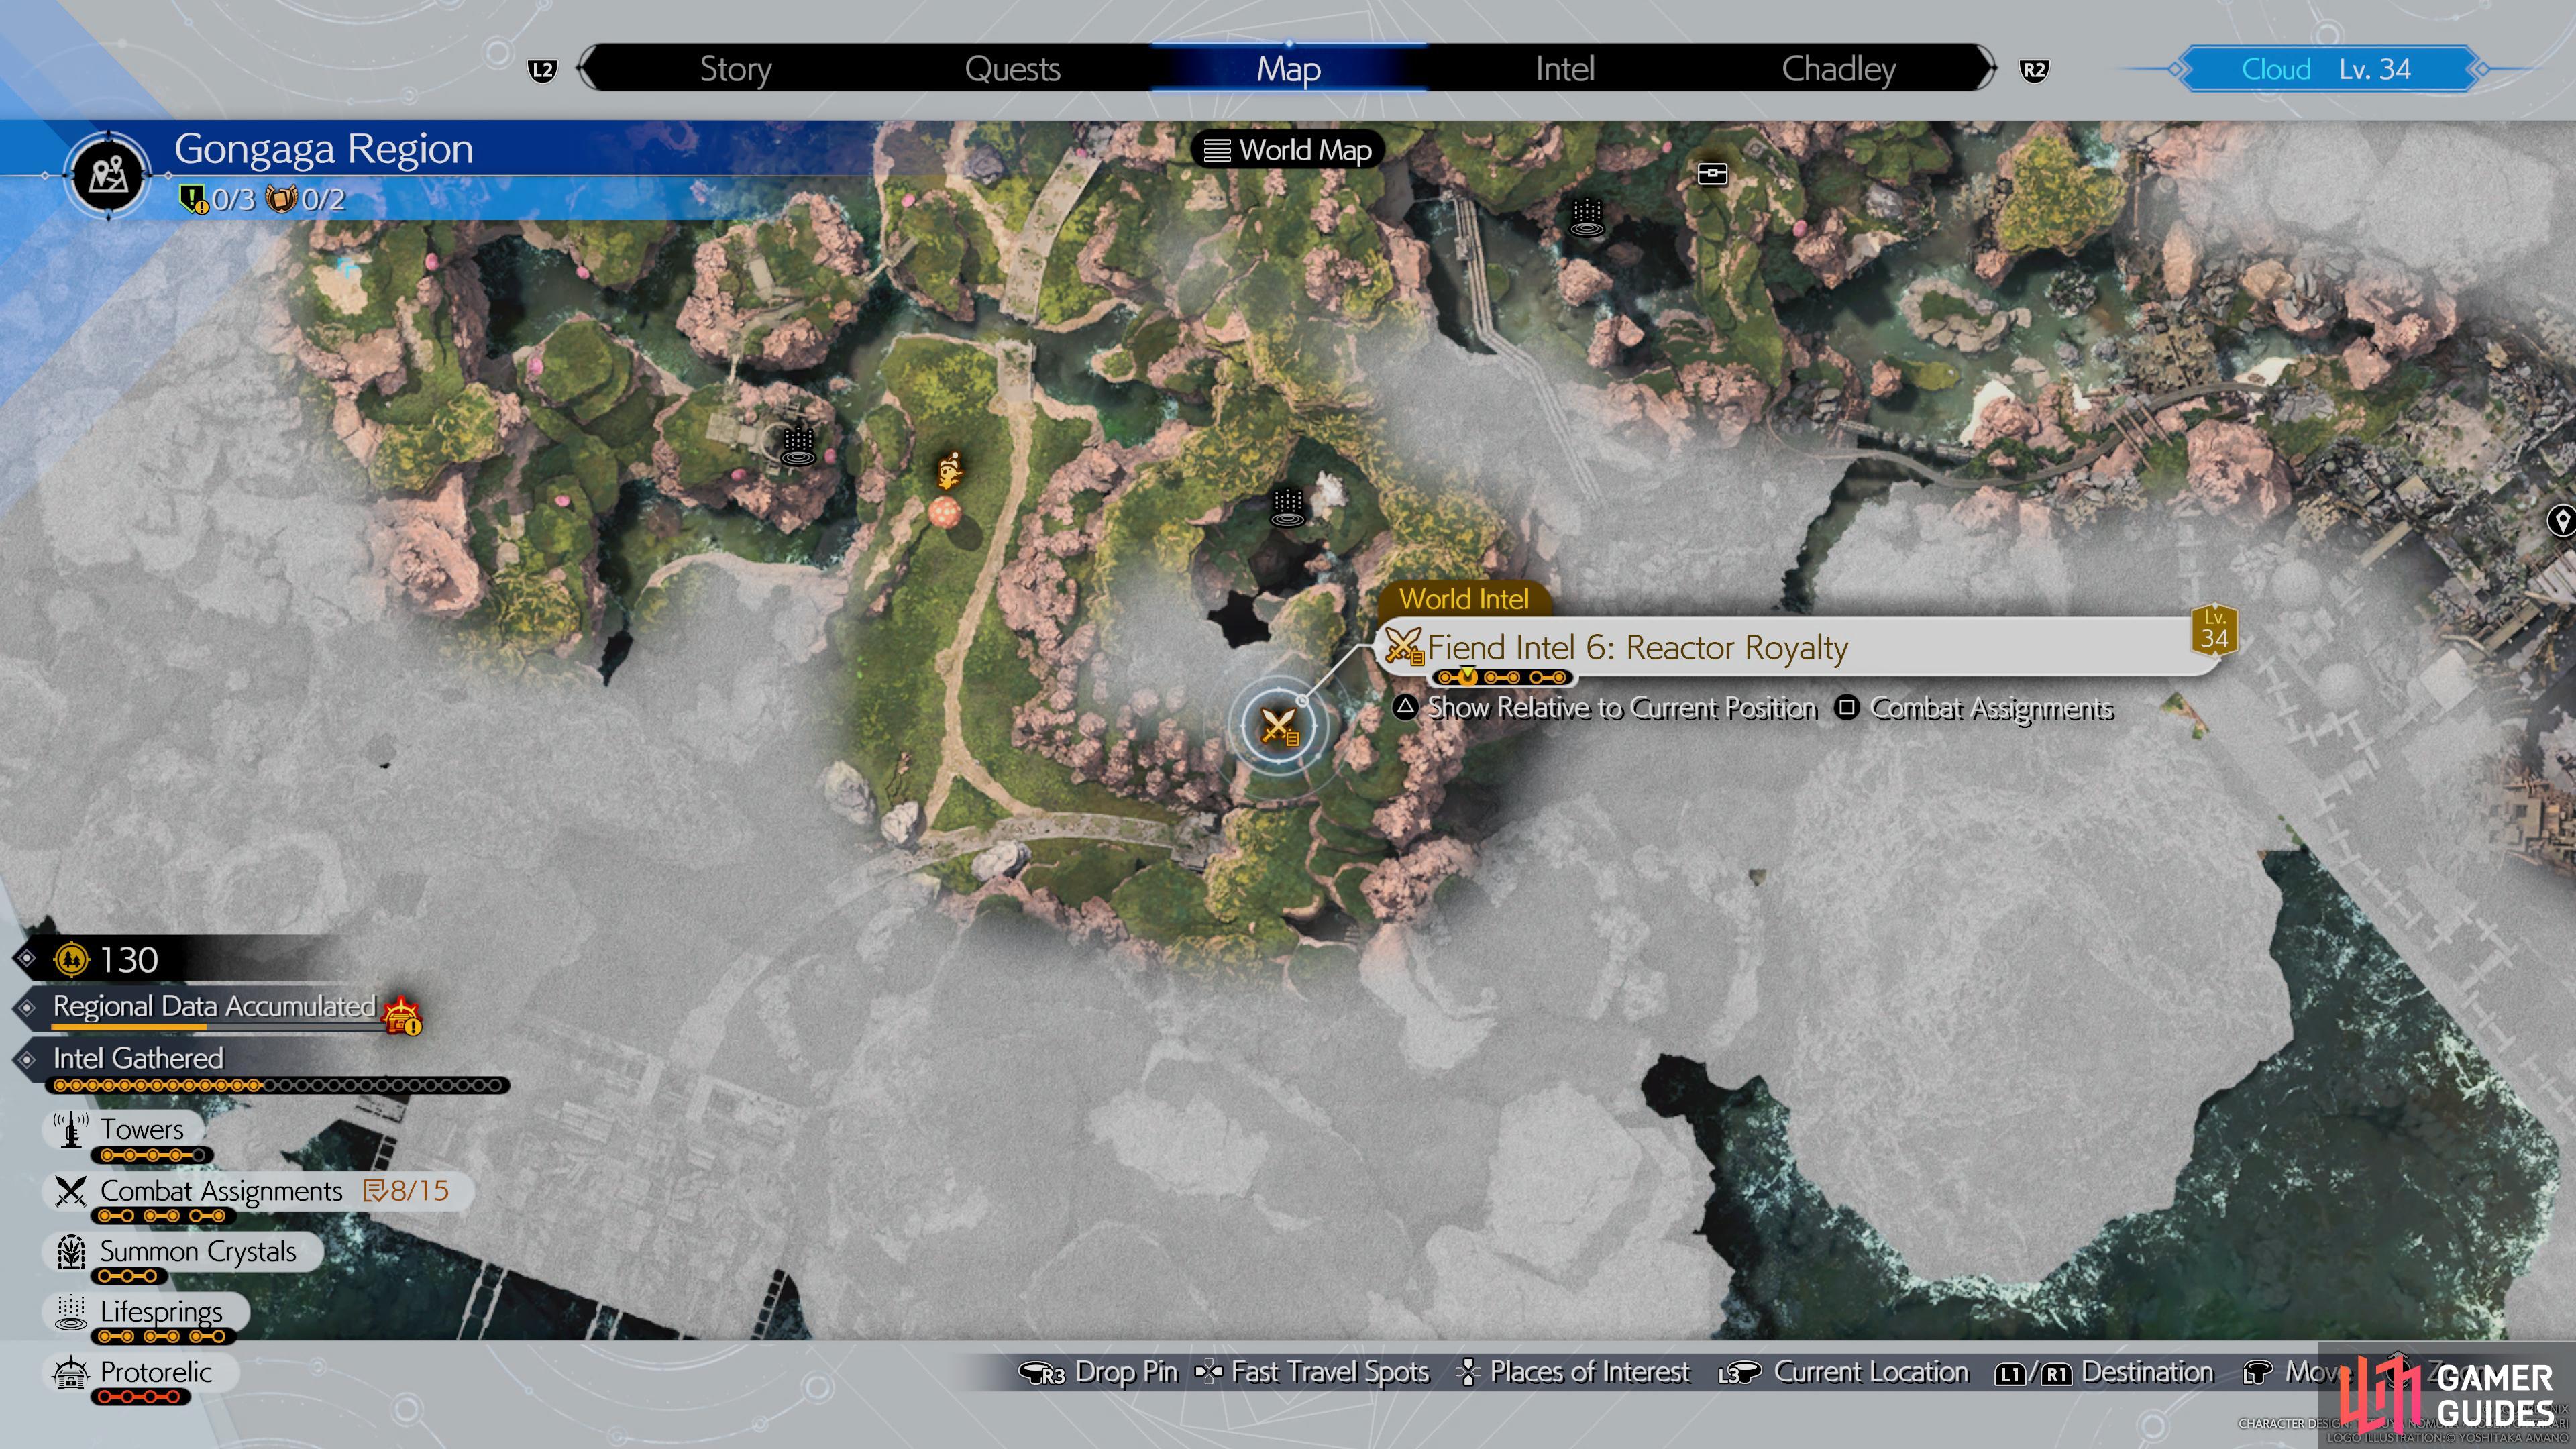
Reactor Royalty – Fulvum Varanus Fiend Intel #6
- Pressure an enemy
- Stagger an enemy
- Defeat all enemies within the time limit
Reactor Royalty is found just north of the abandoned port in the second part of the Gongaga region inside of a cave. This has you face off against two ![]() Fulvum Varanus who has the basic set of objectives. This enemy is weak against Ice, so bring an Ice Materia and use heavy attacks like Braver to quickly get them staggered. By combining these two strategies, you should easily beat the Fulvum Varanus within the time limit.
Fulvum Varanus who has the basic set of objectives. This enemy is weak against Ice, so bring an Ice Materia and use heavy attacks like Braver to quickly get them staggered. By combining these two strategies, you should easily beat the Fulvum Varanus within the time limit.


(1 of 2) Reactor Royalty Fulvum Varanus.

Reactor Royalty Fulvum Varanus. (left), Reactor Royalty Location. (right)
Once you complete the Fiend Intel you can move on to the final fight of the region, the Great Malboro. Before you fight him though, you will need to find four Expedition Intel locations, better known as Lifesprings.
No Comments