
There are plenty of iconic bosses in the original Final Fantasy VII, but few terrorized gamers in the late 90s more than Midgar Zolom. Due to a combination of surprising early game offensive power, the ability to eject allies from fights, a whopping 4,000 HP, the only thing that could make this overgrown snake more dangerous is if it possessed one of the most powerful early game spells… which of course, it did. You could see it swimming around the swamp surrounding the ![]() Mythril Mines and if you were practiced enough, you could bypass this foe entirely by timing your crossing… or by capitulating to the designer’s intention and catching a chocobo. In Final Fantasy VII Rebirth the creature returns, properly named now as Migardsormr, and while the context of the fight and some of the moves have remained, there are still plenty of differences that may catch veterans off-guard, not to mention new gamers. This page will provide strategies for defeating the
Mythril Mines and if you were practiced enough, you could bypass this foe entirely by timing your crossing… or by capitulating to the designer’s intention and catching a chocobo. In Final Fantasy VII Rebirth the creature returns, properly named now as Migardsormr, and while the context of the fight and some of the moves have remained, there are still plenty of differences that may catch veterans off-guard, not to mention new gamers. This page will provide strategies for defeating the ![]() Midgardsormr in Final Fantasy VII Rebirth.
Midgardsormr in Final Fantasy VII Rebirth.


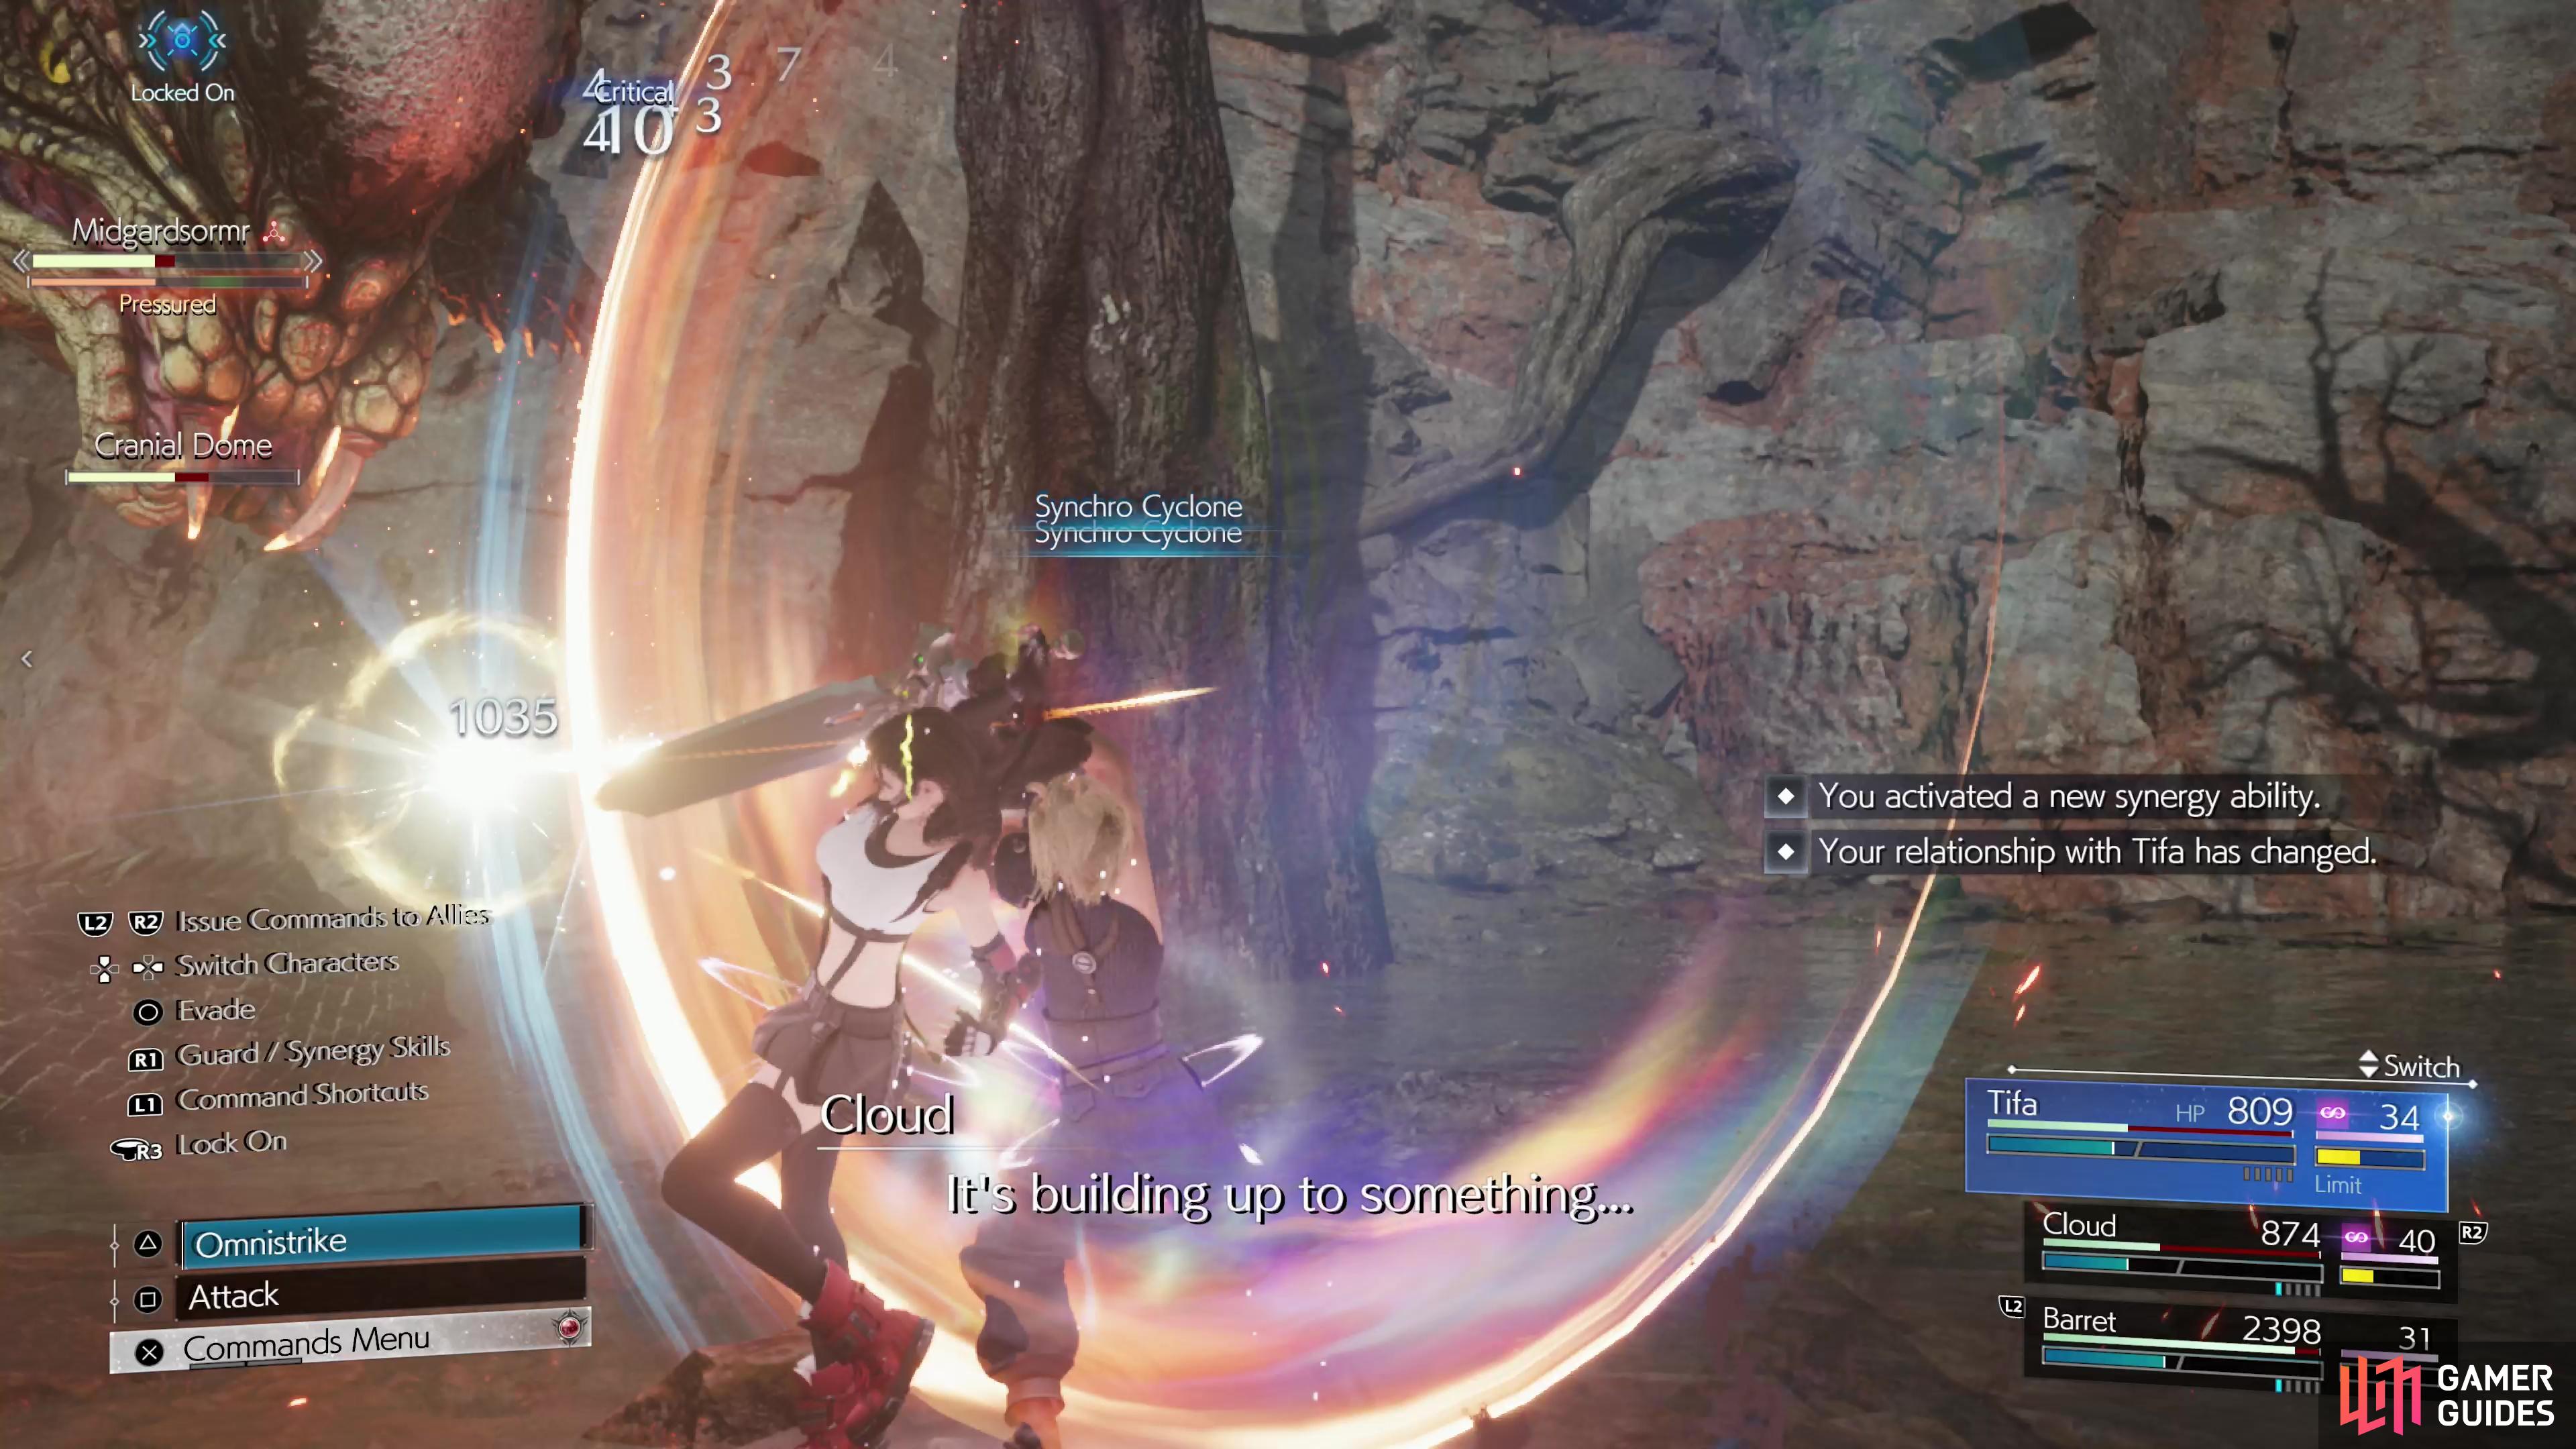
(1 of 2) Before you fight Midgardsormr, make sure you have abilities like Snow Flurry if you want to target its elemental weakness without burning through your MP, and the Synchro Cyclone synergy is a life saver.


Before you fight Midgardsormr, make sure you have abilities like Snow Flurry if you want to target its elemental weakness without burning through your MP, and the Synchro Cyclone synergy is a life saver. (left), You also want to ensure you have the correct materia - Healing (preferably Lv2) and Precision Defense Focus Materia and/or Steadfast Block Materia will help keep you alive. (right)
Beating Midgardsormr: Preparations - Best Materia, Synergies and Characters
The Midgardsormr is, in effect, the boss of Chapter 2. You cannot reach the Mythril Mines without facing it (future glitches notwithstanding) and it’s a significant step up from the rabble you’d otherwise encounter in the ![]() Grasslands. Of all the foes you can face in Chapter 2, only Titan can make a realistic claim to be mightier. That said, unlike
Grasslands. Of all the foes you can face in Chapter 2, only Titan can make a realistic claim to be mightier. That said, unlike ![]() Titan Midgardsormr’s level is static, assuming you’re not playing on dynamic difficulty, and even if so you’ll benefit from some proper preparations. Namely, clearing World Intel events around the Grasslands so you’ve got more levels under your belt and are well-equipped.
Titan Midgardsormr’s level is static, assuming you’re not playing on dynamic difficulty, and even if so you’ll benefit from some proper preparations. Namely, clearing World Intel events around the Grasslands so you’ve got more levels under your belt and are well-equipped.
You can only do so much, being Chapter 2 and all, but having two-socket armor, enhanced accessories (![]() Hi-Power Wristguards,
Hi-Power Wristguards, ![]() Bulletproof Vest Mk.II, etc) and certain materia will help. HP Plus Materia to give yourself more survivability (1,500+ HP is ideal),
Bulletproof Vest Mk.II, etc) and certain materia will help. HP Plus Materia to give yourself more survivability (1,500+ HP is ideal), ![]() Precision Defense Focus Materia and/or
Precision Defense Focus Materia and/or ![]() Steadfast Block Materia on your tanks,
Steadfast Block Materia on your tanks, ![]() Ice Materia and
Ice Materia and ![]() Healing Materia are all wise equips, here.
Healing Materia are all wise equips, here.


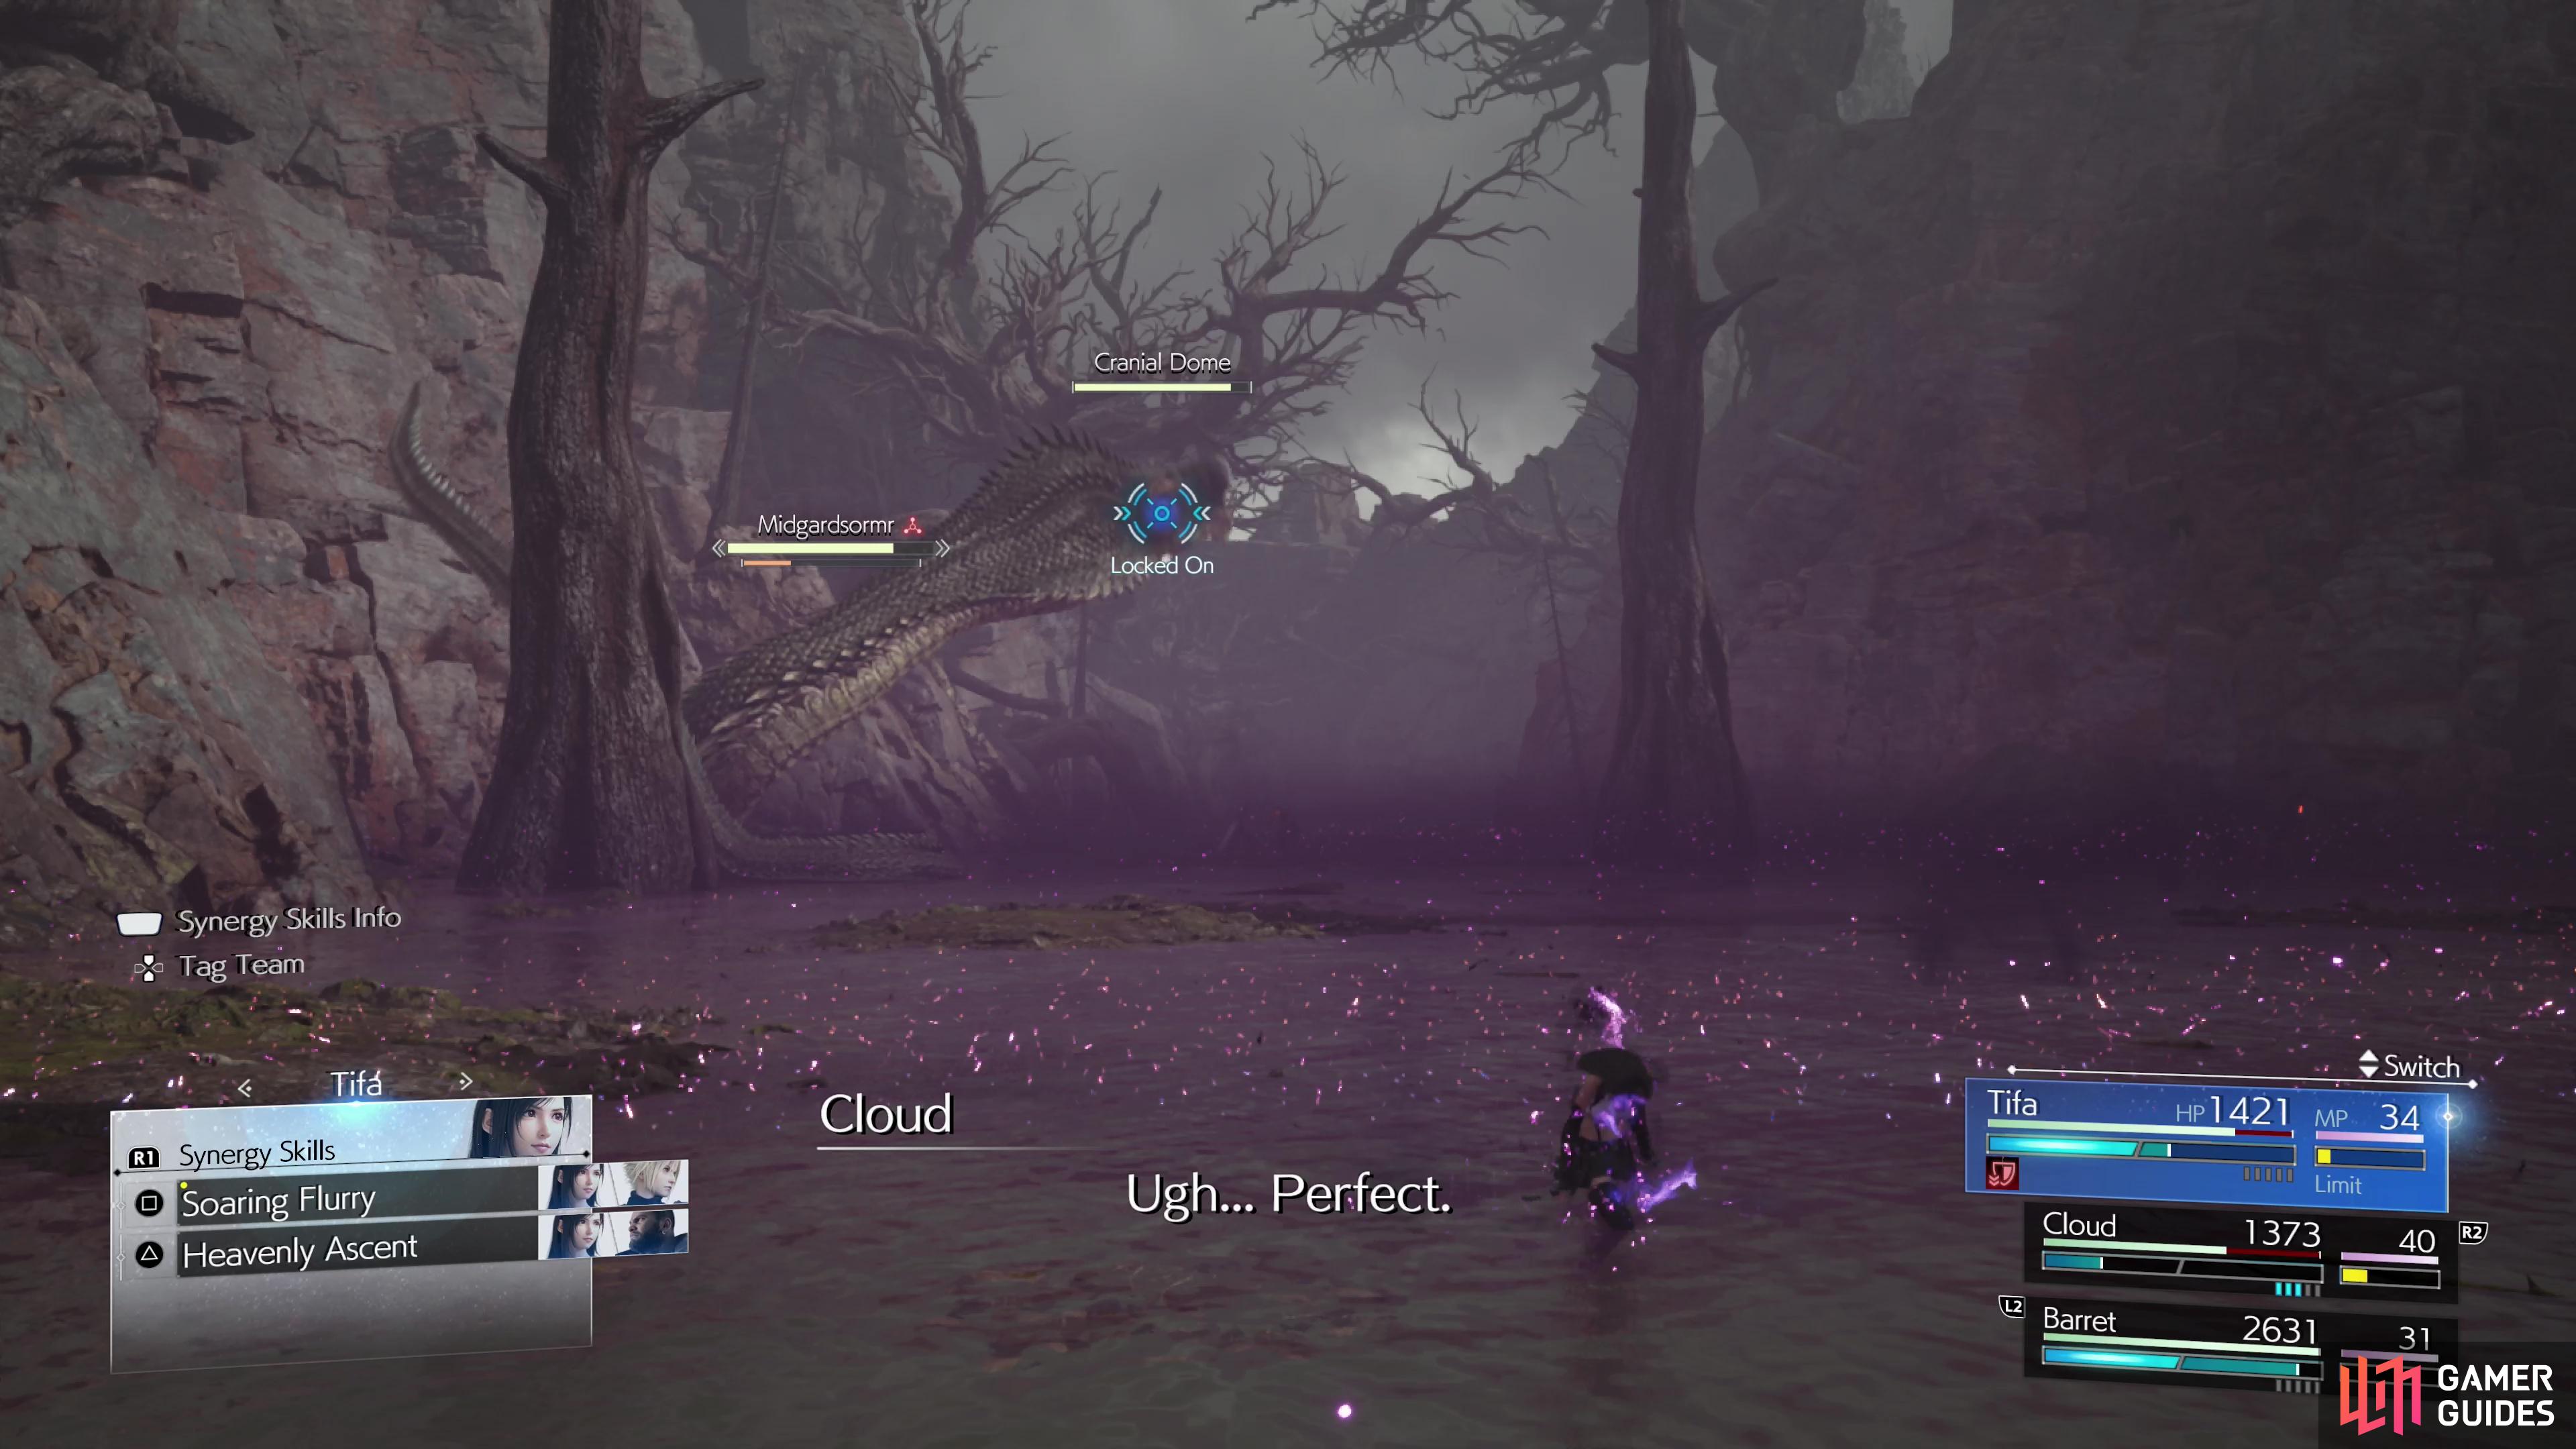
(1 of 2) Midgardsormr is weak to ice, and while you can attempt to stagger it by spamming ice spells,

Midgardsormr is weak to ice, and while you can attempt to stagger it by spamming ice spells, (left), Synchro Cyclone doesn’t consume your MP, pressures Midgarsormr, and is just the more reliable, safer strategy. (right)
Midgardsormr Strategy - Blizzard Spam
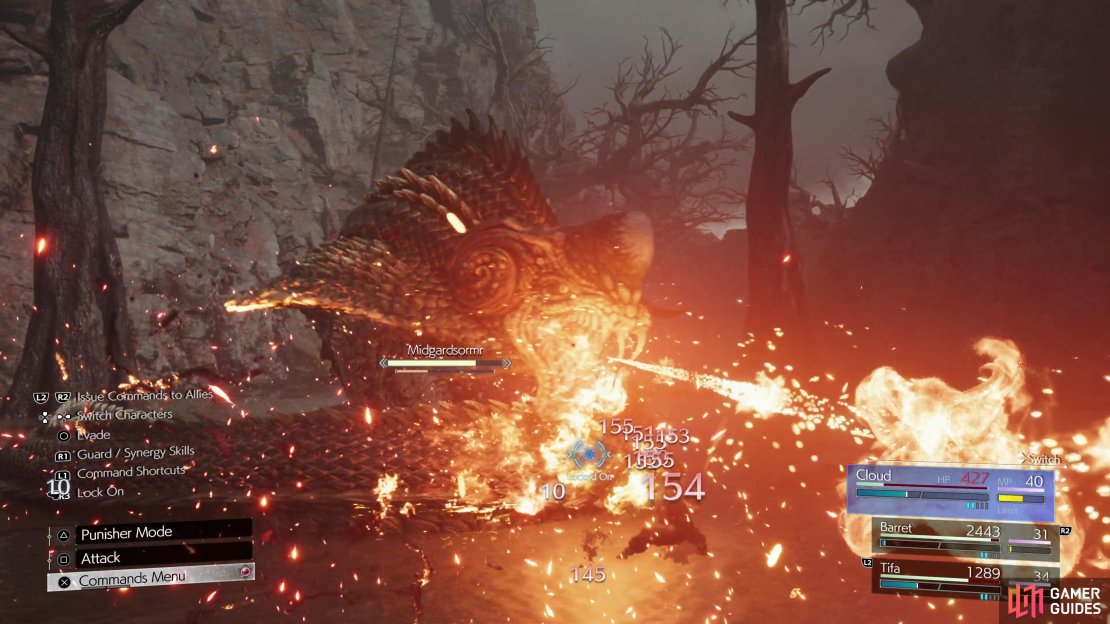
There are at least two good strategies to shoot for in this fight. The first and perhaps simplest is to pelt Midgardsormr with Blizzard/Blizzara. The overgrown snake is weak to ice, and if you deal enough damage to it using its hated element, it’ll get pressured. In this scenario, bringing Aerith makes sense due to her ![]() Arcane Ward, but Cloud + Tifa also make sense due to their Synchro Cyclone Special Ability which give them unlimited MP for a few moments afterwards - time which, ideally, you could be pelting Midgardsormr with Blizzara (or healing with Cura - it’s a solid strategy no matter what you want to do).
Arcane Ward, but Cloud + Tifa also make sense due to their Synchro Cyclone Special Ability which give them unlimited MP for a few moments afterwards - time which, ideally, you could be pelting Midgardsormr with Blizzara (or healing with Cura - it’s a solid strategy no matter what you want to do).
That said, there’s a big downside to this strategy. If you use actual ![]() Ice Materia to pelt Midgardsormr with Blizzard, it’ll consume a lot of MP. If you instead use the Snow Flurry ability from each character’s Folio you can effectively cast Blizzard without expending MP as an ability, but you won’t earn any synergy by doing this. On top of that, in our numerous fights with this boss, we never once succeeded in actually pressuring it with ice magic, although that could be due to phase change shenanigans. In any event, Cloud, Tifa and Aerith make for a good combination with this strategy.
Ice Materia to pelt Midgardsormr with Blizzard, it’ll consume a lot of MP. If you instead use the Snow Flurry ability from each character’s Folio you can effectively cast Blizzard without expending MP as an ability, but you won’t earn any synergy by doing this. On top of that, in our numerous fights with this boss, we never once succeeded in actually pressuring it with ice magic, although that could be due to phase change shenanigans. In any event, Cloud, Tifa and Aerith make for a good combination with this strategy.
Midgardsormr Strategy - Synergy Spam
Alternatively if you want a less risky, less MP-intensive approach, the Synergy Spam worked well for us. Midgardsormr has two weaknesses: ice and Synergy Abilities, and of the two, Synergy Abilities seemed more effective. The basic approach to this is to spam attacks to fill your ATB, blocking and dodging as necessary, then use abilities to build up synergy - ![]() Focused Thrust, Unbridled
Focused Thrust, Unbridled ![]() Strength, whatever you do, as long as you’re not saving it for a rainy day. By the time you have enough synergy stored up (and some ATB charges to take advantage of it) to use a Synergy Ability, you’ll probably be hurting a bit. Use Cloud + Tifa’s Synchro Cyclone, which should pressure Midgardsormr, then follow up with stagger-boosting attacks like Focused Thrust or Focused Strike and hopefully you can stagger Midgardsormr.
Strength, whatever you do, as long as you’re not saving it for a rainy day. By the time you have enough synergy stored up (and some ATB charges to take advantage of it) to use a Synergy Ability, you’ll probably be hurting a bit. Use Cloud + Tifa’s Synchro Cyclone, which should pressure Midgardsormr, then follow up with stagger-boosting attacks like Focused Thrust or Focused Strike and hopefully you can stagger Midgardsormr.
Unfortunately Midgardsormr’s pressured status doesn’t last long and is prone to being interrupted by phase changes, but this strategy has another boon: even when it doesn’t go according to plan, it’s still putting you in a good spot. All the stagger-boosting abilities you launch still contribute to the Midgardsormr’s stagger gauge and deplete its health bar, and if you pull off Synchro Cyclone you’ll be able to spam Cura afterwards without draining your MP, giving you a much-appreciated mid-fight refresh and saving your MP for the end of the fight. This is the approach we go with, and we bring Cloud, Tifa and Barret to pull it off (although ![]() Red XIII is a fine substitute for Barret).
Red XIII is a fine substitute for Barret).
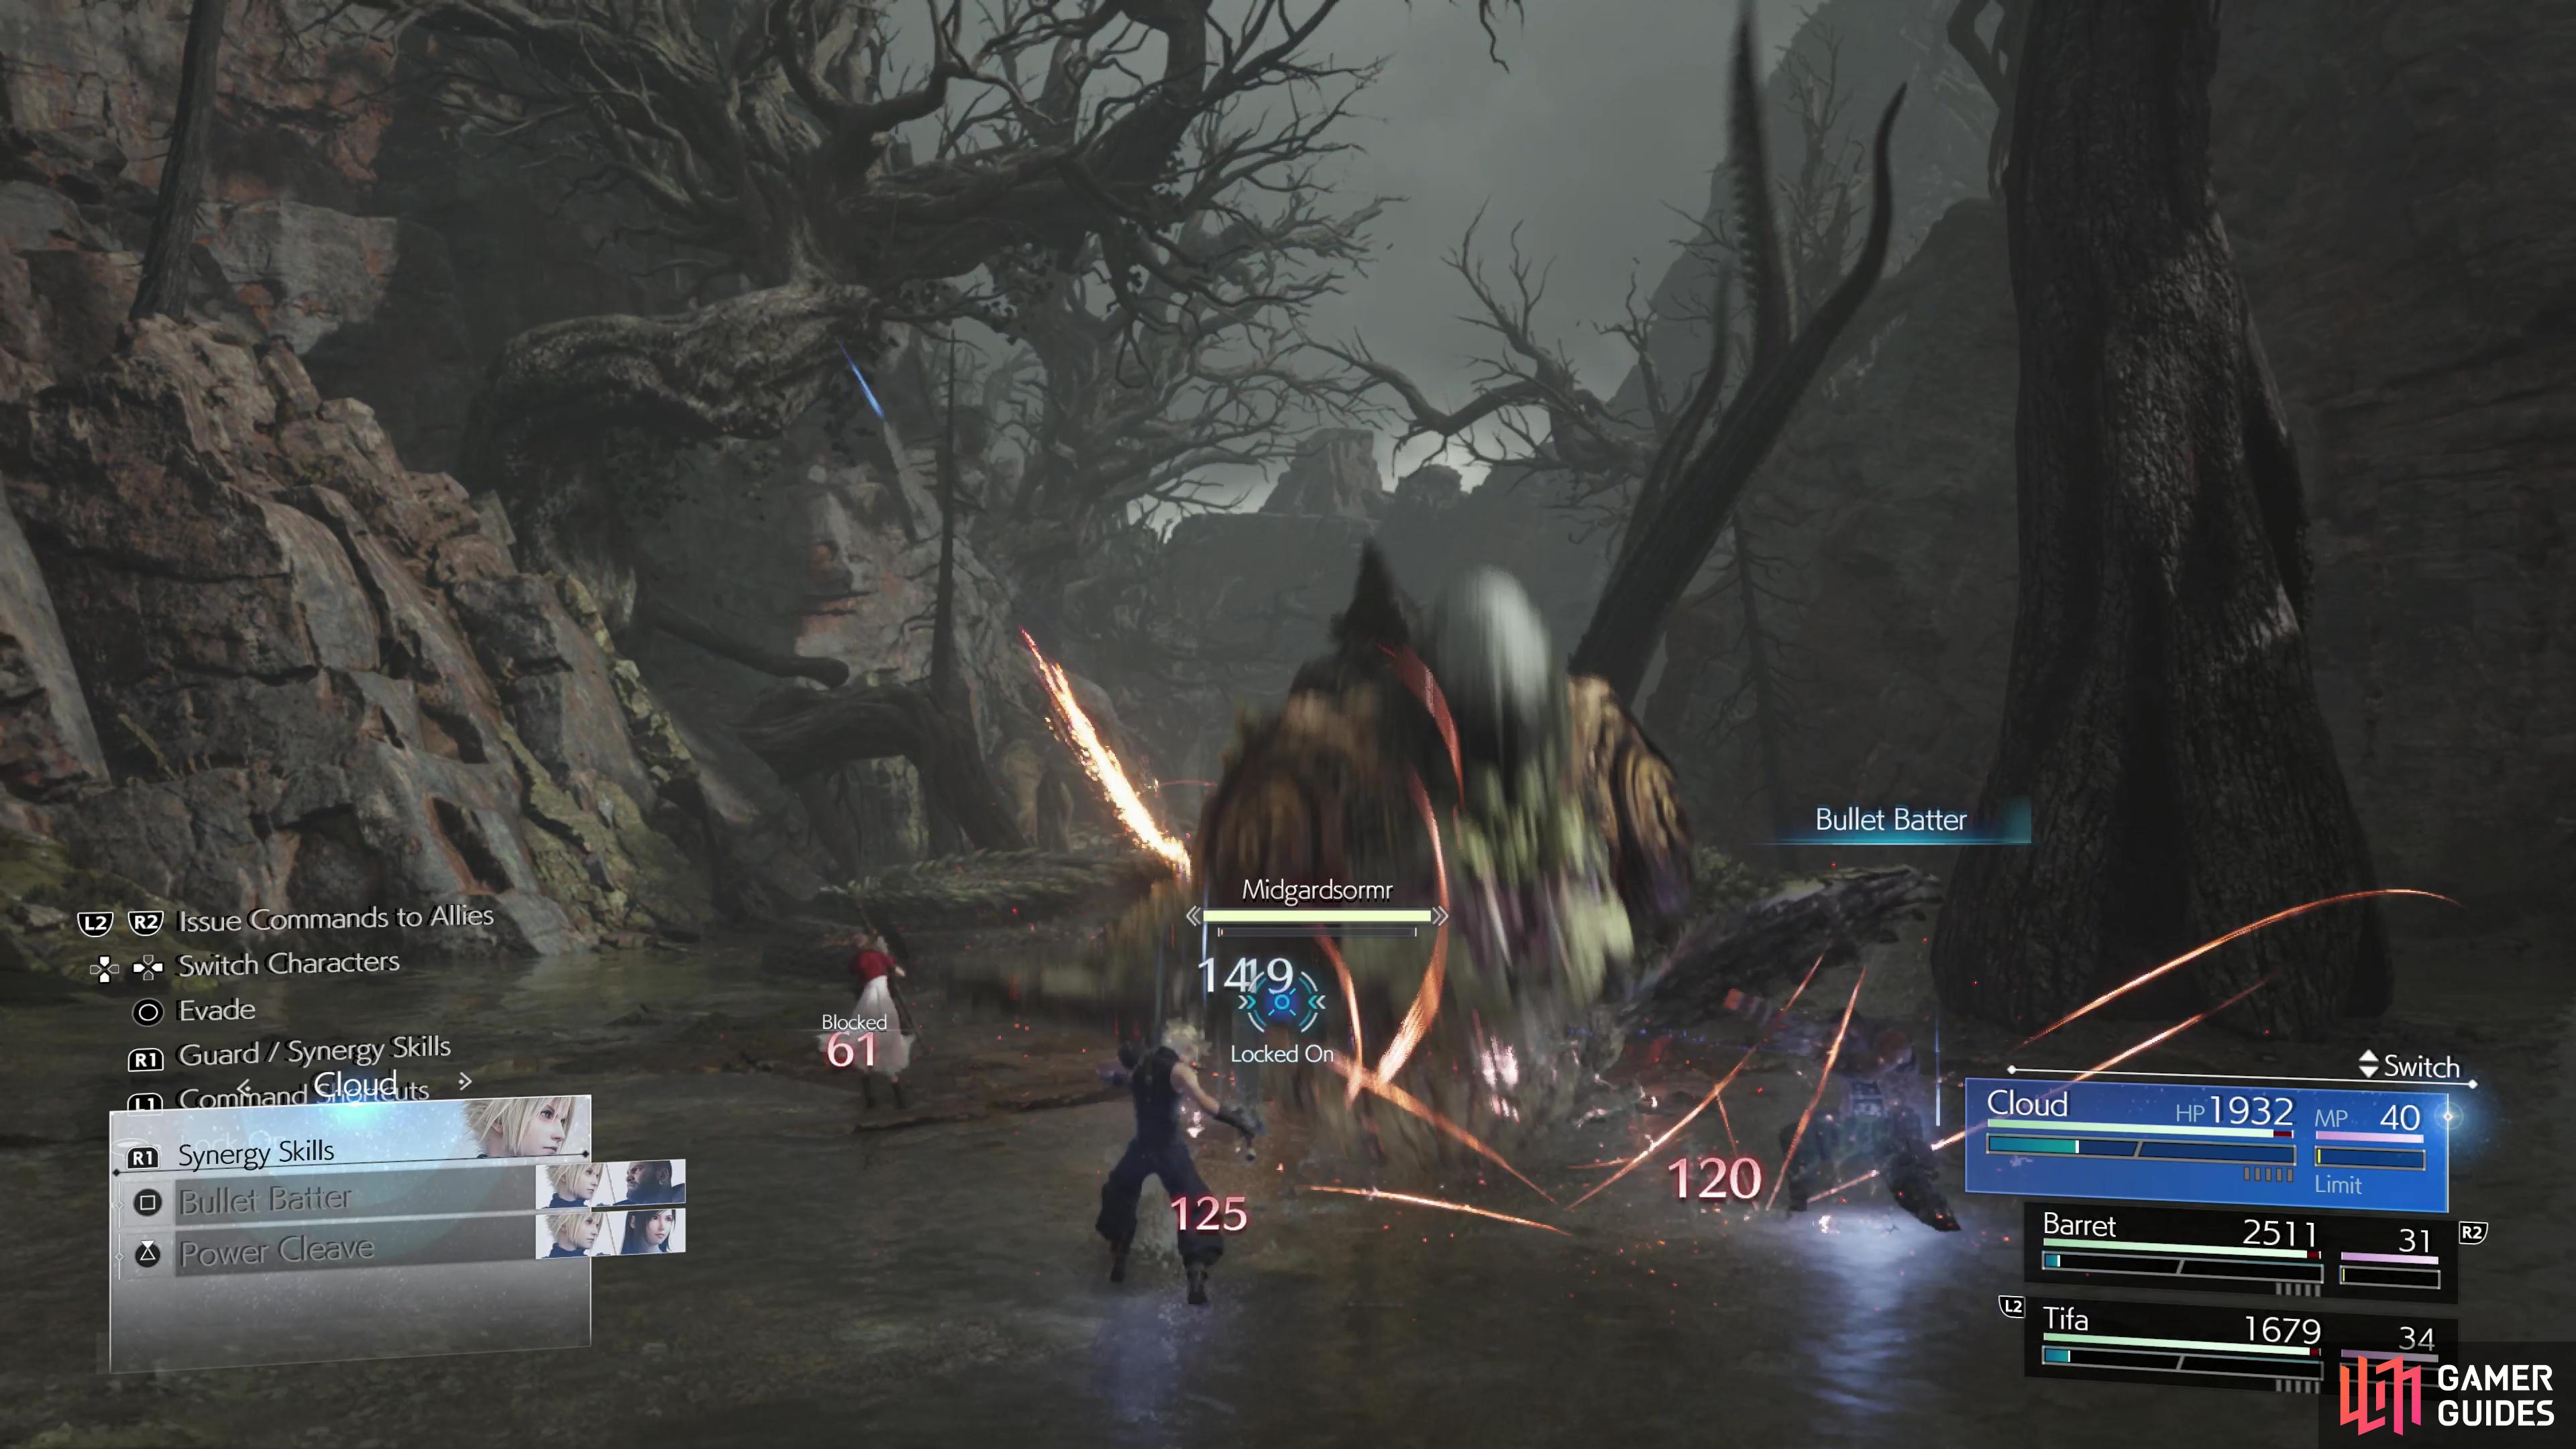
Everybody has Healing Materia (ideally Lv2) and Cloud and Barret will both benefit from Precision ![]() Defense Focus Materia and/or Steadfast Block Materia. Bullet Batter is also a nice Synergy Skill for Cloud to get, as it allows him to attack at range while building up his and Barret’s ATB.
Defense Focus Materia and/or Steadfast Block Materia. Bullet Batter is also a nice Synergy Skill for Cloud to get, as it allows him to attack at range while building up his and Barret’s ATB.


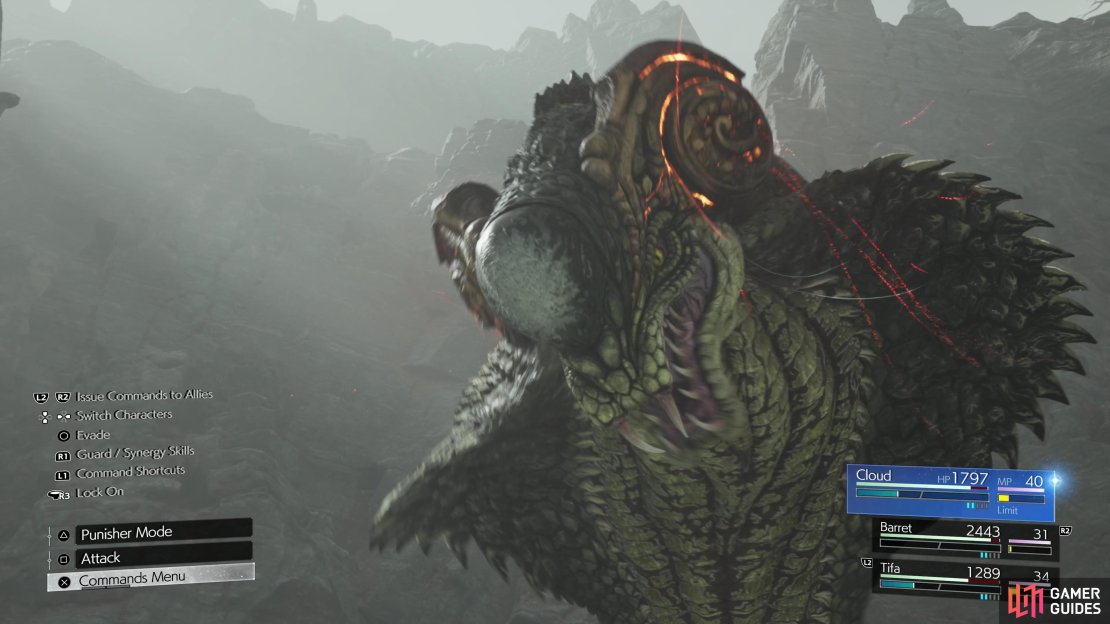
(1 of 2) Midgardsormr will start out relying on various melee attacks, and as its size suggests, it can dish out a fair amount of damage with its bites and bulk.
Midgardsormr will start out relying on various melee attacks, and as its size suggests, it can dish out a fair amount of damage with its bites and bulk. (left), Toxic Waters can inflict the Deprotect debuff, which will make Midgarsormr’s already potent physical attacks even more painful. (right)
How to Defeat Migdardsormr - Final Fantasy VII Rebirth
Choose a strategy and consider making the above preparations, then ride a chocobo into the swamp as far south as you can, until an unassuming little “island” plays a trick on you. Midgardsormr is technically a three phase boss battle, but the first phase, which only lasts until Midgardsormr’s HP is reduced to around 80%, is little more than a preliminary. It’ll mostly stick to using physical attacks like Bite, Headbutt, Snap and Chomp, which generally deal 150-200 damage. Stick to your tanks and block when you see these attacks incoming to mitigate or eliminate damage, meanwhile you should be building up ATB and spamming abilities with the goal of getting enough synergy to land a Synergy Ability.
More dangerous attacks to watch out for in this phase and later on include:
-
Feast: Sometimes used after Midgardsormr enters its Coil state, this is a multi-hit combo that ends with a particularly big strike at the end, after a delay. These attacks can easily shave off 500+ damage cumulatively, and even if you block you’re still going to take a bit of pain.
-
Sweep: Another move Midgardsormr can use after Coil, this one’s what it says on the tin - the snake will put its bulk to nefarious use, hitting all nearby characters around it. While not the most difficult attack to avoid, it will deal around 300~ damage if it lands.
-
Corrosive Fluid: Mostly noteworthy for being a rare ranged attack, Midgardsormr spits a glob of nasty goo at a character. Should be easy to dodge.
-
Toxic Waters: A massive area debuff that reduces the defense of a character by inflicting
 Deprotect. You may want to switch to a character you don’t intend to actively control for a while so you’re not soaking up extra damage for the duration of this debuff.

(1 of 3) When Midgardsormr starts playing with fire, you’ll know the second phase of the fight has begun.
How to Avoid Midgardsormr’s Scorching Breath Attack
Phase 2 will begin when Midgardsormr’s HP is reduced to around 80%, which shouldn’t take too long. It’s unmistakable when this happens, as it’ll absorb heat from the environment and charge up its Scorching Breath attack. It intends to use this immediately after the cutscene, and it’s by far the boss’s most damaging attack, capable of one-shotting any character with a good enough hit. Fortunately it has a long charge time and limited range, and Cloud gives good advice when he tells everyone to “keep their distance”. Get as far away from the snake as possible until the attack whiffs, bonus points if you manage to land some ranged attacks while this is going on. Be wary, however, as Midgardsormr will use this repeatedly and you’ve got to be ready to make a run for it, lest you end up a bit crispy.


(1 of 2) When Midgarsormr dives beneath the surface of the swamp, be on the lookout for it to surface under a character via its Predation attack.
When Midgarsormr dives beneath the surface of the swamp, be on the lookout for it to surface under a character via its Predation attack. (left), Dodge-spamming works to avoid Predation, but Midgarsormr can instead use its Viperous Sting attack to catch you off guard. (right)
While Scorching Breath is by far the most dangerous attack that opens up in this phase, it’s not the only new attack Midgardsormr has. Others include:
-
Thermal Absorption: Despite having an obvious affinity for fire, Midgardsormr also can deal ice damage with this attack, as it drains the heat out of an area to charge its pyromaniacal inclinations. Dodge the marked area to avoid taking damage - it’s not a terribly painful attack, but it does indicate that another Scorching Breath is likely on its way.
-
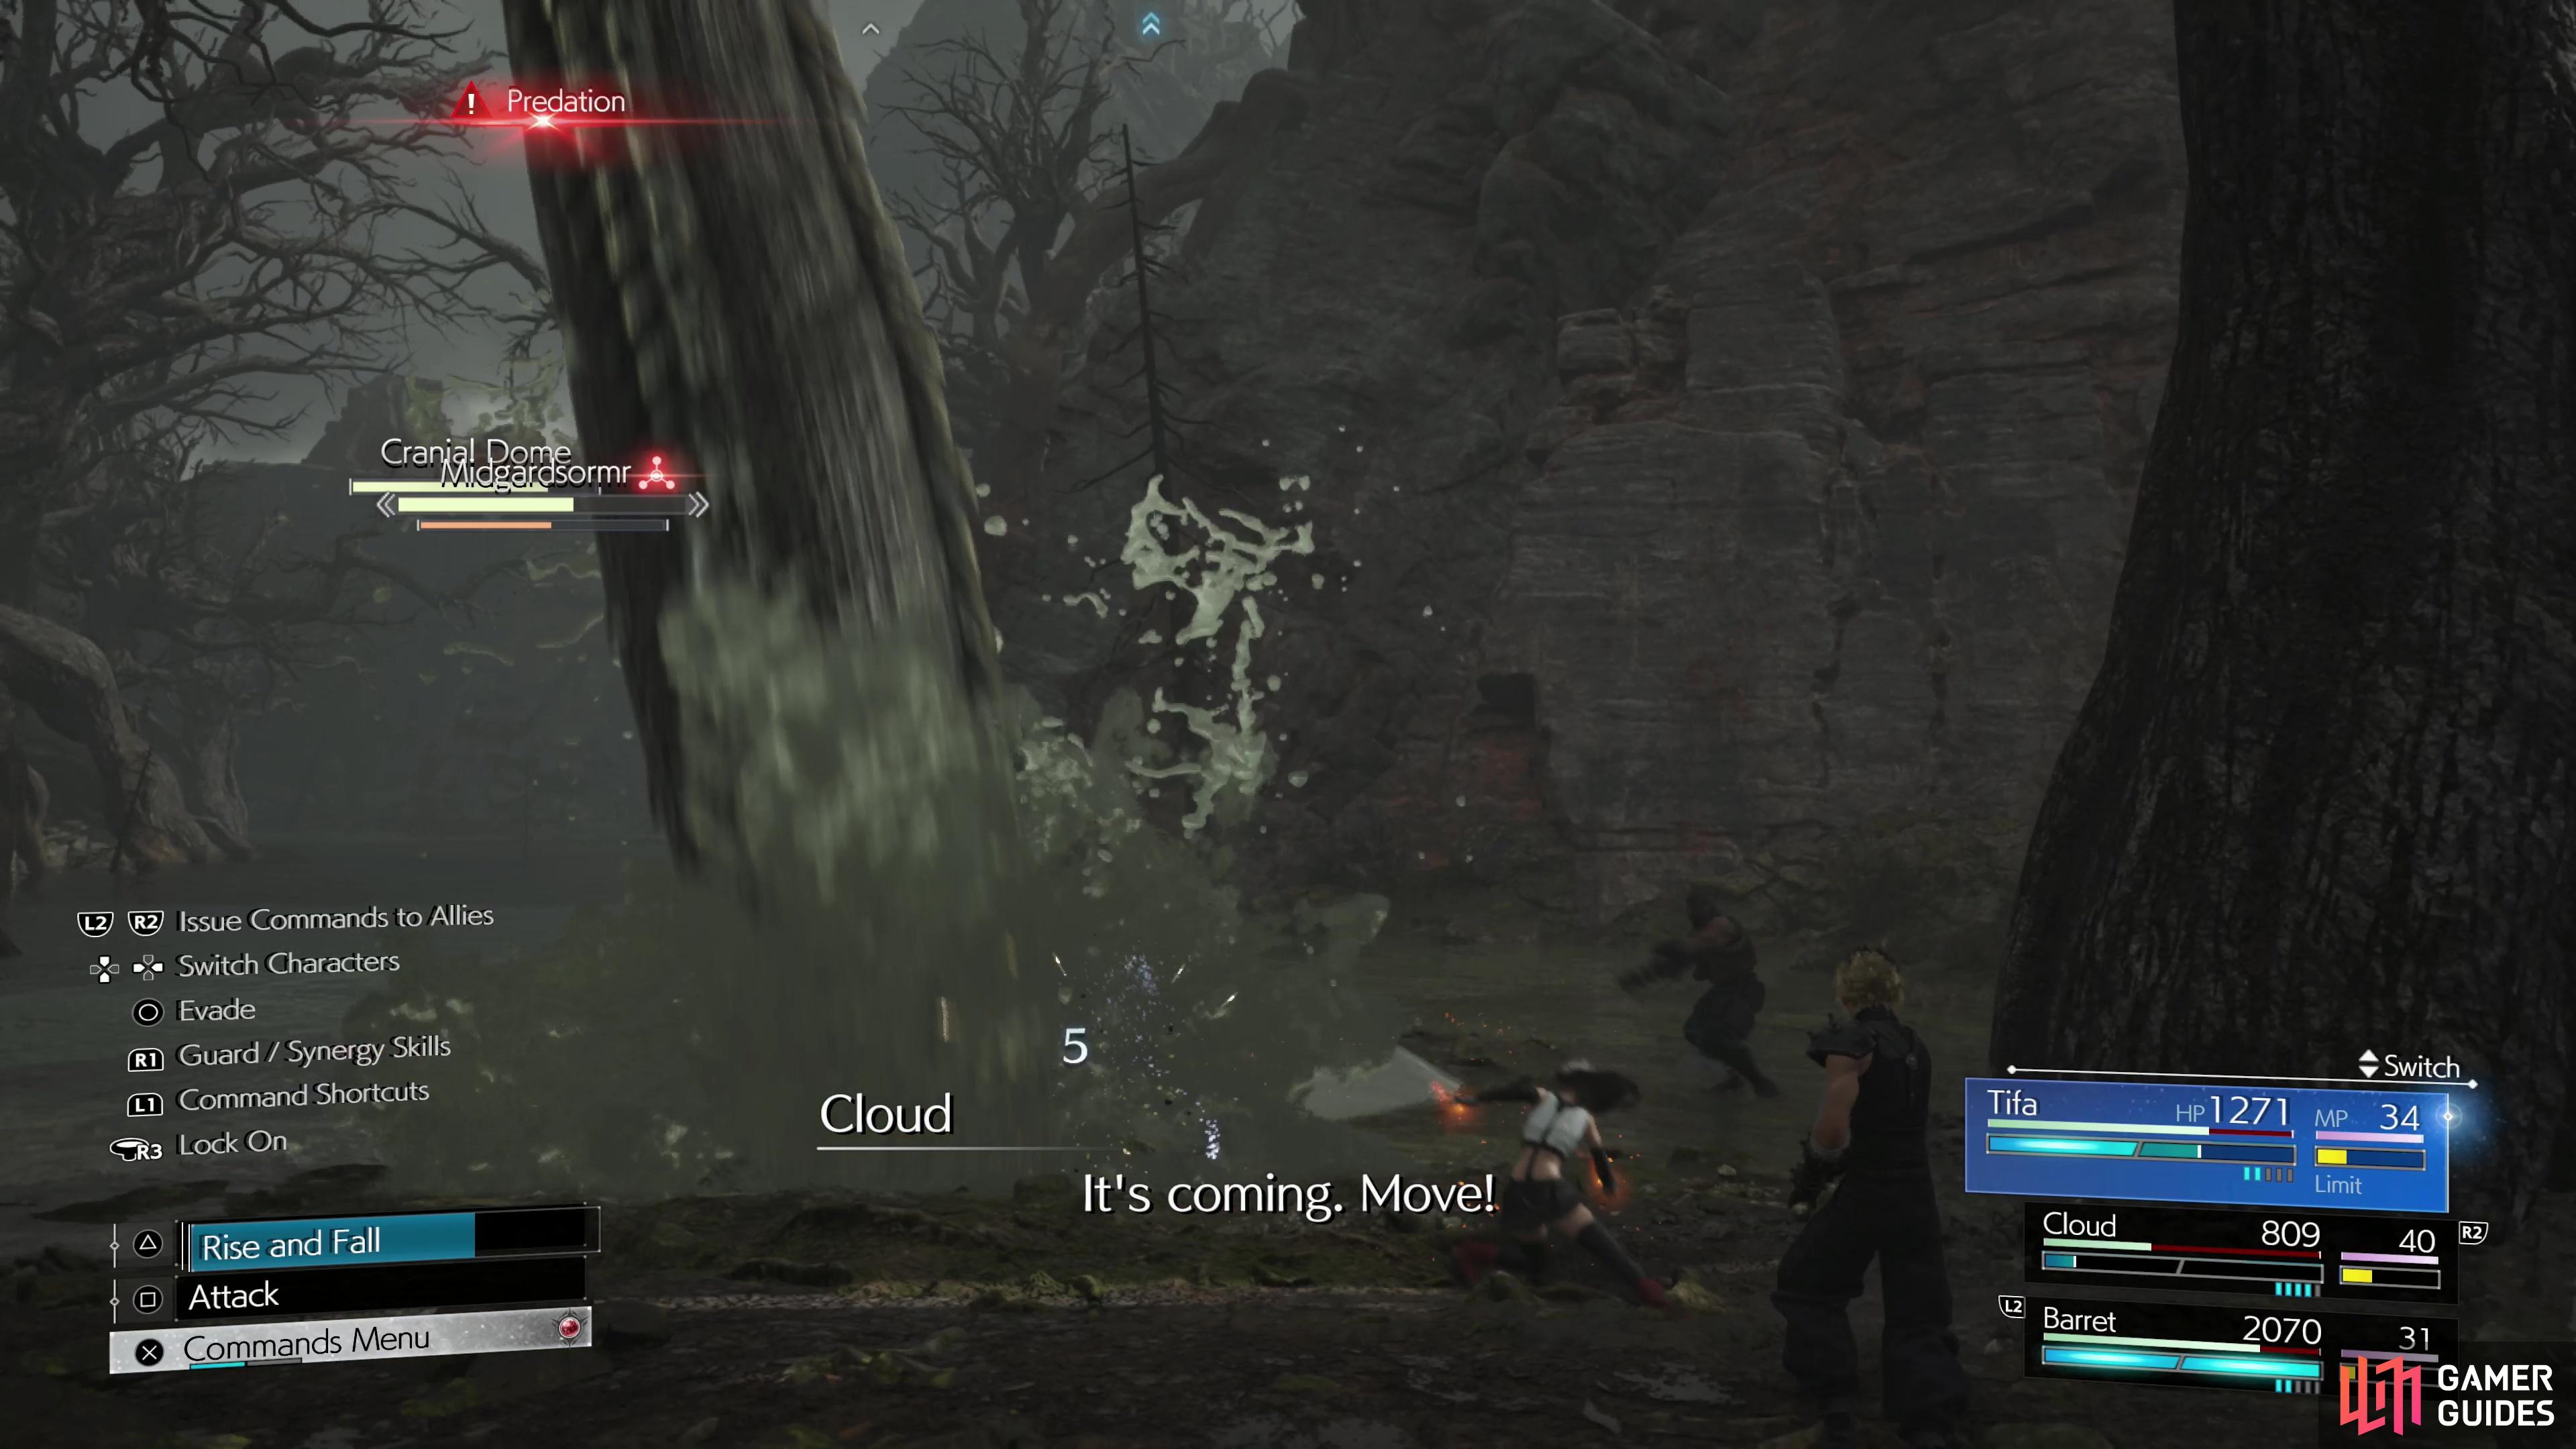
Predation: Also commonly used after Coil, Midgardsormr will burrow (dive?) into the swamp and after a moment erupt under a character. If this lands Midgardsormr will take its time chomping on the ensnared victim until you land a big hit with one of your other characters - use an ability quickly to mitigate damage. If you don’t free your companion in time, Midgarsormr will consume them, removing them from battle for a time and removing any synergy or ATB they’ve accrued. Run around when Midgardsormr burrows and wait for an indication on the surface of the swamp that it’s about to surface, and dodge. Spamming dodge with a fast character like Tifa can also suffice, but you risk being caught by Viperous Sting if you’re not careful…
-
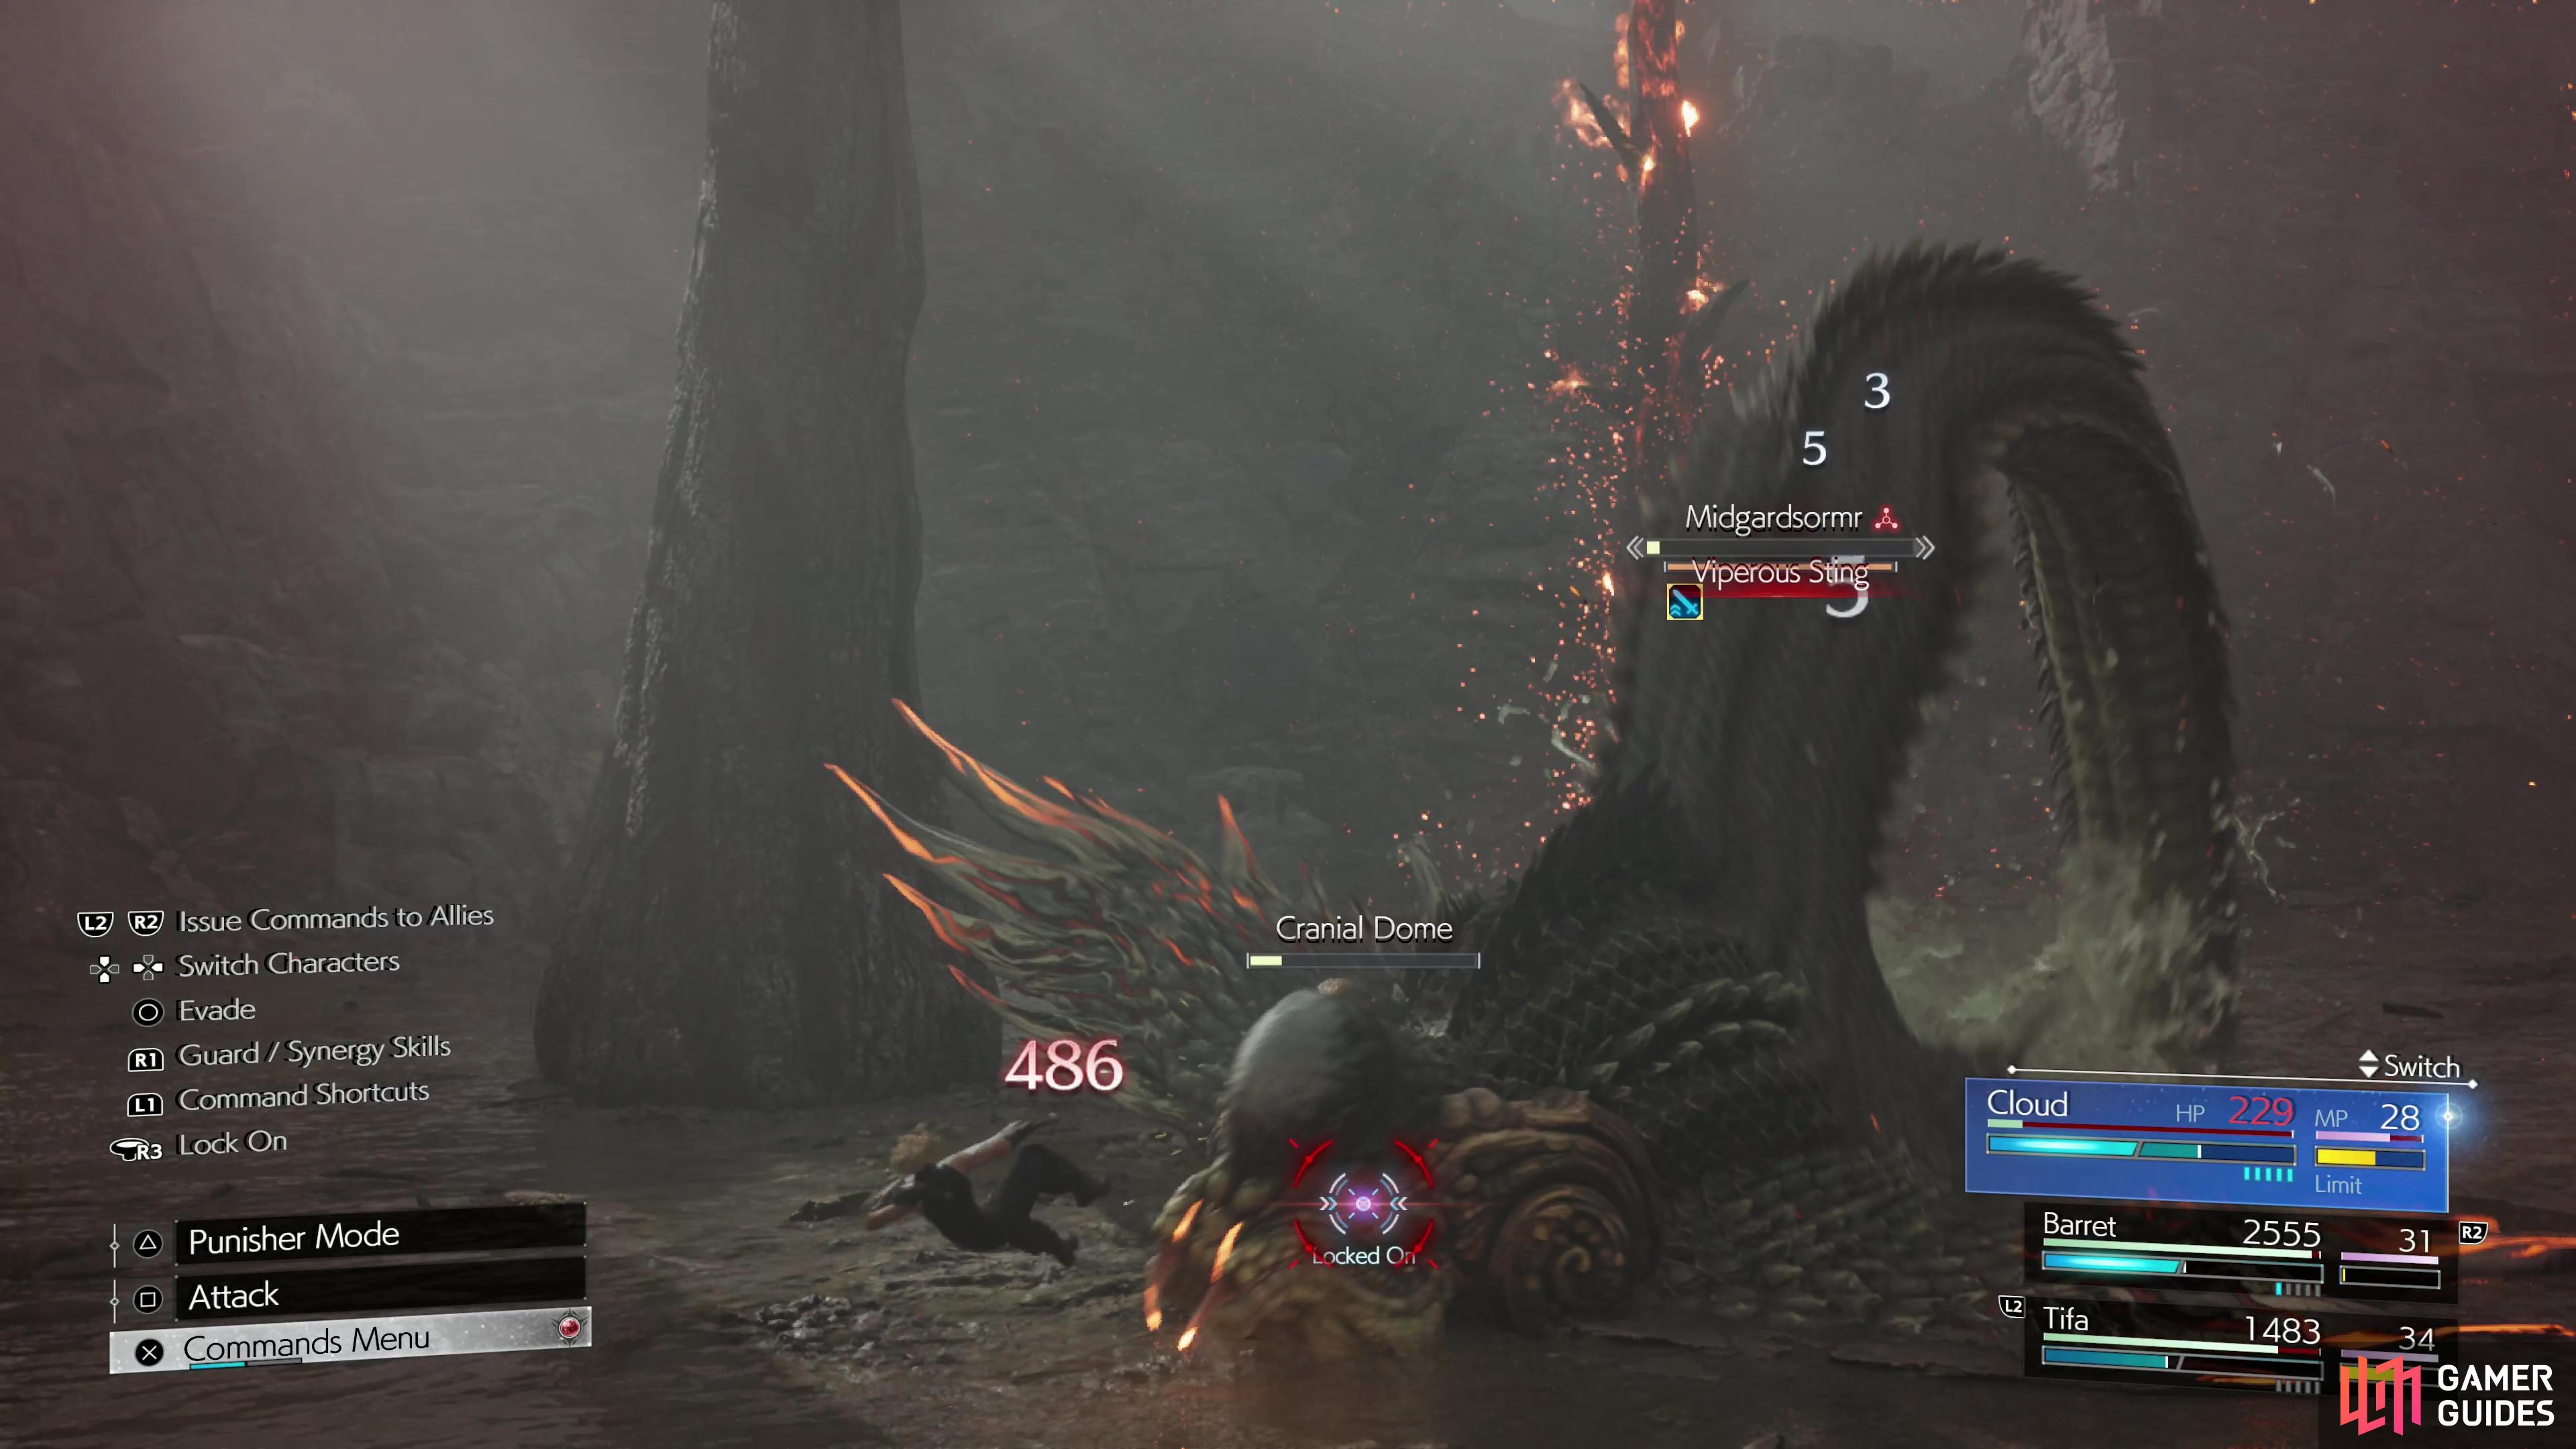
Viperous Sting: A fairly rare attack, in our experience, Midgardsormr will use this after diving into the swamp. If you’re blindly dodging, expecting Predation, this attack will probably catch you off guard, as we suspect it’s designed to do. It doesn’t have the same urgency as Predation, as you won’t end up inside Midgardsormr’s mouth, but it can deal around 500 damage, so it’s still not something you want to get hit by.
Aside from the odd Scorching Breath, this phase isn’t so bad, and you should continue your strategy from before - pelting Midgardsormr with ice magic and/or building up synergy. If you get enough synergy, and the boss’s HP is comfortably above 50%, you may as well unleash it now, especially if your HP are in a bad way. Cloud and Tifa’s Synchro Cyclone can turn the tide of battle. If you’re doing fine, you may want to hold onto it, as Midgardsormr will enter the next phase when reduced to below 50% HP. A good test for this is the ![]() Bravery status, which it will automatically apply to itself when it’s close to changing phases (look for the little blue sword icon under its name).
Bravery status, which it will automatically apply to itself when it’s close to changing phases (look for the little blue sword icon under its name).
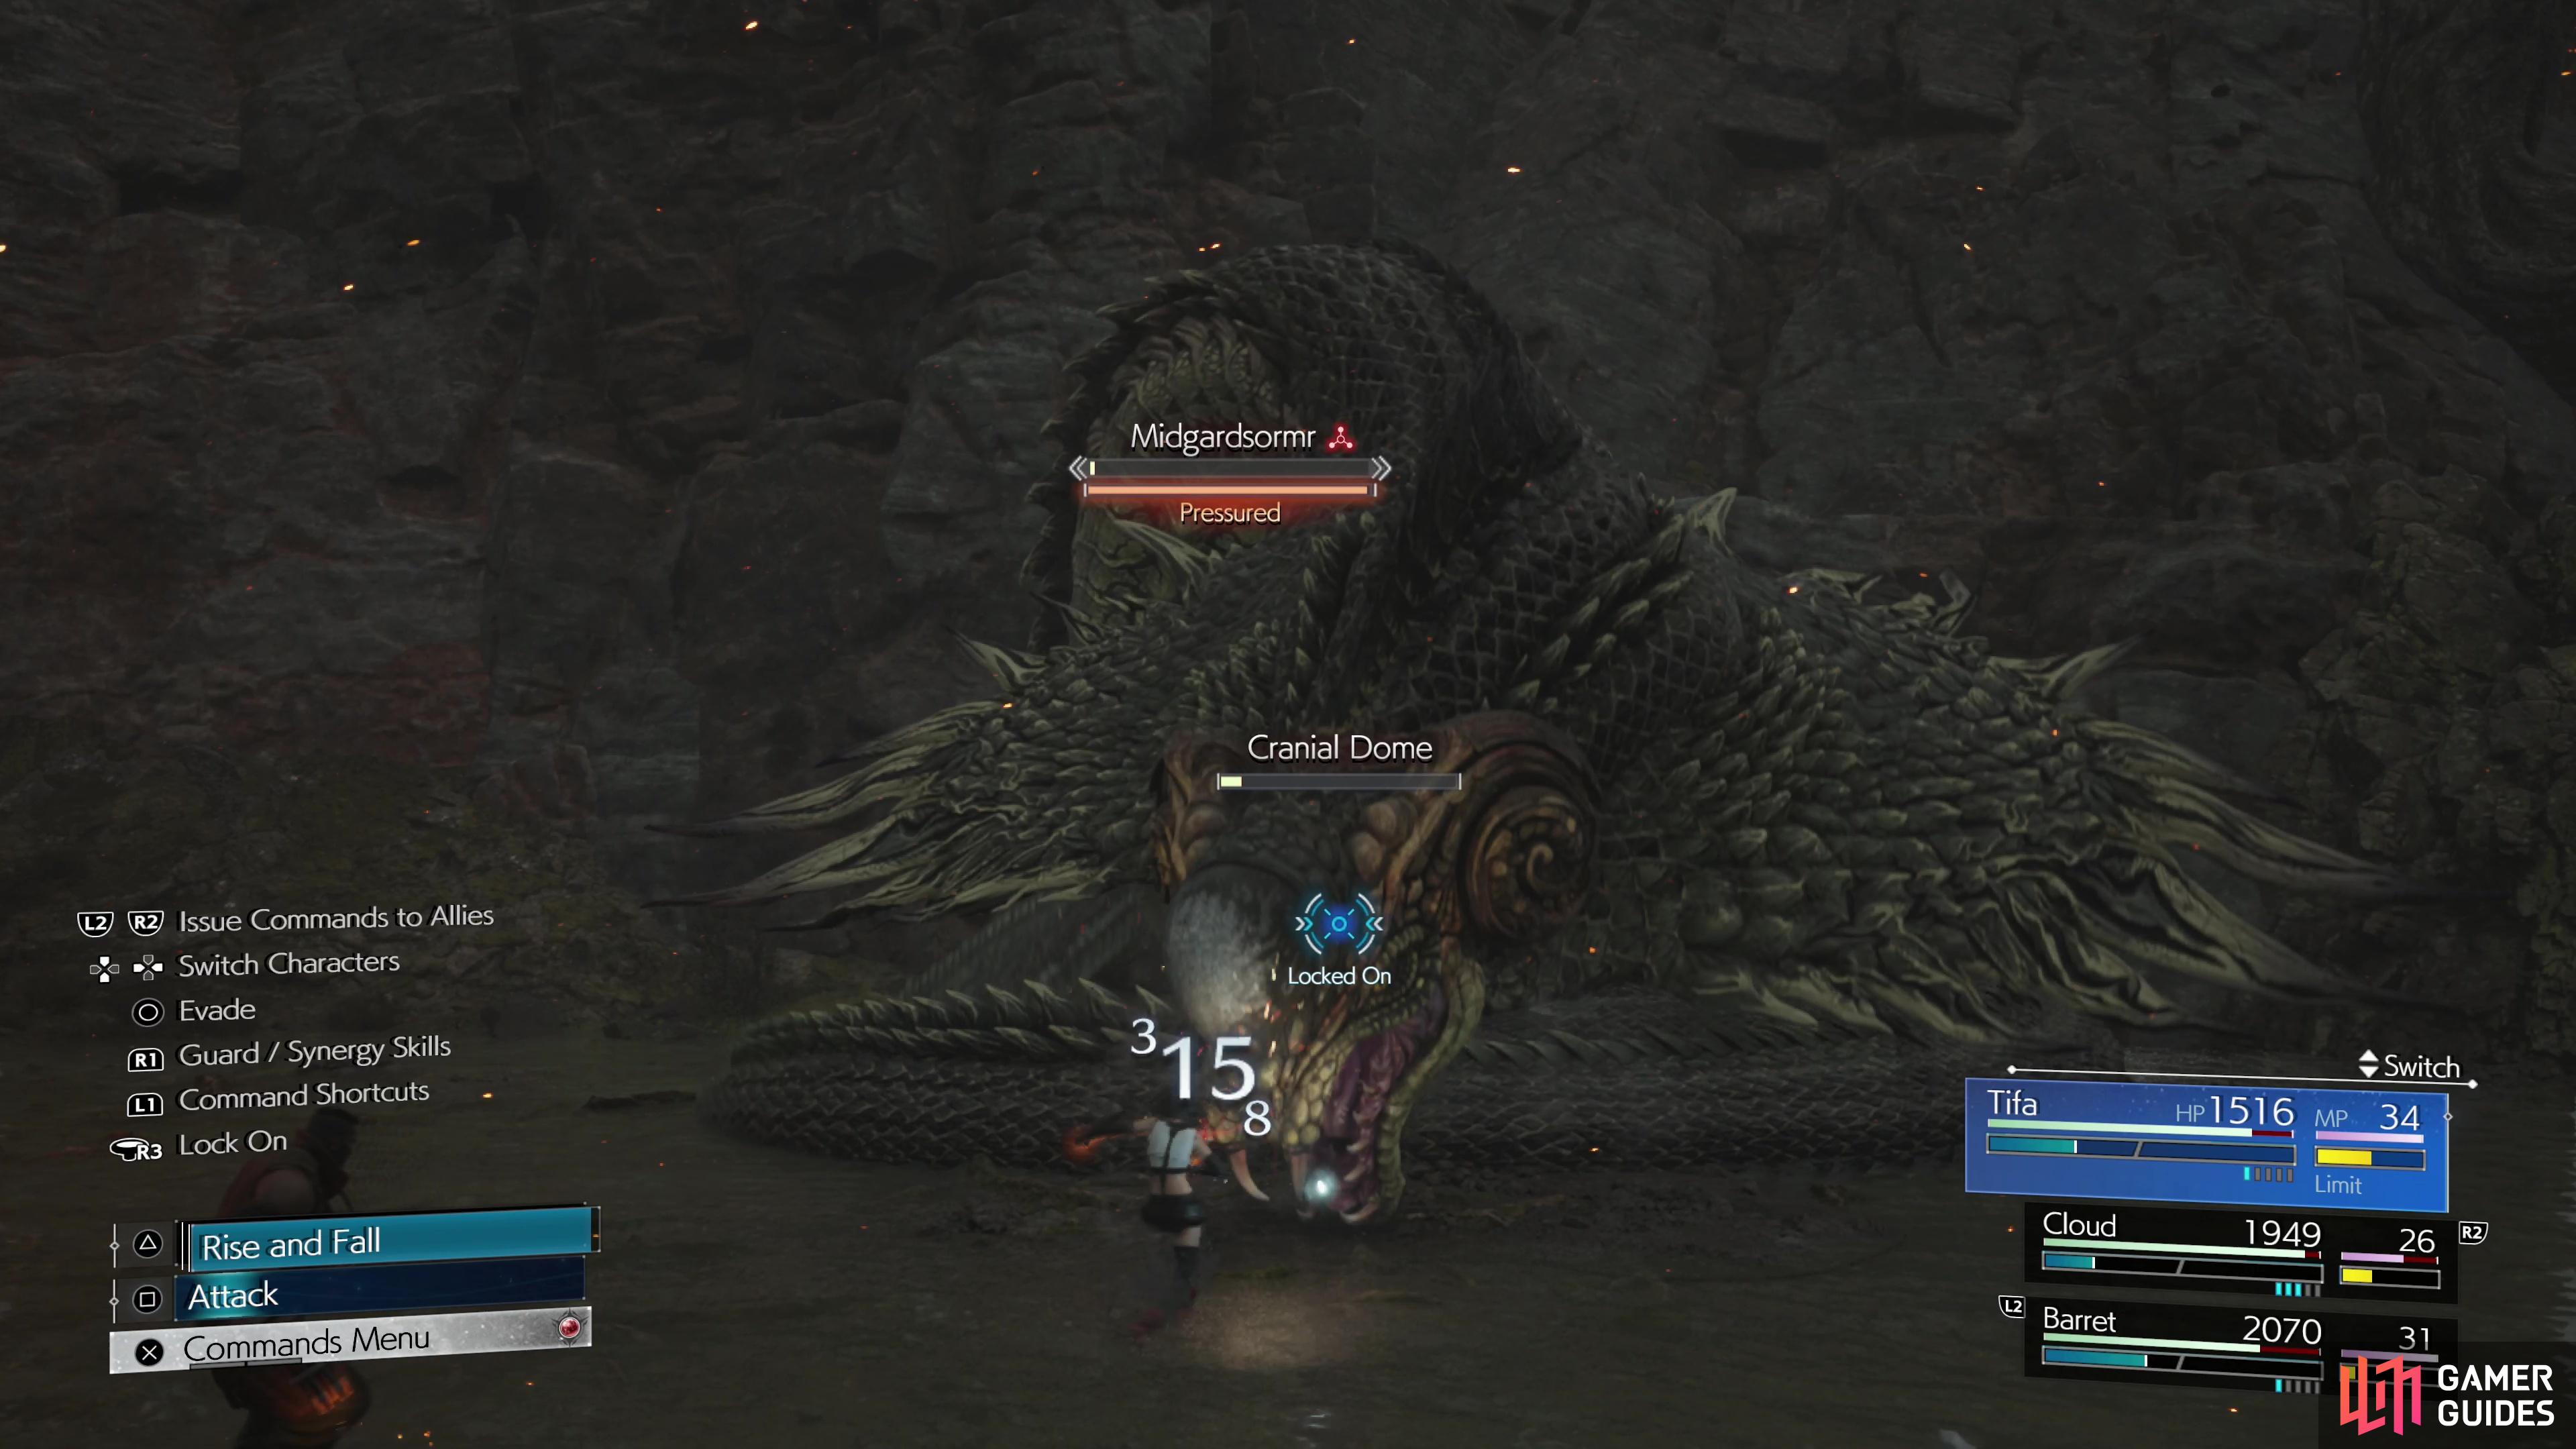
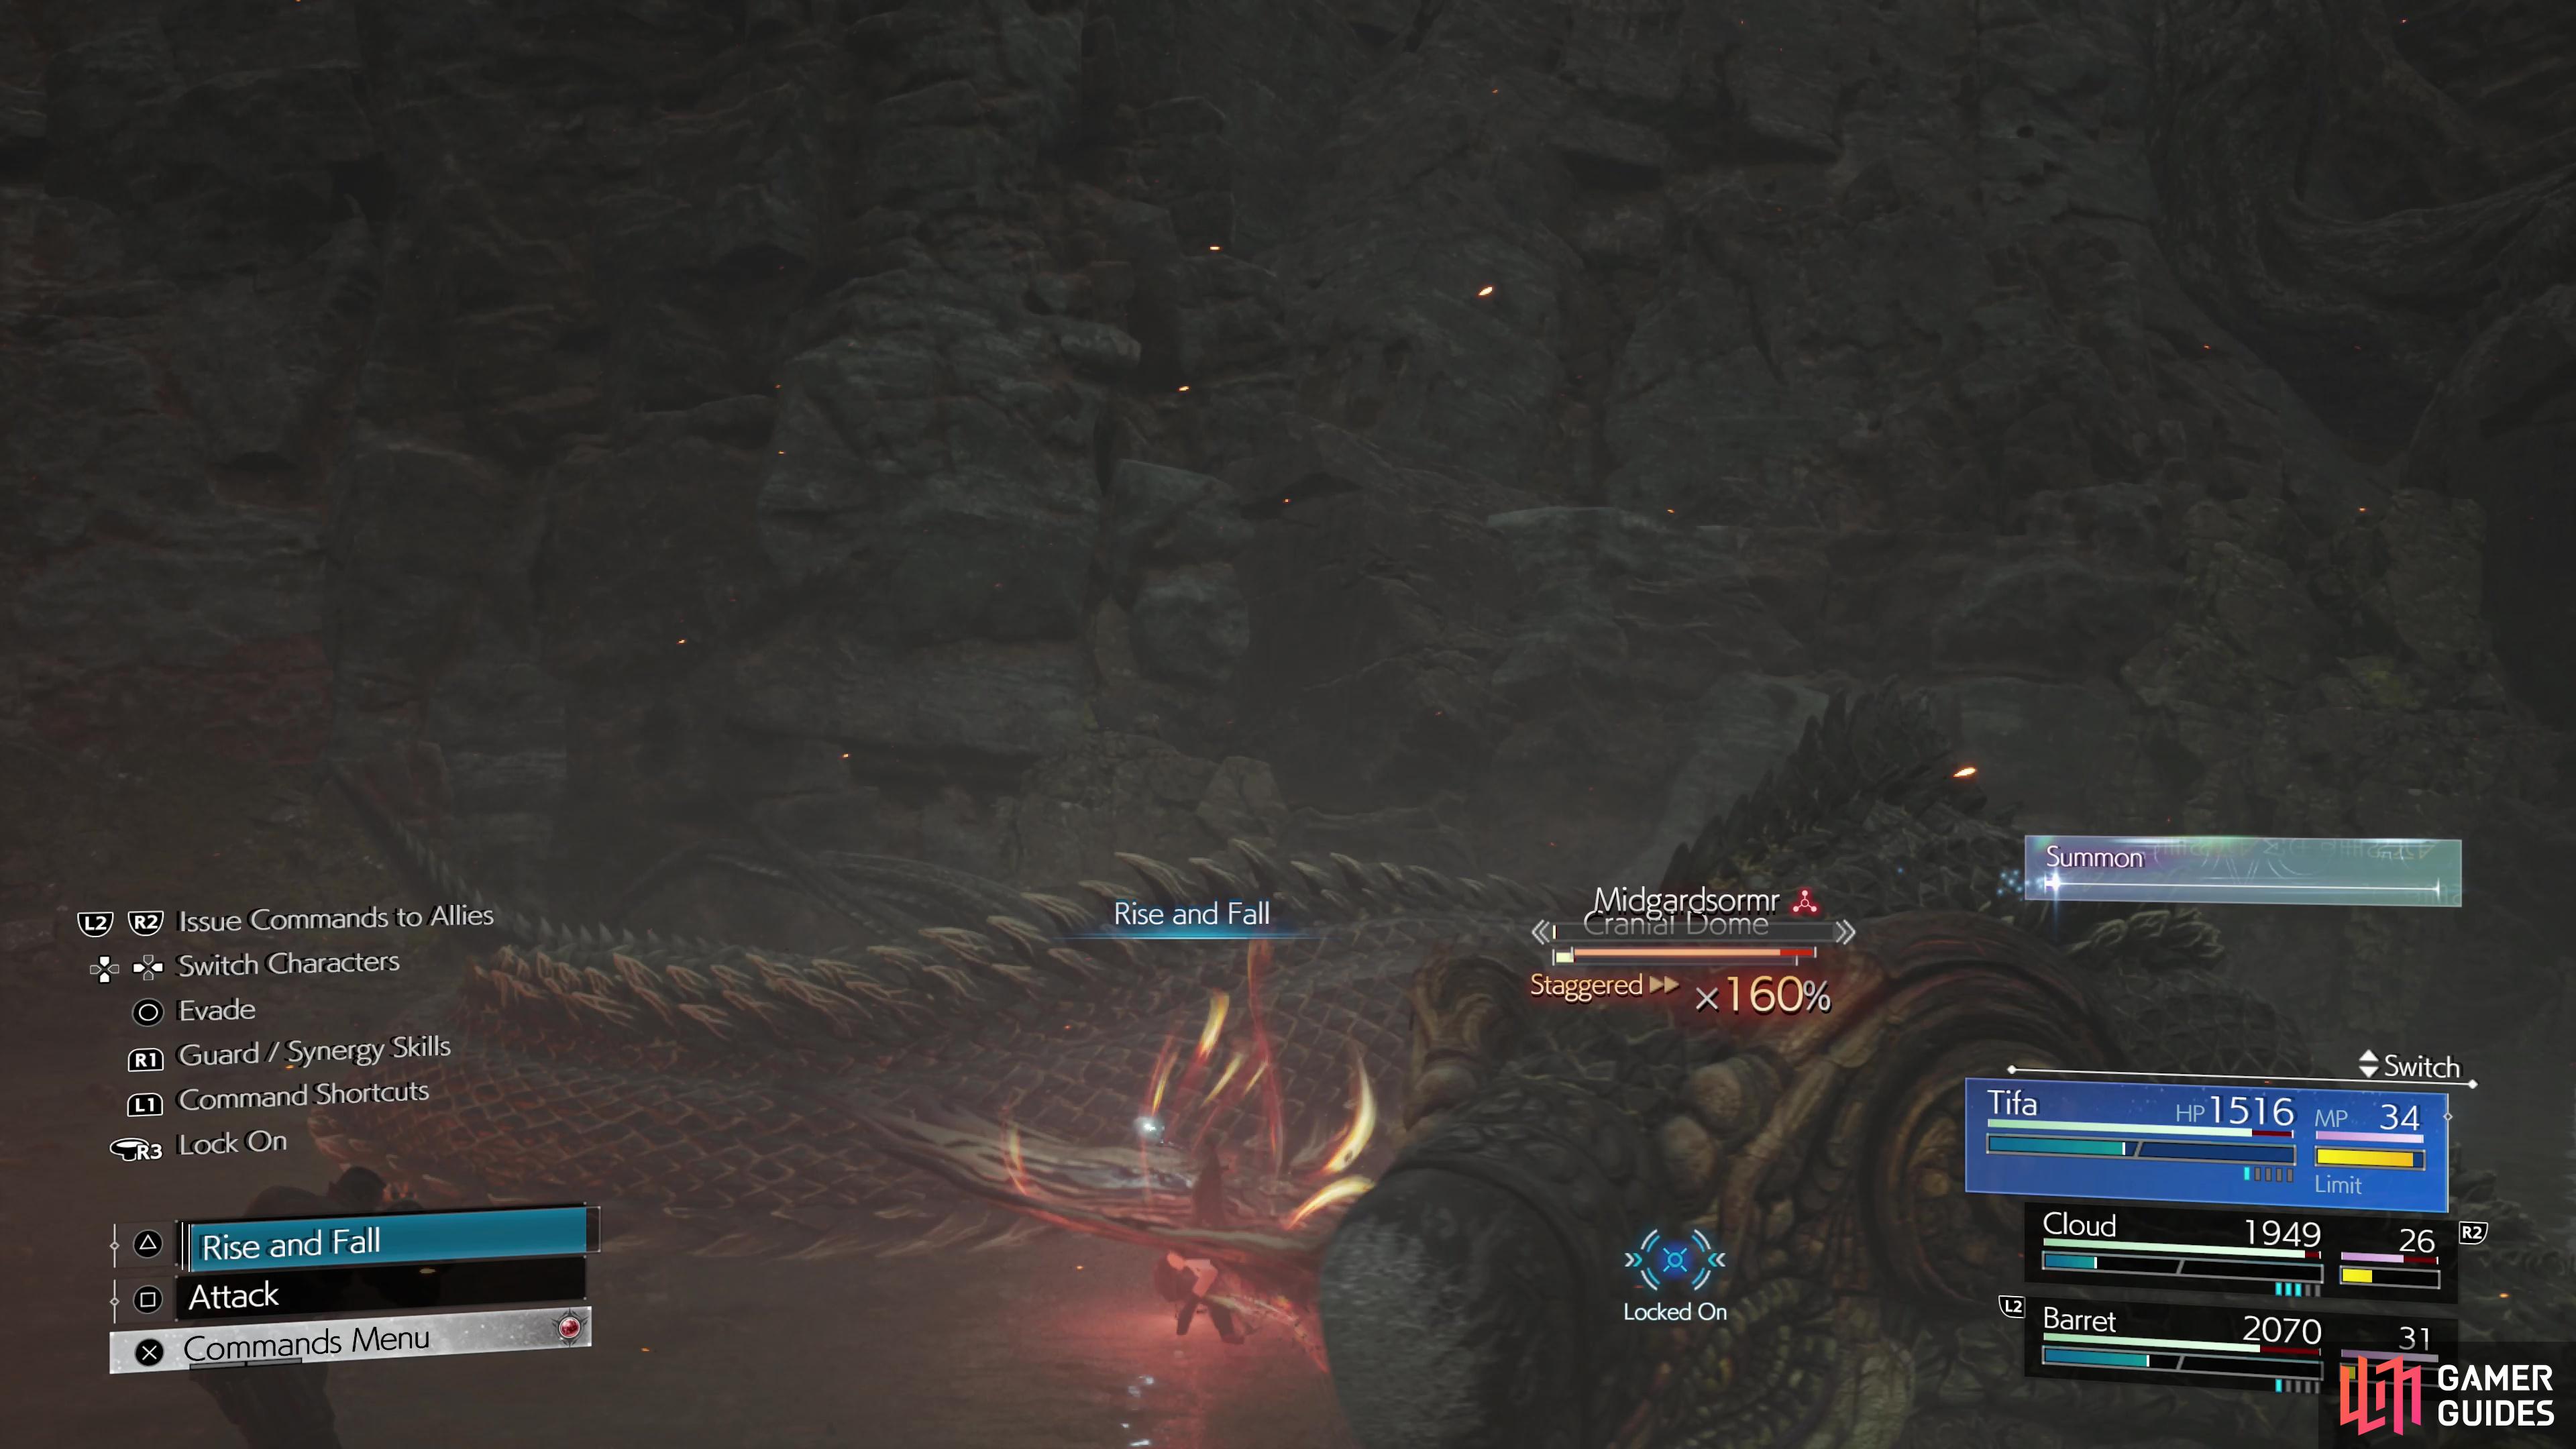
It’s also worth noting that you’ll be able to attack the Cranial Dome at the start of the second phase, and for the rest of the fight… and by “you’ll be able to” means “you’re forced to”. Its head is harder to hit than its body, but it has a habit of putting it close to the ground often. If you’re having issues scoring ranged attacks, remember that Cloud can shoot blade beams after dodging, and he can use Bullet Batter if Barret’s in the party. Tifa can use Soaring Flurry with Cloud and Heavenly Ascent with Barret, so she should have no trouble striking this new target, either.


(1 of 4) After the Beta cutscene, throw the kitchen sink at Midgarsormr, using any synergy abilities you may have charged.


After the Beta cutscene, throw the kitchen sink at Midgarsormr, using any synergy abilities you may have charged. (left), This will pressure - and hopefully subsequently stagger Midgarsormr, (right)
Defeating Midgardsormr and Surviving Beta
Once reduced to around 50% of its HP, Midgardsormr will announce the arrival of the final phase of the fight in no uncertain terms - by using its iconic Beta attack. Basically a flame nuke, the first one you get to dodge for free. The rest of the fight will be effectively timed, as Midgardsormr will eventually use Beta again, and you’ll either take the hit or manage to defeat or stagger the snake before this happens.
The worst part of this fight, surprisingly, isn’t Beta itself. It’s painful and will deal around 600 damage to the party (less if you block), but it’s survivable. What’s really annoying is that Midgardsormr will shake any “pressured” status if he goes below 50% HP in order to perform his cutscene Beta, potentially wasting your effort. This is why you should avoid using a Synergy Ability if Midgardsormr is near 50% HP - save it for after the Beta cutscene, which will aid in staggering and, hopefully, defeating this massive serpent.

The more things change, the more they stay the same.
No Comments