
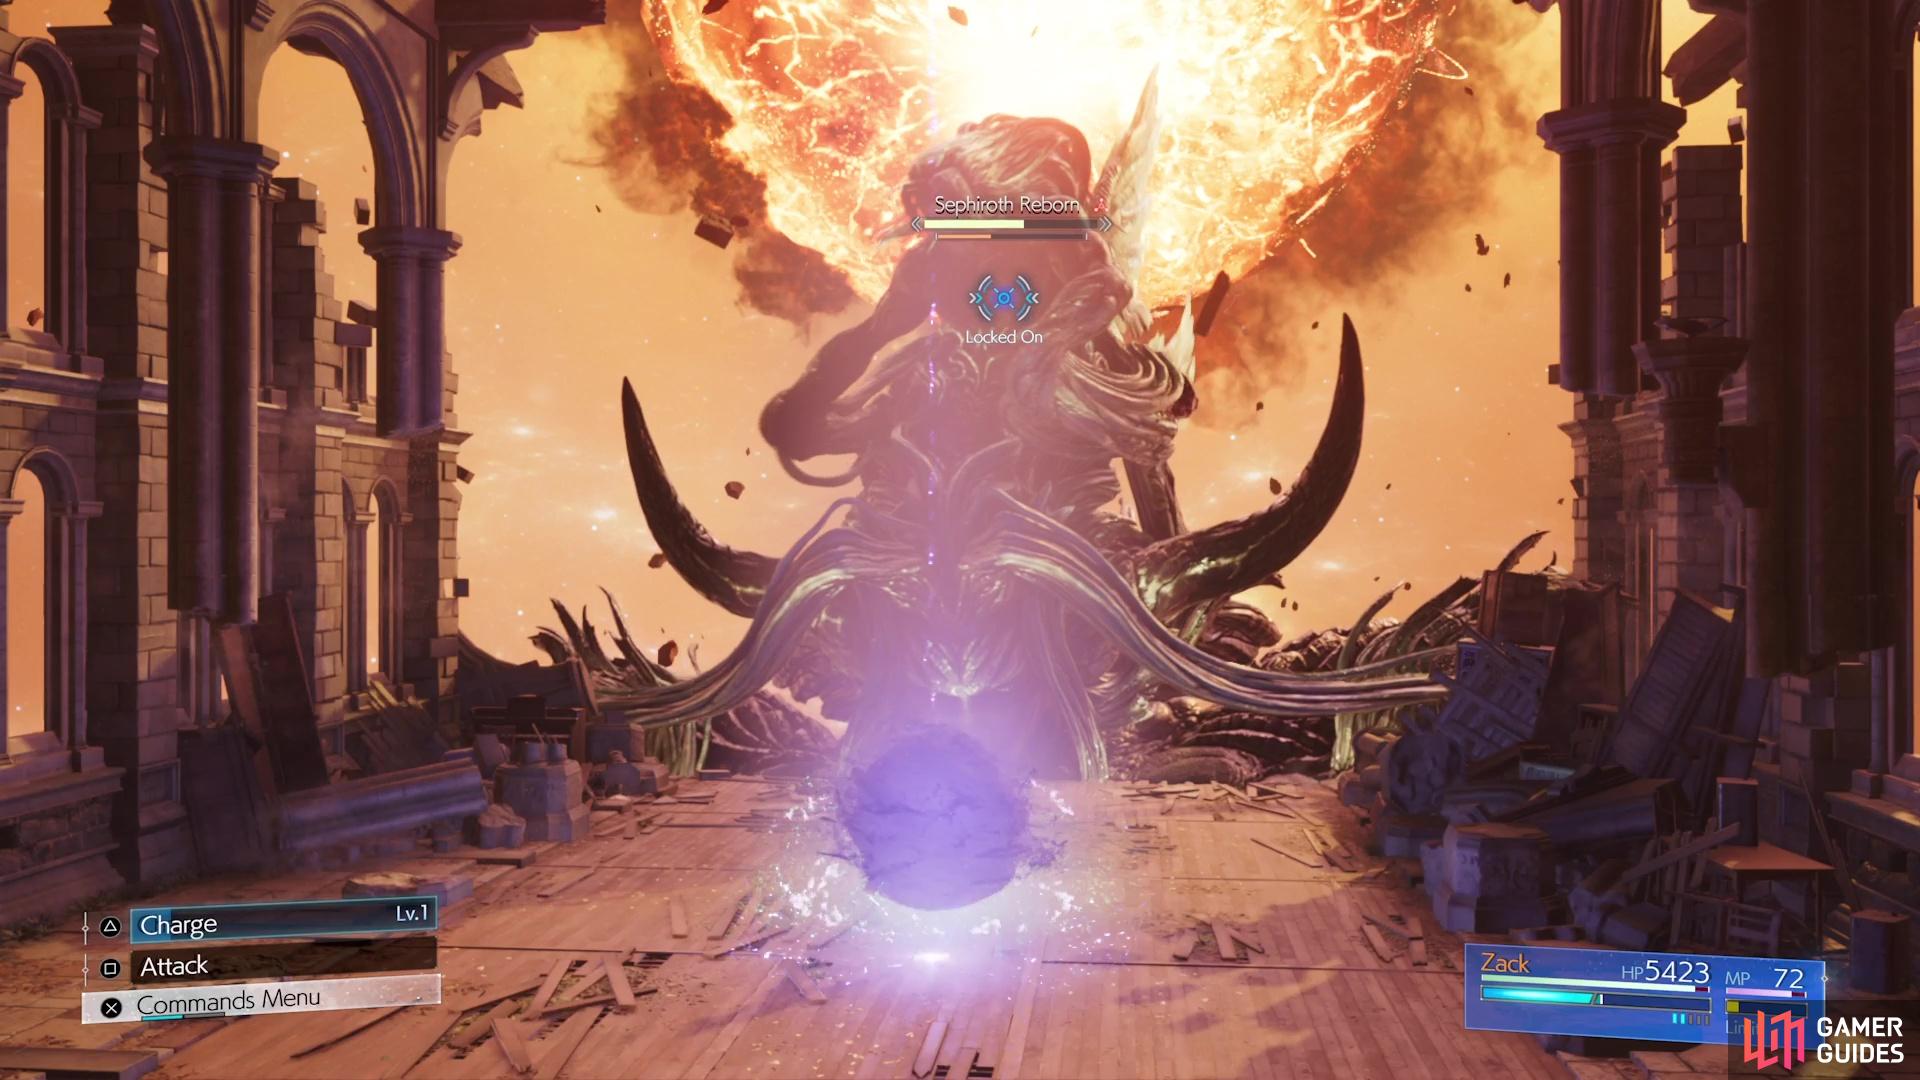
Upon reaching the final chapter of the main story, you will have to go through a series of bosses, one after another. First up is Jenova Lifeclinger, then you have Sephiroth, complete with a special guest party member. After defeating him, you’re thrown straight into a third boss fight, against Sephiroth Reborn. This will be a long fight that utilizes all of your party members in some way.
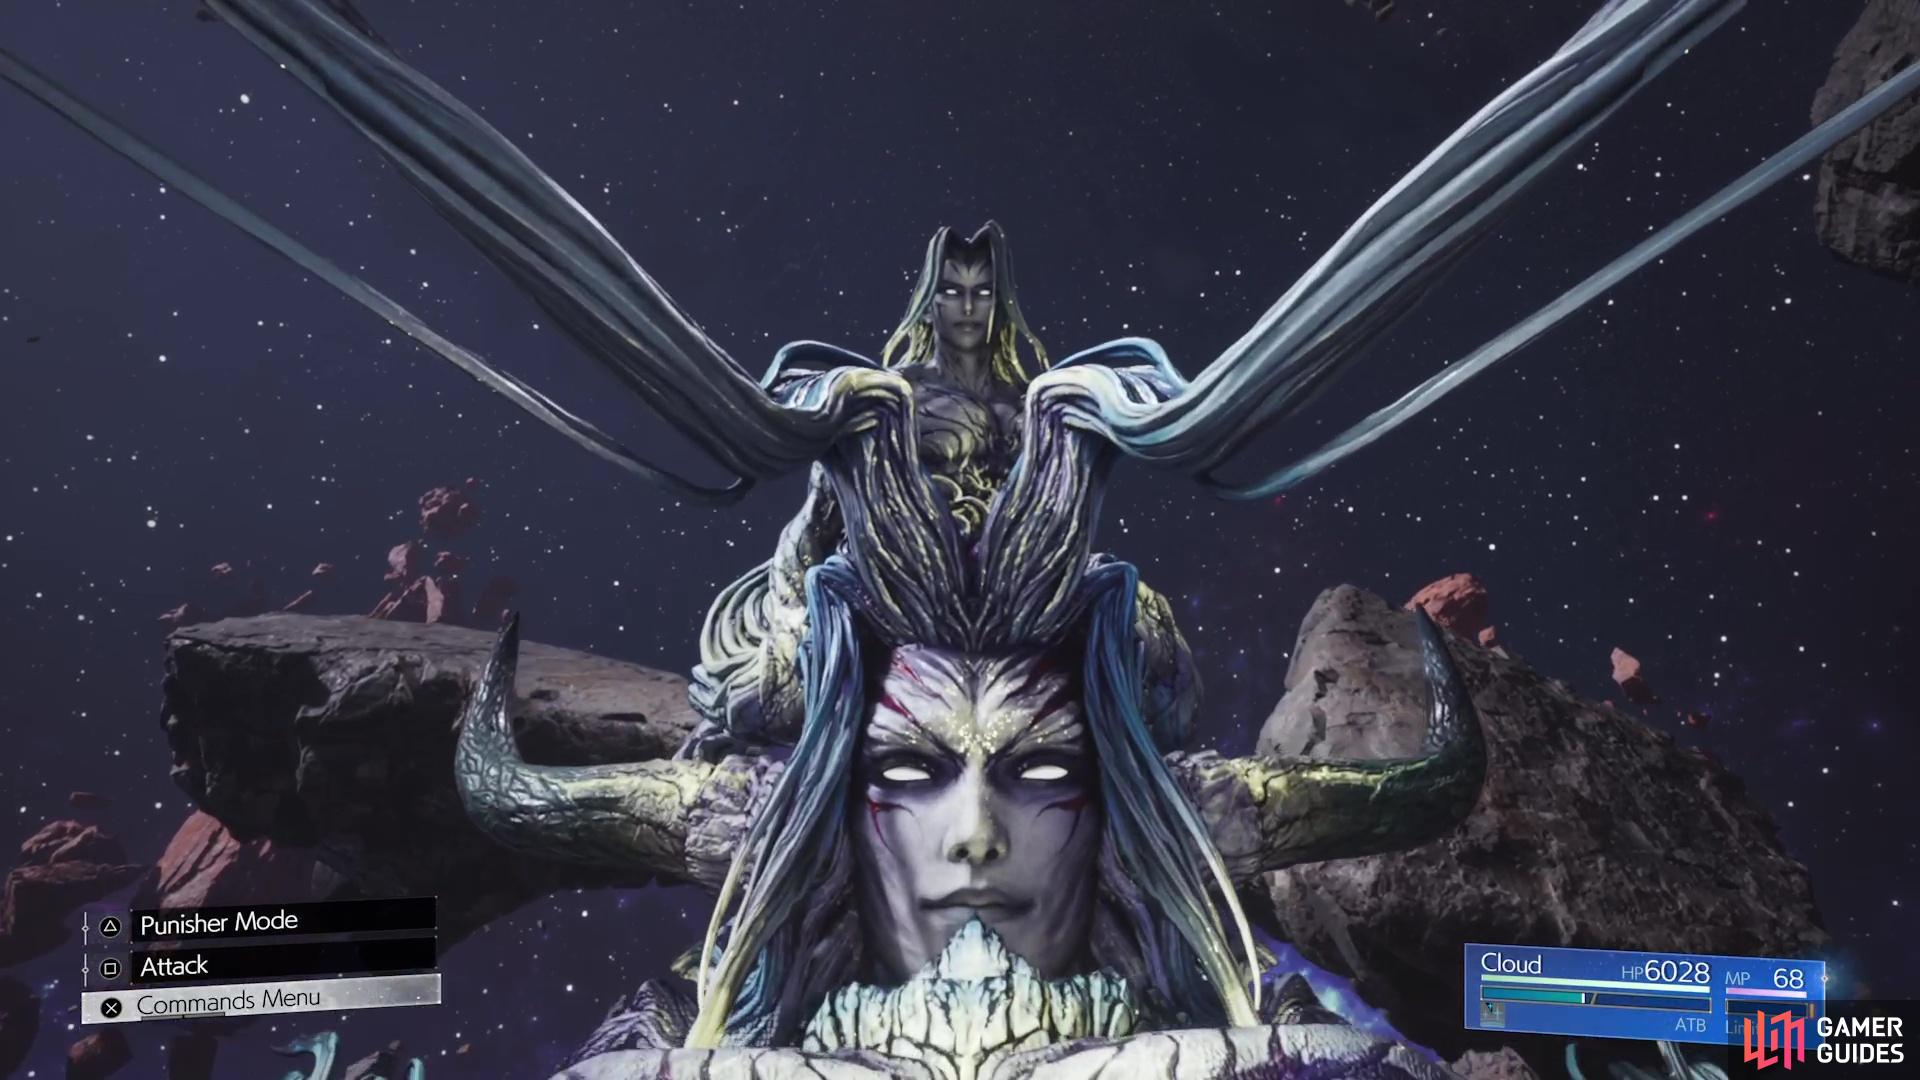
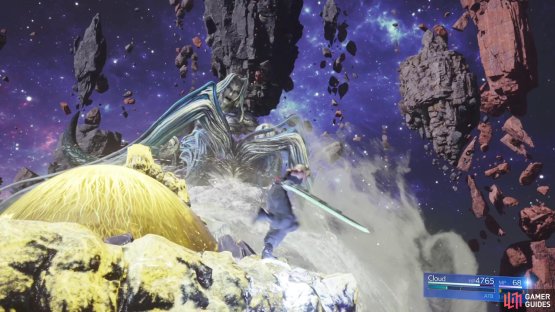
Sephiroth will turn into this montrosity for the penultimate boss.
All of Sephiroth Reborn’s Attacks
Similar to the Jenova Lifeclinger battle, this one will take place over many different phases, where you will be controlling different characters.
-
Whisper Vortex: Sephiroth will begin the Cloud solo portion with this move. He’ll slam his one arm onto the ground, causing a bunch of tornadoes to be summoned. The initial move hurts and if the tornadoes hit you, you’ll take damage from them, too.
-
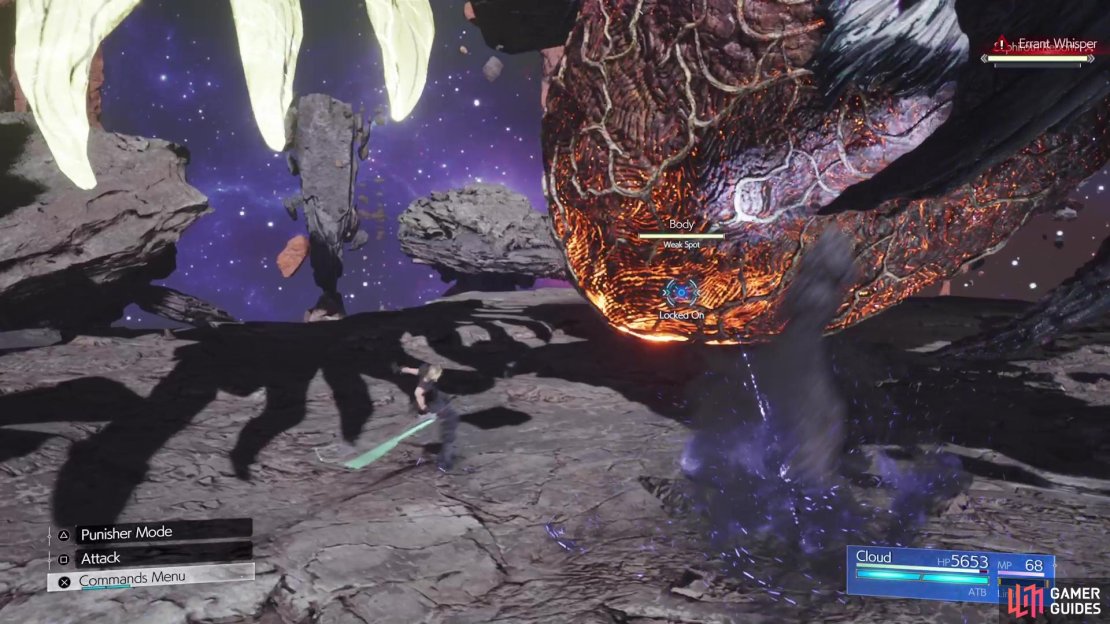
Errant Whisper:
 Unblockable. Sephiroth will summon Whispers, which will come out of the ground. These will track you, similar to
  Rude’s Spirit Geyser attack, so keep moving to avoid them.
 -
Hell’s Gate: A marker will appear on the ground, underneath your character and will track them as they move. Eventually, after a few seconds, a beam will come down and hit the ground, causing a small explosion. Just keep moving.
-
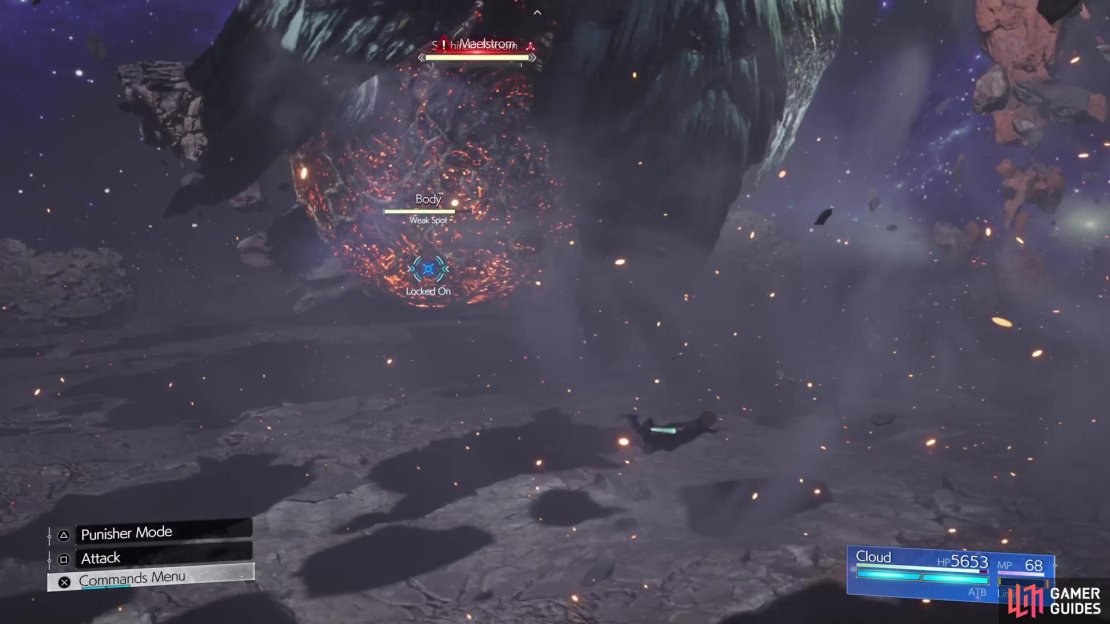
Maelstrom: Unblockable. Sephiroth will create a big gust of wind that blows you towards the far end of the arena. It doesn’t seem to do any damage, but is mostly meant to keep you away from the Body.
-
Interred Horror: He will create some glowing spots on the ground near your position, which will explode with energy after a few seconds. There will be three series of these in a row, so make sure you keep moving.

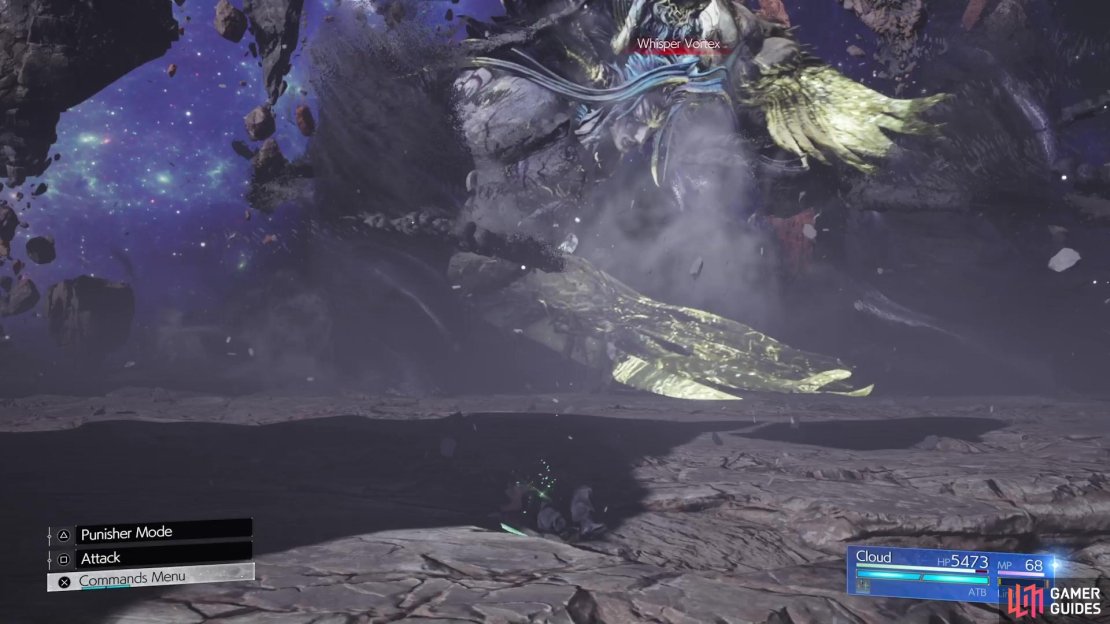
(1 of 4) Sephiroth opens with Whisper Vortex, where he pounds the ground and creates some tornadoes.
-
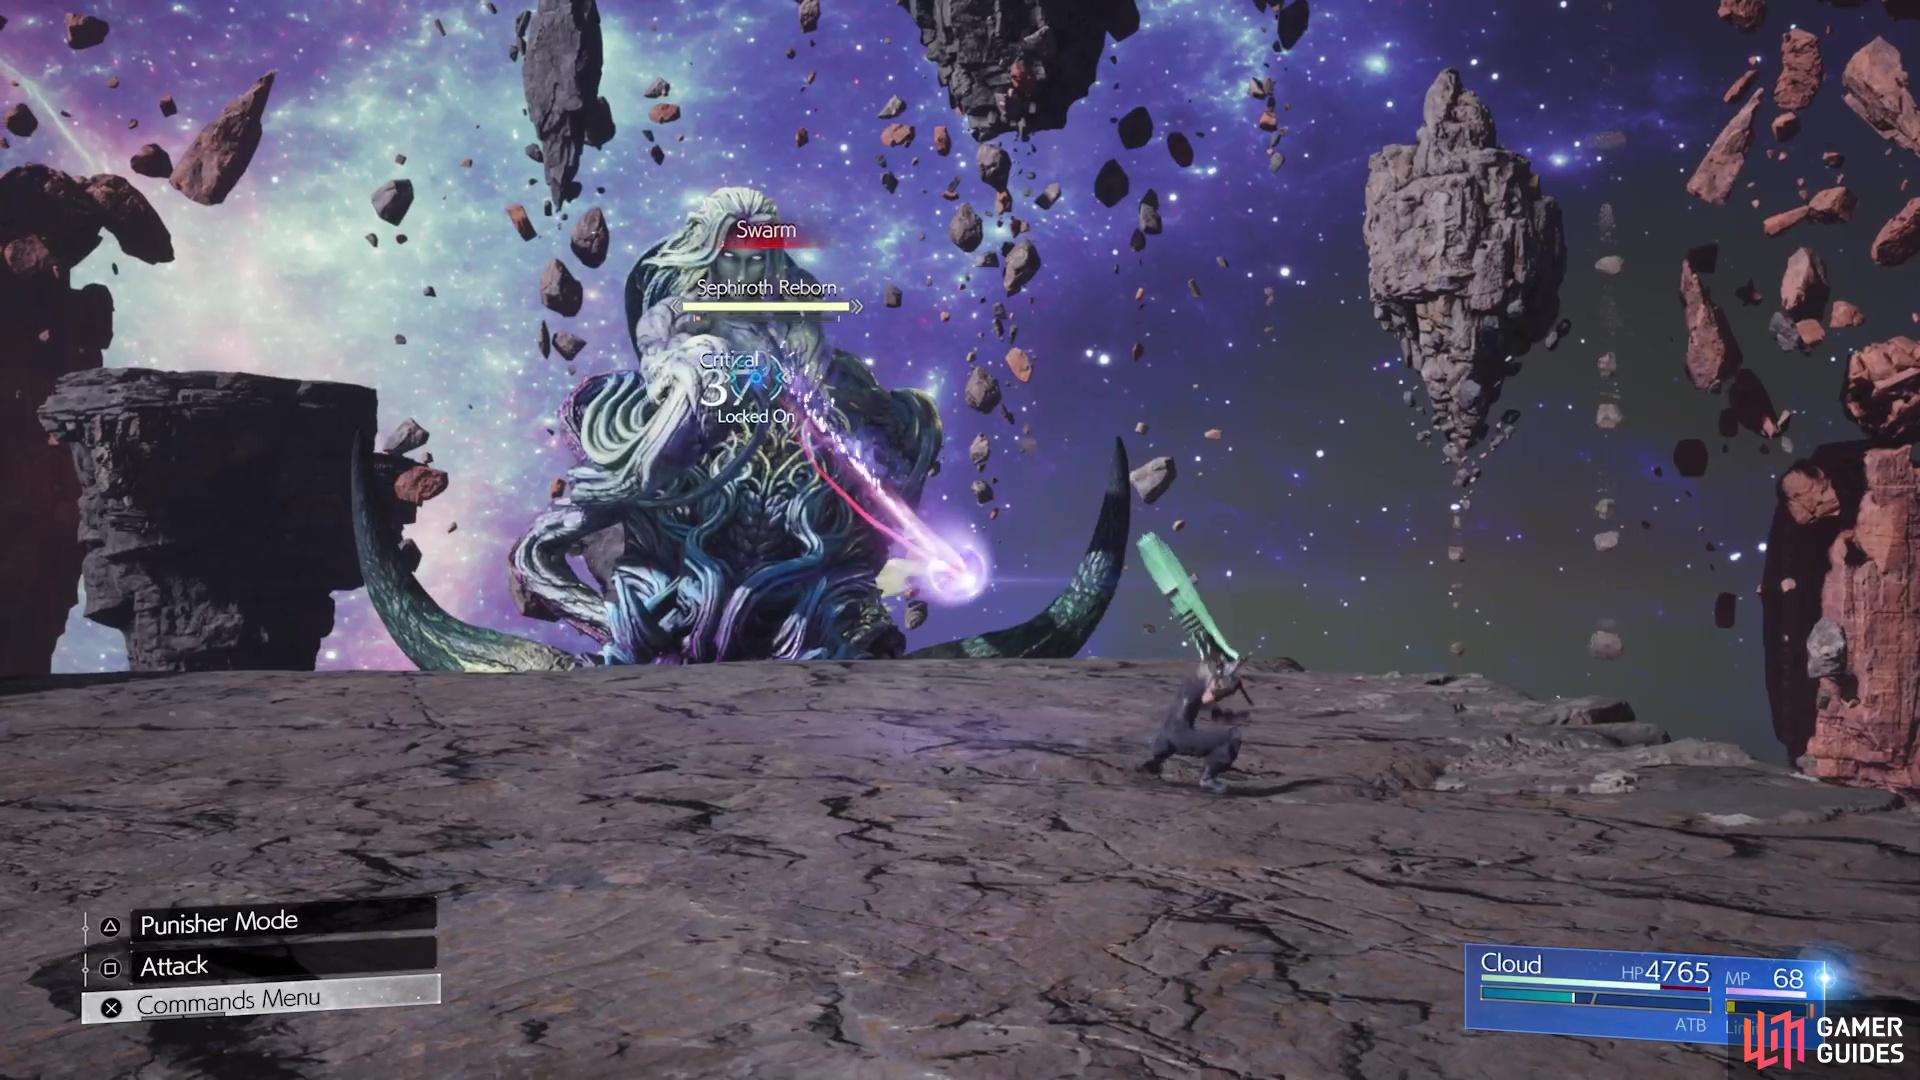
Swarm: Sephiroth shoots three projectiles at you, one after another. Not too hard to avoid, as long as you keep dodging.
-
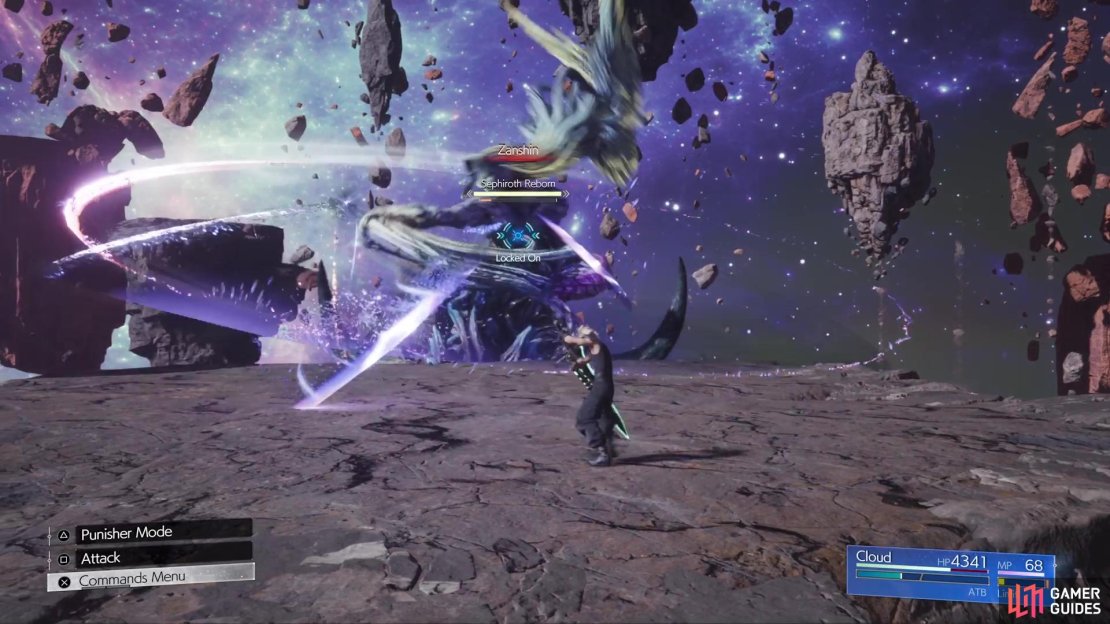
Zanshin: The boss will fire off two large sword-like beams at you. They will slightly home in on you, so be mindful of dodging them.
-
Apocalyptic Fire: A move that will occur when you’re in melee range, with Sephiroth causing an explosion right in front of him. Once you see the move’s name, simply back up some to avoid it.
-
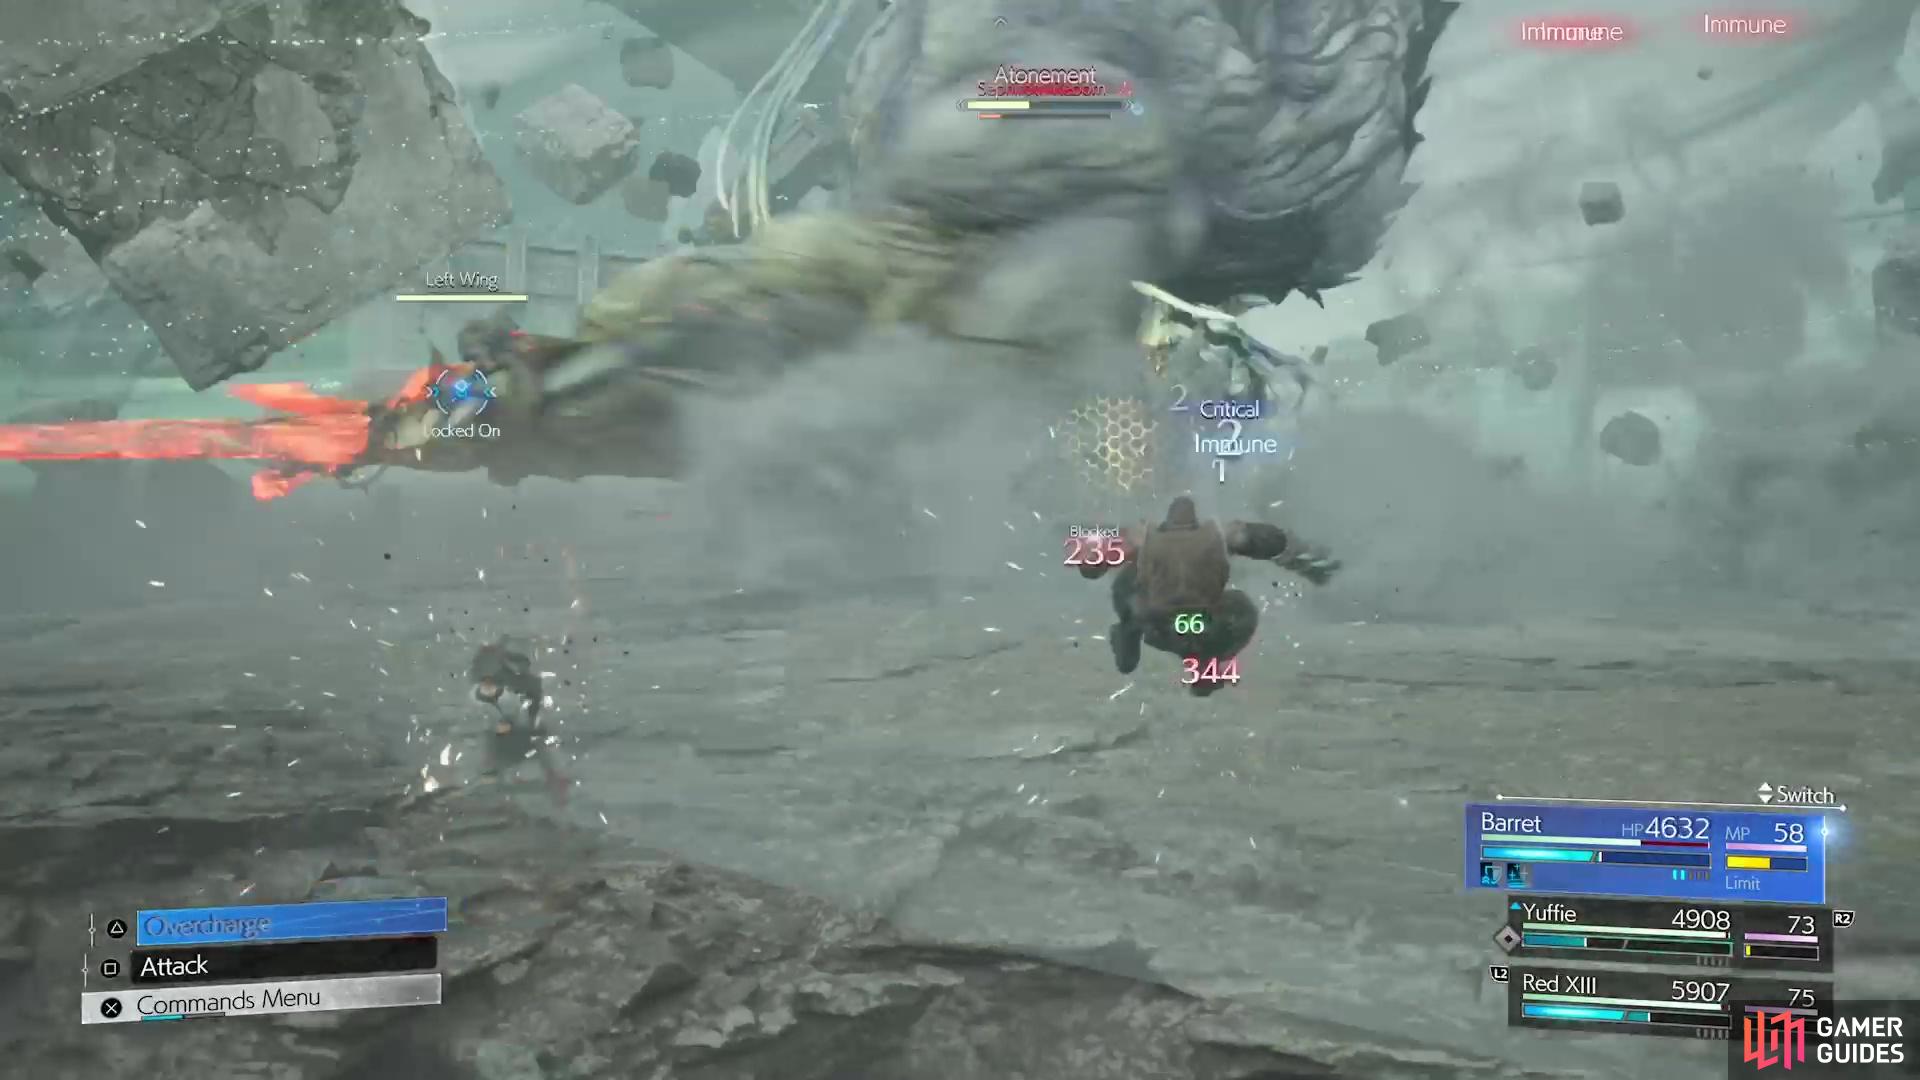
Atonement: Second phase. Sephiroth will smack the ground with one of his wings, damaging everyone. You will be able to attack the wing after it uses this move. In the fourth phase, this move is a sweep across the arena with one of the wings.
-
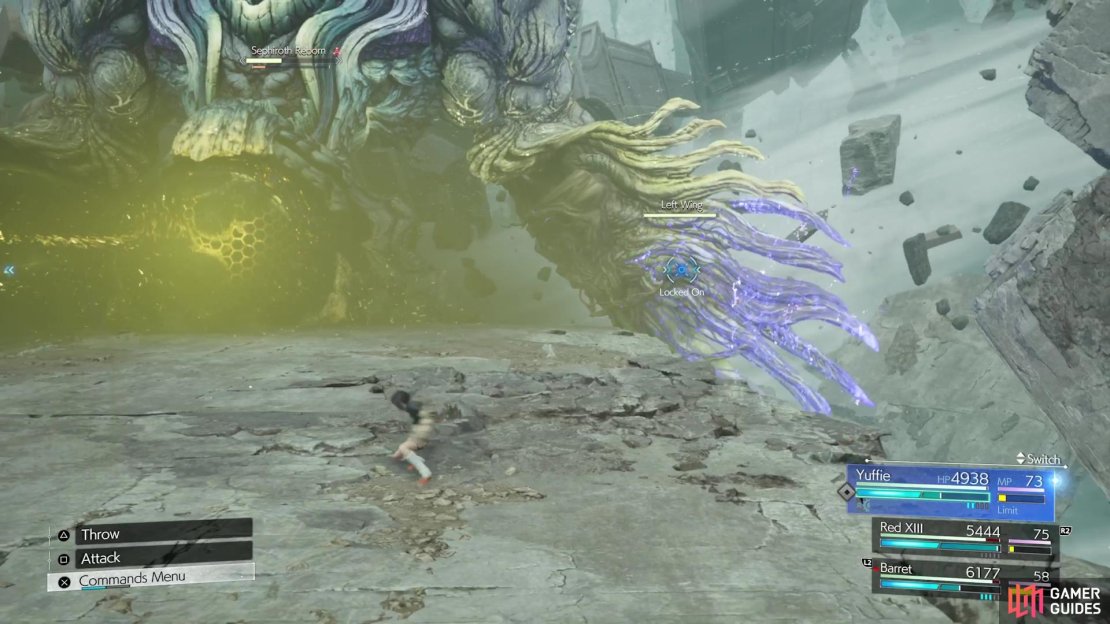
Spirit of Calamity: Second phase. Sephiroth extends his one wing out, enabling Bahamut Arisen to use Particle Charge. While the wing is out, you can damage it.
-
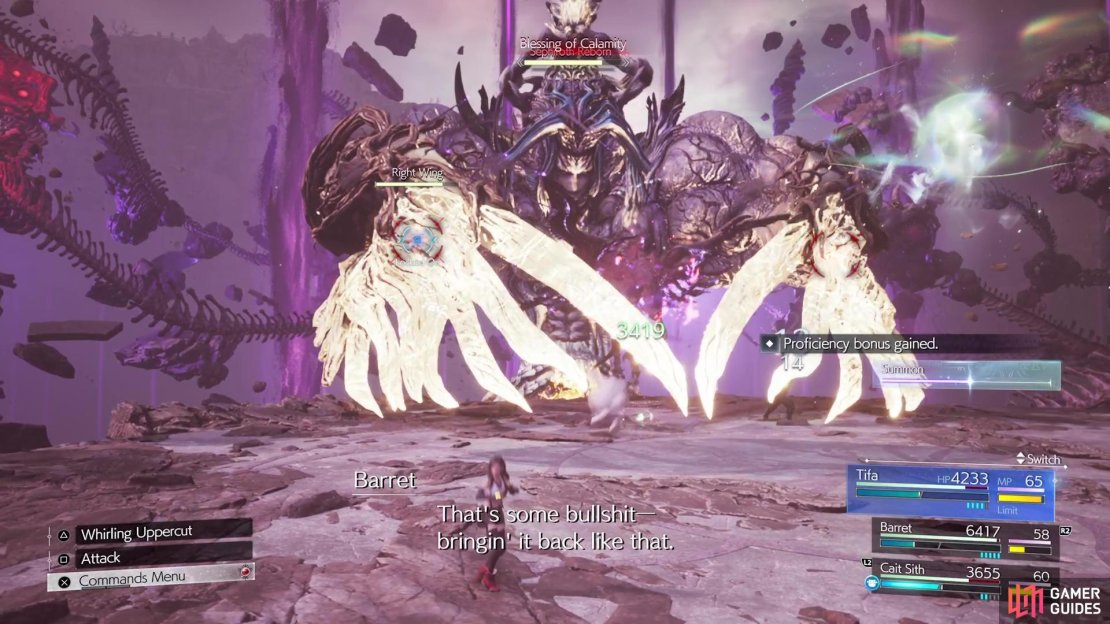
Blessing of Calamity: Second phase. If Bahamut Arisen Whisper is defeated, Sephiroth uses this to bring it back to life, as well as heal it. This ability exposes both wings for you to damage them.
-
Unholy Gate: Third phase. A more powerful version of Hell’s Gate. Instead of an immediate explosion, it will be delayed and the area it covers will be slightly bigger.


(1 of 3) Swarm is just three fireballs that are shot at you.
-
Zanshin Profaned: Third phase. A more powerful version of Zanshin. Sephiroth will fire a third beam, so you have three to dodge instead of just two.
-
Lacryma Deus: Third phase. Sephiroth will create some red lightning beam from his lower head, sweeping it across the ground not too far in front of him. Simply move away to avoid this. Can inflict
 Slow and
  Silence.
 -
Wail: Third phase. Sephiroth will produce a decent-sized orb that will slowly track you. Should it connect, then you will be immobile for some seconds, while he follows it up with Retribution. Treat this move like a grab move and keep moving to avoid it. Can also use the ring of flowers to turn it into an attack of your own.
-
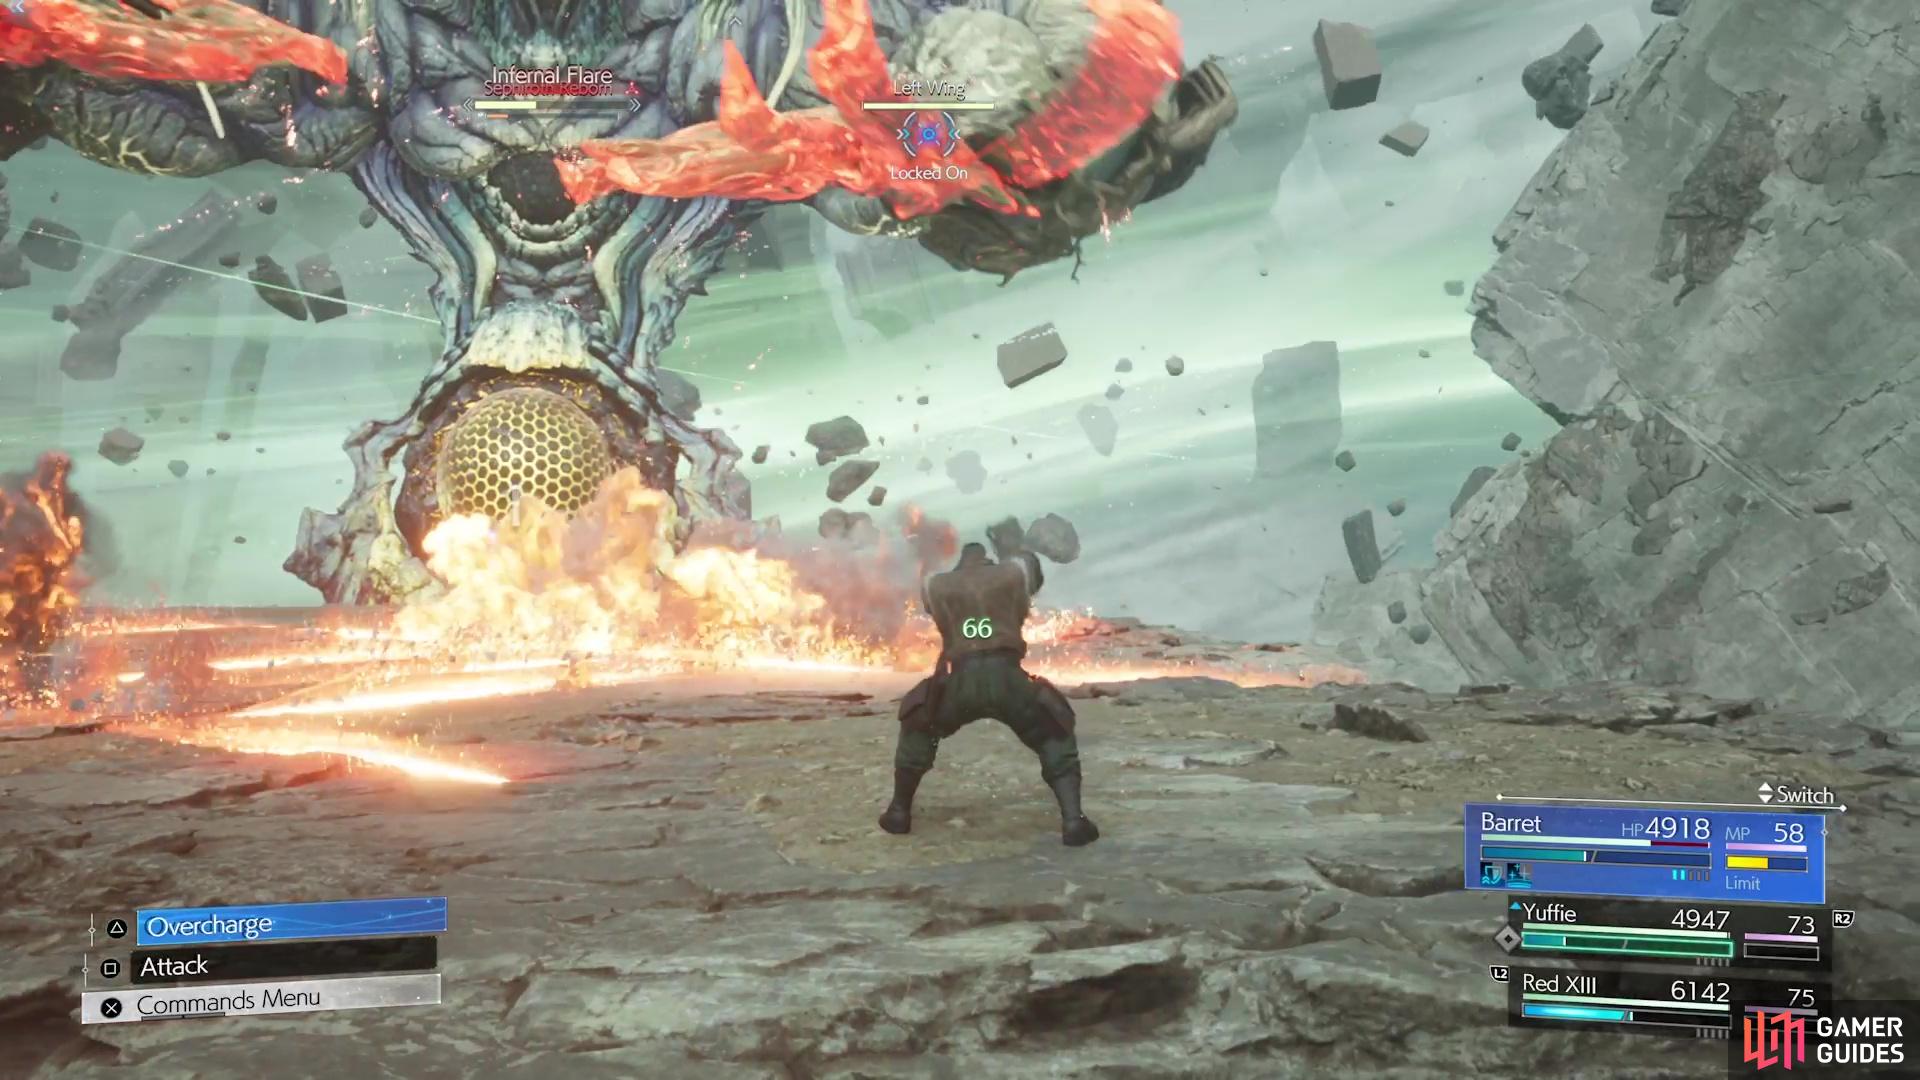
Infernal Flare: Fourth phase. Used when the wings are fire elemental. Explosions happen on the ground, which then split into four directions.
-
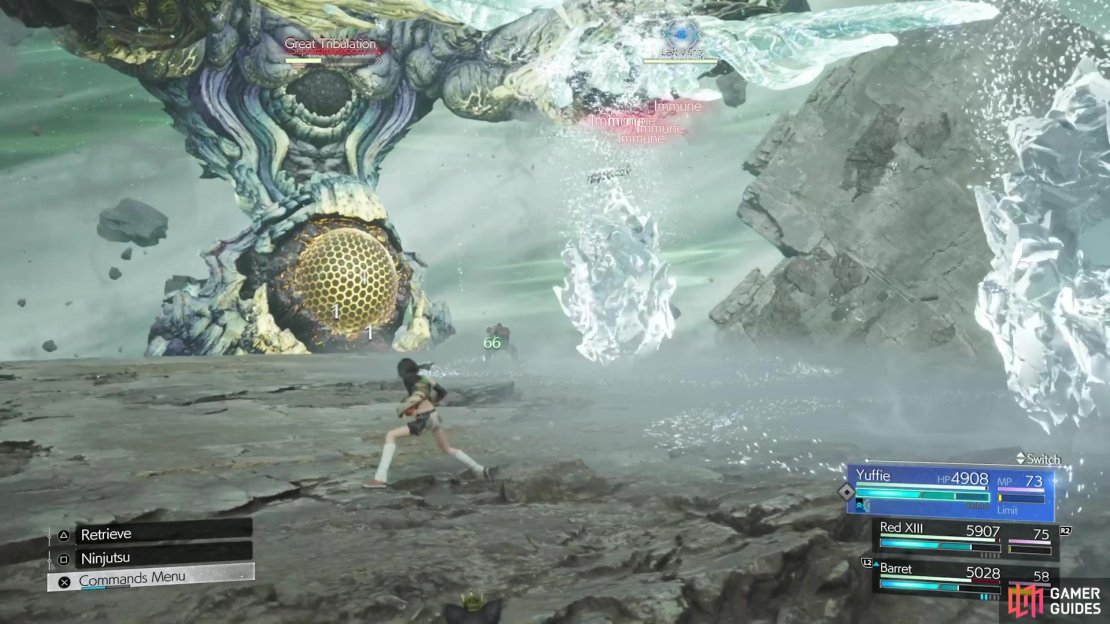
Great Tribulation: Fourth phase. Used when the wings are ice elemental. Sephiroth will drop large chunks of ice onto the ground, with the spots where they drop being shown briefly.
-
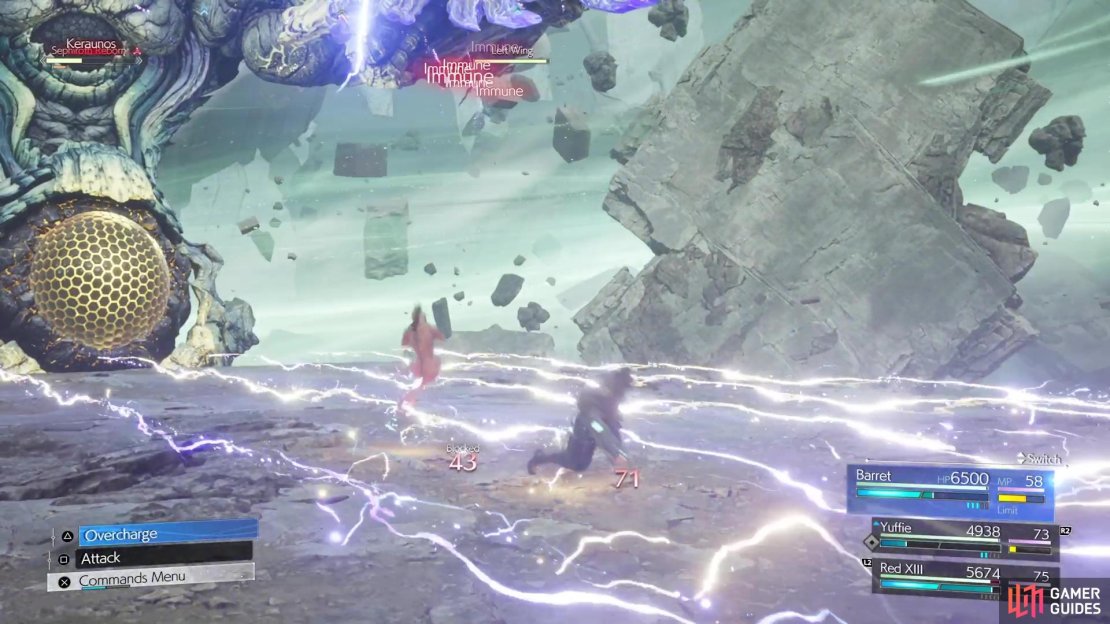
Keraunos: Fourth phase. Used when the wings are thunder elemental. Electricity will shoot across the ground in set lines, two times.
-
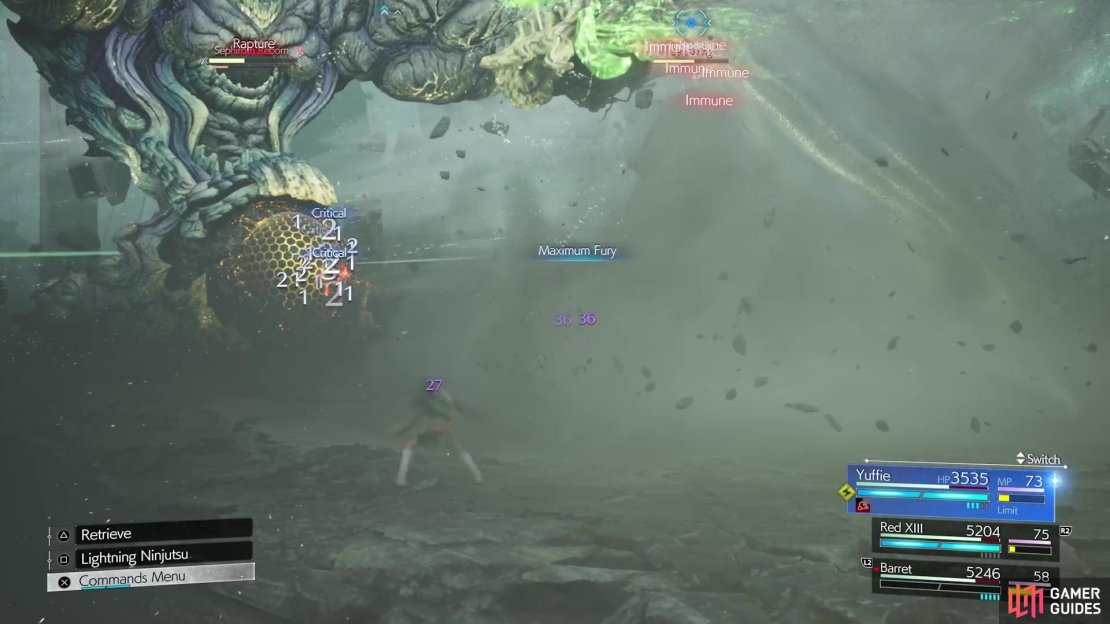
Rapture: Fourth phase. Used when the wings are wind elemental. Sephiroth will create a large tornado in the middle of the arena that slowly moves around. Not too difficult to avoid.

(1 of 4) Each element in the fourth phase will have its own attack, like fire having Infernal Flare.
-
Profane: Fourth phase. Sephiroth will shoot a large cloud of poisonous gas across the arena. Can poison characters.
-
Heartless Angel: Fourth phase, after the Core is destroyed. Unblockable and unavoidable. Will reduce all characters’ HP to 1.
Sephiroth Reborn Boss Strategy
As mentioned above, this boss will take place over a number of phases, where all of your party members will participate in some way. Because of that, let’s split up this page into some more sections.
Sephiroth Reborn - First Phase
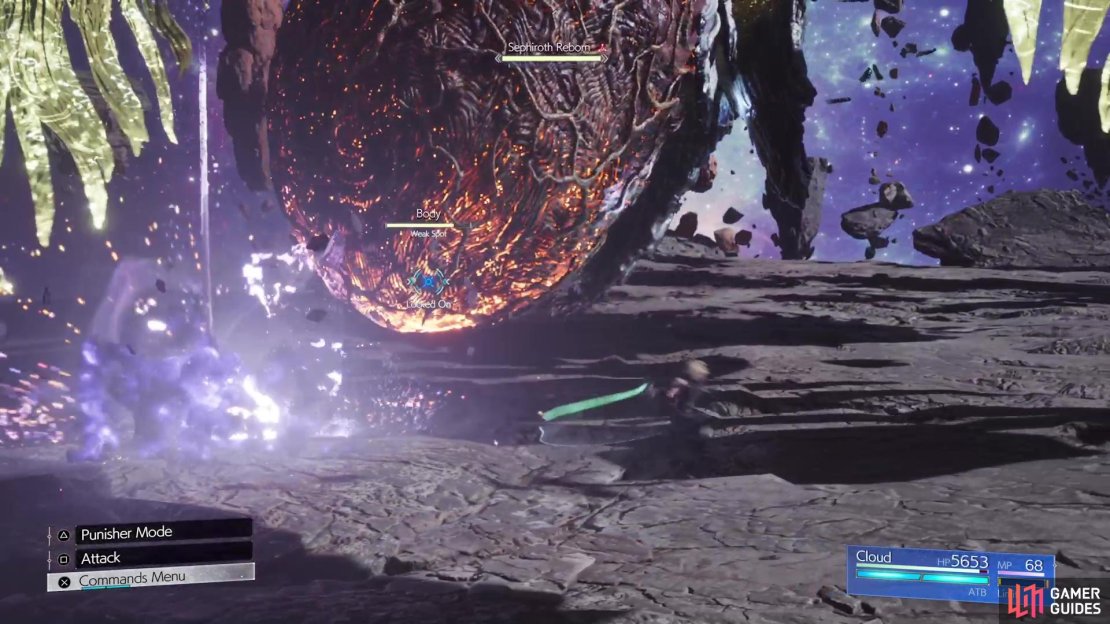
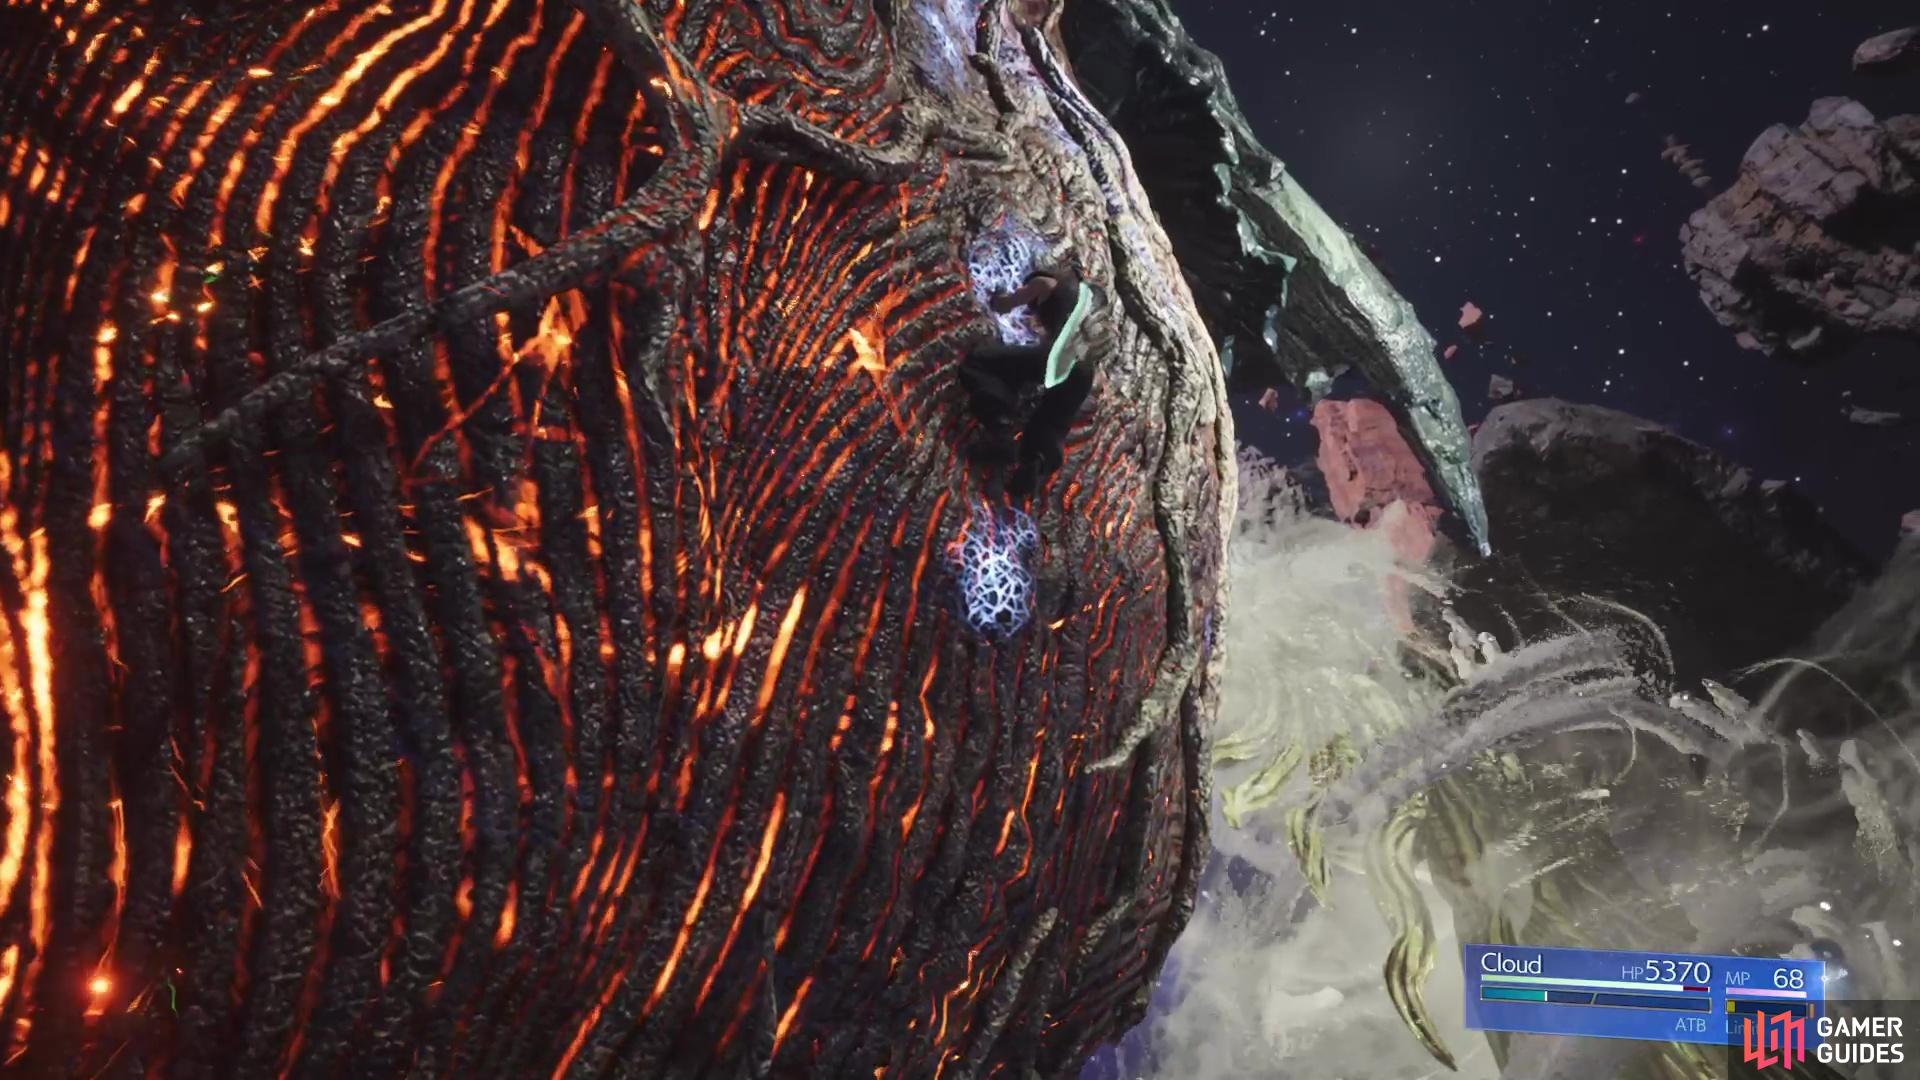
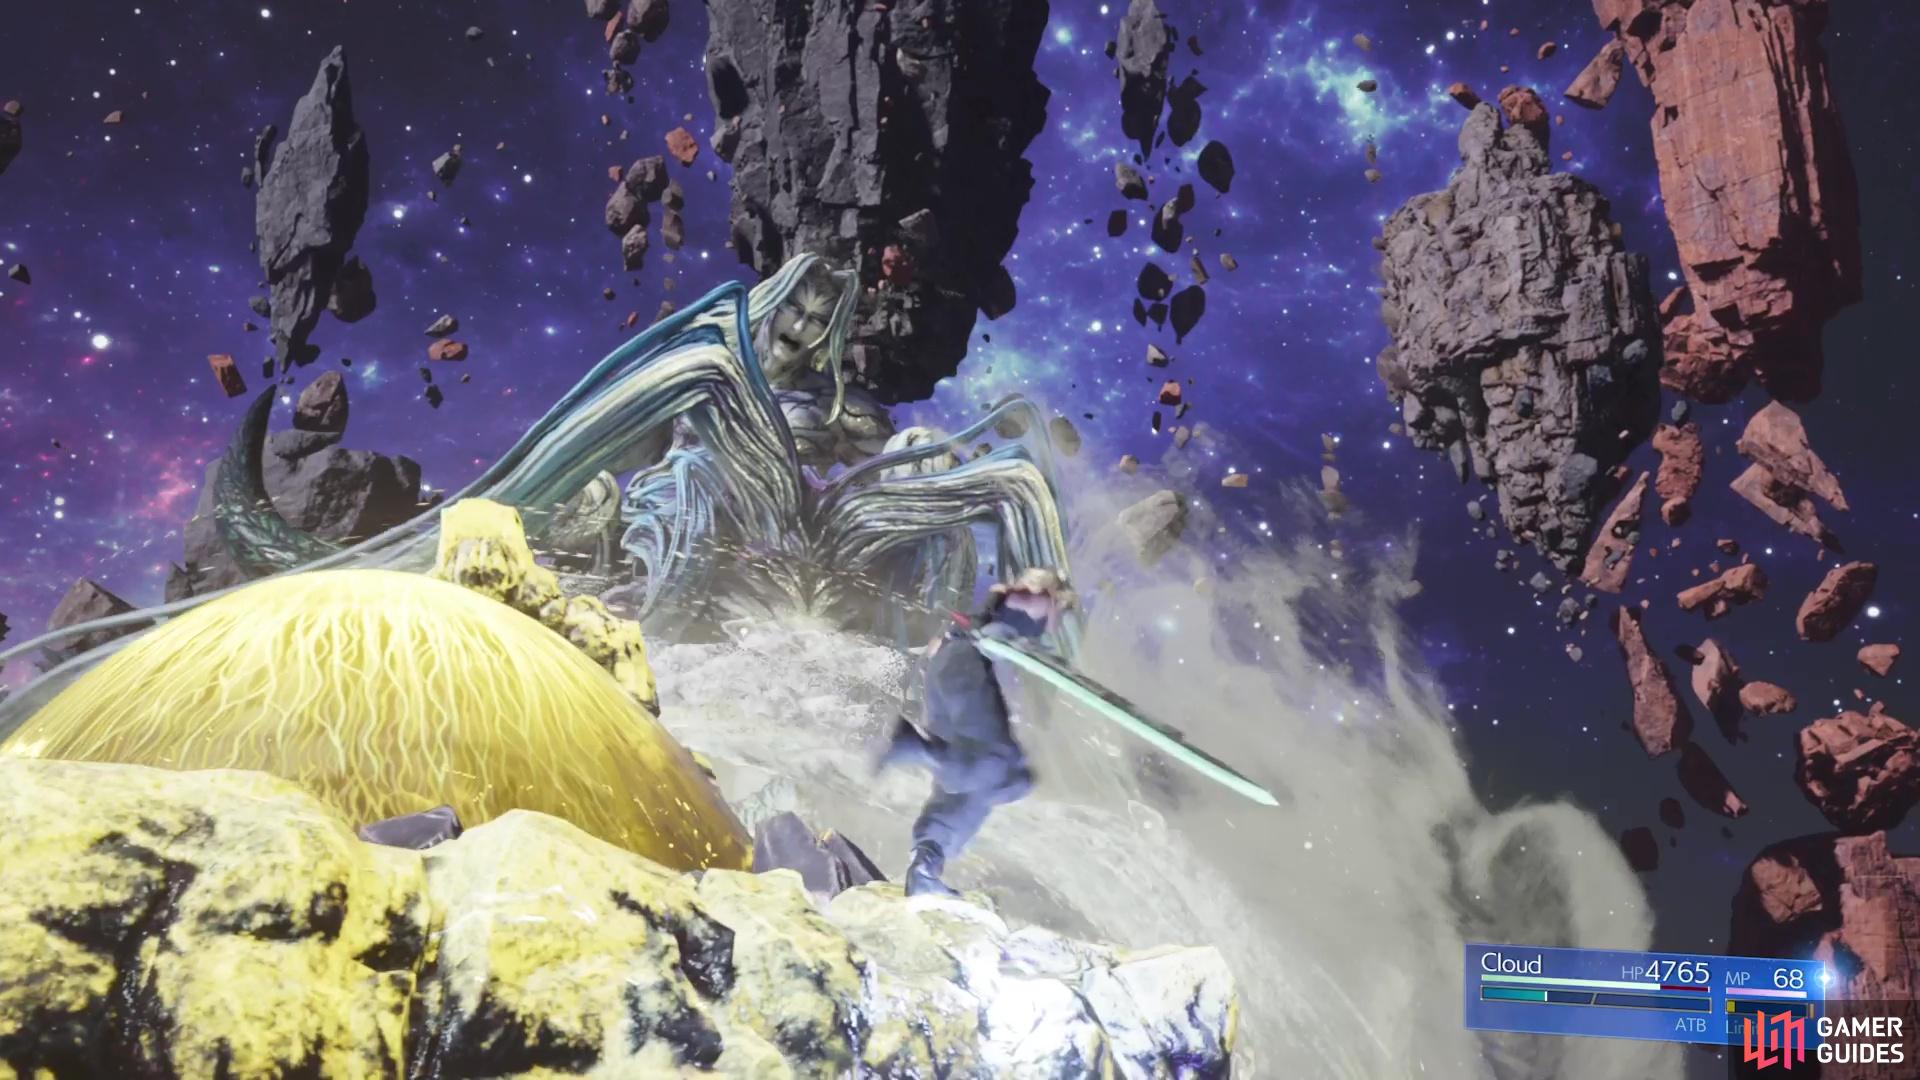
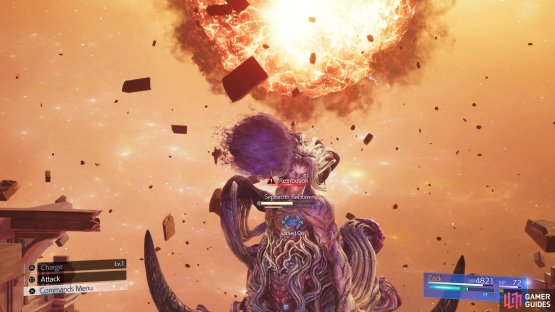
The beginning of the fight will have Cloud alone with the giant being. There will actually be split into two phases, with the first one being real simple. The goal here is to destroy the Body part that is on the very bottom of the boss. Of course, Sephiroth won’t make that easy, since he will use plenty of different attacks to try and stop you. The most annoying attack during this first portion is Whisper Vortex, where Sephiroth will smack the ground and create a bunch of tornadoes. While the initial attack hitting the ground can hurt, you definitely don’t want to touch any of the tornadoes, as they hurt more.
They seem to move in patterns, though, so you could potentially bypass them if you want. However, it might be wise to stay back and avoid them at all costs. The other attacks he can toss at you in this stage can pretty much be dodged if you simply keep moving. There is one more move that you might see, called Maelstrom, where Sephiroth will just blow you back away from him, towards the far side of the arena. It doesn’t do any damage, but it’s meant to keep you away from his weak point. Once you deplete the Body’s HP, there will be a cutscene and you’ll have to climb up the main portion of the boss.

(1 of 2) After depleting the Body’s HP in the first part, you’ll have to do a little climbing.
After depleting the Body’s HP in the first part, you’ll have to do a little climbing. (left), Go right at the second part of the climbing section. (right)
Nothing notable goes on during this part, except you’ll need to move right after the first bit of climbing. This will lead to the second portion of the first phase, in which you fight the main boss now. Here, he will gain a few new moves, while losing access to others. Hell’s Gate and Interred Horror seem to be the only old moves retained from the first portion, as Sephiroth won’t be using Maelstrom, Whisper Vortex nor Errant Whisper during this section. The other moves aren’t really all too dangerous, either, which are Swarm, Zanshin and Apocalyptic Fire.
The last of those latter three is only used when you’re up close to the boss, so if you see the name pop up, move far enough away to avoid taking damage. At this point, the Cloud solo section turns into a pretty straightforward fight, so just dodge the attacks and get in close to attack. The goal is to build ATB for something like ![]() Focused Thrust, since the little bit extra build-up will inch you closer towards the stagger. Once he’s staggered, then you can do Braver and maybe
Focused Thrust, since the little bit extra build-up will inch you closer towards the stagger. Once he’s staggered, then you can do Braver and maybe ![]() Infinity’s End for big damage. The first phase will end at around 70-75% HP remaining.
Infinity’s End for big damage. The first phase will end at around 70-75% HP remaining.
Sephiroth Reborn - Second Phase
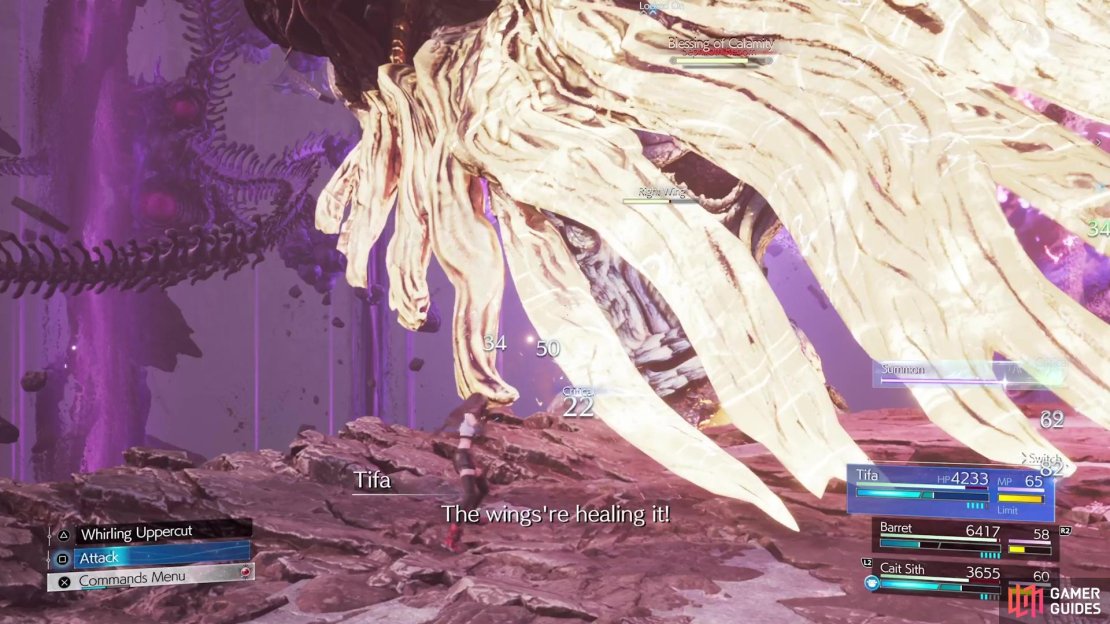
For the second phase, you will be fighting Sephy with ![]() Cait Sith and two other party members determined by your relationship rankings. Immediately upon the phase beginning, he will summon a Bahamut Arisen Whisper, which will act pretty much like the Bahamut Arisen summon battle. You’ll want to make sure your health is topped up at all times (or at least above 3,500, just in case), as the Whisper will use Gigaflare pretty early into the fight. This will probably do around 2,000-2,500 damage to your entire party, which is why you want the higher health. It’s unclear if he can use Gigaflare outside of that instance.
Cait Sith and two other party members determined by your relationship rankings. Immediately upon the phase beginning, he will summon a Bahamut Arisen Whisper, which will act pretty much like the Bahamut Arisen summon battle. You’ll want to make sure your health is topped up at all times (or at least above 3,500, just in case), as the Whisper will use Gigaflare pretty early into the fight. This will probably do around 2,000-2,500 damage to your entire party, which is why you want the higher health. It’s unclear if he can use Gigaflare outside of that instance.
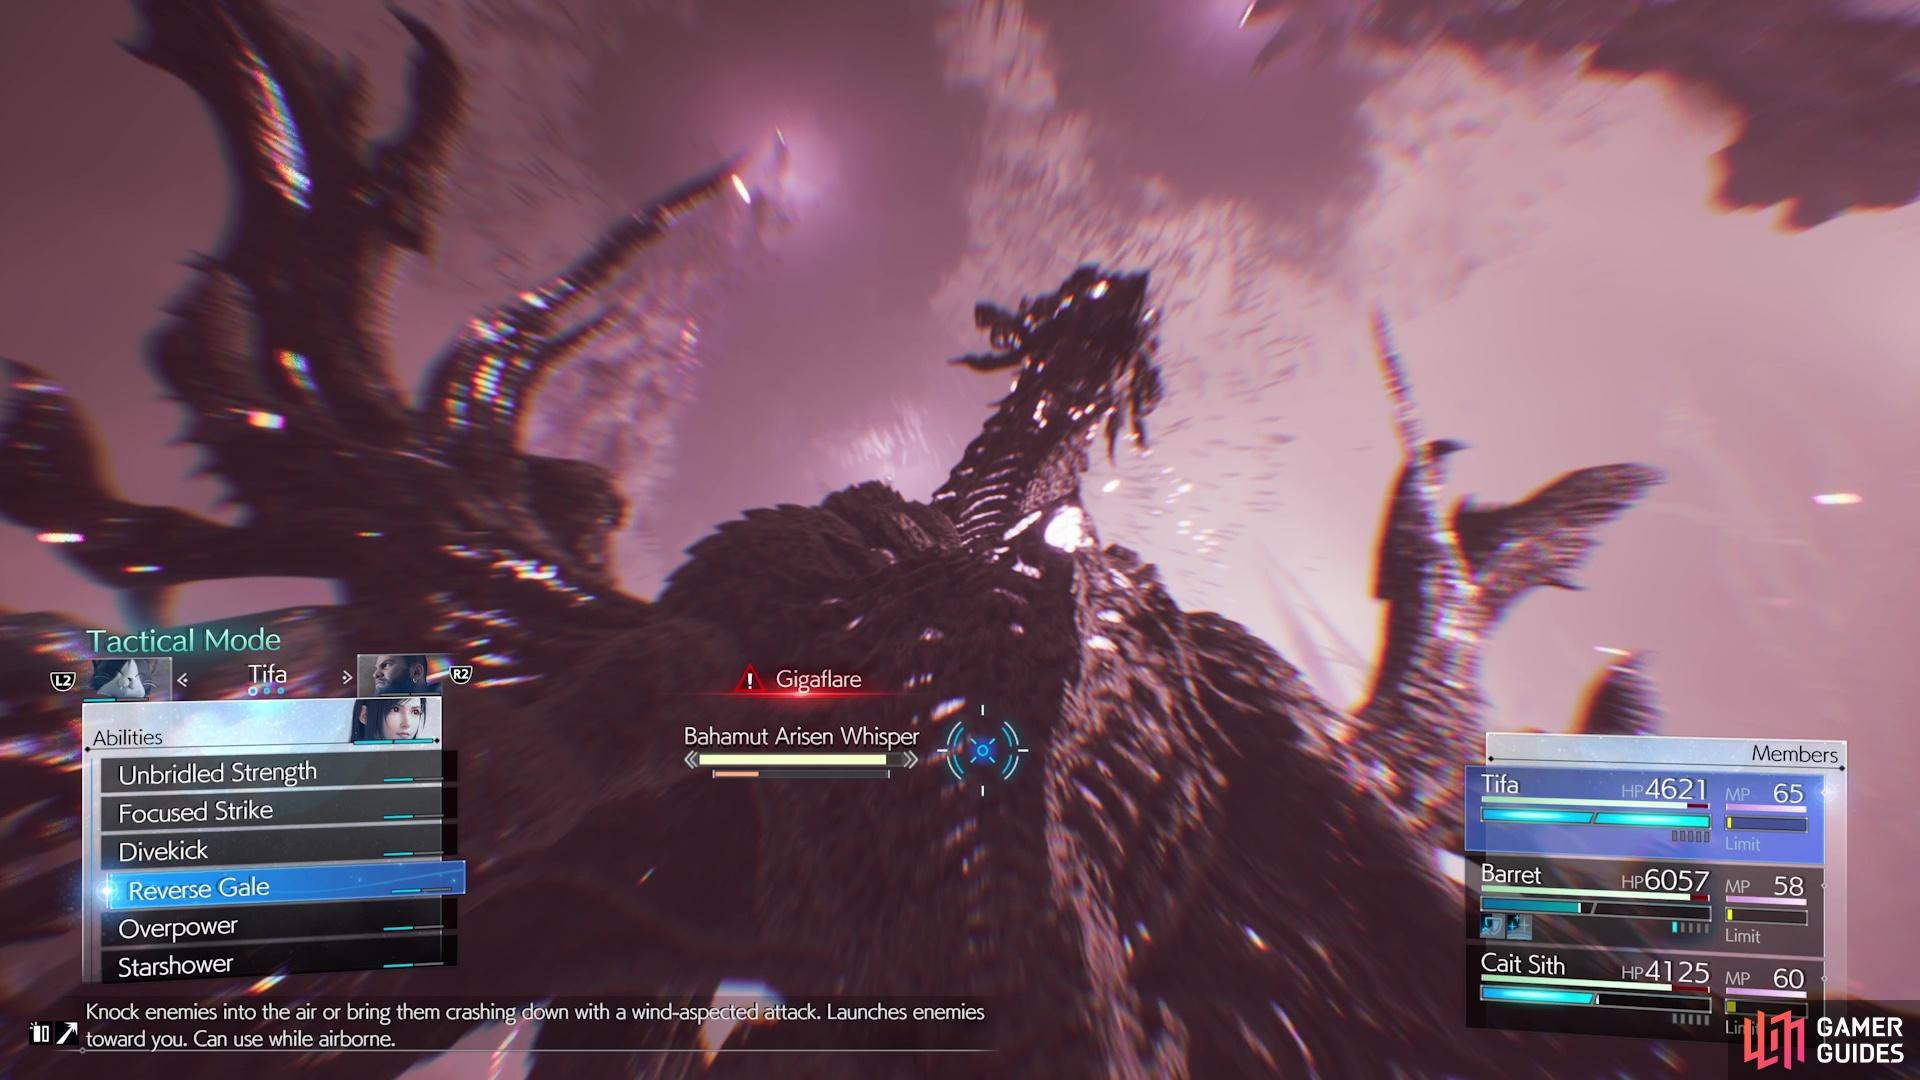

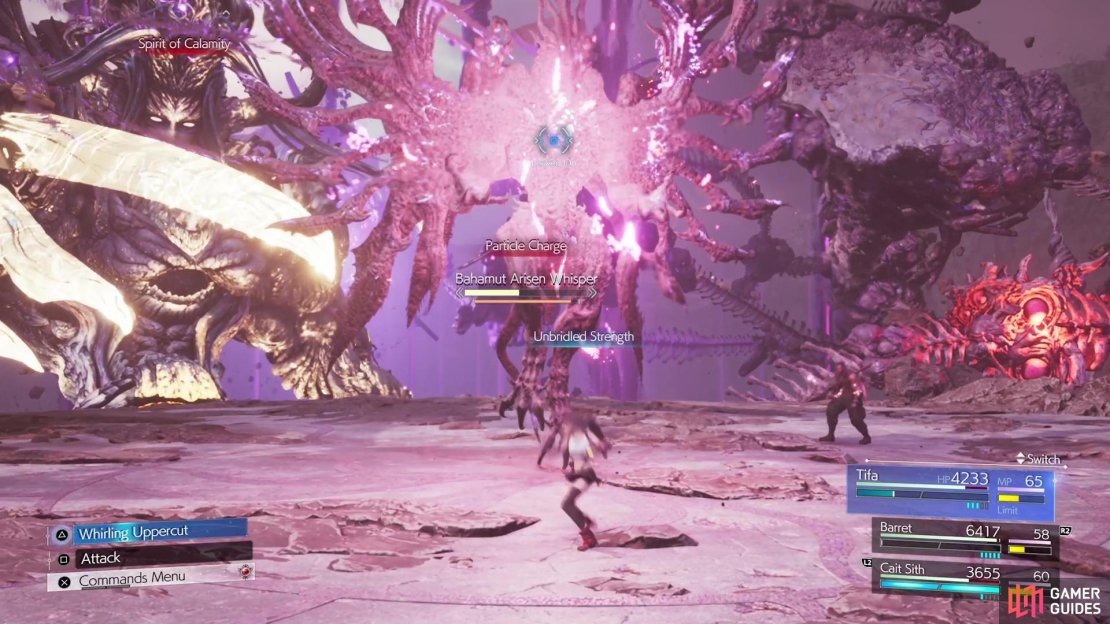
(1 of 5) The Bahamut Arisen Whisper will use Gigaflare pretty early into the second phase.
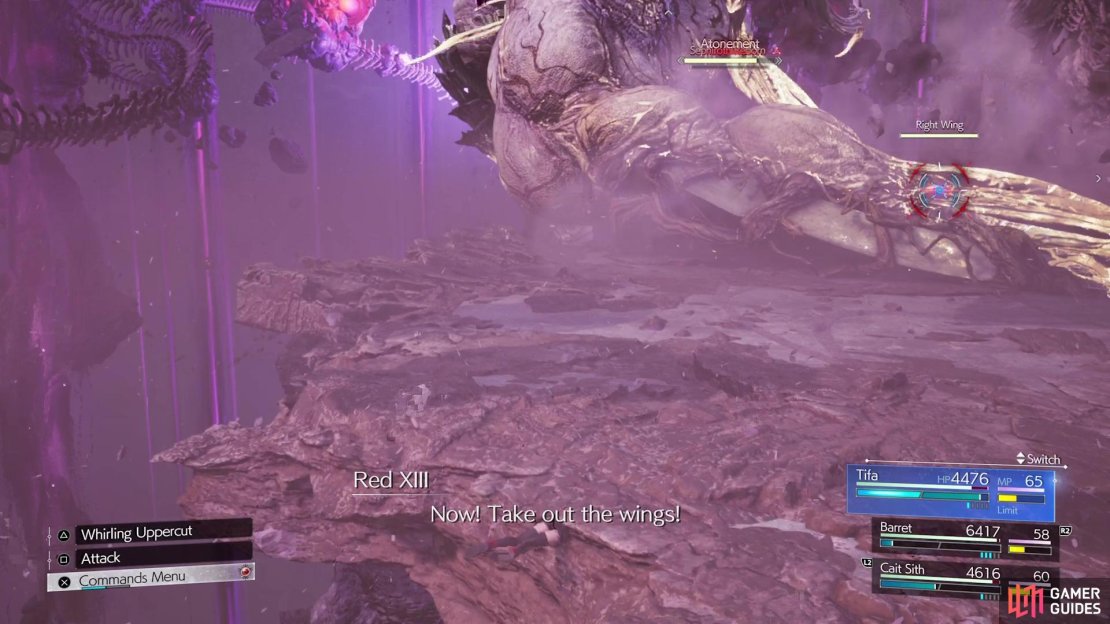
Thankfully, Sephiroth doesn’t really do much during this phase, but he can attack every so often. In fact, the goal is the phase isn’t even the Whisper, but rather Sephiroth’s wings. Once you destroy both of the wings, the phase will be over and you will move onto the third one. Atonement will have Sephiroth smack the ground with one of his wings, while Spirit of Calamity will extend his wing and have Bahamut Arisen use Particle Charge. If you defeat the Whisper, then Sephiroth will use Blessing of Calamity to bring it back, as well as heal it some.
All of the above three moves will expose the wings, allowing you to damage them. They don’t seem to have a whole lot of HP, so use powerful attacks to quickly whittle down their health. When you’ve destroyed both wings, the second phase will be over and the third will begin.
Sephiroth Reborn - Third Phase
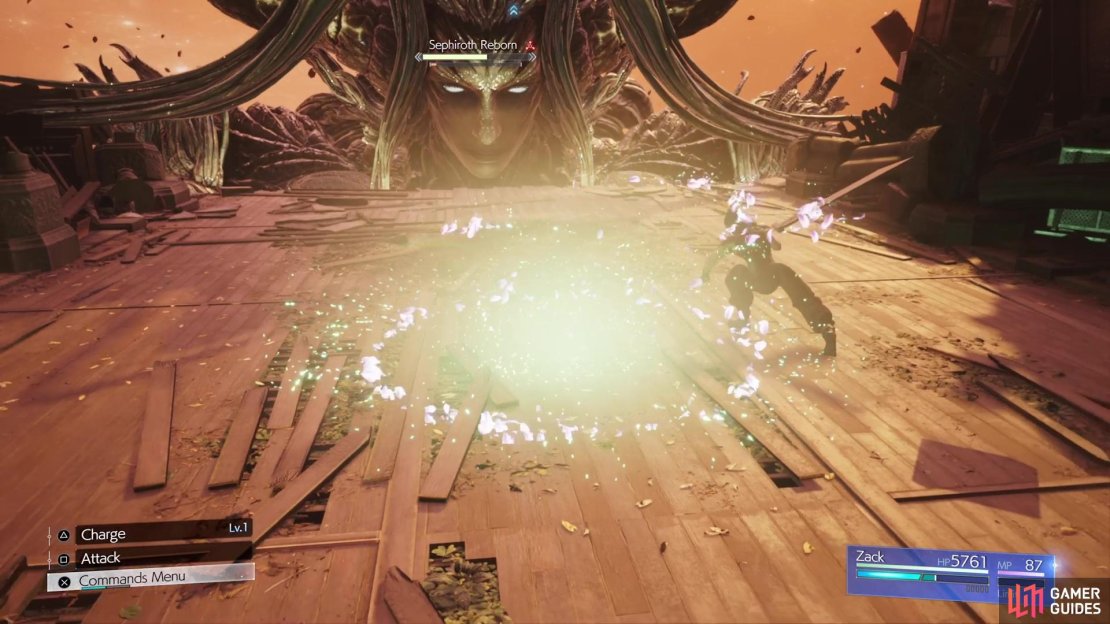
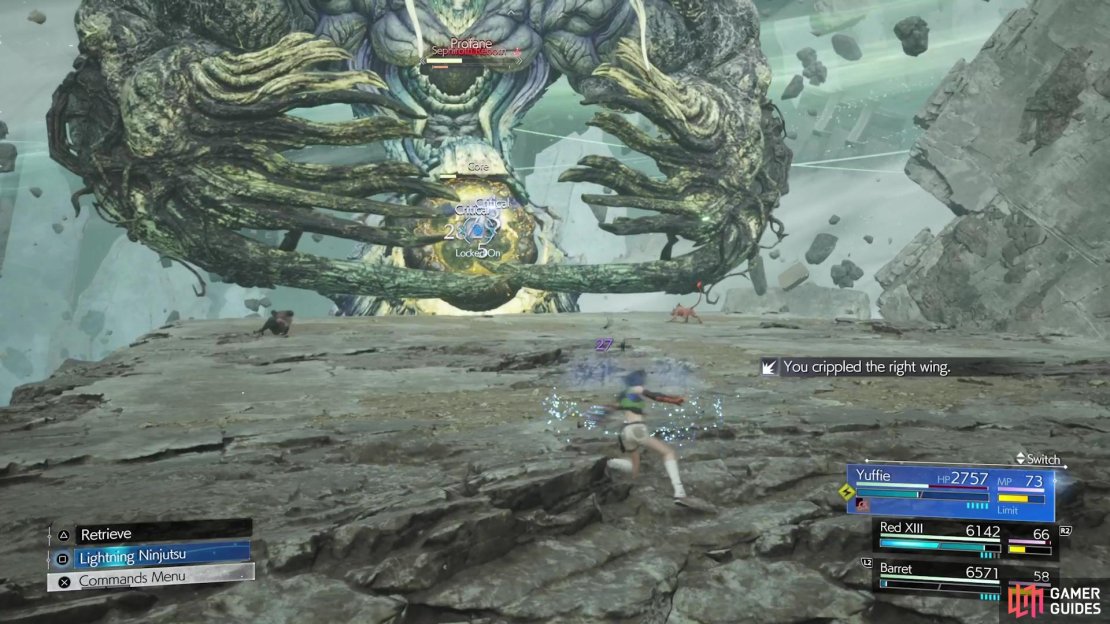
You’ll be in control of Zack during this phase, all alone. The fight will play out pretty similarly to the second part of the first phase, where Sephiroth is more towards the ground. He’ll pretty much have most of the moves from that portion, too, although he has stronger versions of some, as well as some new ones. Zanshin Profaned adds a third projectile, while Unholy Gate covers a larger area and has a delayed explosion. One of the new attacks is called Wail, where Sephiroth produces a large orb that will track you.

(1 of 2) Wail is a large orb that slowly tracks you until it disappears.

Wail is a large orb that slowly tracks you until it disappears. (left), If it does catch you, then you will be hit by a follow-up attack called Retribution. (right)
Should you get hit by it, you’ll essentially be bound and he will follow it up with Retribution, an attack that deals decent damage. One way you can avoid Wail is to simply keep moving, but there is another little gimmick to this fight that can help. Not long into the phase, you will see a ring of flowers appear on the ground. Standing in this circle will create a little barrier around you, which can block a few attacks from Sephiroth, like Swarm and Wail. In fact, using it against Wail is a great idea, as it will be trapped and you can target this energy to send at Sephiroth, dealing some good damage.
There is one other new move, called Lacryma Deus, where the big head will create some lightning arc that will be swept across the area in front of him. You can easily avoid this by moving backwards, but the ring of flowers can also protect you from this attack. The third phase is pretty straightforward, otherwise, so you just need to take your chances at hitting Sephiroth when you have the clearance. Of course, you could try to charge up Zack’s abilities, but it might be worth it if you pressure/stagger him.

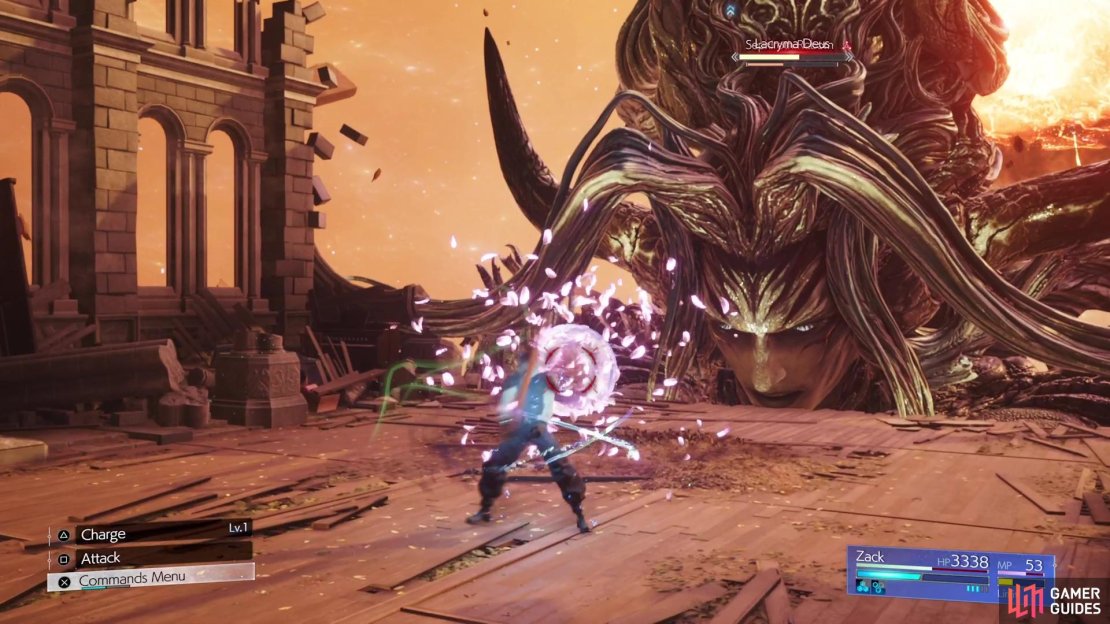
(1 of 3) A ring of flowers will appear early into the third phase of the fight.
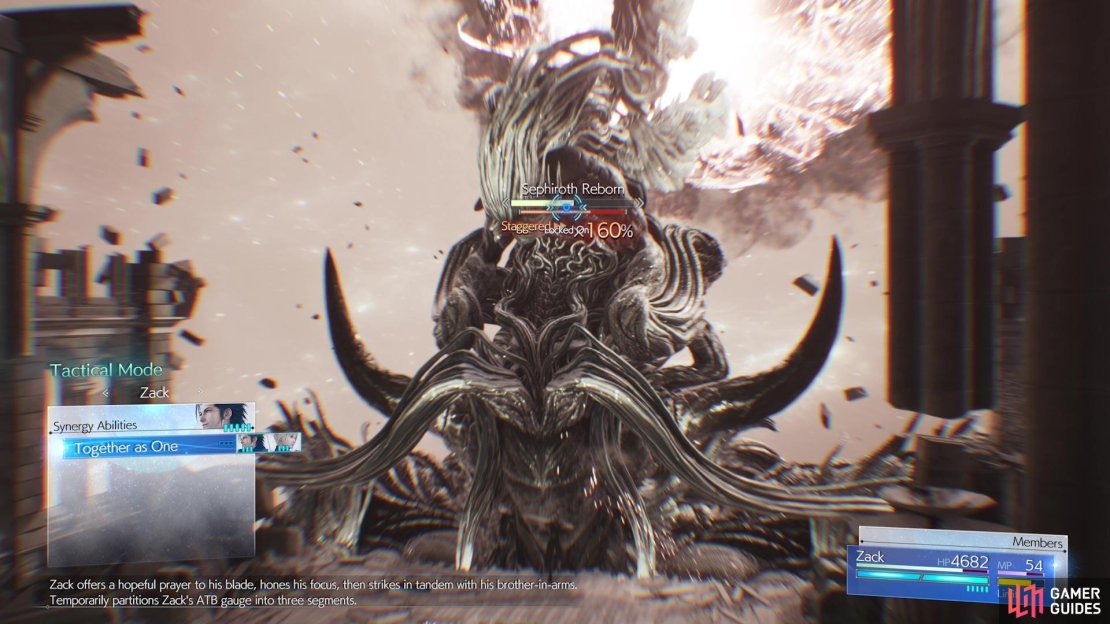
Note that while Zack is technically solo during this phase, he still has access to a Synergy Ability with Cloud. Named Together as One, this Synergy Ability will partition Zack’s ATB gauge into three segments, which is quite useful. Once you get his health to about 40-45% or so, then the game will take over and you’ll move onto the final phase.
Sephiroth Reborn - Fourth Phase
The final round with Sephiroth Reborn will use one of the two characters from the second phase, then the two that weren’t used. The goal here is to defeat the Core, which is the same spot you attacked with Cloud in the first part of the first phase. However, at the start of the phase, it will be protected with a shield, so all attacks will do very little damage. In order to drop this shield and make the Core vulnerable, you’ll have to destroy both of the wings, which is kind of similar to the previous phase with your other party members.
Things are even more complicated, as the wings will be immune to all physical attacks, and they change their elemental properties often. Each of the elements will have its own attack, with fire using Infernal Flare. ![]() Ice has a move called Great Tribulation, electric has Keraunos and wind has Rapture. None of them are all to serious and don’t appear to deal too much damage to your characters. Staying at the far of the arena should help in mitigating the damage as much as possible.
Ice has a move called Great Tribulation, electric has Keraunos and wind has Rapture. None of them are all to serious and don’t appear to deal too much damage to your characters. Staying at the far of the arena should help in mitigating the damage as much as possible.
In between these attacks, Sephiroth will usually do one of two moves, either Atonement or Profane. The former is something you’ve seen before, but this time it’s a sweep with one of the wings across the entire field. The latter, Profane, is a poisonous beam that is swept across the field, too, and can poison your characters. He will always go in the order of fire, ice, electric, and wind, so you can plan out when to attack, should you not have all the elements in your arsenal.

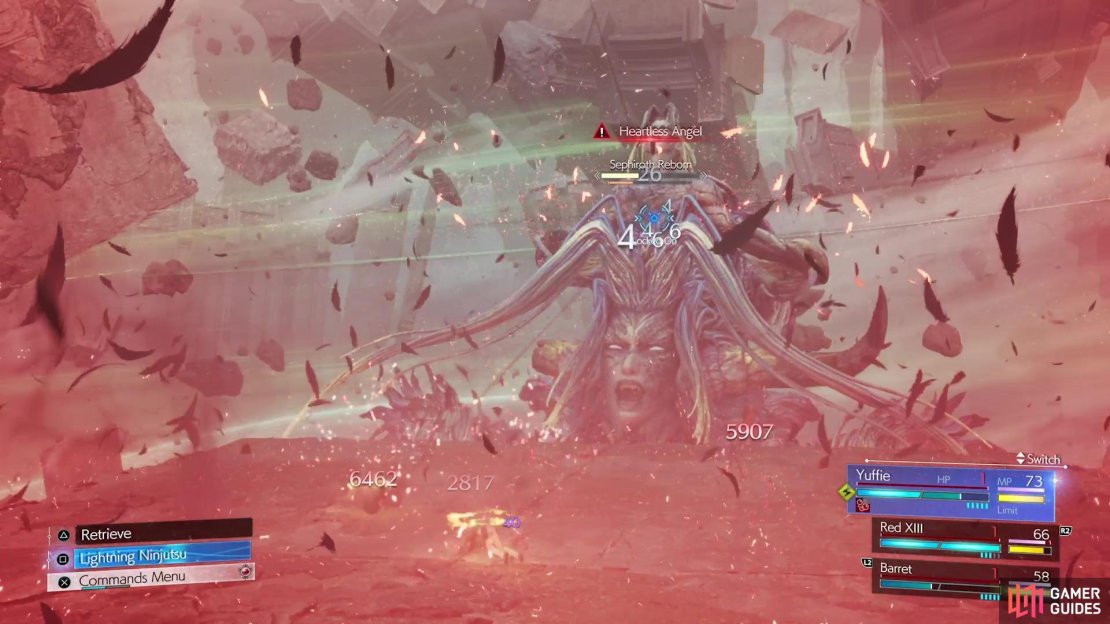
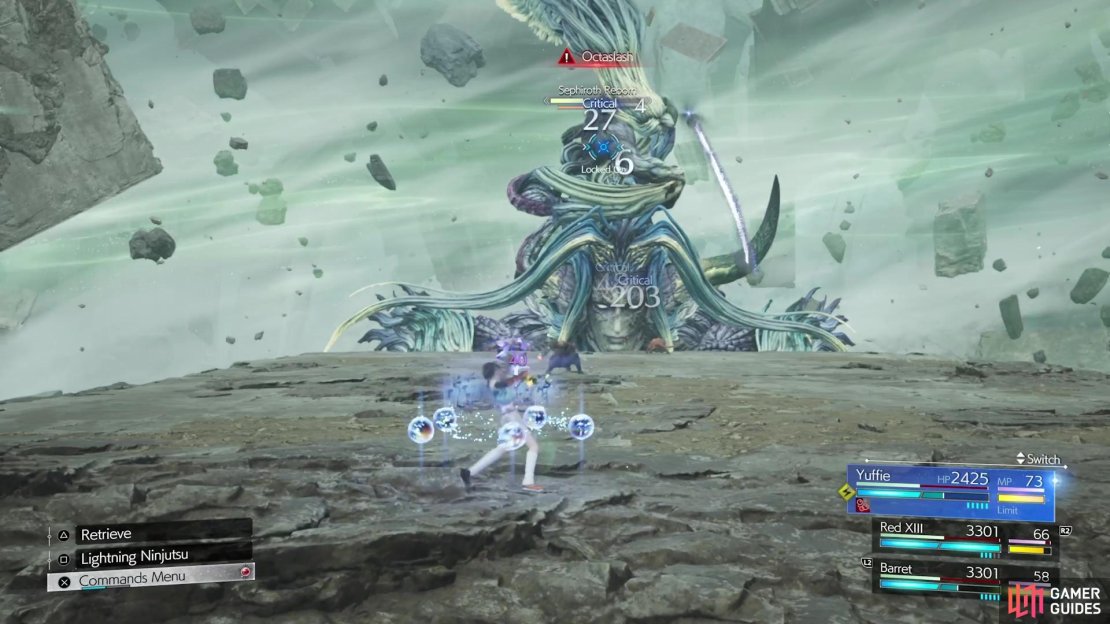
As soon as you break the Core, make sure you have enough ATB, since the fight will continue into the final stretch. The first move that Sephiroth will do here is Heartless Angel, an unavoidable and unblockable move that reduces all characters’ HP to 1. Thankfully, even if someone is poisoned, it cannot KO you in this game. However, you do have to quickly heal your team, since Sephiroth will continue attacking. At this point, he will revert to the moveset used during the third phase, although he can also start charging up for an Octaslash here.
Deal enough damage while he’s charging for it and you can stop it, which will also pressure him. It does seem like his stagger gauge builds up quick, but eventually, you will get it and be able to deliver big damage to the boss. If you go back to the elemental wings, keep at it and you will finally put an end to Sephiroth Reborn. A scene will occur and then it’s time for the final boss.
No Comments