
A lot of extra content becomes available once you reach Chapter 12 of Final Fantasy VII Rebirth. This includes harder versions of the various minigames, as well as new quests. One such quest is called Victim of Circumstance, which is found in the ![]() Cosmo Canyon Region. However, in order to get this, you will first need to complete both From Whence Life Flows and Promises to Keep. These are available earlier in Chapter 10, so you might have already done them. This page will detail where to find the
Cosmo Canyon Region. However, in order to get this, you will first need to complete both From Whence Life Flows and Promises to Keep. These are available earlier in Chapter 10, so you might have already done them. This page will detail where to find the ![]() Vibrodetector, as well as how to find and defeat the Gigaworm.
Vibrodetector, as well as how to find and defeat the Gigaworm.
Where to Start Victim of Circumstance
As mentioned in the opening paragraph, you will need to wait until Chapter 12 before you can start this quest. You will also need to have completed both From Whence Life Flows and Promises to Keep, two quests that were available in Chapter 10. Once you’ve done those and reach Chapter 12, you should get a notification that new quests are available in the region. You could go to the noticeboard in ![]() Cosmo Canyon to start this quest, which might be easier since the actual starting point is out in the middle of the area.
Cosmo Canyon to start this quest, which might be easier since the actual starting point is out in the middle of the area.


(1 of 2) You can start Victim of Consequence at this spot in the Cosmo Canyon region.
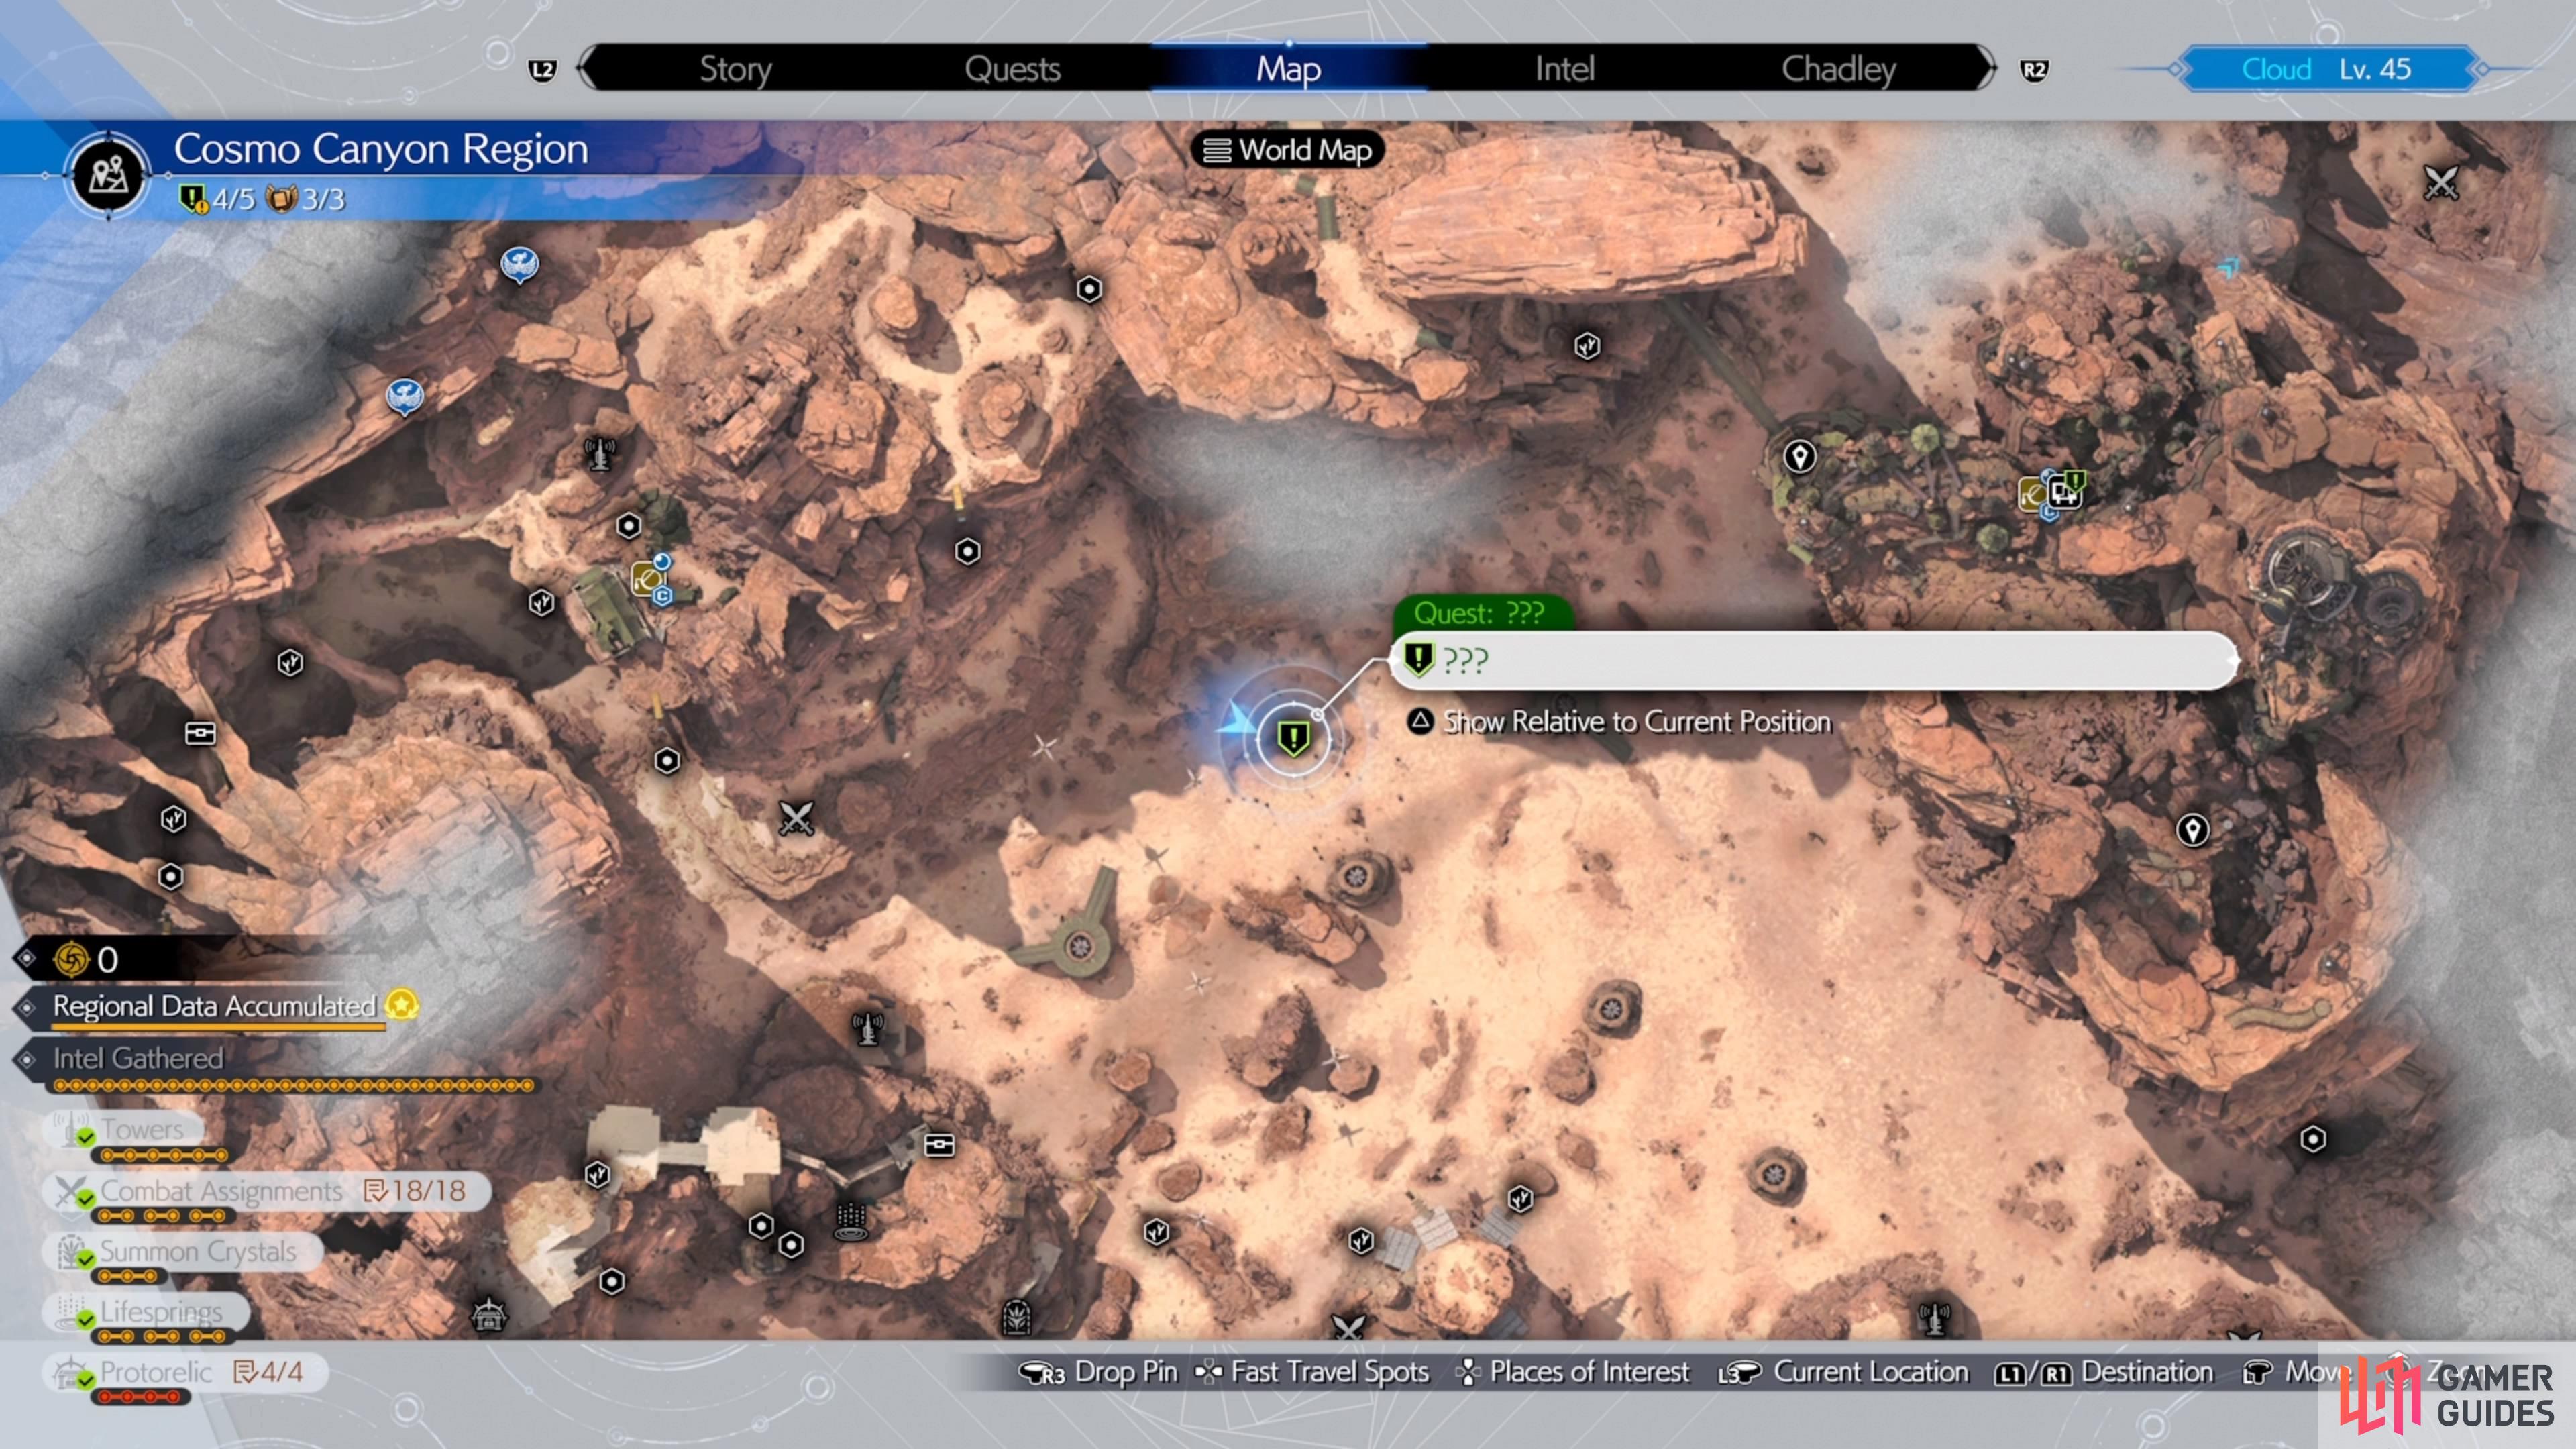

You can start Victim of Consequence at this spot in the Cosmo Canyon region. (left), You’re looking for a broken down jeep. (right)
Look northeast of Activation Intel 2: Crimson Earth Tower for one of those wooden contraptions that cause an updraft. A little more northeast of there will be the spot you want to go to, where you’ll find a broken-down jeep. It turns out that Zhijie is in a bit of a tough spot, as some large fiend has left him stranded here, so he asks you to take care of it.
Where to Find a Vibrodetector
Zhijie mentions that the fiend causing problems is hiding underground, but you won’t really know where it is without a Vibrodetector. You might already have this one if you’ve been doing all of the content through the open world areas already, but if not, you can get it from the Moogle Emporium. This is the shop where you spend your ![]() Moogle Medals, with more items being unlocked as you complete the Moogle Intels in the various regions.
Moogle Medals, with more items being unlocked as you complete the Moogle Intels in the various regions.
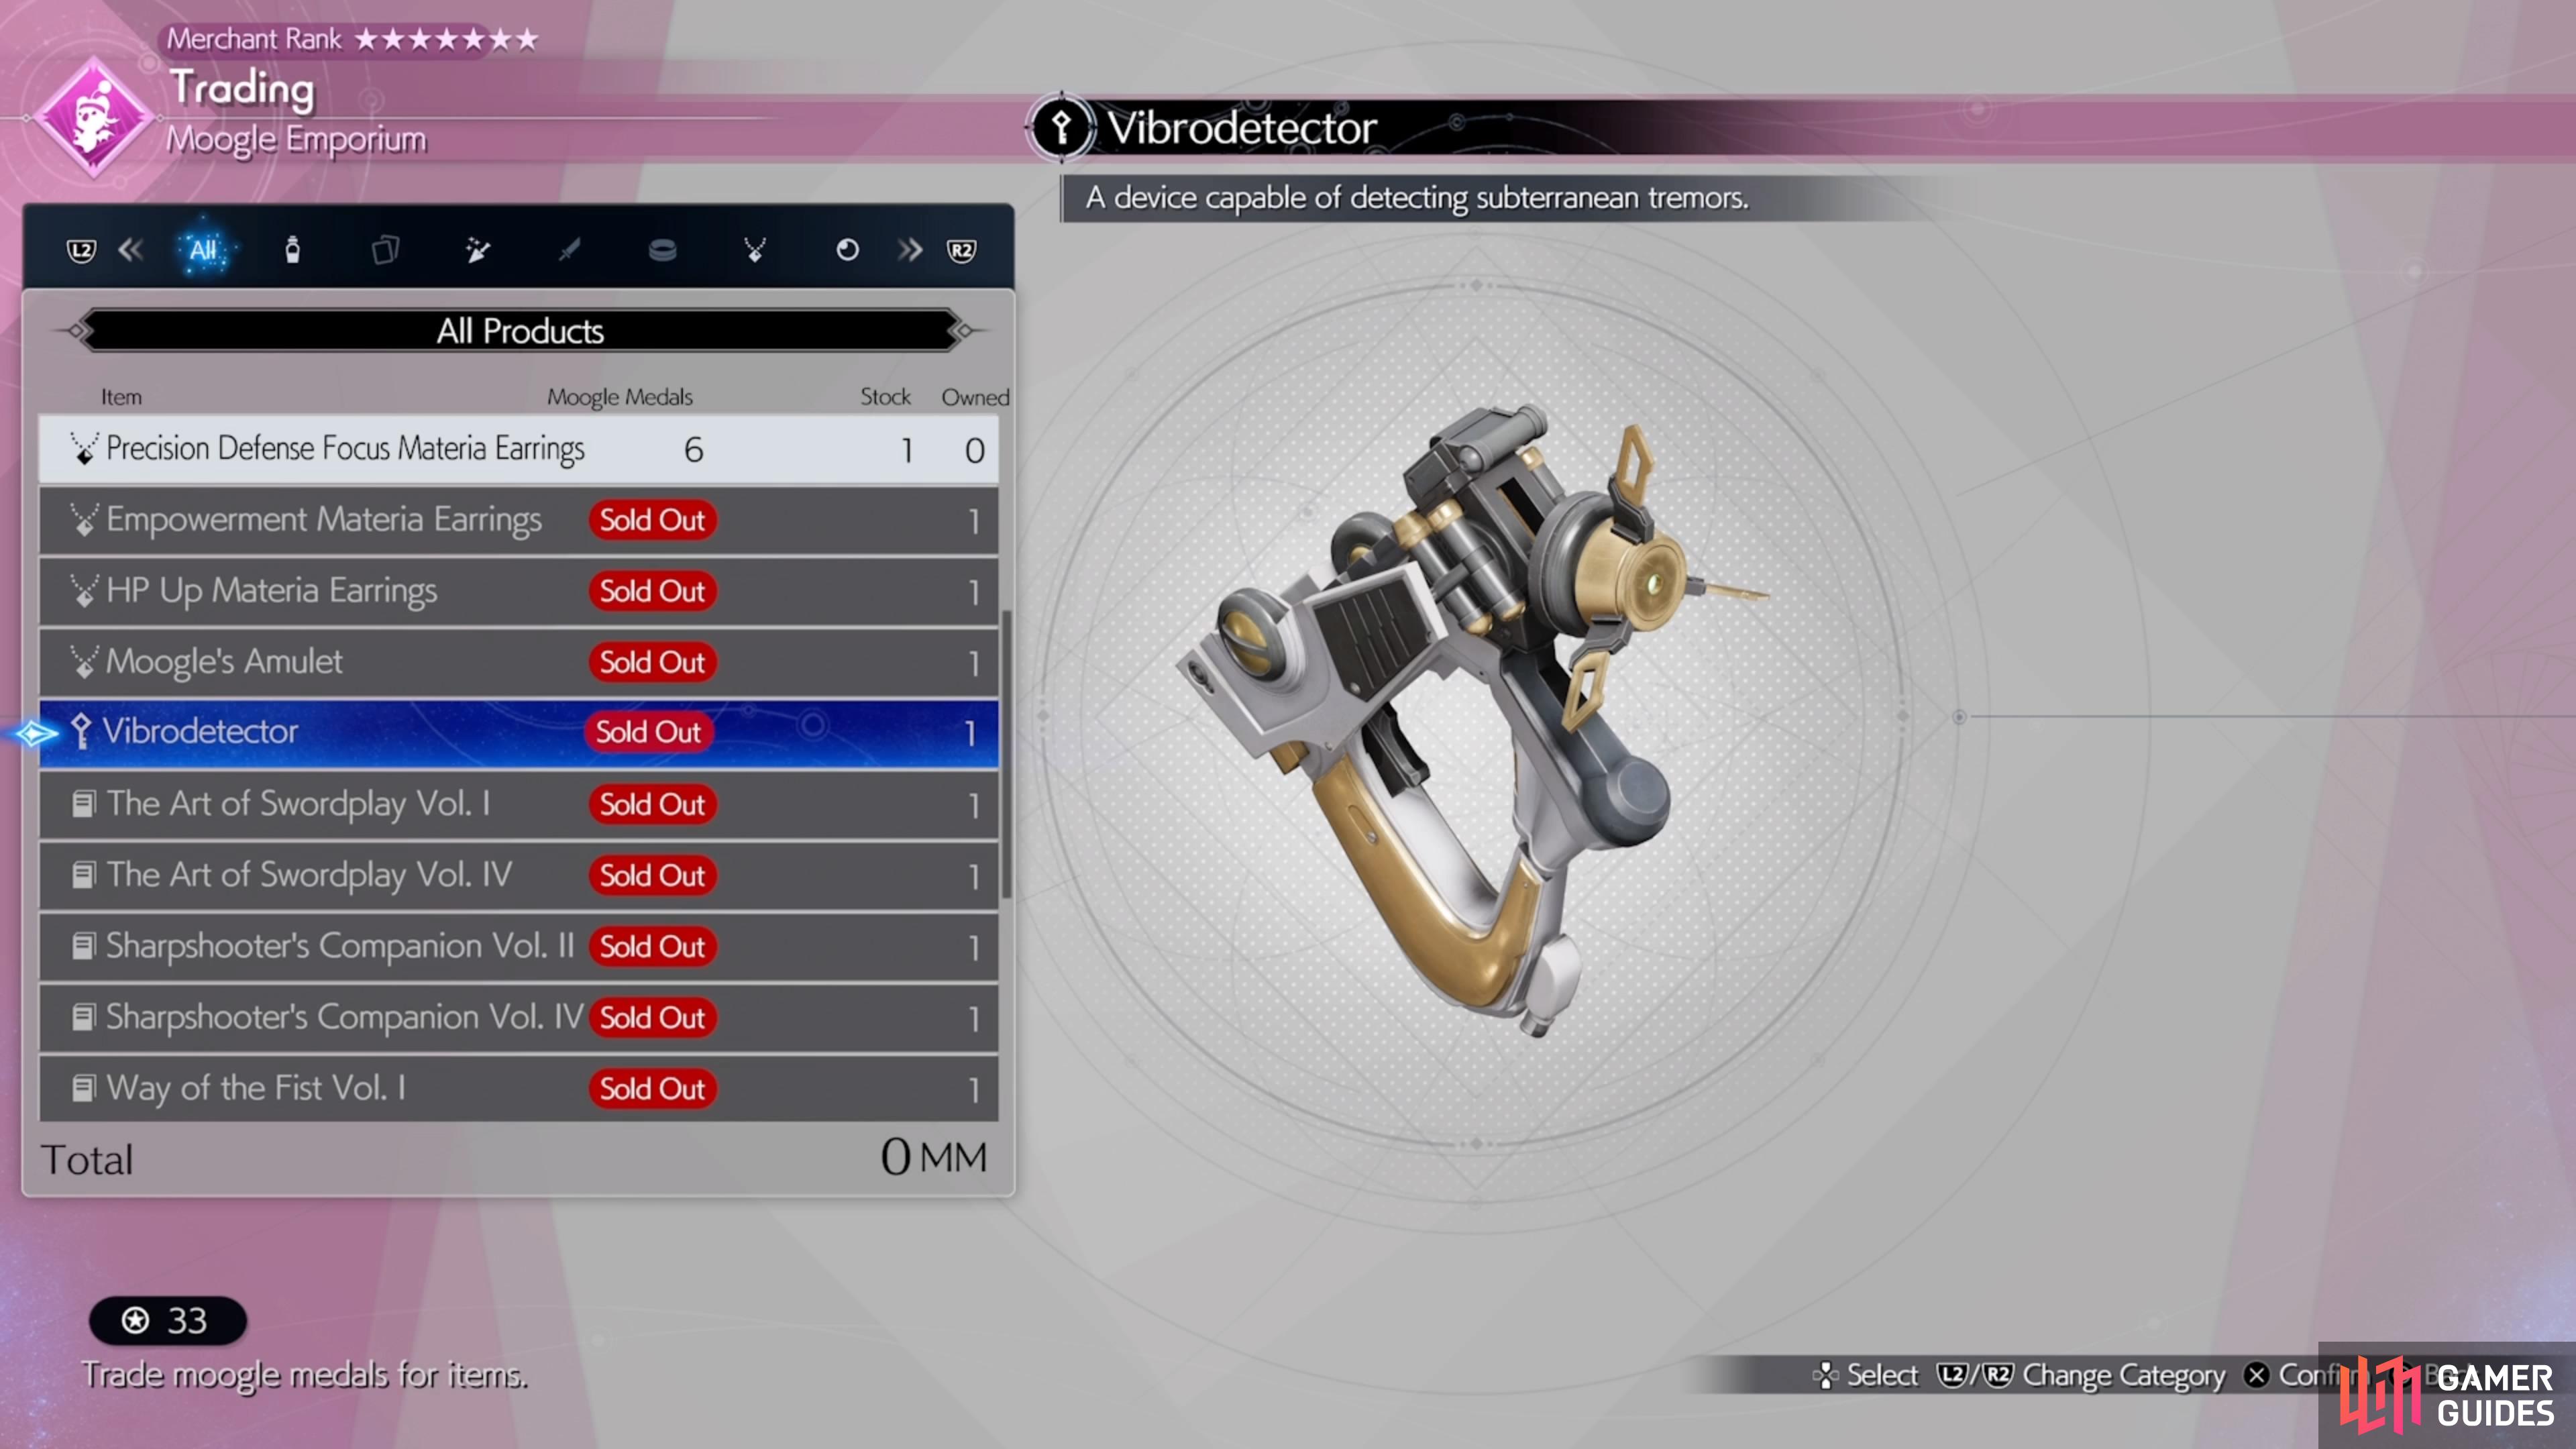
Use your Moogle Medals to purchase a Vibrodetector, once you’ve leveled up their store.
To be specific, you will complete at least four of the Moogle Mischief minigames, as you need the fourth tier of the Moogle Emporium. That is when you’ll find the Vibrodetector in the shop, with it costing a measly three Moogle Medals. Once you have purchased the key item, head back to where Zhijie was located to start the quest, as that is where you will be beginning tracking down the fiend.
How to Use the Vibrodetector
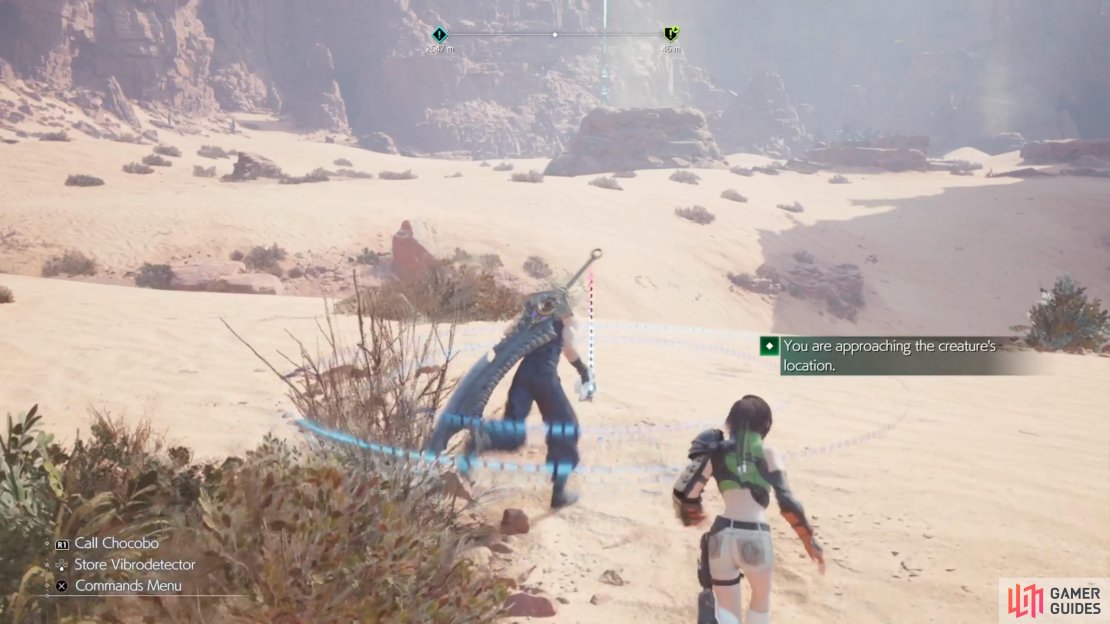
With the Vibrodetector in your inventory, press up on the D-Pad to take it out. The item will give off some vibrations, but the most important thing to keep track of are the circles that will appear. If the circles are blue, then you are heading towards the fiend, while red circles mean you are heading away from it. Note that you won’t be able to use this device while on Chocobo, so you will have to make the trek on foot. There will be three different locations for the fiend, with you having to fight it at the third spot.
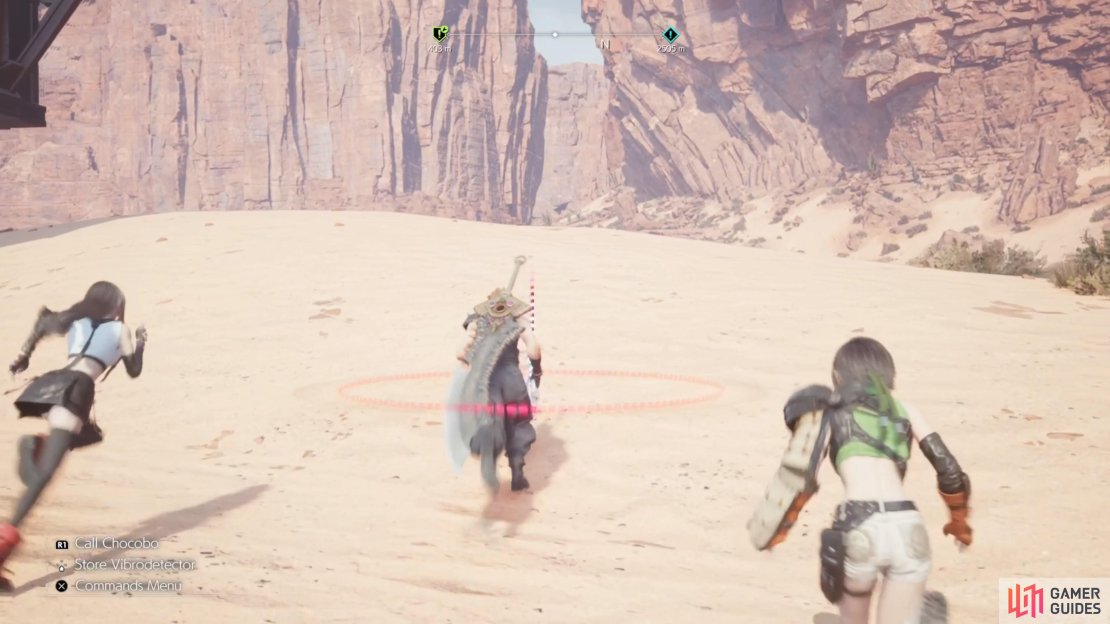

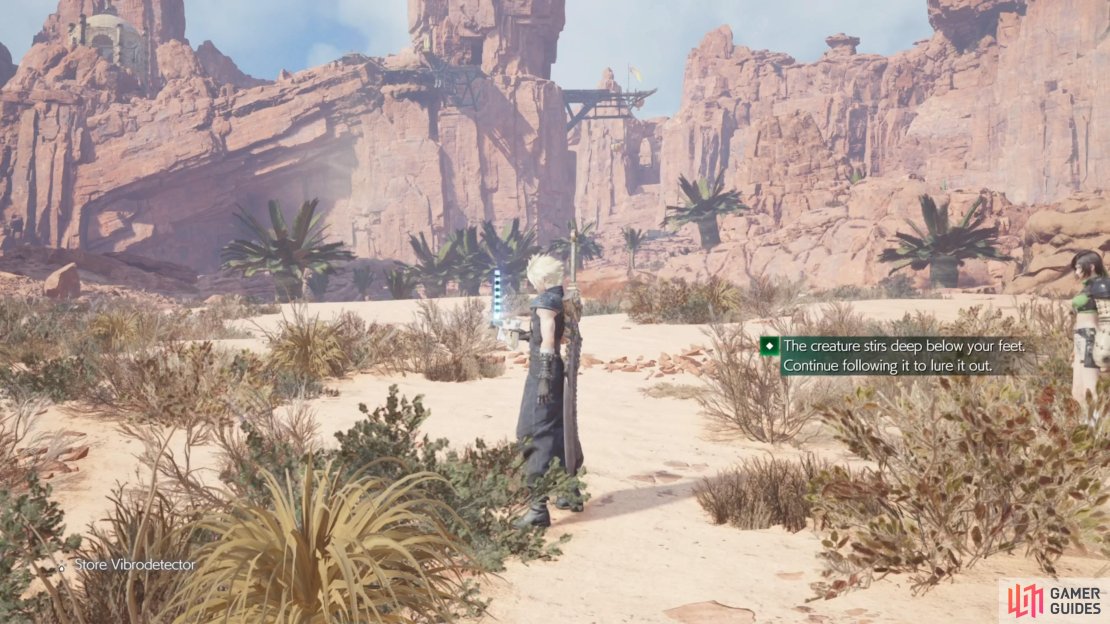
(1 of 4) If you see red rings, then you are going the wrong way.
Fiend Location #1
For the first location of the fiend, head southeast of Zhijie. It will be south of Activation Intel 3: Dried Oasis Tower. Find the large wooden updraft device here (the one with the ramps), then go a little north of it for the spot with the fiend. You’ll know you’re in the right spot when you see the Vibrodetector putting out blue circles very rapidly. The only thing you will see is Cloud stumble from the ground shaking, then you can move on to the next spot.
Fiend Location #2
The second location of the fiend will be in the northern end of the Cosmo Canyon Region. Look for Phenomenon Intel 2 on the map and then it will be north and a little east of that marker. If you’ve fully explored up here, then you should have a bunch of Gliding Ranges already marked on the map. The fiend will be located directly east of Gliding Range No. 29, in the little open area right there. You will see the fiend at this point, one of those sandworms, but its presence brings about some other fiends, as it runs away again.


(1 of 3) The second fiend spot will be in the northern part of Cosmo Canyon.
You will have to fight two ![]() Desert Sahagins, as well as a
Desert Sahagins, as well as a ![]() Stone Golem. The Sahagins are weak to ice, while the
Stone Golem. The Sahagins are weak to ice, while the ![]() Stone Golem will be weak to wind. These are nothing more than normal enemies you have already faced throughout the region, so you should know how to handle them by now.
Stone Golem will be weak to wind. These are nothing more than normal enemies you have already faced throughout the region, so you should know how to handle them by now.
Fiend Location #3
Head back to Activation Intel 3: Dried Oasis Tower and go northwest from it. You should come across one of those smaller updrafts here, so check north of it and you will find the fiend there, which will now come out of the ground and do battle with you.
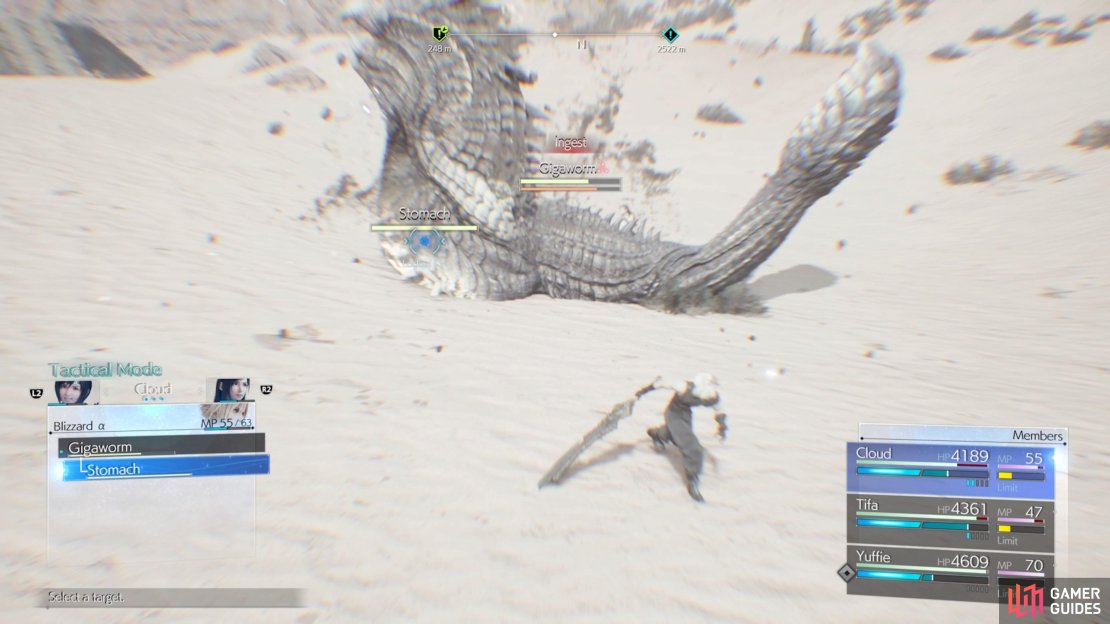
How to Defeat the Gigaworm
The Gigaworm is pretty much a stronger version of the ![]() Landworm, except it does do something slightly different than that one. It has a move called Ingest, where it swallows some rocks that it can use as projectiles. Doing this, though, will cause its stomach to become a target. Destroying the stomach will pressure the Gigaworm, making the fight much easier. Note that this version still has the Swallow attack, where it removes a party member from combat, but dodging towards the creature when it jumps out of the ground seems to be a good way to avoid this.
Landworm, except it does do something slightly different than that one. It has a move called Ingest, where it swallows some rocks that it can use as projectiles. Doing this, though, will cause its stomach to become a target. Destroying the stomach will pressure the Gigaworm, making the fight much easier. Note that this version still has the Swallow attack, where it removes a party member from combat, but dodging towards the creature when it jumps out of the ground seems to be a good way to avoid this.
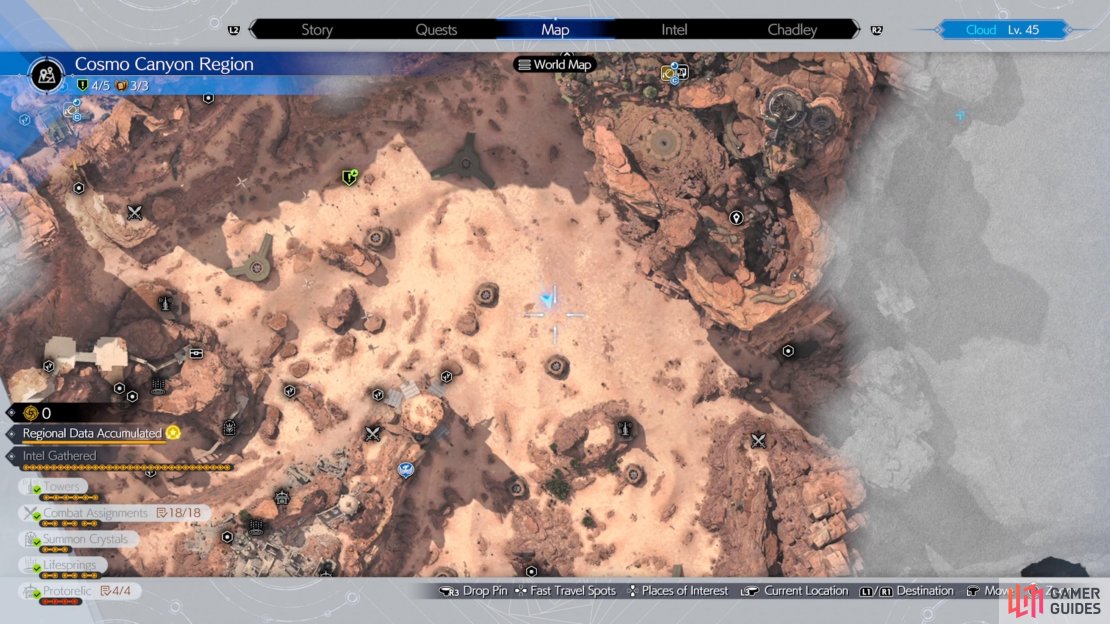


(1 of 4) The third spot where you find the fiend is here on the map.
Should a party member get swallowed, target the stomach with ice damage to try and whittle it down before the worm spits them up naturally. It also has an attack that can inflict ![]() Petrify on characters, so you will want to get out of the way of that, too. Other than Ingest and the petrifying move, the fight plays out pretty similarly to all other worm battles. It is weak to ice, but just doing that won’t pressure it, so you will need to destroy the stomach to do that.
Petrify on characters, so you will want to get out of the way of that, too. Other than Ingest and the petrifying move, the fight plays out pretty similarly to all other worm battles. It is weak to ice, but just doing that won’t pressure it, so you will need to destroy the stomach to do that.
With the Gigaworm felled, Zhijie will roll up and thank you for helping out. You will now be done with this quest and be rewarded with the usual experience for your characters and party. You will also receive a ![]() Magnify Materia and affection for Yuffie.
Magnify Materia and affection for Yuffie.
No Comments