
Kyrie has been a thorn in your side during the course of Final Fantasy VII Rebirth, as she has gotten you in trouble more often than not. She will appear for the final time during Chapter 12 of the main story, in one more quest, called Trouble in Paradise. In order to do this, though, you will need to have completed two other quests, titled Lifeline in Peril and The Hardest Sell. This page will detail how to craft the Legendary Bait for the Trouble in Paradise quest.
(1 of 2) Go to the Bar del Sol in Chapter 12 to find this quest.
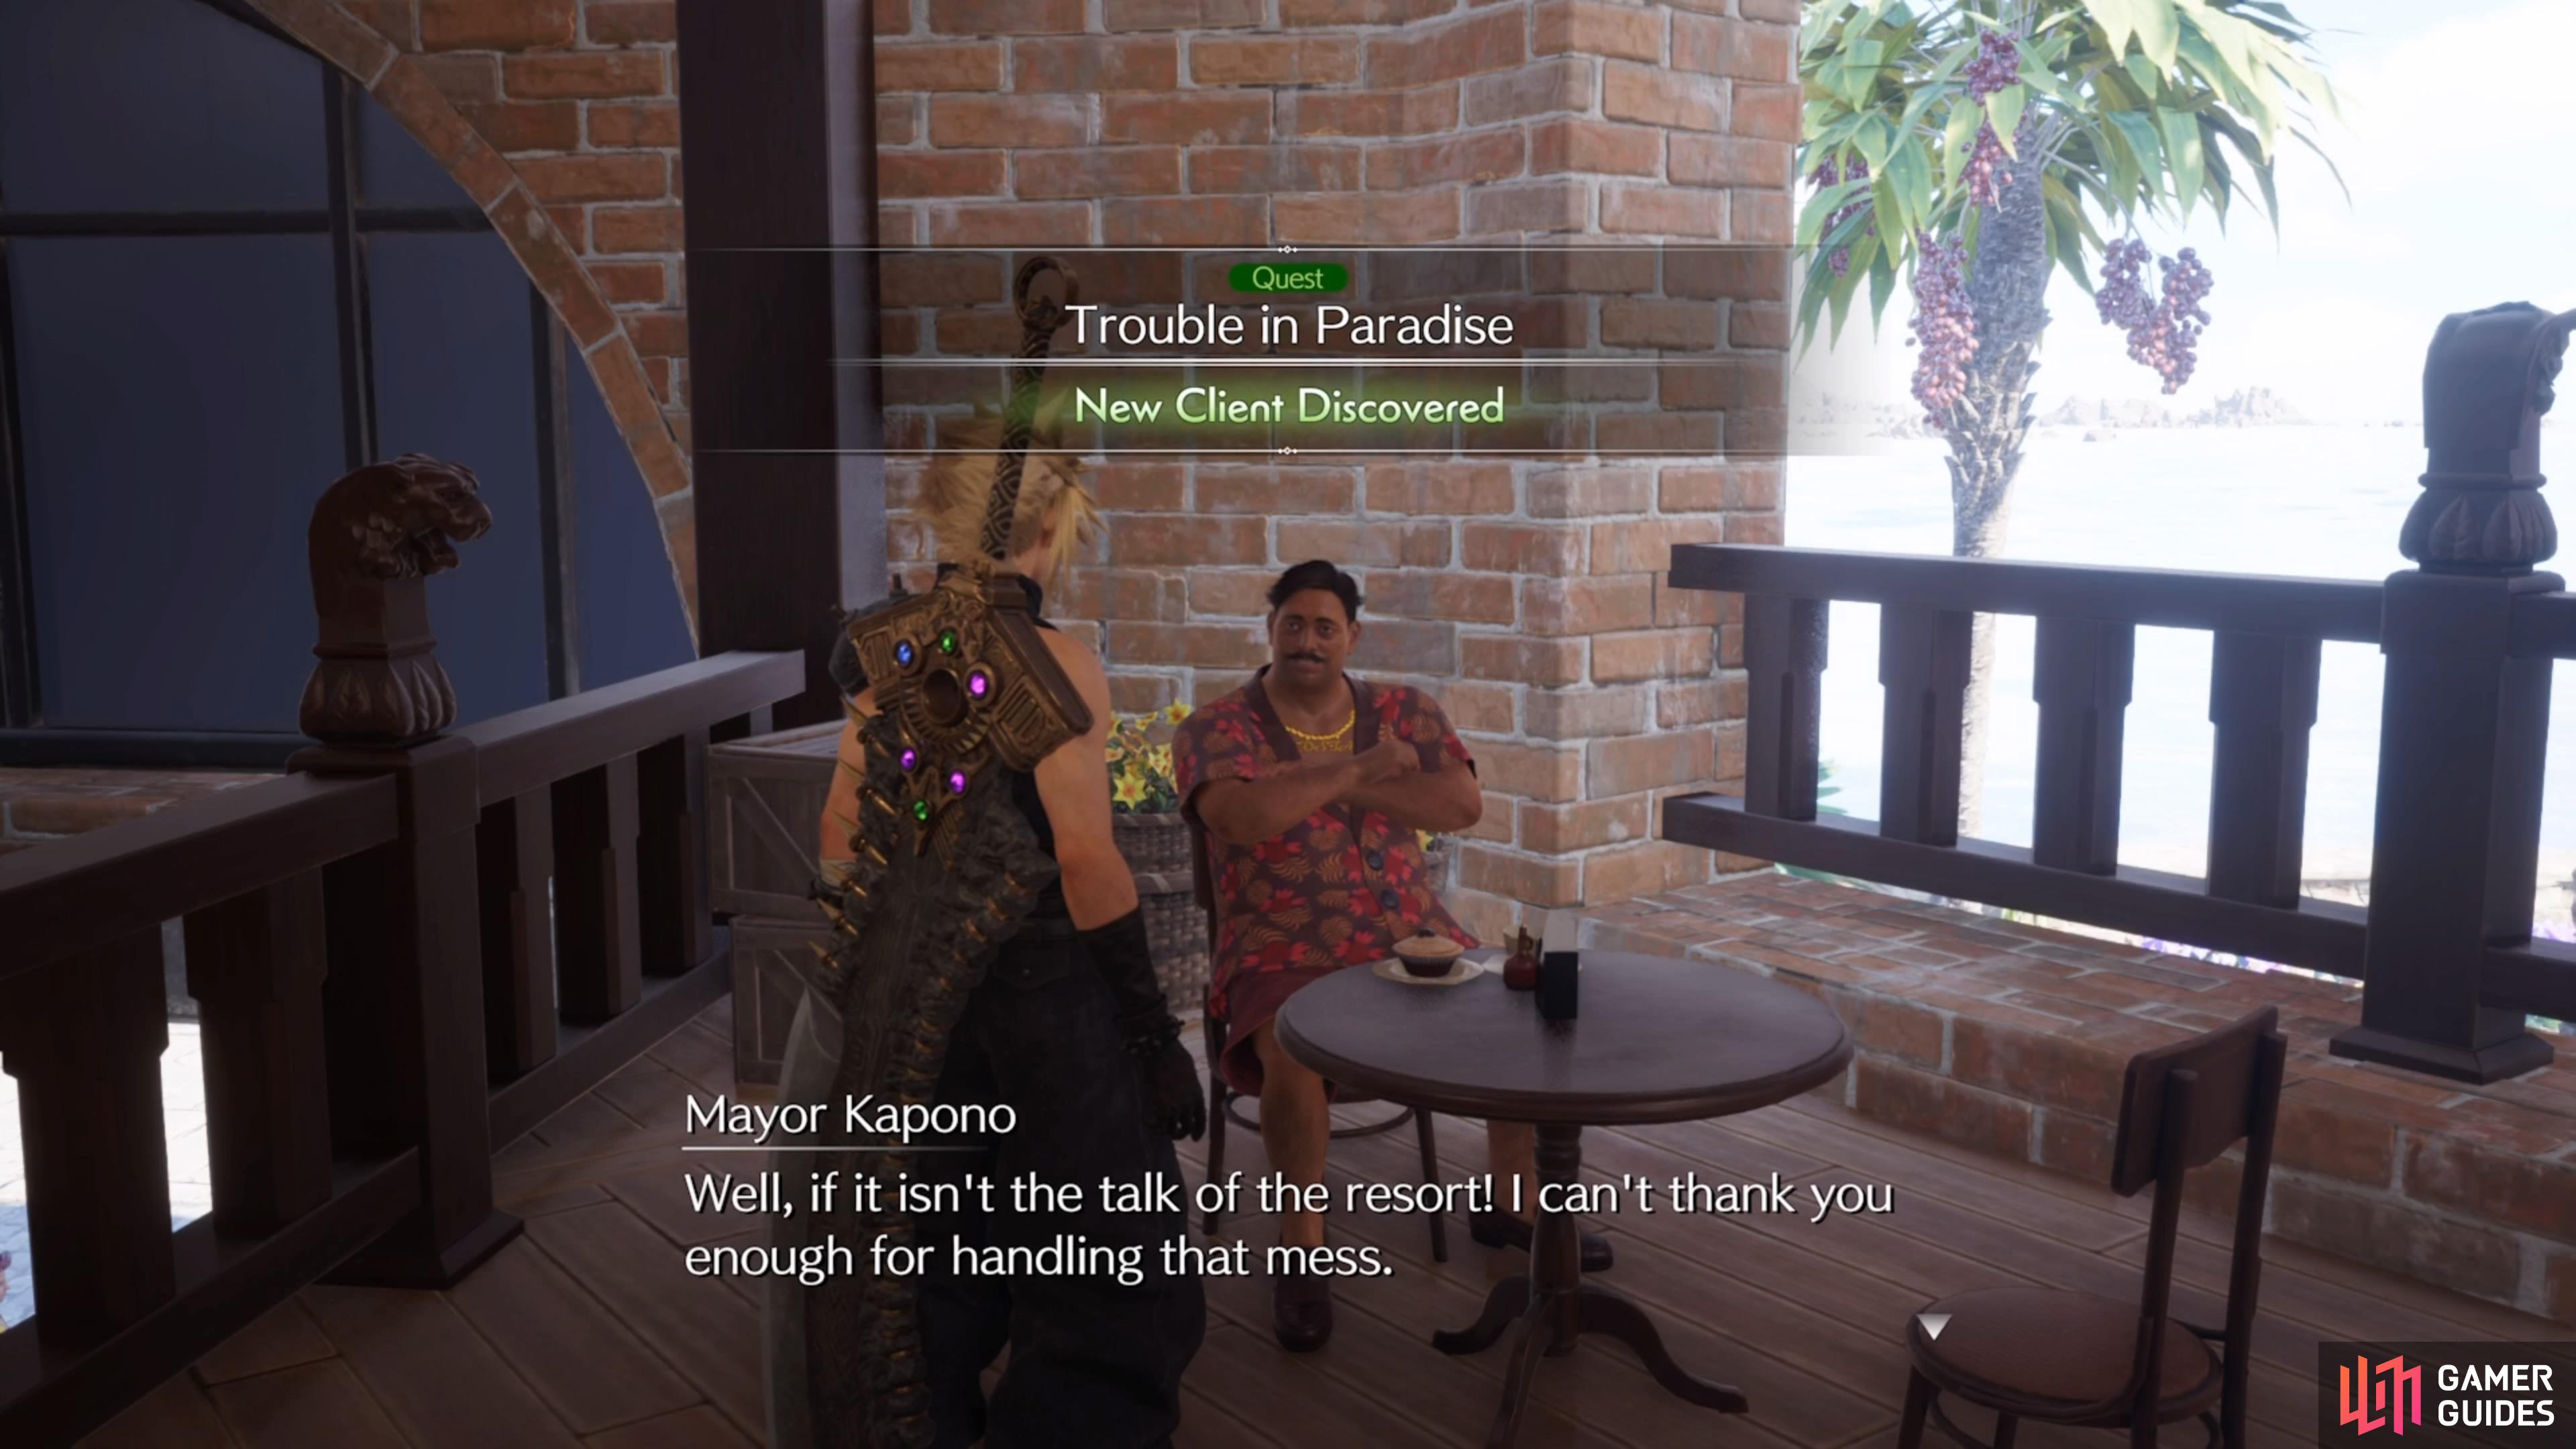
Go to the Bar del Sol in Chapter 12 to find this quest. (left), Inside, speak with the mayor to actually start the quest. (right)
Where to Start the Trouble in Paradise Quest
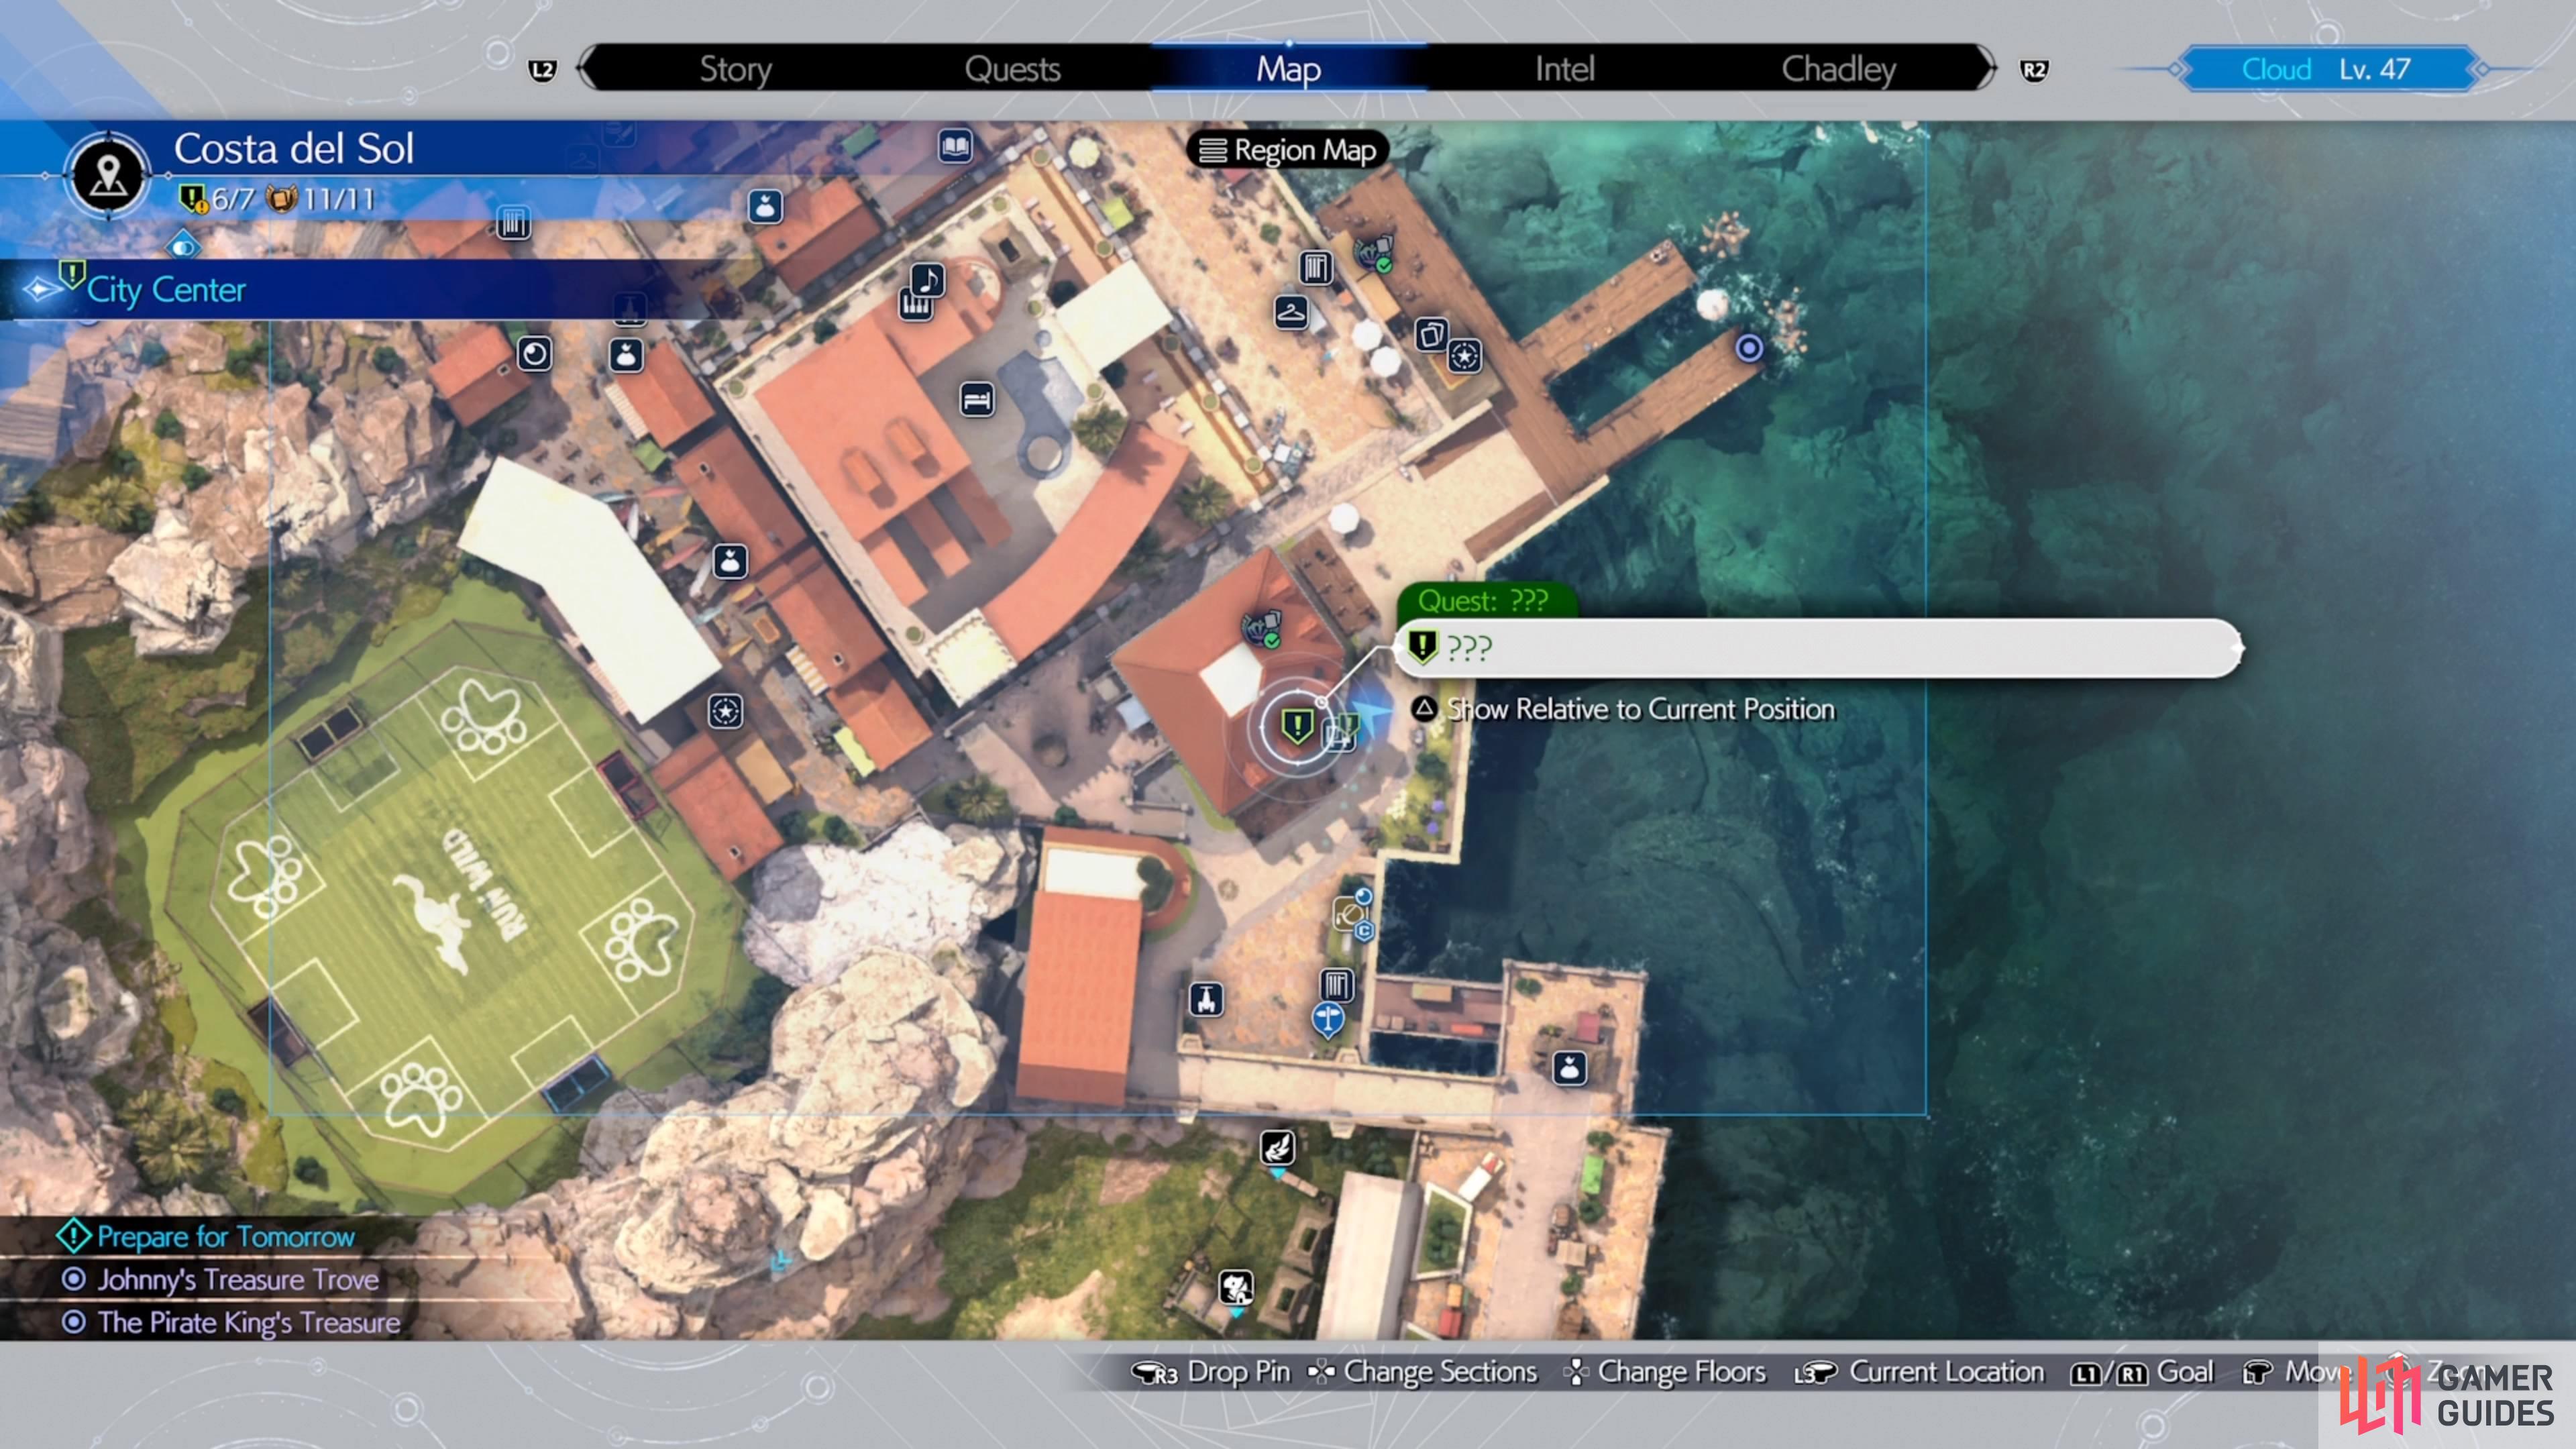
As mentioned above, Trouble in Paradise is a quest that will unlock in Chapter 12 of the main story. However, you will need to do two other quests before it actually becomes available. Those are Lifeline in Peril, which was initially unlocked during Chapter 2, and The Hardest Sell, a quest you could have done in Chapter 4. Once you have done all of the above, simply head to Costa del Sol and look inside Bar del Sol to find Mayor Kapono.
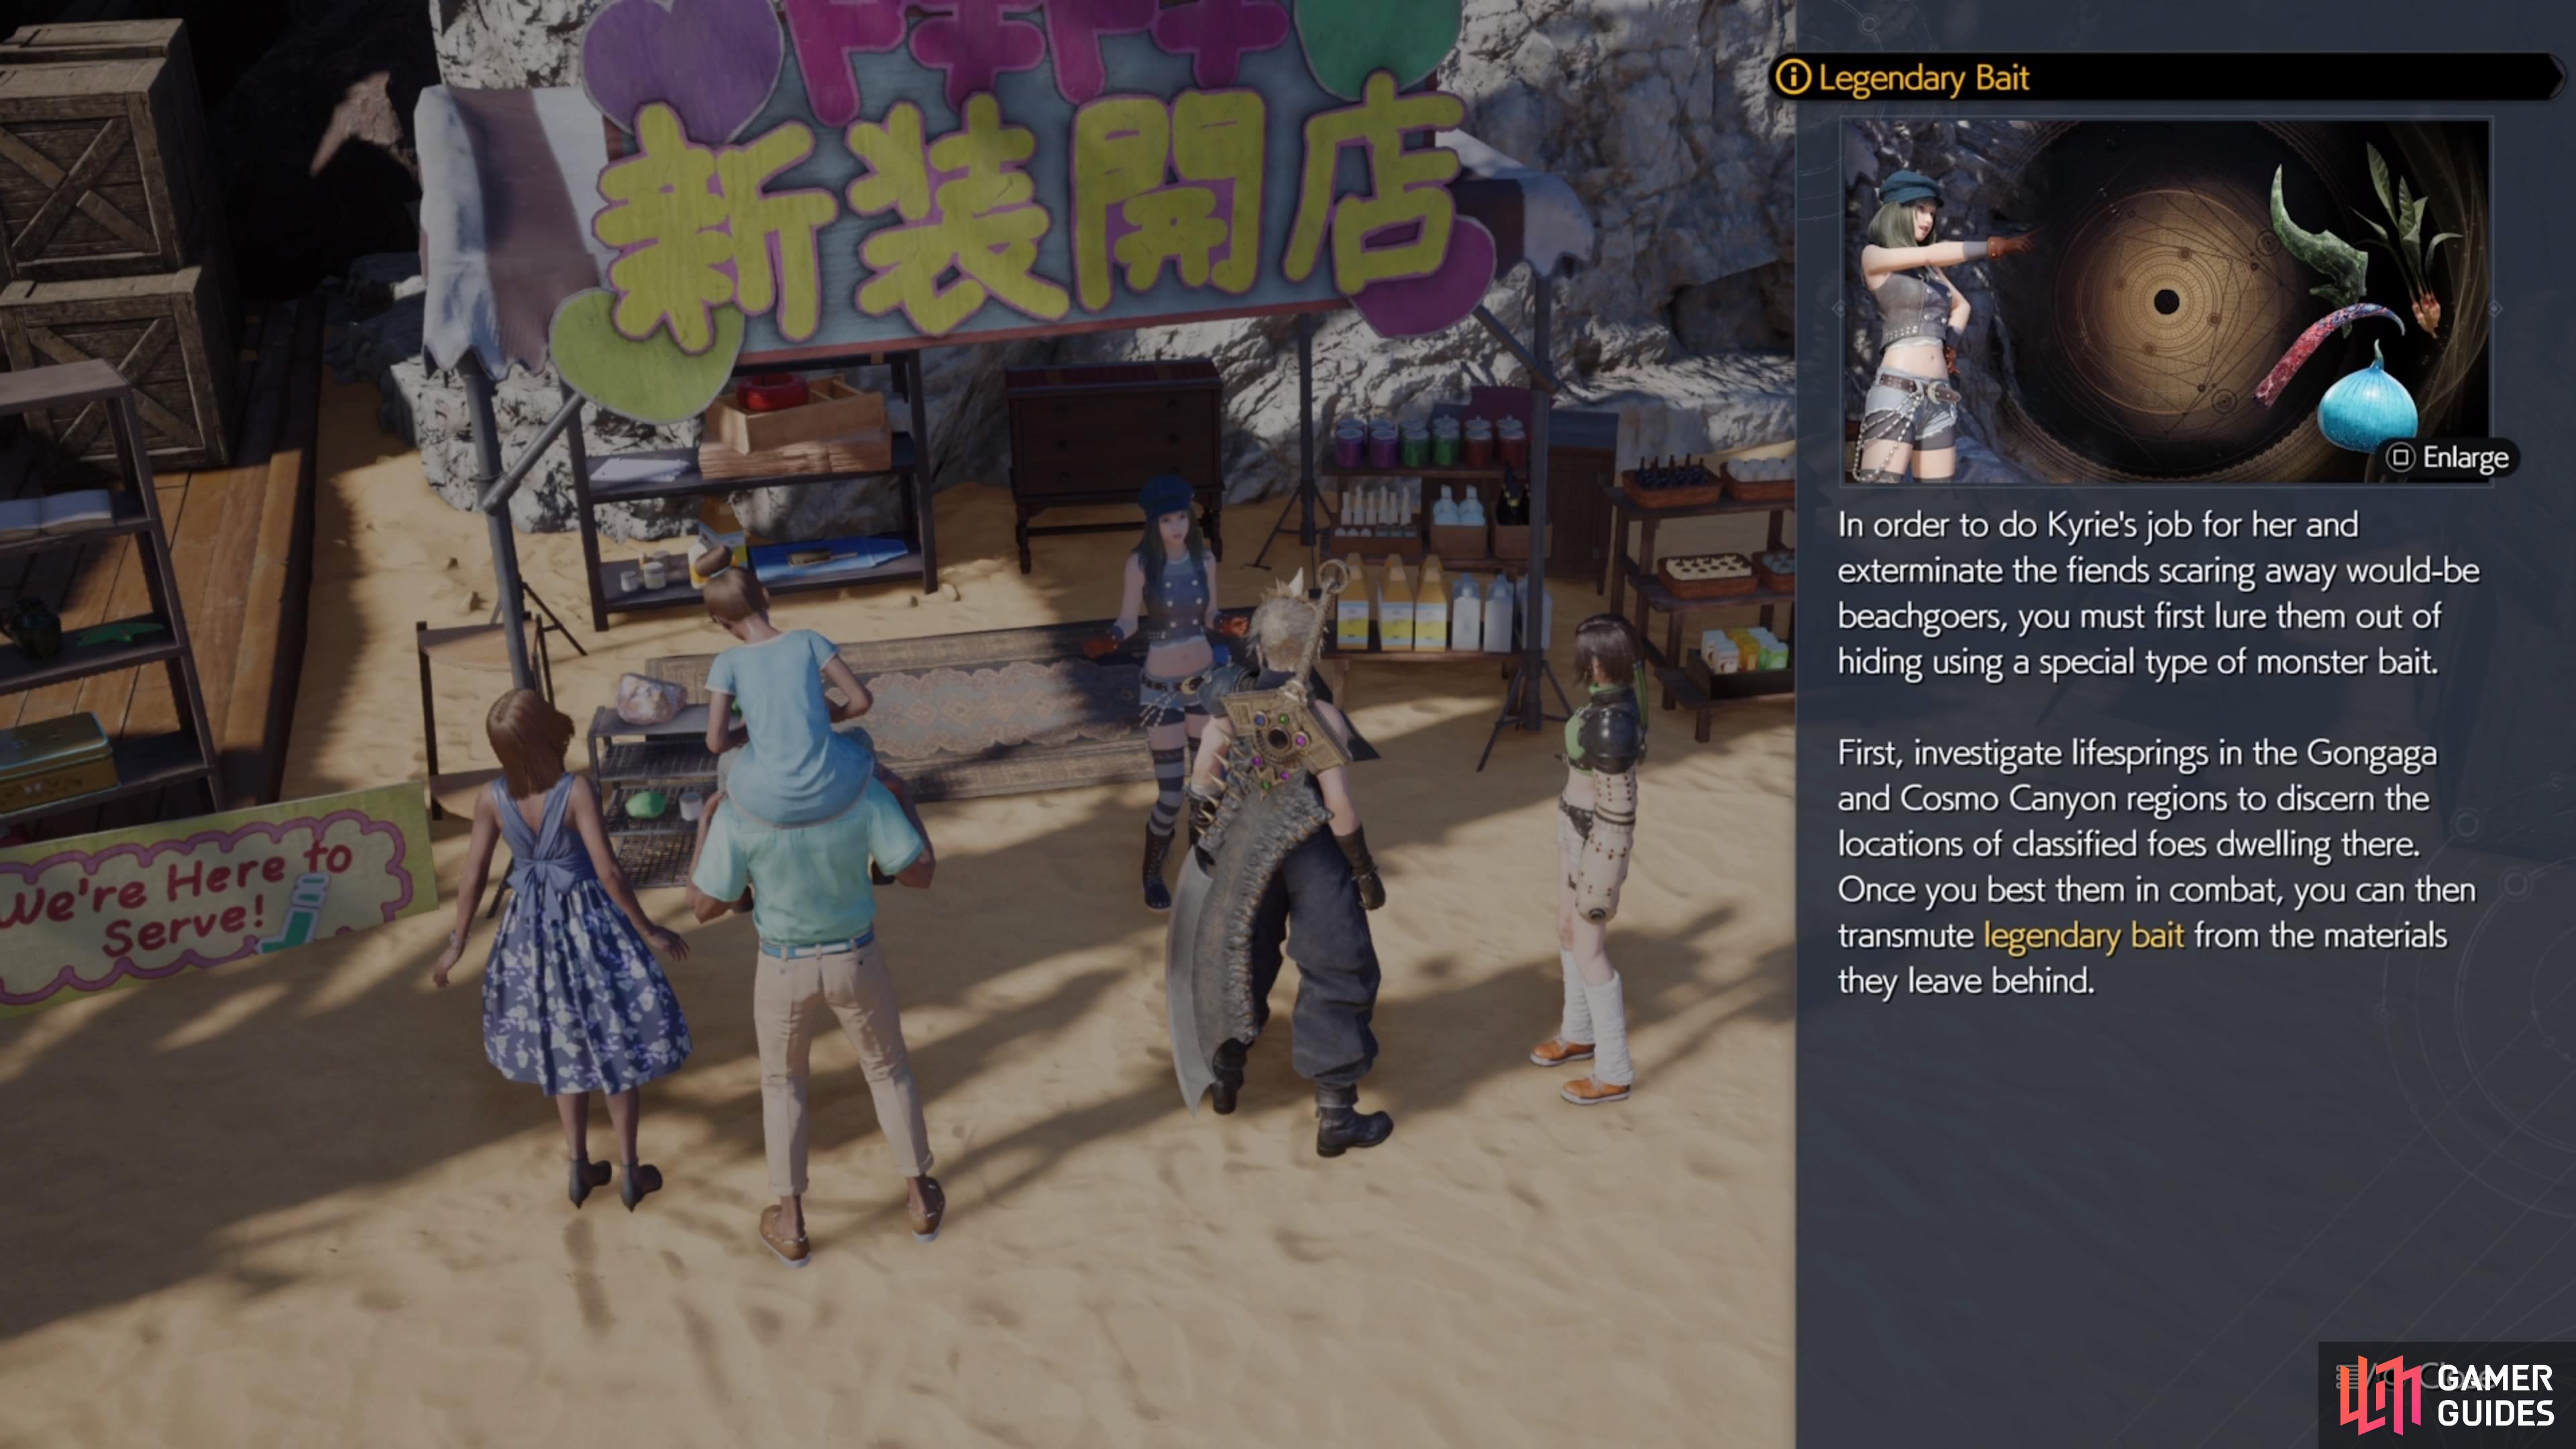
He will have this new quest for you, where he mentions a merc he hired has really done nothing but party it up on his money. So, he wants you to check up on the merc and “take her out,” if necessary. Head on over to the beach and check the stand on the far side to find Kyrie, who basically coerces you into taking care of the fiend problem. However, you will need some bait in order to get the fiends to appear. Kyrie will give you a transmuter chip for Legendary Bait, which requires two rarer monster ingredients.

(1 of 2) You’ll find Kyrie on the beach in Costa del Sol.
You’ll find Kyrie on the beach in Costa del Sol. (left), The game will outright tell you to hunt down the classified foes in Gongaga and Cosmo Canyon. (right)
How to Craft the Legendary Bait
If you check your transmuter list and cycle over to the key items tab, you will see the recipe for the Legendary Bait there. It will call for five ![]() Pearl Ginger Roots, five
Pearl Ginger Roots, five ![]() Ether Onions, a
Ether Onions, a ![]() Jabberwock Horn, and a
Jabberwock Horn, and a ![]() Great Malboro Tendril. The Pearl Ginger Roots and
Great Malboro Tendril. The Pearl Ginger Roots and ![]() Ether Onions are items you can get anywhere, and you likely already have them in your inventory. However, the other two items are specific drops from Classified Intel fiends.
Ether Onions are items you can get anywhere, and you likely already have them in your inventory. However, the other two items are specific drops from Classified Intel fiends.
How to Get the Great Malboro Tendril
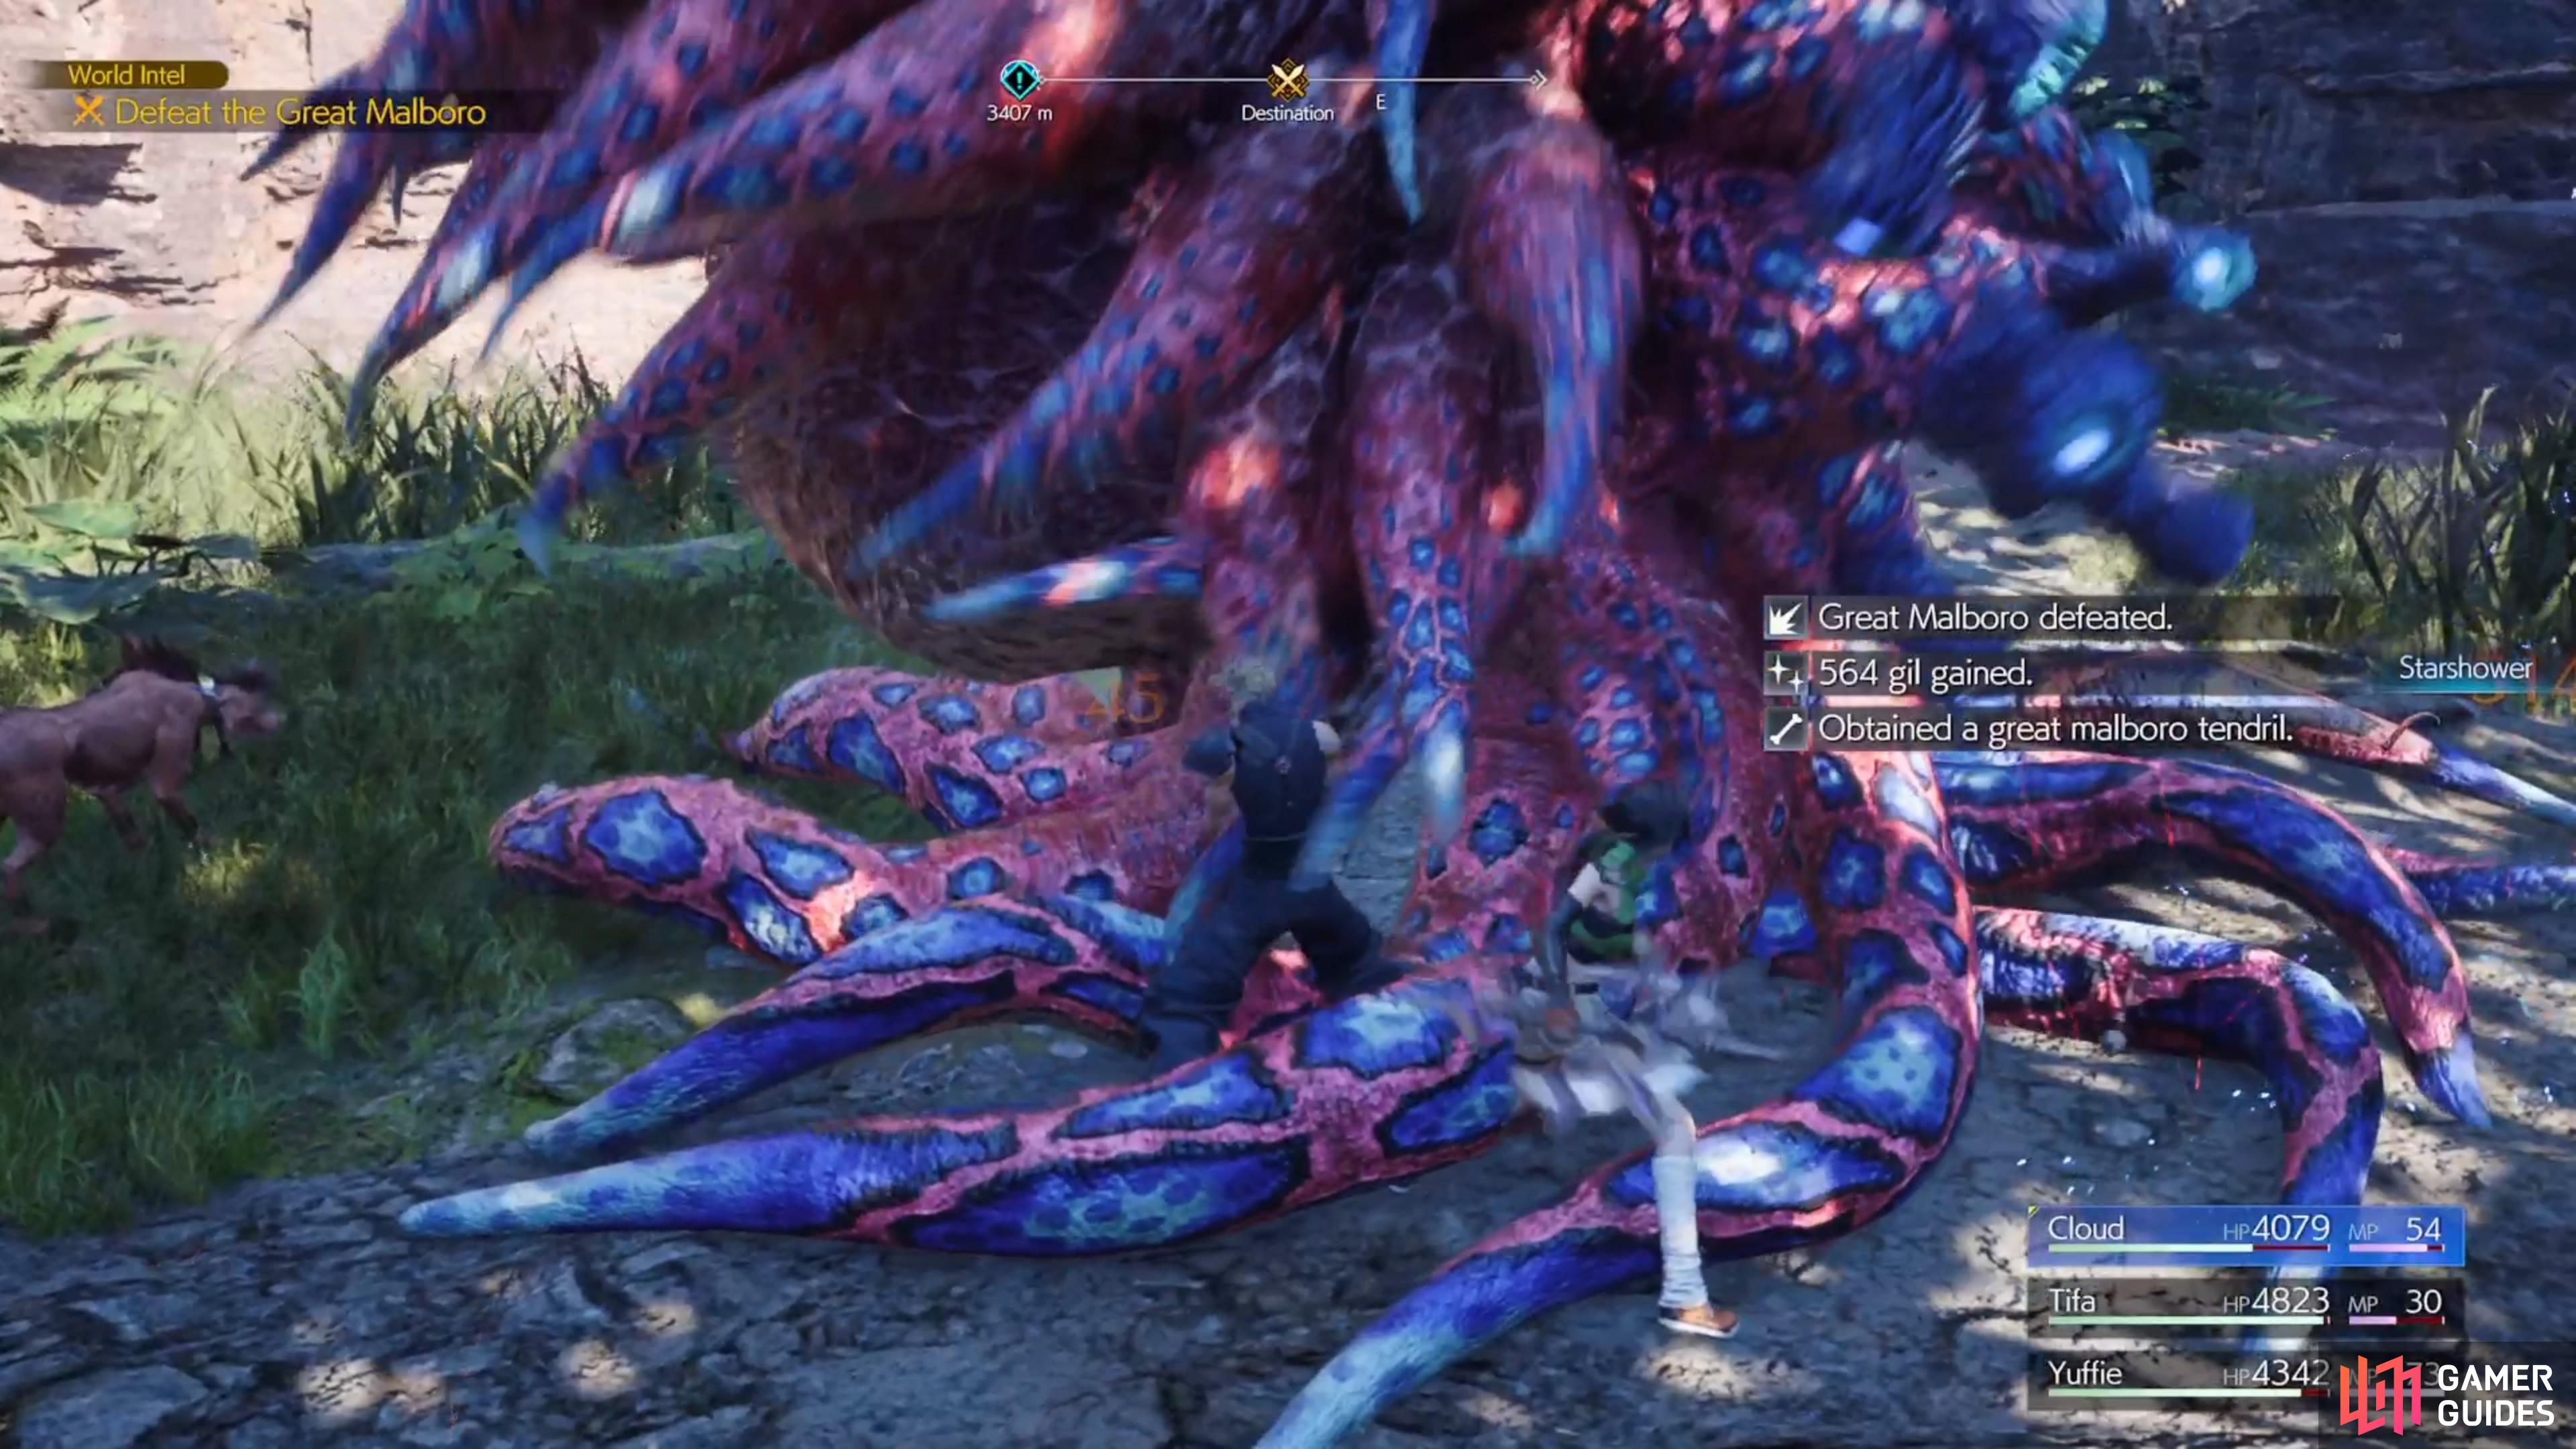
The Tendril drops from the ![]() Great Malboro enemy, which is the Classified Intel for the
Great Malboro enemy, which is the Classified Intel for the ![]() Gongaga Region. If you haven’t done this yet, you receive the location for the Great Malboro by finding four of the six Expedition Intel for Gongaga. Once you do this, Chadley will chime in and unlock the Classified Intel: The Sultan of Stench. You will find the Great Malboro in the lower left corner of the Gongaga Region and you don’t have to do anything special to get the Tendril, as it will be dropped upon defeating it. If you need a guide on how to fight this foul-breathed creature, visit the Great Malboro guide page.
Gongaga Region. If you haven’t done this yet, you receive the location for the Great Malboro by finding four of the six Expedition Intel for Gongaga. Once you do this, Chadley will chime in and unlock the Classified Intel: The Sultan of Stench. You will find the Great Malboro in the lower left corner of the Gongaga Region and you don’t have to do anything special to get the Tendril, as it will be dropped upon defeating it. If you need a guide on how to fight this foul-breathed creature, visit the Great Malboro guide page.
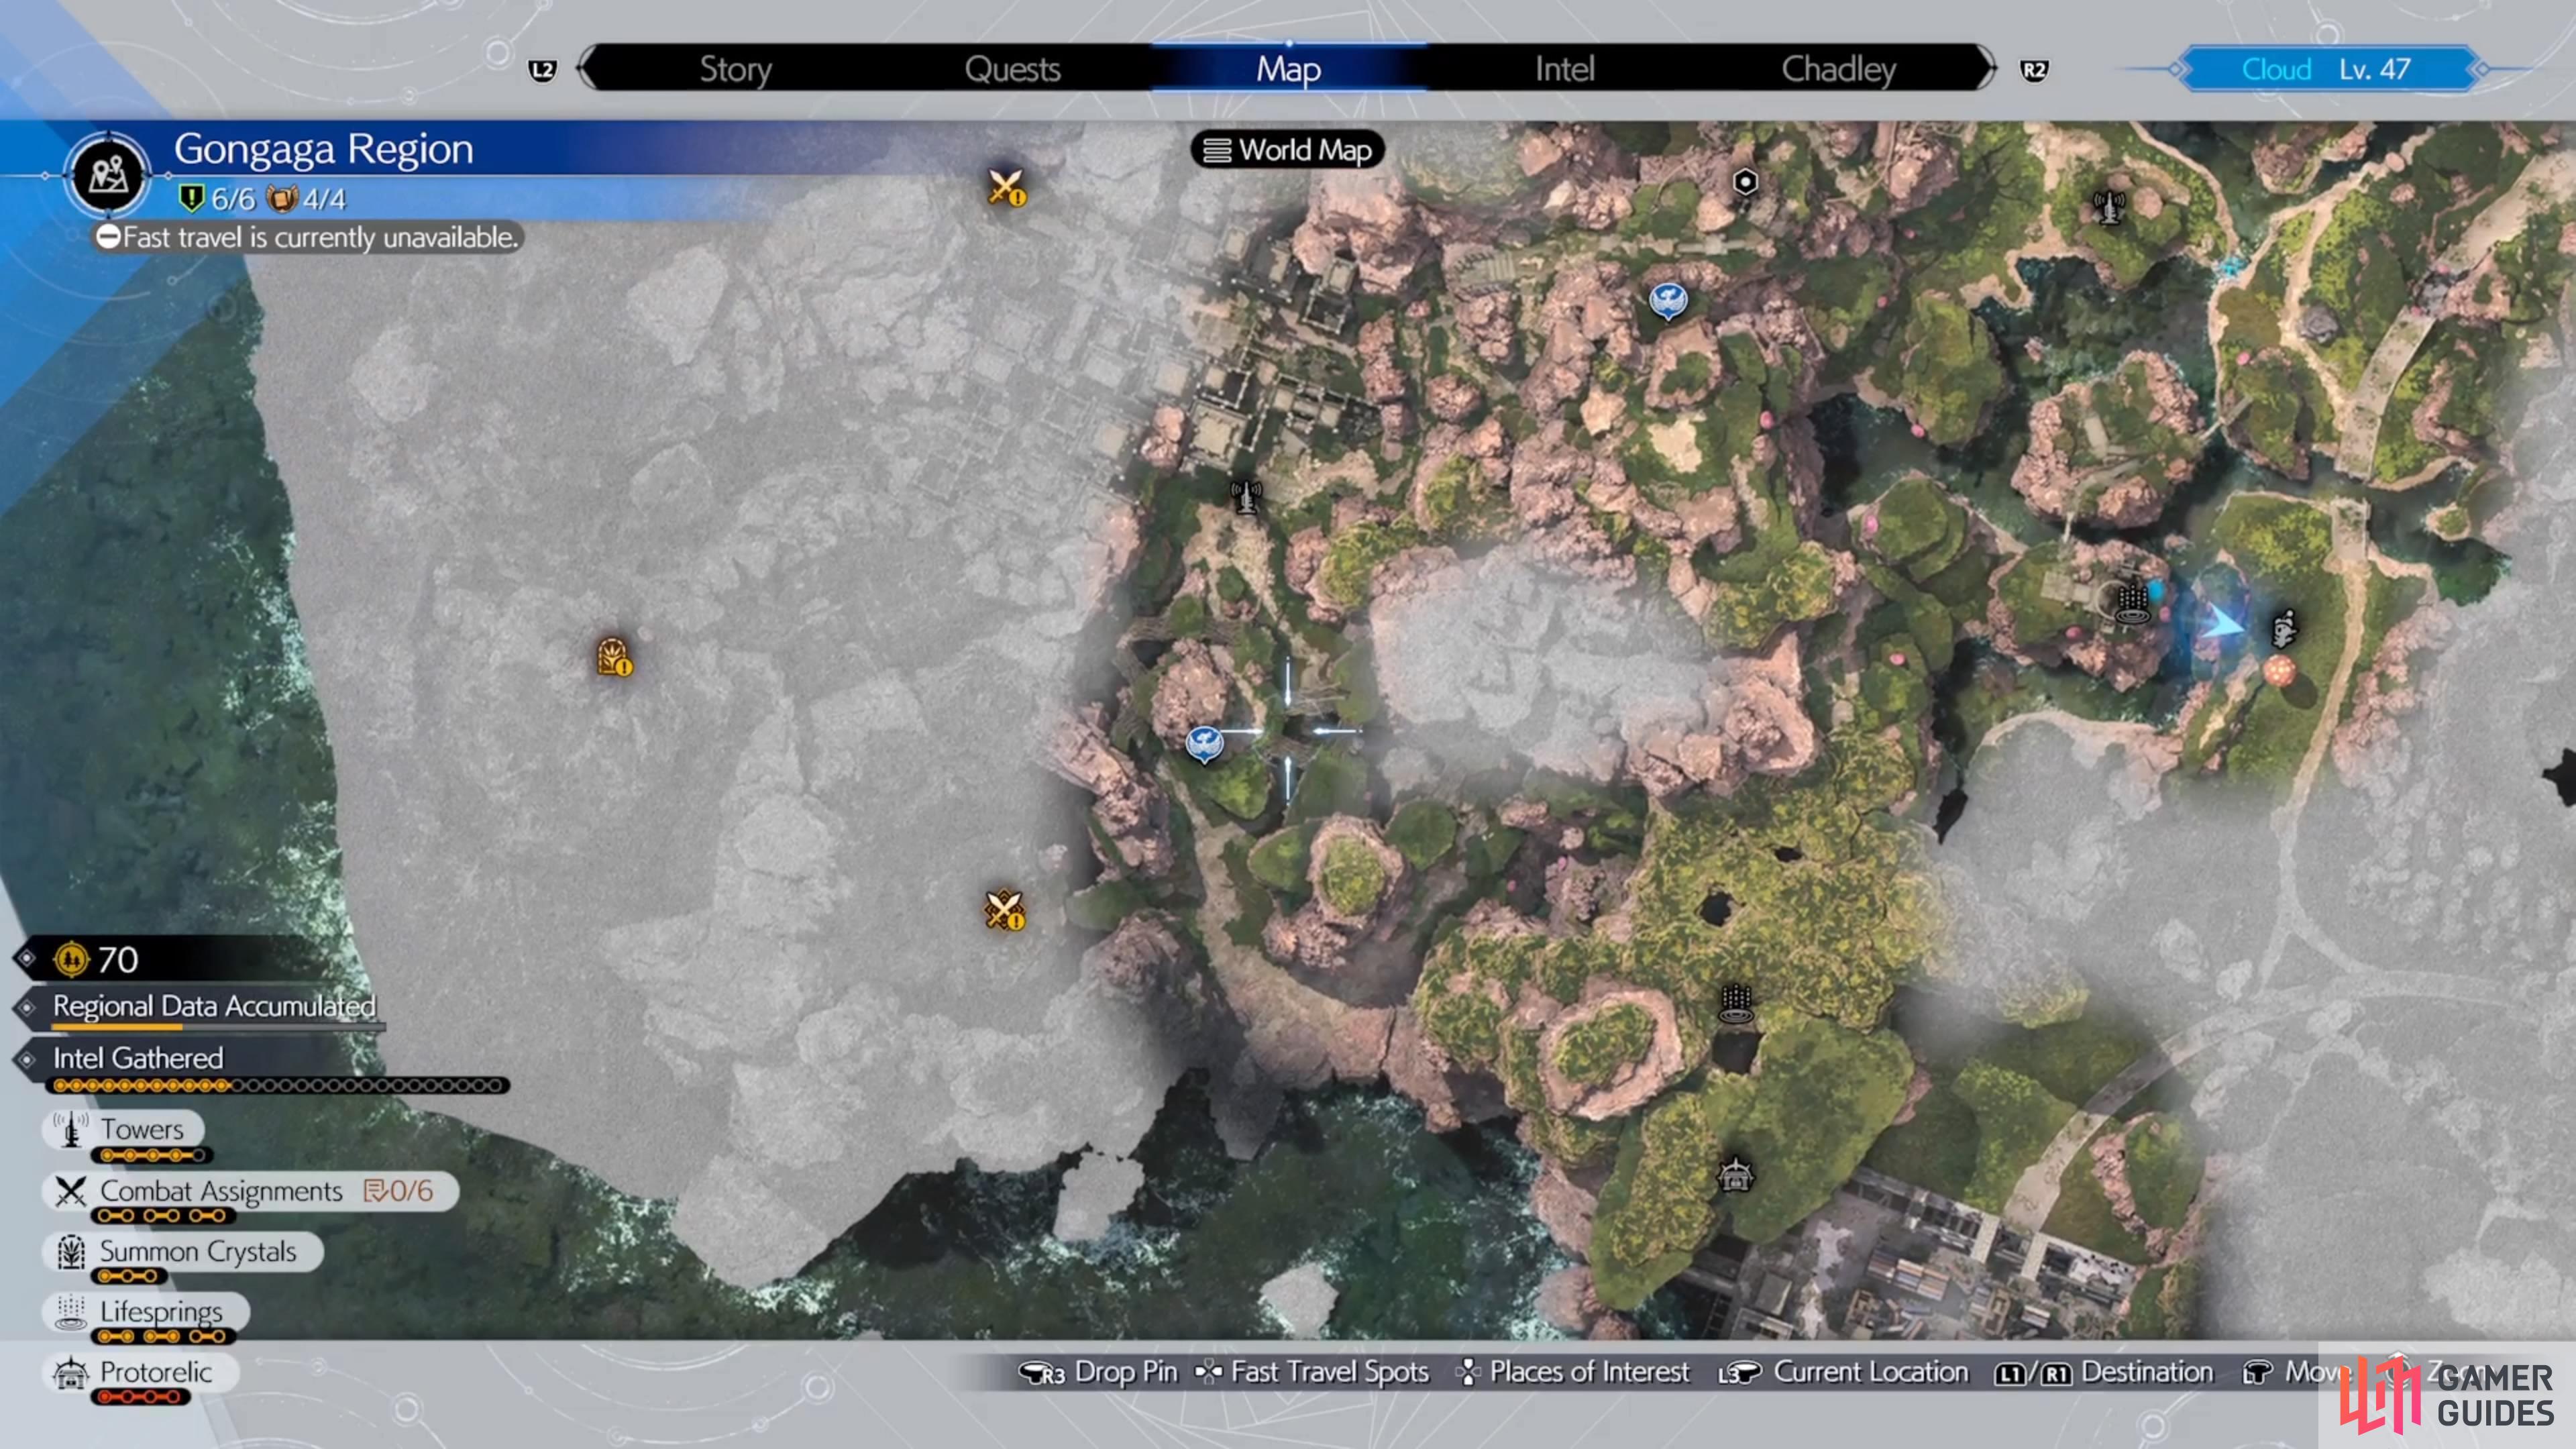
(1 of 4) The Great Malboro is found in the southwestern portion of Gongaga.
How to Get the Jabberwock Horn
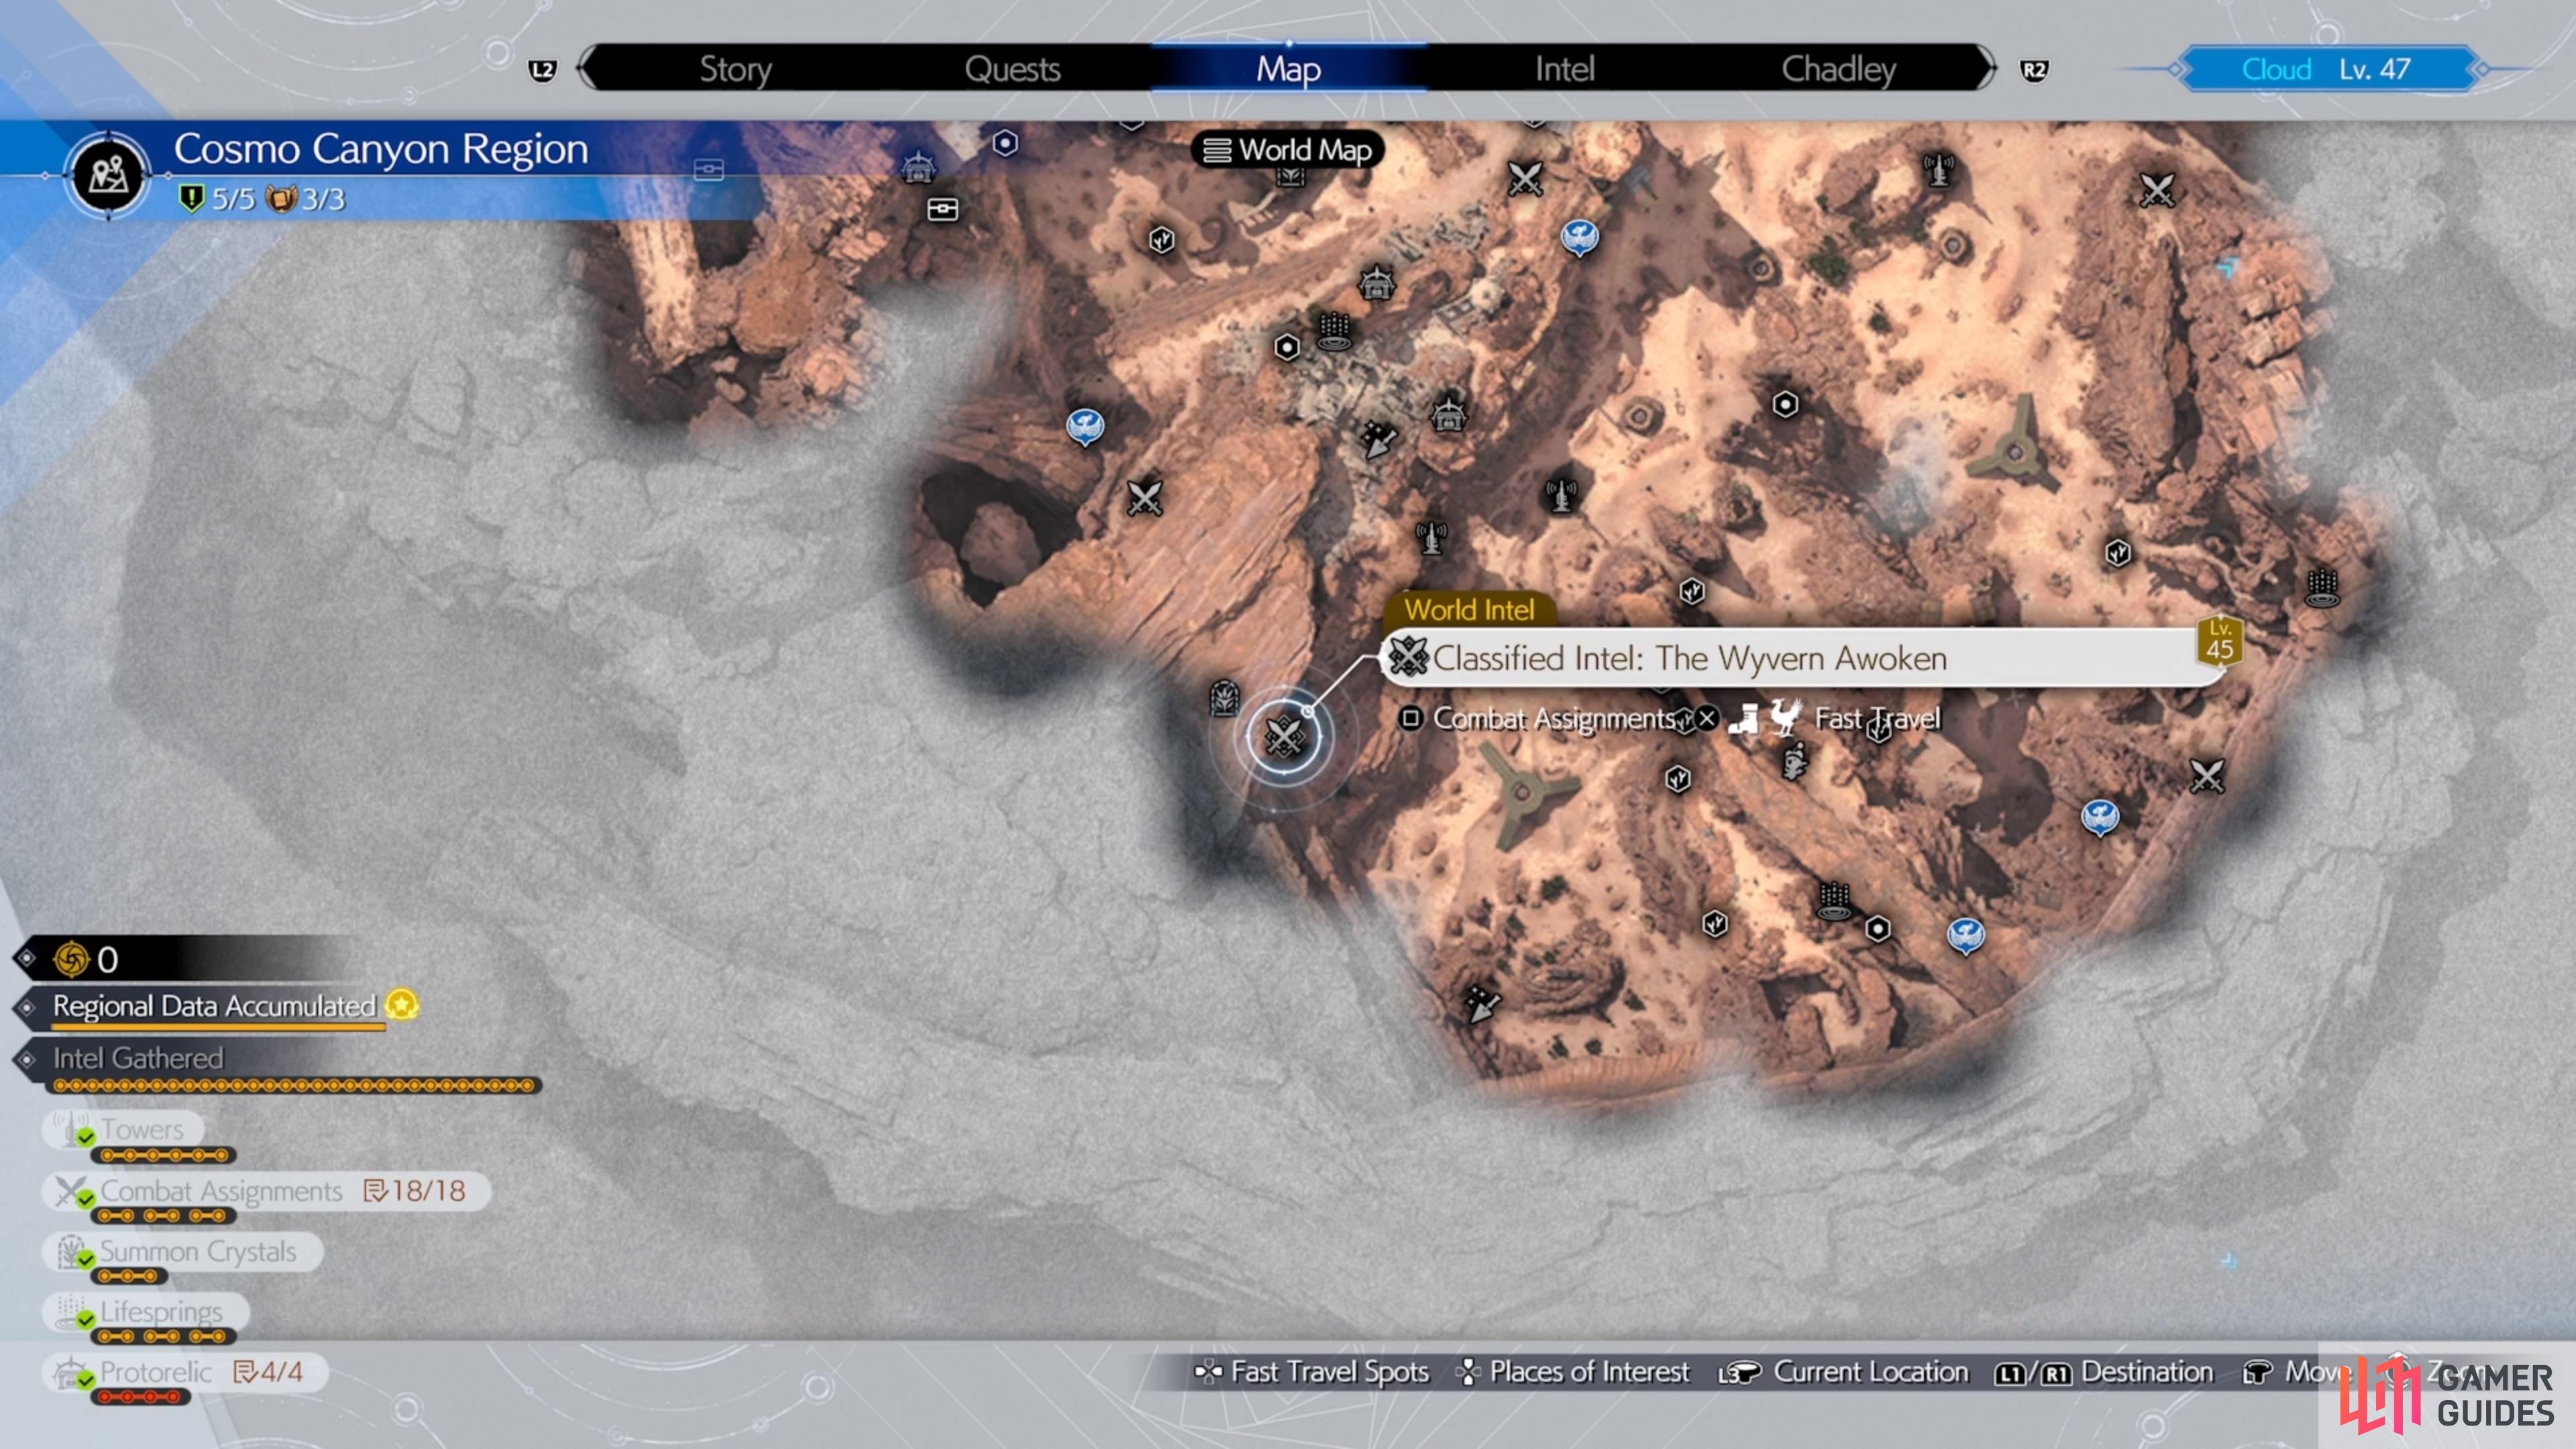
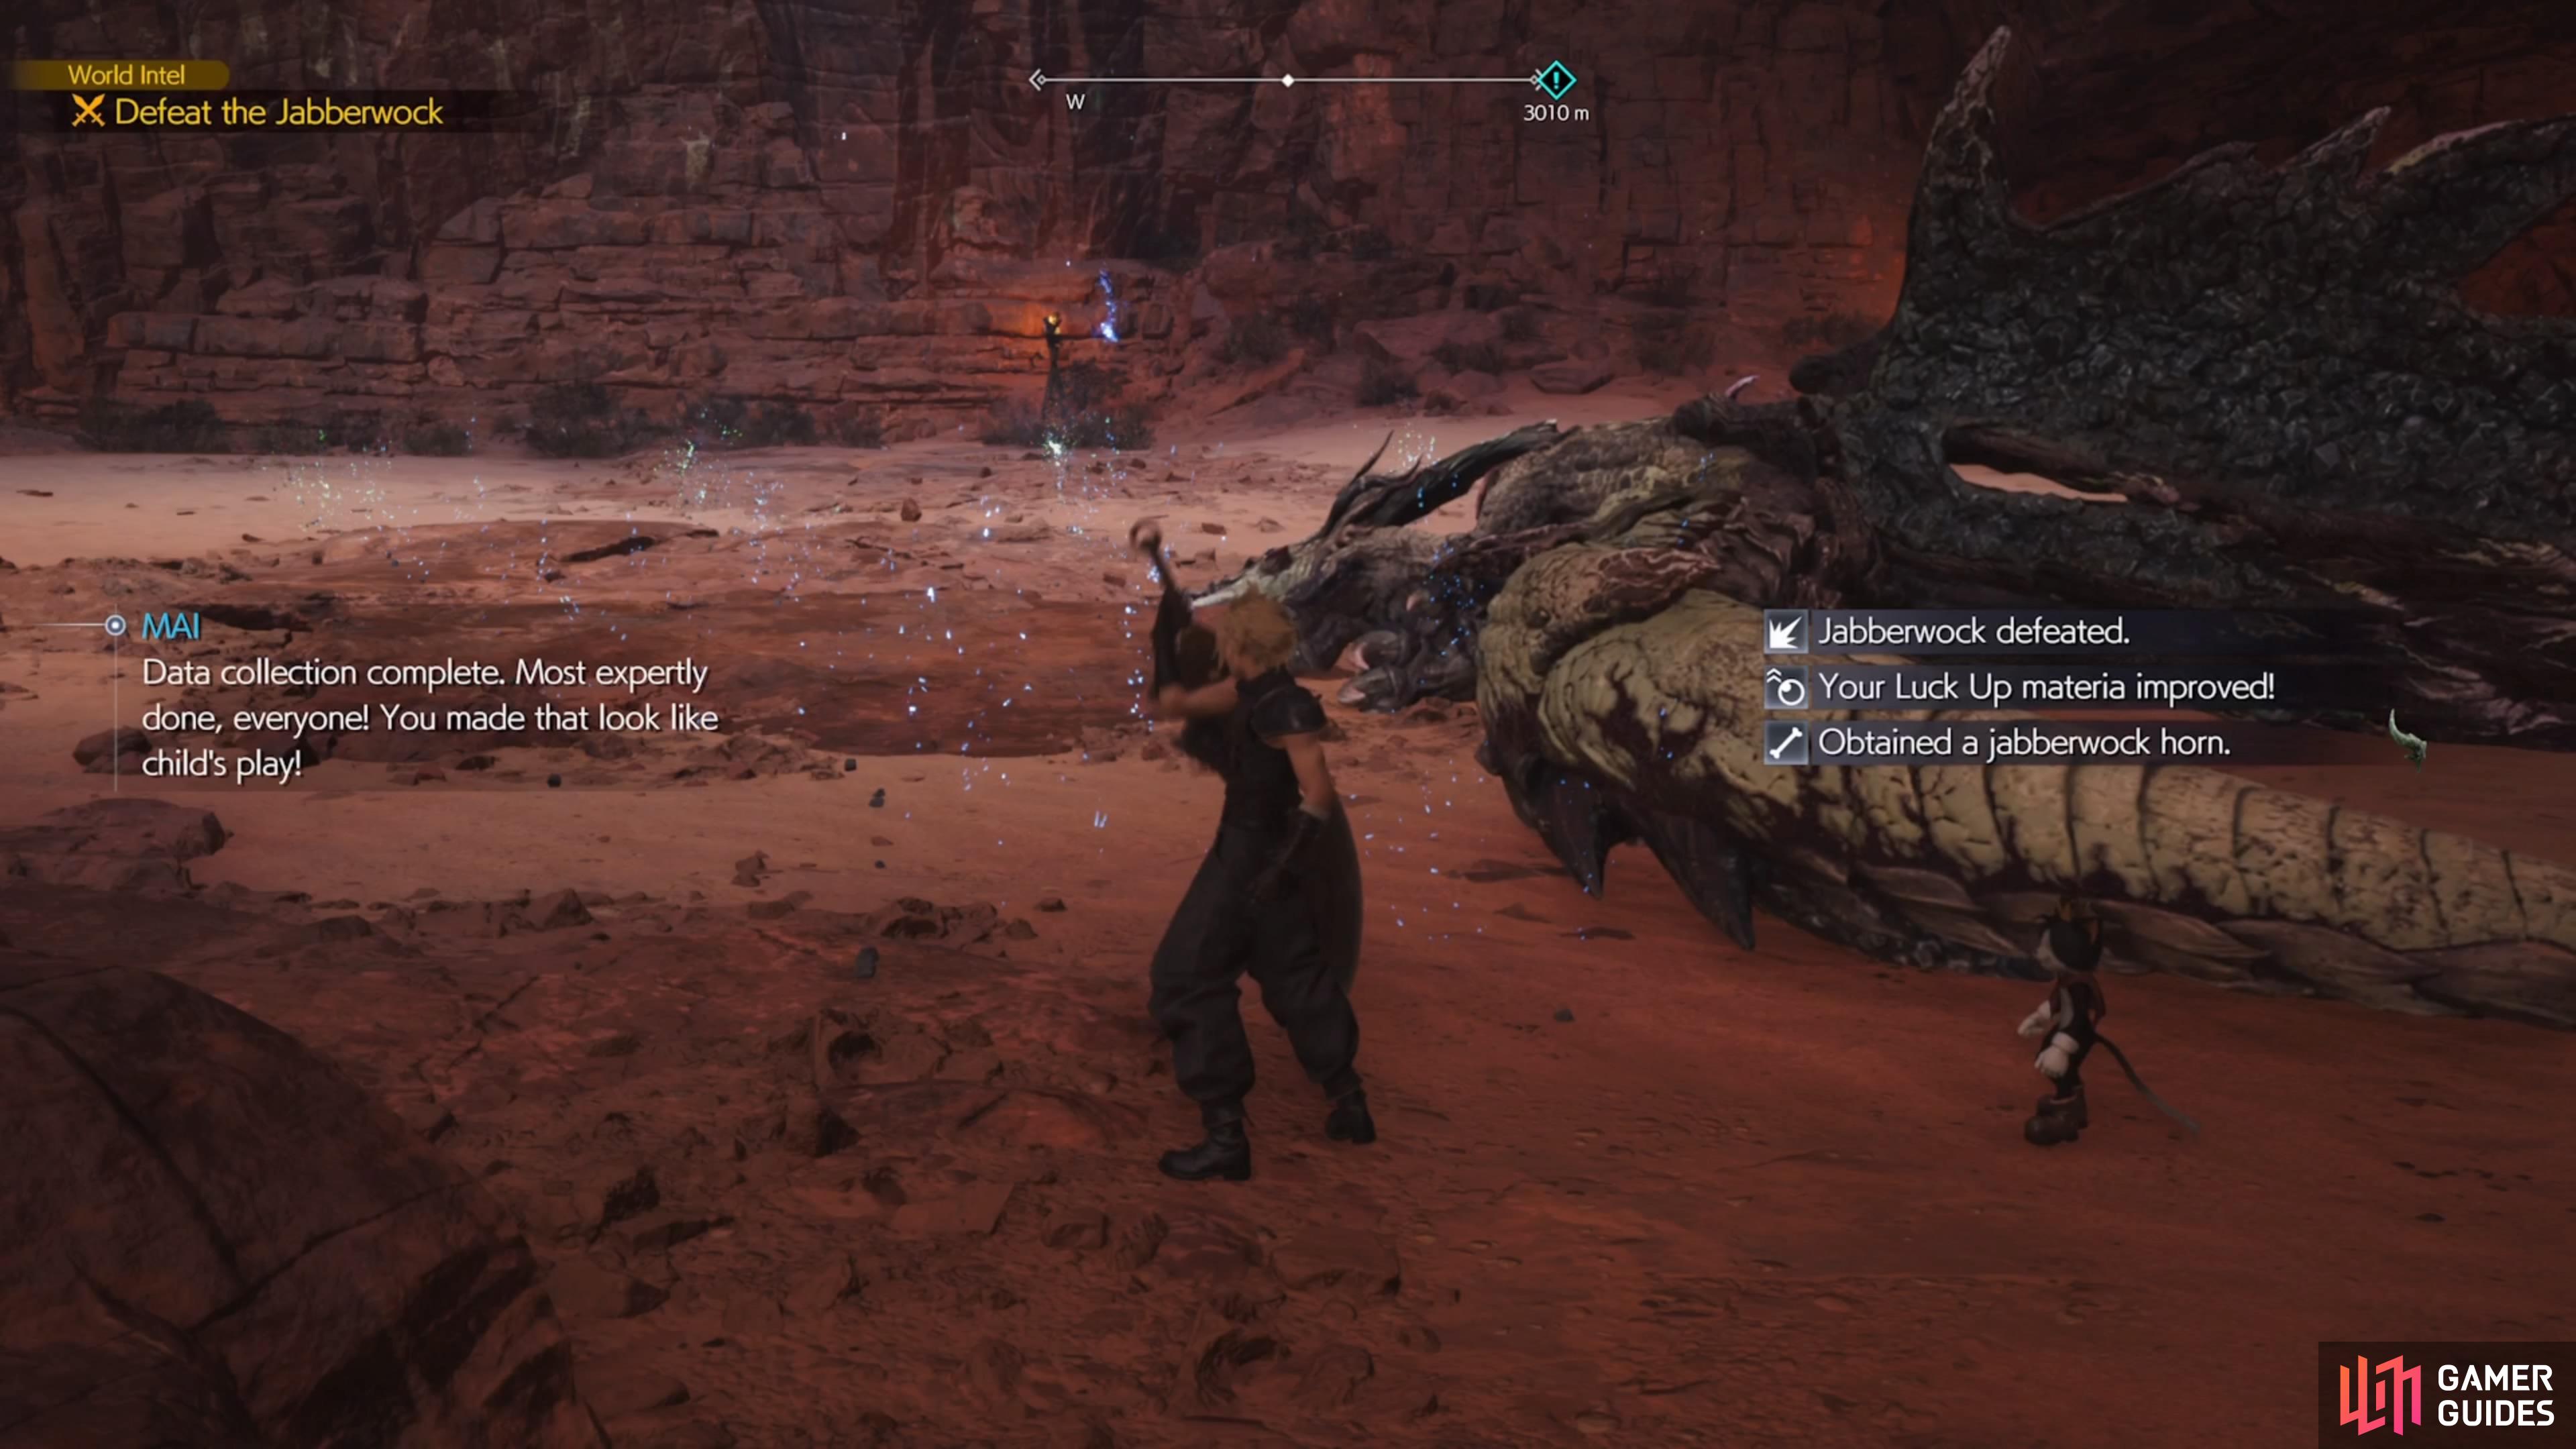
The Jabberwock Horn drops from the Jabberwock and is similar to the Great Malboro, only the Expedition Intel for this creature will be in the ![]() Cosmo Canyon Region. You will also need all six Intel there to get the classified Intel. The Jabberwock is found towards the south-southwest portion of the region. Defeat the creature to get yourself the Jabberwock Horn, but should you need any more help, check out the Jabberwock guide page for more info.
Cosmo Canyon Region. You will also need all six Intel there to get the classified Intel. The Jabberwock is found towards the south-southwest portion of the region. Defeat the creature to get yourself the Jabberwock Horn, but should you need any more help, check out the Jabberwock guide page for more info.
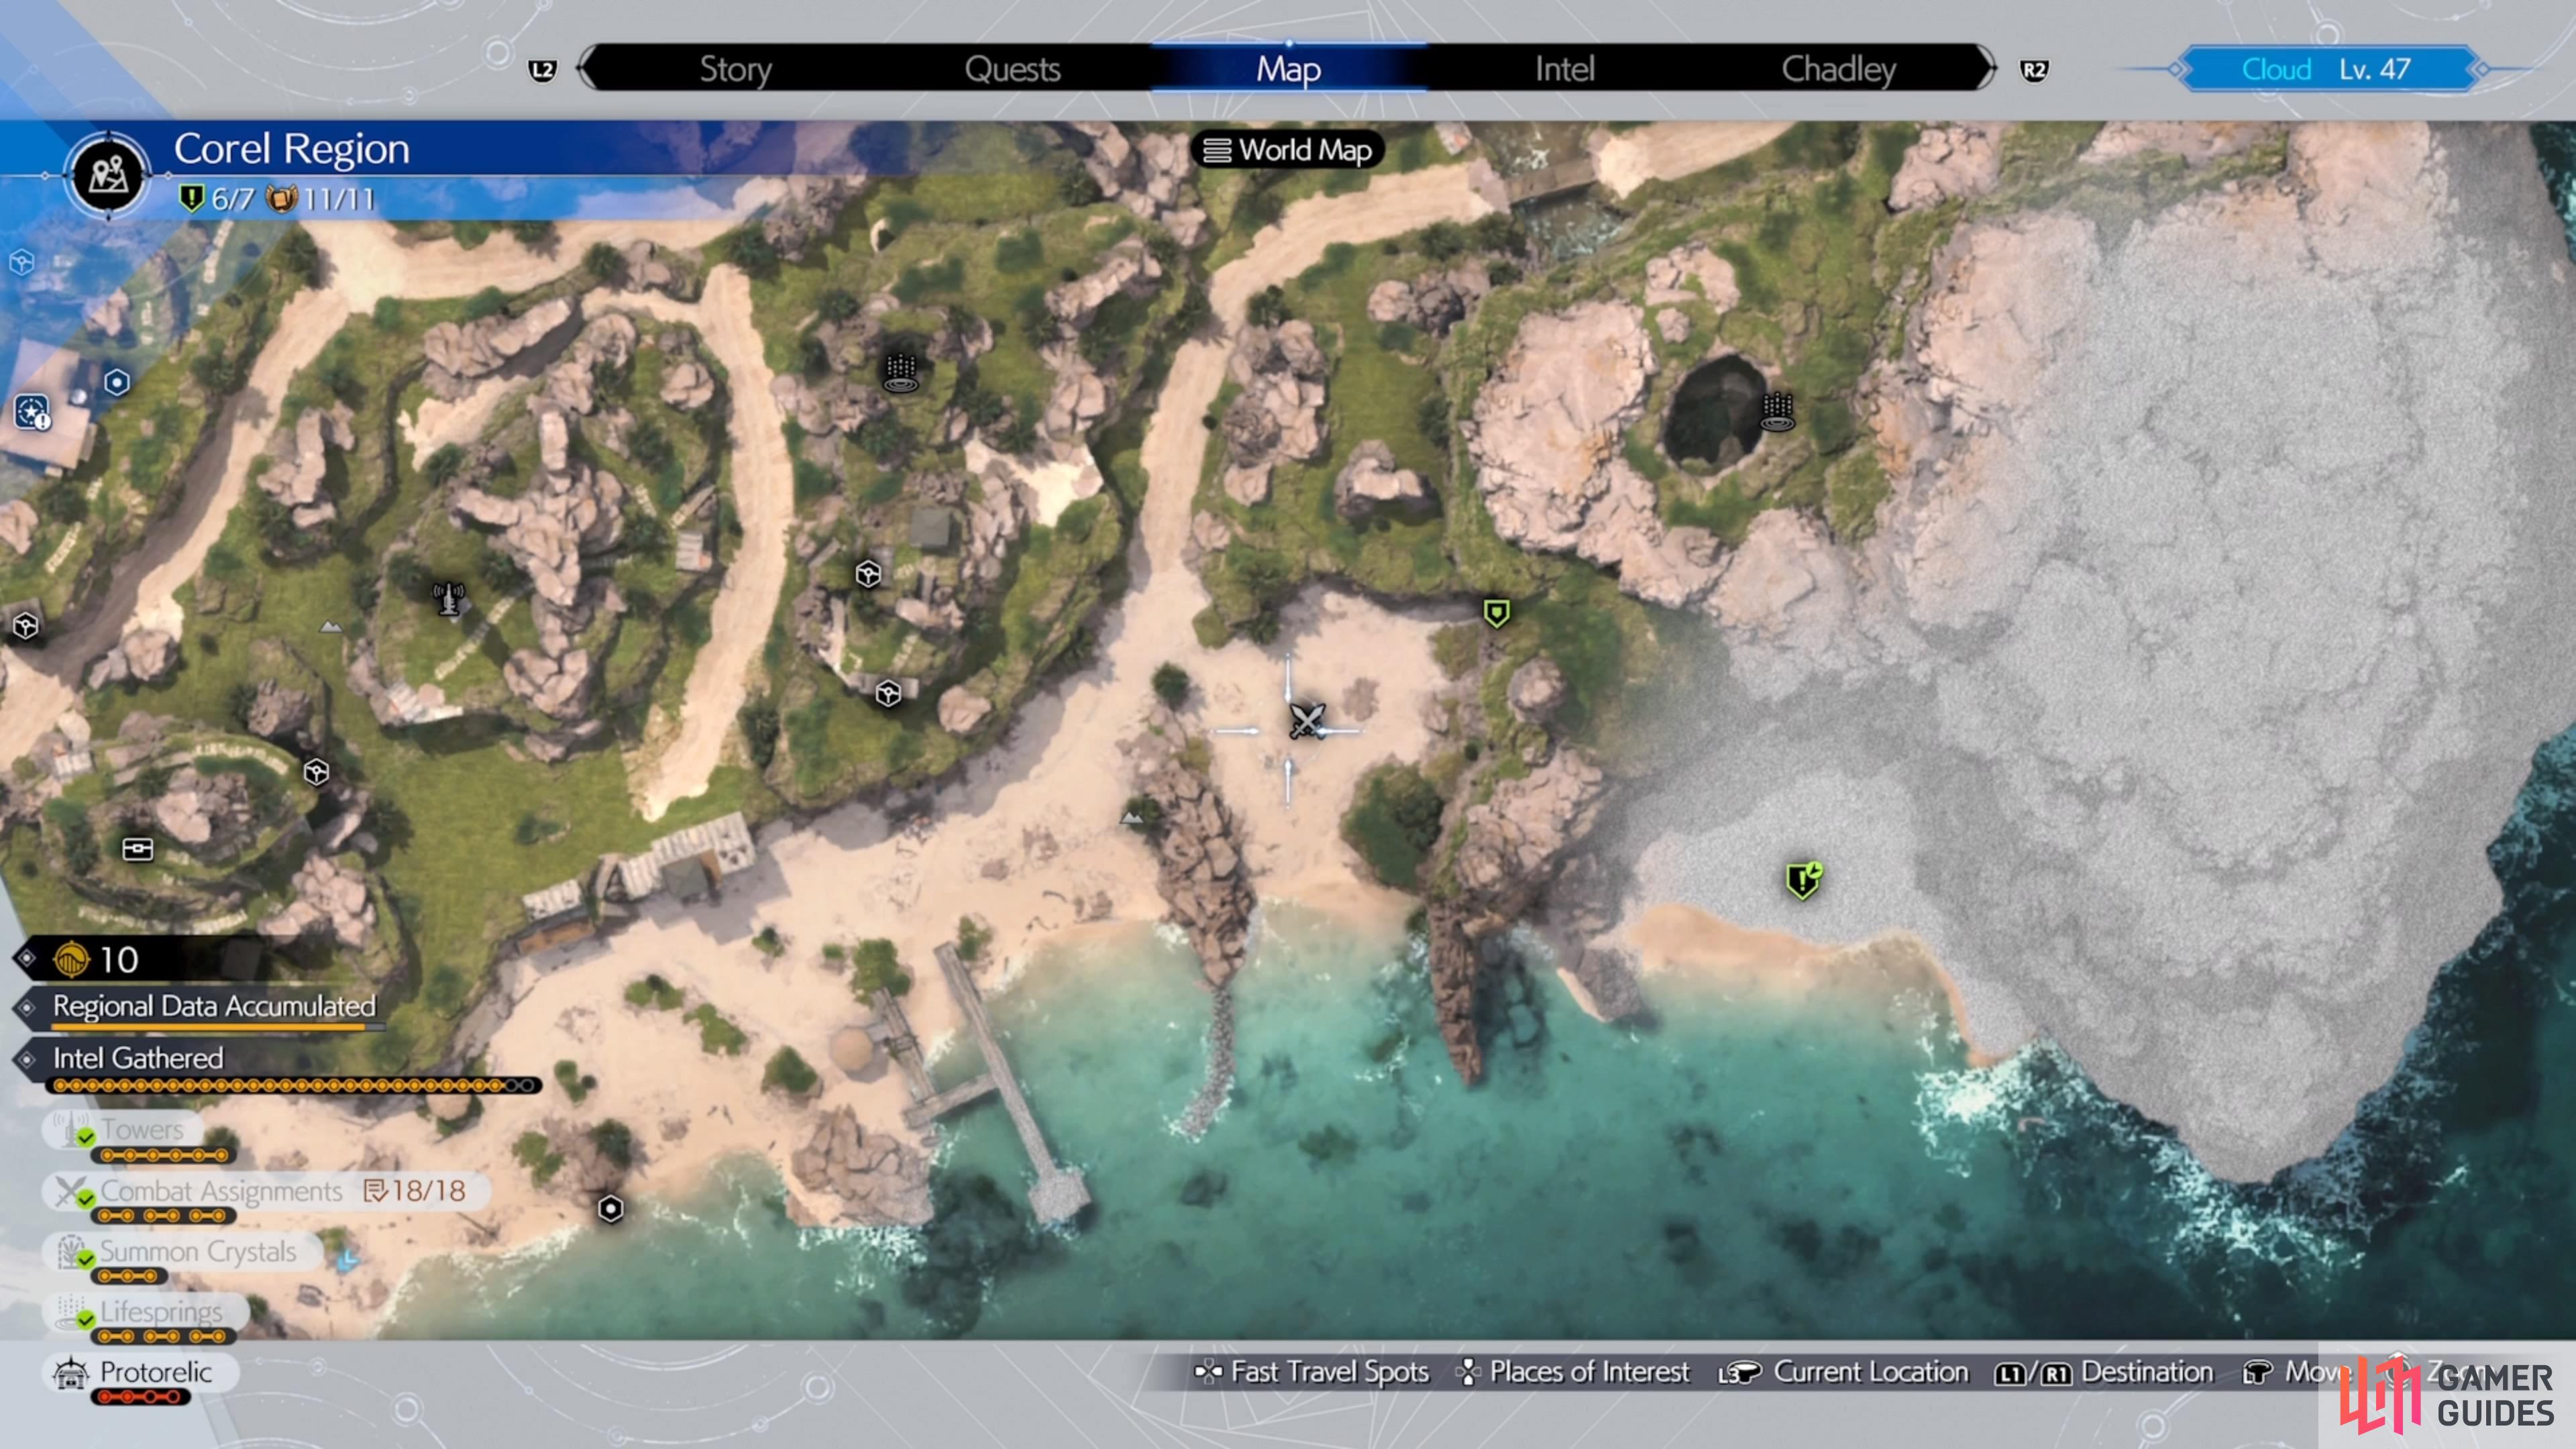
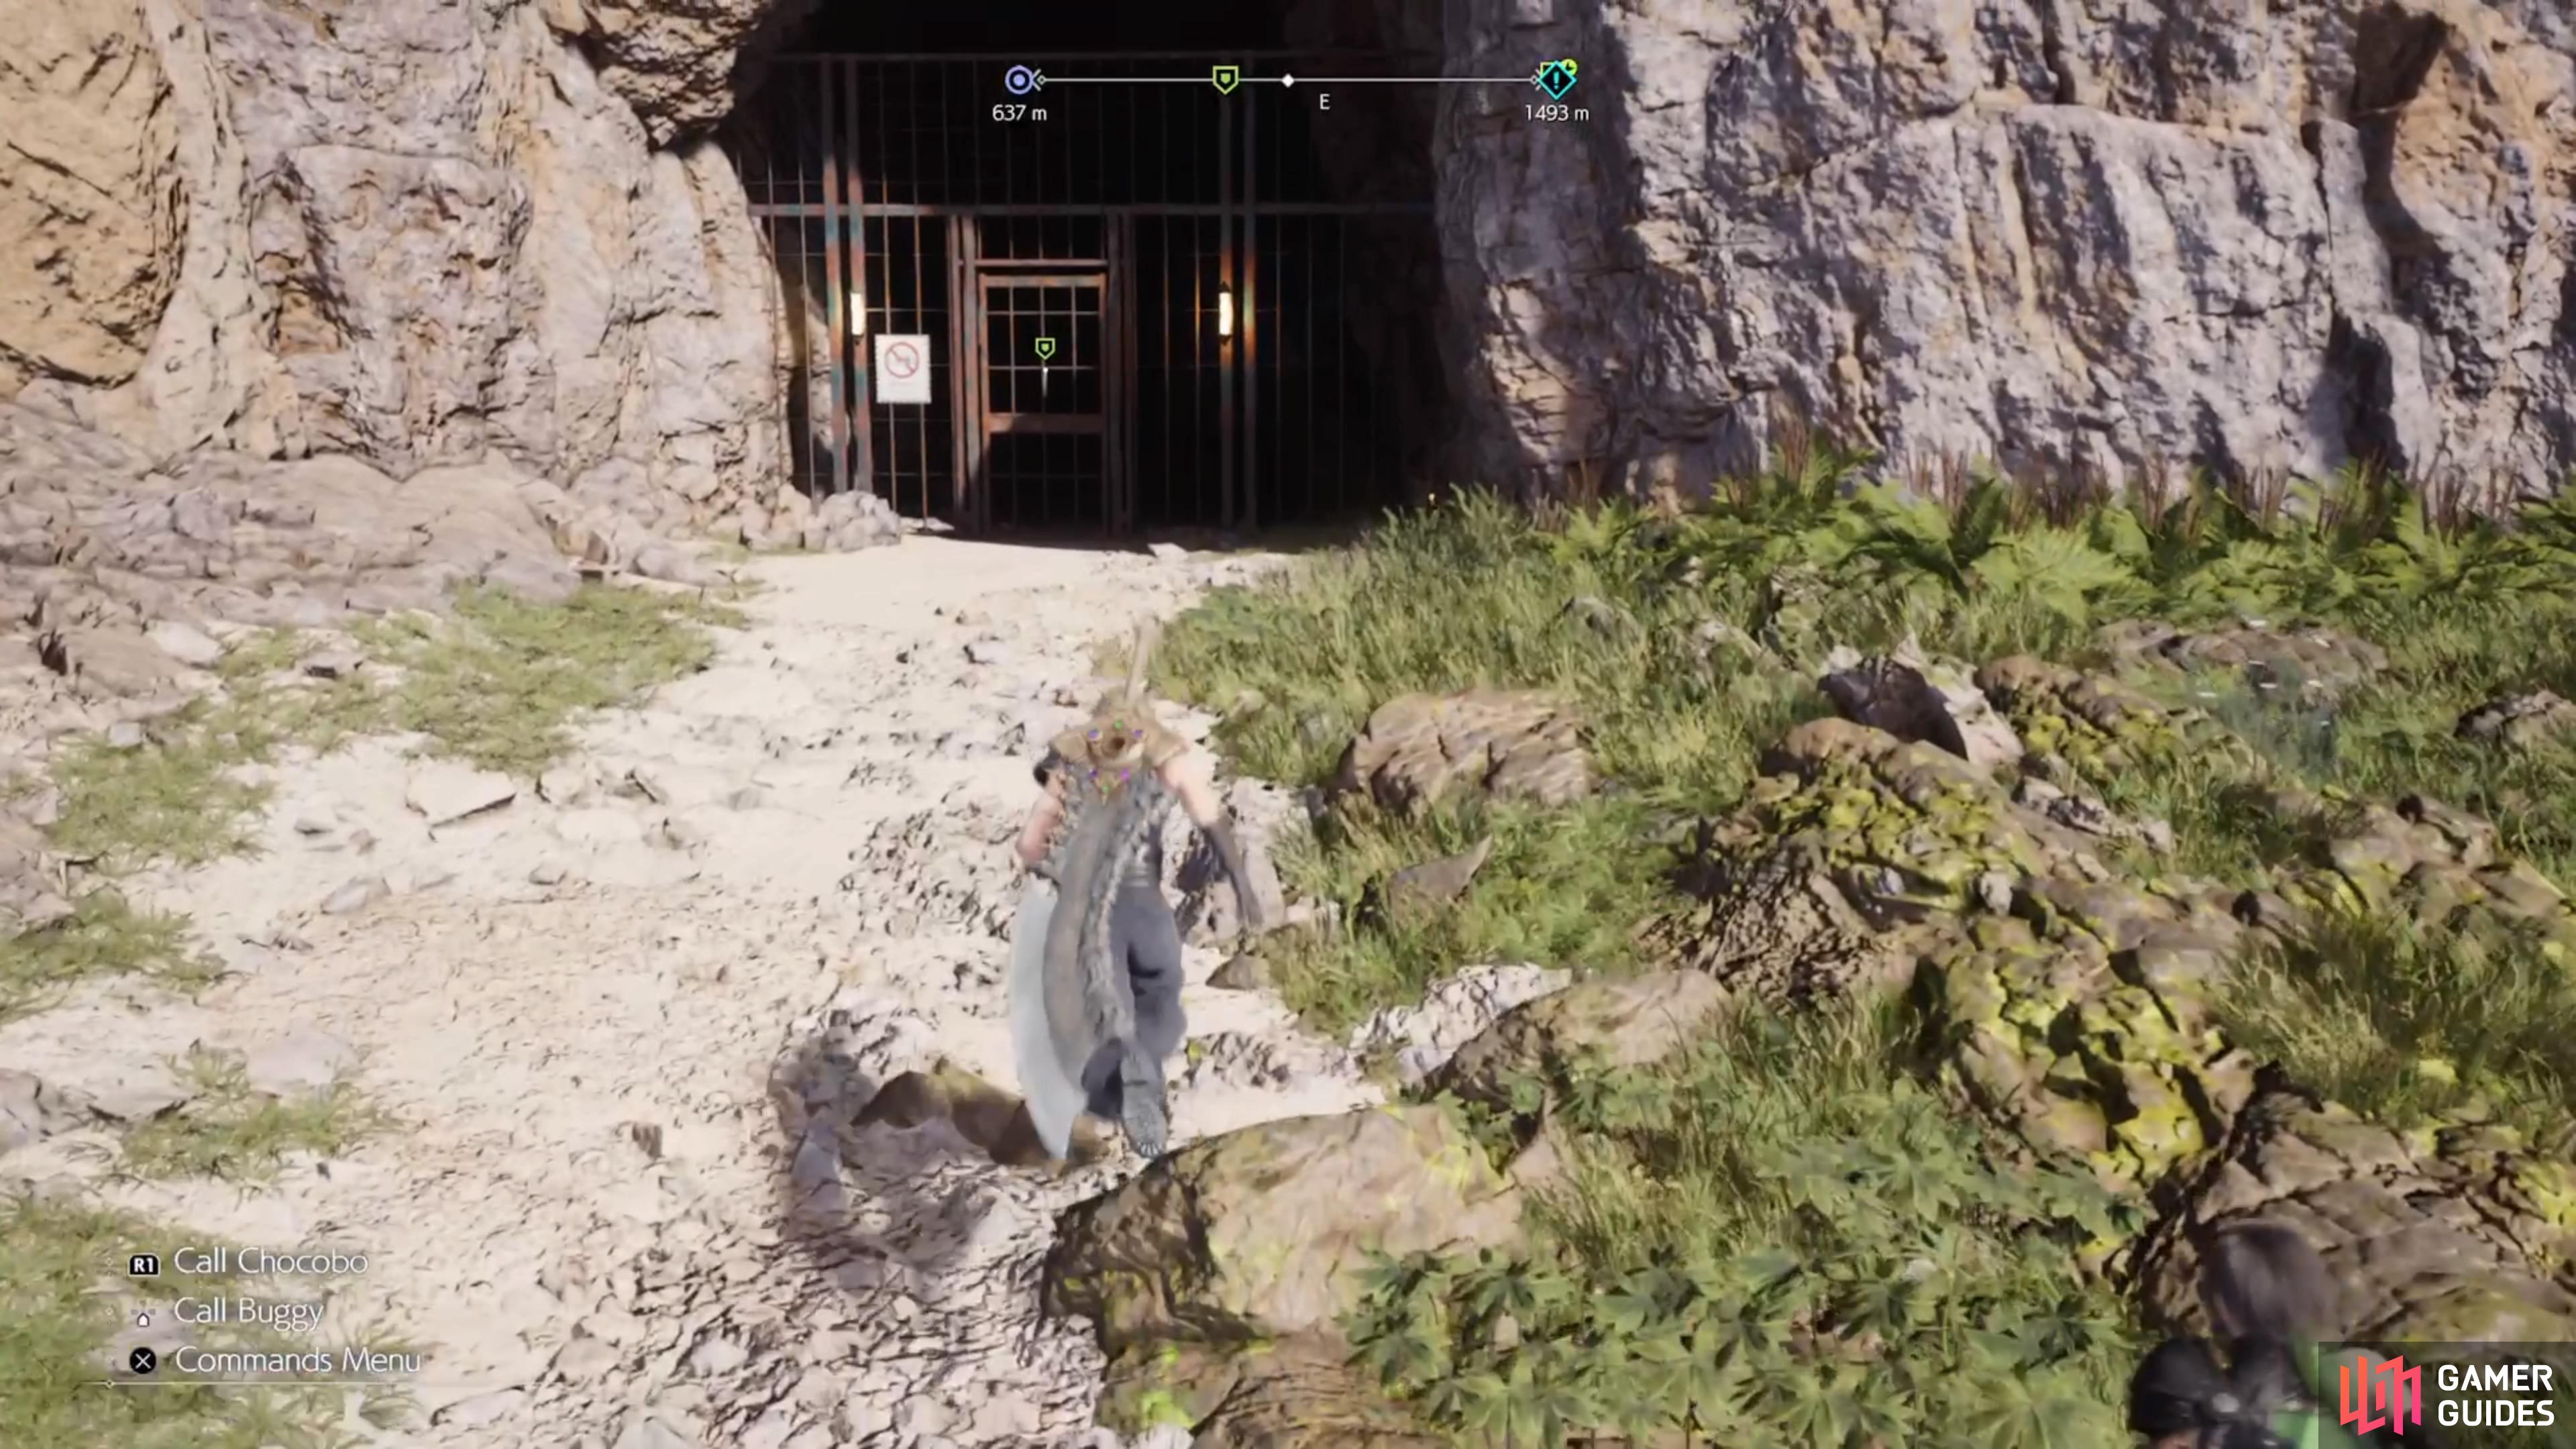
Once you have all the necessary ingredients, go into your transmuter menu and craft the Legendary Bait. Head back to the ![]() Corel Region and to the beach just outside of Costa del Sol, where you fight Fiend Intel 1: Hit the Squids. There will be a door on the eastern side of this little area, which was previously locked and you now have the key for, so open it to find an off-limits beach. Use the Legendary Bait on the wreckage and you will spawn some Sea Devils.
Corel Region and to the beach just outside of Costa del Sol, where you fight Fiend Intel 1: Hit the Squids. There will be a door on the eastern side of this little area, which was previously locked and you now have the key for, so open it to find an off-limits beach. Use the Legendary Bait on the wreckage and you will spawn some Sea Devils.
How to Defeat the Sea Devils
The Sea Devils are weak to ice, but if you use lightning attacks on them, the frequency of their attacks will be lessened. Honestly, while they attack often, they aren’t really all too challenging for foes, so you could probably forgo the lightning bit. Most of their attacks don’t have names, but they can attack with their tails and other parts of their bodies. The only named attack they have is one where they grab a character, so try to avoid this at all costs.

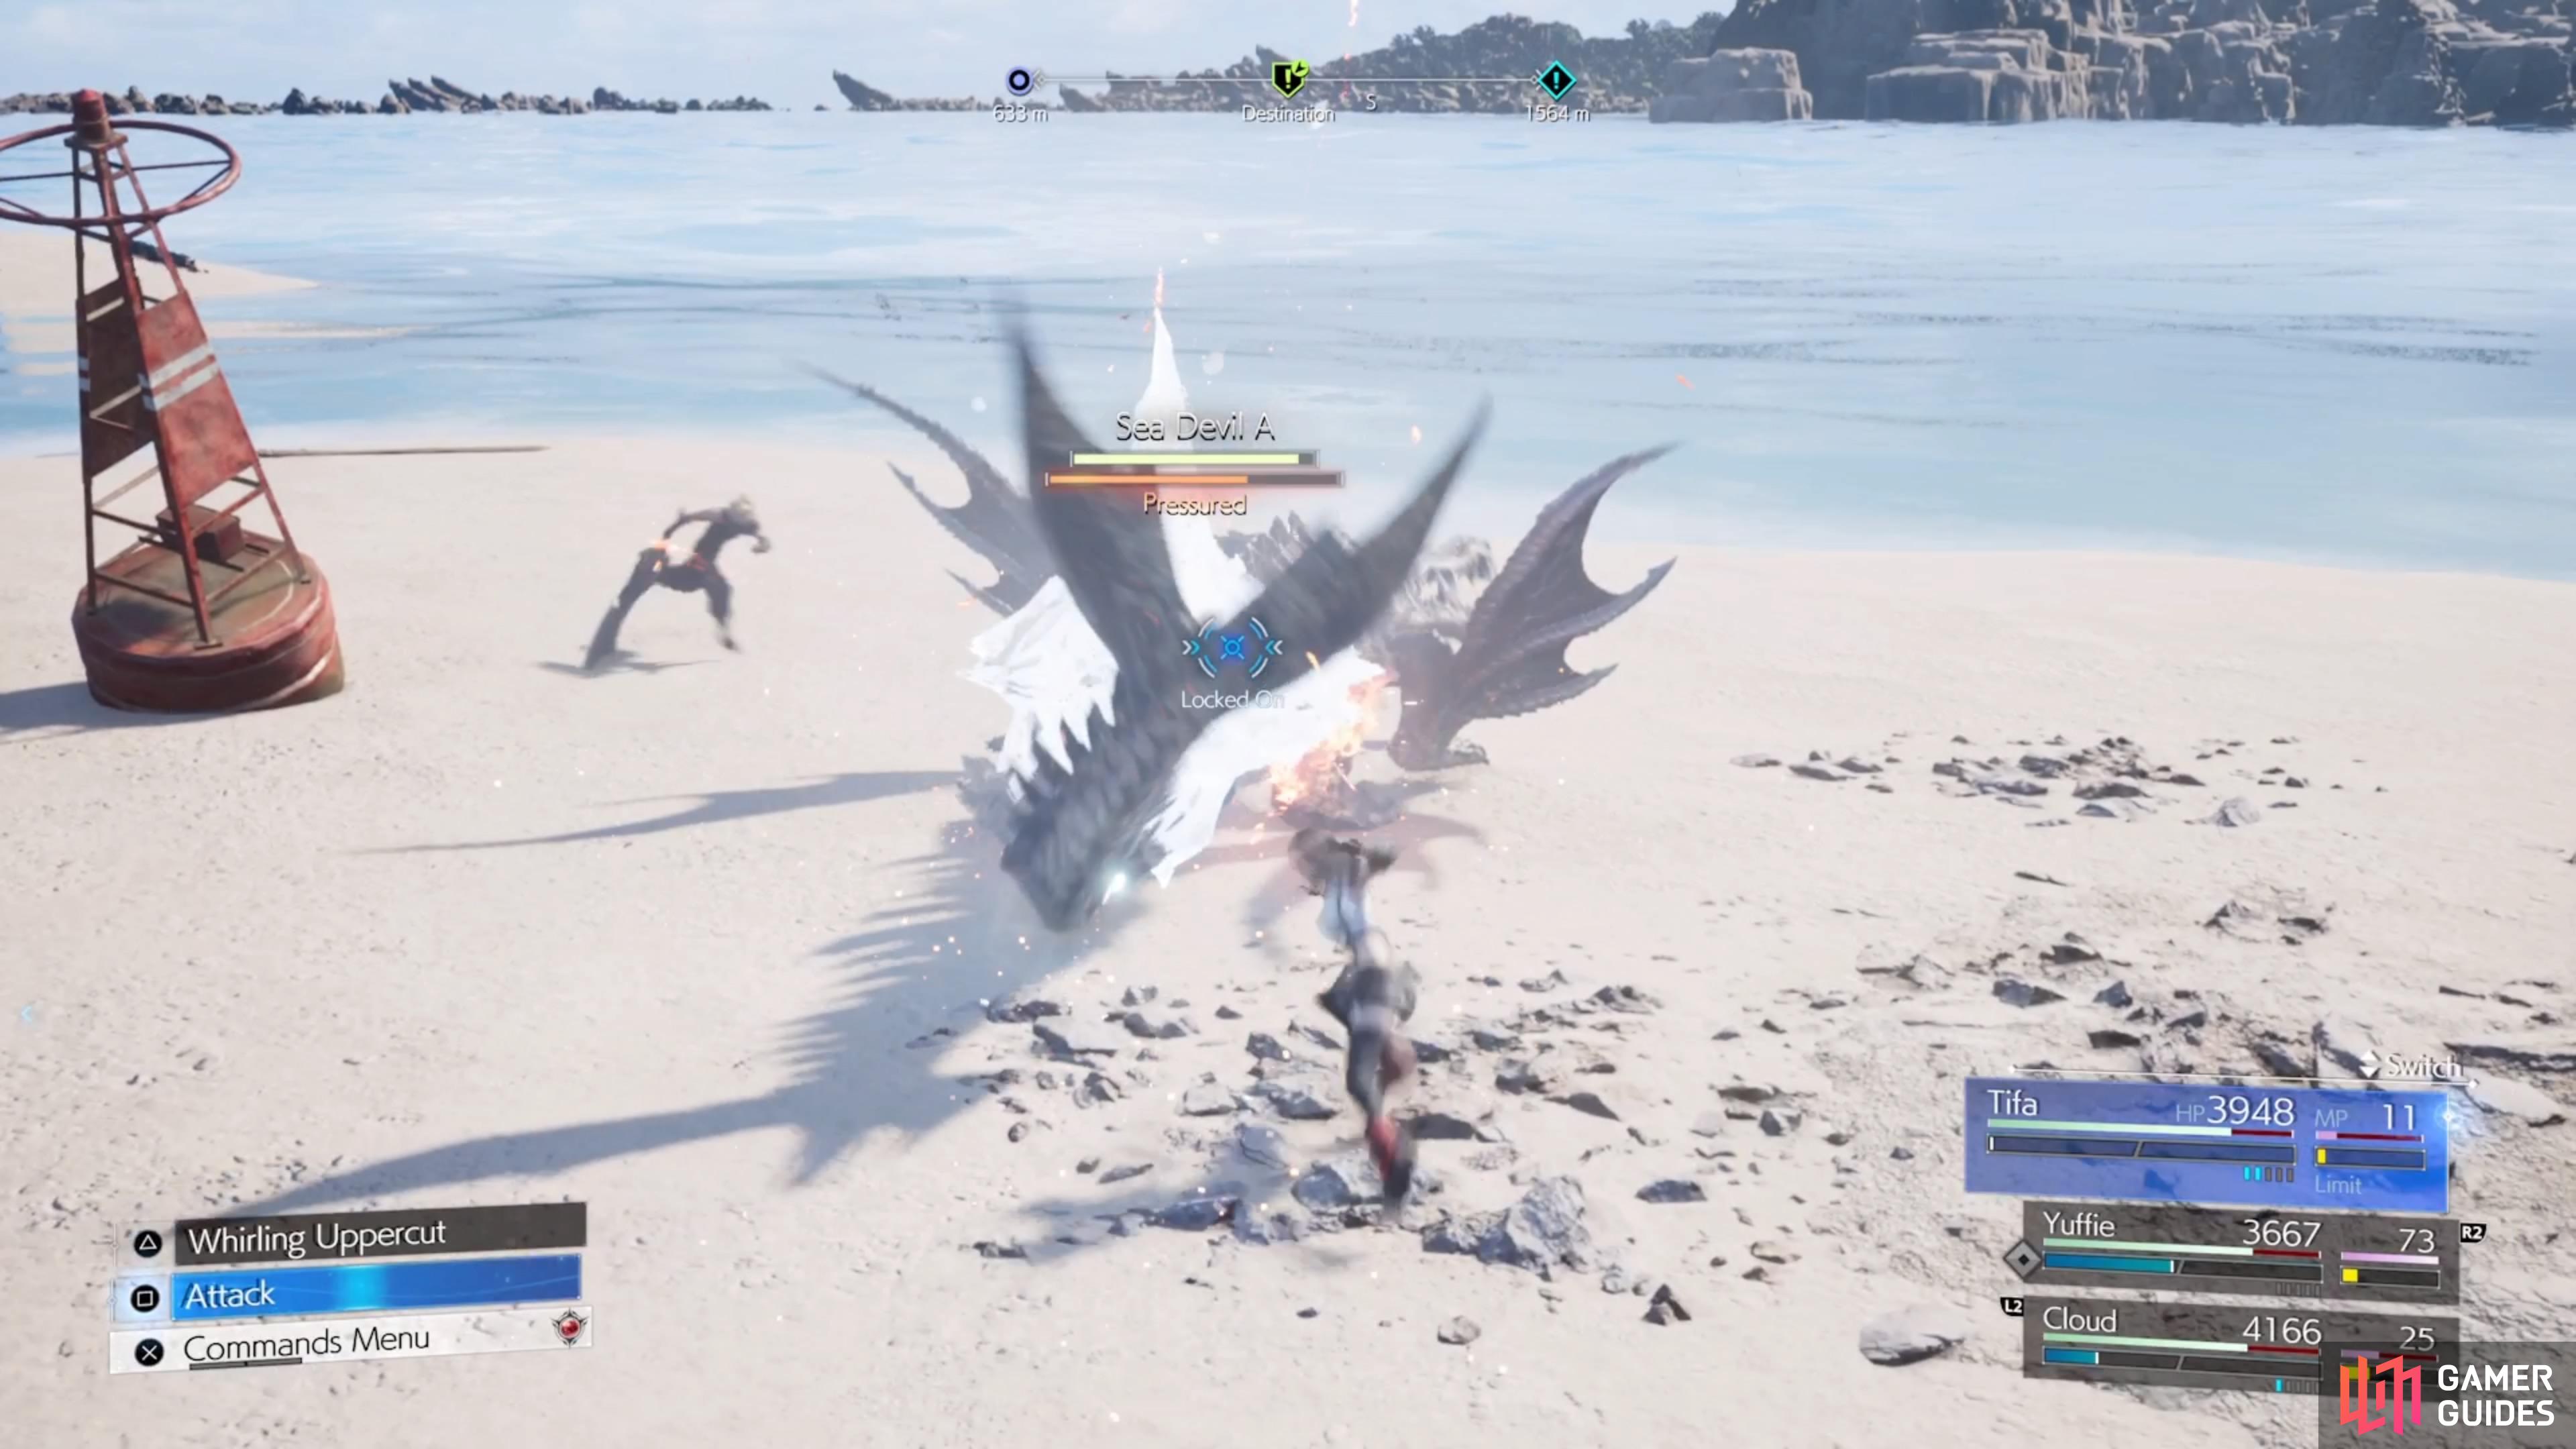
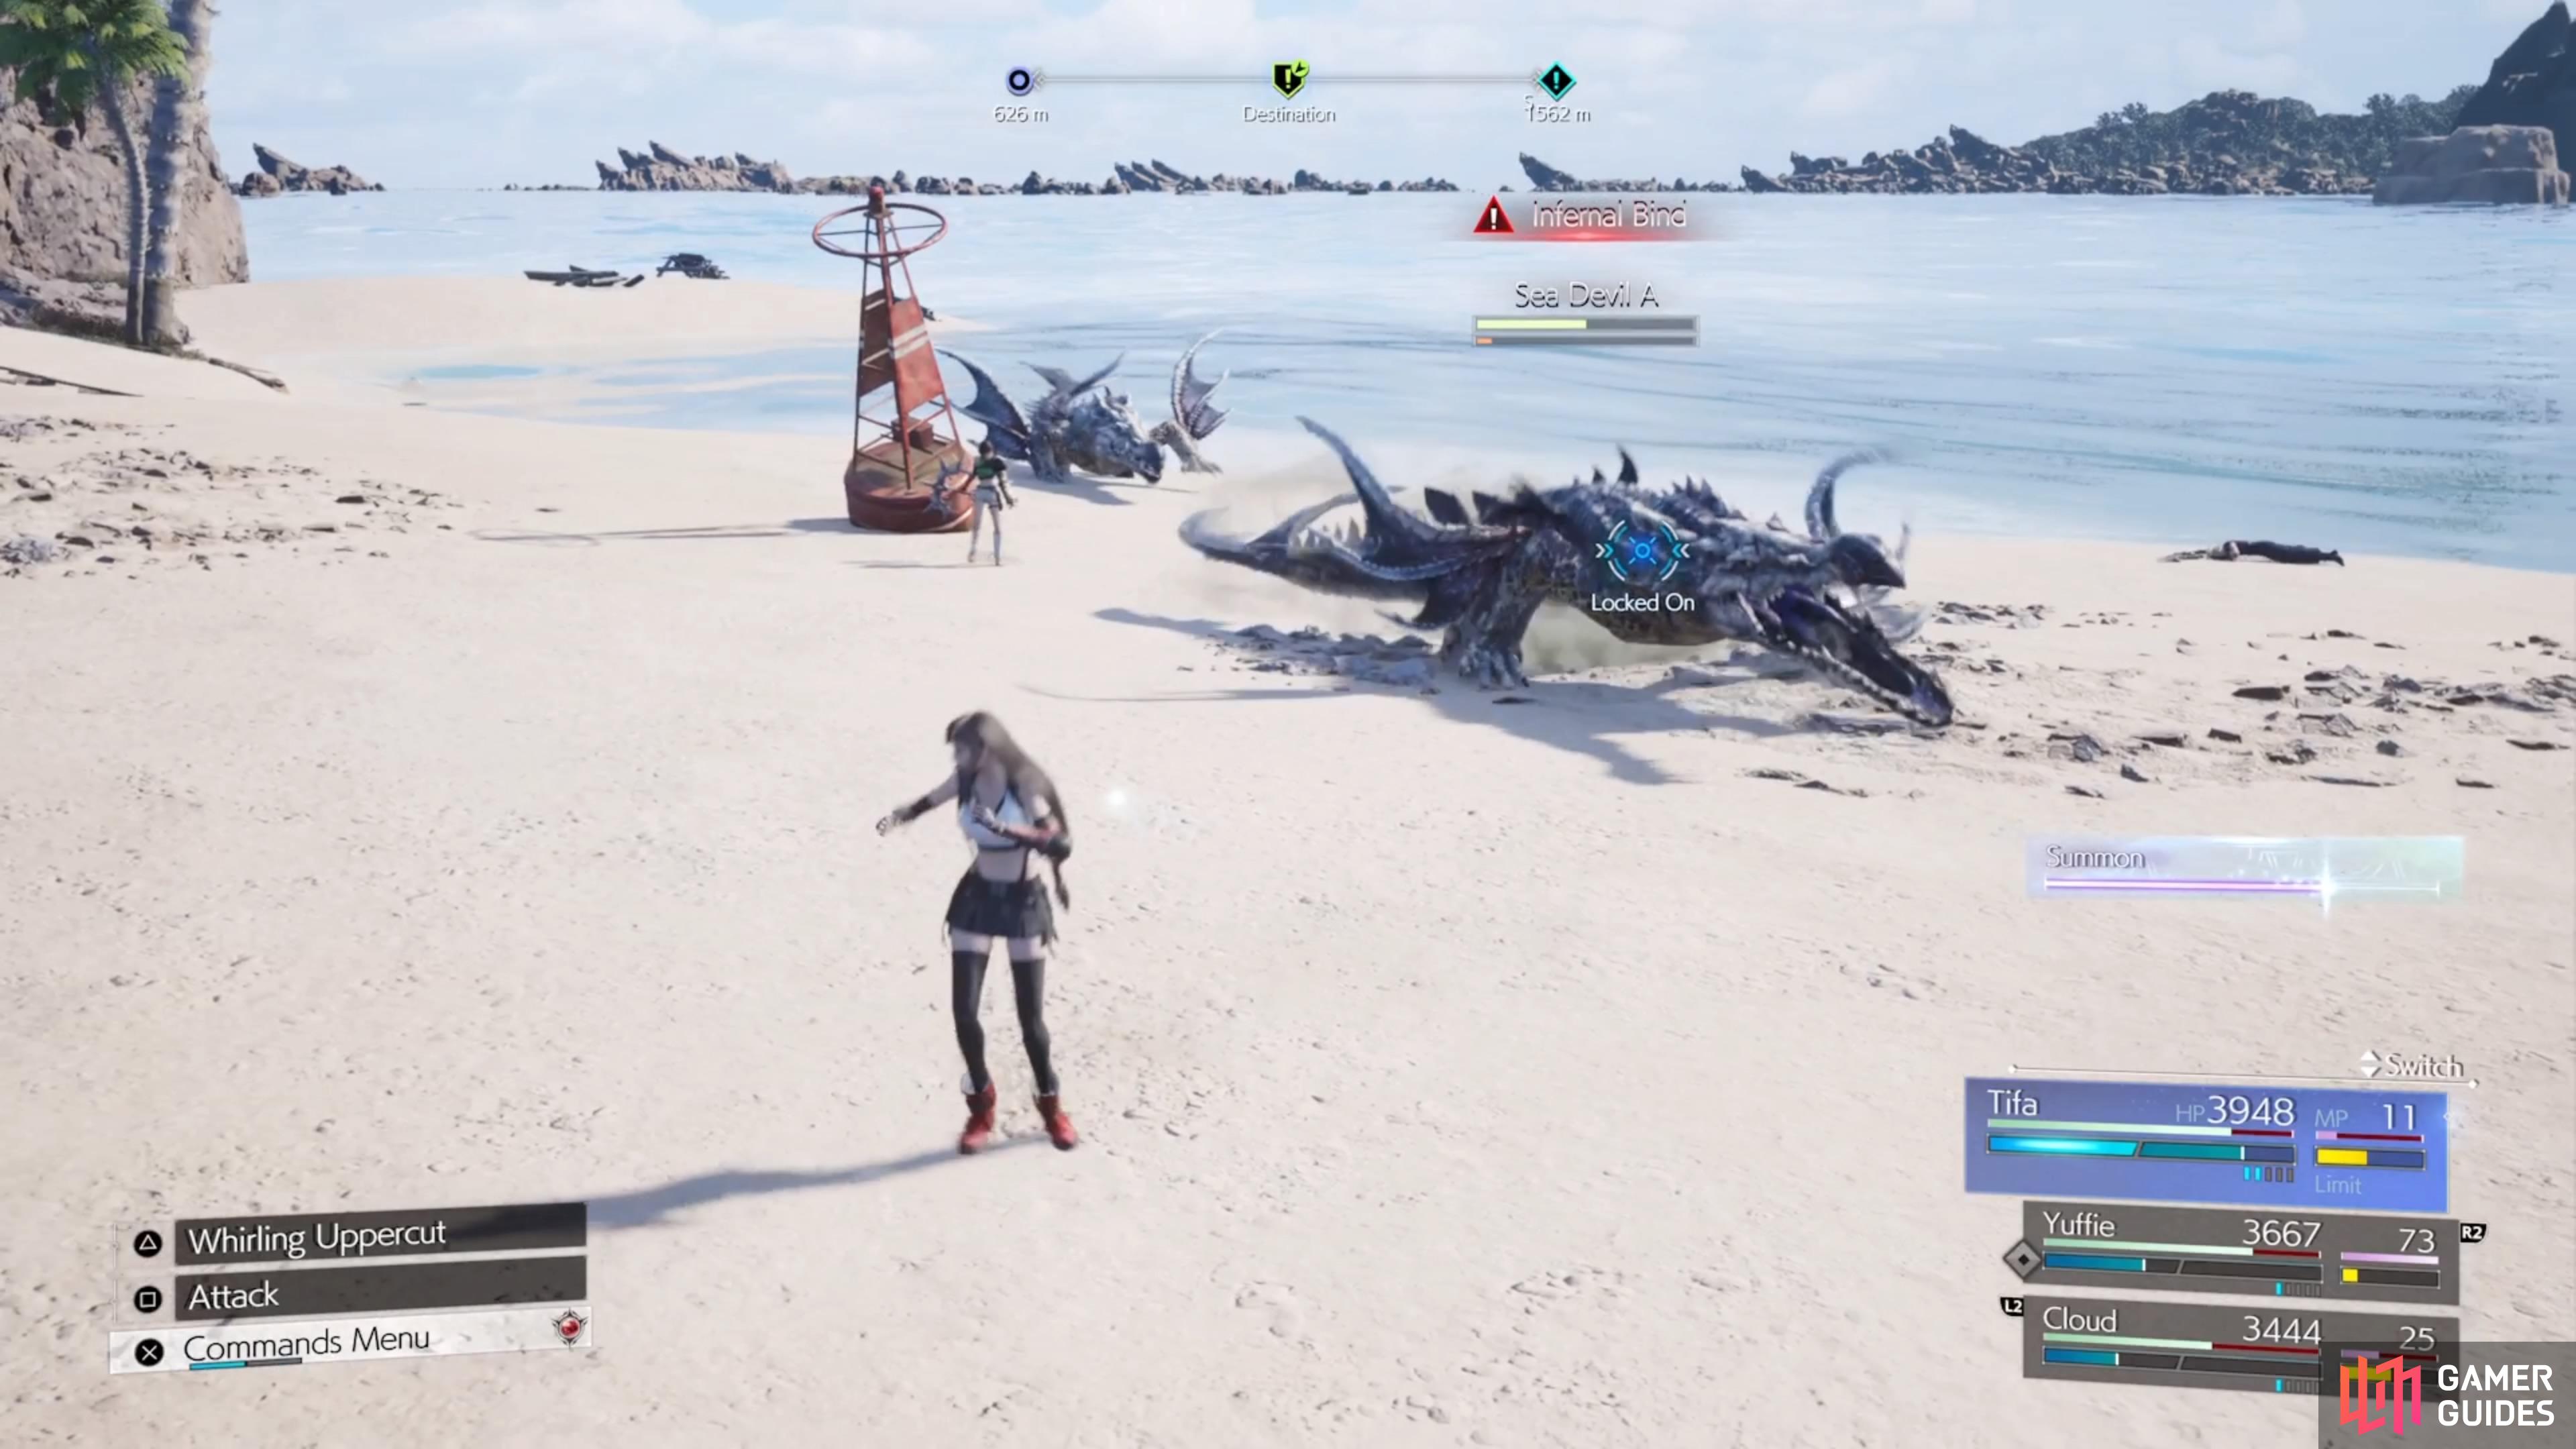
Use something like Blizzara on them to pressure the creatures, which is your cue to do the usual bit of increasing the stagger gauge. Once you defeat the Sea Devils, return to Kyrie for a scene, then go back to the mayor to finish the quest. You will be rewarded with a Secrets of the Ninja Vol. VI manuscript for Yuffie, as well as affection with her, and the usual Party/Character EXP. If you did all other side quests in the Corel Region, then you should also unlock Sand and Circuses.
 Sign up
No Comments