
The Pirate’s King Treasure is a side quest that’ll become available in chapter 12 of Final Fantasy VII Rebirth. It’ll require you to hunt down multiple relics which are scattered around the world. However, a difficult opponent will need to be dealt with before you can collect them. On this page, we’ll provide you with the necessary steps to tracking down the relics and tips on how to defeat all of the fiends.
How to Start The Pirate King’s Treasure Side Quest - FFVII Rebirth
The Pirate King’s Treasure Side Quest can be unlocked by interacting with the chest that’s located on the dock in Costa del Sol during Chapter 12. Here you’ll be provided with a treasure map that provides you with clues as to where the four individual treasures are, but each destination will have a tough enemy that needs to be taken down before you can collect the treasure.
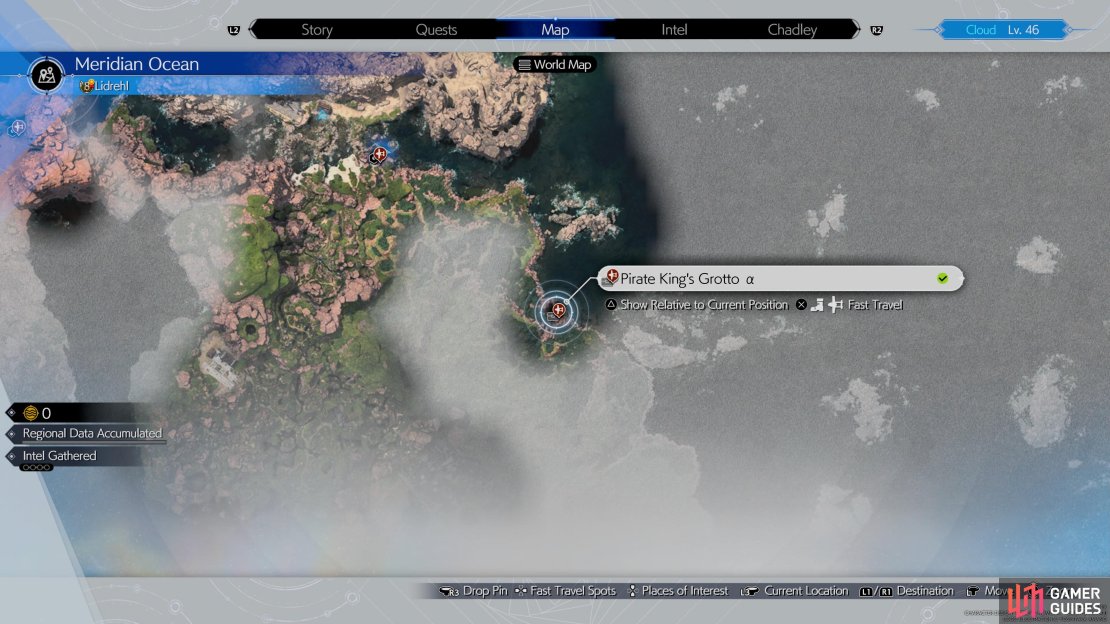
Pirate King’s Grotto Y
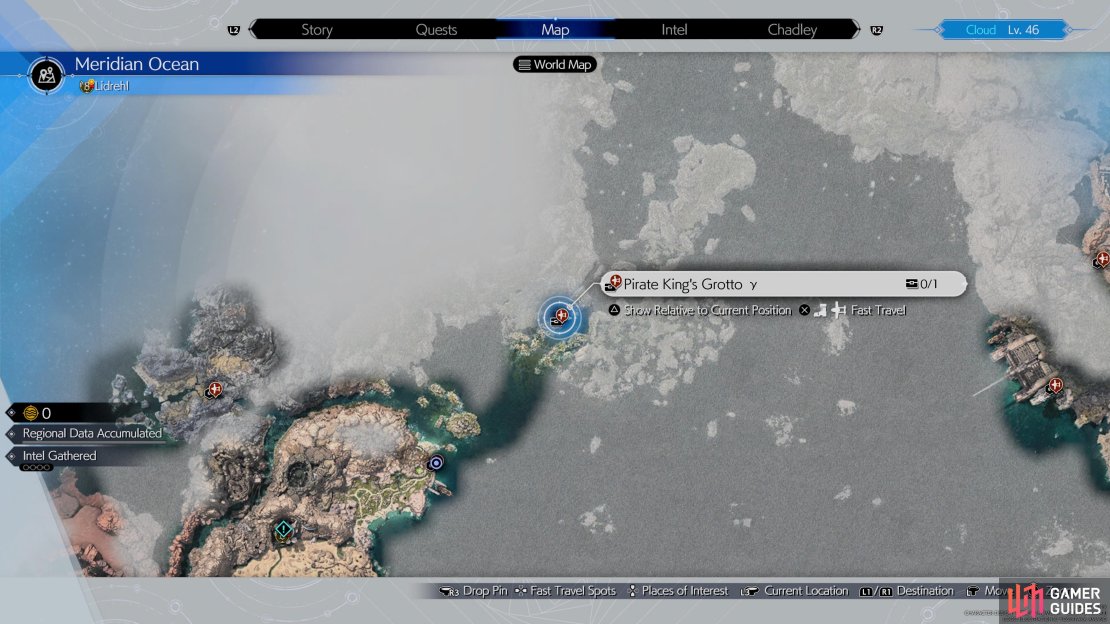
(1 of 3) Head to this location on the map to find the Pirate King’s Grotto y.
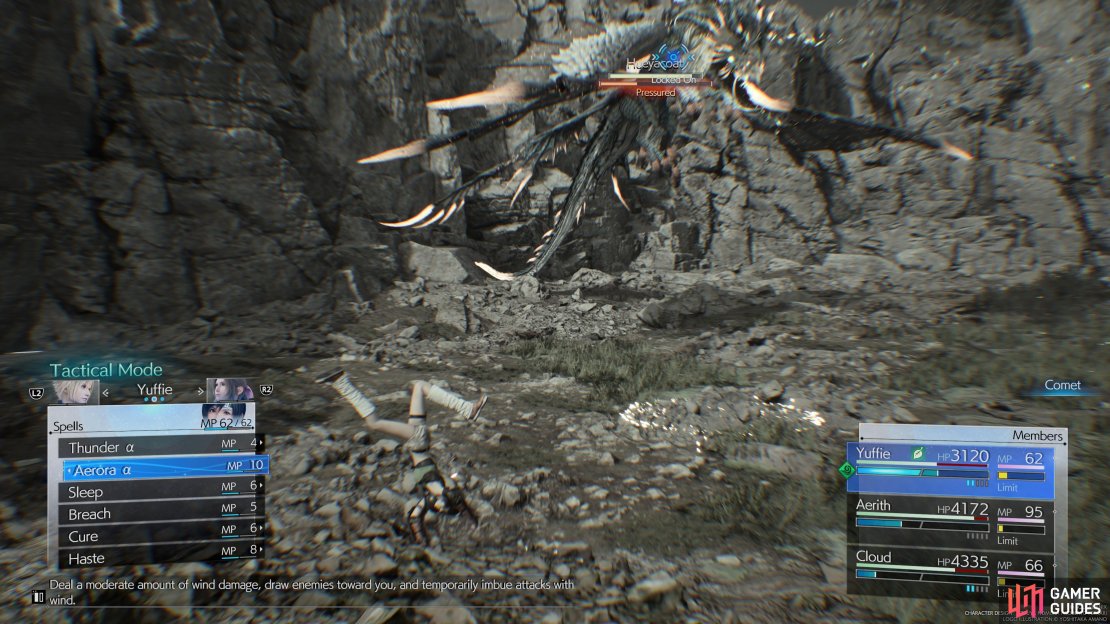
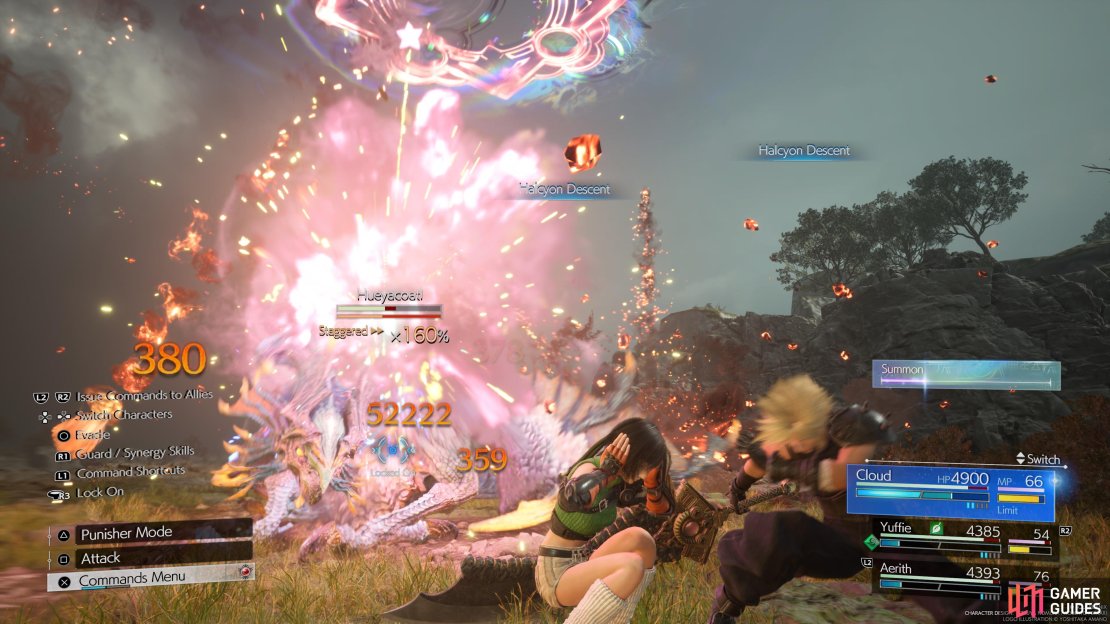
The Pirate King’s Grotto Y can be found by setting off from Costa del Sol and then heading northeast. You’ll see a small opening between two islands that you can sail through, then pay close attention to the left side until you see an orange glow. Here you’ll need to defeat a Hueyacoatl before you’re able to collect the treasure. You can easily tackle this opponent by hitting it with high-level wind-spells like Aerora as this will make it gradually generate an electric charge and eventually cause it to go into a supercharged state.
Attacking Hueyacoatl while it’s supercharged will cause it to become pressured and then you can follow up with a focused thrust to stagger it. However, while it’s supercharged it’ll unleash a lot of attacks which have paralyzing capabilities, so you’ll want to attack it from a distance until it’s pressured to avoid this. If you do get paralyzed then you’ll want to quickly remove it with a ![]() Remedy or by using Esuna. Collect the relic from the nearby chest and return to the boat.
Remedy or by using Esuna. Collect the relic from the nearby chest and return to the boat.
Pirate King’s Grotto δ
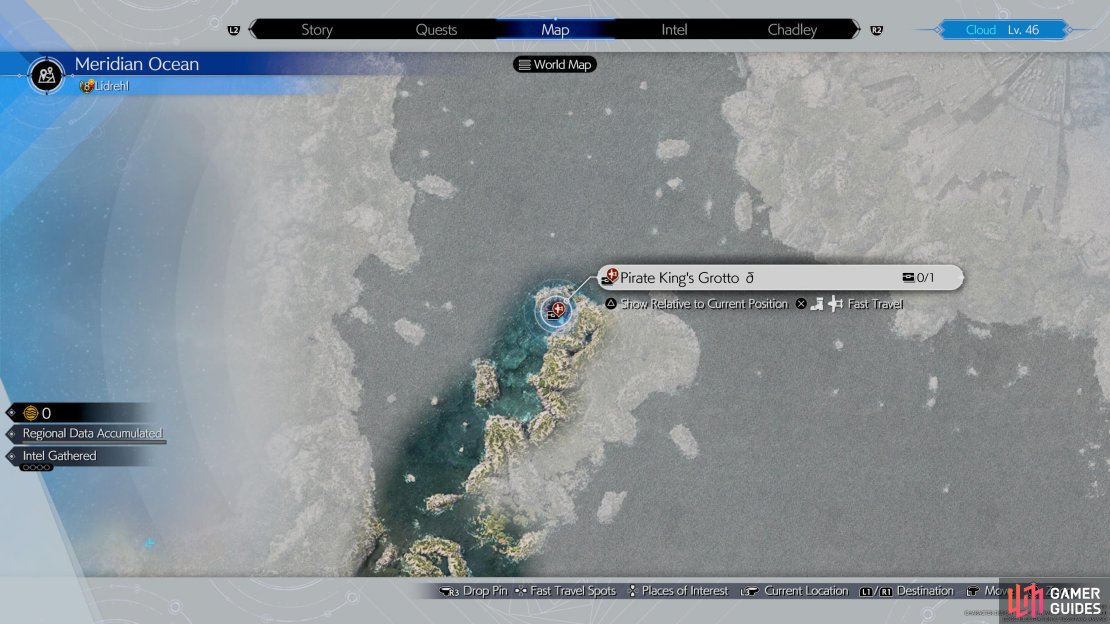
(1 of 3) Head to this location on the map to find the Pirate Grotto.
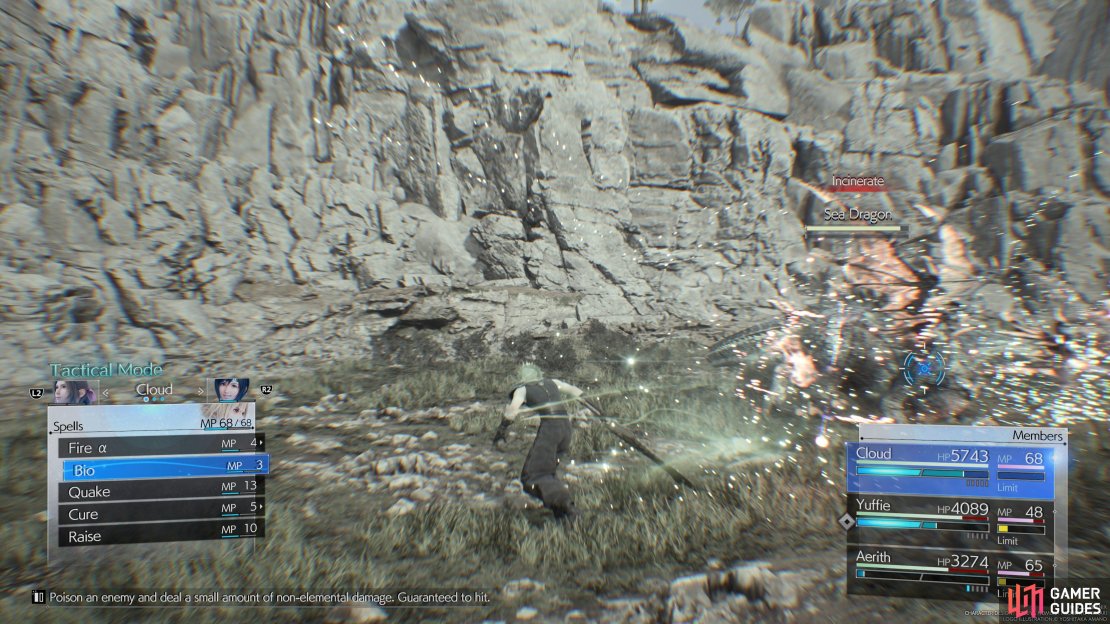
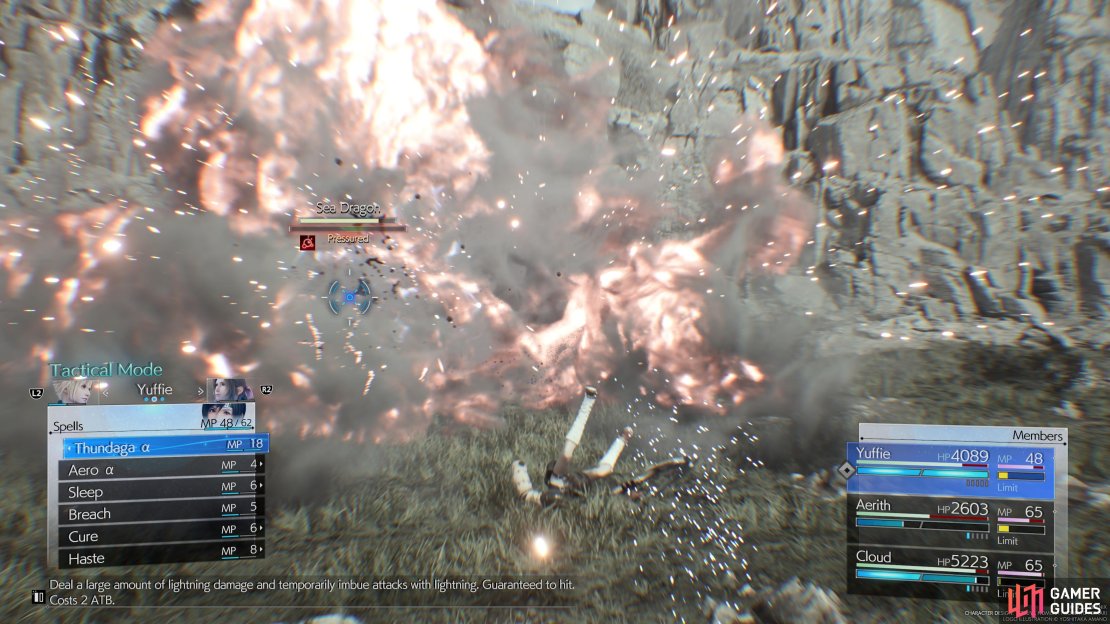
Continue heading northeast from the Pirate King’s Grotto Y while hugging the eastern side of the island, then you’ll find Pirate King’s Grotto δ in a small opening to the northeast point of the island. This time around you’ll be fighting a Sea Dragon which you can defeat by poisoning it via the Bio Spell when it’s galvanized in flames to pressure it, then quickly use Thundaga to stagger it. If you haven’t got enough ATB then you can quickly generate it by spamming synergy abilities. Collect the relic from the nearby chest and then fast travel to the ![]() Junon Region.
Junon Region.
Pirate King’s Grotto B
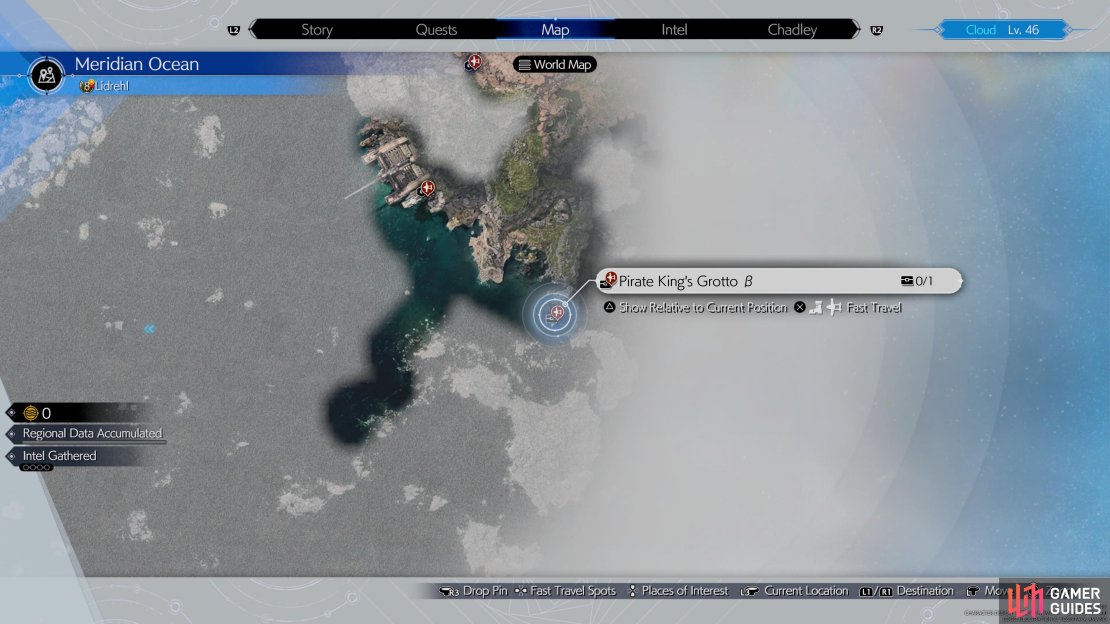

(1 of 3) Head to this location on the map to find the Pirates Grotto b
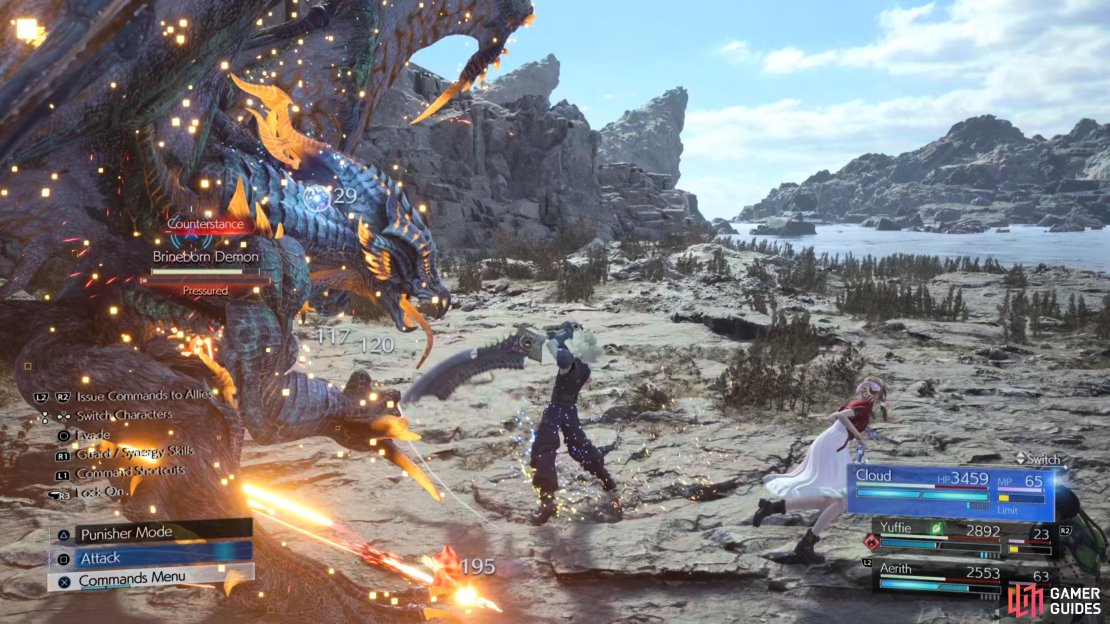
From the Port of ![]() Under Junon, head south until you see a lighthouse in the distance then head over to the southern portion of the island to find the dock. Here you’ll need to deal with a Brineborn Demon which can use Graviga against the entire party which will put them in a critical state, but you can counter this by staggering your opponent while it’s in Counterstance. To do this, you’ll want to repeatedly use Focused attacks, such as
Under Junon, head south until you see a lighthouse in the distance then head over to the southern portion of the island to find the dock. Here you’ll need to deal with a Brineborn Demon which can use Graviga against the entire party which will put them in a critical state, but you can counter this by staggering your opponent while it’s in Counterstance. To do this, you’ll want to repeatedly use Focused attacks, such as ![]() Focused Thrust (Cloud) or Focused Strike (Tifa). If you are unable to stagger the demon in time and get hit by Graviga, then you’ll want to quickly perform a group heal which can be done by using Curaga which is linked to a
Focused Thrust (Cloud) or Focused Strike (Tifa). If you are unable to stagger the demon in time and get hit by Graviga, then you’ll want to quickly perform a group heal which can be done by using Curaga which is linked to a ![]() Magnify Materia or Mist
Magnify Materia or Mist ![]() Giga-Potion.
Giga-Potion.
Pirate King’s Grotto A
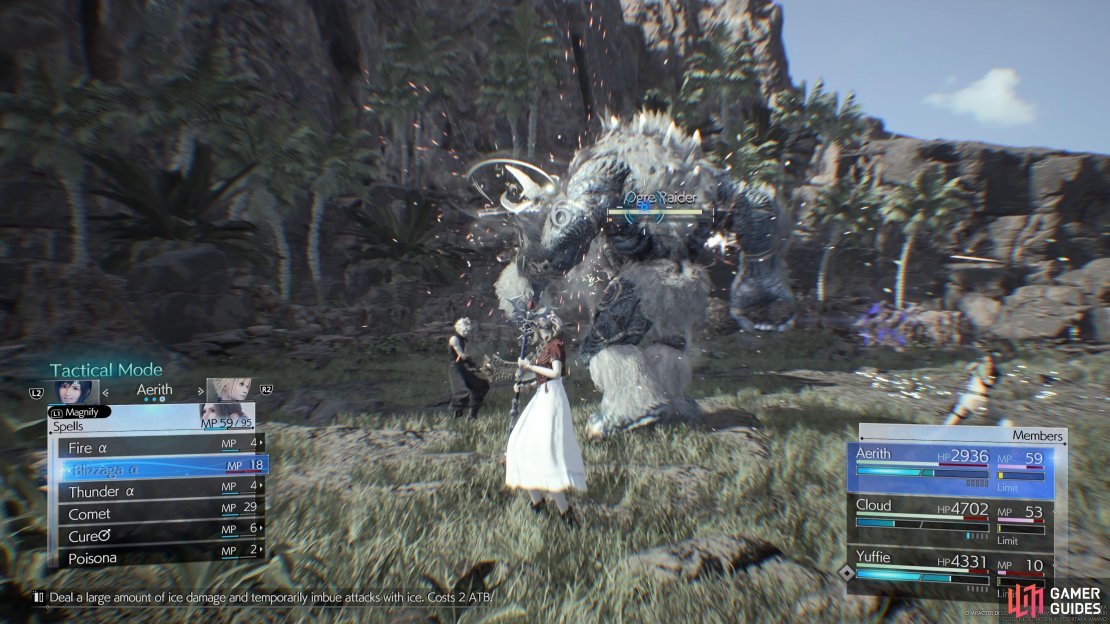

(1 of 3) Head to this location on the map to find the Pirate Grotto a
Head to the Gongaga Port and sail east while hugging the wall on the right side and work your way around the patch of large rocks, then go south to find the dock which leads to the Pirate King’s Grotto A. Before you can claim the final relic, you’ll need to take down an ![]() Ogre Raider and you can do so by using its elemental weakness against it. The Ogre Raider is weak to
Ogre Raider and you can do so by using its elemental weakness against it. The Ogre Raider is weak to ![]() Ice, so you’ll want to use Aerith and use Blizzaga against it to pressure it, then as always use Focused abilities until it’s staggered. Once you’ve successfully staggered it, use any available Limit Breaks, synergy abilities, and high damage attacks such as
Ice, so you’ll want to use Aerith and use Blizzaga against it to pressure it, then as always use Focused abilities until it’s staggered. Once you’ve successfully staggered it, use any available Limit Breaks, synergy abilities, and high damage attacks such as ![]() Infinity’s End to deal as much damage as possible.
Infinity’s End to deal as much damage as possible.
Craft a Corsair’s Compass
With all of the relic pieces in your possession, you’ll want to head on over to the ![]() Item Transmuter and then navigate over to the accessories tab to find the Corsair’s Compass near the bottom of the list, crafting it to complete the quest. Having created the Corsair’s Compass, you’ll be led to interesting treasure while sailing out in the Meridian Ocean.
Item Transmuter and then navigate over to the accessories tab to find the Corsair’s Compass near the bottom of the list, crafting it to complete the quest. Having created the Corsair’s Compass, you’ll be led to interesting treasure while sailing out in the Meridian Ocean.
More Final Fantasy VII Rebirth Guides
If you’re looking for help in other aspects of Final Fantasy VII Rebirth, then make sure to check out the pages below:
 Sign up
No Comments