
The nomadic Romani people have long lived on the fringes of broader European society, living by their own rules and under their own laws, they’ve suffered much persecution and distrust due to their outsider status. When trouble arises, they’re both free to resolve them however they see fit within their own camp, and restrained from seeking assistance from outside authorities, leaving them in a precarious predicament when the Voivode’s daughter goes missing. Appealing to Henry, the prophesied savior, for aid, it’s up to Henry to track down Marika and bring her home… all while navigating a river of lies, half-truths and undisclosed complications. This page will provide a walkthrough for the side quest Miri Fajta in Kingdom Come: Deliverance 2.
Page Breakdown
Starting Miri Fajta
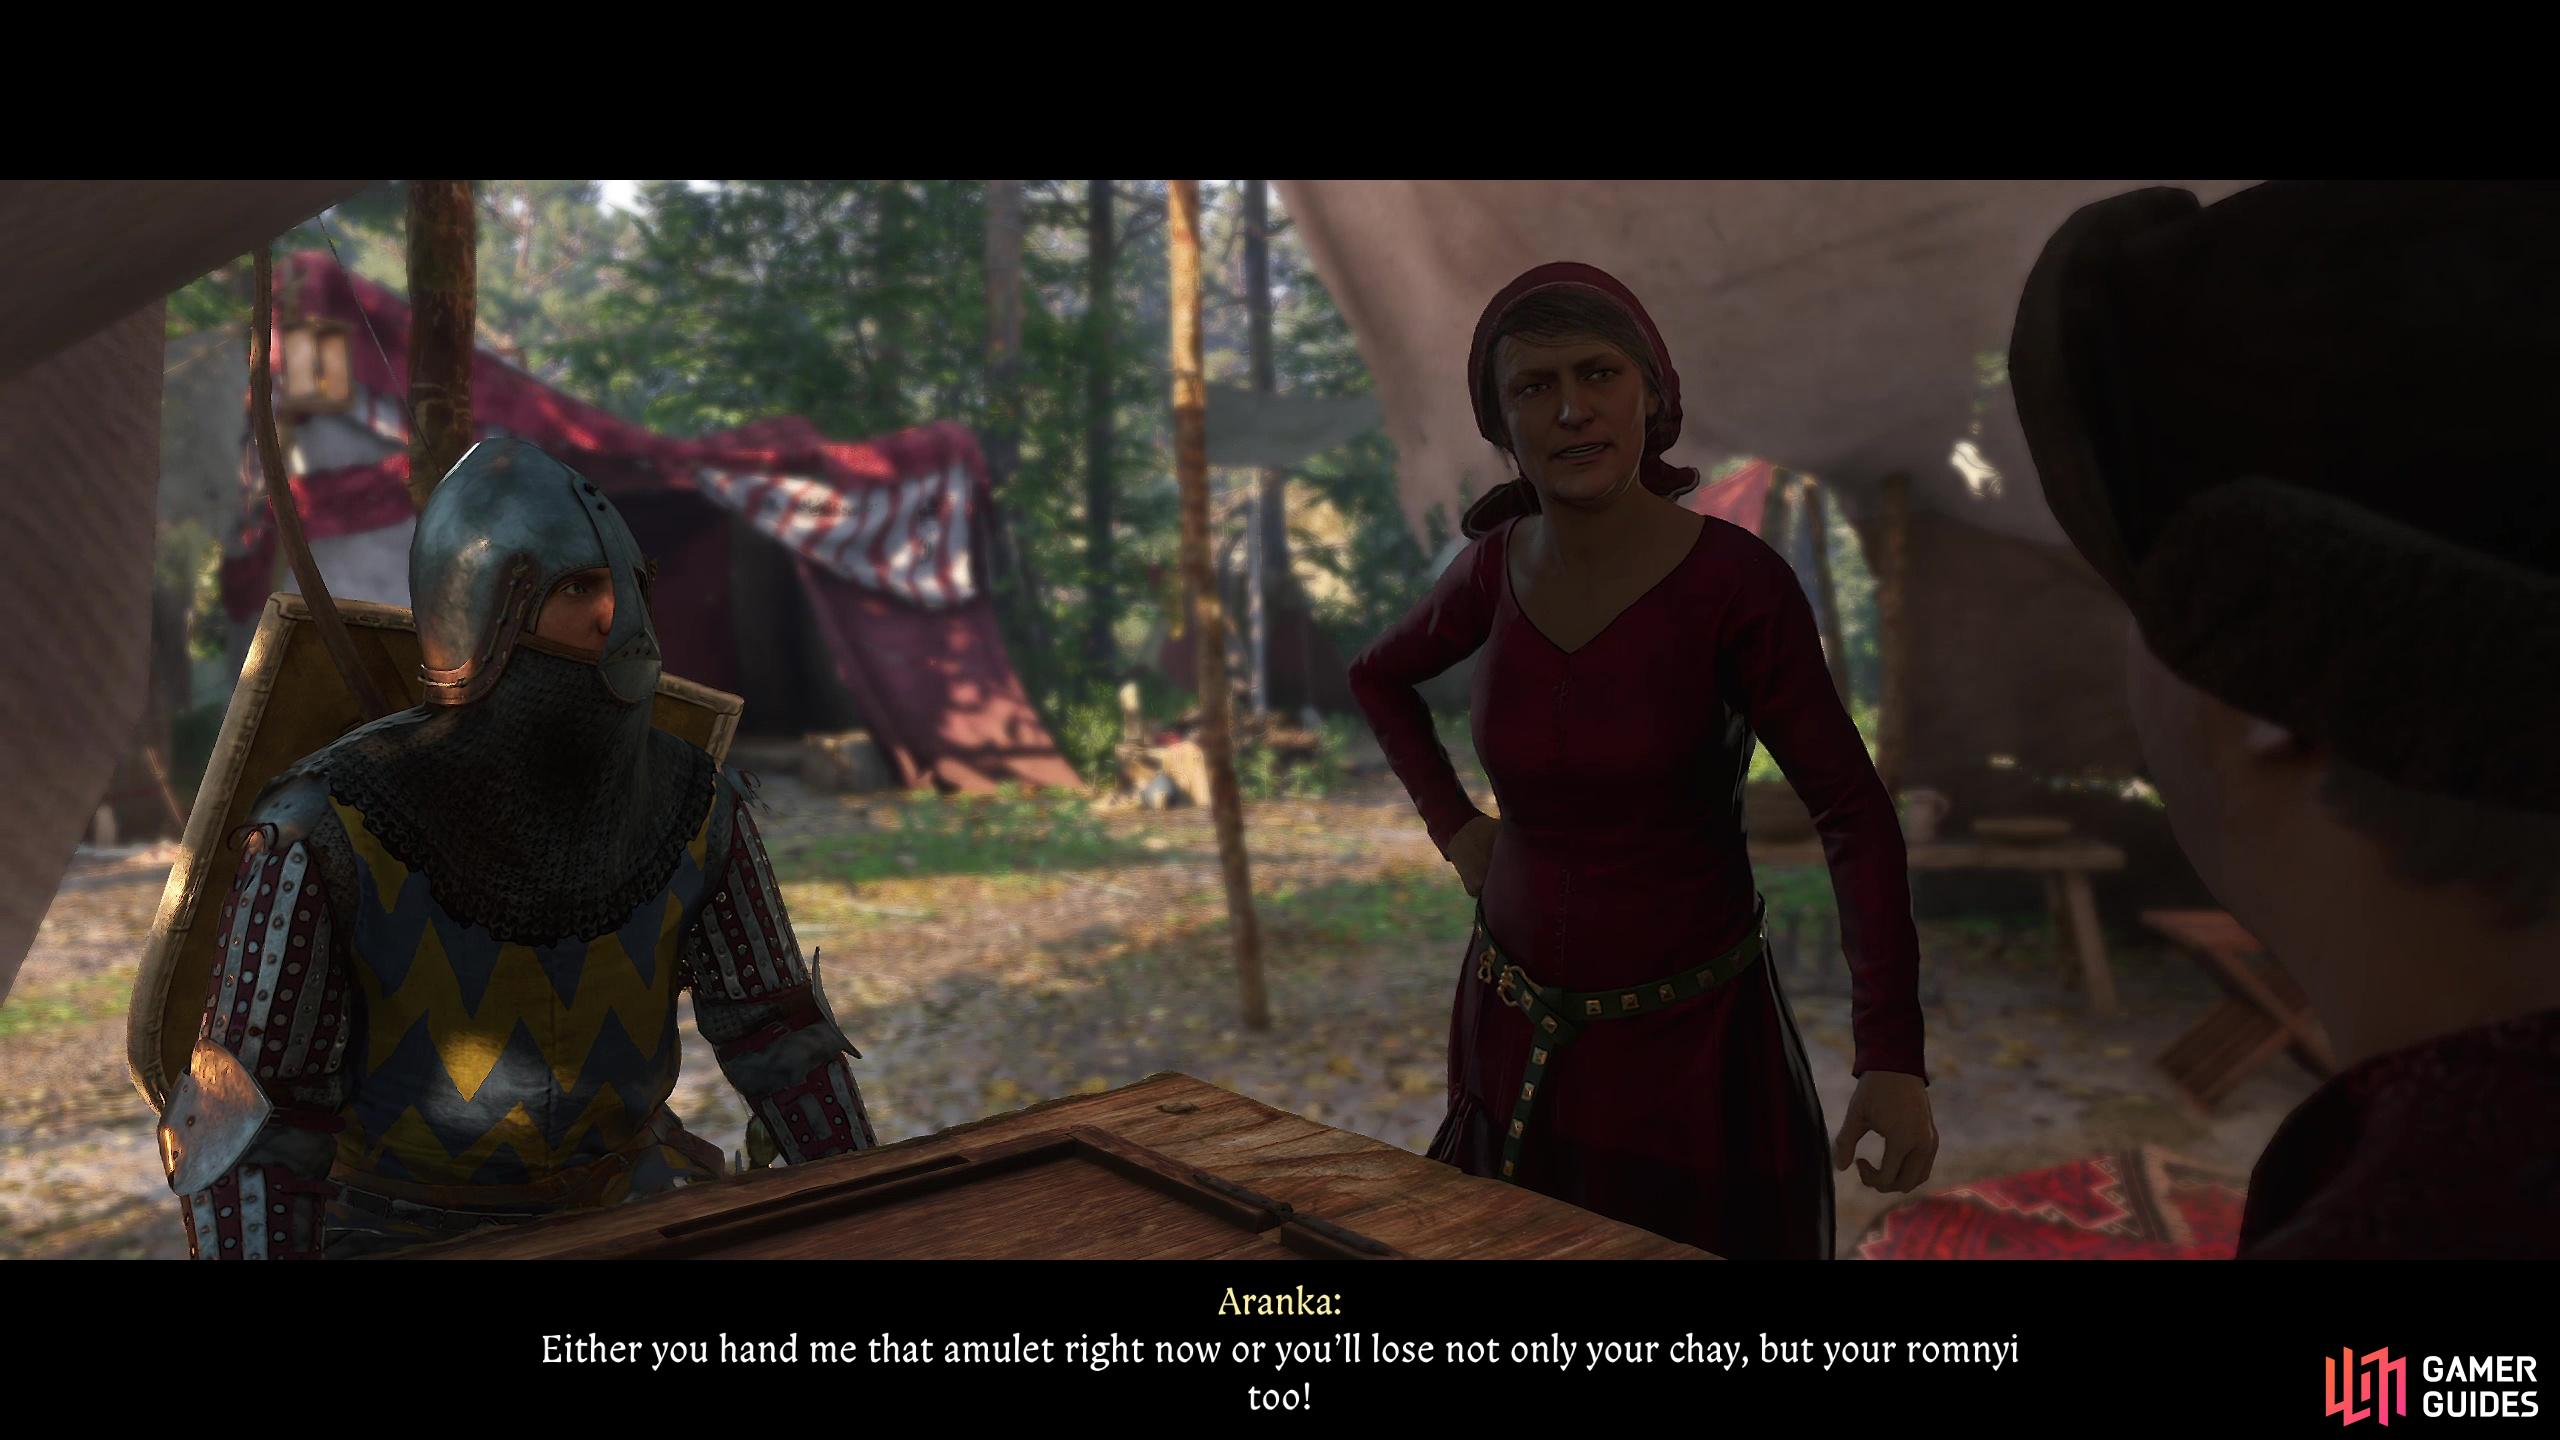
To start this quest, head over to the Nomad Camp along the cliffs overlooking the southern shore of Rocktower Pond and seek out a woman in red named Aranka. Talk to her and she’ll tell you she’s seen Henry in her dreams, the promised savior - or destroyer - of her family. That’s a lot to put on somebody!
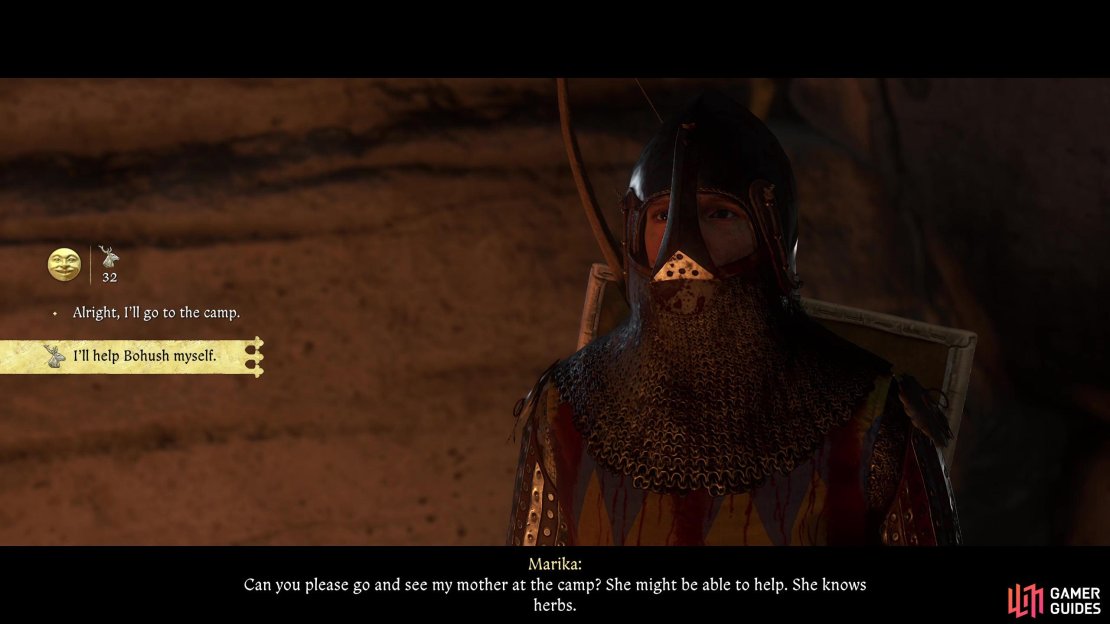
She’ll then instruct you to speak to the Voivode, a mustachioed man in red who usually occupies the large tent across from where Aranka sits. Talk to this Voivode and he shares the same messianic delusions Aranka imposed on Henry. Question him and he’ll tell you his daughter, Marika, ran off and he wants you to find her. Accept to start this quest, but keep in mind that this is a long, involved quest - you may want to avoid it unless you’re familiar with riding horses (either you have your own horse and/or your Horsemanship skill has been leveled a bit) and you’ve leveled your Unarmed skill a bit. These aren’t hard requirements, but you’ll be expected to win a horse race and/or fistfight later in the quest, and failure could compromise the outcome.
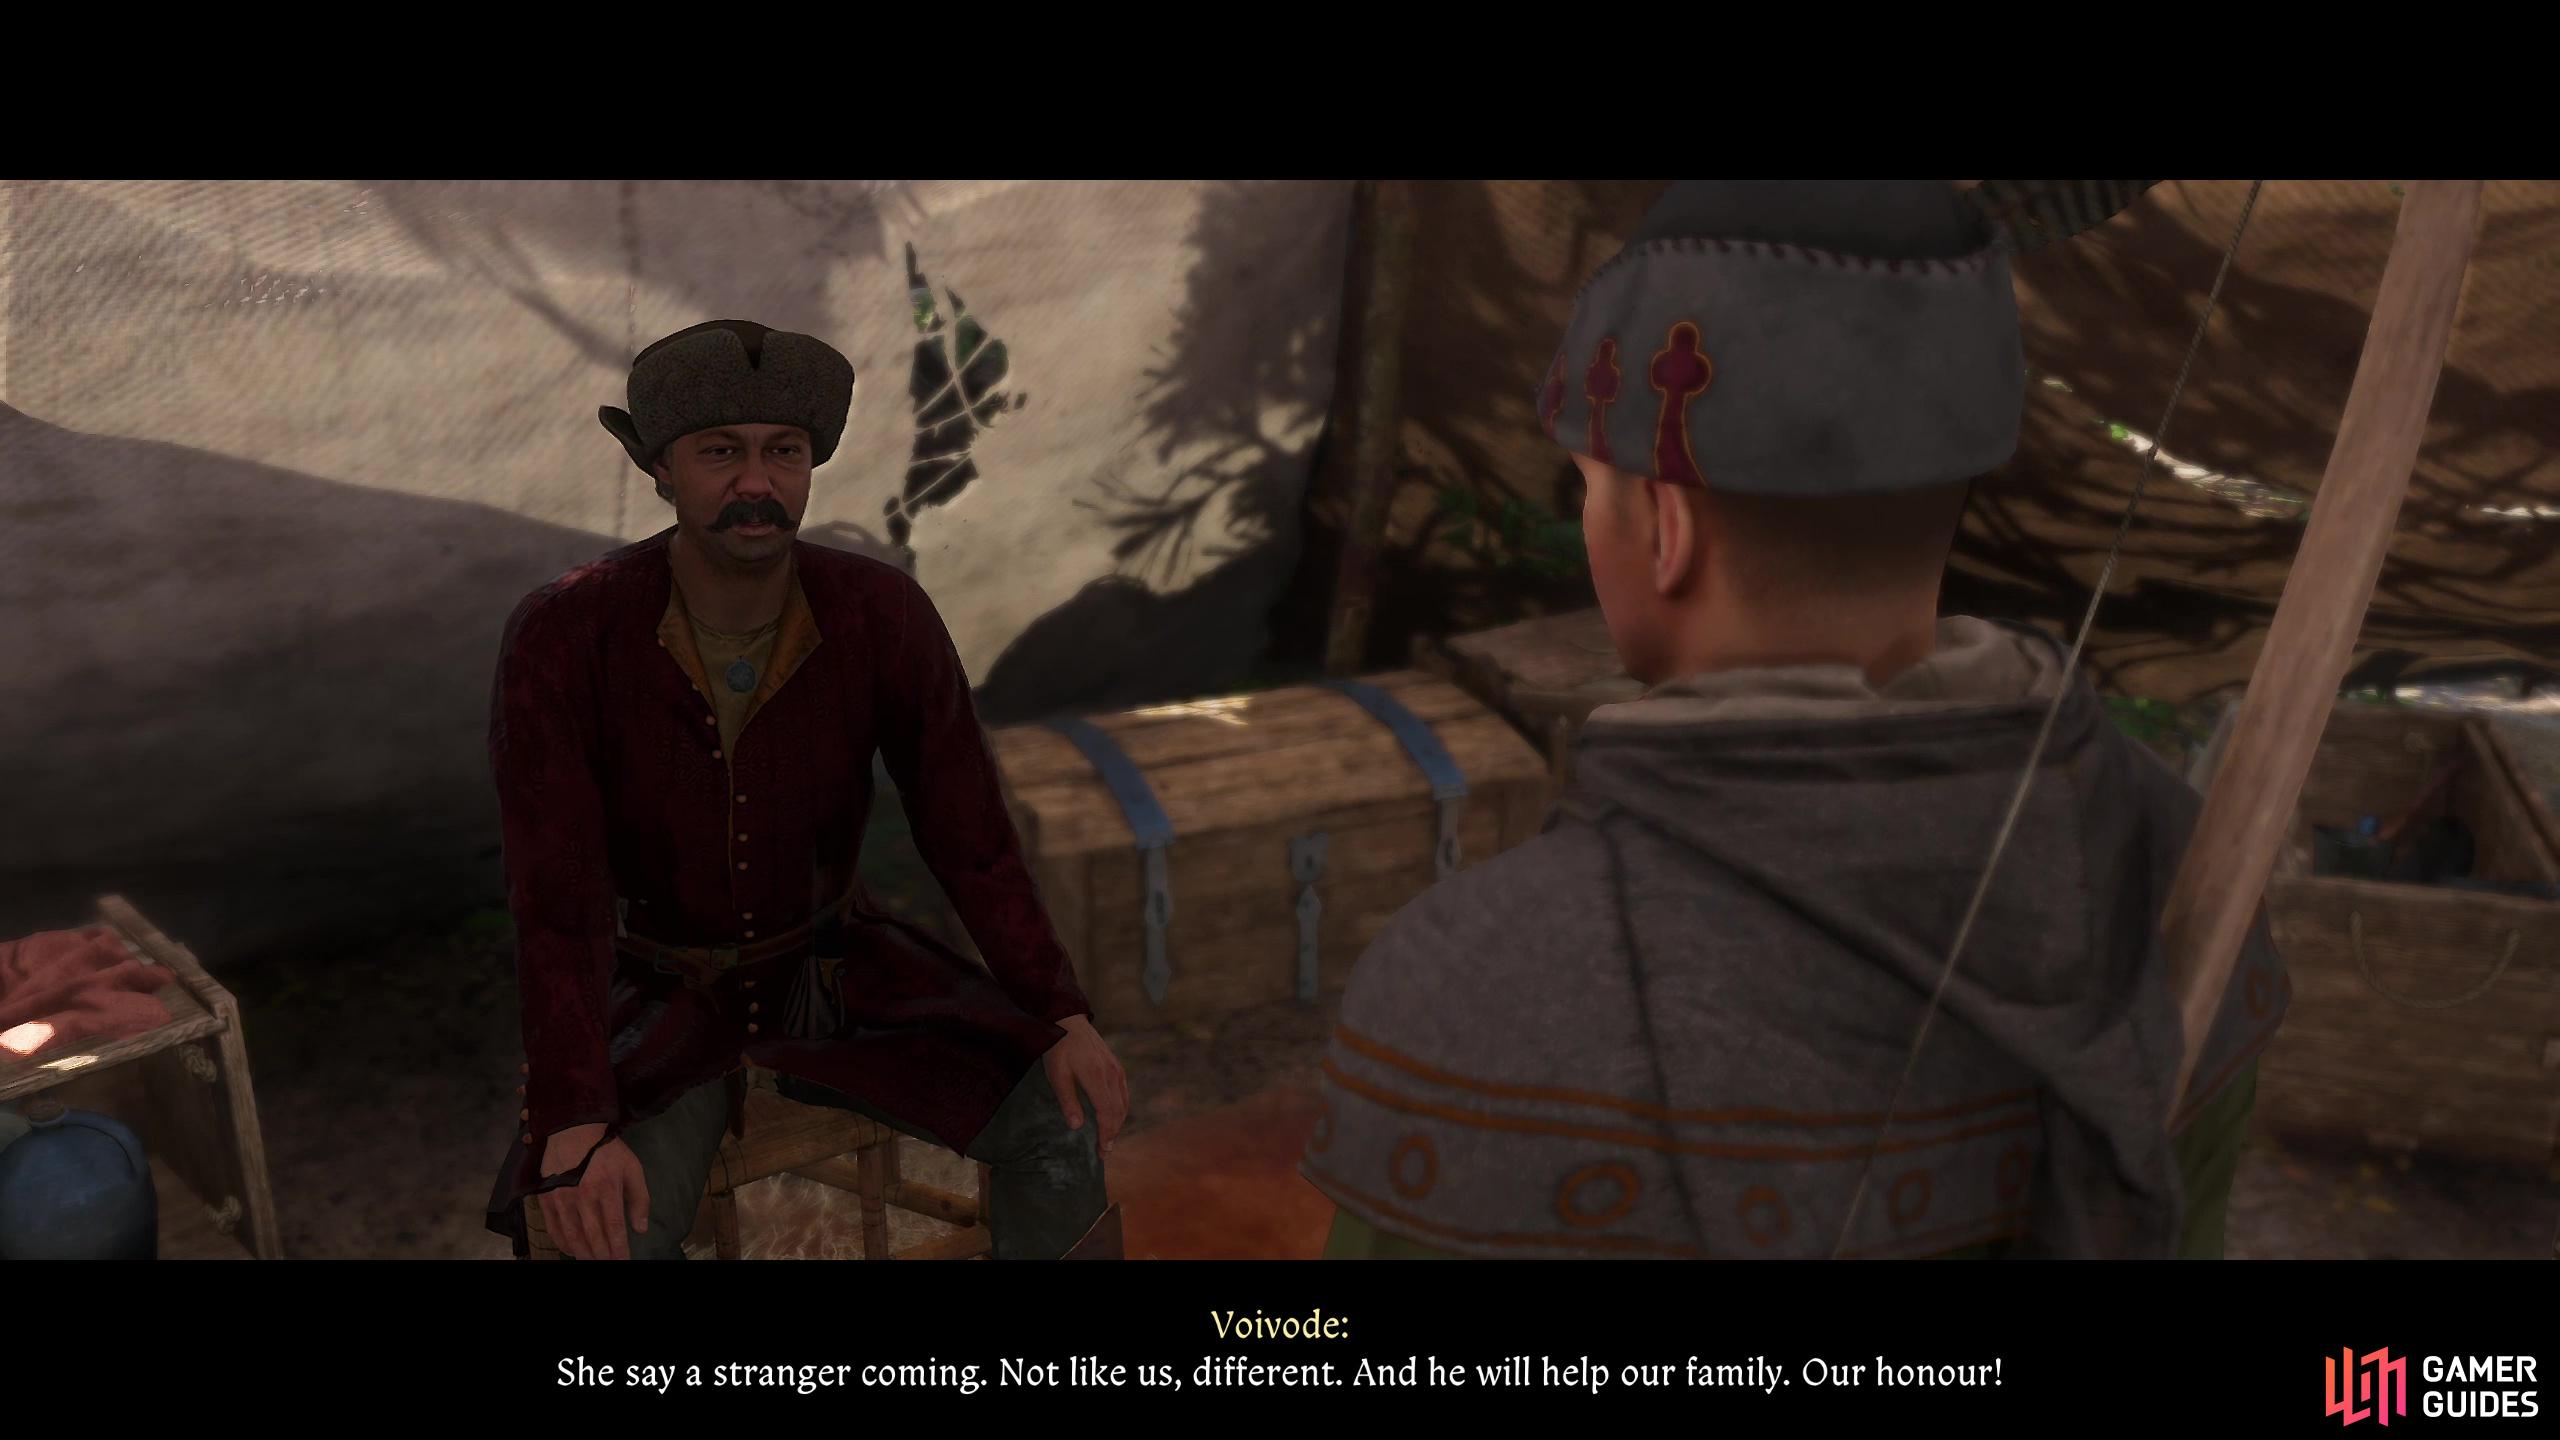
Talk to the Voivode in the Nomad Camp to begin this quest.
Find Marika
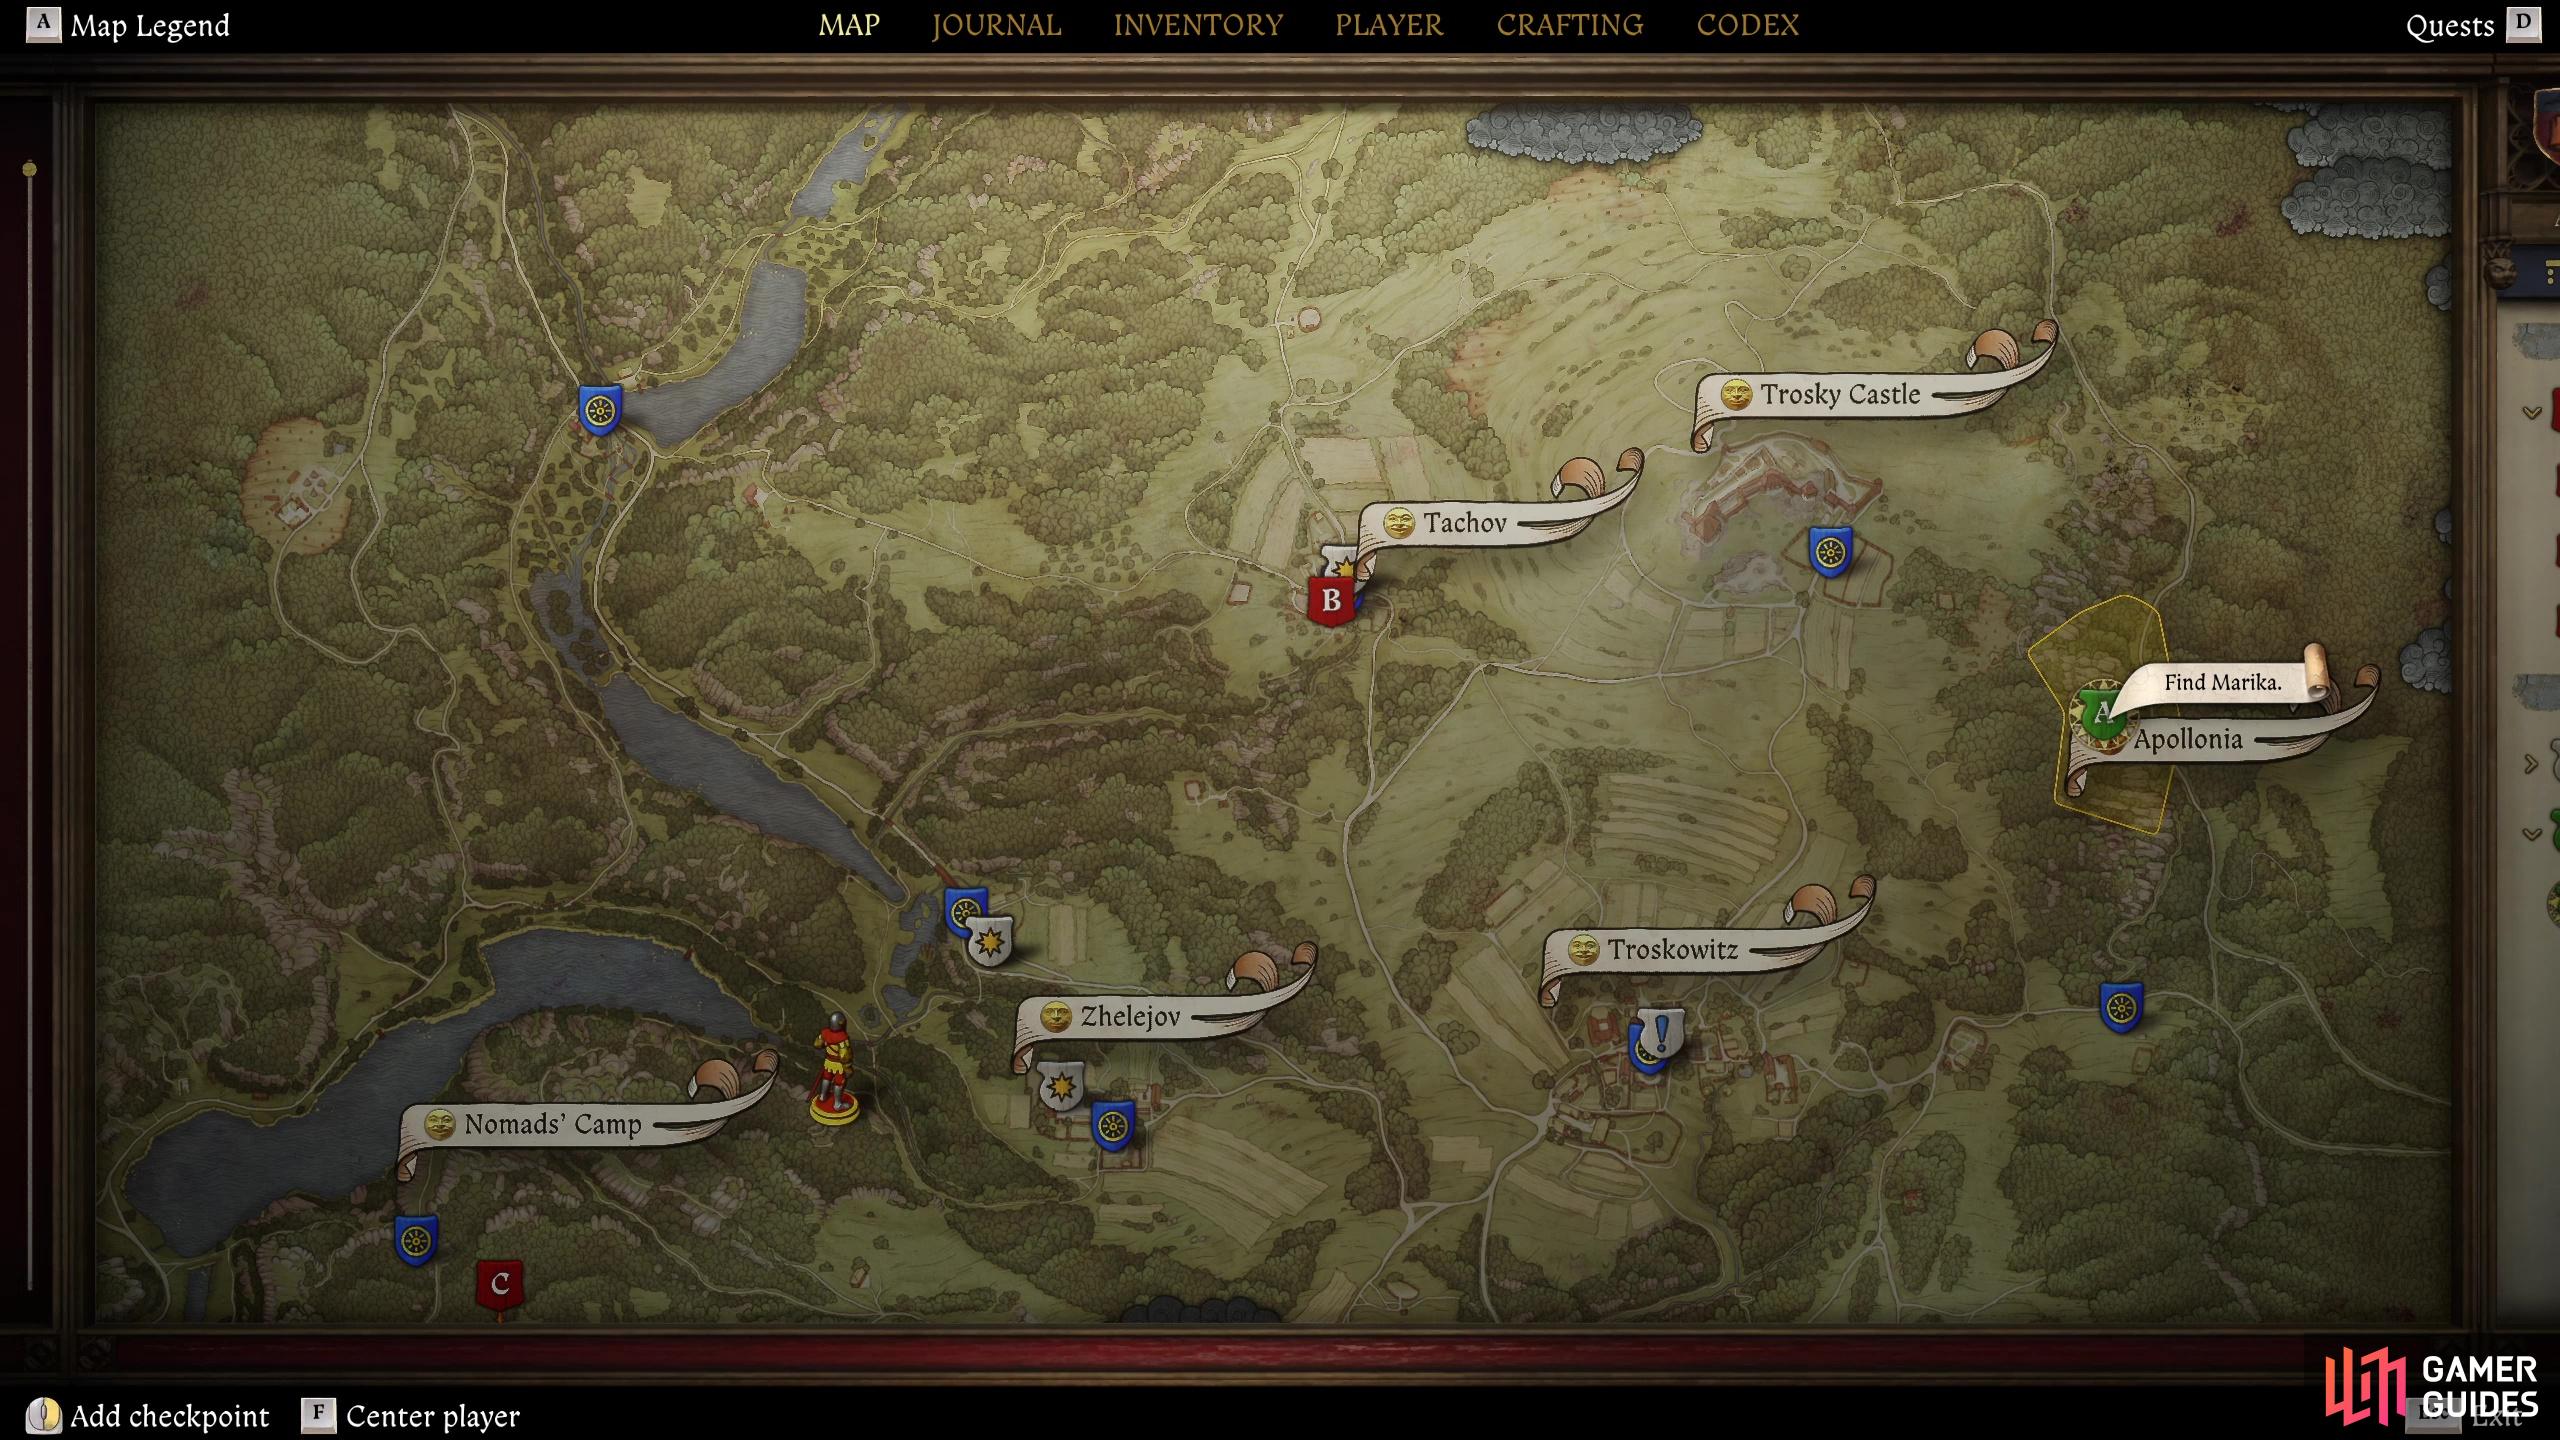
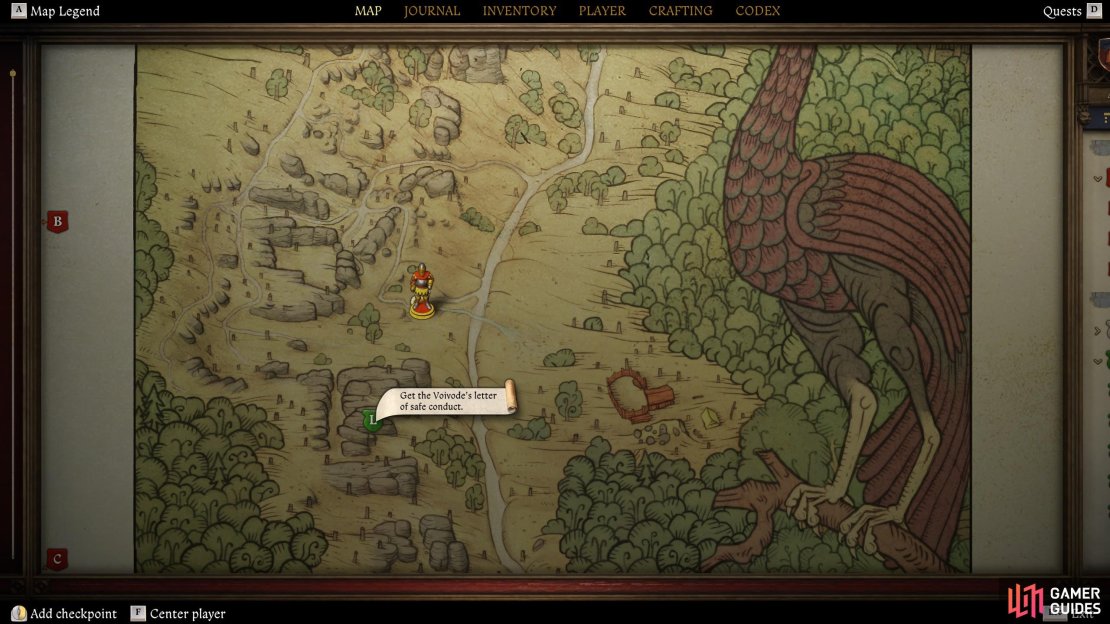
Your first major objective in this quest is to locate Marika, and the Voivode already gave you a very useful bit of information by mentioning the Apollonia area, which can be found to the east of Troskowitz. You can just follow the road east from Troskowitz to find the area marked as Apollonia on the map, but there are other leads worth pursuing, first.
Talk to Aranka About Marika
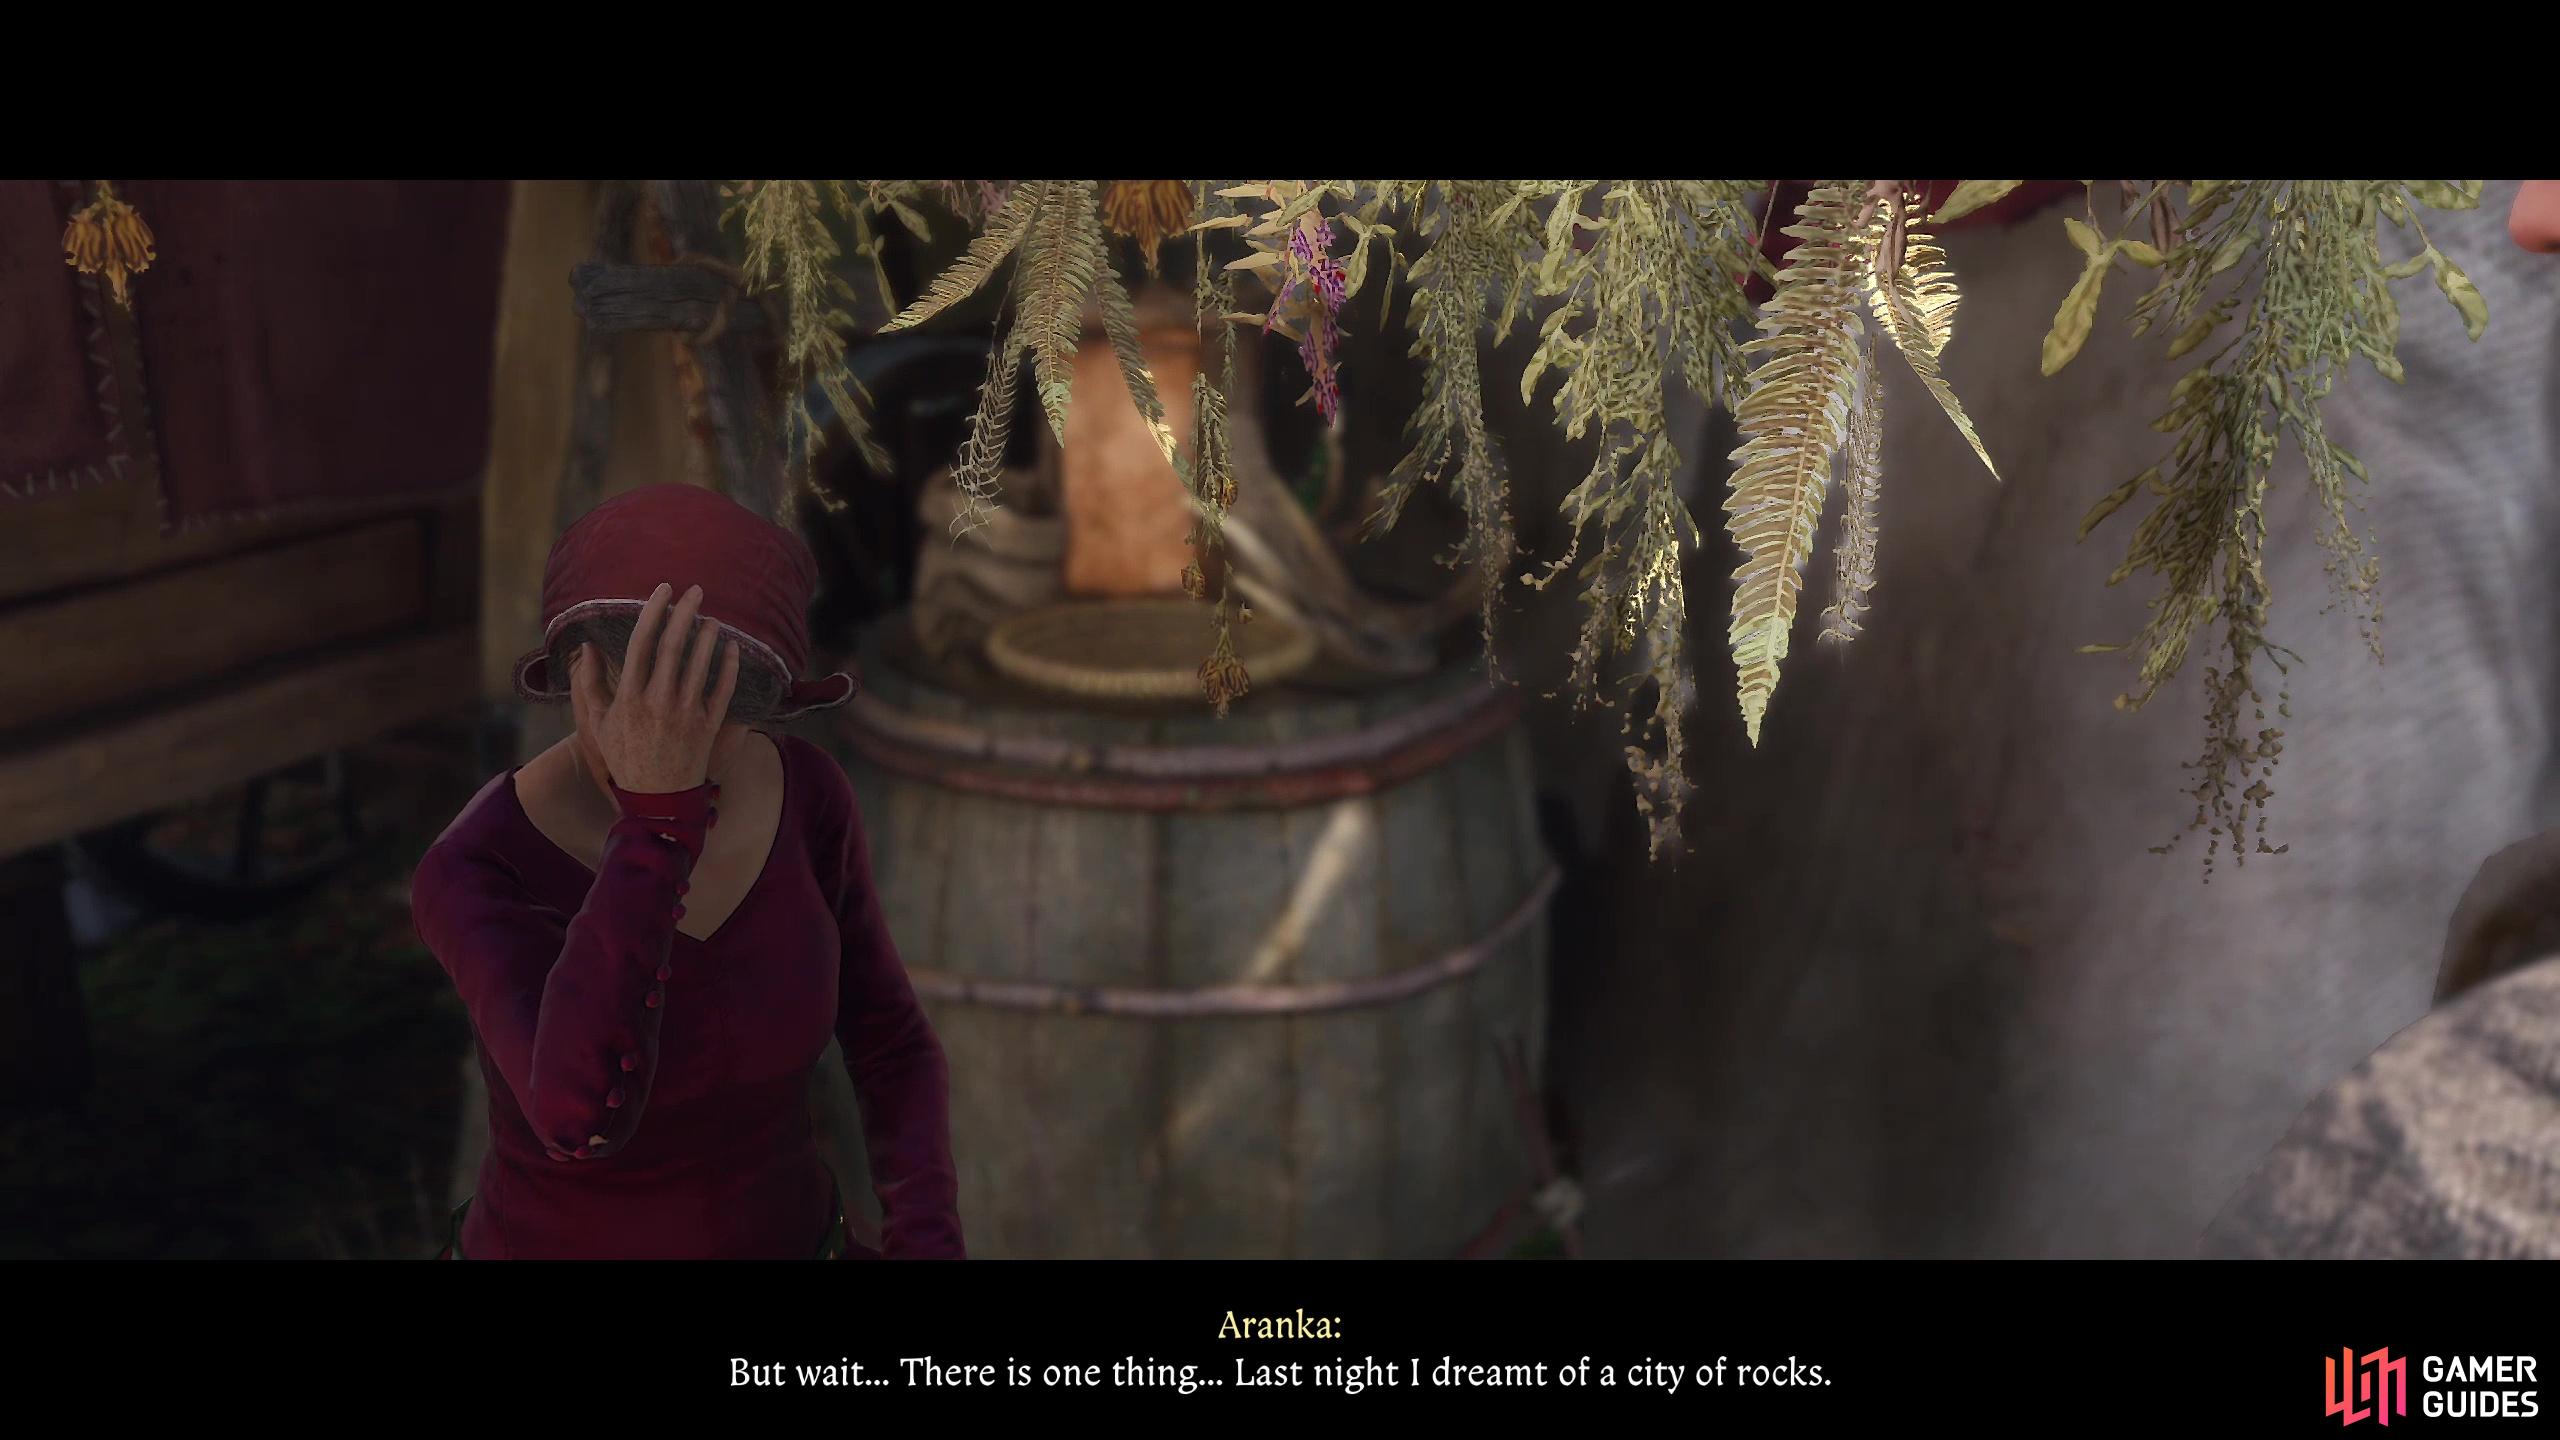
First things first, you can ask Aranka about her daughter’s whereabouts, but her powers - such as they are - dreamt of a city of rocks. As we’ll eventually discover, that’s a fairly apt description, but useless for the task at hand.
Search Markia’s Tent
Next up, search Marika’s tent, which is adjacent to Aranka’s shop. Tent is generous here - Marika was clearly a camping minimalist, sleeping under a simple shelter with blankets strewn about. Search under a wagon to find Marika’s Scarf underneath it, propped up against a locked chest (hard). If you’ve reunited with Mutt this will be fairly handy in pinpointing Marika’s location, but we’ve one more lead to chase.
Talk to Bozhena About Marika
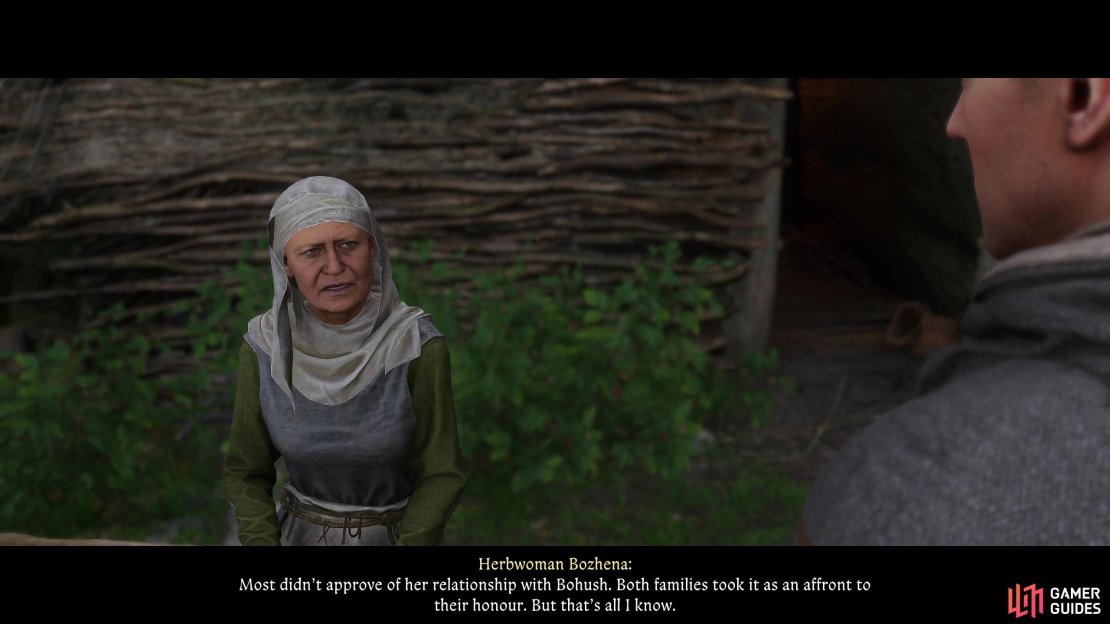
Finally, the Voivode mentioned herbwoman Bozhena, so we should be sure to talk to her. She nursed Hans and Henry back from the edge of death, so you should be familiar enough with her - she dwells to the east, still in the environs of Rocktower Pond, but getting to her hut from the Nomad Camp is bound to be via a roundabout route given the cliffs rising and falling between the two locations. Make your way there, talk to Bozhena, and she’ll tell you about Marika, her bloody and injured lover, and the quarrel over their relationship shared by the people of Semine and the nomads. This doesn’t answer any questions we may have, but it does suggest there’s more at play than the Voivode initially disclosed.
Bozhena will point us towards Apollonia, specially a cave where Marika and her lover Bohush are hiding, and while she gives directions, unless you want to look for “one little rock wedged between two big ones on the right side of the valley”, you may want some more details, and the search area on the map doesn’t help all that much. Mutt will narrow things down a bit, but failing that you can always use the map we’ll provide to pinpoint the location of this cave.


(1 of 3) Consult Aranka and she won’t be able to tell you much besides she saw a “city of rocks” in her dreams.
Search for Marika in Apollonia
With all that chatter aside it’s time to set off and look for Marika. As mentioned earlier, Apollonia is east of Troskowitz, so either head to Troskowitz and follow the road east until you find the marker for Apollonia, or just fast travel to the Apollonia map marker. Once done, you’ll need to venture north from this marker, into a forest befouled by rocky cliffs. If you have Mutt, get him to track Marika’s scent by letting him sniff the scarf you picked up at the Nomad Camp and he’ll lead you right to the cave entrance (look at Mutt, select the “Chat” option, then “Commands” and finally “Track”) - when you breach the search area Henry should mention this, so there should be no mystery about when to do this. If you don’t have Mutt handy, you’ll just need to search on your own, but landmarks aside the cave is just northwest of the objective marker on the map. You’ll know you’re close when you spot blood on the ground and rocks.


(1 of 3) Marika is hiding somewhere in Apollonia, east of Troskowitz.
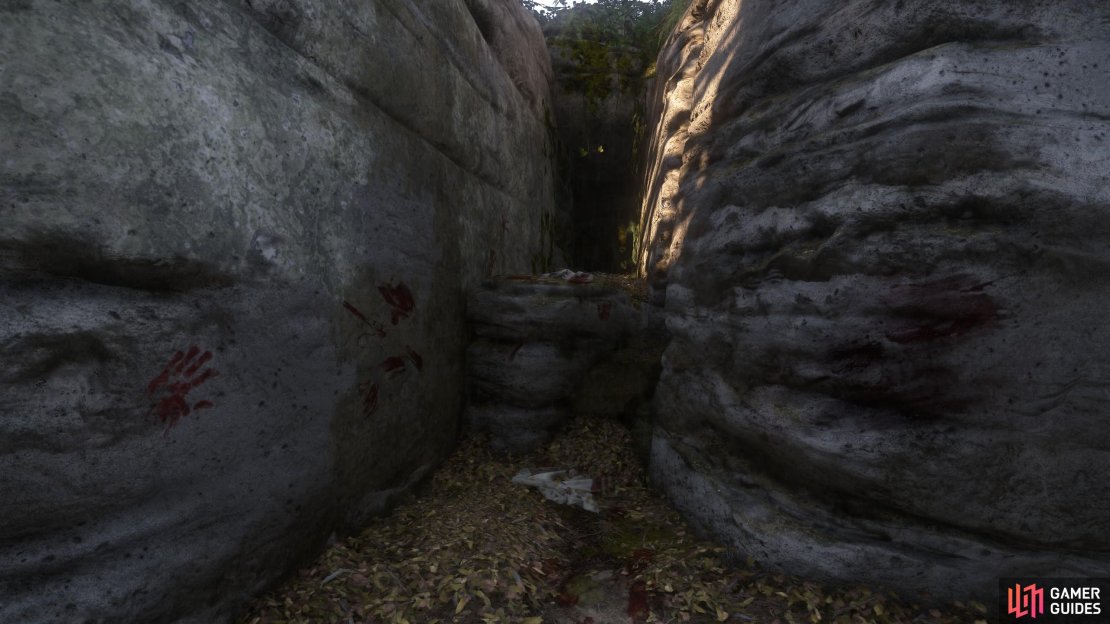
Alternatively you can follow Bozhena’s advice and follow her landmarks - Apollonia is infested with bandits, enemy camps and Cumans, especially in the cliffs you’ll be passing through and near. For Bozhena’s route, fast travel to Trosky Castle, if you have the marker for it (it’s north and very slightly east of Troskowitz) and from there head southeast to reach a clearing of felled forest - the work of the woodcutters Bozhena mentioned. This clearing can be seen clearly on the map. Head to the eastern edge of this clearing and continue east into the woods a short distance to find a path (also visible on the map) and follow it southeast and east until, just off to your left, you find a round boulder wedged in between two larger rocks. Crawl under the suspended boulder then follow the cliffs to your right until you find a cleft in the rocks - some blood on the wall should indicate you’re nearby. Enter the cleft and follow the path until you find a rocky ledge to the left - the blood around here is pretty copious, so it should be easy to spot.
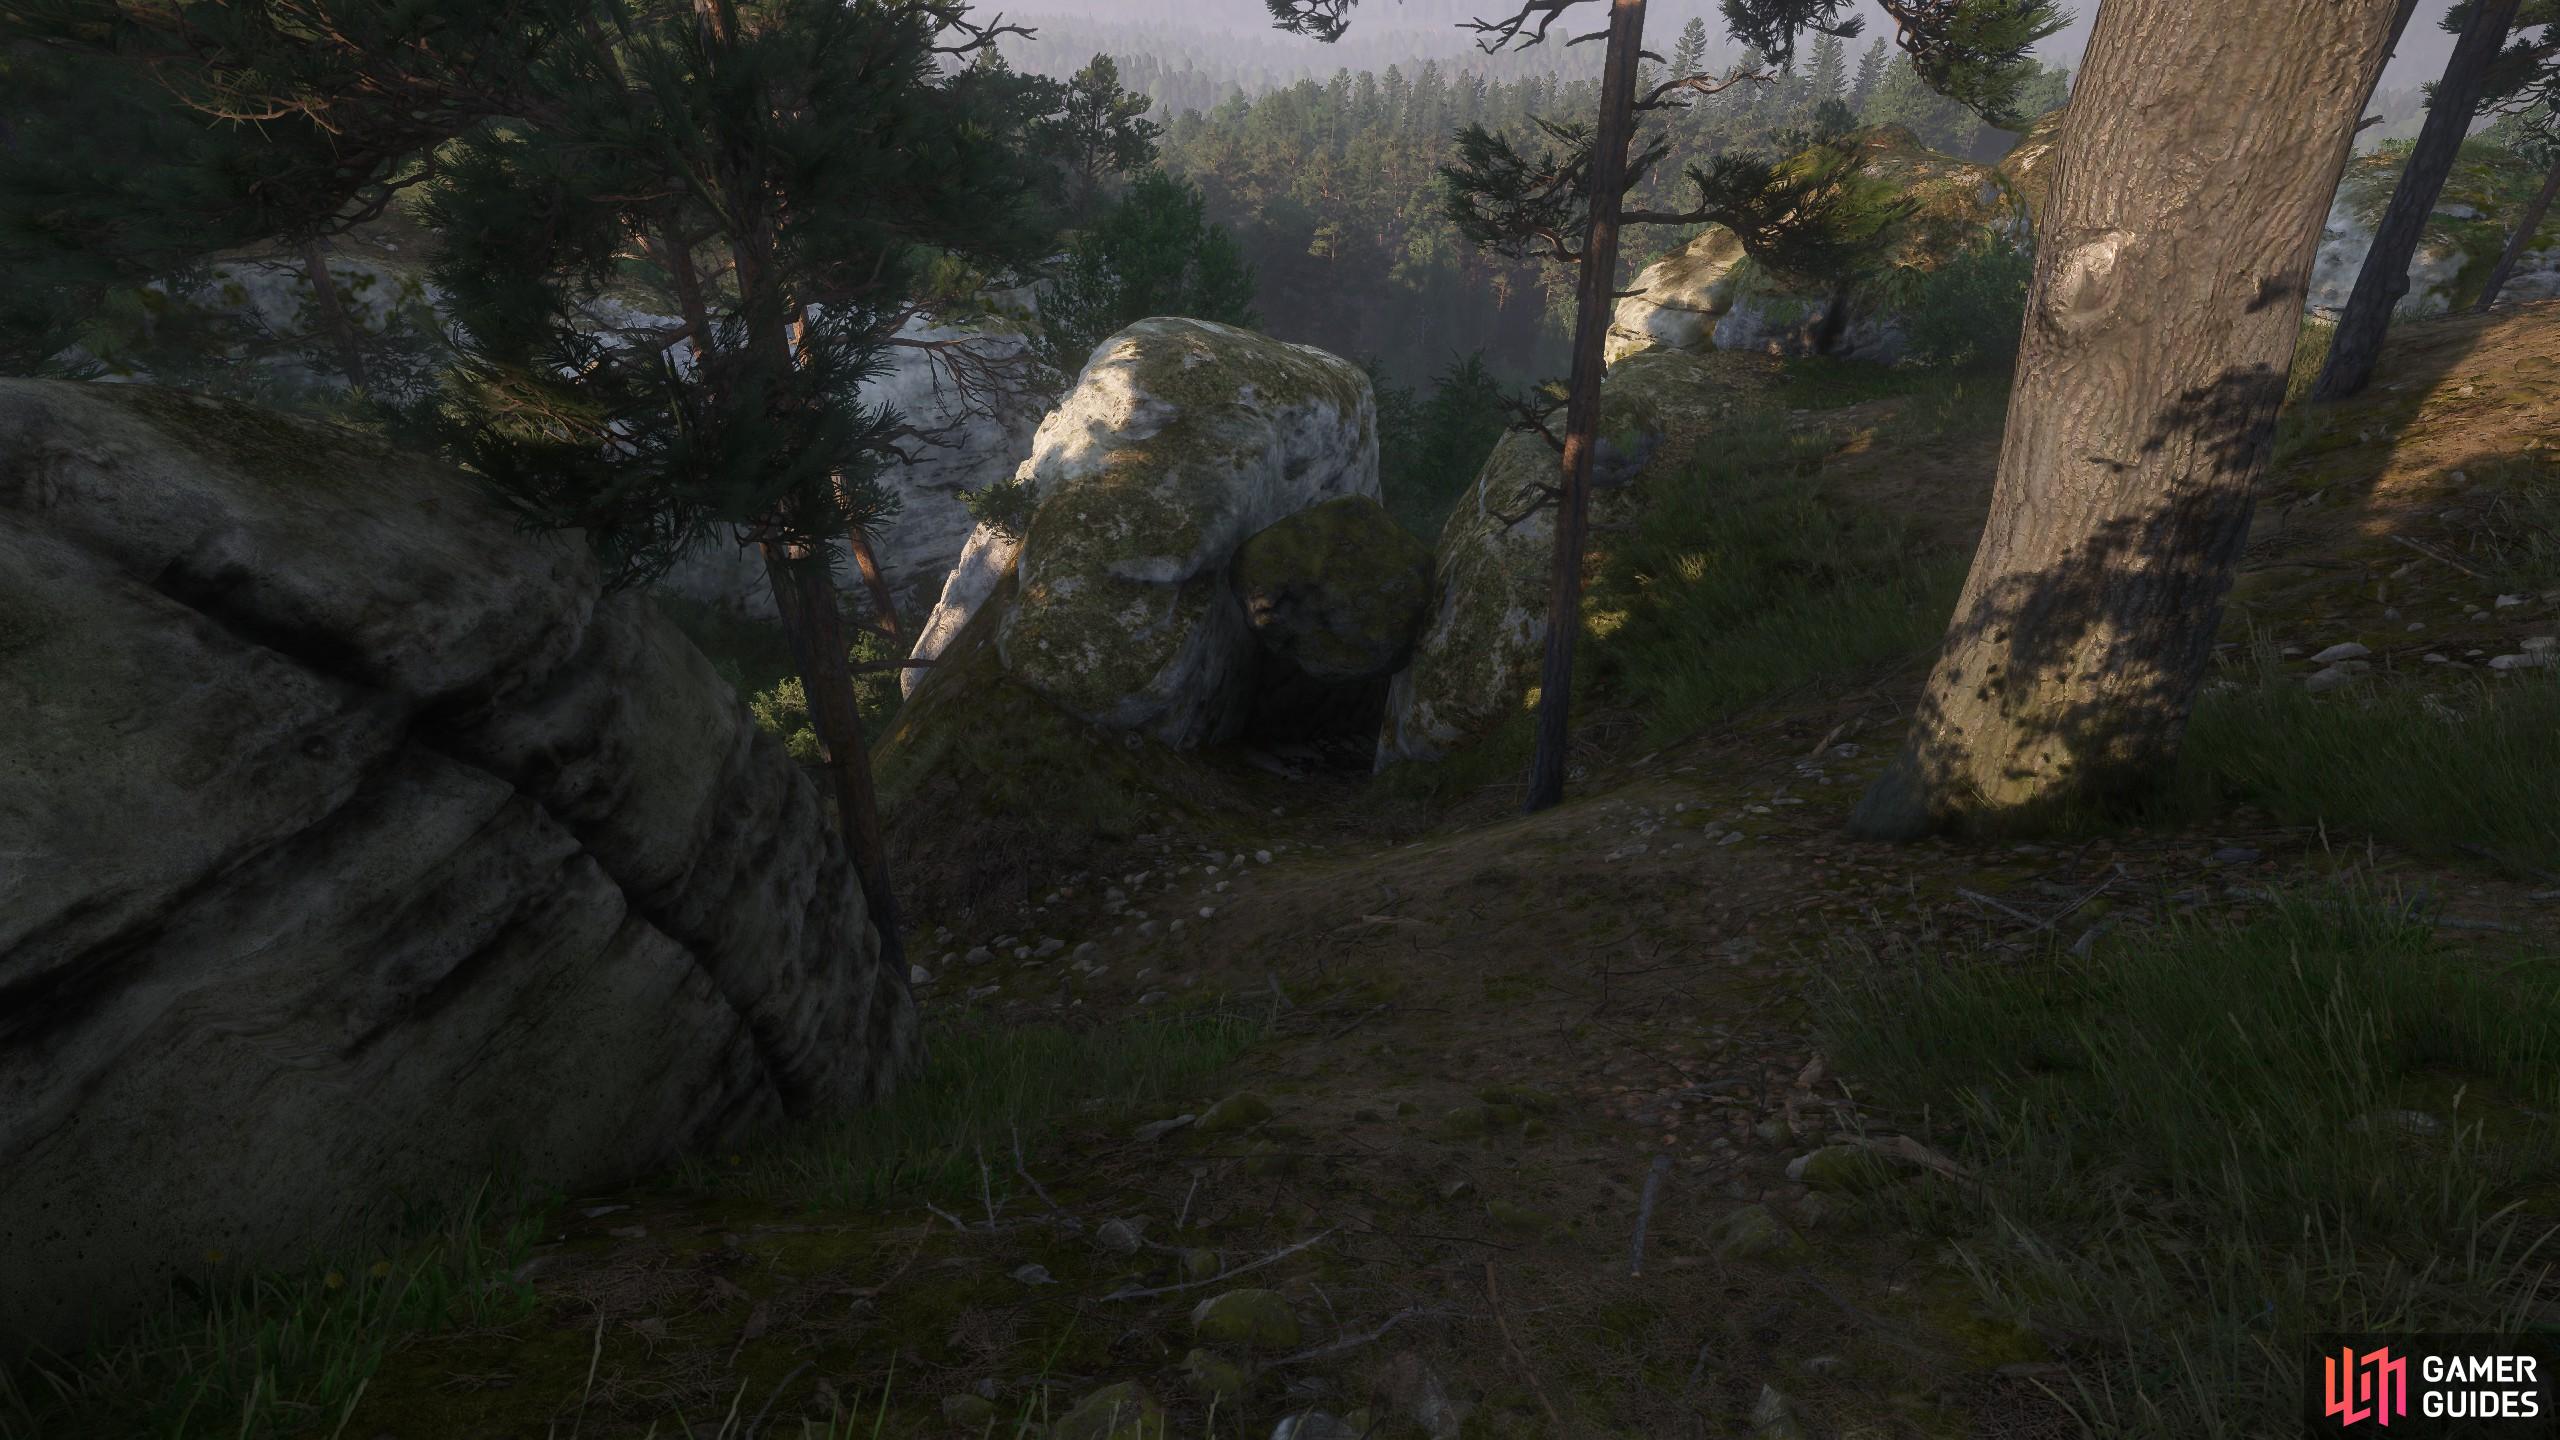


(1 of 3) Follow a trail east of the woodcutter’s clearing to find a boulder wedged between two rocks,
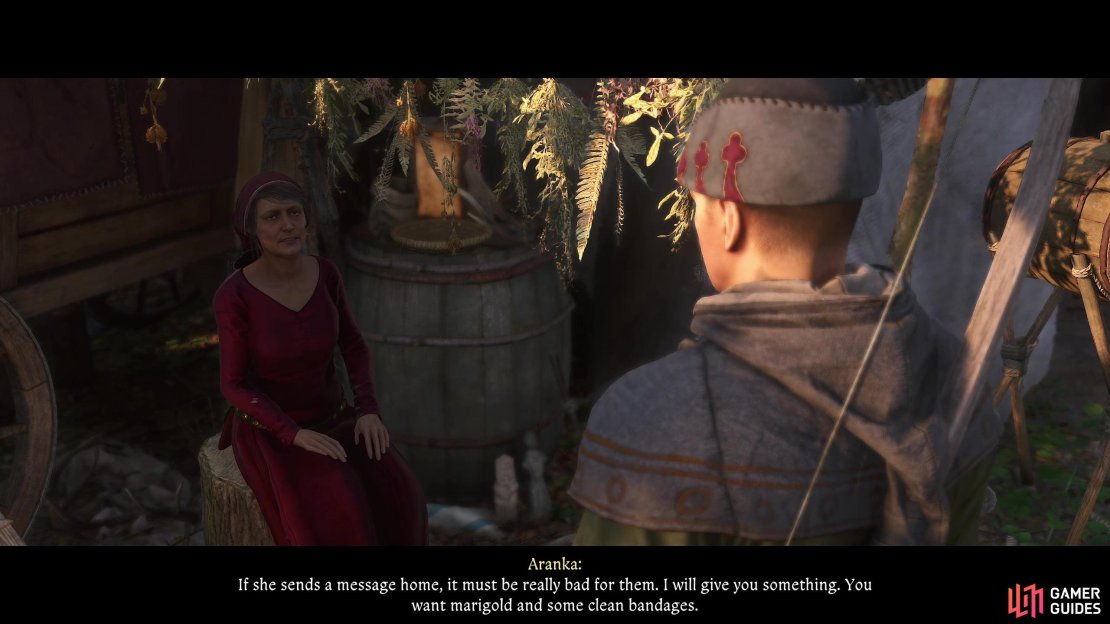
However you manage it, when you arrive, climb up the ledge and descend into the cave to find Marika and her wounded lover. Talk to Marika and she’ll tell you a great deal more details about what happened - she ran away because her relationship with Bohush devolved into an honor feud between the nomads and the villagers of Semine, and one of her own brothers wounded Bohush in a fit of rage. To settle matters, she wants two things: 1) her father’s amulet, delivered in person and 2) herbs and bandages to help her ailing Bohush. The former will be the overarching objective for the rest of the quest (among many, many complications and diversions) while the latter is an optional objective you can complete now.
Bring Herbs and Bandages for Bohush
To help Bohush you need to bring Marika the following:
- 2x Bandages
- 4x Comfrey
- 4x Marigold
The herbs cannot be dried, so you’ll either have to pick them yourself or get them from a merchant that sells fresh herbs. This excludes the Alchemist at Troskowitz, but you shouldn’t write off that town, for reasons we’ll get to, later. First, however, if you pass a Survival check Henry will volunteer his own services in healing Bohush, and if you had a Marigold Potion in your inventory before you talked to Marika she’ll accept the offer and you’ll complete the objective. No fuss, no muss. If you pass the Survival check but you do not have a Marigold Potion handy, Marika will swear off potions and you’ll find yourself needing to hunt down the aforementioned objectives.
Marika will help out by asking you to talk to her mother, and if you do Aranka will give you the bandages and Marigold you need, making things a bit easier. That said, you can find everything you need in Troskowitz. The Alchemist may not sell what you need, but the herb garden outside of his house contains both Comfrey and Marigold, and you can buy Bandages from the general store merchant. Get what you need to help Bohush, then return to Marika for a reputation boost.
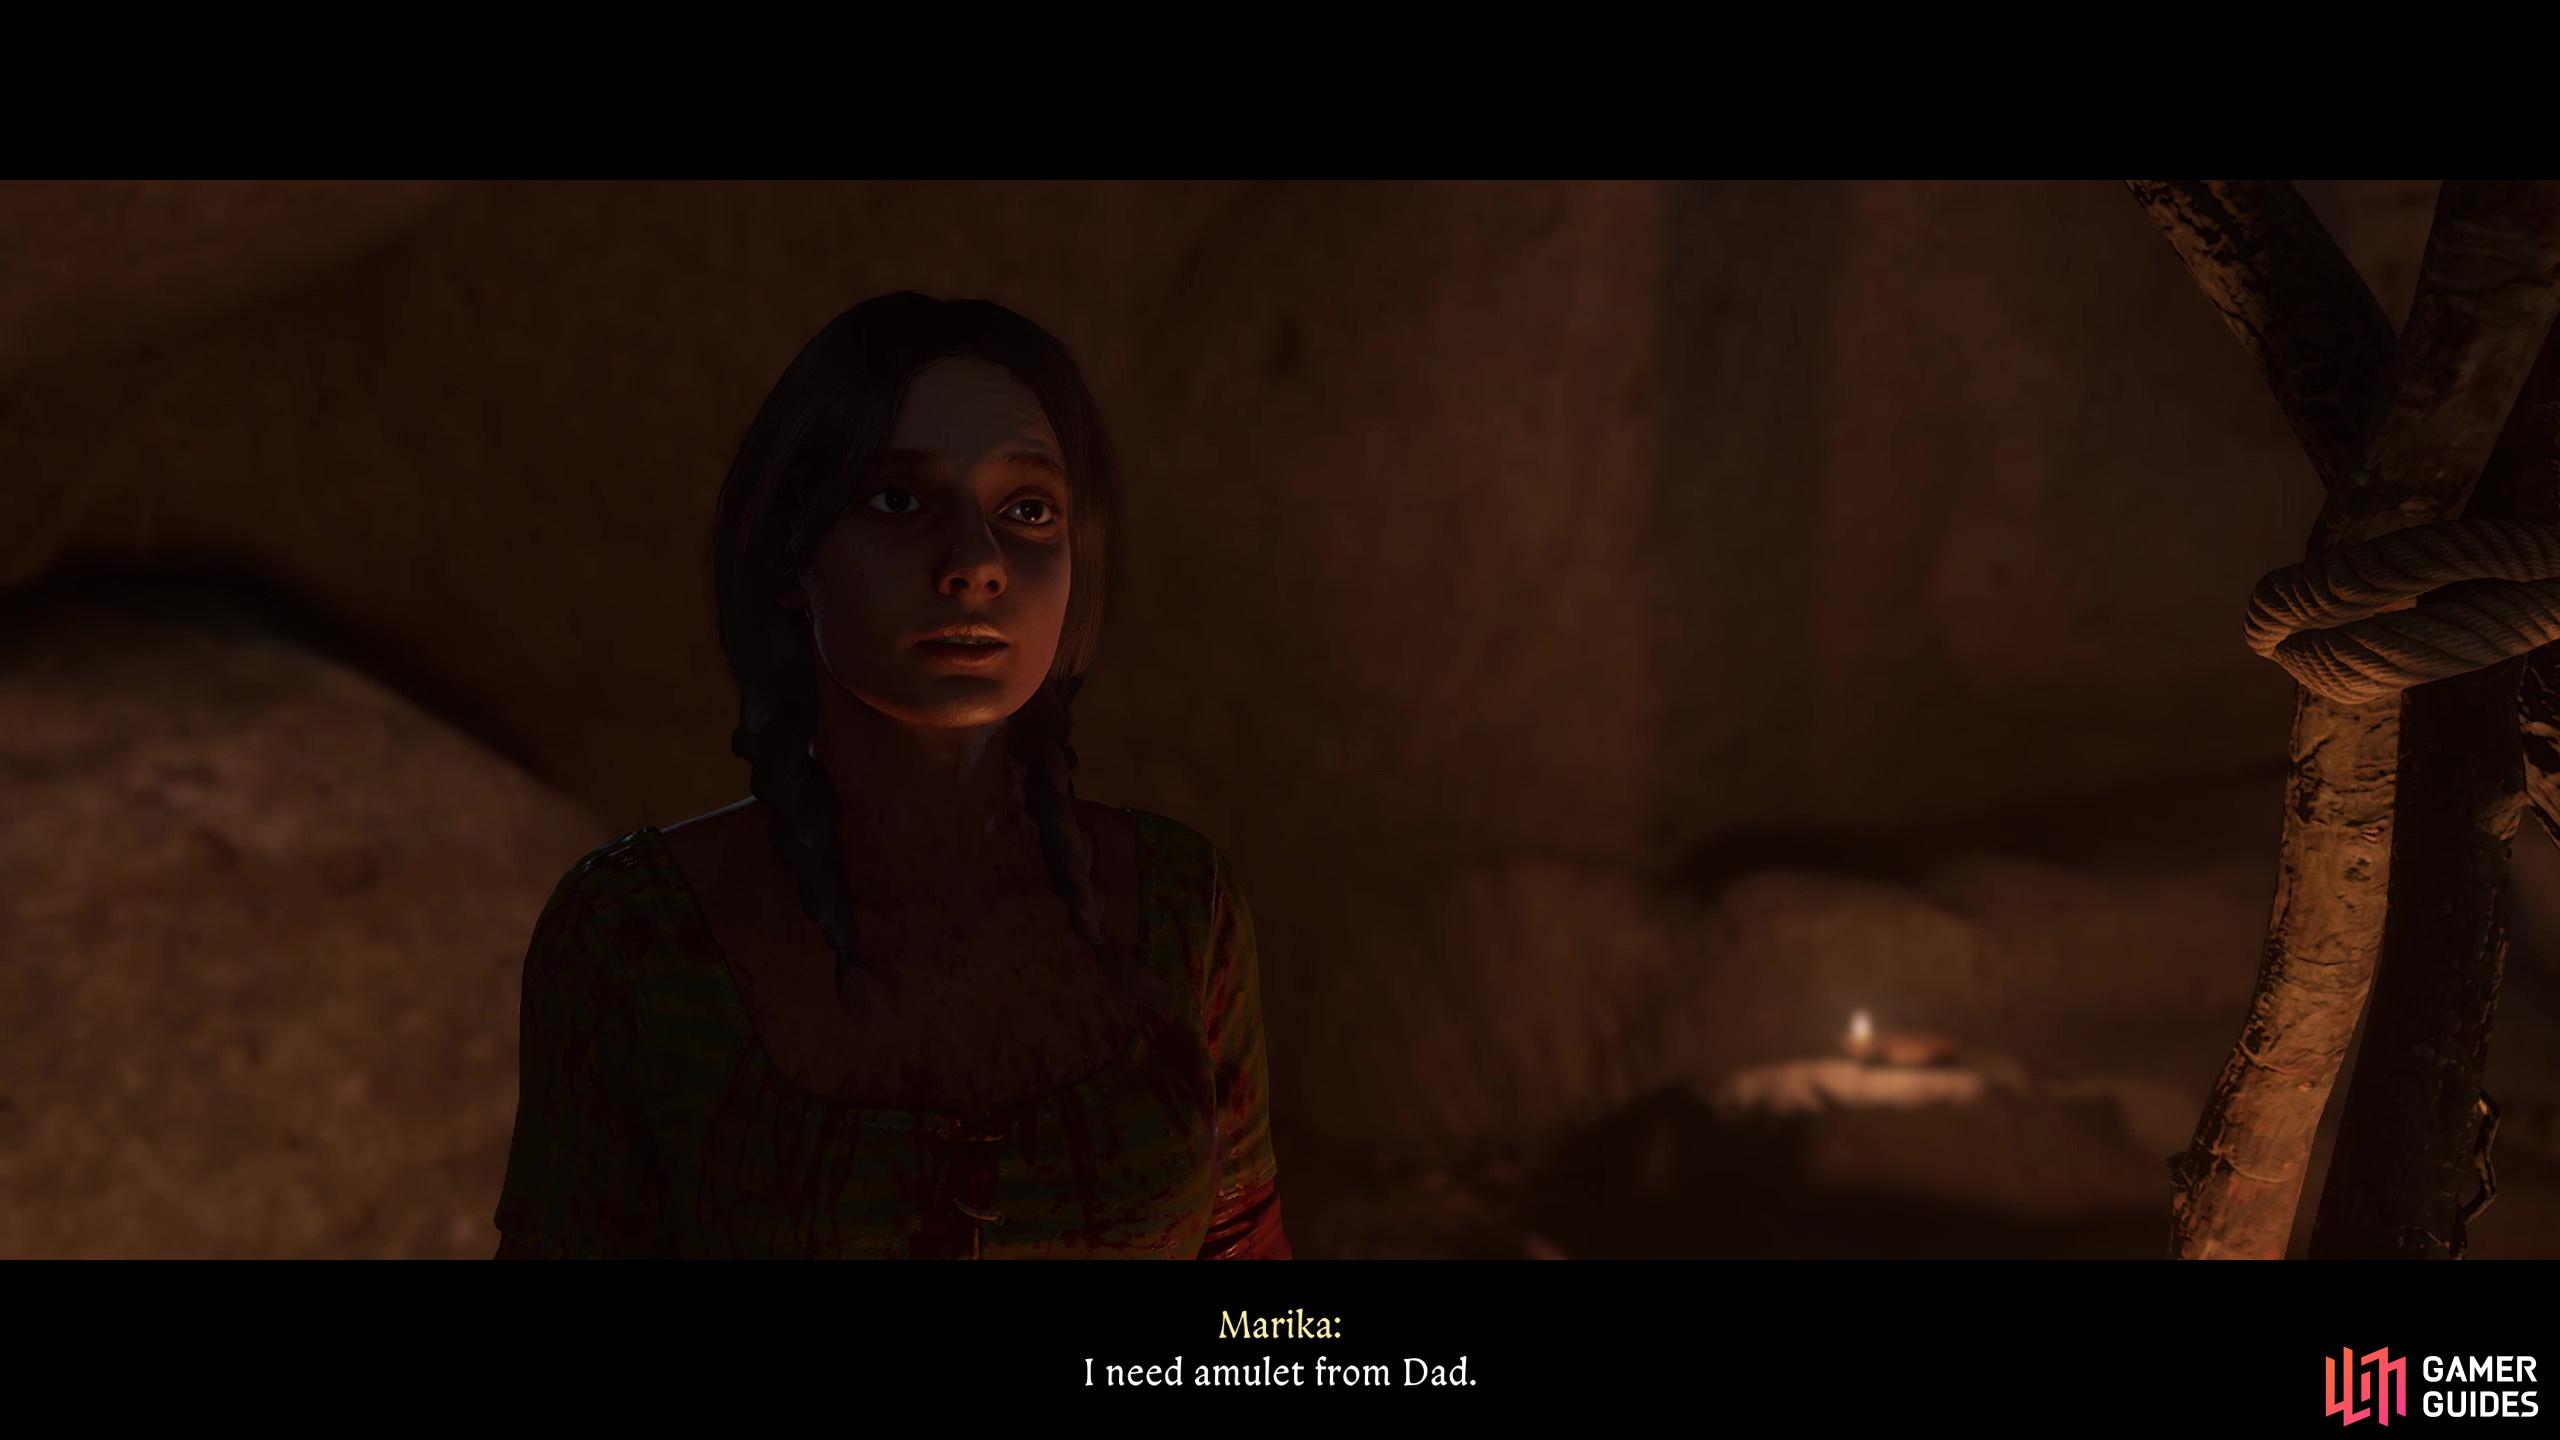

(1 of 4) Find Marika hiding out in a cave in Apollonia and she’ll ask you to get an amulet from her father.
Rescue Tibor
Return to the Nomad Camp and talk to the Voivode, who will come clean about his early omissions and tell you more of the story… from his perspective. Long story short, Marika isn’t his only missing child, his two sons are gone, too - Tibor is imprisoned by the people of Semine and Gejza was slain in a skirmish. To have any chance of getting the Voivode’s amulet you’ll need to rescue Tibor, then secure a proper burial for Gejza, in that order.
Nothing for it ,time to head to Semine, which is down the road to the south and east from the Nomad Camp.
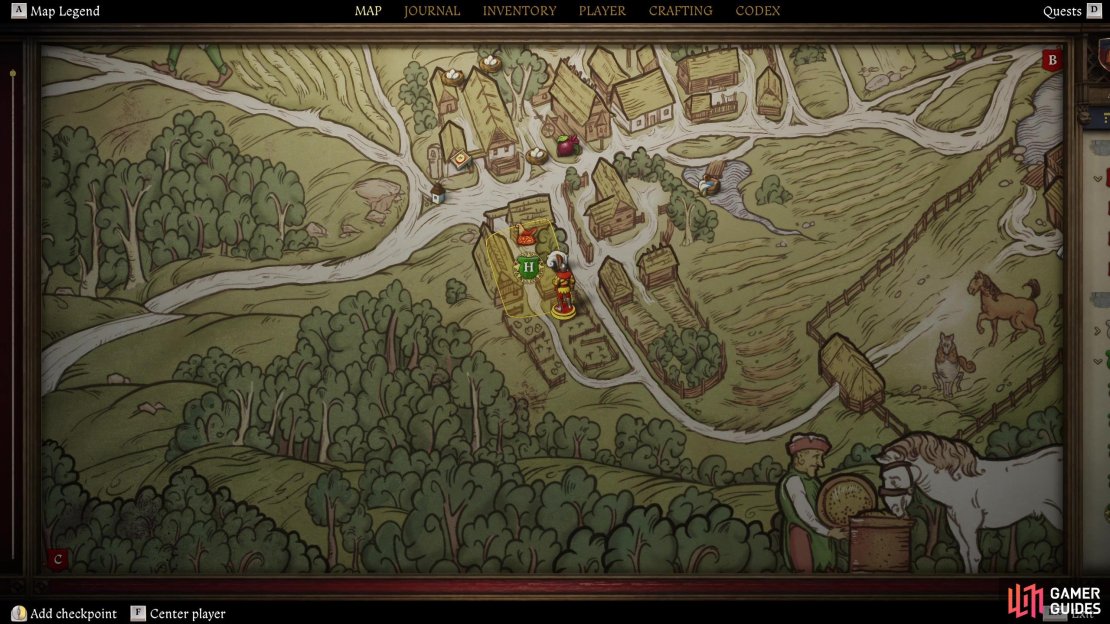
Once you reach the outskirts of town, talk to any character you find and ask about their captive and you should find that Tibor is being held captive at the Saddler’s house. Any random NPC should tell you this, but if not, just keep asking until you get the info you need, which will put a smaller search area along the southwestern corner of town.
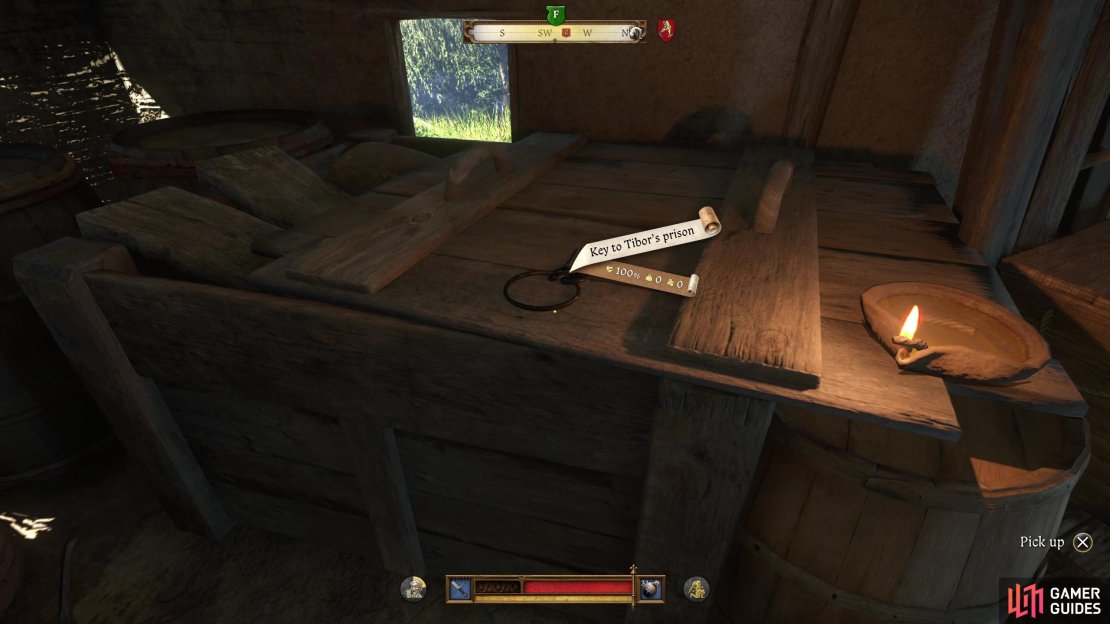
Head to the Saddler’s house and talk to a hired hand stand guard outside of a barn to the south. If you succeed at a Speech check he’ll agree to look away while you free Tibor to stave off any potential retaliation from the nomads - grab the Keys to Tibor’s Prison off a crate inside the barn, unlock the door to find Tibor in the room beyond tied to a post. If you can’t talk your way past the guard, circle around to the back of the barn (sneak around the edge of town - the area around the barn is a restricted area) and just climb in through a window. However you get inside, untie Tibor, follow him out the window and into the woods.


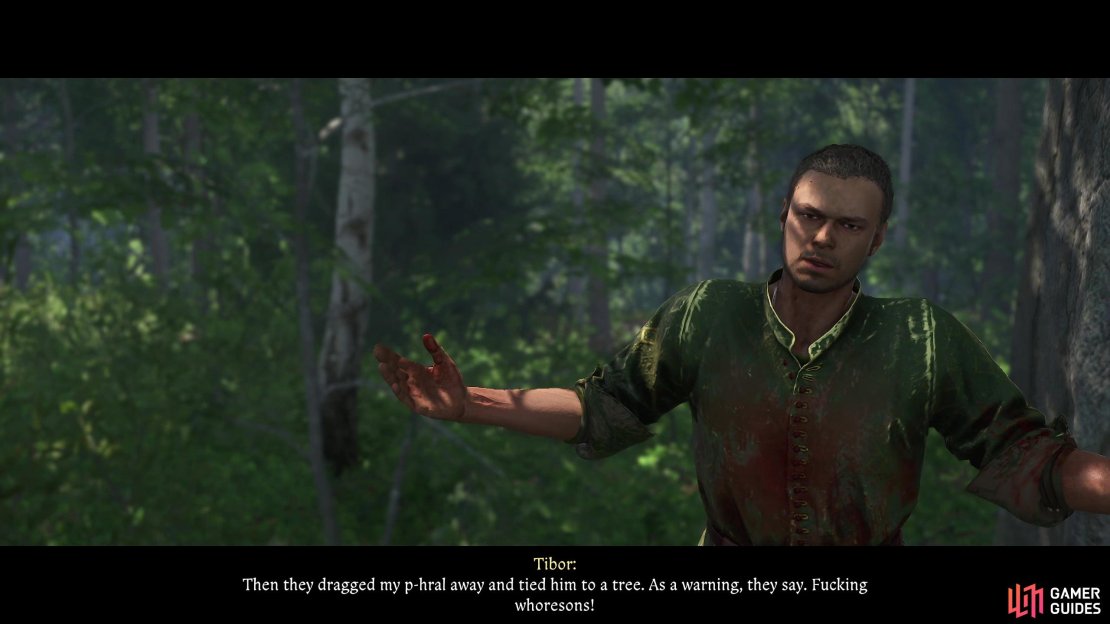
(1 of 6) Talk to any villager and Semine and they’ll point you towards the Saddler’s hut,
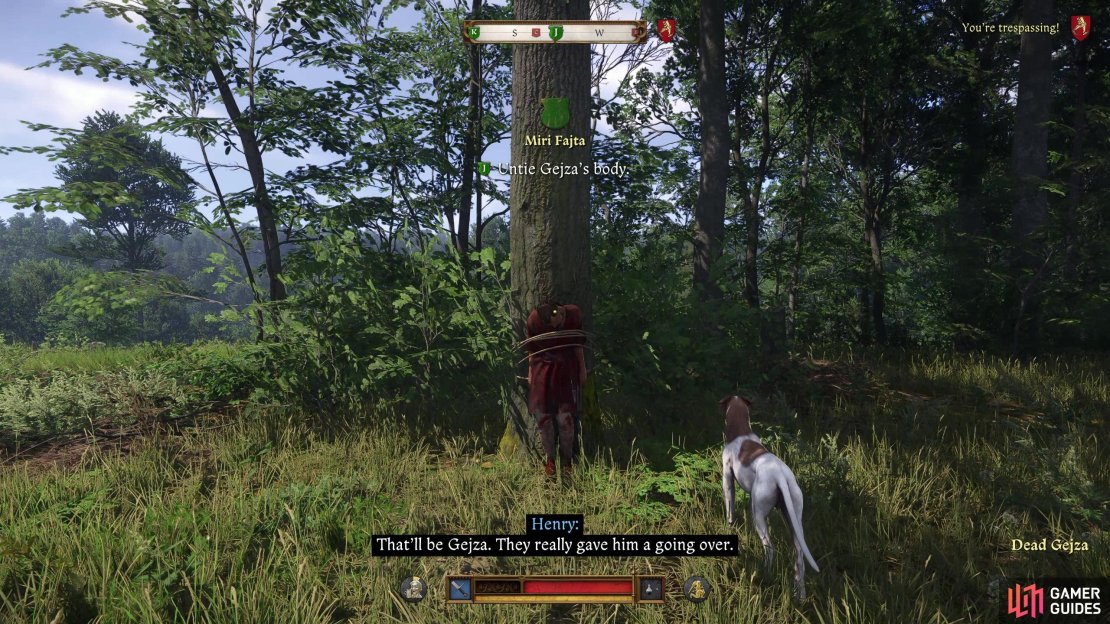
Recover and Bury Gejza
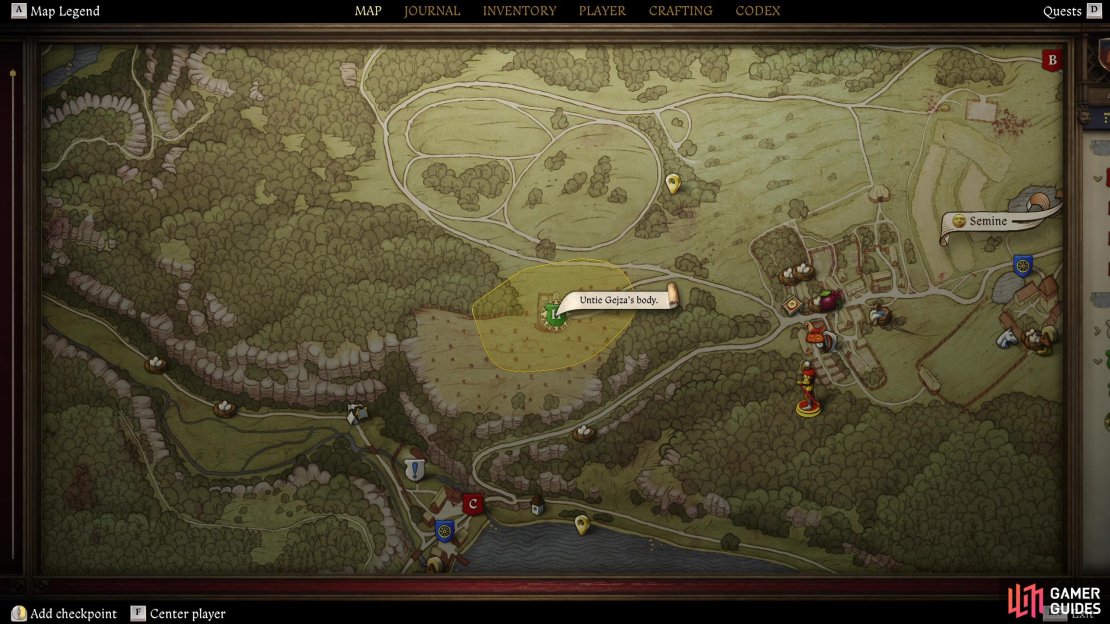
Now that you’ve freed Tirbor, talk to him when he stops in the woods and he’ll tell you what happened to him and Gejza, and where you can find Gejza. Seems that even in death, Gejza ended up captured, and you’ll have to find a way to recover his body from the woodcutters who split his skull. You’re on your own for this, but don’t worry - Tibor will be busy off-screen digging a grave for Gejza. All you need to do is get Gejza’s corpse to the burial site.
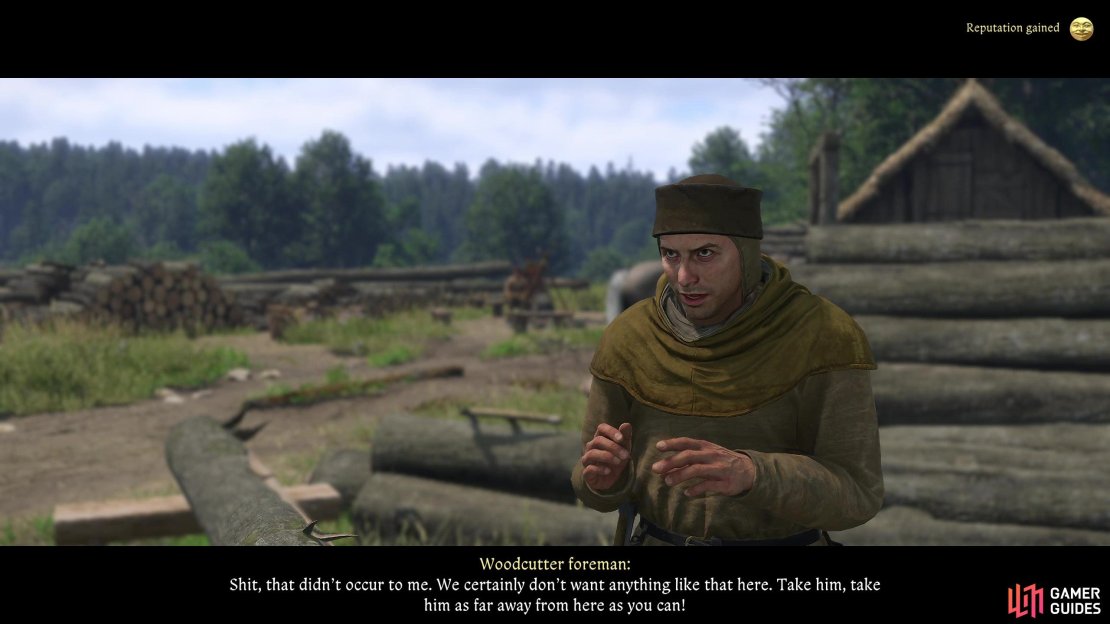
This can either be relatively quick and painless or something of a chore, depending on your skills and luck. Make your way northwest from Tibor to find a woodcutter’s clearing west of Semine, where you’ll find several Woodcutters milling about along with a Woodcutter Foreman. The Woodcutters will just direct you to talk to the foreman, so cut out the middleman and talk to the foreman. If you pass a speech check you can convince the foreman that the nomads have the innate ability to haunt people after death, and that Gejza’s mother is a witch, which is like, double scary hauntings. Succeed and he’ll practically beg you to get that corpse out of here, making this by far the easiest and cleanest approach.
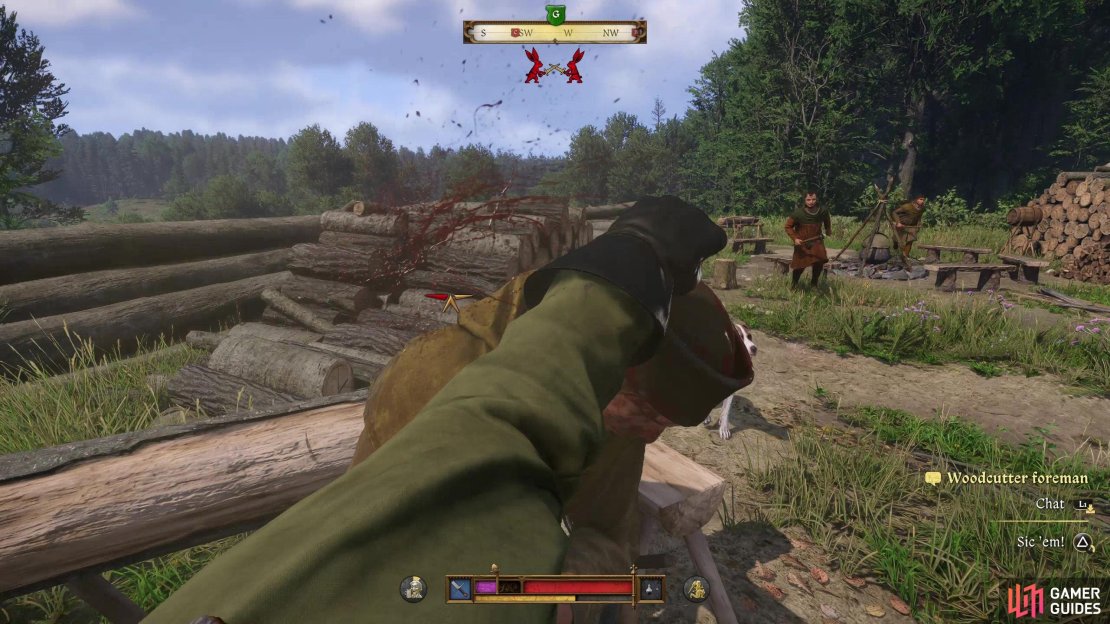
If you attempt to pay the foreman, he scams you out of money and threatens you afterwards. If you’ve got decent armor, you can just indulge in fisticuffs with the woodsmen - they’re armed with axes not well suited for penetrating armor, and as long as you just rain punches on them as long as you’ve got the stamina to do so before retreating and catching your breath, you can knock them all out. Killing them is also on the table - they’ve not much of a chance against a well armed and armored Henry, but murder is a much more serious crime than assault.
The only other peaceful approach we’ve discovered is simply absconding with the body when nobody’s looking. Gejza is tied to a tree along the western edge of the clearing, and there’s usually one Woodcutter looking in this direction, either sitting on a bench nearby (not necessarily the ones by the stew) or leaning against the wall of a building. You may just have to wait an hour to get the Woodcutters to move, and when nobody is looking at Gejza’s corpse, cut him down, pick him up and quickly shuffle to the west before you’re caught.
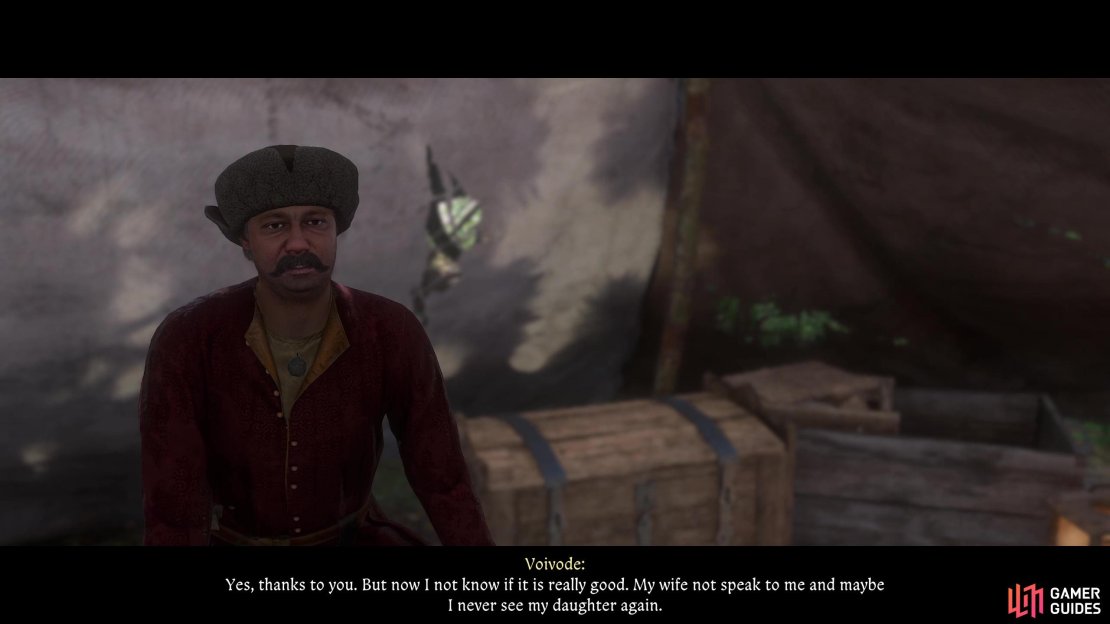
Haul Gejza to the burial site marked on your map, approach the hole Tibor dug, and dumb Gejza’s corpse in. After some chatter Tibor will fetch the rest of the party and you’ll bury Gejza - say “Amen” at the end to get some reputation. After more chatter you’ll return to the Nomad Camp where the Voivode will break the bad news to you - even after all this, he will not part with the amulet. Instead, he’ll tell you that Marika stole a letter of safe conduct from Sigismund when she left, which serves as the legal backbone for the nomad’s autonomy, and he wants you to get it back for him.
This leads to two choices: Get the letter of safe conduct back from Marika, or seek an alternative means of getting the Voivode’s amulet.


(1 of 5) After learning where Gejza can be found, head to the woodcutter’s camp west of Semine.
Get the Voivode’s Letter of Safe Conduct
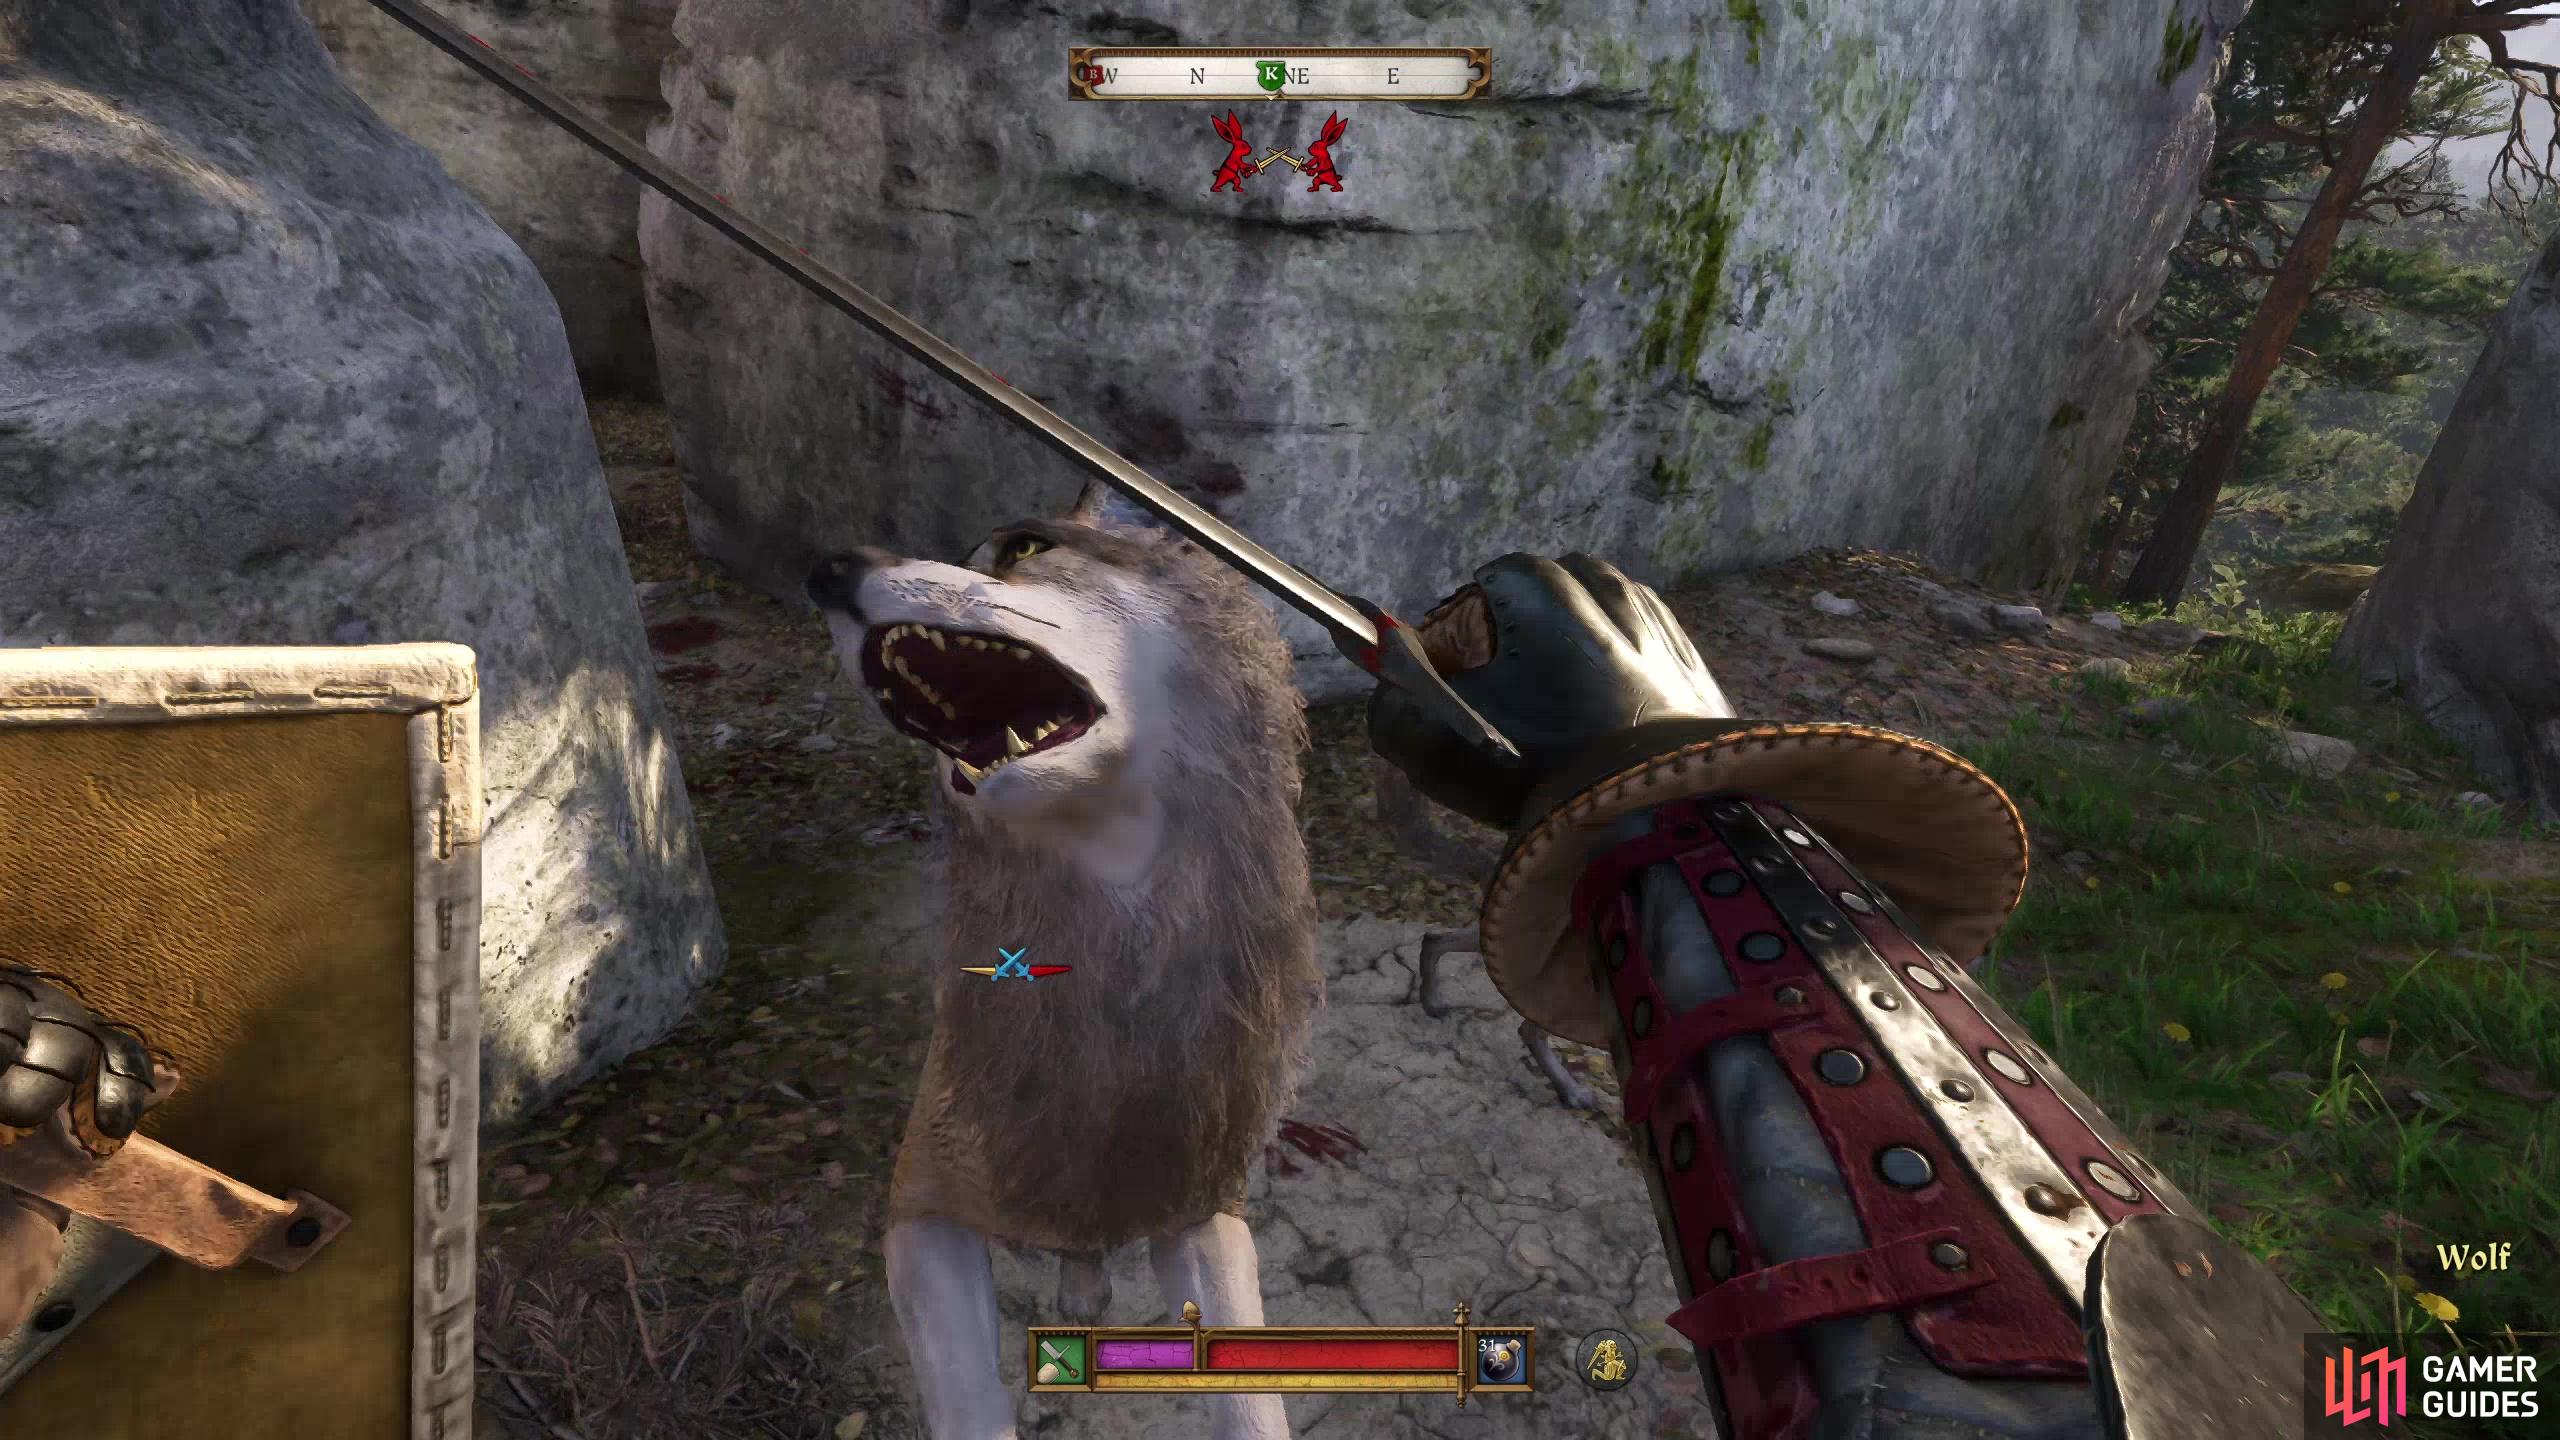
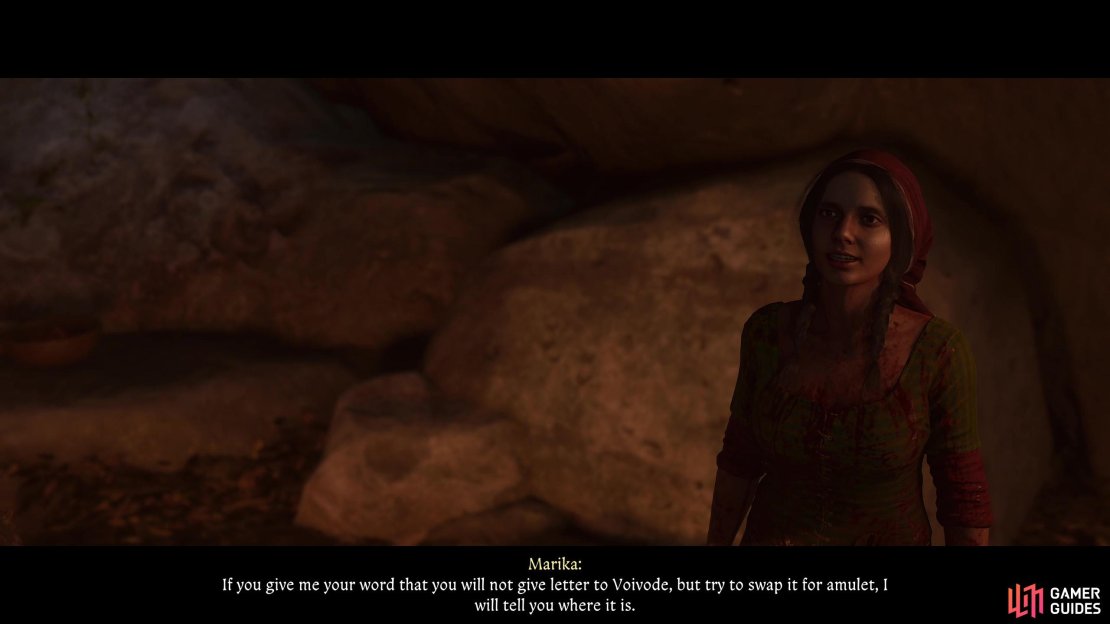
The easier of the two options is to just screw Marika over, take the letter of safe conduct and give it back to the Voivode. It’s the less satisfying ending, but much less bother for you. To do this, return to Marika’s cave in Apollonia, fend off some wolves near the entrance, talk to Marika and tell her the Voivode wants the letter of safe conduct. She’ll offer to give it to you if you swear you’ll only use it as leverage to trade for the amulet, and you can either make the pledge with the intent of breaking your word, or decline outright. The latter will result in a loss of reputation, but functionally there’s no difference between lying to get the letter of safe conduct or just taking it without Marika’s help in terms of how the quest will end.
Make your promise or not, then exit the cave and turn right (north), and once you’re out the cleft turn northeast to find a stream running downhill. Follow this stream to its highest point (follow it uphill to the west, southwest) and you’ll find a pool blocked by a fallen log and other debris, with a bottle of beer and bucket nearby. From this pool turn southeast to find a tree, and search this tree to find the Voivode’s letter of safe conduct.
Take this letter and give it to the Voivode to end the quest, earning 85 groschen in the progress. Join a party if you wish and in the morning, talk to Aranka to find out that she’s decided you’re anathema. If you talk to the Voivode you’ll find out that he is starting to have buyer’s remorse, and even Tibor is upset with how things turned out! Sweet, level-headed Tibor! If you return to Marika in her cave she’ll condemn you with a gypsy curse and… that’s that. Not much of a reward or ending, really.


Win the Voivode’s Amulet
If you want the good ending, you’ll have to win the Voivode’s amulet, which is a lot more work than just giving him the letter of safe conduct… which you first must claim as your own. Repeat the steps above, but make the promise to Marika and follow her directions to the tree by the spring to claim the letter of safe conduct, then return to the Nomad’s Camp and talk to the Voivode. He’ll refuse your offer, but it you tell Tibor or Aranka about it they’ll suggest you make a bet out of it, which the Voivode won’t be able to refuse - if you ask Aranka, she’ll promise to help you come out ahead.
Return to the Voivode and challenge him - the letter of safe conduct for the Voivode’s amulet. He’ll accept, with conditions - stick to your guns and he’ll eventually tell you that there will be three competitions, and Henry must win two of them. First is a horse race and the second is a fist fight, and you’ll be competing against Tibor (standing in on the Voivode’s behalf) both times. The third competition will be revealed later, if it goes that far.
Win the Horse Race
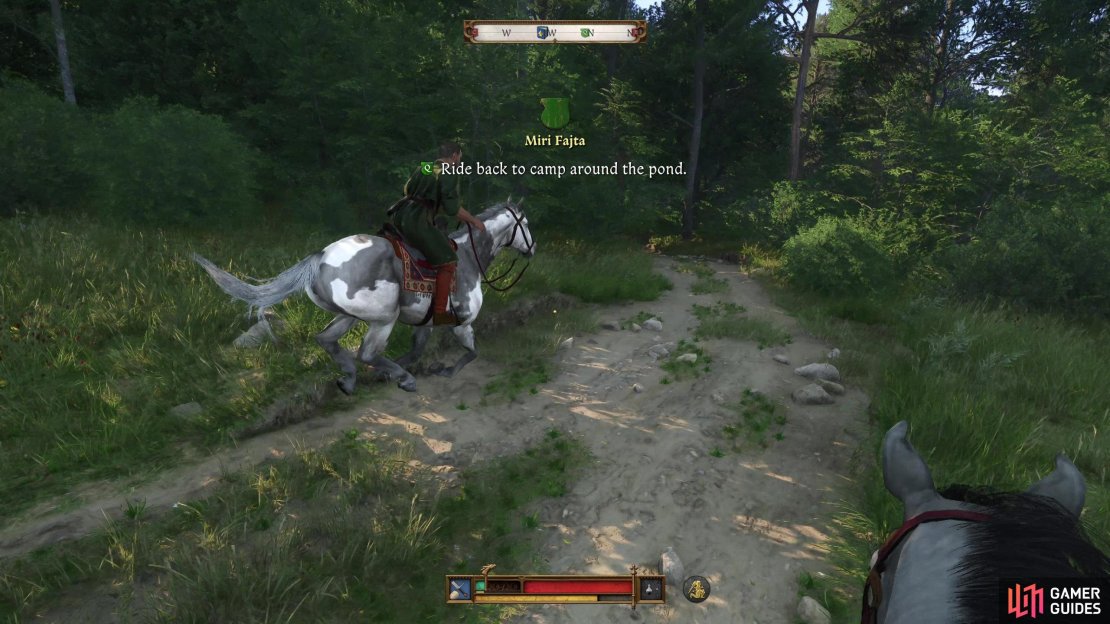
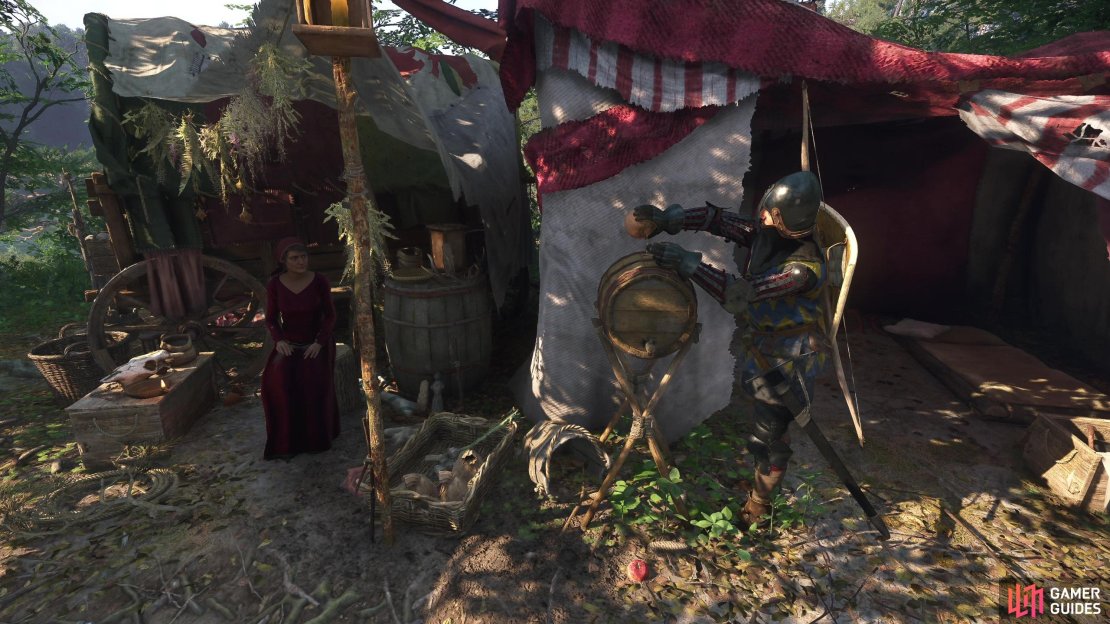
After challenging the Voivode, be sure to decline to start the competition straight away and instead talk to Aranka and tell her about the competition. To help even the odds, she’ll give you a concoction and tell you to poison Tibor’s horse’s trough, which will lower the stats of Tibor’s horse. Before you have any moral qualms, the Romani are cheating rat bastards - Tibor’s horse will be superior to the one they provide you (although you can use your own horse, if you have one), and unless you’ve leveled Horsemanship and bought a few perks in it, your odds of beating Tibor are slim to nil. Even with the concoction, you’ll need some skill to win. Tibor’s mount, Chon, can be found on the southern edge of the Nomad Camp.
When you’re ready, talk to the Voivode and start the race. You’ll have to alternate between galloping and managing your stamina while staying on the course, and again, if your Horsemanship is low, there’s a good chance you’ll lose even if you dope Tibor’s mount. Don’t worry, though, there are two more challenges left and these are easier to win, with or without cheating.

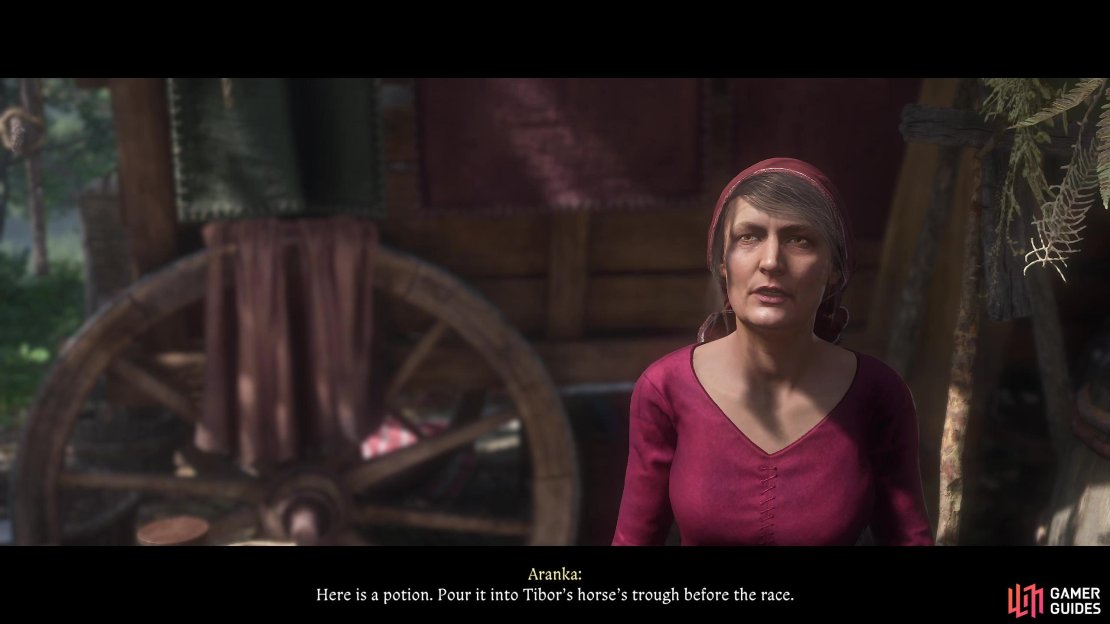
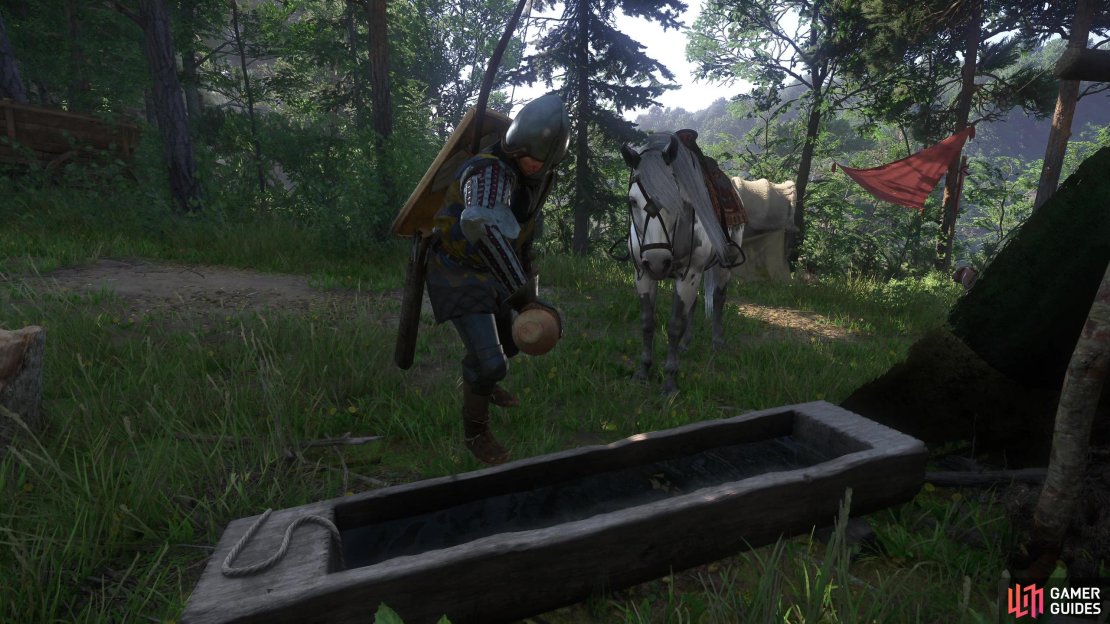
(1 of 3) Talk to Aranka before starting the horse race and she’ll give you a potion you can use to tip the odds in your favor.
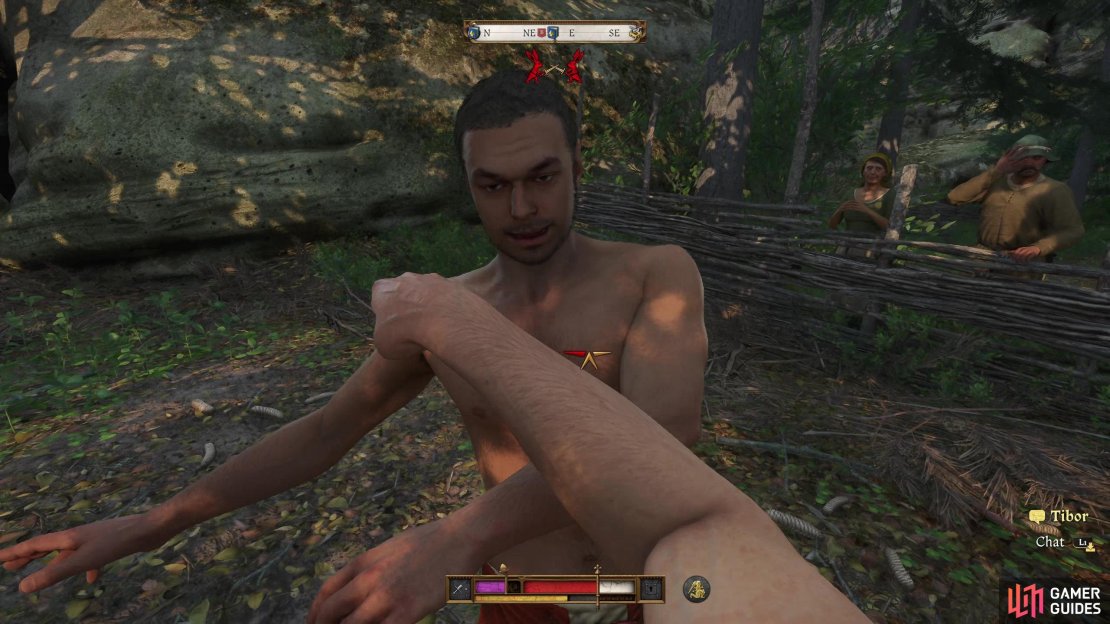
Win the Fist Fight
Talk to the Voivode and after some chatter he’ll try to goad you into starting the next competition - a fistfight against Tibor. Again, say you’re busy, then talk to Aranka and she’ll give you a potion to use to spike Tibor’s drink - the keg near Aranka’s hut. Spike the wine if you wish, wait for Tibor to drink, then talk to Viovode and start the fight. Tibor isn’t a push-over when it comes to fisticuffs, but he’s a much better racer than a fighter. Even if you didn’t spike Tibor’s wine and even if you haven’t leveled Unarmed, Tibor should be beatable if you perform well enough, but having an elevated Unarmed skill or spiking his wine will shade the odds more in your favor. It’s also worth noting that you do not get to wear any armor during the fight, so don’t rely on armor to get you through this bout. Win the fight and, assuming you didn’t win the last round it’ll be time to move onto the final phase of the competition.
We’ll cover what happens after you win or lose the wager after discussing the third competition.
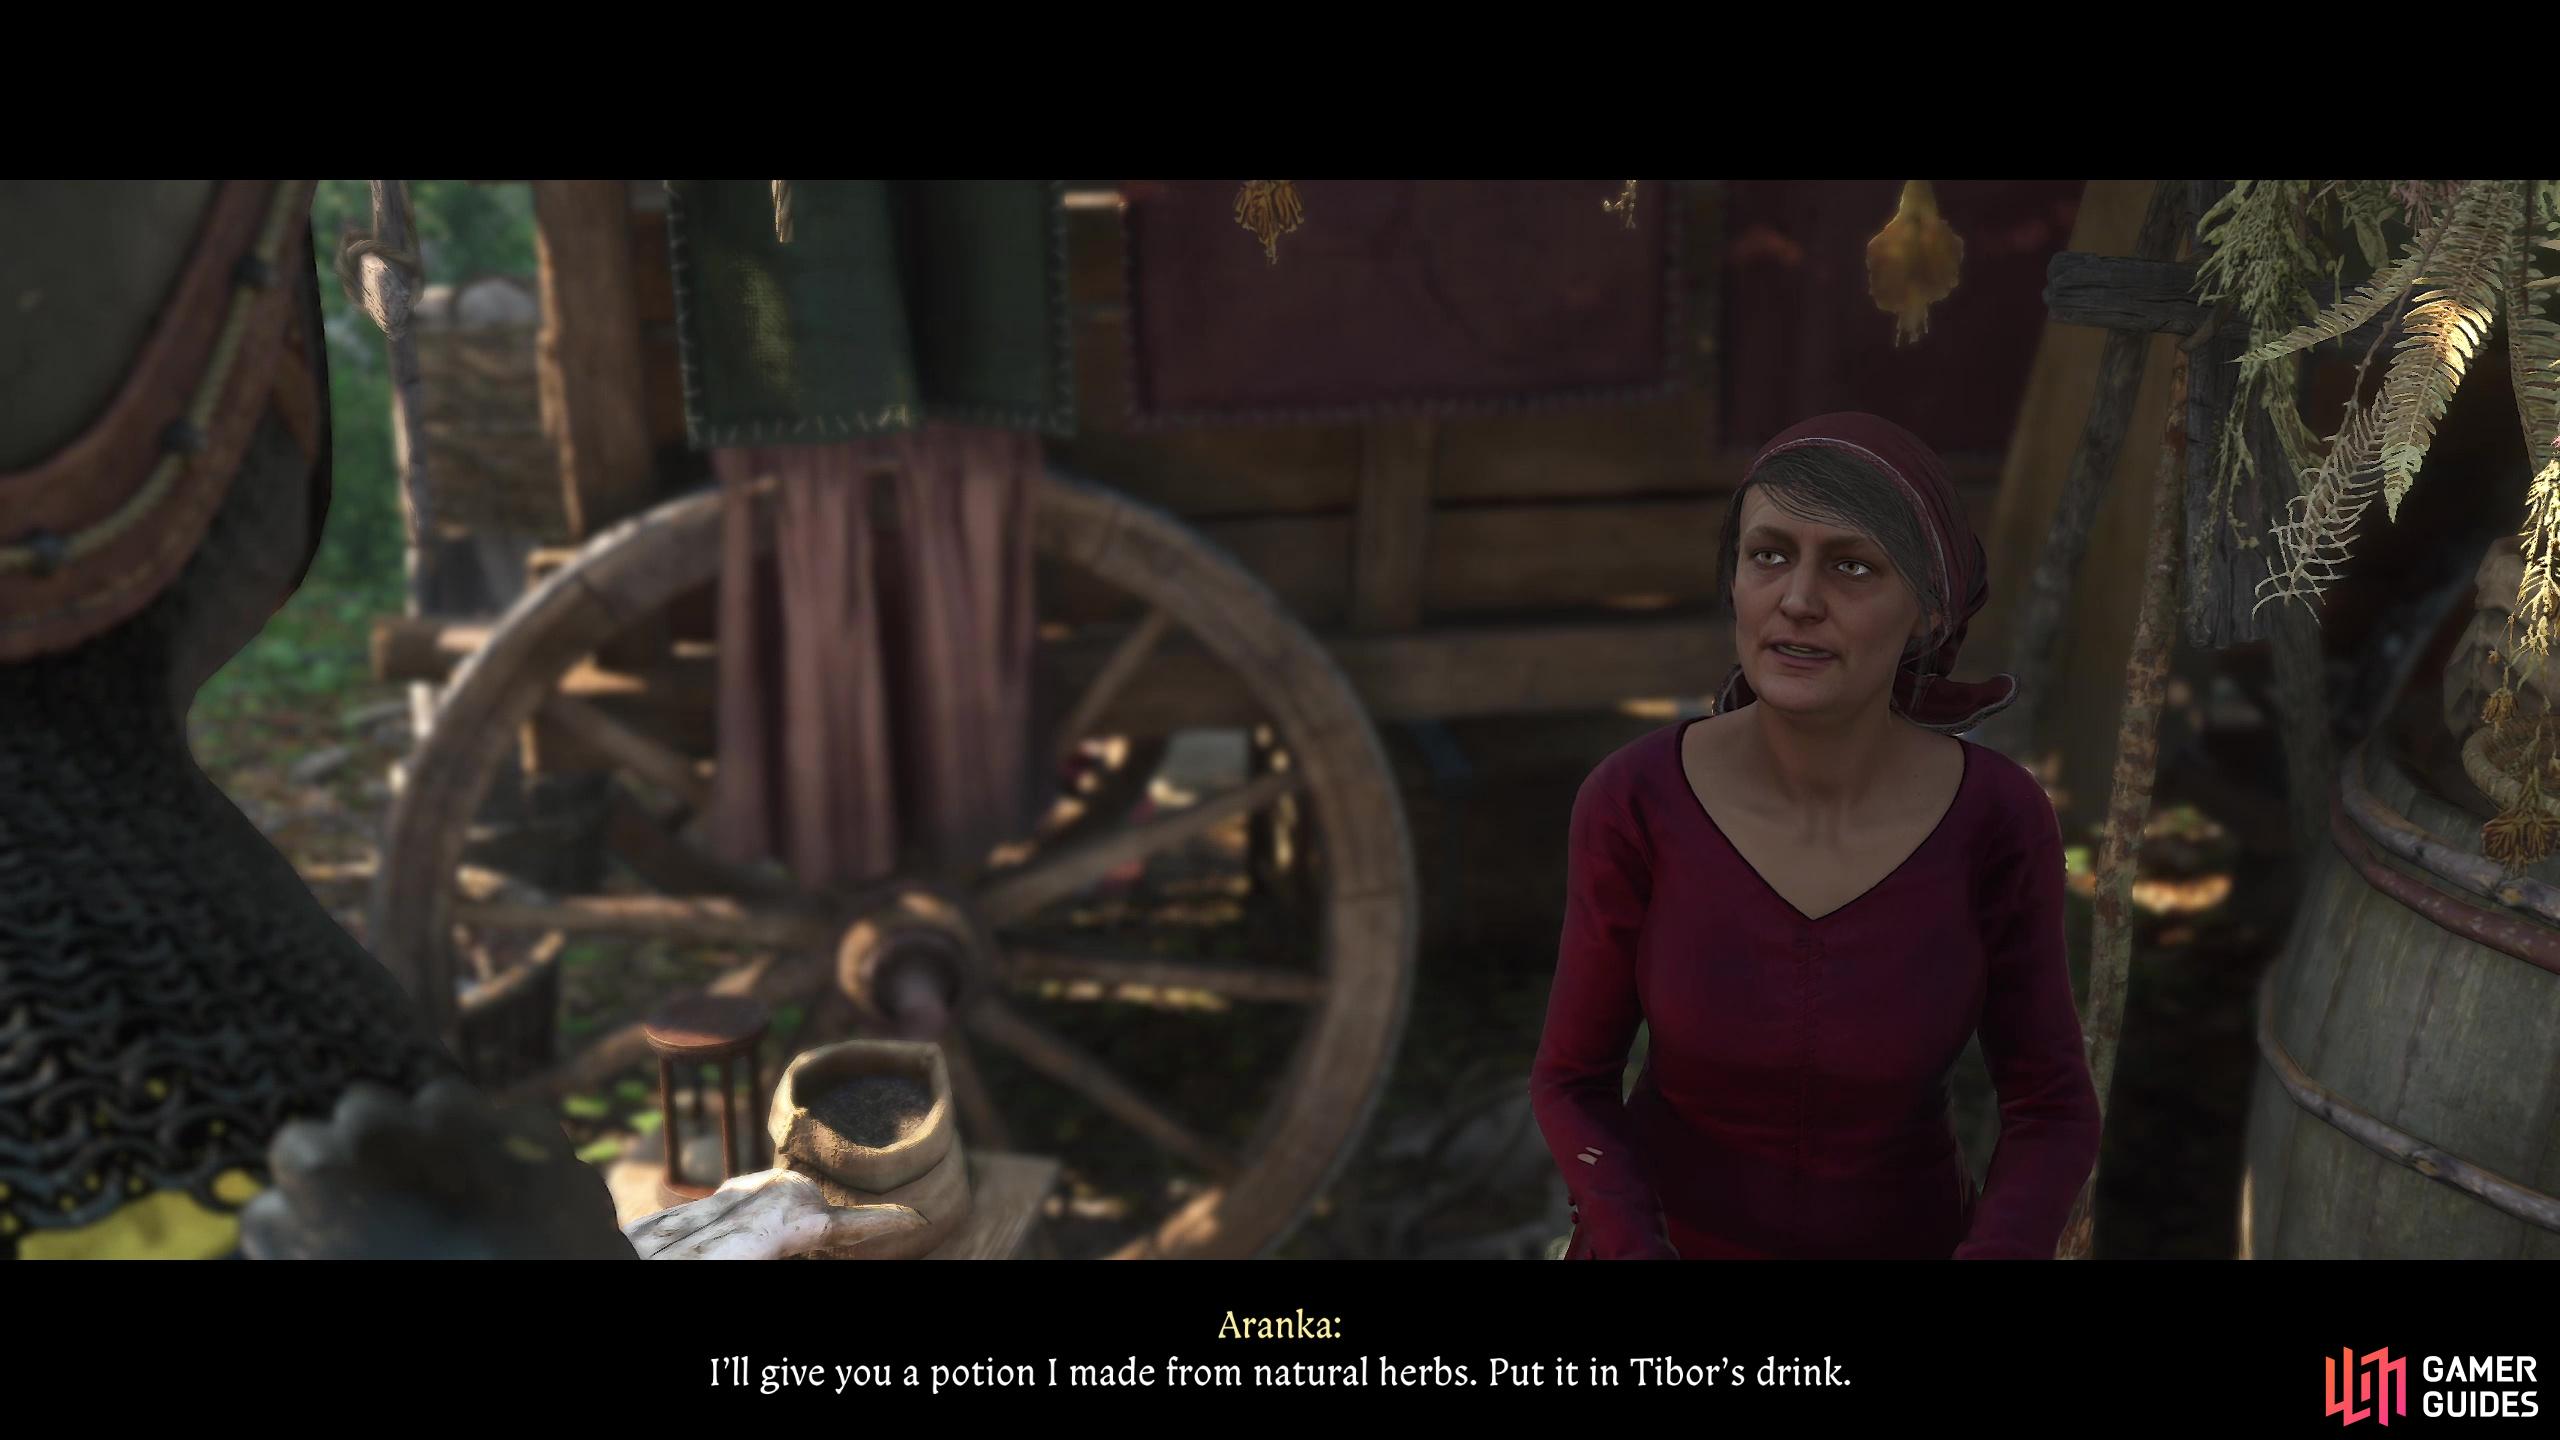

(1 of 3) Once again, chat with Aranka before the fist fight and she’ll give you another potion,
Defeat the Voivode at Dice
Assuming you split the first two competitions, you’ll move onto the third competition - a game of dice against the Voivode. You know the drill, tell the Voivode to wait before you agree to play him, then talk to Aranka, who will give you Aranka’s Dice… while also warning you that using this device may hinder Henry’s manhood.
Accept the dice or refuse - we found the dice decidedly unhelpful, but dice is a game of RNG, so maybe we were just unlucky… with the magical dice that’s supposed to make us lucky. It’s a good idea to save your game, then challenge the Voivoide. You can use whatever dice you wish, if you’ve got some loaded favorites already (in addition to or instead of Aranka’s Dice, it doesn’t matter). The Voivode is a cheating rat-bastard, who, like most NPCs in this blatantly rigged game will pull straights and other one-round winner combos out of their ass, but with a little luck, patience and save-scumming you’ll come out ahead. Ironically we won our first try without Aranka’s Dice and lost half a dozen or so times with it, but your mileage may vary. That said, the Voivode is generally impetuous and takes risks even when it doesn’t make sense, going bust fairly regularly.


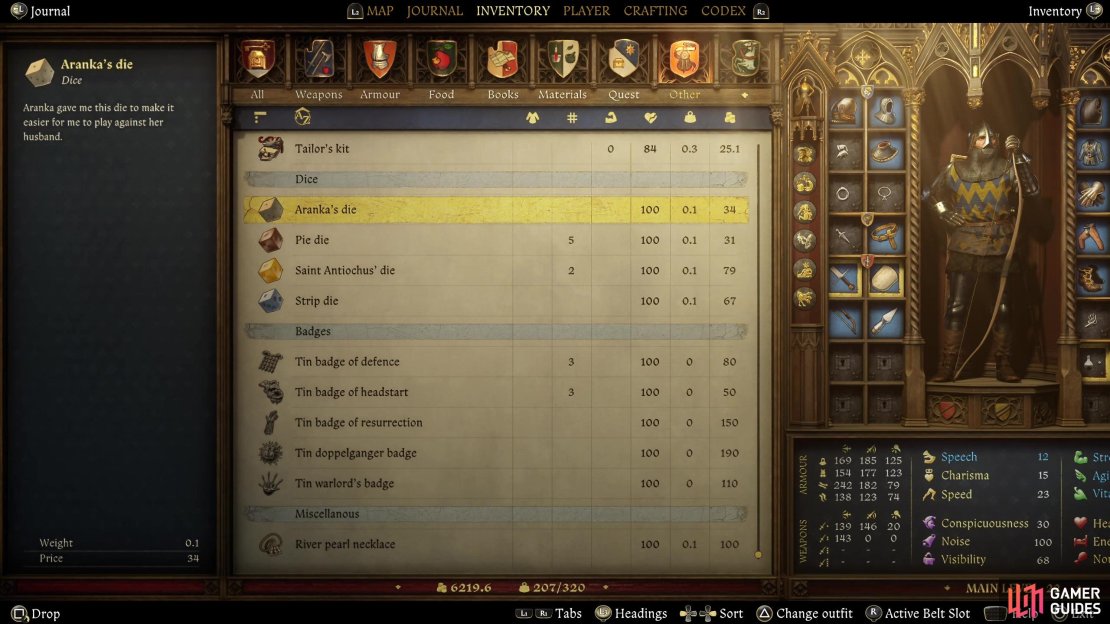

(1 of 3) Once again, you can turn to Aranka for assistance, but she’ll warn you that this time her aid may have consequences.
Losing the Wager
If you lose two of the three competitions, Aranka will intervene and, for the sake of her family, brow-beat the Voivode into handing over his amulet, then she’ll accompany you to Marika’s cave (you’ll travel there automatically). Marika will reveal her scheme, which was foiled by your failure, and you’ll get a consolation prize of 25 groschen from Aranka for your trouble. Marika will remain away from the Nomad Camp, however, and a great “you tried” energy will permeate the affair.


(1 of 2) If you lose the competition, Aranka will intervene and salvage the situation somewhat, but the quest will still end on somewhat deflating terms.
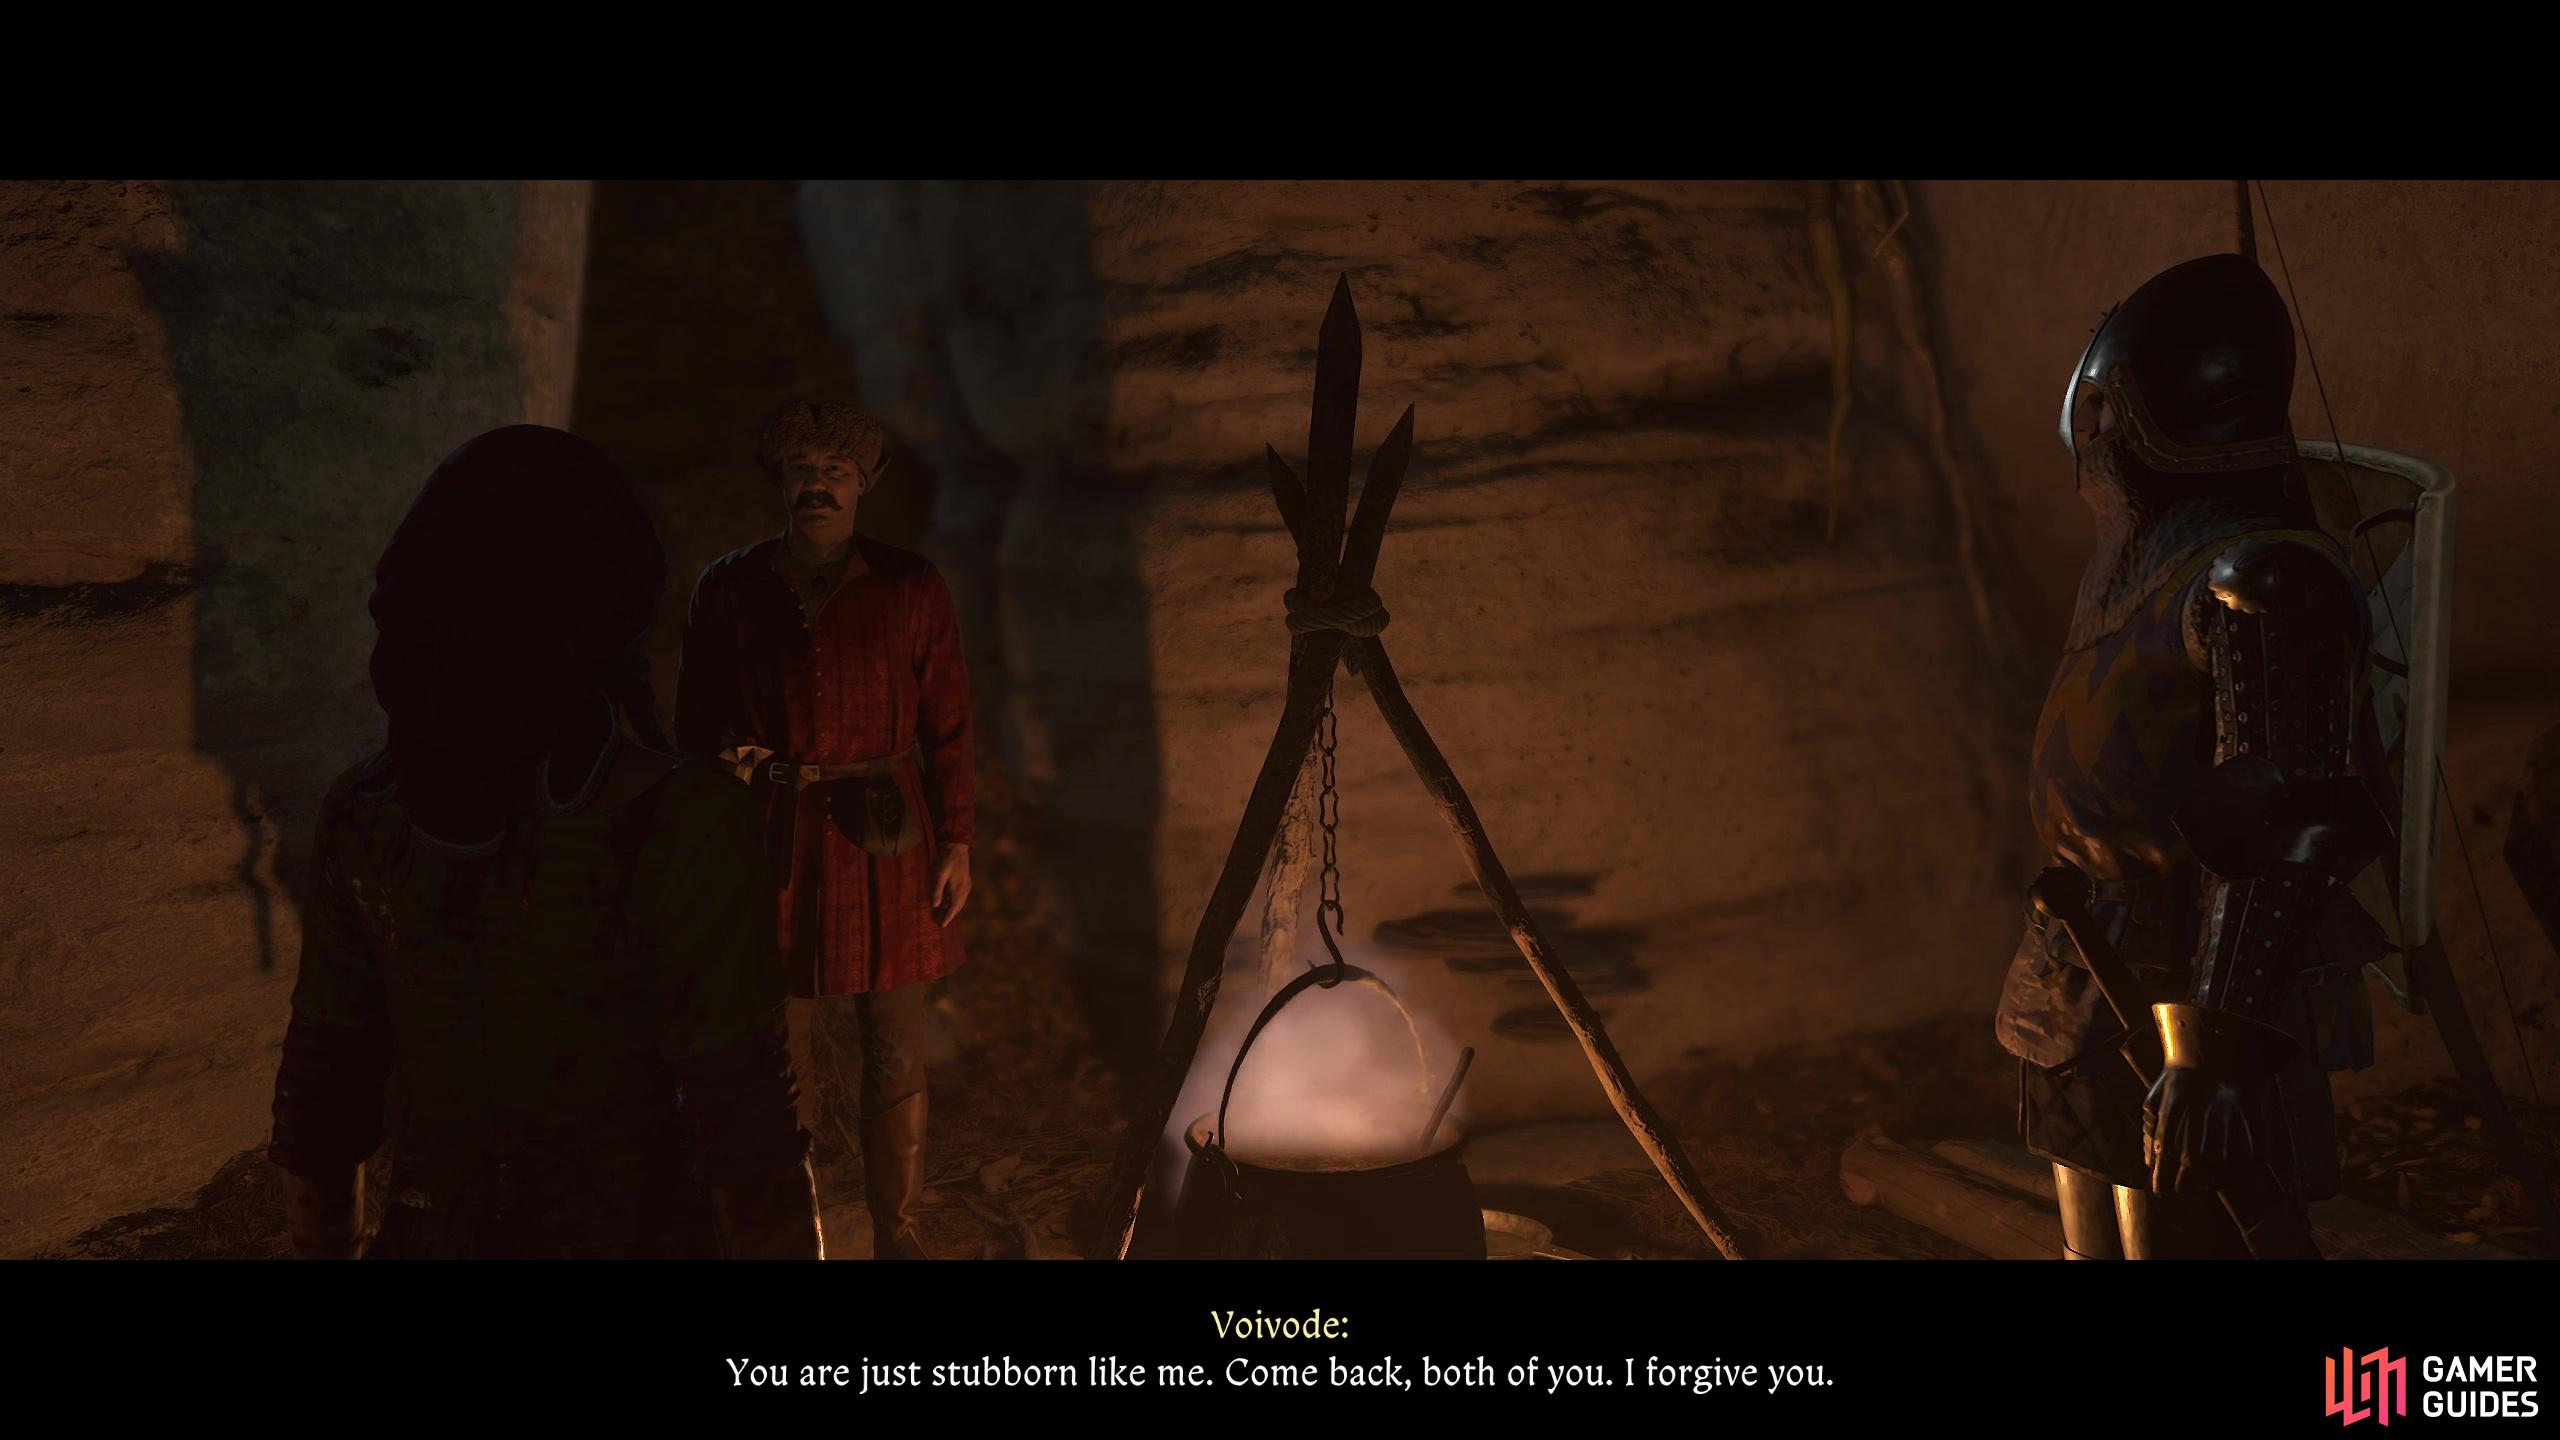
If you lose the competition, Aranka will intervene and salvage the situation somewhat, but the quest will still end on somewhat deflating terms. (left), Win the competition, however, and the Voivode will finally live up to his obligations, learn and lesson, and get his daughter back. (right)
Winning the Wager
Should you win two of the three competitions, you’ll be able to force the Voivoide to finally live up to his end of the deal and deliver his amulet to her in person. Only then will the Voivode realize the nature of his daughter’s scheme, and for forfeiting his “honor” the Voivode learns a valuable lesson and gets his daughter back. Everybody is happy, Bohush recovers and can be found around the Nomad Camp and good feelings pervade. You don’t get anything in the way of a monetary reward, but as some undoubtedly impoverished fellow once said, a good deed is its own reward.
On the plus side you can sleep at Gejza’s bed (he’s found different accommodations) - it’ll be in a tent across from the Voivode’s tent, the correct bed will give you the option to “Sleep and Save” when you look at it, instead of just “Sleep”, and Tibor will train you in Unarmed (Basic) and Marksmanship (Basic) for free. It’s a bit odd you can’t eat from any stewpots without it being considered stealing, but I guess nomad hospitality only extends so far… In any event, you’ve completed one of the longest quests in Trosky!
No Comments