
The cliffs and crags scattered throughout the forests of ![]() Apollonia hide many secrets, mostly bandit camps. Killing bandits can prove lucrative enough, as they hoard their ill-gotten gains in their aforementioned camps, but some bandits are wise enough to hide loot from their fellows… just in case that adage about thieves and honor turns out to be true. This page will help you find Hired Hand Ventza’s Map and the treasure it leads to in Kingdom Come: Deliverance 2.
Apollonia hide many secrets, mostly bandit camps. Killing bandits can prove lucrative enough, as they hoard their ill-gotten gains in their aforementioned camps, but some bandits are wise enough to hide loot from their fellows… just in case that adage about thieves and honor turns out to be true. This page will help you find Hired Hand Ventza’s Map and the treasure it leads to in Kingdom Come: Deliverance 2.
Page Breakdown
How to find Hired Hand Ventza’s Map
Getting your hands on this map can be more bother than finding the treasure itself. You’ll encounter Hired Hand Ventza during the quest The Jaunt, when you’re searching Apollonia in the company of Lord ![]() Semine. In the second camp you’ll be treated to a scene where it’ll become clear that Ventza indeed stole the cart you’re searching for, but what’s more he tried to scam his bandit accomplices out of the spoils. Needless to say, they’re not on friendly terms.
Semine. In the second camp you’ll be treated to a scene where it’ll become clear that Ventza indeed stole the cart you’re searching for, but what’s more he tried to scam his bandit accomplices out of the spoils. Needless to say, they’re not on friendly terms.
You - along with your allies - will take advantage of this strife and attack, and once you’ve subdued the bandits you’ll be sent off in pursuit of Hired Hand Ventza. Explore the nearby rocks until you find him and you’ll get some options: either kill him and loot him for the map, succeed at a Speech check to convince him to surrender, or seek out another solution, which ends with Ventza bribing you with this map (you can then either kill him or succeed at the aforementioned Speech check to convince him to surrender).
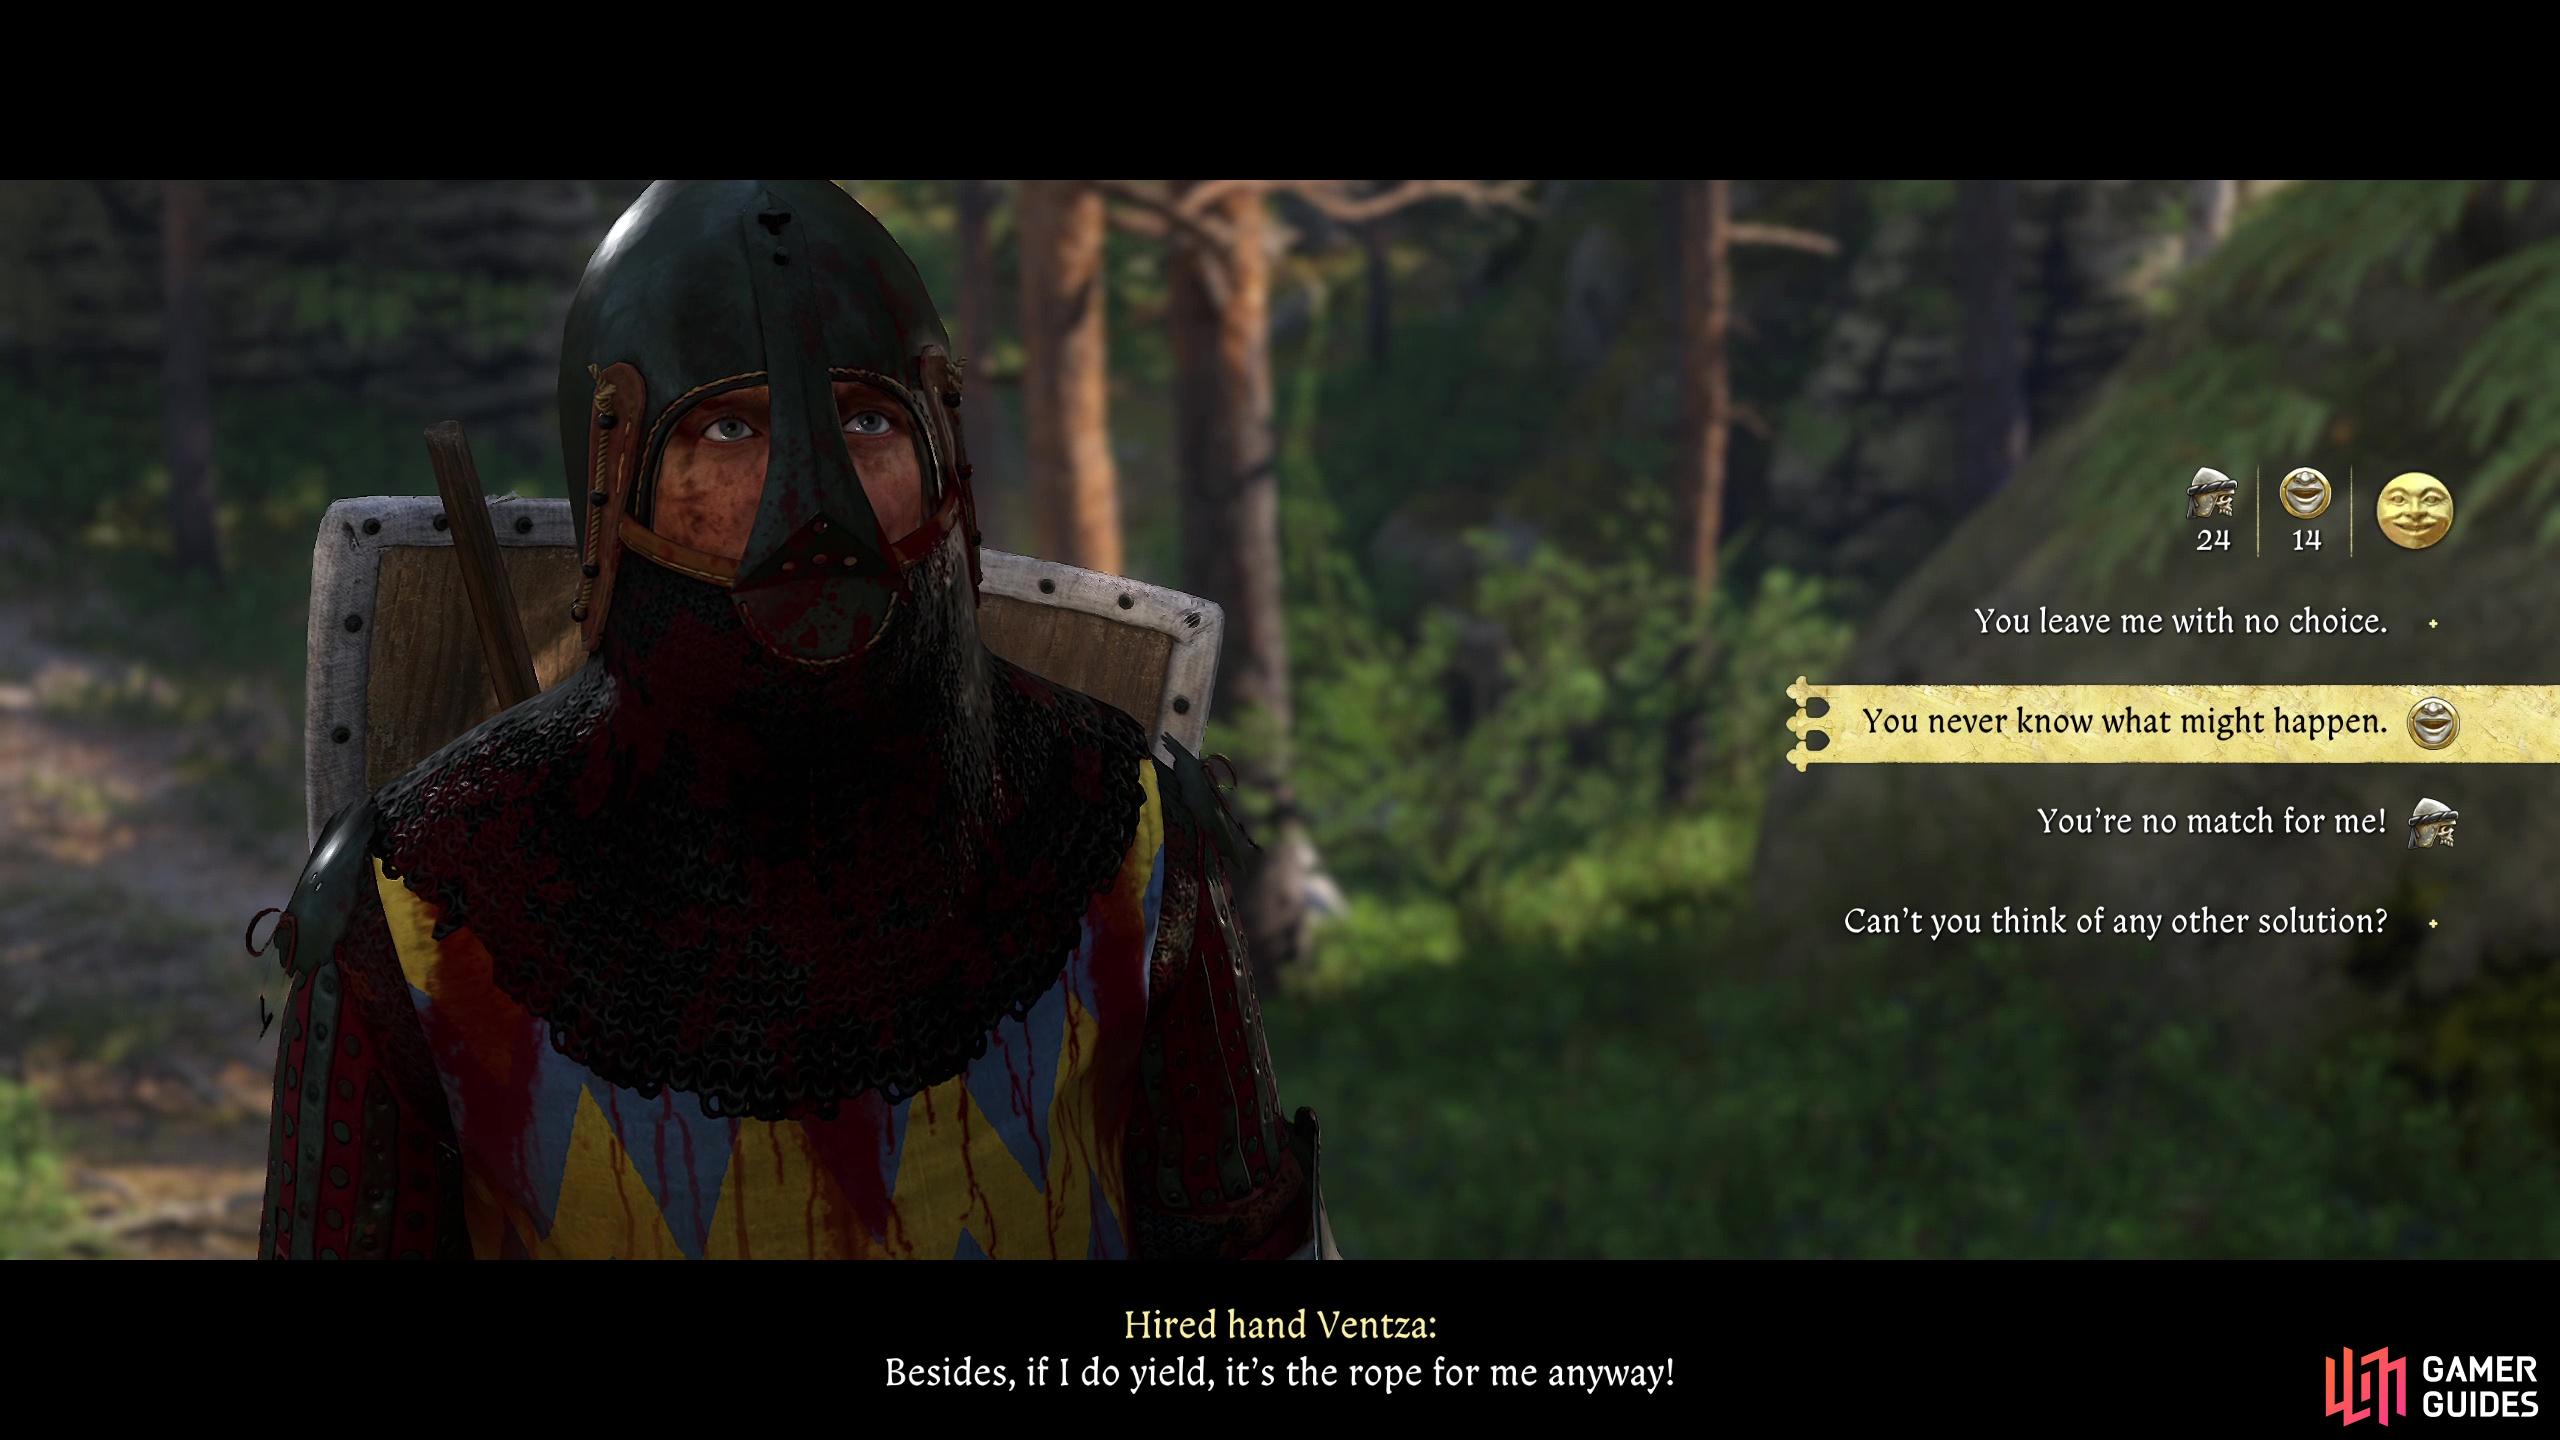

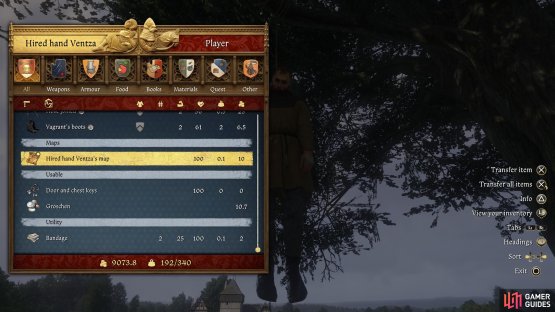
(1 of 2) During “The Jaunt” you’ll be tasked with tracking down a hired hand who ran away. He’ll attempt to bribe you by giving you this map,

During “The Jaunt” you’ll be tasked with tracking down a hired hand who ran away. He’ll attempt to bribe you by giving you this map, (left), but you can always take the map off his corpse or, if you spare him, steal it from him. (right)
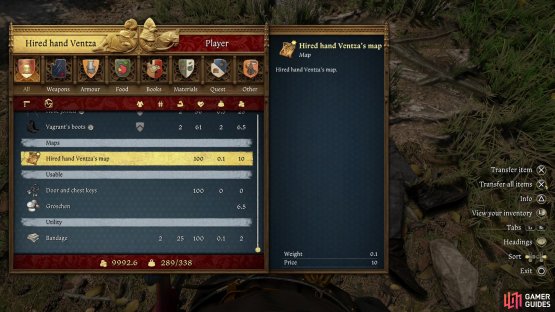
If you convinced Ventza to surrender without getting his map off him, you still can, it’ll just take a little legwork. When you return to Lord Semine you’ll get some dialog options that actually will determine whether Ventza lives or dies. This doesn’t matter when it comes to getting his map, but it will determine where you have to go to get it. If you want to keep Ventza live, pick the dialog option ”What happens with the hands?” followed by Put in a word for Ventza.. In this case, Ventza will survive, but apparently learns nothing from his ordeal, as he’ll head back to the bandit camp and will treat you as if you’re trespassing should he see you there. Kill him or knock him out and take the map or pick his pockets to get it. If you don’t put in a word for Ventza, fast travel to Semine and head northwest along the road to find a tree near a crossroads to the left, which is now decorated with Ventza’s corpse. Loot him to get this map.
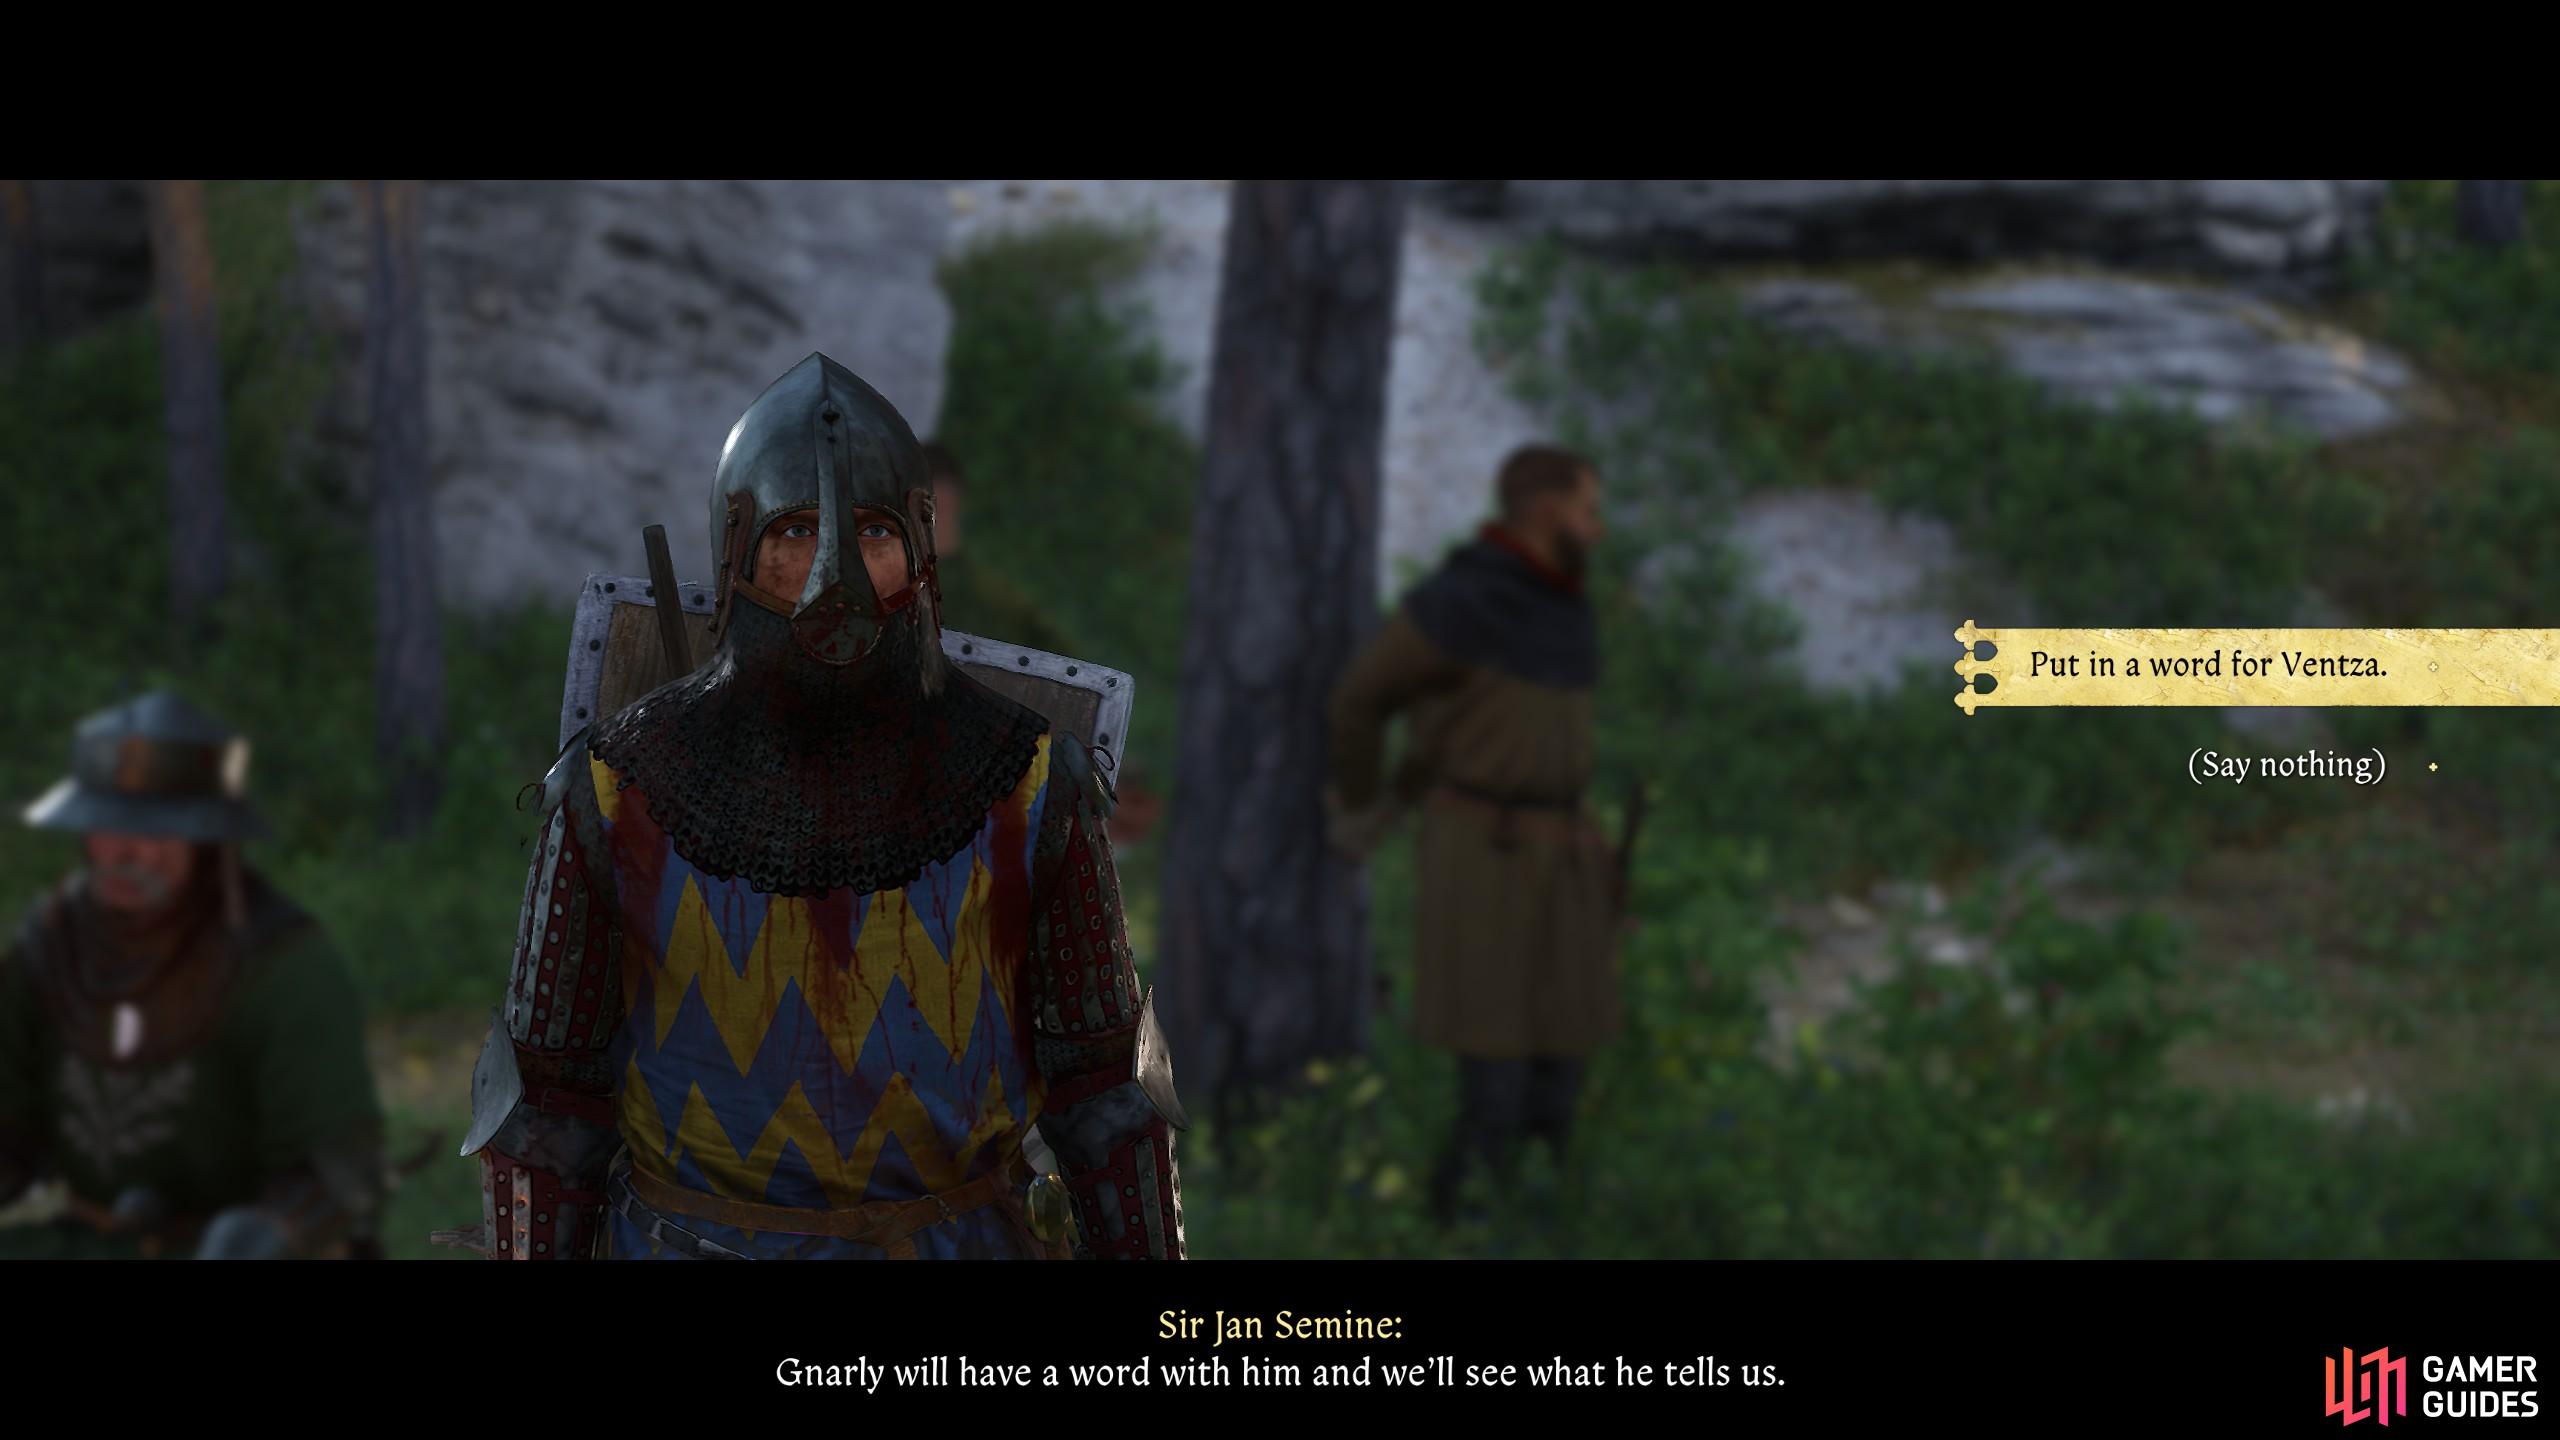
(1 of 2) Succeed at a Speech check and Ventza will surrender, during which you can put in a good word for him.

Succeed at a Speech check and Ventza will surrender, during which you can put in a good word for him. (left), If you do, he’ll survive Lord Semine’s judgement and return to the camp where you found him. If not, you’ll find him swinging from a tree northeast of Semine. (right)
Find the Tunnel in the Cliffs Treasure
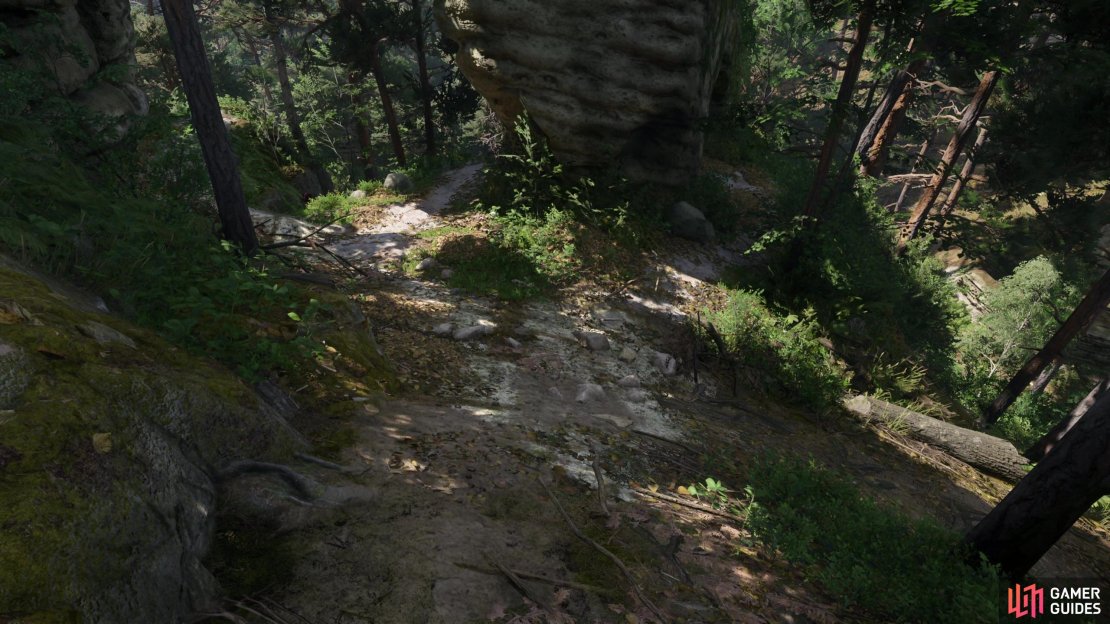
If you take a gander at the map Ventza gave you, you’ll see a trail running past two camps before forking, and one of these forks leads into some rocks, where a skull is circled. This trail does exist, but it’s fairly nondescript compared to any other patch of forest devoid of undergrowth, and following it will run you perilously close to a Cuman camp. For that reason, we highly recommend you check out the screenshot below showing the “Tunnel in the Cliffs” point of interest, which is your destination. You’ll know you’re in the vicinity when you see some exposed white rock on the forest floor, which leads into two caves.
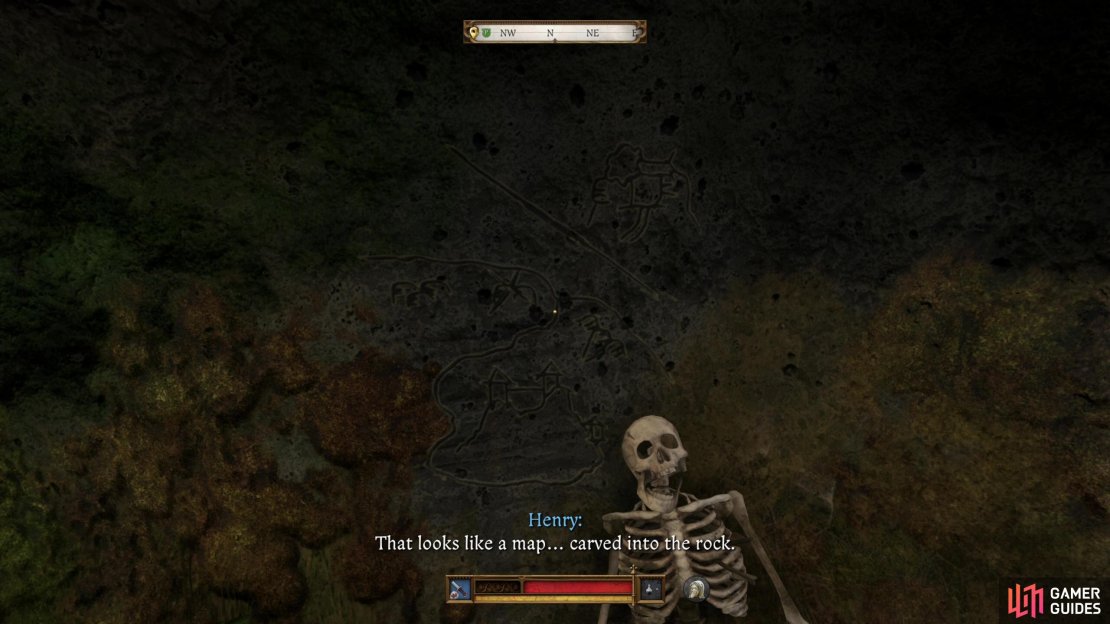
Go into the eastern cave and you’ll find a skeleton lying on the ground, above which is another map scrawled into the rock. This leads to [another treasure], but you can also find a ![]() Dagger, a Kettle Hat and some bolts sticking out of the skeletons’ ribs. How the shafts of these projectiles survived the decomposition of the corpse they were embedded in is a fair question, but the answer, my dear friends, is environmental storytelling. Just take the bolts and don’t think about it so much.
Dagger, a Kettle Hat and some bolts sticking out of the skeletons’ ribs. How the shafts of these projectiles survived the decomposition of the corpse they were embedded in is a fair question, but the answer, my dear friends, is environmental storytelling. Just take the bolts and don’t think about it so much.
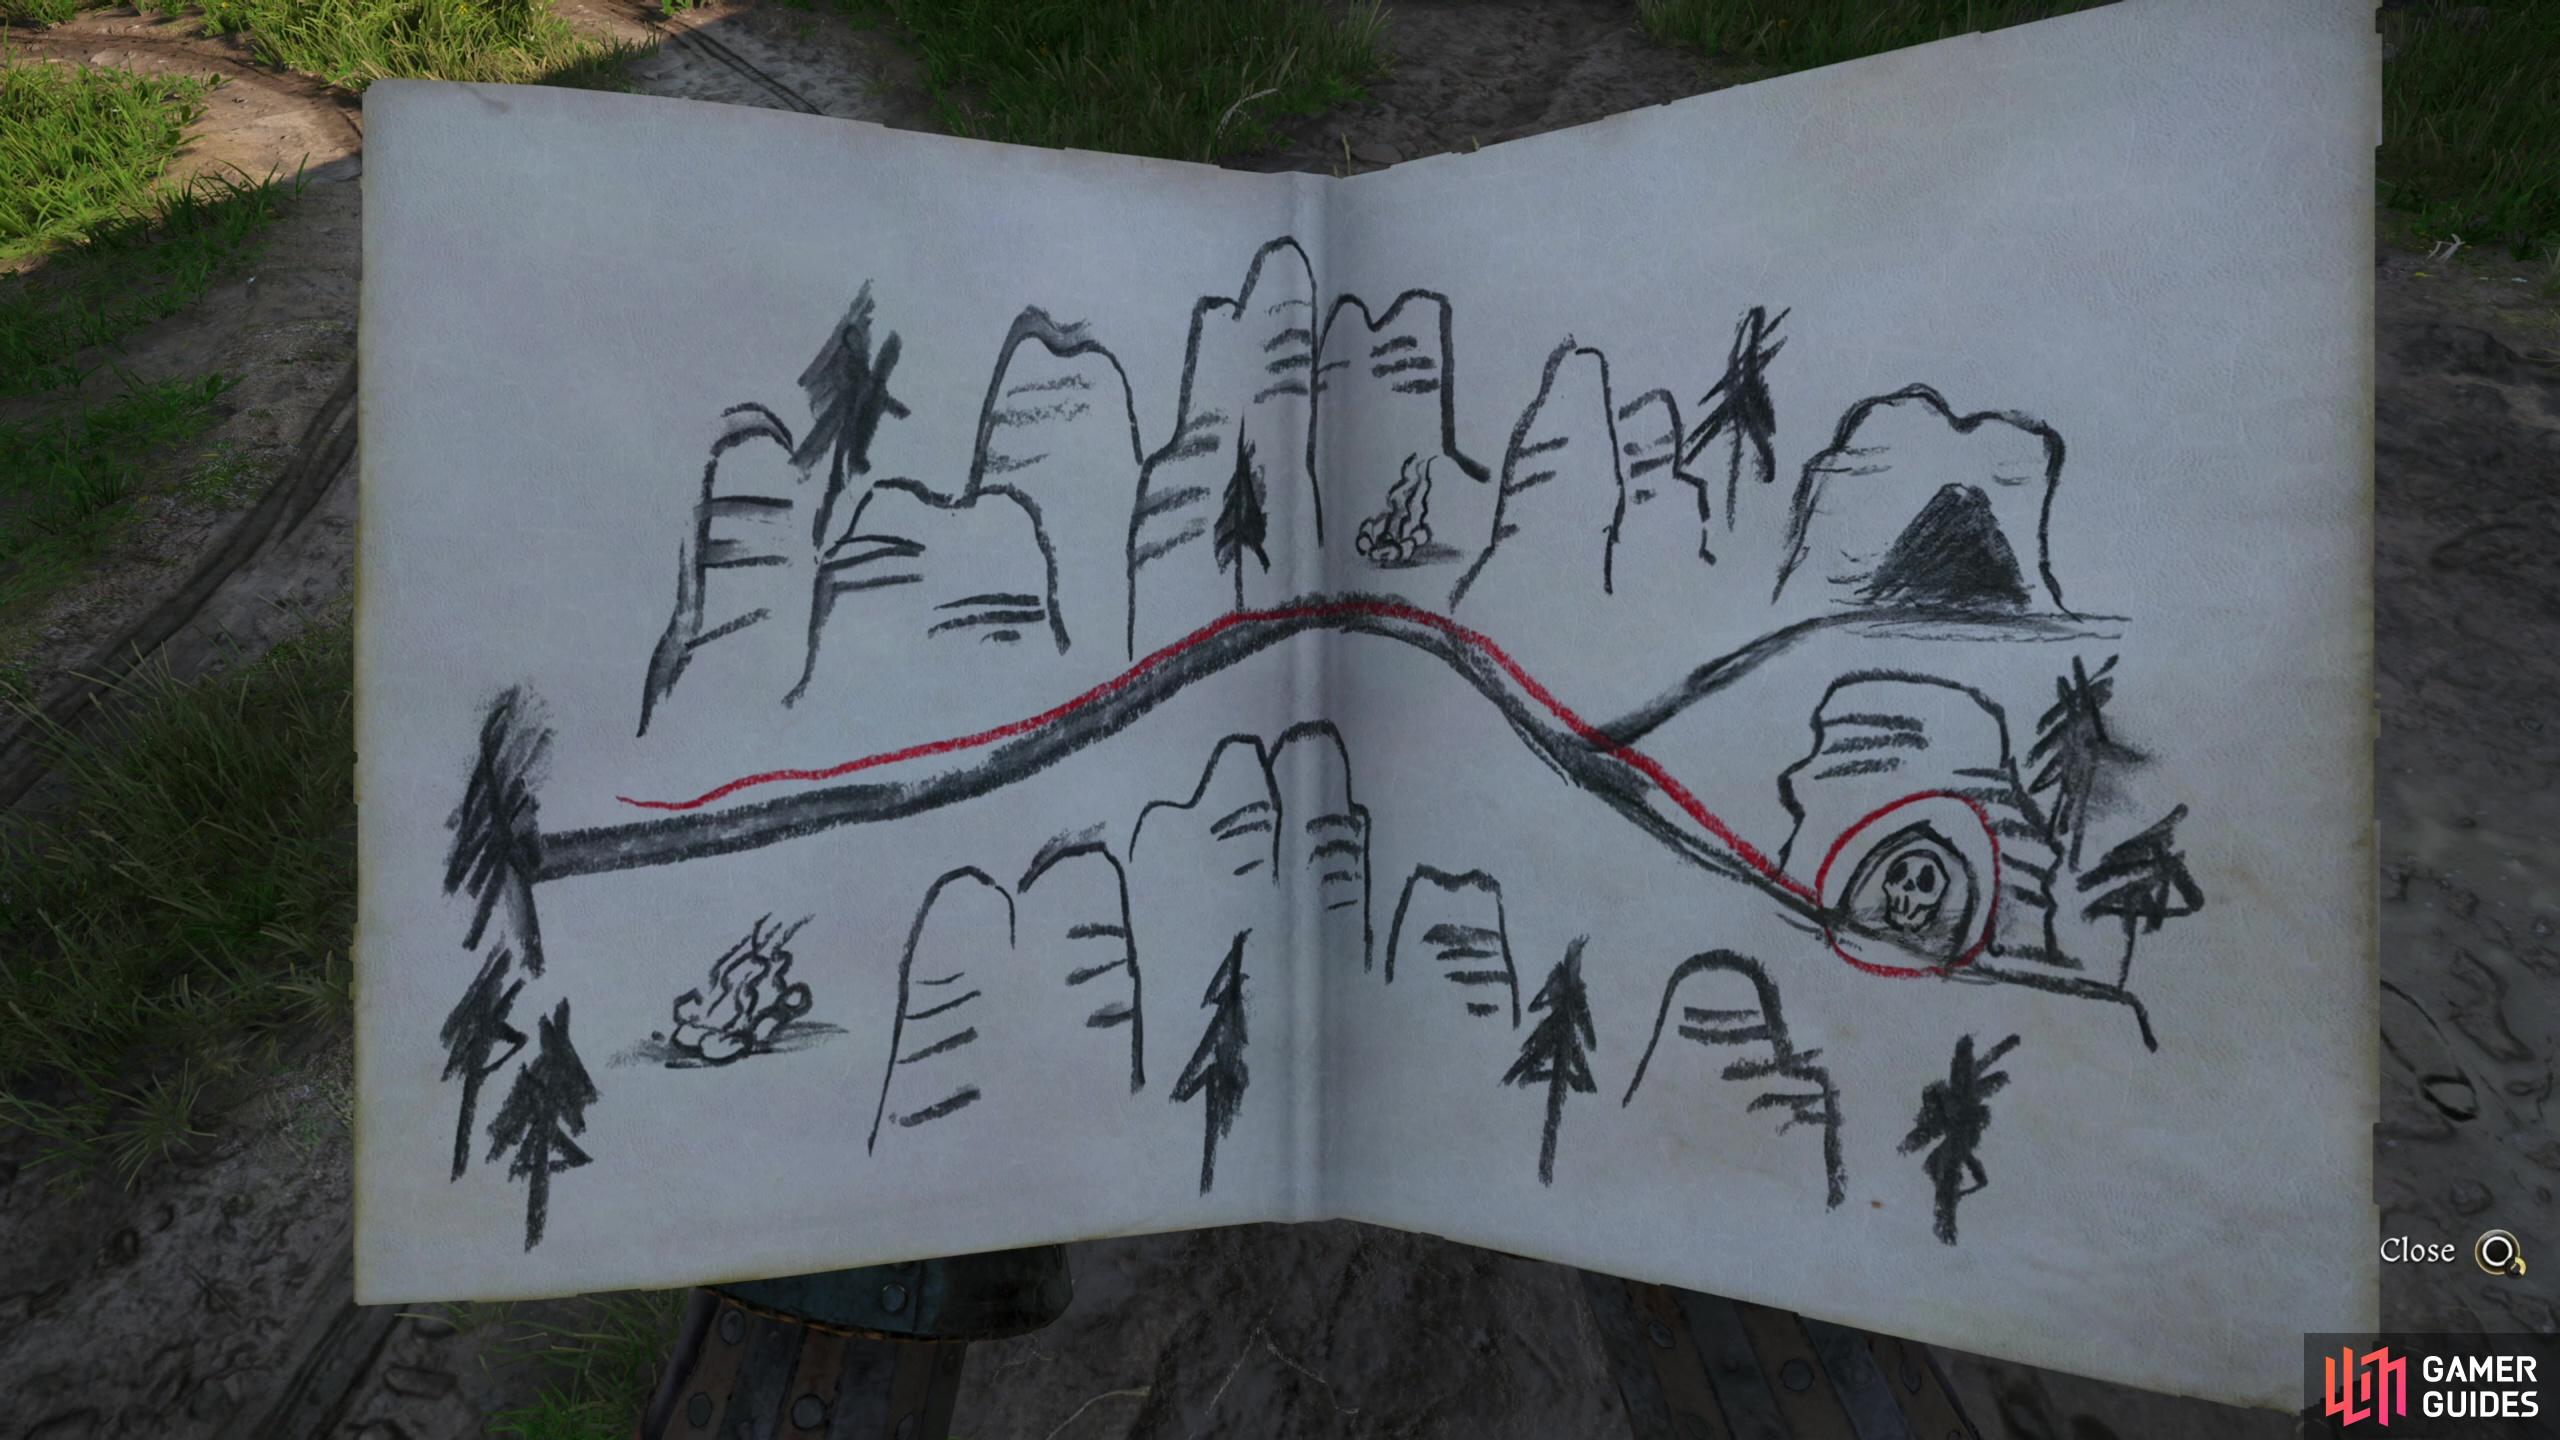


(1 of 5) Read the map and it’ll point you south of the bandit camp, marking a skull in particular.
Follow the white rocks into a cave (an arch, really) to the west and you’ll find another skeleton, with a Bearded Axe on the ground nearby and a ![]() Billhook embedded in its skull. More importantly you’ll find a sack on the ground nearby with a skull watching over it - the stash indicated on the map. Loot the sack for a
Billhook embedded in its skull. More importantly you’ll find a sack on the ground nearby with a skull watching over it - the stash indicated on the map. Loot the sack for a ![]() Hunting Crossbow, some Fine Bolts, a Strong Bowman’s Brew and a Marksman’s Kit.
Hunting Crossbow, some Fine Bolts, a Strong Bowman’s Brew and a Marksman’s Kit.
No Comments