Crafting new arms and armor - especially Witcher set items - is an important way of growing more powerful in The Witcher 3, and that being the case it should be no surprise that the opportunity to familiarize yourself with the mechanic appears in White Orchard, the game’s prologue area. To unlock new crafting recipes you’ll typically need to find or buy the appropriate diagrams, and in the case of Witcher set items, these diagrams are often pulled out of dangerous dungeons, a task around which a “scavenger hunt” quest of some description revolves.
In White Orchard you can find diagrams for the Viper Silver Sword and the Viper Steel Sword, the former of which can be found in a chapel north of White Orchard while the latter is in the possession of bandits near the Ransacked Village. This page will provide a walkthrough for the quest Scavenger Hunt: Viper School Gear, detailing how to find both the Viper Silver Sword and the Viper Steel Sword, and once found, how to craft them.
Viper Silver Sword Location
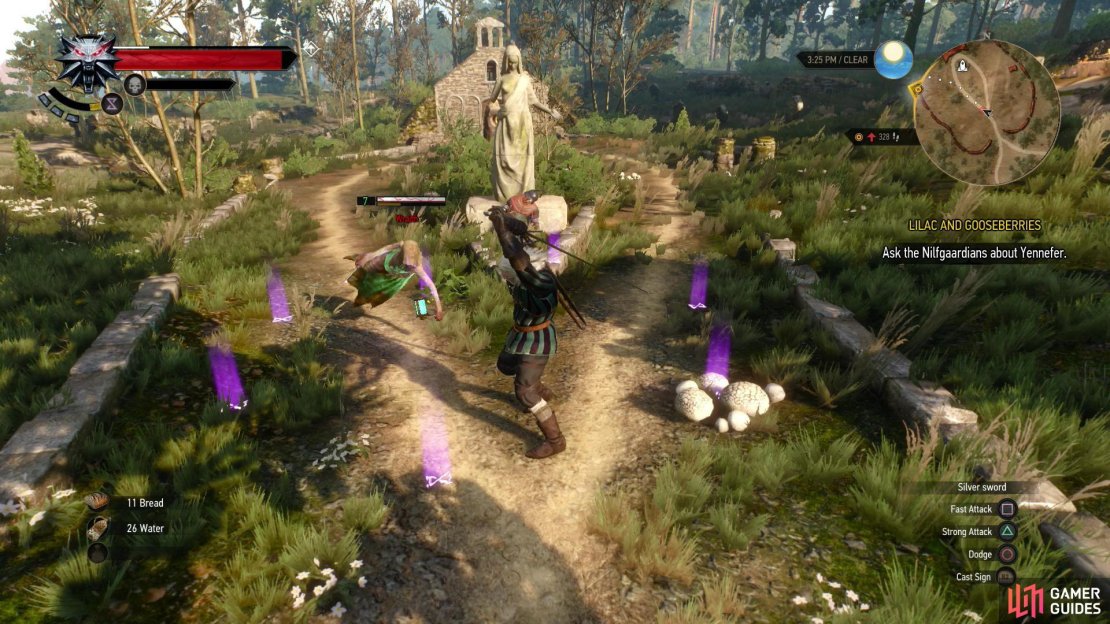
Across the river north of White Orchard you’ll find the Mill signpost at a crossroads. North of this is an unmarked chapel and cemetery which houses a Place of Power. Approach the chapel and a Wraith (Lv7) should spawn and attack. Dodge spam whenever it turns incorporeal, as it’s aiming to appear near you and begin a punishing sword combo. Quen can cover for any mistakes you make, and really a one-on-one fight with a Wraith shouldn’t really be anything more than a test of patience. Counterattack when the Wraith’s attacks end and get dodging when it teleports and you’ll be fine.
(1 of 4) Fight a Wraith in a cemetery and whittle it down to half its HP, at which point it’ll flee.
Once the Wraith is reduced to half its HP, it’ll flee, leaving you to claim the Place of Power if you wish. Turn your attention to the southern edge of the chapel and you’ll find, if you use your Witcher senses, that the doorway is fragile. By using some gentle persuasion courtesy of the Aard sign you can blast on through and access the interior of the building. You’ll also spot some red hand prints near the doorway - markings that often denote the presence of Witcher School gear.
Blast the wall open, head downstairs and through a gate to find the Wraith from above waiting for you. It’s still at half health and the change of venue shouldn’t help it any, as the underground chamber you’re in is still plenty sizable. Aside from a few pillars getting in your way, it should be easy enough to dodge, and hence, dispatch the Wraith. Once it’s dead turn right (east) and loot a body to find the Letter from Witcher Kolgrim of the Viper School and the Diagram: Serpentine Silver Sword. The former should start the quest Scavenger Hunt: Viper School Gear, which will make finding the Viper Steel Sword much easier.
Viper Steel Sword Location
Now that you have the quest Scavenger Hunt: Viper School Gear started, finding objectives should be easy, as you’ll have a quest marker leading you to where you need to go. That being said, there’s no real reason why you have to prefer the Viper Silver Sword over the Viper Steel Sword aside from the lone Wraith guarding the former being arguably easier to deal with than the Bandits hoarding the latter. To get the Viper Steel Sword - whether you’ve found the Viper Silver Sword by now or not - fast travel back to the Ransacked Village. You should have passed through this place with Vesemir near the start of [Lilac and Gooseberries], so you should have this signpost. Your goal is a Bandit Camp east of the Ransacked Village, but getting there can be a bit of a bother.
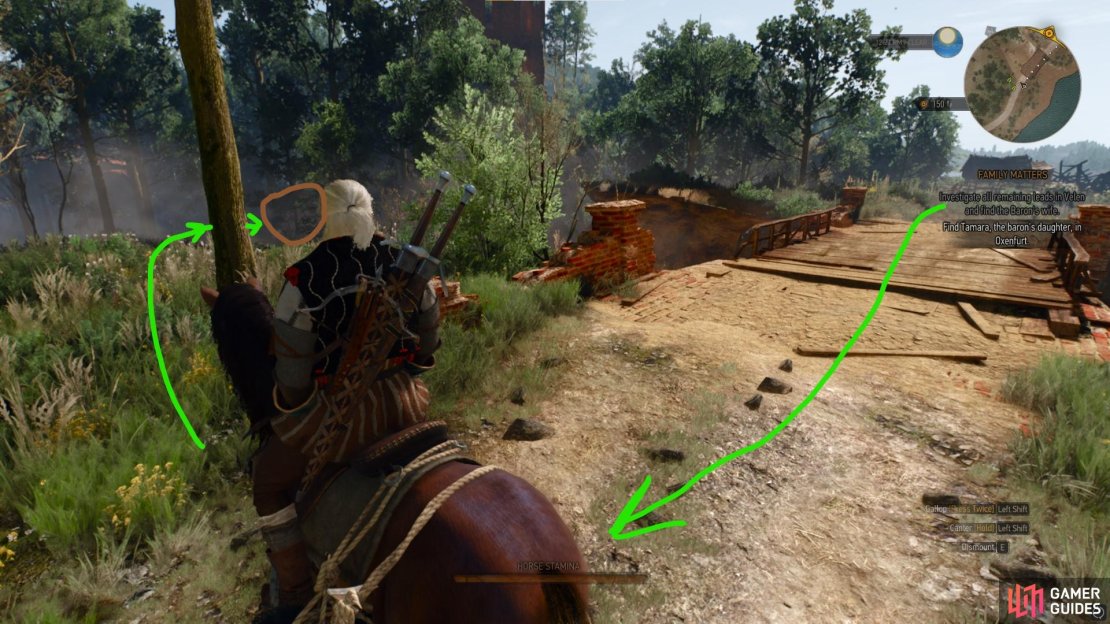
(1 of 4) From the Ransacked Village, follow a road southwest then west across a bridge,
When you arrive, follow the road southwest, then west across a bridge which spans a chasm. Once you cross to the western side of the bridge, turn north and climb over some crumbling brickwork and follow the edge of the chasm north until you find a collapsed brick wall to the northeast (right). This now forms a ramp you can use to reach a ledge, and from this ledge you can turn left (north) to reach another ledge and from there climb up into the ruins above.
Here you’ll find four Deserters, including their leader. Bandits (a rose by another name…) can be a bit of a combat puzzle in The Witcher 3, especially on Death March! difficulty, as their varied weaponry call for different tactics. Archers should be chased down first lest they pepper you with arrows while you focus on their fellows, and sprinting or dodging towards the archer is usually the order of the day, but you need to create separation between them and their allies to ensure a safe, clean kill. Any enemies with two-handed weapons can be killed easily by performing a strong attack, then dodging away. Spam this attack dodge combo and there’s little they can do. Enemies wielding one-handed weapons - especially if they also have a shield - should be parried and countered. You’ll need to do a lot of dodging and moving about to create opportunities to attack, spacing enemies so you can take the prescribed actions above without opening yourself up to attack. This encounter throws a bit of everything at you, so take your time, dodge to create space and hence, openings, and whittle the small bandit group down.
Once they’re vanquished, enter the most intact section of stonework - a section of ruins with three standing walls one could generously call a “room”, and search for a chest. Inside you’ll find the Interrogation Report and the Diagram: Serpentine Steel Sword. The former will start the quest Scavenger Hunt: Viper School Gear if it wasn’t started already and the latter will teach you how to craft the Viper Steel Sword.
Crafting the Viper School Swords
Now that you have the diagrams for both the Viper Silver Sword and the Viper Steel Sword you can craft them. Theoretically, anyways. And not “you” as in Geralt, but “you” as in you can have somebody talented in such matters do it for you - like a blacksmith. There are two such craftspersons in White Orchard, the Quartermaster found at the Nilfgaardian Garrison and Willis in the town of White Orchard itself. To get Willis back on his feet and crafting you’ll need to complete the quest [Twisted Firestarter] and even then, he specializes in armor, so the aforementioned Quartermaster is the guy you need to see.
Aside from a willing craftsperson you’ll need to pay a fee for their work as well as provide all the materials required to craft the item in question. This last part is what will delay you the most, as both the Viper Silver Sword and Viper Steel Sword require some uncommon materials:
Viper Sword Crafting Materials
| Weapon | Materials Required |
|---|---|
| Viper Silver Sword | Leather Straps x1, Silver Ingot x2, Emerald Dust x1, Venom Extract x1 |
| Viper Steel Sword | Leather Straps x1, Iron Ingot x1, Emerald Dust x1, Venom Extract x1 |
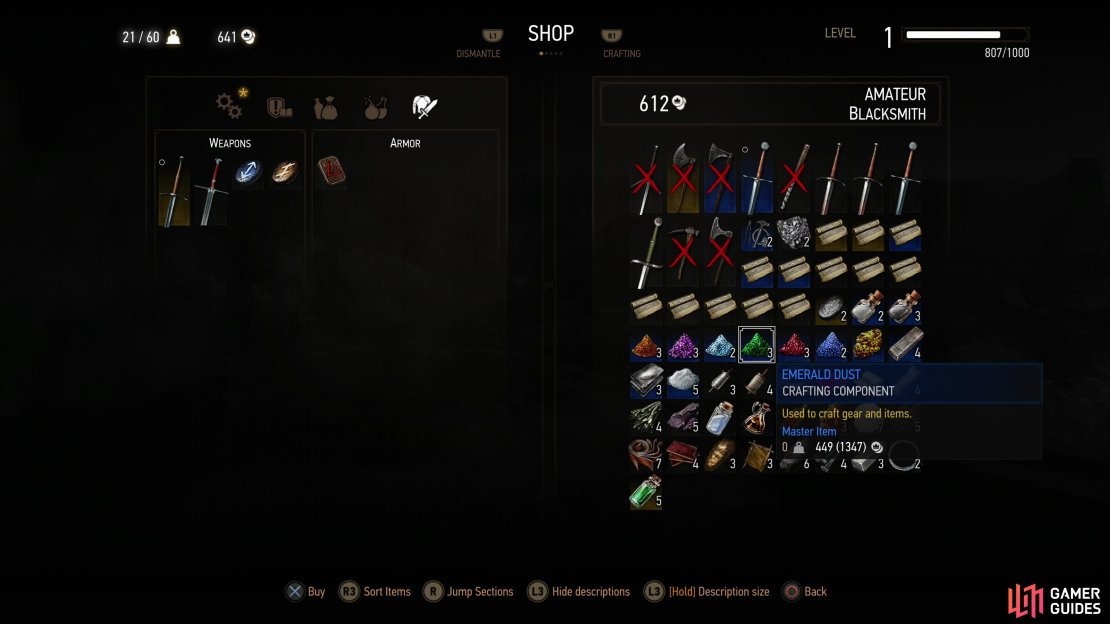
(1 of 3) Emerald Dust is required to craft both weapons, and it’s quite expensive if you have to buy it from blacksmiths.
You can gain materials by defeating monsters, looting chests or dismantling other weapons, armor and junk items you find. Without some significant luck, the Silver Ingots and Emerald Dust are going to be the most difficult materials to obtain at this point in the game: you might just find some in chests as you explore, and Emerald Dust can be dropped by Wraiths, but if you don’t get a lucky drop, you still have options.
Unfortunately these options are expensive, as you’ll just need to buy the materials from either of the two aforementioned blacksmiths. Emerald Dust will set you back over 400 coins, and Silver Ingots, while cheaper, are even more of a chore, as you can’t buy Silver Ingot directly. Instead you’ll need to buy Silver (individually cheap, but you need 10x of it) then pay to have 10x Silver crafted into a single Silver Ingot. If you’re lucky and find some junk or a weapon that yields Silver, Silver Ore or a Silver Ingot when dismantled, you’ll save some money and expedite this process significantly, otherwise you’ll just need to buy all the Silver sold by the two blacksmiths, rest, and repeat.
All told you’re looking at spending at least 1200 crowns in materials costs, much less if you get some Emerald Dust to drop from Wraiths (you’ll encounter them near the Sawmill Place of Power and the Cemetery Place of Power, but this is rare and random. You can earn an unlimited amount of money by just picking flowers as you explore and selling them, but this is one coin per flower and can be a bit tedious. The merchant along the road near the White Orchard tavern, the Herbalist just east of the Sawmill signpost and a third Herbalist who will spawn when you liberate the Abandoned Site east of the Abandoned Village will all buy whatever herbs you pick.








No Comments