
Walkthrough for the main quest The Beast of Toussaint in The Witcher 3 Blood and Wine, including details about how to defeat Golyat with one shot from your crossbow.
This quest will begin immediately upon arriving in Toussaint, following the completion of Envoys, Wineboys.
| Suggested Level |
|---|
| 35 |
| Important Items in this Area |
|---|
| Golyat Trophy |
| Handkerchief monogrammed d.l.C. |
| Information for Tournament Participants |
| Clan Drummond Shield Maiden Card |
| Pouch Filled with Florins |
| Unusual Severed Hand |
| Skellige Storm |
| Skellige Storm |
| War Longship |
| Young Berserker |
| Deed to Corvo Bianco |
| Key to Corvo Bianco |
| Key from the Golden Fish |
| Clue from the Horn of a Unicorn |
| Gwent Card | How to Obtain |
|---|---|
| Clan Drummond Shield Maiden | Win from the Innkeep at the Cockatrice Inn |
| Skellige Storm | Win from the Armorer at the Tourney Grounds |
| Skellige Storm | Win from the Barber at the Tourney Grounds |
| War Longship | Win from the Innkeep at the Tourney Grounds |
| Young Berserker | Win from the Blacksmith at the Tourney Grounds |


(1 of 2) Golyat uses his improvised club to perform sweeping strikes that deal surprisingly low damage.
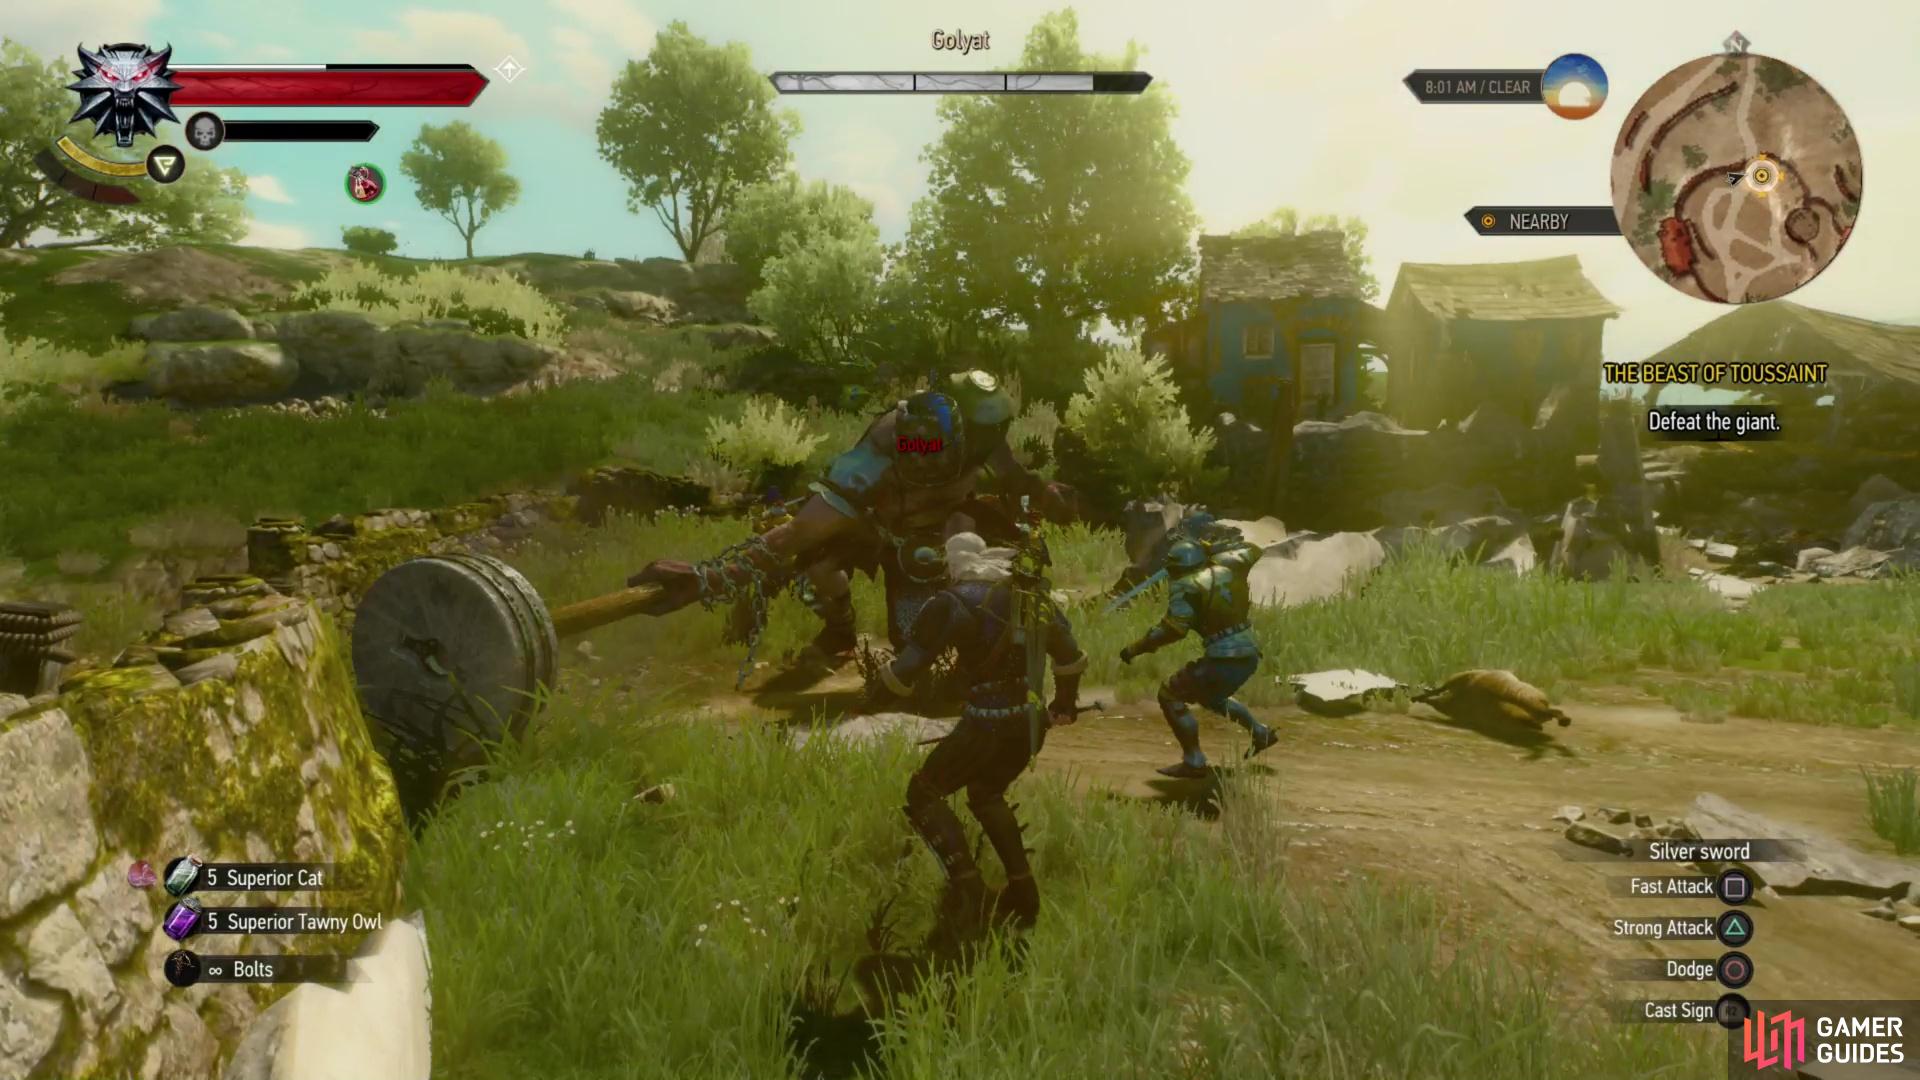
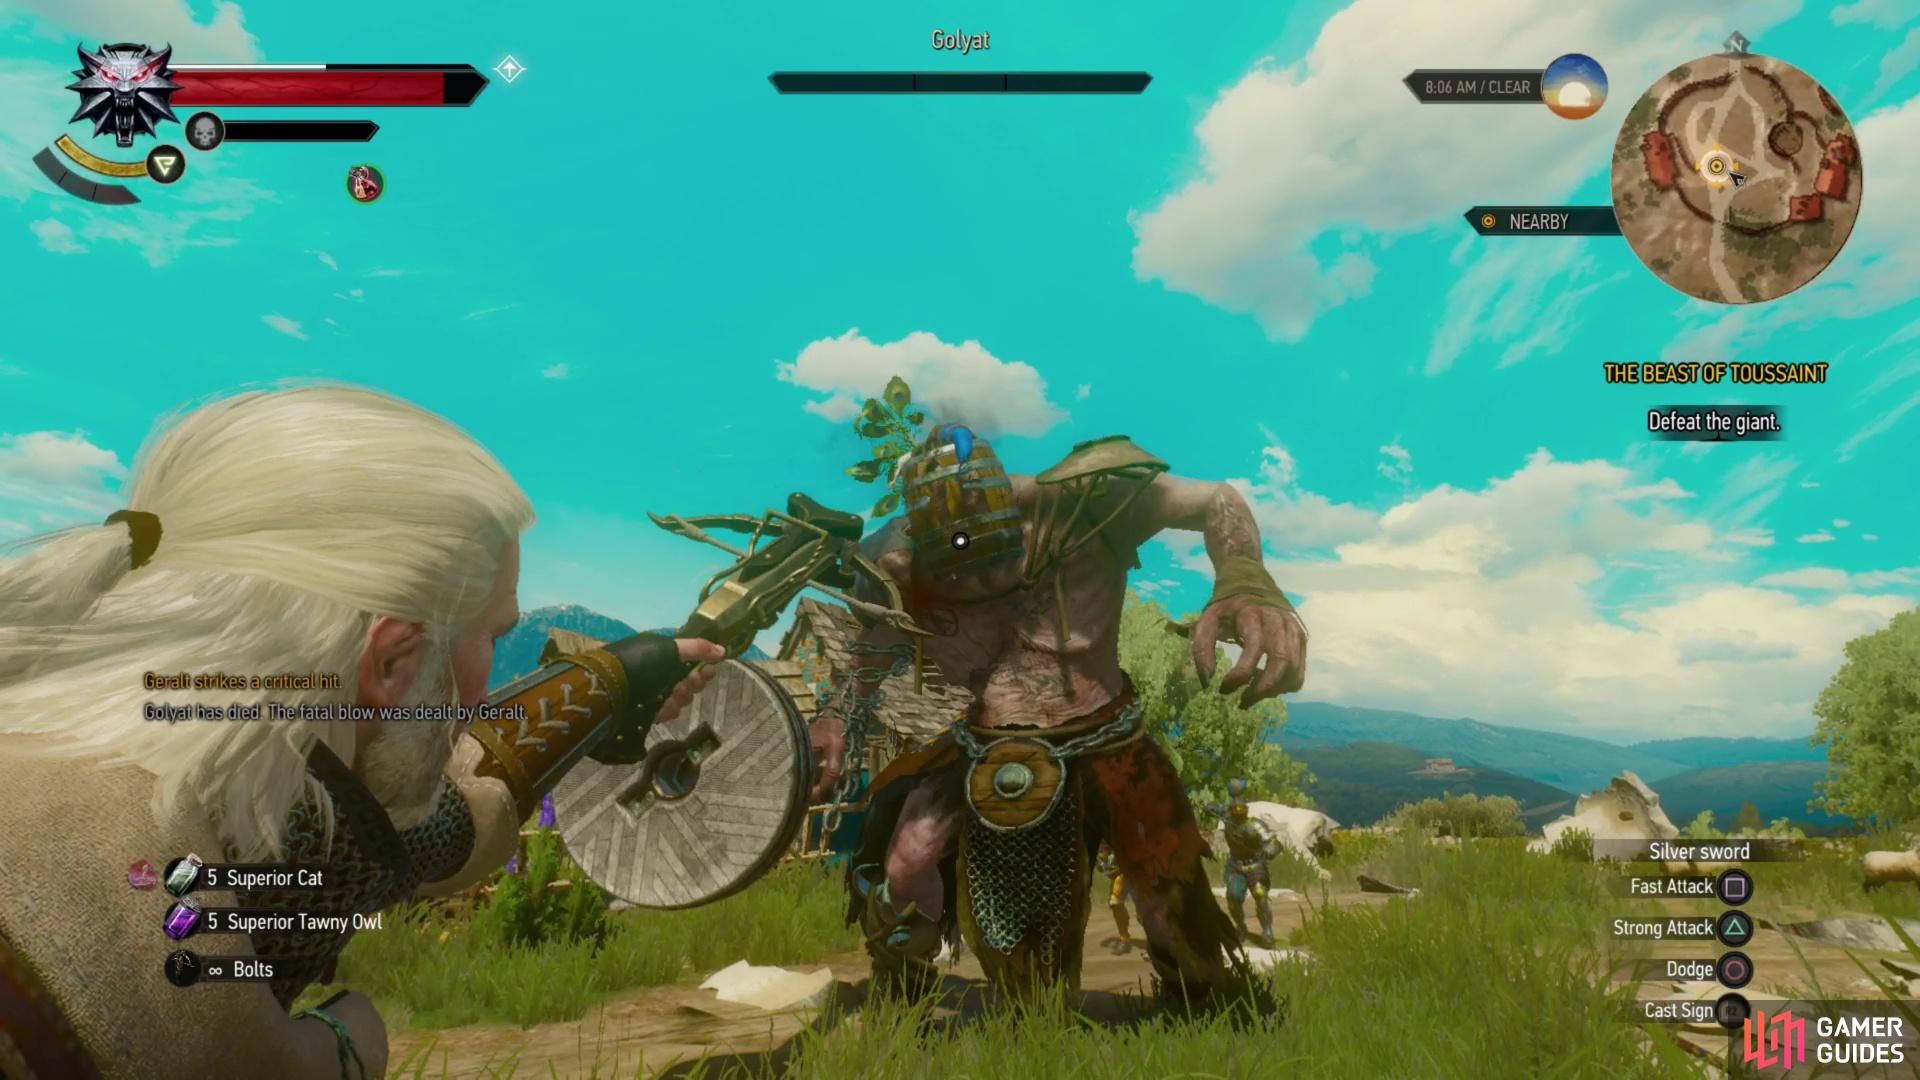
Golyat uses his improvised club to perform sweeping strikes that deal surprisingly low damage. (left), While Golyat can be brought down conventionally, you can also defeat the giant with one well-placed bolt to the eye. (right)
How to Defeat Golyat
Ah, Toussaint - a land out of a fairy tale, with chivalric knights, a decidedly brighter color palette… and giants, apparently. So much for proving that Toussaintois aren’t strange, eh? Geralt and his companions arrive on the scene in time to aid the hard-pressed knight, but alas, poor horse, poor windmill. Golyat, despite his fearsome size, isn’t terribly powerful and possesses only four attacks: a quick swipe with his improvised club, an overhand smash with his cudgel (sometimes appending a charge), a spinning, three-rotation attack which he advertises well in advance, and a stomp, the force of which somehow he’s able to project in a cone in front of him.
All of these can be blocked and absorbed with Quen, as well as simply dodged. Hitting him with a strong attack before dodging his inevitable counter will suffice to whittle him down, and setting him on fire with Igni will do a bit of damage, as well. If you want to take him out more creatively, however, use your crossbow and aim at his eye, or rather, at the eye slit in the center-right of his barrel helmet (right from your perspective, not Golyat’s right). You don’t need to whittle the giant down or anything, one well-placed shot will fell the monster. Of course, considering the inherent inaccuracy of the crossbow and the fact that Golyat probably won’t deign to stand still while you aim, this will probably be more a matter of repetition and luck than one of accuracy and finesse.


However you manage to do it, once Golyat has been felled the three knights and Geralt will chat. The knight you rescued - Guillaume - will reveal the reason for his fight with the giant before delivering some bad news; apparently the beast you were hired to slay has struck again, and some locals are probably in the process of destroying any evidence through their ignorance and incompetence. Palmerin de Launfal will part company with you, and you’ll be instructed to rendezvous with them near Guillaume’s tent at the tourney grounds… after your investigation, of course.
First, look at your world map and note that Toussaint is not exactly a small place. You’re getting your money’s worth out of this expansion! Right now you’re near the middle of the map, just south of the Dulcinea Windmill signpost. Also note that there are no fewer than seven Notice Boards on the map - plenty to see and do in Toussaint. For now, however, we suggest sticking to the main questline.
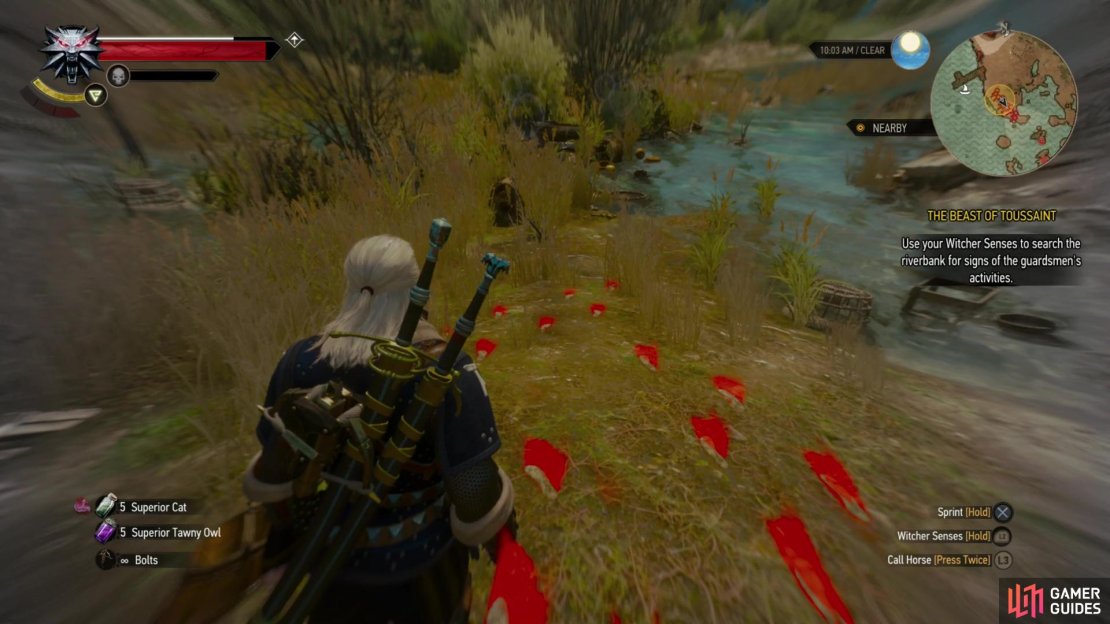

(1 of 3) Search near the river for clues,
Search the Riverbank Near the Cockatrice Inn
Loot the various containers nearby (and Golyat’s corpse!) then mount Roach and follow Milton down to the river, enduring his chatter and some tutorial menus telling you about new gear and character development options in Blood and Wine. All in good time, game, all in good time…
When you reach the river, Milton will dismount. Follow suit and activate your Witcher Senses to discover some footprints on the ground. Examine them, then follow the trail southeast to find some Scurvers (level thirty-five), which are a variant of Rotfiend. These necrophages aren’t too dangerous, just smack them with a fast attack and dodge, protecting yourself with Quen, and remember that - like their smaller cousins - when they’re low on health (around 25% remaining) they’ll start to convulse. Dodge or roll away from them, as they’ll explode when their health bar depletes, and their grisly shrapnel is by far their most dangerous attack.
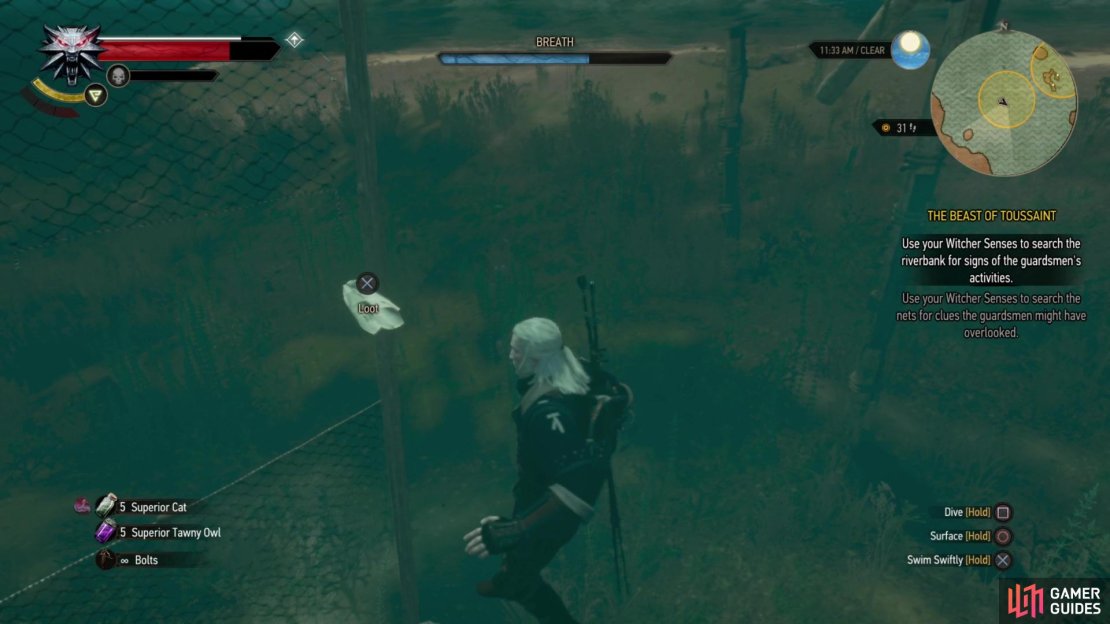
After the Scurvers are slain you’ll be free to activate your Witcher senses and explore the nearby shallows, where all sorts of junk accumulates. Ignore the junk and search the rut and nets on the small island where Milton will stand to determine that… well, a bit of diving is in order. Dive into the river to the west and search a net just south of the center of the search area to find a Handkerchief monogrammed d.l.C. … and before you return to Milton, you may as well grab the submerged chest nearby.
Once you’re back on shore Geralt will confer with Milton, who will identify the latest victim and suggest you check out the nearby Cockatrice Inn. There’s history there, but Milton refuses to elaborate too much before leading you north along the river, towards the Cockatrice Inn. Enter the inn and you’ll find yourself in the company of some men who belittle Milton’s courage, and a peasant who is fixated with telling his tale about the corpse… and red skies. Fortunately, Geralt does learn where the corpse was taken from the annoying peasant - Corvo Bianco. After spotting an overly suspicious woman (comically, even), the conversation will degenerate into noble gossip about their scandalous peers, and peasant prophecies of doom based on the impropriety of the modern knight. After learning that the beast you’re after seems to have a mind for religious holidays, and that Milton has been granted a rather dubious honor, Geralt will finally take his leave.


(1 of 2) Search the carnage at Corvo Bianco to identify the monster prowling about,
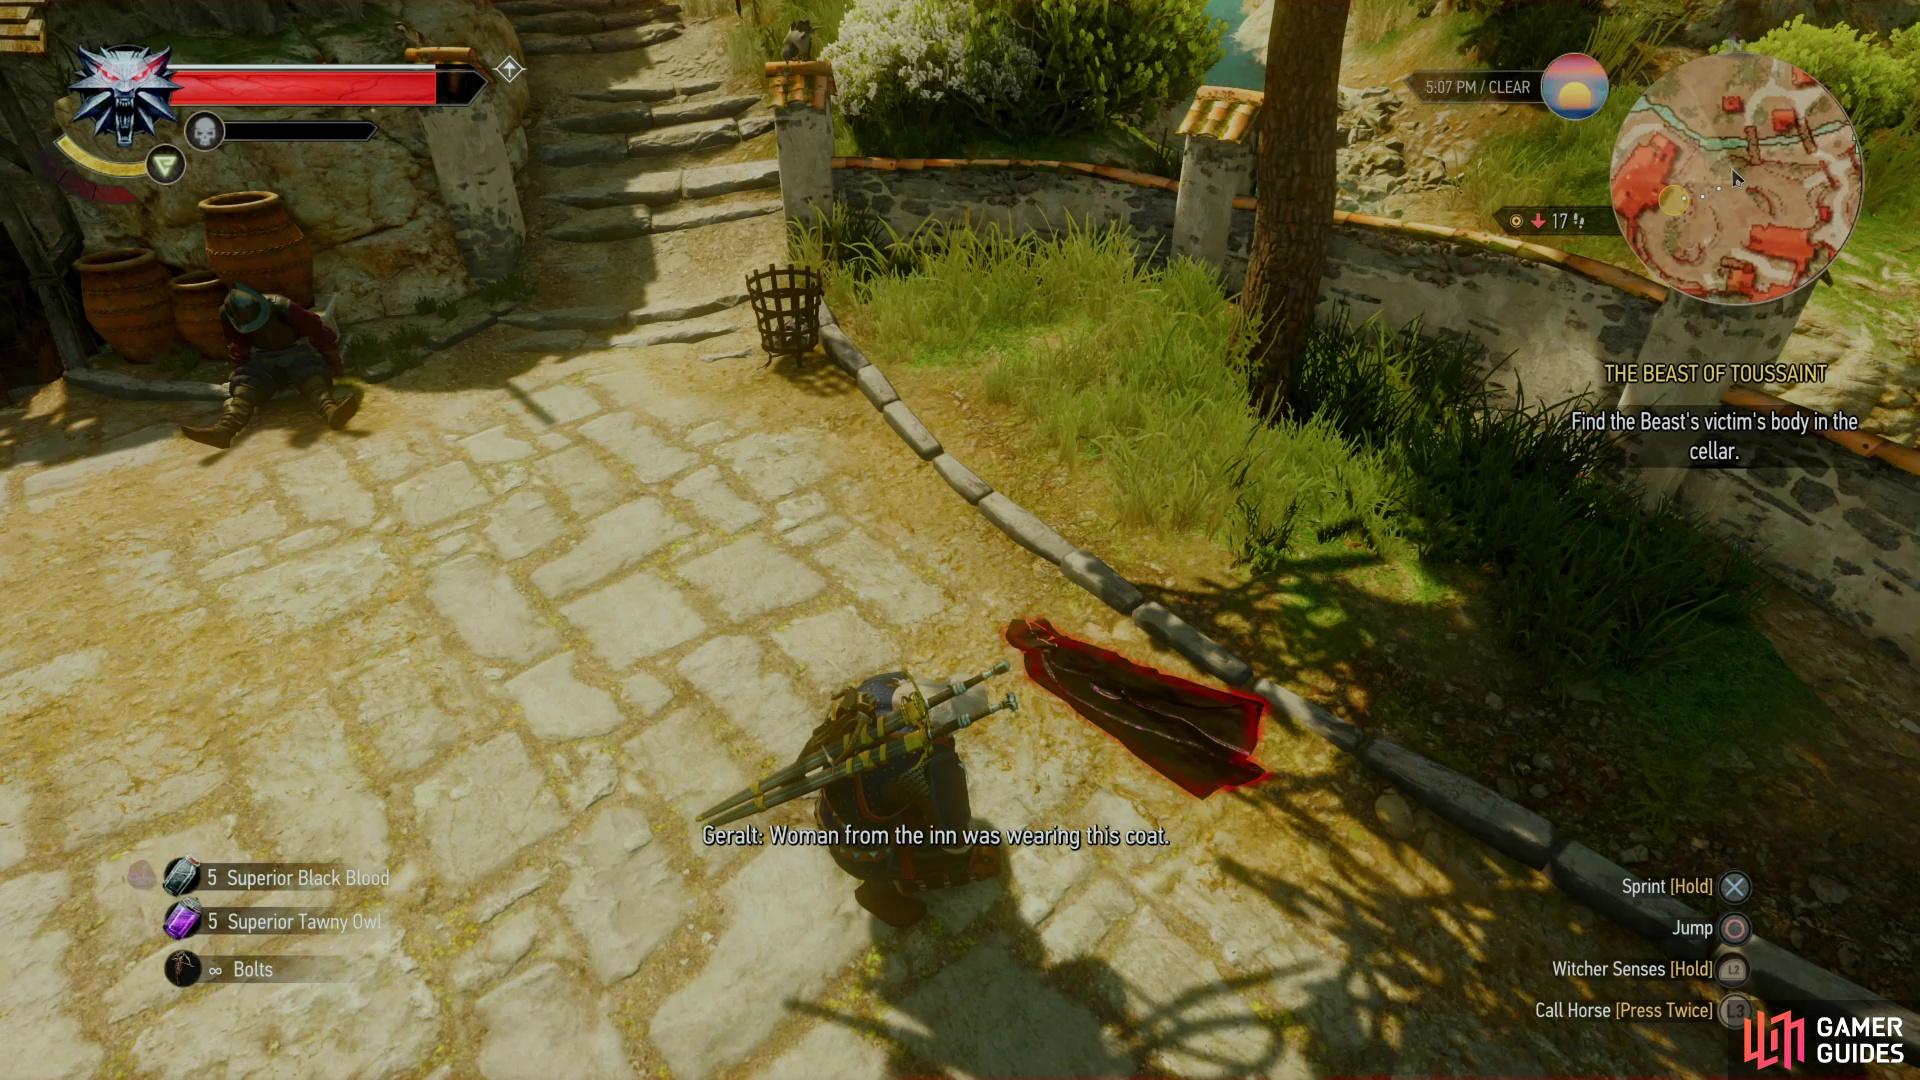
Search the carnage at Corvo Bianco to identify the monster prowling about, (left), which will allow you to prepare with Vampire Oil and Black Blood. (right)
Investigating Corvo Bianco
To get to Corvo Bianco just cross the bridge to the southwest and follow the road there. Couldn’t be easier if you have a breadcrumb trail, a mini-map, and quest markers… which you do! When you approach the estate, however, you’ll discover that all is not well. Follow the sounds of combat the rest of the way to the estate and you’ll witness a grisly scene.
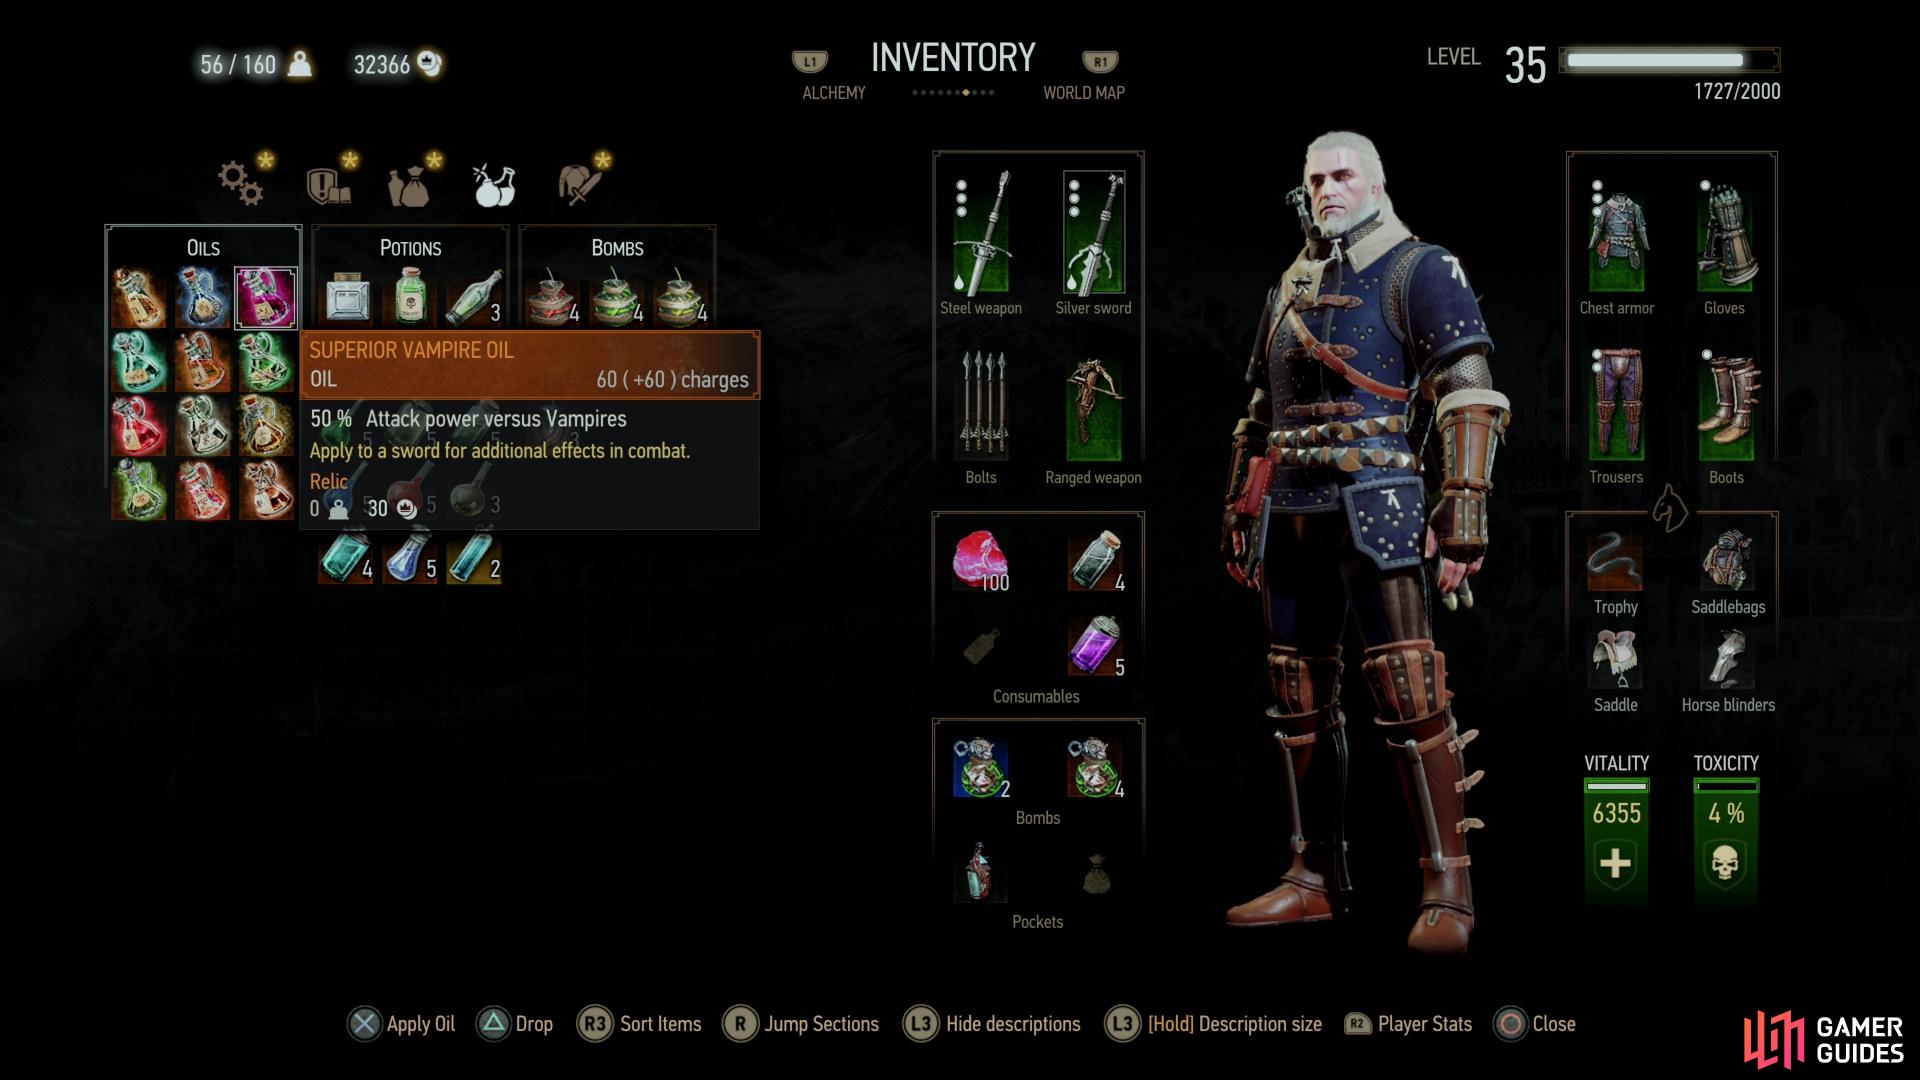
Activate your Witcher senses and search (and loot!) the first few bodies to identify the killer (applying some Vampire Oil to your sword wouldn’t be a bad idea), then continue west, examining a discarded dress, an overturned cart, and another corpse. When you’re ready to confront the beast head down some stairs into the cellar and examine yet another corpse, then use your Witcher Senses to spot some tracks you can follow. Trail the vampire west, south, then west again, surveying examples of your prey’s strength as you go.
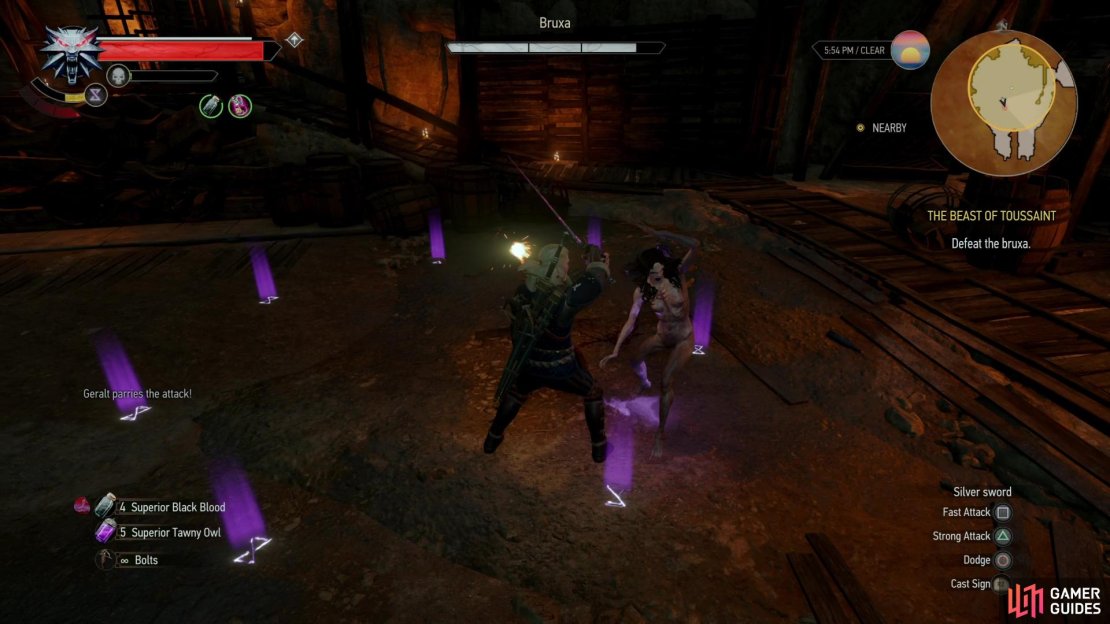
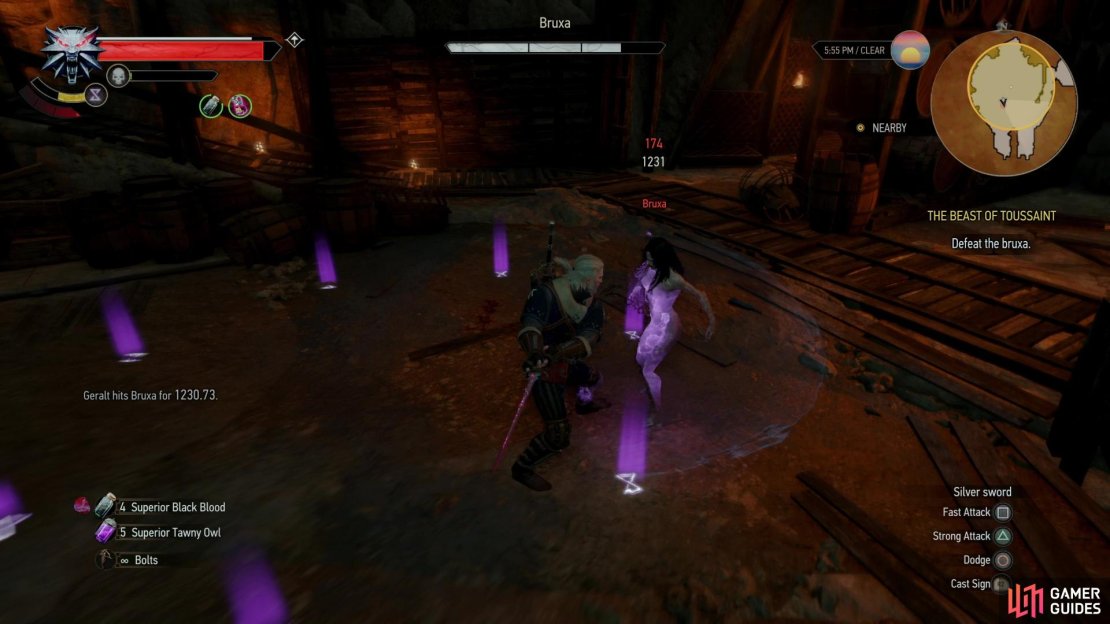
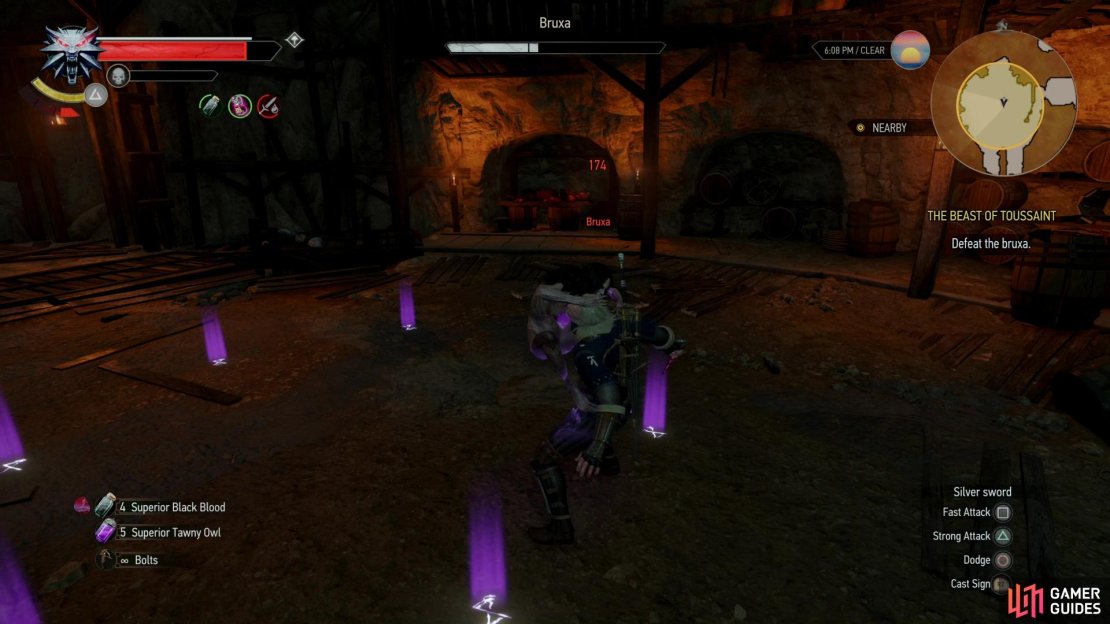
Pass through a cage door to reach a large chamber, where you’ll find the Bruxa, who is predictably the suspicious woman you saw at The Cockatrice Inn. Some words are exchanged, and one thing becomes clear: this isn’t going to end peacefully. Make sure you have Vampire Oil on your sword, as it’ll speed up what is a fairly simple battle. The Bruxa has two main attacks, she’s fond of turning invisible and closing to launch a flurry of blows, and she’ll also perform a screech attack, which projects a cone of force.
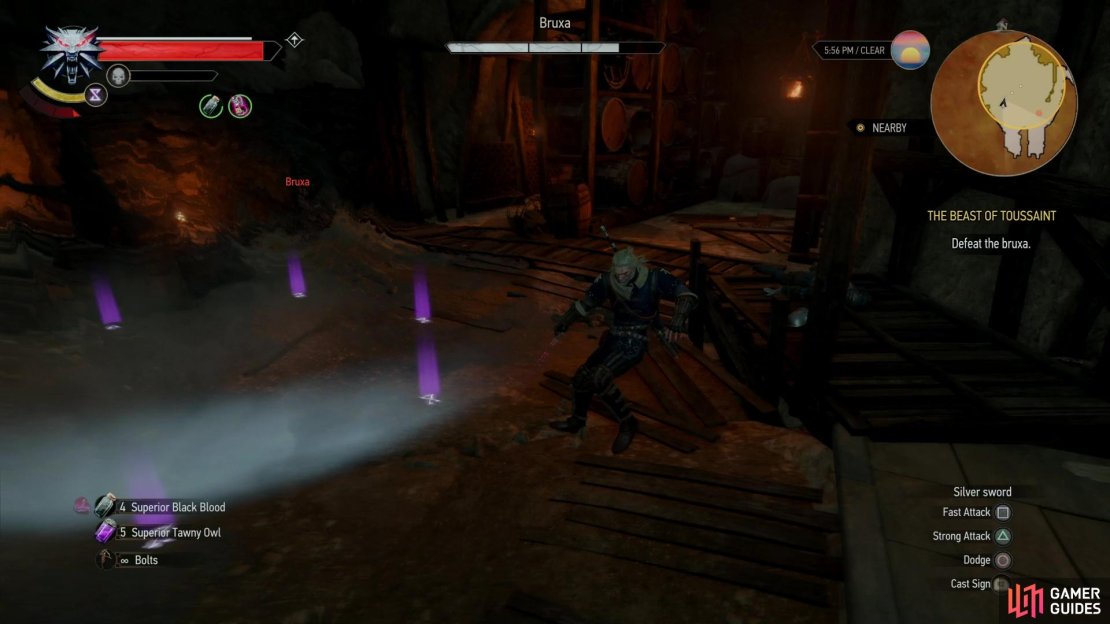
(1 of 4) Toss up a Yrden sign and block to thwart the Bruxa’s invisible assault,
How you choose to handle the former attack routine will impact her usage of the screech attack. If you use Quen, you can simply absorb the attacks and, if you have the “Explosive Shield” ability activated, just let down your Quen when the Bruxa is close to stun her and score some cheap hits. Afterwards she’ll likely leap away and charge her screech, which you can easily dodge.
Alternatively you can simply block her invisible onslaught (those Witcher senses sure are something else!), which will eventually frustrate her and provoke her to do a close-range screech… which of course you can take advantage of by introducing her to your silver sword while she charges up. In the latter case you’ll probably only be able to score one good hit, after which she’ll leap away (perhaps to perform another, long-range screech), but still, if you dodge the screech and block (or Quen) the invisible attacks, there’s not much she can do to hurt you.
She does have a grapple attack she’ll use when she’s low on health, drinking your blood and causing her to regenerate, but there’s a good chance you’ll dispatch her before she can pull this off. Even if she does manage to pull this move off, the regeneration is not significant enough to really impact the outcome of the fight. If you want to prevent this, however, consider drinking a Black Blood potion. If you happen to have a superior-grade variety of this potion, all the better, as it’ll cause the Bruxa’s health to deteriorate any time she damages you as well as while she’s near you… even if you’re safely protected by Quen or actively blocking her attacks.
Examine the corpse of the murdered noble to find an Unusual Severed Hand, which raises many questions and offers few answers.
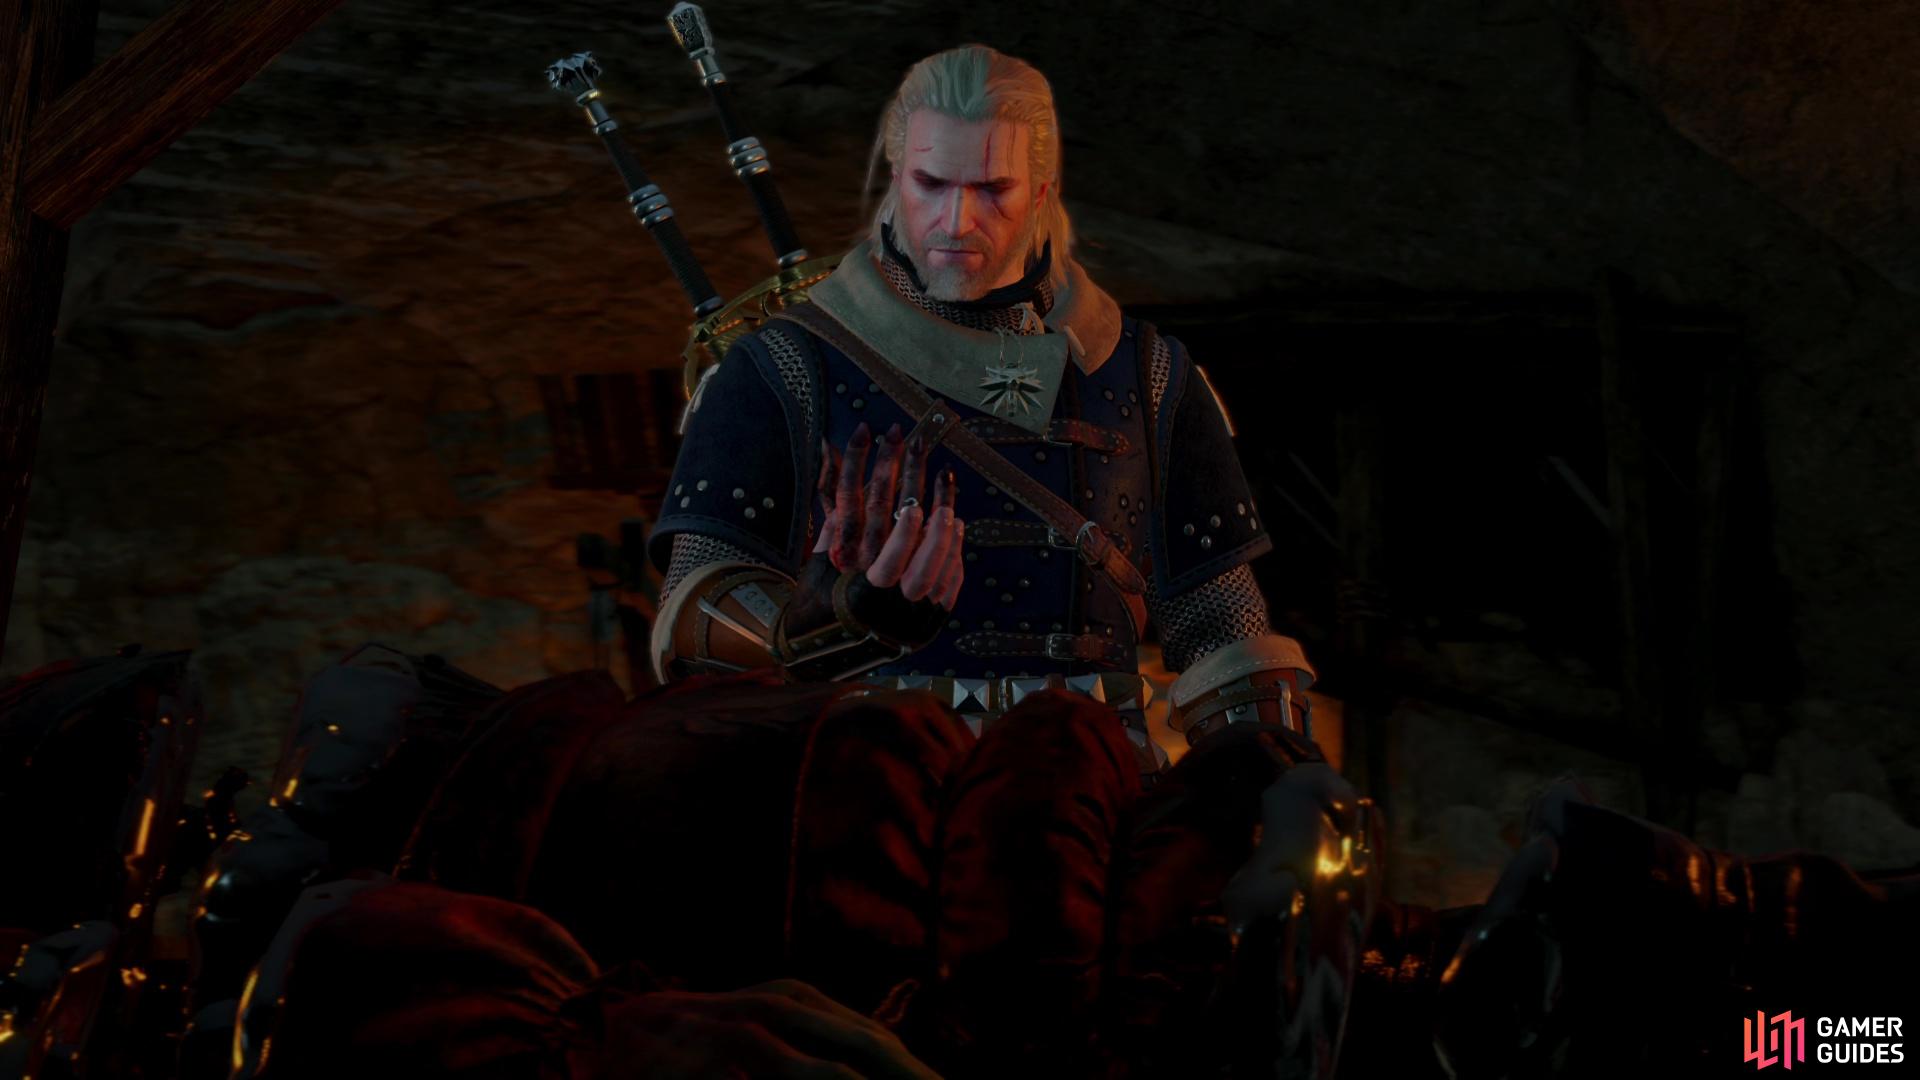
After the Bruxa has been butchered, search her body to harvest some valuable vampire bits, then examine de la Croix’s corpse, which so many men died over. Be sure to examine the head to discover a Pouch Filled with Florins , then examine the severed hand - a most peculiar third hand - to obtain an Unusual Severed Hand, as opposed to all the mundane severed hands one might find. This endeavor ultimately opened up more questions than it answered, but every bit of knowledge is welcome against a clearly sentient killer whose crimes aren’t random acts of wanton violence.
Meet Palmerin at the Tourney Grounds
Now that your business at Corvo Bianco is done (for now) it’s time to rendezvous with Palmerin Tourney Grounds and hopefully gain an audience with the duchess. Make your way southwest from Corvo Bianco to reach your destination, which should be a short and uneventful trip. Before you seek out Palmerin, however, note that there’s a lot you can do in this area, as there’s a Barber, an Innkeep, a Blacksmith and an Armorer, all of whom play Gwent. You can win from them two Skellige Storms cards, a Young Berserker card and a War Longship card. There’s also plenty of loot around you can plunder, and while none of it is notable (aside from some interesting letters, perhaps) it’s better in your inventory than in some random crates. Finally, seek out the Tourney Grounds signpost - you’ll be coming back here, so discovering the signpost now will spare you some running around later on.
Return to the Tourney Grounds and find Palmerin who, depending on what time it is, may be resting in Guillaume’s tent or will be near the arena, talking to a group of children. In the latter case, one of the brats will ask you if “virtue always trumps villainy” (answer however you please, it really doesn’t matter) while in the latter case you’ll have to pass time talking to Palmerin until it’s a proper hour for you to be bothering the Duchess. Either way, you’ll eventually head off to the arena, where the Toussaintois have decided to entertain themselves with a bit of sport. You’ll get a chance to have Geralt weigh in on the morality of this matter, too, but there are again no consequences either way, so respond as you will. Unfortunately, some bells aren’t quite enough to tip the scales in Guillaume’s favor, so Geralt and Palmerin leap to the rescue… again.
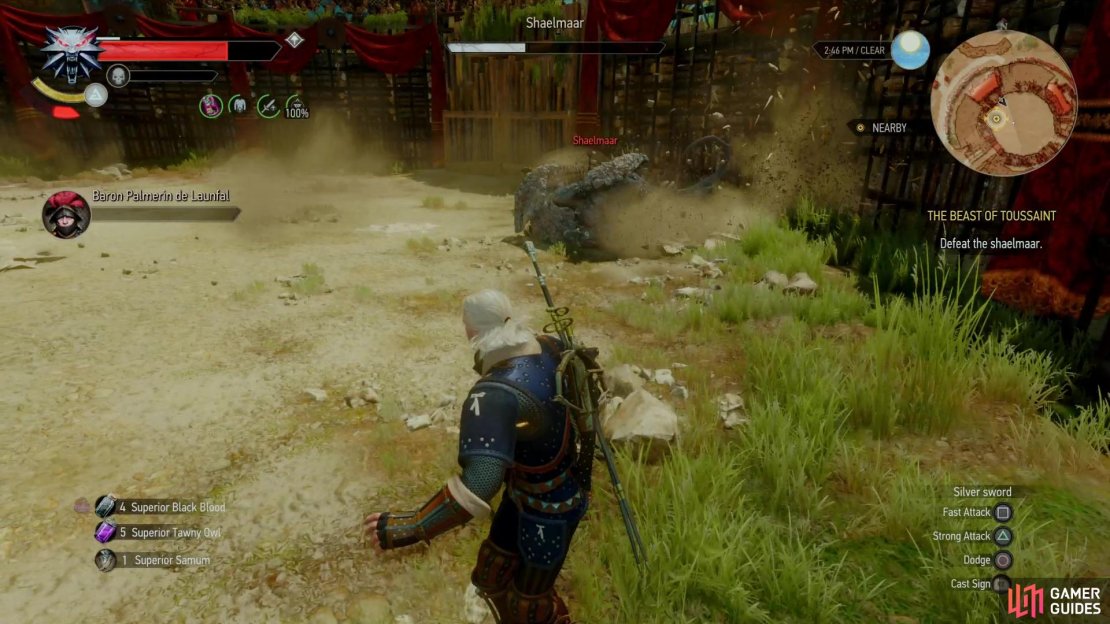
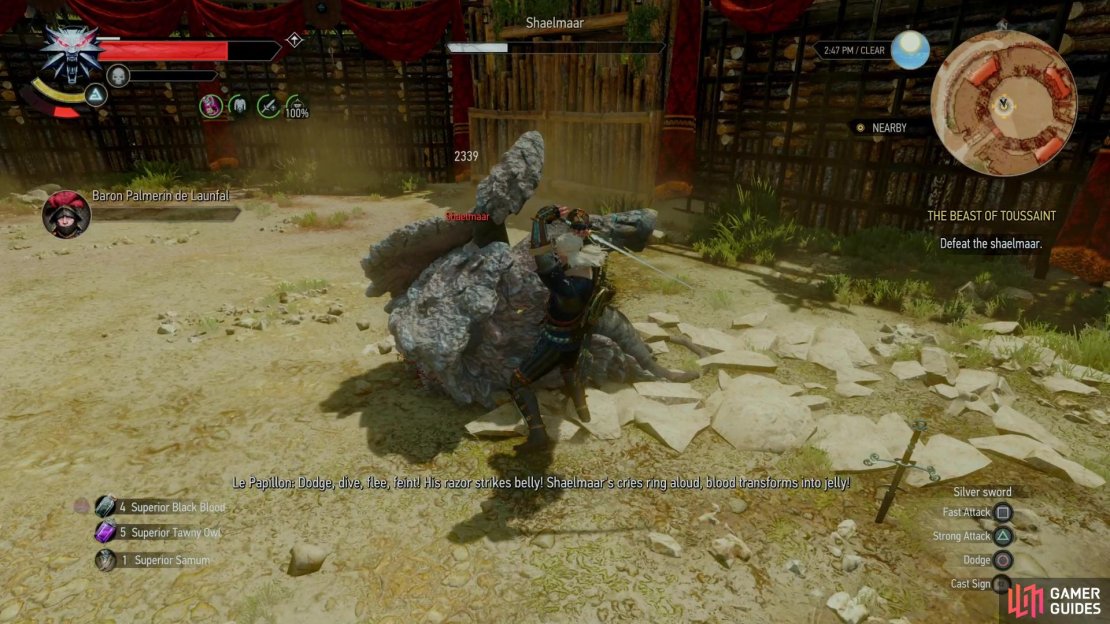
(1 of 2) Dodge the Shaelmaar’s rolling attack to cause the monster to collide with the arena wall.
The Shaelmaar is an armored monster that you can’t defeat through swordplay alone. Even your Quen sign is unlikely to be sufficient protection against its rolling attack, as it can strike multiple times in a single charge and knock you down. When it’s hurt, it also has a habit of burrowing into the ground and start spinning, resulting in an area-of-effect attack, which you’ll just have to distance yourself from and wait it out. Note that Palmerin has a life bar in this fight, but if it’s depleted you’ll just lose his services (meager as they are) for the rest of the fight - there’s no dire consequences if he falls.
So, how to defeat the monster, then? Well, frontal assaults are ill-advised, due to its armor, but the Shaelmaar isn’t exactly lacking in ranged options, either. First, it can roll surprisingly quickly, sometimes for quite a long time - certainly enough to cover the span of the arena. It can also perform a shockwave attack, sending a line of force at you, buckling the ground in its wake. This attack, however, is easily dodged. It also has some close-ranged attacks, but it’s the roll that’s the most dangerous, and also the attack that provides the most opportunity…
Apply Relict Oil to your silver sword and stand along the edge of the arena opposite the Shaelmaar and wait for it to roll at you, at which point roll out of the way. If you’re lucky, it’ll ram into the side of the arena, stun itself, and flip onto its back, leaving it vulnerable for a few moments. You can use Quen to protect yourself (the normal cast-and-forget version, not the “Active Shield” version) or Aard to knock it out of its roll, or you can cast Aard at an adjacent section of wall and hope it confuses the beast into rolling at where you cast the sign, but simply rolling out of the way is arguably simpler and more reliable.
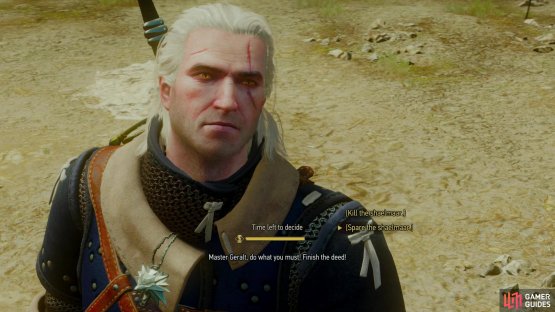
(1 of 2) After you defeat the Shaelmaar you’ll be able to choose to slay or spare the monster. Sparing it will prove you possess the virtue of compassion.

After you defeat the Shaelmaar you’ll be able to choose to slay or spare the monster. Sparing it will prove you possess the virtue of compassion. (left), You’ll be given the deed and key to Corvo Bianco, which you don’t have the time to enjoy just yet. (right)
When the Shaelmaar is defeated you’ll get a timed decision to put the beast down or spare it. Sparing the Shaelmaar will prove you possess the virtue of Compassion, advancing the quest There Can Be Only One, although honestly, it could be argued it’s more humane to put the beast out of its misery.
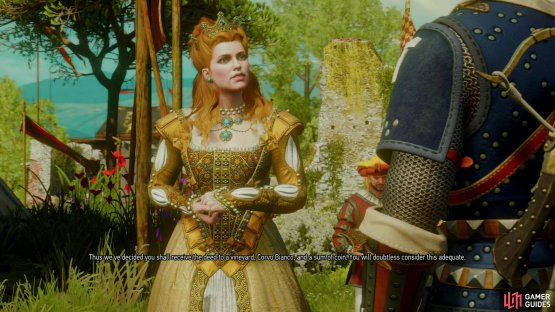
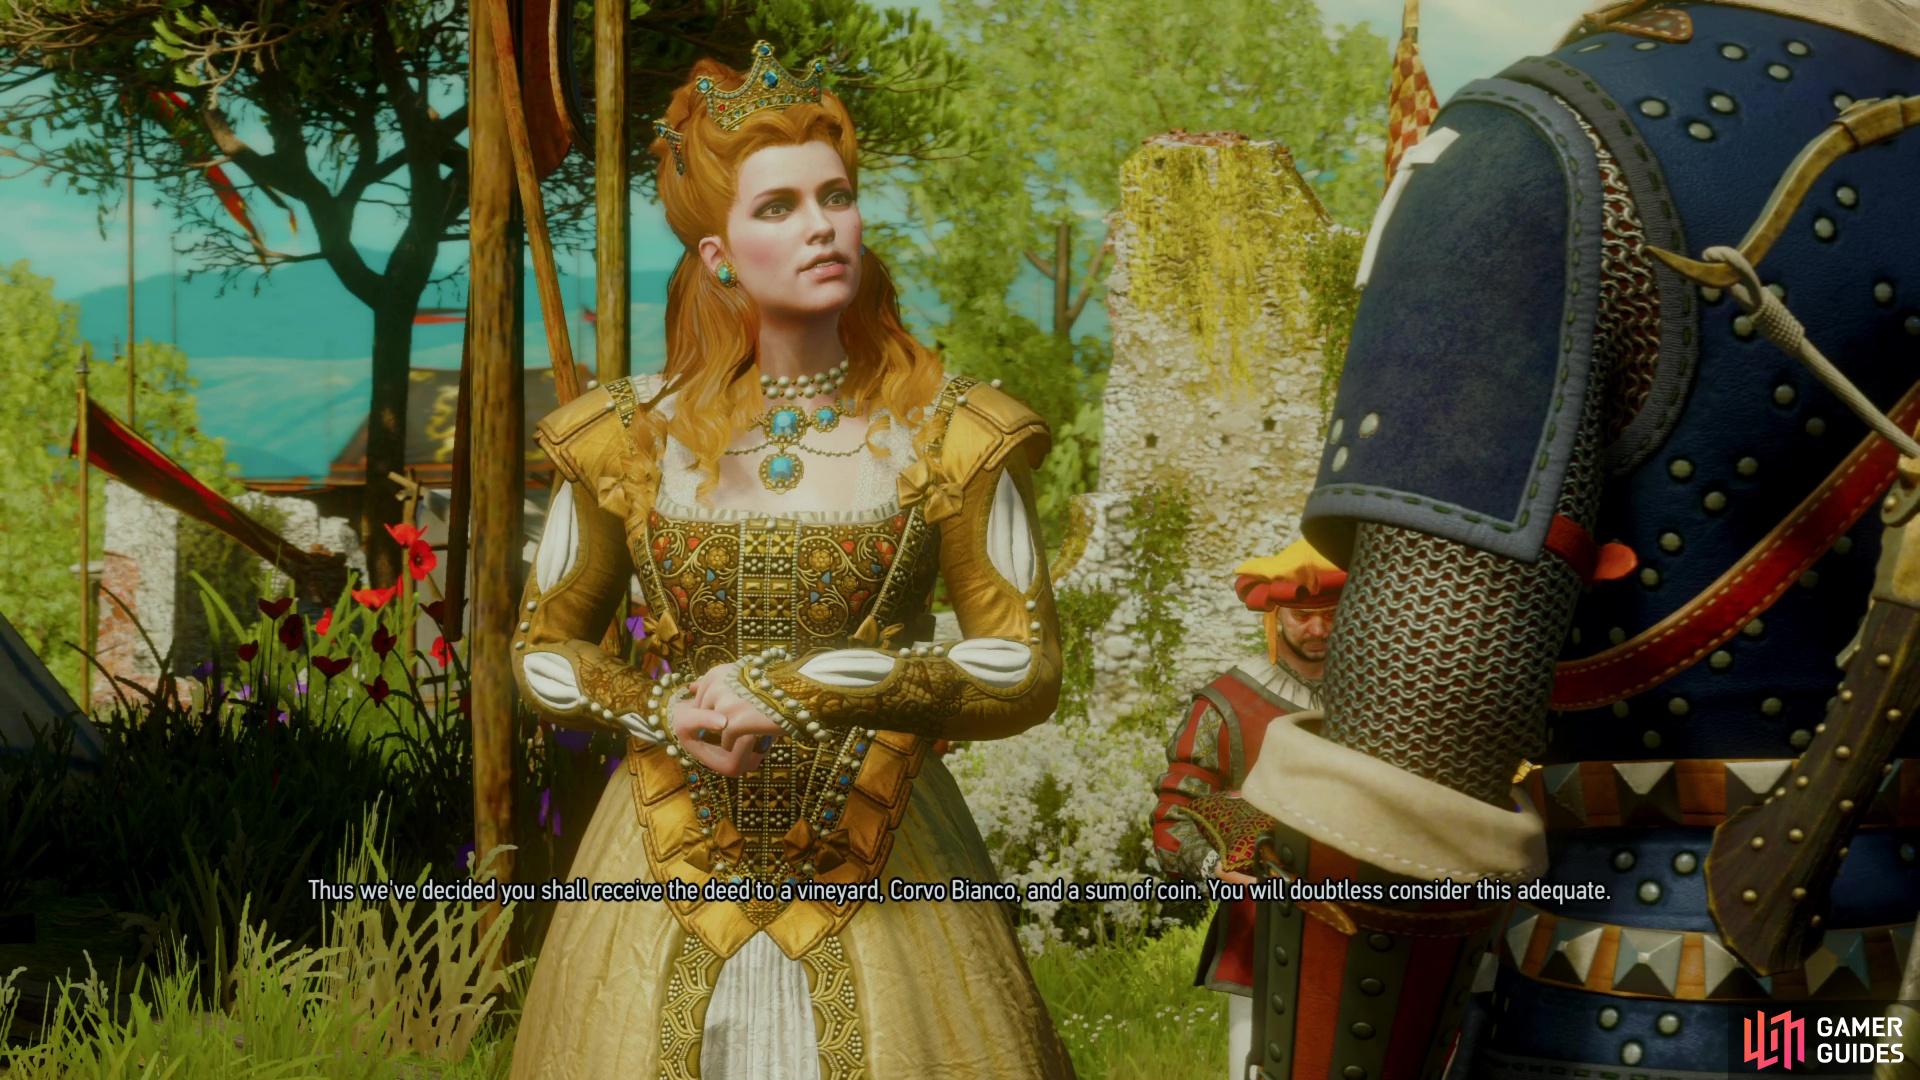
After you make your decision, Anna Henrietta will come greet you in person… along with Guillaume’s “heart’s champion”, for whom he’s nearly gotten himself killed twice over. The rest of Guillaume’s love-quest will play out during the Side Quest The Warble of a Smitten Knight, which you can get to after you’re done with this Main Quest.. After some chatter the Duchess will take you to meet Damien de la Tour, captain of her personal guard, who isn’t shy about expressing his professional rivalry with Geralt. Guy must be stung he wasn’t good enough to stop this murderer himself.
Fortunately, his whining doesn’t come to much, and after Anna questions Geralt about the sort of reward he’s after, she’ll make an advance by offering the deed to the Corvo Bianco Vineyard, with the monetary reward due after the beast is slain. What seems like insane generosity is actually pretty shrewd business on Anna’s part - what better to keep a Witcher in her lands longer by offering him a reward that can’t travel? This starts the quest [No Place Like Home], which will have to wait until your current quest is resolved.
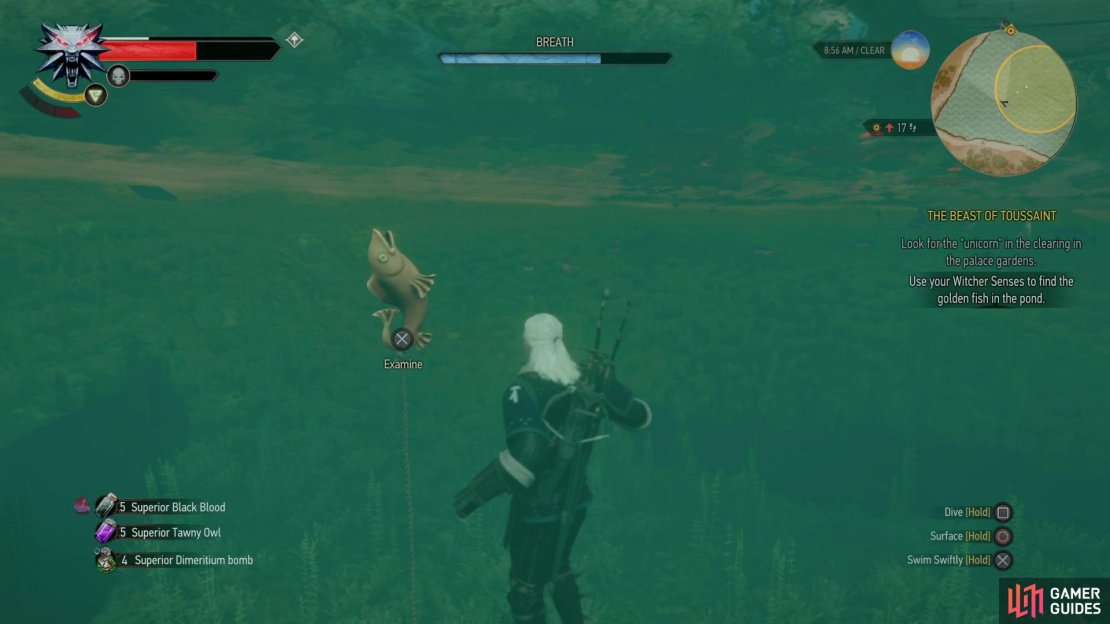


(1 of 3) Search the southwestern end of the search area to find the golden fish containing the key you need.
How to Catch the Golden Fish
After Geralt accepts the vineyard, you’ll be free to question Damien about the first two murders, which quickly makes a pattern become clear. Seems the beast is making a statement about the degeneration of the five chivalric virtues in Toussaint’s knights, and it doesn’t take Geralt and Anna long to deduce who the fourth victim very well may be.
Anna shouts some orders and changes her attire to suit the urgency of the situation, after which you’ll find yourself on Roach, riding through Beauclair. Simply follow Anna through the city up to the palace and dismount when she does, then follow her south (on foot) while she explains the game that’s going on in the garden. The victim is currently dressed up as the hare, and is hiding somewhere. The gardens of Beauclair Palace are spacious, however, and time is of the essence, so instead of relying on Damien’s goons to search out the hare’s location, you’ll need to bend the rules of the hare hunt (into a pretzel, if need be) to find clues that’ll lead to the hare’s location.
Simply put, you’ll have to obtain a unicorn’s horn and a golden fish while Anna secures the phoenix egg. You’ll get a pointless timed decision to ask about your two objects (just pick one - she tells you about both, either way) after which you’ll be left to your own devices. This is a bit timed, but all that’s affected are the experience points you’ll earn for the task, and if you want to maximize your gains, go after the golden fish, first.
Make your way south down a ramp and head south through the garden to reach the pond, where nobles idle away their time on swan-boats fishing for fake fish, most of which contain sweet party favors. How pointlessly decadent. Wade into the water, endure their complaints of your bad form, and swim to the southwestern end of the search area and investigate a fish under a boat to obtain the Key from the Golden Fish . If you take too long, the prop will be fished away from you just before you can grab it, and Geralt will commit an even greater faux pas to retrieve the key. You brute, you. Either way, you have the key.


(1 of 3) You can use Axii on the “unicorn” to calm the beast down,
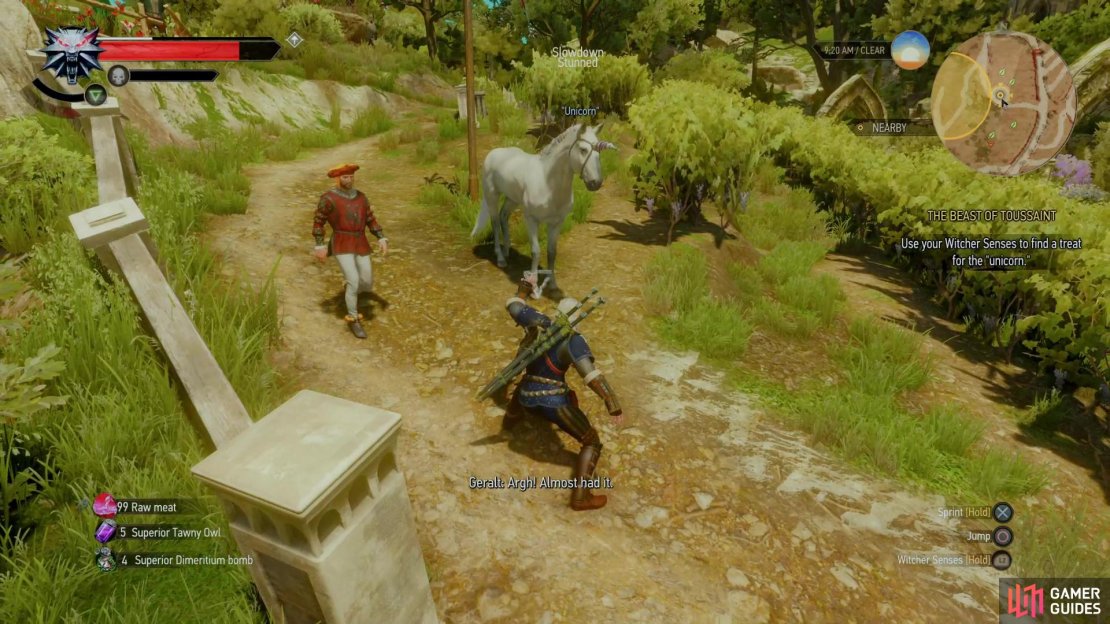
How to Catch the Unicorn
Make your way back north through the garden to find the “unicorn”, which may not have a real horn, but is certainly skittish enough for the part. There are two ways to handle this beast: you can hit the unicorn with Axii, but this will anger some fellow gamers, who cry foul and demand satisfaction. Use Axii on them, too, to get them to go away peacefully, or indulge in some pugilism outnumbered three-to-one. You gain nothing for winning, and lose nothing (save some pride) for losing, but using Axii on them will, as always, net you some experience.
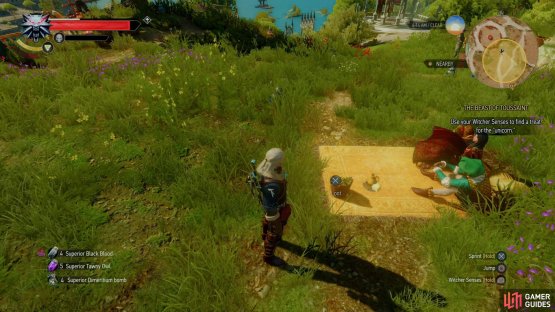
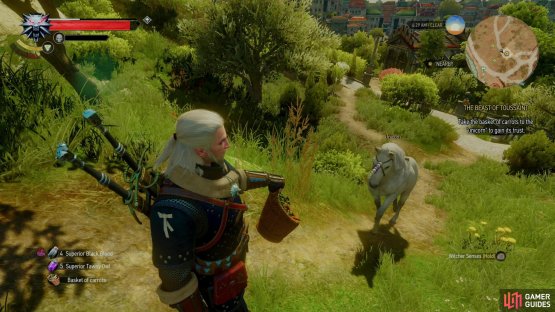
(1 of 2) Alternatively you can swipe some carrots,


Alternatively you can swipe some carrots, (left), and use those to lure the “unicorn” in. (right)
Alternatively you can use your Witcher Senses and head over to a picnic site northwest of the tree the unicorn was under (two nobles are sitting on a yellow blanket) to find a Basket of Carrots, which can be equipped via the radial menu (hold down [L1]/[LB]). With the vegetables in hand, just approach the unsuspecting horse, who sacrifices its horn for a snack.
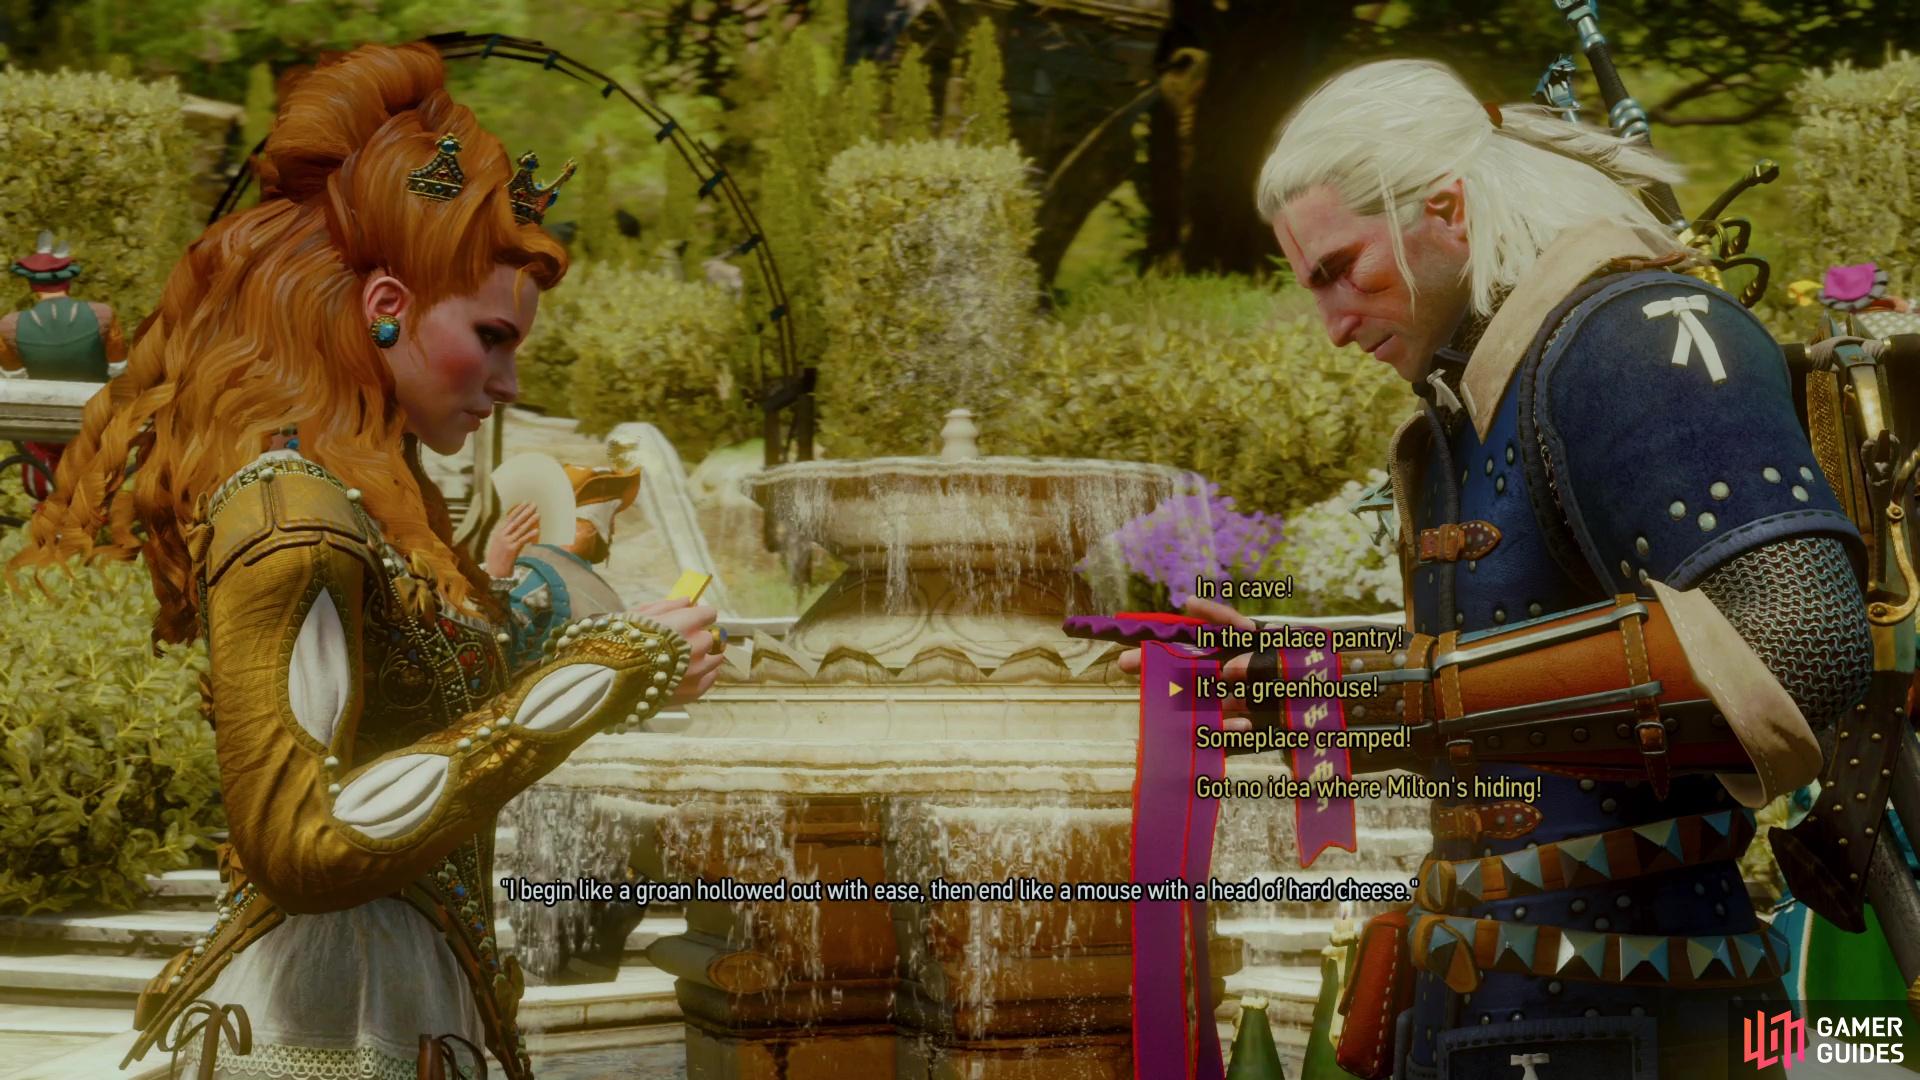
Solve the riddle by picking the dialog options “It’s a greenhouse!” to prove you possess the virtue of Wisdom.
When you have both the Key from the Golden Fish and the Clue from the Horn of a “Unicorn”, find Anna, who has successfully bullied her way to the phoenix egg. After reading the riddle inside, pick the answer “It’s a greenhouse!”. Not only is this the correct answer, but it’ll prove you possess the virtue of Wisdom - one of the five virtues required to claim the sword in the lake as part of the quest There Can Be Only One.
After guessing correctly Geralt will follow up on his hunch, which proved correct… if not timely. The quest The Beast of Toussaint will end during the cutscenes that follow, and when you’re back in control the next Main Quest, Blood Run will have begun.
No Comments