Now you’re on track to solving the mysteries surrounding the vineyard estates, you’ll get a quest for the Vermentino estates. Complete this quest if you intent to side with Vermentino, or fancy solving both estates if you fancy doubling your rewards and jetting off with as many rewards as possible. But, to solve this quest, you’re going to need to do many errands. So, here is a Wine Ward Vermentino walkthrough, featuring a map of objectives, and other helpful things.
| Important Items in this Area |
|---|
| Heavy Brass Key |
| Letter on elegant stationery |
| Augustin Tonnelliay’s Journal |
| Key to the chest in sunflower fields |
| Letter from Augustin Tonneliay |
Wine Wars Vermentino Map
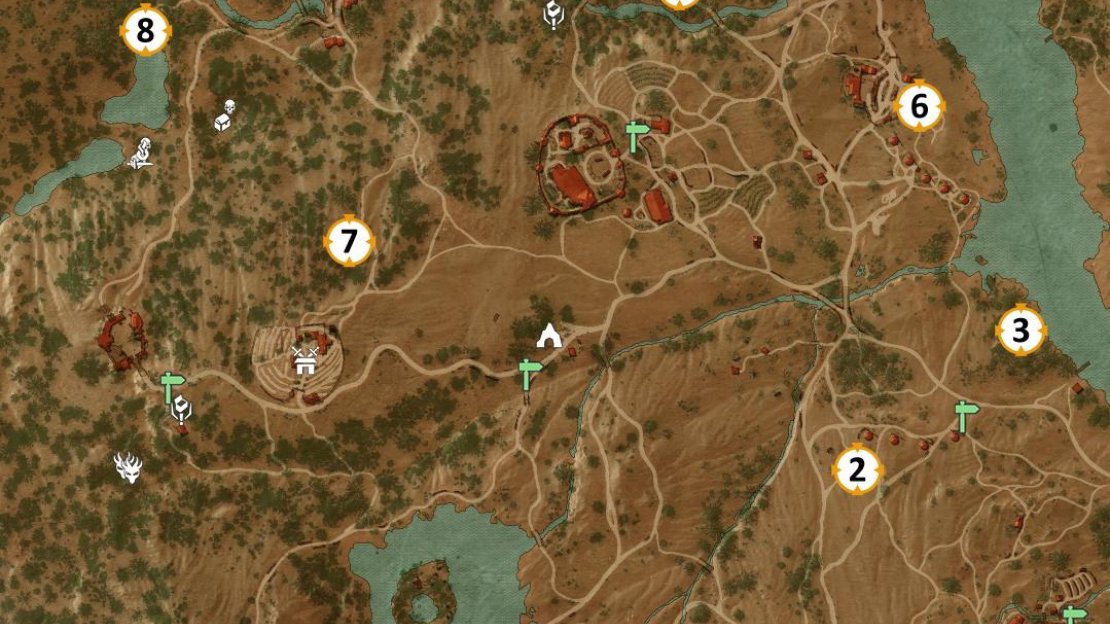
The Vermentino locations you ned to visit to beat this phase of the Wine Wars quest.
The Vermentino areas you need to clear can be found west and southwest of the Plegmund’s Bridge signpost, and these are more spread out than the Coronata ones. That being the case, a bit more running about is necessary, and the southern-most area is particularly isolated.
Each of the markers represent the order we recommend completing the Wine Wars Vermentino quest in. It’s also the format we have structured the rest of the walkthrough in.
Vermentino Site: Abandoned Site
With that in mind, let’s clear out the southern-most area, first. Travel to the Tourney Grounds via any convenient signpost and from there head west and northwest to find an Abandoned Site (#1 on the map), which is located just south of the lake/island recursion where you can pick up the quest There Can Be Only One. When you reach the area, kill an Archespore (level thirty-eight) after which Geralt will meditate and the peasants will return.
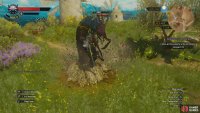
(1 of 2) Dispatch some giant centipedes,
Dispatch some giant centipedes, (left), then destroy their nest. (right)
Vineyard Infestation
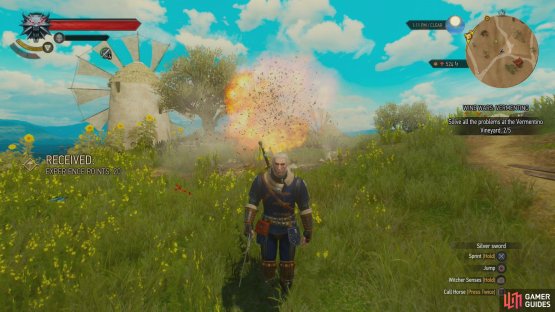
Now for a somewhat long trek to the northeast, as your next target is in that direction… more specifically, it’s due north of Corvo Bianco. On the way, however, is another event (#2 on the map) you can clear out, and although it’s a Vineyard Infestation, it’s unrelated to the Vermentino Vineyard’s problems… somehow. As you make your way northeast you should come across some windmills. This event is south, southwest of the west-most windmill, and you may even find some distressed vineyard workers crying about the monsters, although they have nothing essential to say. Locate the monsters - in this case a pair of Giant Centipedes (level thirty-eight) - and kill them, then bomb and loot their nest to complete this event.
| Reward: For destroying the Giant Centipede Nest |
|---|
| 20 XP |
Vermentino Site: Guarded Treasure and Investigate Location
With that little diversion out of the way, make your way to the windmills nearby to find a road to the north of them, and follow this road north, then northeast until you find the Sansretour Valley signpost. From here, veer off the road to the northeast and continue until you reach a camp near the river (#3 on the map)… a camp that’s now occupied by some hungry Archespores (level thirty-eight). Prune the man-eating plants, loot the camp, then search the remains of some of their victims to find a Heavy Brass Key and a Letter on elegant stationery. Like a similar letter found on Coronata lands, this one implicates intentional sabotage, and is signed “C”. Interesting…
Wine Wars Vermentino: Investigate Optional Objective
The Heavy Brass Key and Letter on Elegant Stationary are both optional items you can pick up for the optional objective. This is part of the quest chain where you search Coronata for proof, or search Vermentino for proof, depending on the order you did it in. If you happen to find both optional objectives, Geralt with have all the proof he needs to determine there’s a third party involved. Doing so also helps top contribute to the good ending, where both families unite and you get the best rewards.
If you do find both optional objectives and found evidence of sabotage during Wine Wars: Coronata, this should be enough for Geralt to determine that a third party is at work, starting the quest Wine Wars: The Deus in the Machina. Something to check out before deciding the fate of the Belgaard Vineyard, surely, but for now, let’s keep focused on ridding the Vermentino Vineyard of its woes.
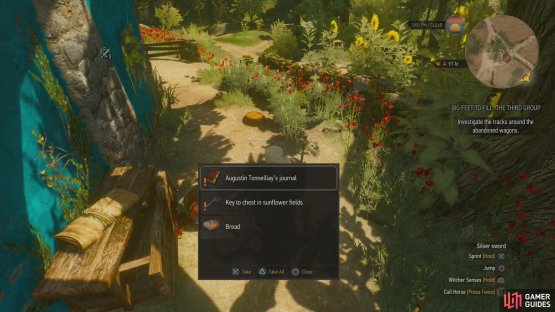
(1 of 2) Grab the “Key to the chest in sunflower fields” from a corpse,
Grab the “Key to the chest in sunflower fields” from a corpse, (left), then search under some sunflowers to find the chest the key opens. (right)
Vermentino Site: Don’t Take Candy from a Stranger
Next stop is north of the Castel Ravello Vineyard, beyond a river with two convenient bridges. There are, however, quests near both of these bridges which are best avoided, one because it features higher level monsters than you need to tangle with and the other because… well, you don’t need to be distracted from the task at hand even more than usual.
Still, geography makes dealing with at least one extraneous event inevitable, so from the Castel Ravello Vineyard signpost head northeast to find a bridge spanning the river. Follow the road across the bridge to the northwest and you’ll run into a curious marker, “The Prophet Lebioda’s Footsteps” (#4 on the map), which in this case consists of an abandoned wagon now being tended to by a trio of Wolves (level forty). Kill the Wolves, after which the quest Big Feet to Fill: The Third Group will begin. You’ll get to this quest when you’re done with Wine Wars, but for now, ignore it and continue along the road to the northwest.
Eventually you’ll come across another event, a Hidden Treasure (#5 on the map), the location of which is a lonely blue hut guarded by a trio of Rotfiends (level thirty-seven). Dismember the necrophages, then search behind (north of) the house to find a corpse, on which you can recover “Augustin Tonnelliay’s Journal” and a Key to the chest in sunflower fields. Reading the aforementioned journal will start the quest Don’t Take Candy from a Stranger.
This quest directs you to backtrack yet again, to an estate (#6 on the map - the otherwise unmarked Vermentino Vineyard, as it were) near the river east of the Castel Ravello Vineyard. Don’t head straight there, however, as you can nab a relatively nearby signpost to make future trips that much quicker. Instead, from the blue hut the Rotfiends guarded make your way along a road to the east, northeast, continuing eastwards as it forks, crossing a bridge, then turning north at another fork. This road will eventually lead to the Prophet Lebioda Statue signpost, which is where you can properly pick up the “Big Feet to Fill” quest… at a later date. For now, it’s enough that you’ve paved the way, so to speak.
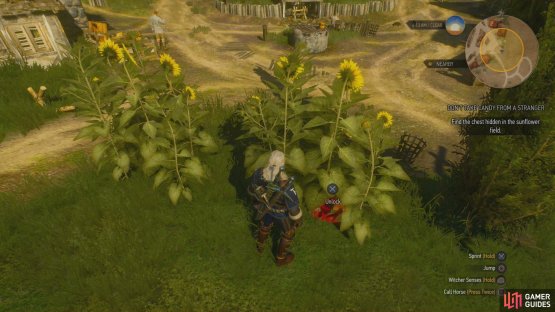
Use this signpost and fast-travel back to the Castel Ravello Vineyard signpost, and from there trudge over to the unmarked Vermentino Vineyard, where the quest marker for the quest Don’t Take Candy from a Stranger beckons. At the quest marker you’ll find a search area, and in the center of the search area you’ll find two clusters of sunflower plants, in the midst of which you’ll find a chest containing treasure that’s probably not worth the trouble. Still, this quest is now complete.
Vermentino Site: Abandoned Site
Return to the Castel Ravello Vineyard signpost (you were warned there would be a lot of running about in this quest) and from there venture to the next target, which is to the west, southwest (#7 on the map). Approach the quest marker and you’ll discover another Abandoned Site, which is remarkably similar to the other ones you’ve done thus far, save this time there are two Archespores (level thirty-eight) that must be smote. Kill them, meditate, and the peasants will magically return to this site and get back to work, and with them comes a variety of containers you can loot for various, low-quality goodies. Also, like a similar event back on the Coronata side of things you’ll be able to find a wagon full of corpses, this time northeast of the map marker near a road. Search one of the corpses on the wagon to find a “Letter from Augustin Tonneliay”, which details the work being done here, and the cause for such urgency.
Vermentino Site: Person(s) in Distress
Four down, one to go, and this last one is the furthest to the west, being northwest of the last event - the Abandoned Site - you just cleared. From the Abandoned Site, follow the road north, then northeast until it forks, at which continue north then northwest until you hit another fork. At this fork, if you take the eastern of the two roads you’ll reach the Abandoned Site of Fox Hollow, which is now crawling with Bandits (level forty-four). It’s a bit involved for a side venture, and there’s no pressing need to clear it, so instead stick to the western-most road heading northwest and ignore any forks to the northeast as you go. Eventually, however, you’ll come to another fork, with one road veering west, then south, and the other continuing northwest. Take the northwestern road one more time, and when you come to another fork, make your way west to finally come to the Person(s) in Distress marker you’re after.
Kill the three Bandits (level thirty-seven) guarding their captive, after which their captive - Vermentino Vineyard’s resident Armorer - will speak to you and offer to travel together to Vermentino Vineyard. Turn him down so you can loot the corpses of the Bandits you slew, then scour the area for other treasures. In this case, this includes a chest submerged in the lake to the south. Once you’ve accumulated what loot there is to gather, you should be done with this quest… save for the all-important final step of turning it in, of course.
:::note:
If you return to the Vermentino Vineyard after rescuing the Armorer, you should find him waiting to put his trusty hammer to work for you.
:::
| Reward: For resolving the problems plaguing the Vermentino Vineyard |
|---|
| XP / 525 Crowns |
:::note:
You’ll only get the aforementioned reward when you return to Matilda de Vermentino at Plegmund’s Bridge, regardless of whether you’ve also completed the objectives for Wine Wars: Coronata or not. If you complete one quest’s objective but not the other, you’ll get the reward from the appropriate vineyard owner, who then purchases the Belgaard Vineyard. If you complete both quest’s objectives, you’ll be rewarded by both vineyard owners, making this the suggested approach.
:::
If you’re following this guide, you should have completed both Wine Wars: Vermentino and Wine Wars: Coronata. Don’t turn either of them in yet, however, as you can deal with the conspiracy to sabotage both vineyards by dealing with the quest Wine Wars: The Deus in the Machina, which will be covered next.




No Comments