Fast-travel to the Border Post, which will serve as a fine staging point for the run up to Novigrad. The goal, obviously, it to reach Novigrad, but there’s an entire island full of exploration to do along the way, complete with monster to kill, side-quests to resolve, useful signposts to discover and Gwent to play!
| Important Items in this Area | . |
|---|---|
| Diagram: Feline Silver Sword - Superior | Julia Kenyon’s Diary |
| Letter from Toben | Prince Adrien’s Journal |
| Letter | Diagram: Feline Steel Sword |
| Captain’s Log | Silver Dagger |
| Mage’s Note | Deithwen |
| Diagram: Feline Crossbow | Noonwraith Trophy |
Monster Den (Level 18)
From the Border Post head north, cross a bridge, and follow a road north. Be wary, as the critters here can be a good bit stronger than they were in Velen, although the foes in the southern parts of Velen should have prepared you somewhat for the critters up here. Case in point, your first destination. Head north along the road leading from the Border Post and take the first trail you find to the west, ignoring a trail to the north-east along the way. Follow this trail west, then north-west until you find a Monster Den location south of the road. At that point, veer off the road to the south to a cave, which is guarded by Nekkers (level eighteen)..
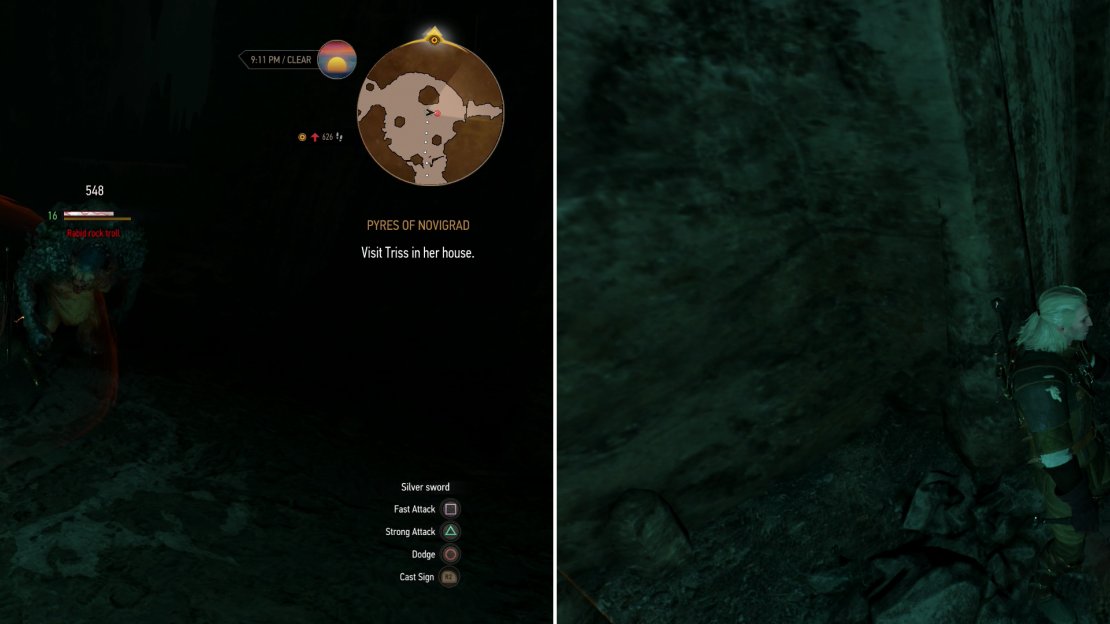
Once the vanguard is dead, head inside the cave, where more Nekkers await. Continue north, down some stairs, and into a large central chamber, where more Nekkers are joined by a Rock Troll (level sixteen). Try to get rid of the Nekkers before tackling the Troll, as the two are only really dangerous in the presence of the other. Once the Rock Troll is isolated, it’s business as usual; Quen and strong attacks (don’t get greedy!) followed followed by a quick dodge after landing the blow are all you need to emerge victorious. Once it’s dead, climb a ledge to the east and blast some stalagmites you’ll uncover a chamber with a chest in it, which in turn contains the “Diagram: Feline Silver Sword - Superior” . In a larger chamber to the west you’ll find two chests-one large, one small, which both contain goodies worth grabbing.
Defeat the Nekkers and the Rock Troll (left) then claim the treasures hidden in their cave (right).
Monster Nest(s) (Level 9)
Leave the cavern and head north-west through the forest until you find a pair of Monster Nests a short distance apart. Both are Endrega nests, and are guarded by Endrega Workers (level nine) and Warriors (level nine). Stomp the bugs and blow up their nests, then loot them for a small collection of runes and monster bits. Yum!
| Objective | Reward |
|---|---|
| For destroying the Monster Nest | 20 XP (each) |
Ursten
From the Endrega nests head south-west to find the village of Ursten. Besides the signpost, there’s not much of interest here… just a Merchant who doesn’t even play Gwent. Oh well. On a more positive note, there’s plenty of things the loot in and around the houses of Ursten, just follow the road through the town to the south until you reach some swamps where fortifications were erected to the south and east.
Don’t bother with the south too much, as that’s an island you’ve already explored (Monster Nest, Rotfiends, ring any bells?), but do take a diversion along the shore to the east and loot the various crates, barrels, parcels and chests that are lying around. The chests are mostly in the water, so keep your eyes to the south and use your Witcher Senses to spot them out. You may have to kill a small group of Bandits (level seven) along the way, but that’s hardly a challenge anymore.
John’s New Job
Return to Ursten and leave the village by taking a road to the north until it forms a triangle splitting in three directions. Follow the north-western road a bit and you’ll find a camp south of the road. If you rescued John Verdun… the deserter that was going to be fed to Drowners back in Velen. Seems he wasn’t brave enough to stand and fight the Nilfgaardians, but he’s proved more than capable of banditry.
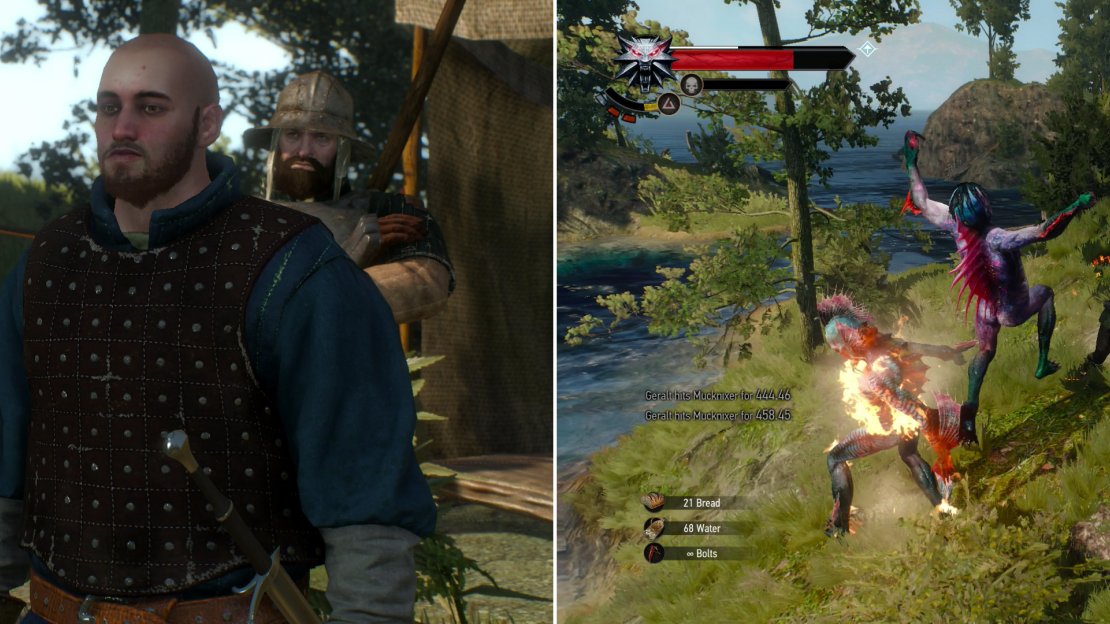
He’ll offer to thank you for rescuing him earlier. If you accept he’ll hand you some Crowns and you’ll get an experience reward. Alternatively you can state your regret for rescuing John, which provokes him and his Bandit buddies. Kill them, then search some note under a shelter to the south to find a “Letter From Toben” . Unfortunately, despite John having all kinds of money to give you for saving him, if you kill him he’s surprisingly poor. Funny thing, that.
| Objective | Reward |
|---|---|
| For reuniting with John Verdun | 50 XP / 50 Crowns |
| For fighting John Verdun | 50 XP |
If you rescued him, John Verdun has been up to mischief in the meantime (left) defeat the Mucknixers near the Coast of Wrecks to claim the treasures along these islands (right).
Hidden Treasure: Coast of Wrecks (level 15)
Head west and slightly south from John’s camp to reach the coast. South-west of the coast you’ll find three small islands, on the eastern-most of which is absolutely infested with Drowners (level ten) and a few Mucknixer (level fifteen). There’s a lot of them and the ground isn’t ideal, but Quen and a lot of dodging will get you through it just fine. Kill the horde of Necrophages and search the western end of the island to find the remains of a ship, near which you’ll find a chest which contains a “Letter” , amongst other loot. Pick it up and read it to start (and advance) the quest “Coast of Wrecks”. Venture west into the water to find a chest containing quality loot, then turn south-west and dive to find another chest. The third chest can be found on the northern end of the island to the south, while the fourth is just to the south-west of the last one, past a bush.
Widows Grotto
Swim north to return to the mainland… or at least, to a more significant island. Continue up the shore to the north to find a cave entrance, and the “Widow’s Grotto” signpost. Head inside the nearby cave, where you can score two chests and a few other, less profitable containers.
Bandit Camp (level 9)
Head uphill to the east to find a watch tower with some parcels on it you can loot. Do so, then continue east to find a road running to the north. Follow it north until it forks, then turn east a short distance to find a Bandit’s Camp. Kill the Bandits (level nine) then loot the houses, in one of which are two chests, along with other containers full of goodies.
Scoiatael Camp
If you head north from the Bandit Camp you’ll reach a Scoia’tael camp in the woods, where you can find a Merchant to trade with, although he doesn’t sell anything worth buying at the time, unless you’re really hankering for some glyph and runestone diagrams. He’ll be a bit more interesting later, however.
Lucian’s Windmill
Leave the Scoia’tael camp and head east to find a trail (or you can follow the road north-east from the Bandit’s Camp). Continue following the trail south, then south-east to find a farmland dominated by a large windmill, marked on your map with the Lucian’s Windmill signpost. There’s a few things you can loot under and around the windmill, and there are also some Dwarves tending some artificial beehives north and north-east of the windmill.
Smugglers Cache
Return to the Bandit Camp area and follow a trail northwest into a forest. You’ll need to follow this road quite a distance, ignoring side trails that branch off until you find some trees that have been knocked (torn?) down around an abandoned campsite. At this point the road will fork three ways: north, northwest and northeast. Note that you’ll find yourself right back at the Scoia’tael Camp if you follow the northeastern road to a fork, and then east at said fork. No point in backtracking there, however, so instead turn west at the fork near the collapsed trees, head past the abandoned camp, and keep going west until you hit the water. Swim south-west to find a Smuggler’s Cache event, dive near the barrels and score three chests anchored here.
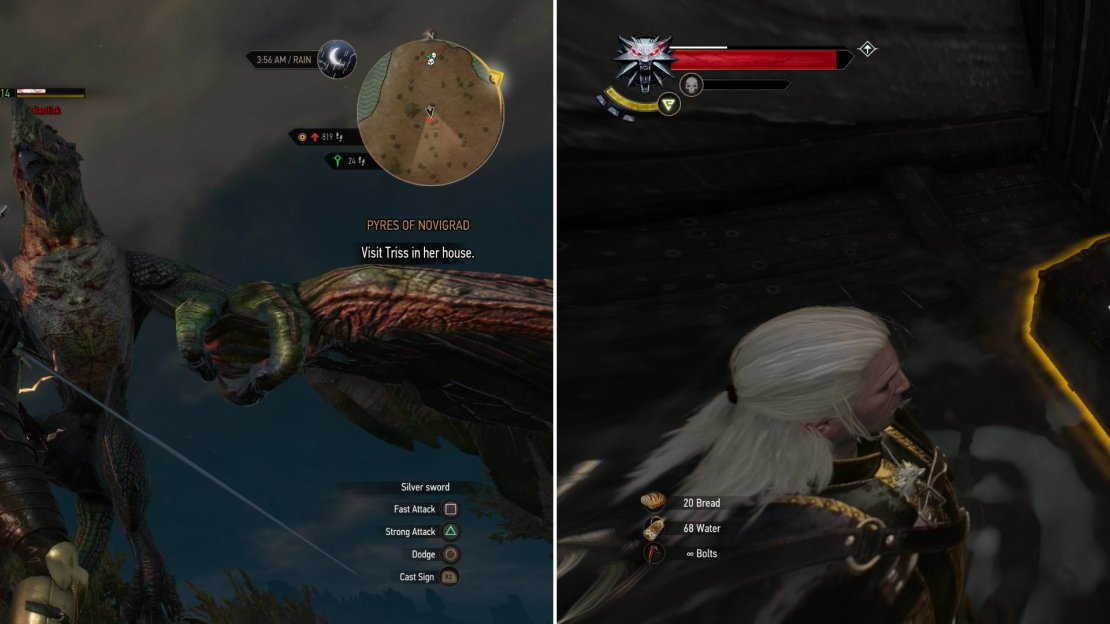
Defeat a Basilisk (left) then board a neaby shipwreck and claim the treasure it’s still carrying (right).
Guarded Treasure (level 14)
From the site of the Smuggler’s Cache continue swimming west until you find a small island with a scuttled ship near the eastern shore. Swim around the southern end of the boat, then swim north between the shore and the boat to reach a strip of shore north of the boat. Here you can find a skeleton, near which is the book “Captain’s Log” . Take it, read it, then turn around and swim onto the boat, looking for the gap in the railing where you can climb aboard. One on the ship head below deck to find a chest which contains the book “Mage’s Note” and the “Diagram: Feline Crossbow” .
Leave the boat and explore the northern end of the island to find a nesting Basilisk (level fourteen). Ciri battled one earlier, now it’s your turn. The Basilisk fights much like a Wyvern, save the Basilisk can poison you, and it’ll spit poison at your from a distance, as you experienced while playing as Ciri. It’s also somewhat more fond of staying in the air, trying to remain aloft as much as possible. Kill the beast and search its nest, north of which is a corpse containing some nice loot.
From the Lighthouse to Novigrad Outskirts
Swim back to shore then continue following the coast north-west until you find the “Lighthouse” signpost. The lighthouse itself contains some loot you can crab, but nothing exceptional. Now follow the northern coast to the east to find the “Logger’s Hut” signpost, which again, isn’t very interesting, but it’s worth getting the signpost. Continue east along a road until you reach the outskirts of Novigrad. The houses here are worth looting for the random goodies you can find, but be especially sure to loot a house with plenty of cats - and subsequently a bunch of dead rats - outside of it (this house is along the coast west of the Portside Gate signpost and has pillars painted light blue). Inside you can find “Julia Kenyon’s Diary” , which updates the quest “Scavenger Hunt: Cat School Gear” .
Further east you’ll find two bridges - both with their own signposts - which lead north to southern Novigrad. The “Portside Gate” is to the west, while the “Glory Gate” is to the east. In between them, further inland (to the south) you can find a notice board, where you can pick up the notices “Contract: Devil in the Woods” and “Contract: The White Lady”, which start the quests “Contract: Lord of the Wood” and “Contract: The White Lady” . The former is too high of a level for you right now, but the latter should be well within your means. Ignore the notice “High Stakes Gwent Tournament!” as the related quest is currently unavailable, despite being posted.
Smugglers Cache
Before you run off to deal with any quests, though, head to the “Glory Gate” signpost, and from there dive into the canal outside of Novigrad and swim to the north-east to find a “Smuggler’s Cache” event. Loot the three chests connected to barrels, then return to shore. Easy-peasy.
Contract: The White Lady (level 16) Walkthrough
You might as well do the quest “Contract: The White Lady” , since it takes place to the south of where you are now. Head south from the notice board where, behind a house, you’ll find a lady named Helma, who will tell you about the White Lady and her most recent victims; Micko and a band of fellow drunkards who chose an unusual - but unfortunately ineffective - method for trying to banish the White Lady. Accept to help (after haggling for more money, first, if you wish) then head off to find this White Lady.
Head south-east from the outskirts to find a search area, pop on your Witcher Senses, then search to find Micko and his gang just east of the center of the search area, unburied in the fields as Helma said. Use your Witcher Senses and investigate the bodies and some discarded bottles, as well as a crispy old pool of blood south-west of the bodies, if you’re a glutton for information. After searching the three bodies follow a trail to the south (after examining it) and it’ll lead you to Drahim Castle.
Search a blood trail outside the castle, which seems to lead down some stairs. Before you follow the trail, however, let’s explore the castle, as there’s some pretty nifty loot inside. First loot a barrel south-west of the stairs down, where you’ll have a chance to score quality loot. There will be plenty of barrels and parcels in the castle which hold Diagrams and Formula - containers which normally don’t contain such treasures. Be sure to loot everything. There’s only one barrel in the first chamber of the castle, but you’ll be well-served by having stickier fingers than usual in the upcoming areas.
Leave the castle and head south-east around the exterior to find a door which can be broken down with Aard. Further south-east, on a stone resting against the corner of the castle you’ll find a Witcher sign on some rock, which should hint at the quality of loot that lies ahead. Use your handy-dandy Aard sign in lieu of a key to coax the door to open, then enter the chamber beyond. There are multiple levels up and down, littered with great loot at no cost to yourself. Atop the tower are the remains of a whirlwind near a chest that can be investigated, for what that’s worth, while at the bottom of the tower you’ll find a chest containing “Prince Adrien’s Journal” and the “Diagram: Feline Steel Sword” . If you’re fortunate, you could walk out of this place possessing half a dozen new Diagrams/Formula.
Leave the tower and return to the main floor of the castle, this time going down the previously neglected stairs, where a trail beckons you. Head down the stairs, loot whatever containers are around and go down another flight of stairs to the south-east, where you’ll find the missing body. Examine it and Geralt will decide he needs to find something that belonged to our prey, so he can lure it out.
| Objective | Reward |
|---|---|
| For finding all of the Noonwraith’s victims | 25 XP |
Recover a possession dear to The White Lady (left), which you can use to summon, and subsequently slay, the Noonwraith (right).
Return to the outskirts and talk to Helma, who, when Geralt reveals the nature of the White Lady, will instantly identify who the victim was in life. You’ll be given the significant belonging you need to lure the fiend, as well as some back-story about the cause of this event. Take the “Silver Dagger” you’re given and return to the site of Micko’s massacre. Prepare as you wish, then activate the fire to dispose of the dagger and summon the White Lady. Typical Noonwraith rules apply; use Yrden to force the wraith to manifest so you can harm her with your Silver Sword, then attack-and-dodge until she’s dead, smiting her life-draining clones when she summons them. Loot her remains for the Silver Sword “Deithwen” and another “Noonwraith Trophy” . Once the looting is done, return to Helma and collect your reward.
| Objective | Reward |
|---|---|
| For slaying the Noonwraith, The White Lady | 260 XP / 184 Crowns |


"down around an abandoned campsite."
You can start the "Contract: Lord of the Wood" quest by checking the body here, but the quest itself will be described later.