
After facilitating a meeting with the Bloody Baron, Geralt will finally get a first hand report from someone who met the wayward Ciri. Unfortunately this tantalizing tale was just a teaser, and before disclosing the rest the ![]() Bloody Baron has his own missing family to worry about. In order to learn more from the Bloody Baron, you’ll need to help him find his wife and daughter, which is the major objective of the main quest
Bloody Baron has his own missing family to worry about. In order to learn more from the Bloody Baron, you’ll need to help him find his wife and daughter, which is the major objective of the main quest ![]() Family Matters in The Witcher 3.
Family Matters in The Witcher 3.
Quest Objectives
Starting Family Matters
The quest Family Matters will begin immediately after the Bloody Baron finishes recounting how he met Ciri, a tale largely retold via the playable flashback quest Ciri’s Story: The King of the Wolves. Once that flashback ends this quest begins, and it doesn’t really matter what you say to the Bloody Baron, if you want more information about Ciri’s current whereabouts you’ll need to put your Witcher senses and training to use for the despot. His men are capable of shaking down peasants and bullying the region into submission on behalf of Nilfgaard, but not at tracking people through the dangerous swamps of Velen. Once the dialog is over with, follow the Bloody Baron outside of the room you’re in and upstairs - you’ll need to search the rooms to find some clues that’ll set you on the trail of the Bloody Baron’s family.
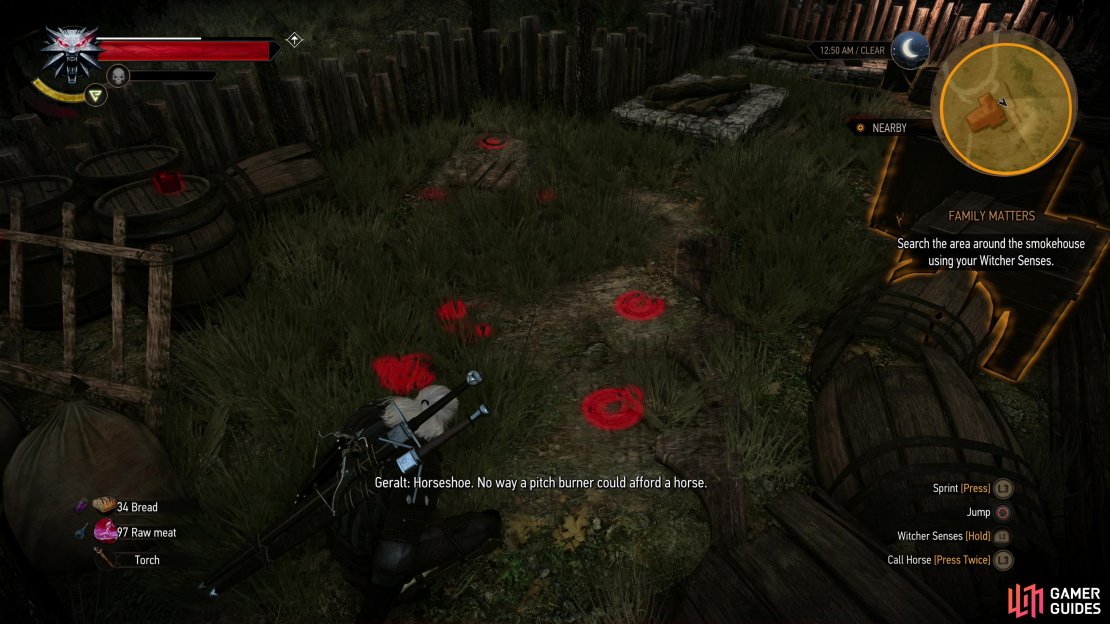
Search Tamara’s Room
Despite the two search areas you have on the map, searching Tamara’s room (west) is optional, but it’s still worth doing for loot and some details that help fluff up the story. Enter the room to the west and activate your Witcher senses, then investigate the following:
- A
 Letter to Tamara on a bookshelf to the southwest.
 - A doll (of the black magic variety) next to the bed in the bedroom to the northwest)
- A dresser along the wall to the southeast. It contains some
 Incense and a Rusty
  Key. Grab both.

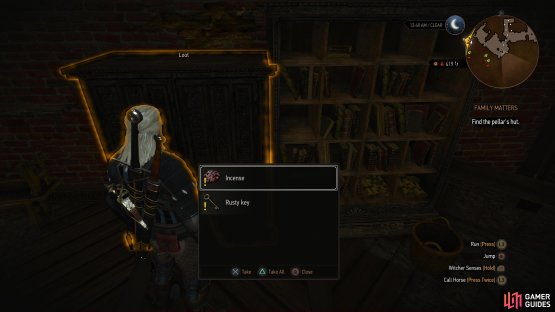
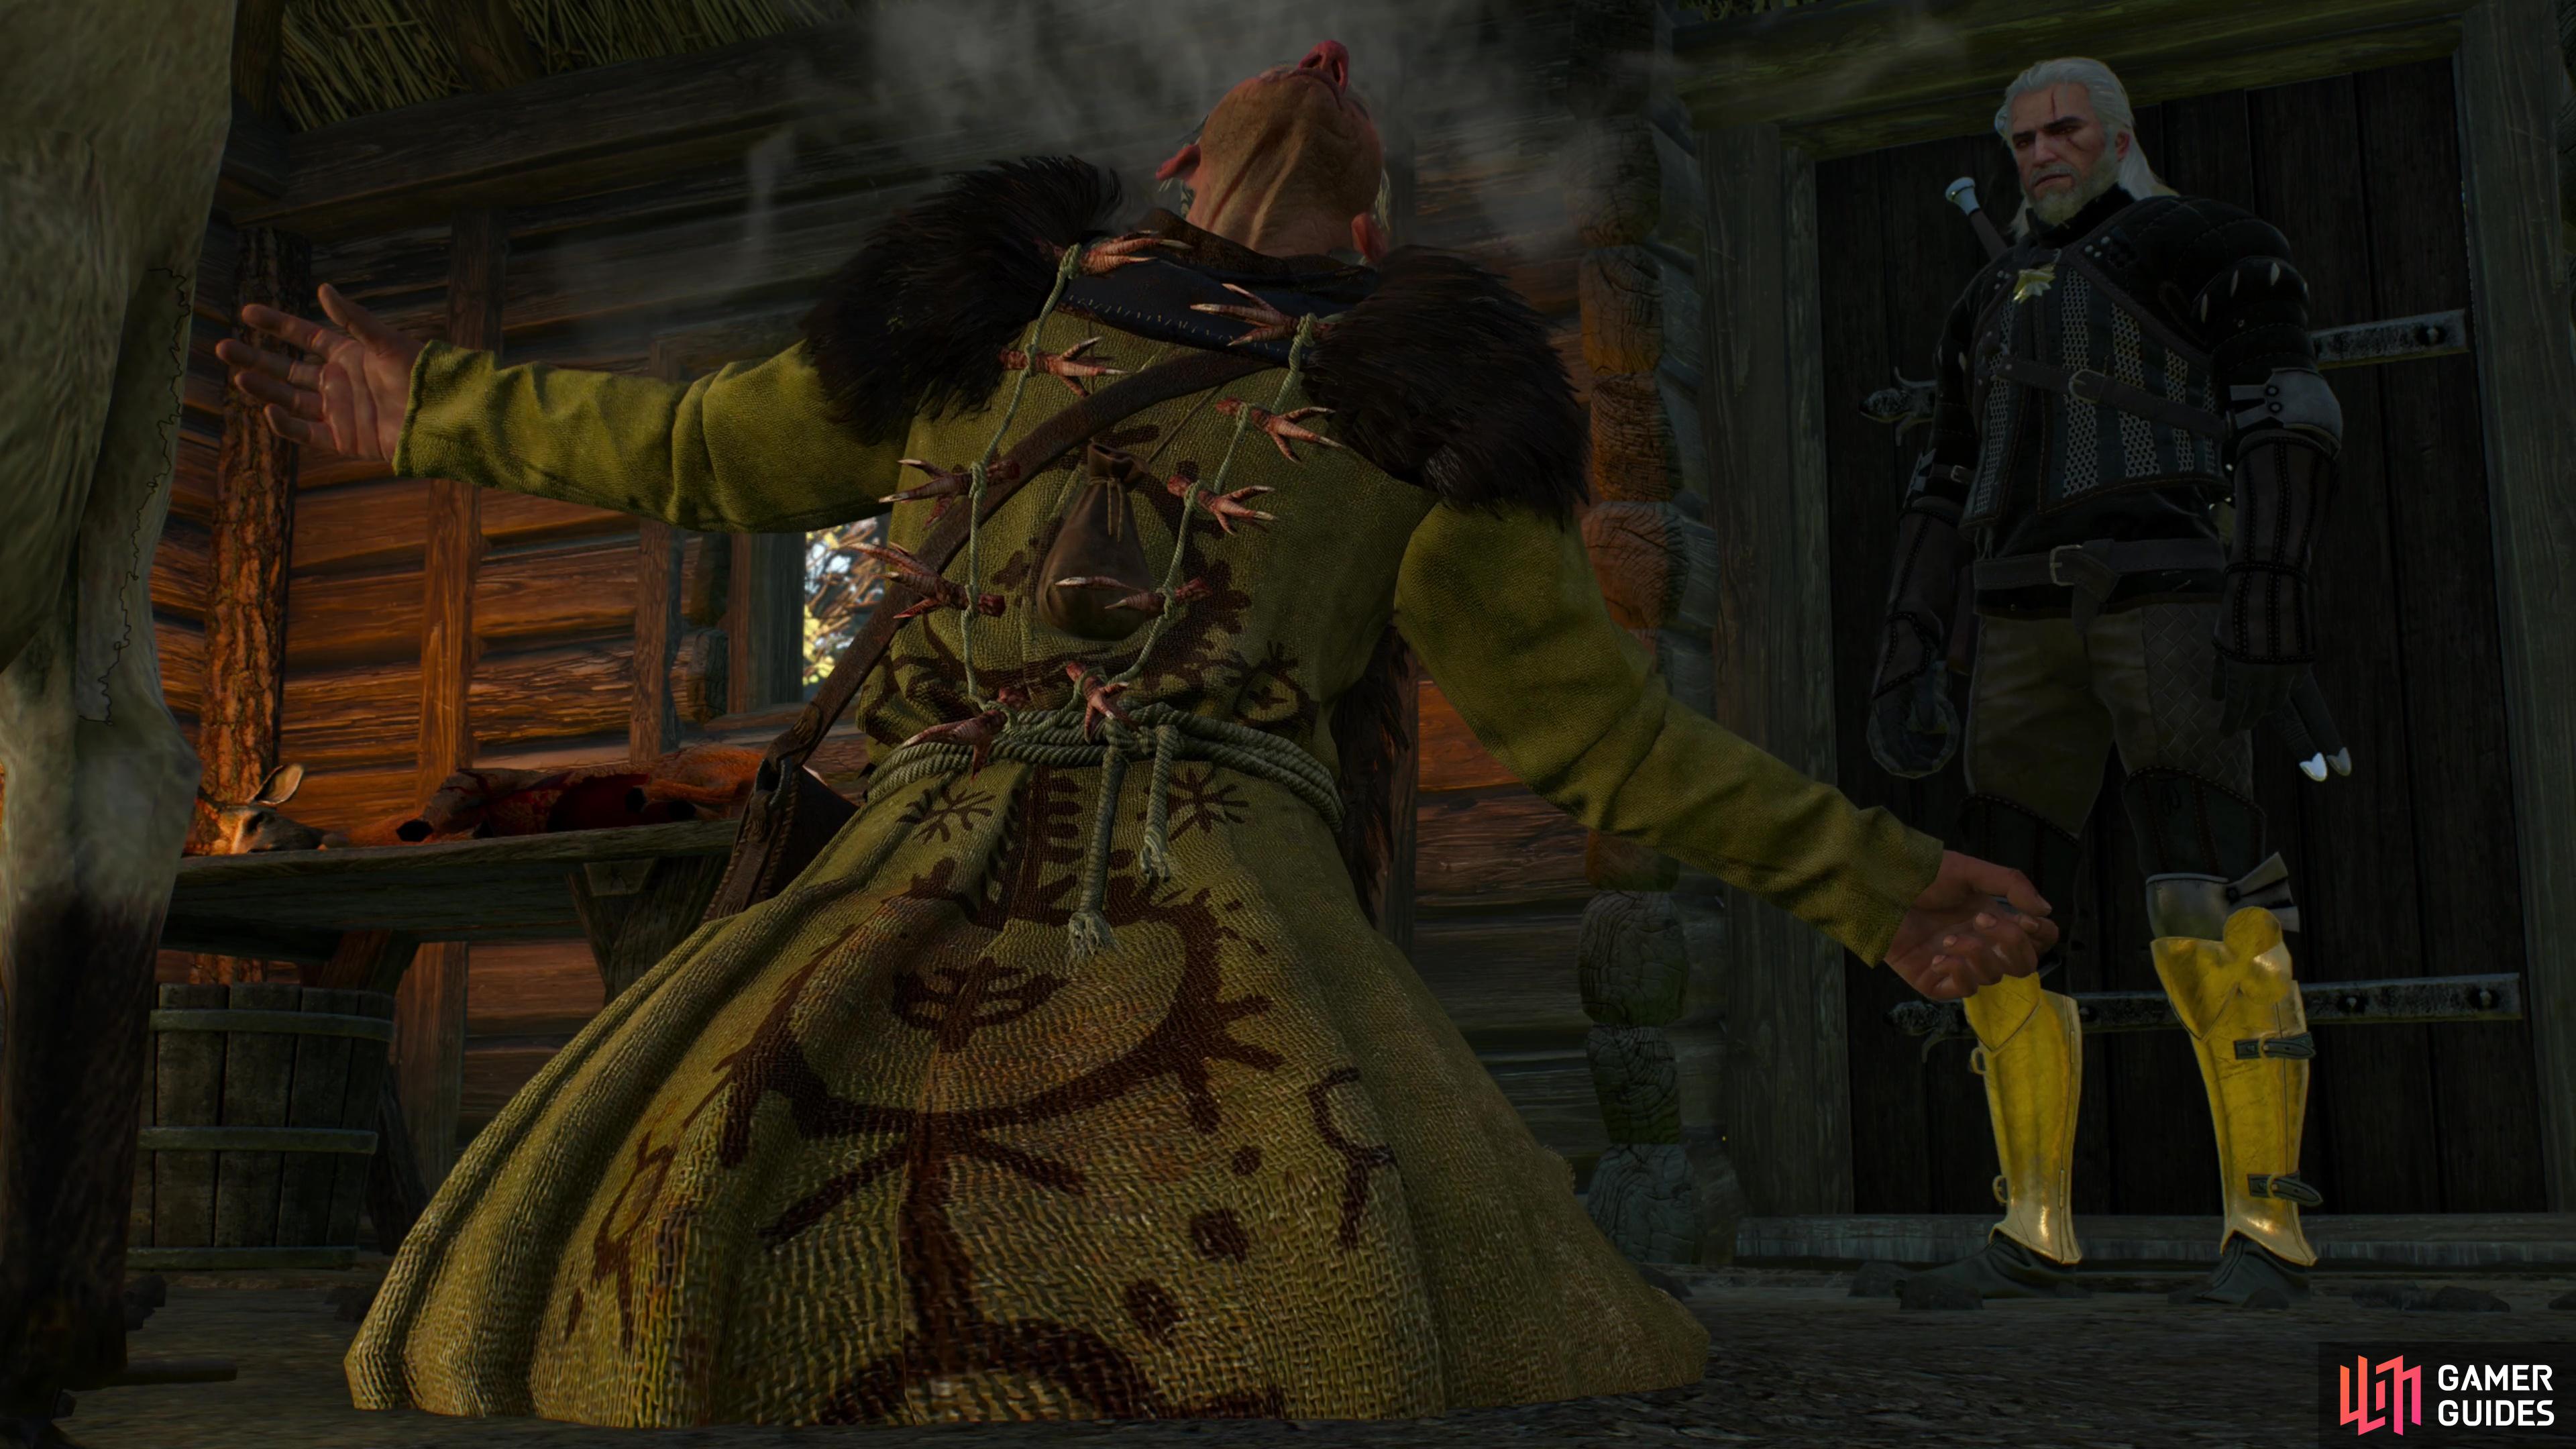
(1 of 2) Search a dresser in Tamara’s room to find some Incense and a Rusty Key,
Search a dresser in Tamara’s room to find some Incense and a Rusty Key, (left), then follow the incense trail to find a locked shrine in the bowels of the castle. (right)
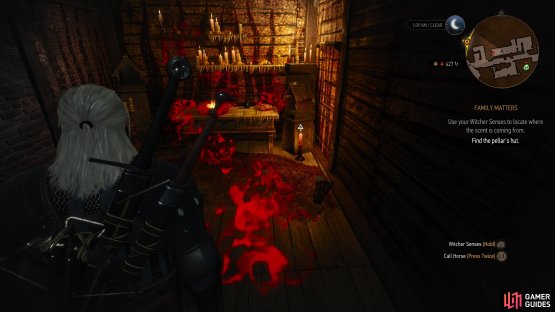
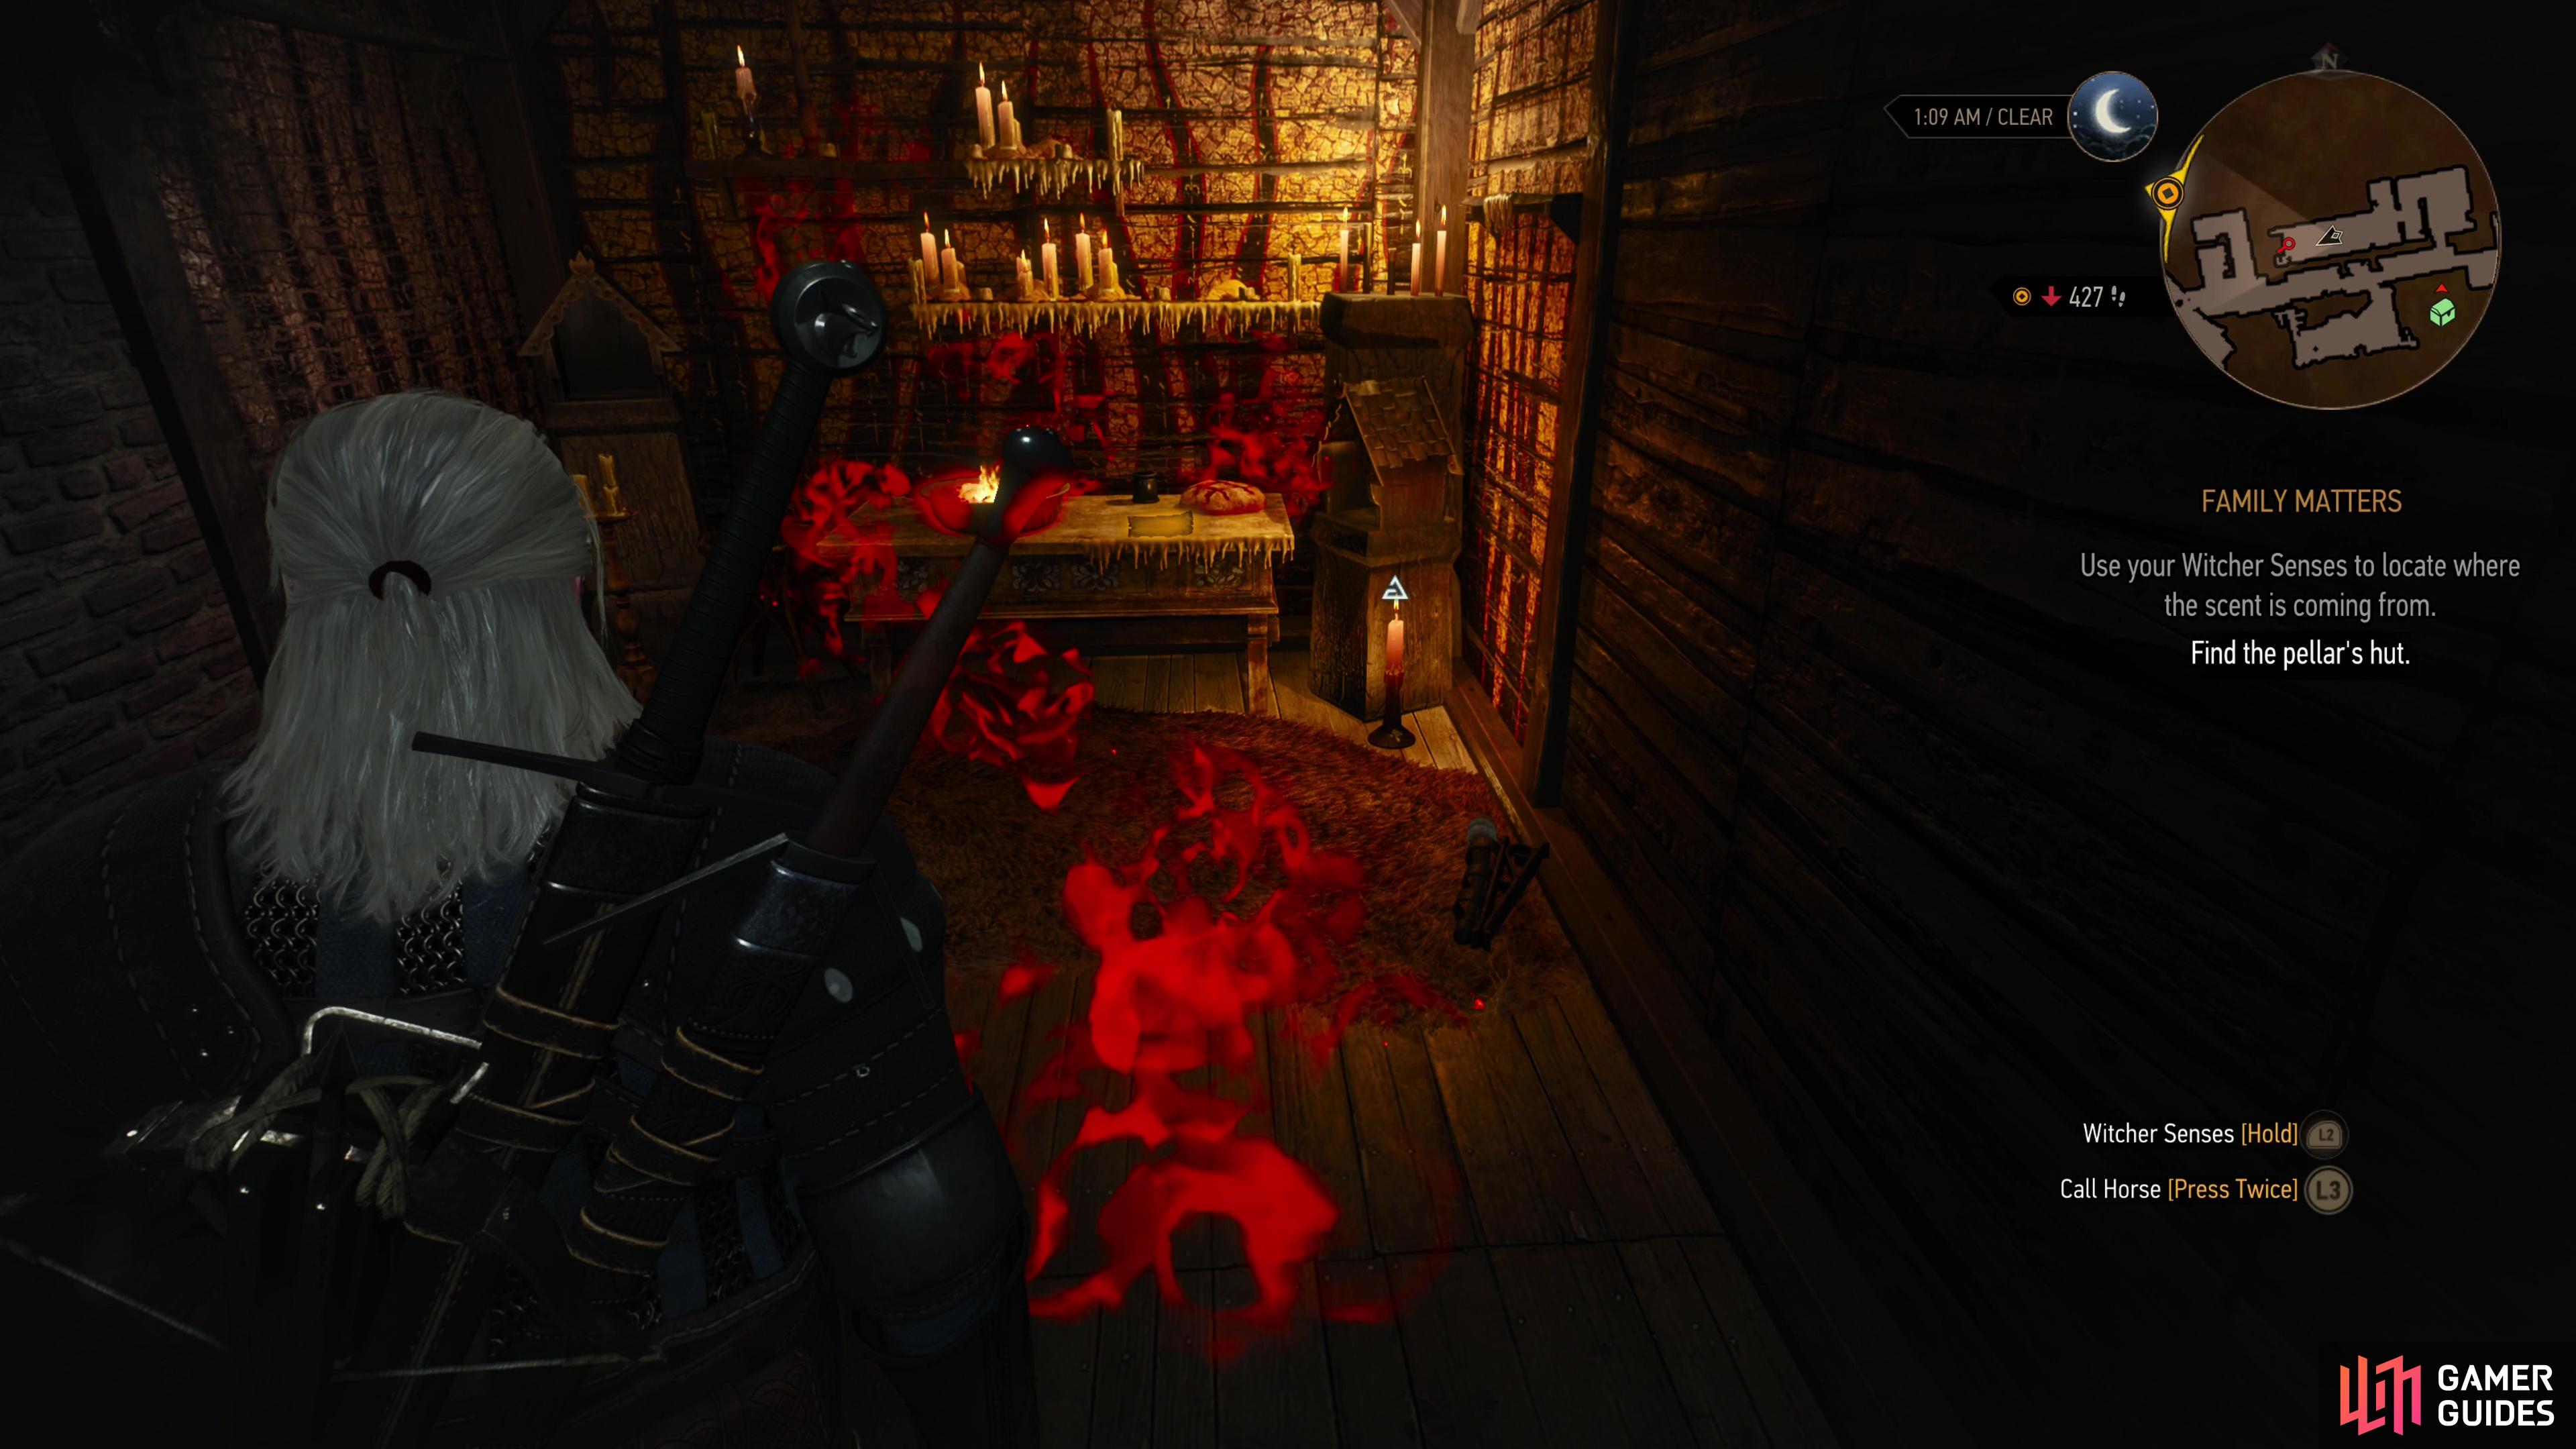
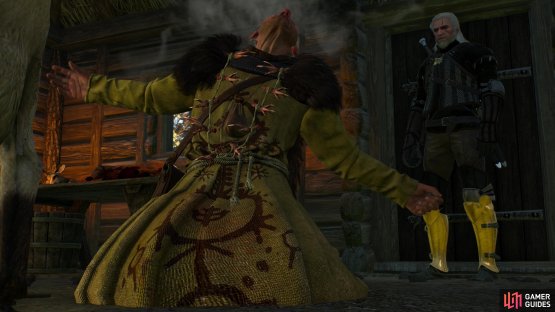
Picking up the Incense will leave a scent trail Geralt can track. Take the opportunity to be distracted by this diversion and follow the scent trail downstairs into the cellar, then turn northeast down a hallway until you reach a door, at which turn left (north) to enter a storage room. Work your way around some shelves and go through a locked door - which you can open, thanks to the key you just looted - to find a hidden shrine. Examine the still-burning brazier on the table along with the note ![]() A prayer. Seems Tamara was corresponding with the Cult of the Eternal Fire and may be a recent convert. Oh, and she wishes ill on her father. Lovely. Head back up to the third floor, talk to the Bloody Baron and pick the option ”Found a doll.” to get a rather odd story about the toy.
A prayer. Seems Tamara was corresponding with the Cult of the Eternal Fire and may be a recent convert. Oh, and she wishes ill on her father. Lovely. Head back up to the third floor, talk to the Bloody Baron and pick the option ”Found a doll.” to get a rather odd story about the toy.
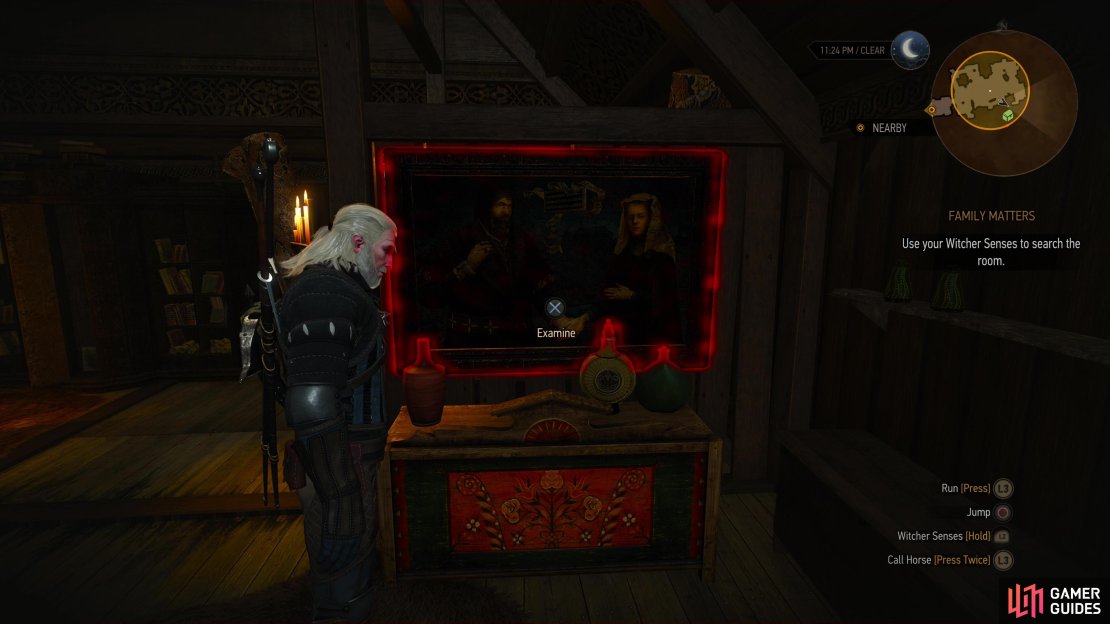
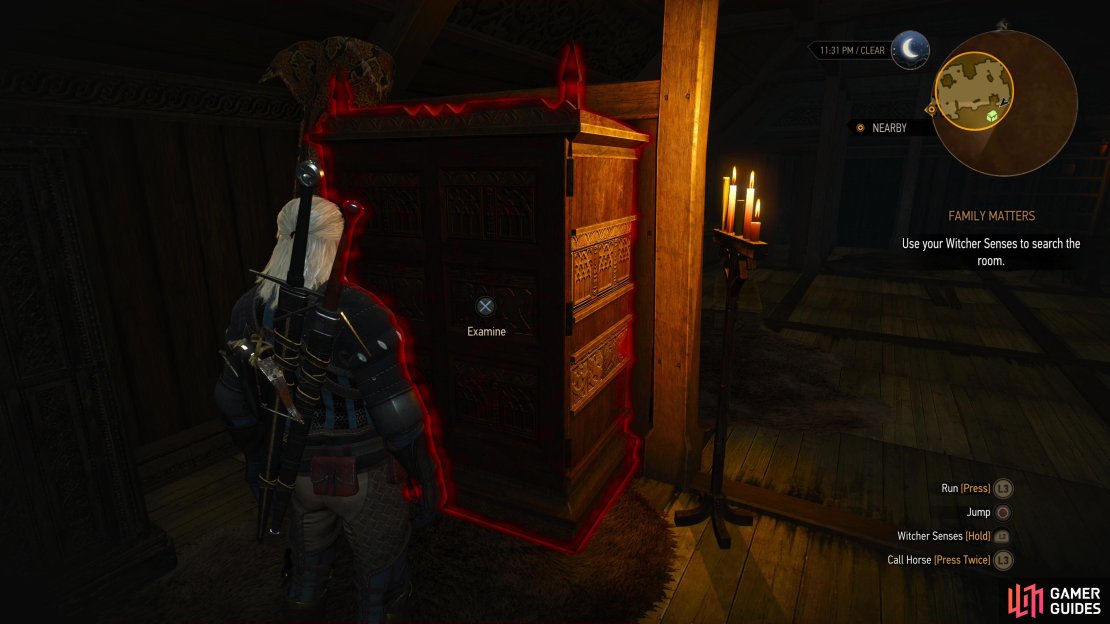
Search the Bedroom
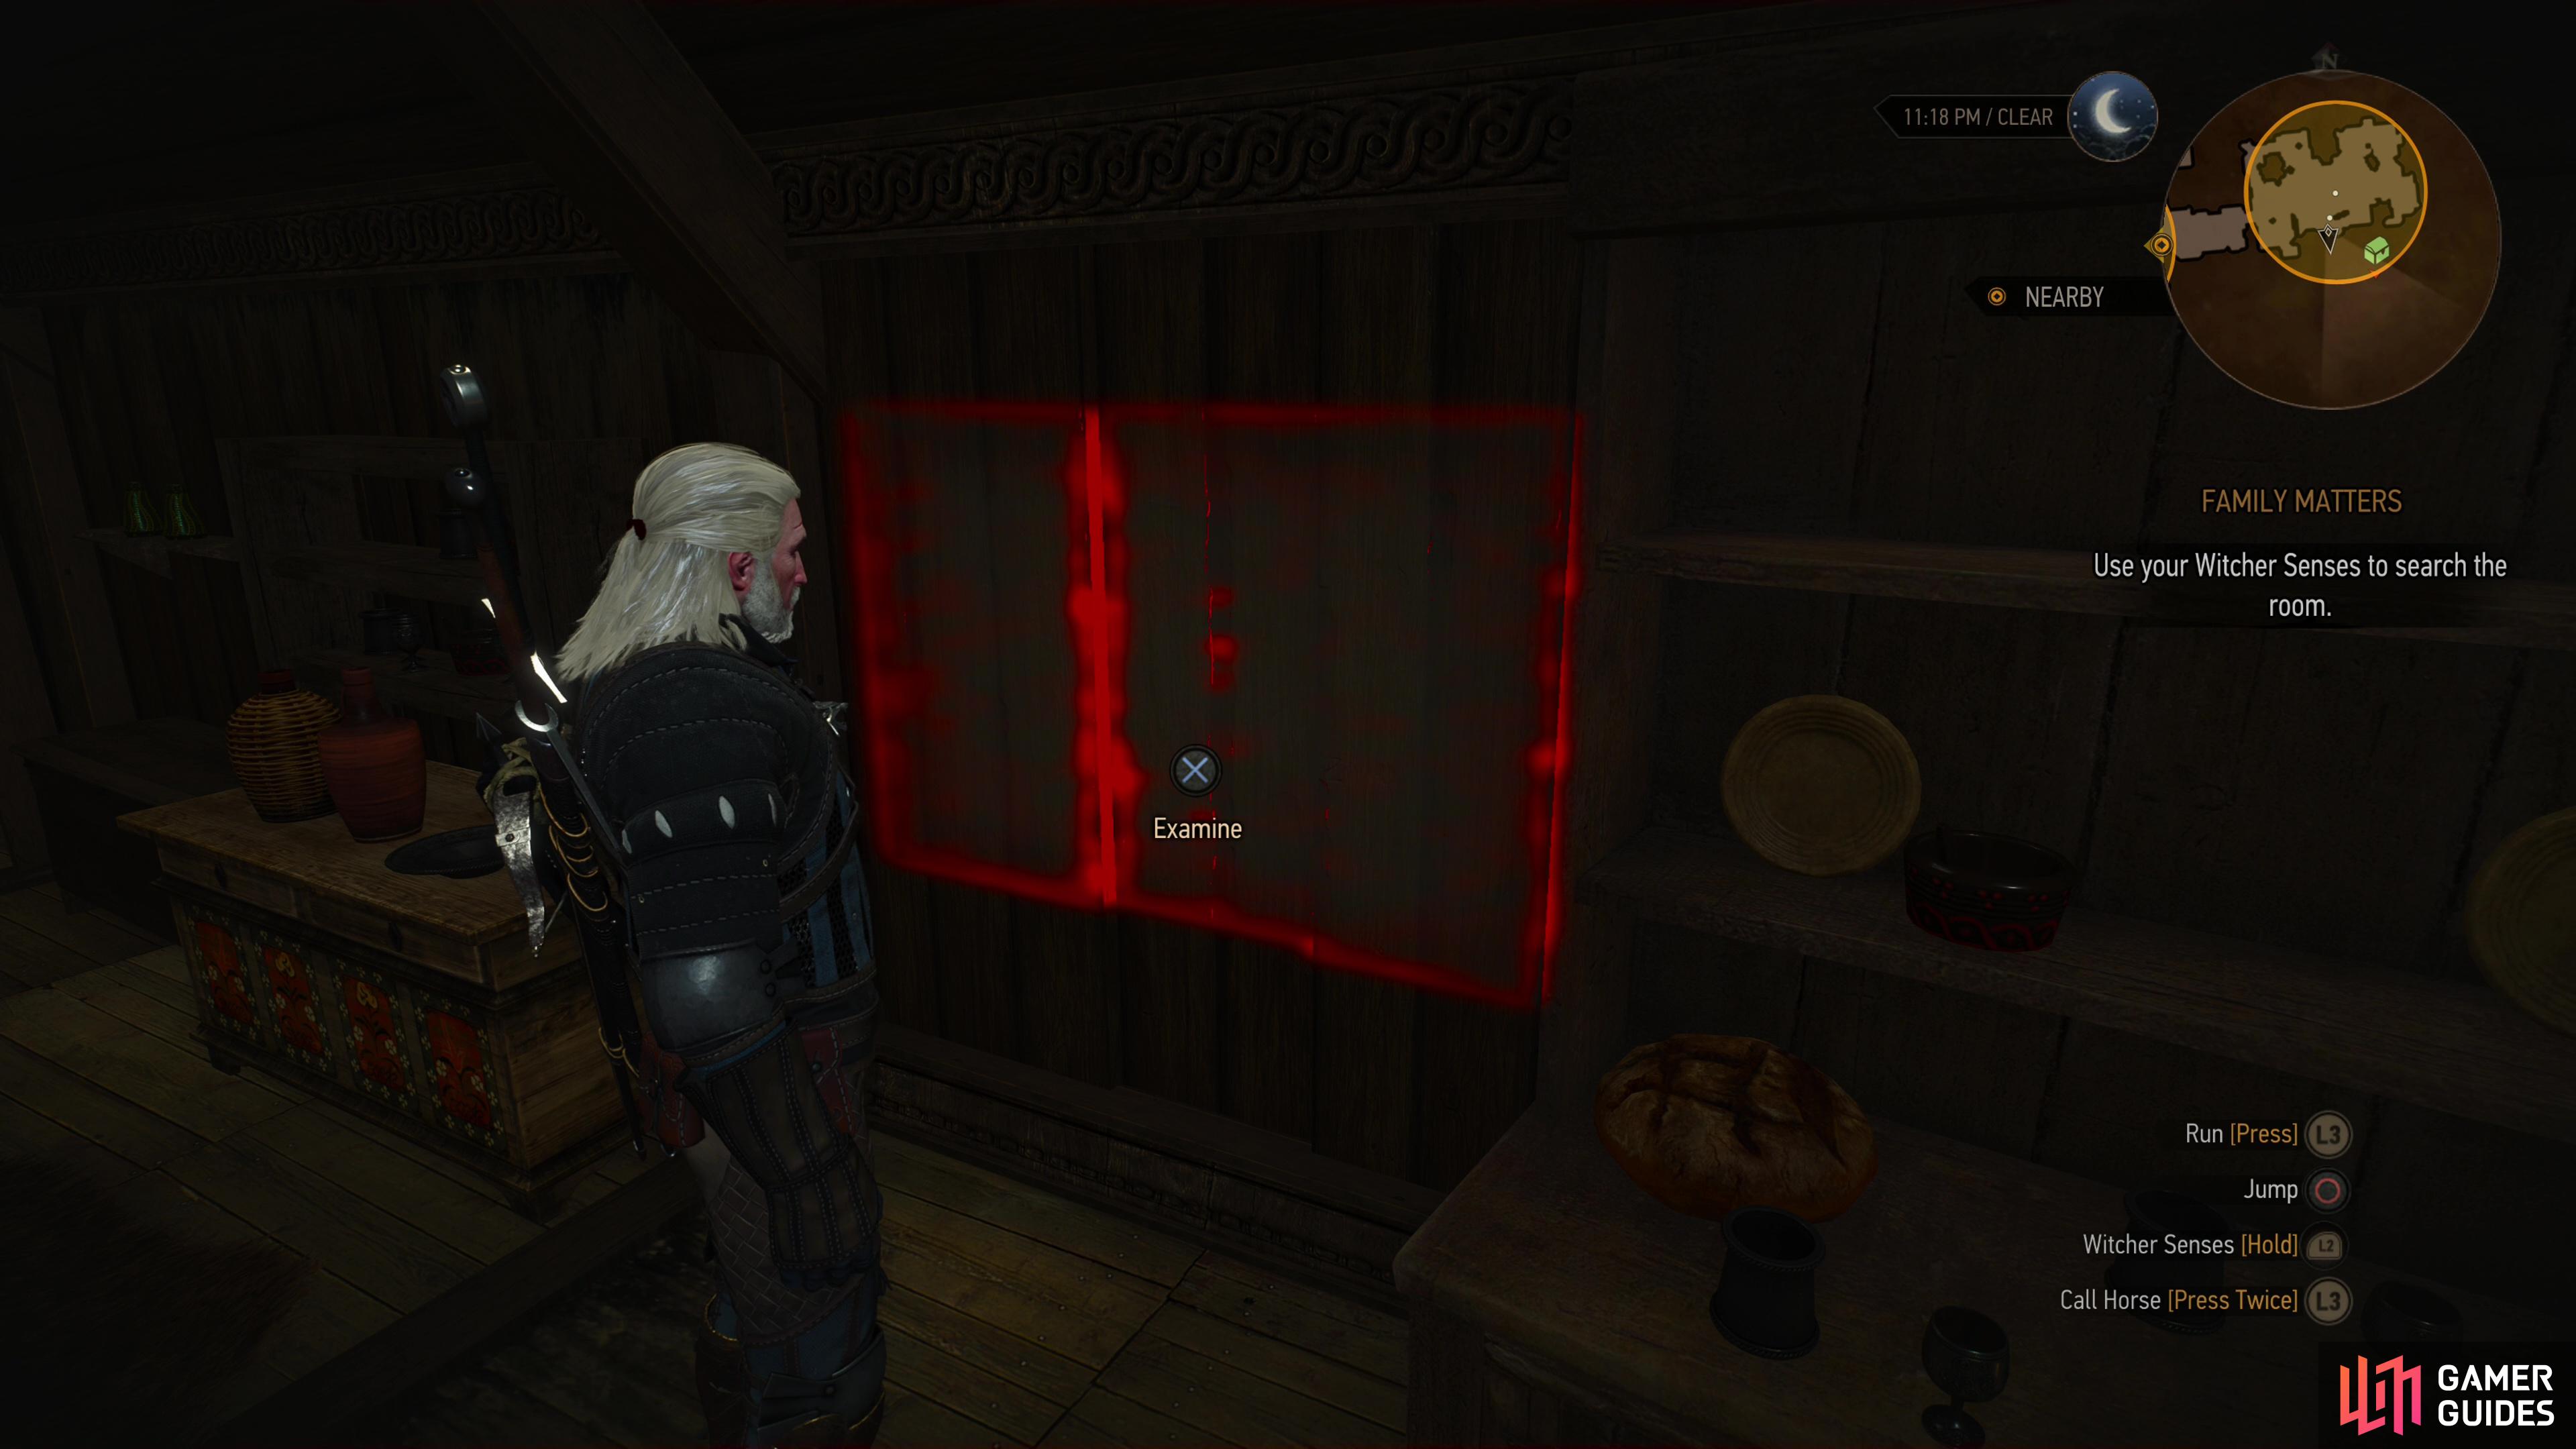
One room down, one more to go, and this one actually advances the questline! Enter the bedroom to the east and use your Witcher senses to search examine the following:
- A discolored rectangular patch on the wall to the south.
- A painting on the wall to the east of the discolored spot.
- A cabinet in the southeastern corner of the room.
- Some flowers in a vase on a table along the eastern side of the room.
- A damaged pillar near the table with the flowers.
- A candlestick on a table along the western end of the room.

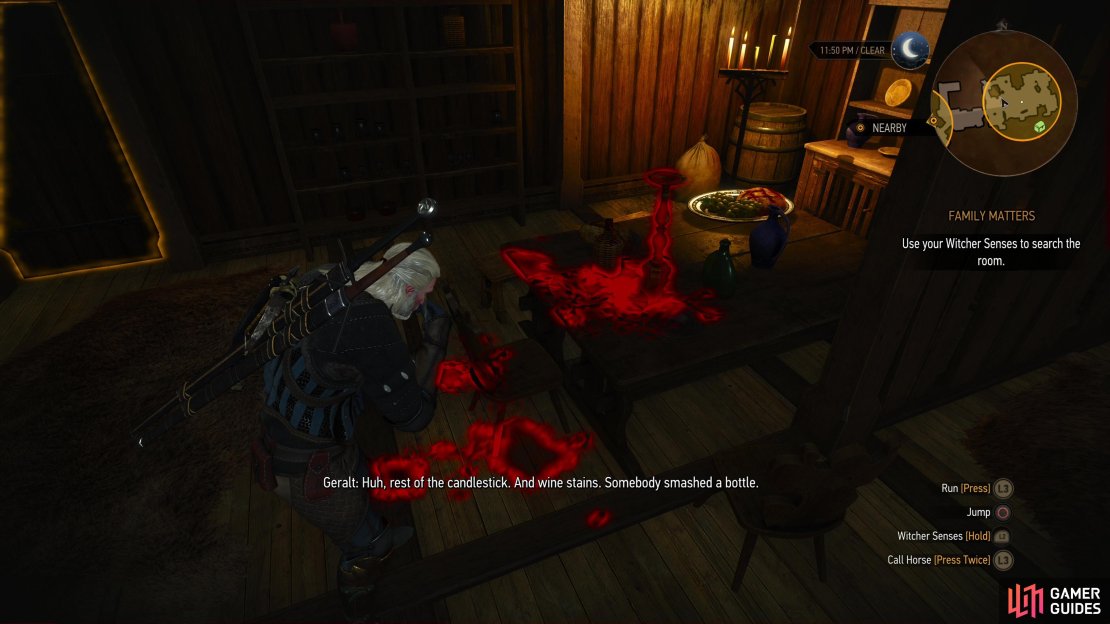
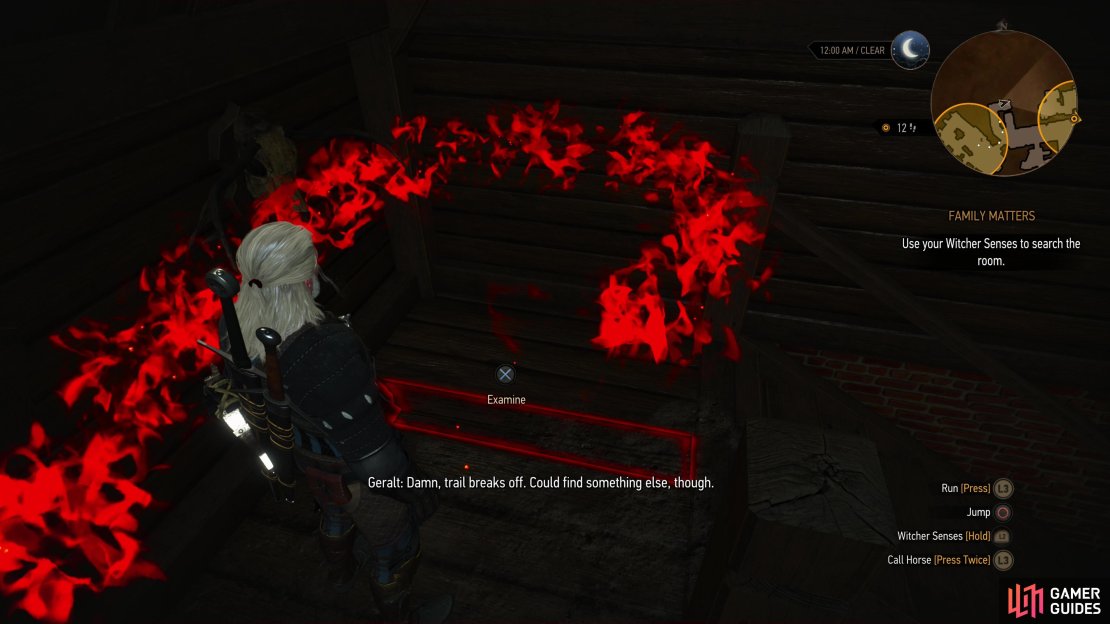
Once you’ve searched all those, activate your Witcher senses again and follow a scent trail outside and down a flight of stairs. Search the marked floorboard to find a ![]() Talisman, then talk to the Bloody Baron about what you found. Ask about the talisman and he’ll mention a Pellar that lives nearby - the other dialog options aren’t essential, but the Bloody Baron’s responses are worth noting.
Talisman, then talk to the Bloody Baron about what you found. Ask about the talisman and he’ll mention a Pellar that lives nearby - the other dialog options aren’t essential, but the Bloody Baron’s responses are worth noting.
Play Gwent with the Bloody Baron and Complete Ciri’s Room
To continue with this quest you’ll need to pay this Pellar a visit, and as he lives northwest of Blackbough, you’ll need to do some walking to get there. Before you go, however, there are more things to do around the castle. First, and most obviously, you should loot the place. Everything that’s not bolted down. Nobody will get mad and there are tons of alchemical and crafting components lying in various containers. You should also talk to the Blood Baron in his chambers on the second floor, as he’s now open to playing Gwent. He is, in fact, one of the players you need to defeat during the quest Gwent: Velen Players and he’ll yield the ![]() Sigismund Dijkstra card if defeated. Finally, you should search Ciri’s room on the eastern end of the second floor, as doing so will complete the aptly named Ciri’s Room quest. When all that’s done, it’s time to leave
Sigismund Dijkstra card if defeated. Finally, you should search Ciri’s room on the eastern end of the second floor, as doing so will complete the aptly named Ciri’s Room quest. When all that’s done, it’s time to leave ![]() Crow’s Perch behind so we can question this Pellar.
Crow’s Perch behind so we can question this Pellar.
Meet the Pellar
When you’re ready to find this Pellar, make your way to Blackbough, which is west of Crow’s Perch. Once there, follow a trail north into the woods to find the Pellar, or rather, his hut. And you’re not the first gentleman caller to pay the Pellar a visit, it seems, as several of the Baron’s Henchmen are gathered around the hut, and given their ambient dialog, they’re not here to make friends. Approach the thugs and their leader will intercept you, where you’ll find yourself presented with numerous ways to resolve this encounter:
- Picking the option ”I’ll pay you to go.” is a dead end, so don’t even bother.
- If you say ”Leave or die.” you’ll provoke a fight and will have to kill the Baron’s Henchmen (Lv6).
- Ask ”What do you want from the Pellar?”, then pick the followup option ”Tell you what - you leave, and I’ll heal Edric.”. If you did not kill the Bandits at the
 Inn at the Crossroads during The Nilfgaardian Connection they’ll agree to go away when Geralt gives them the promised cure. If you did kill the Bandits, they’ll understandably become hostile when they find out Geralt’s a Witcher.
 - Use the
 Axii sign on them to gain some EXP and get them to leave without any fuss.

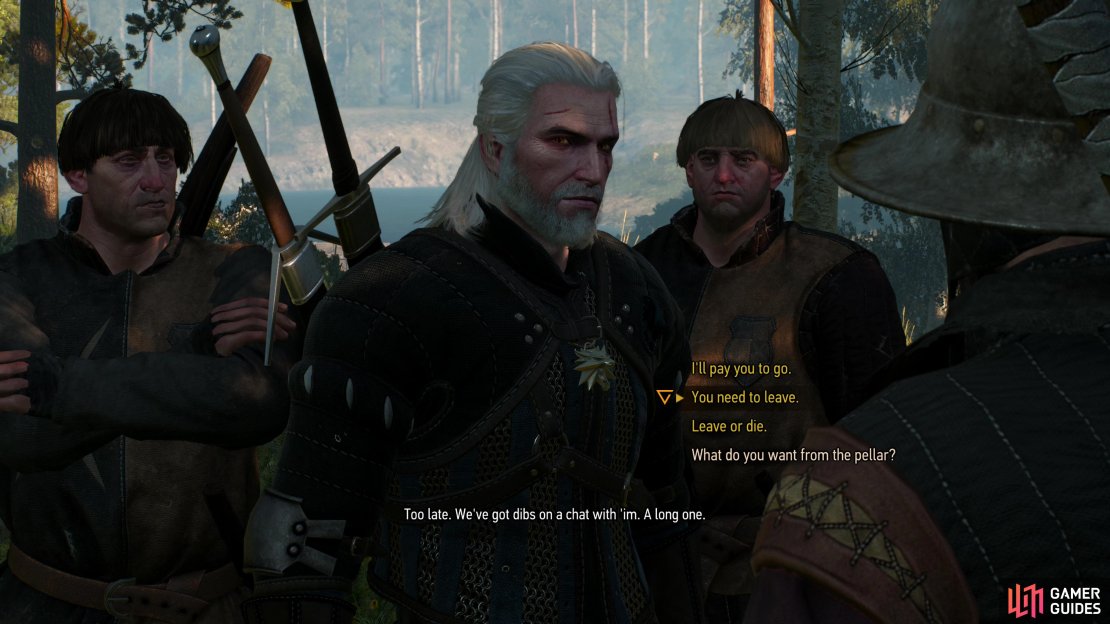
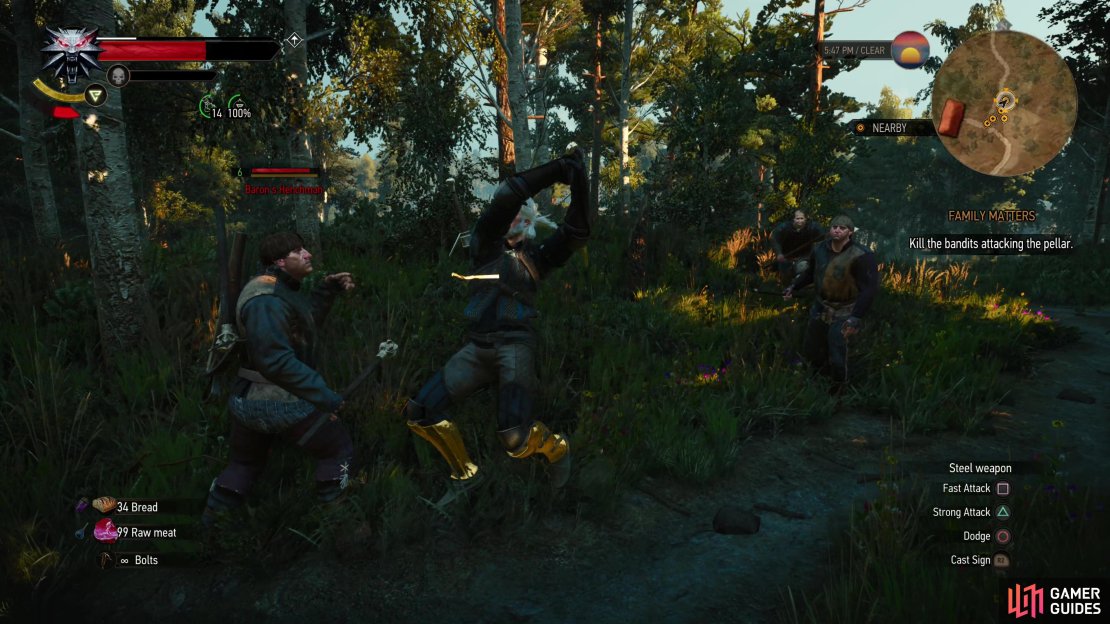
(1 of 3) Approach the Pellar’s hut and you’ll be confronted by some of the Baron’s Henchmen.
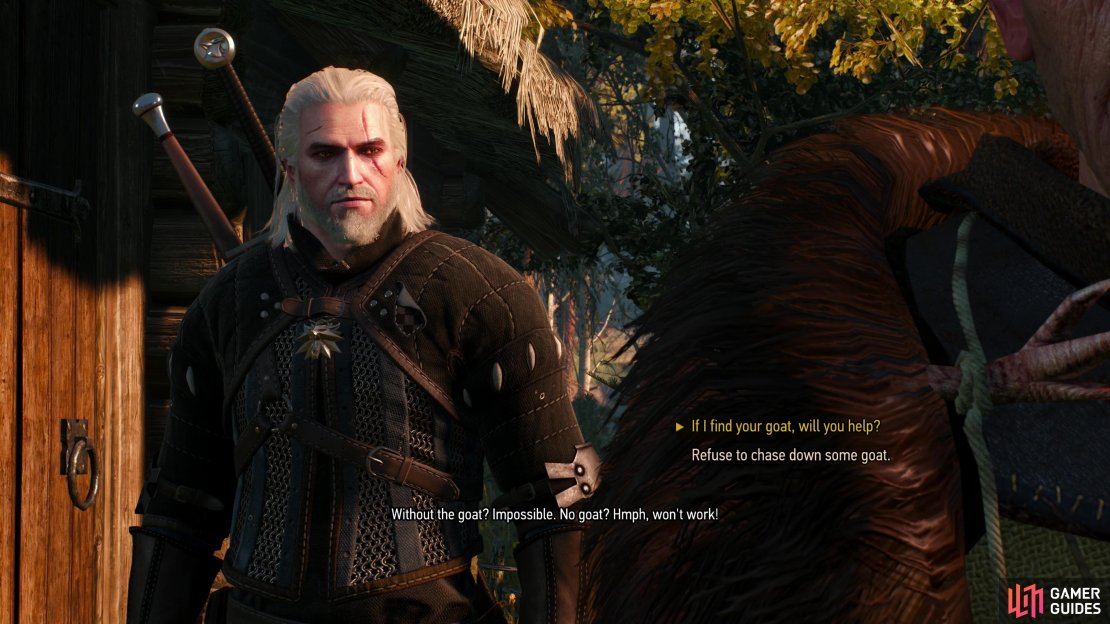
As usual we’re fond of using Axii for the bonus EXP, but pick whichever option you prefer. Once the Bloody Baron’s goons are gone - one way or another - knock on the door to talk to the Pellar. After some chatter the Pellar will decide that he simply can’t ply his craft without his beloved goat, Princess, and you’ve no choice but to agree to find her for the Pellar. Pick the option ”If I find your goat, will you help?” as the other options lead to Geralt refusing, which merely delays the inevitable. At this point the quest Family Matters will go dormant until you make good on your promise and rescue Princess, which is covered on the page A Princess in Distress.
Get an Augury from the Pellar
If you can’t be bothered to swap to the full walkthrough for A Princess in Distress, we’ll provide a brief rundown. Once the Pellar is safe, talk to him and another complication will crop up - the Pellar refuses to do any foretellin’ without his goat, Princess. Armed with the Pellar’s Bell and a worsening attitude you’ll need to wander off into the forest west of the Pellar’s hut and search for Princess, dispatching ![]() Wolves (Lv5) as you follow the goat’s trail. When you find Princess, ring the bell regularly to keep her following Geralt, defend her from a Bear (Lv6) when she goes astray, and bring her back to the Pellar to finally get your augury.
Wolves (Lv5) as you follow the goat’s trail. When you find Princess, ring the bell regularly to keep her following Geralt, defend her from a Bear (Lv6) when she goes astray, and bring her back to the Pellar to finally get your augury.
After learning about the Bloody Baron’s misdeeds and the evil he unleashed upon Crow’s Perch, read the “![]() Botchling” entry in your bestiary, then head back to Crow’s Perch. There are two ways you can deal with the Botchling - try to remove its curse, or kill it. Before you can get to this bit of Witchering business, however, another crisis sparks into existence.
Botchling” entry in your bestiary, then head back to Crow’s Perch. There are two ways you can deal with the Botchling - try to remove its curse, or kill it. Before you can get to this bit of Witchering business, however, another crisis sparks into existence.

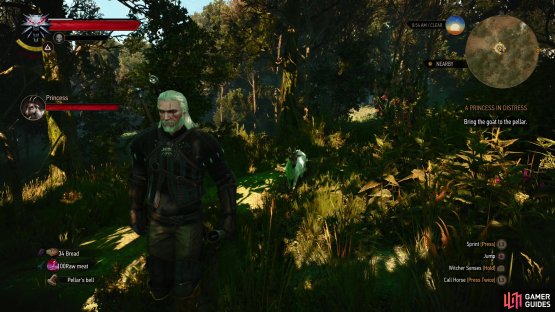
(1 of 2) Track down the Pellar’s goat, Princess, and use the Pellar’s Bell to lure the animal back to the Pellar’s hut.
Track down the Pellar’s goat, Princess, and use the Pellar’s Bell to lure the animal back to the Pellar’s hut. (left), After which you’ll finally get the augury you were seeking. (right)
Rescue the Stable Hand and the Horses
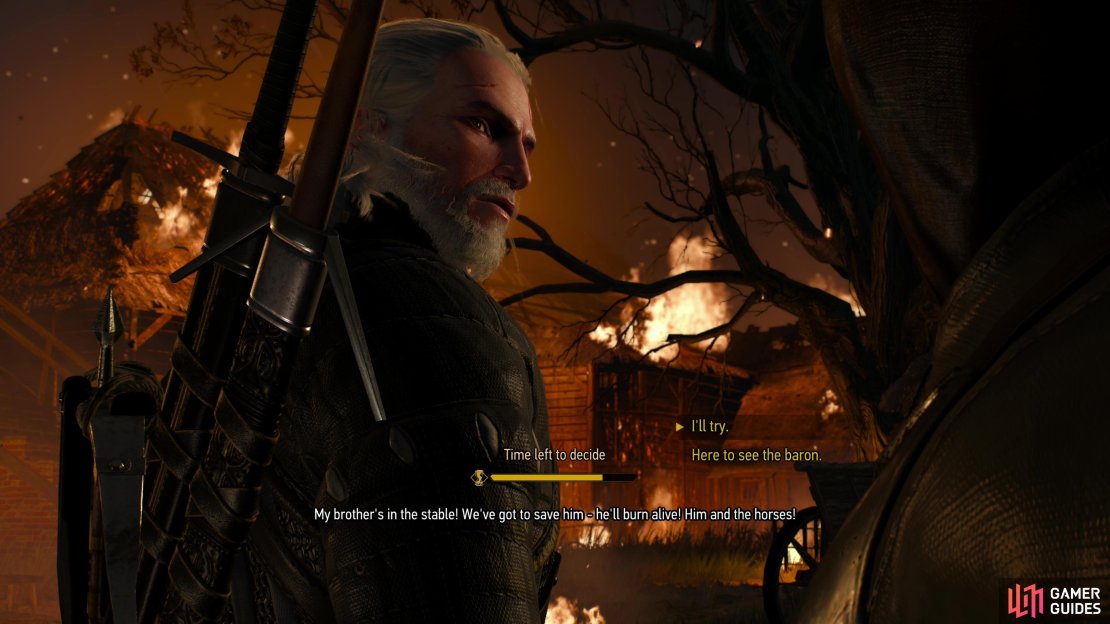
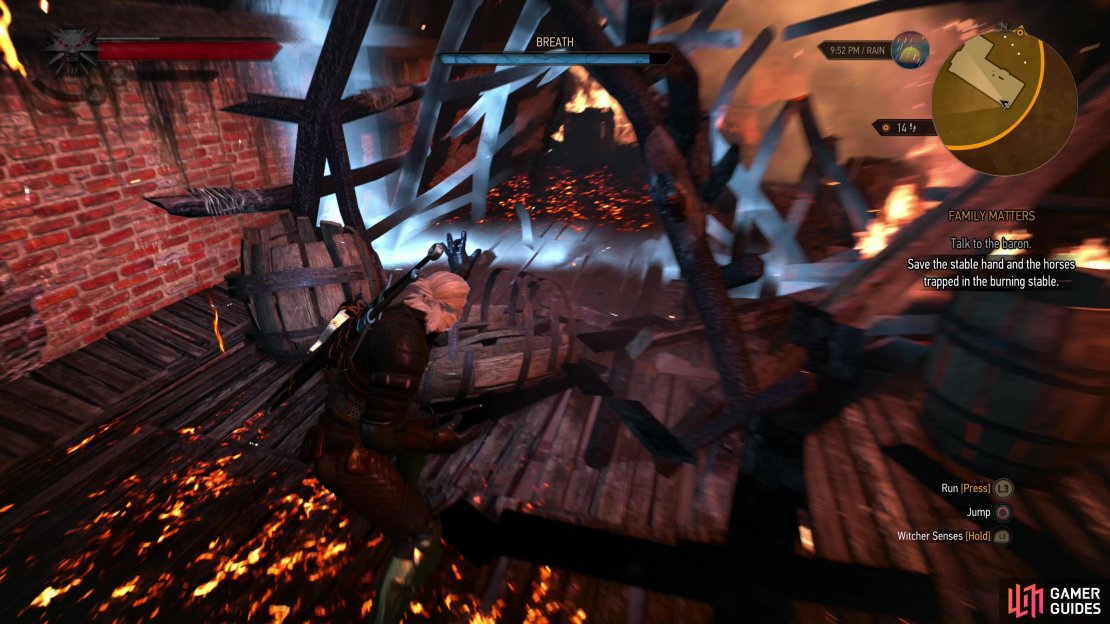
When you approach Crow’s Perch (best done on foot, at night, if you want the full effect) you’ll see the castle is burning. Or at least the stables near it. Rush up to the castle as a bell clangs futilely and you’ll find a sad scene - the Baron’s men, so good at shaking down peasants and making the lives of others miserable, are useless and rudderless without a leader. No bucket brigade, nothing. At your approach one will beg Geralt to save his brother and you’ll get a timed dialog choice. You don’t need to do this and the reward isn’t great, so this is mostly a moral choice. Pick ”I’ll try.” to make the attempt or ”Here to see the baron.” to callously let the stable hand and horses burn to death.
Assuming you choose the former, head up to the front of the stables and climb a ladder. Once you’re inside, you’re timed, as a Witcher’s mutations are no proof against smoke inhalation. Head forward (southwest) and turn right (northwest) and use ![]() Aard to blast some debris away, then continue northwest to find another obstruction you need to clear with Aard (mostly barrels) near a ledge. Drop down to the northwest (or climb the ladder, if you’re feeling dainty in this spot of crisis) and turn right) northeast until you reach the stable’s door. Open it to provide egress for the horses, the stable hand, and one heroic Witcher.
Aard to blast some debris away, then continue northwest to find another obstruction you need to clear with Aard (mostly barrels) near a ledge. Drop down to the northwest (or climb the ladder, if you’re feeling dainty in this spot of crisis) and turn right) northeast until you reach the stable’s door. Open it to provide egress for the horses, the stable hand, and one heroic Witcher.
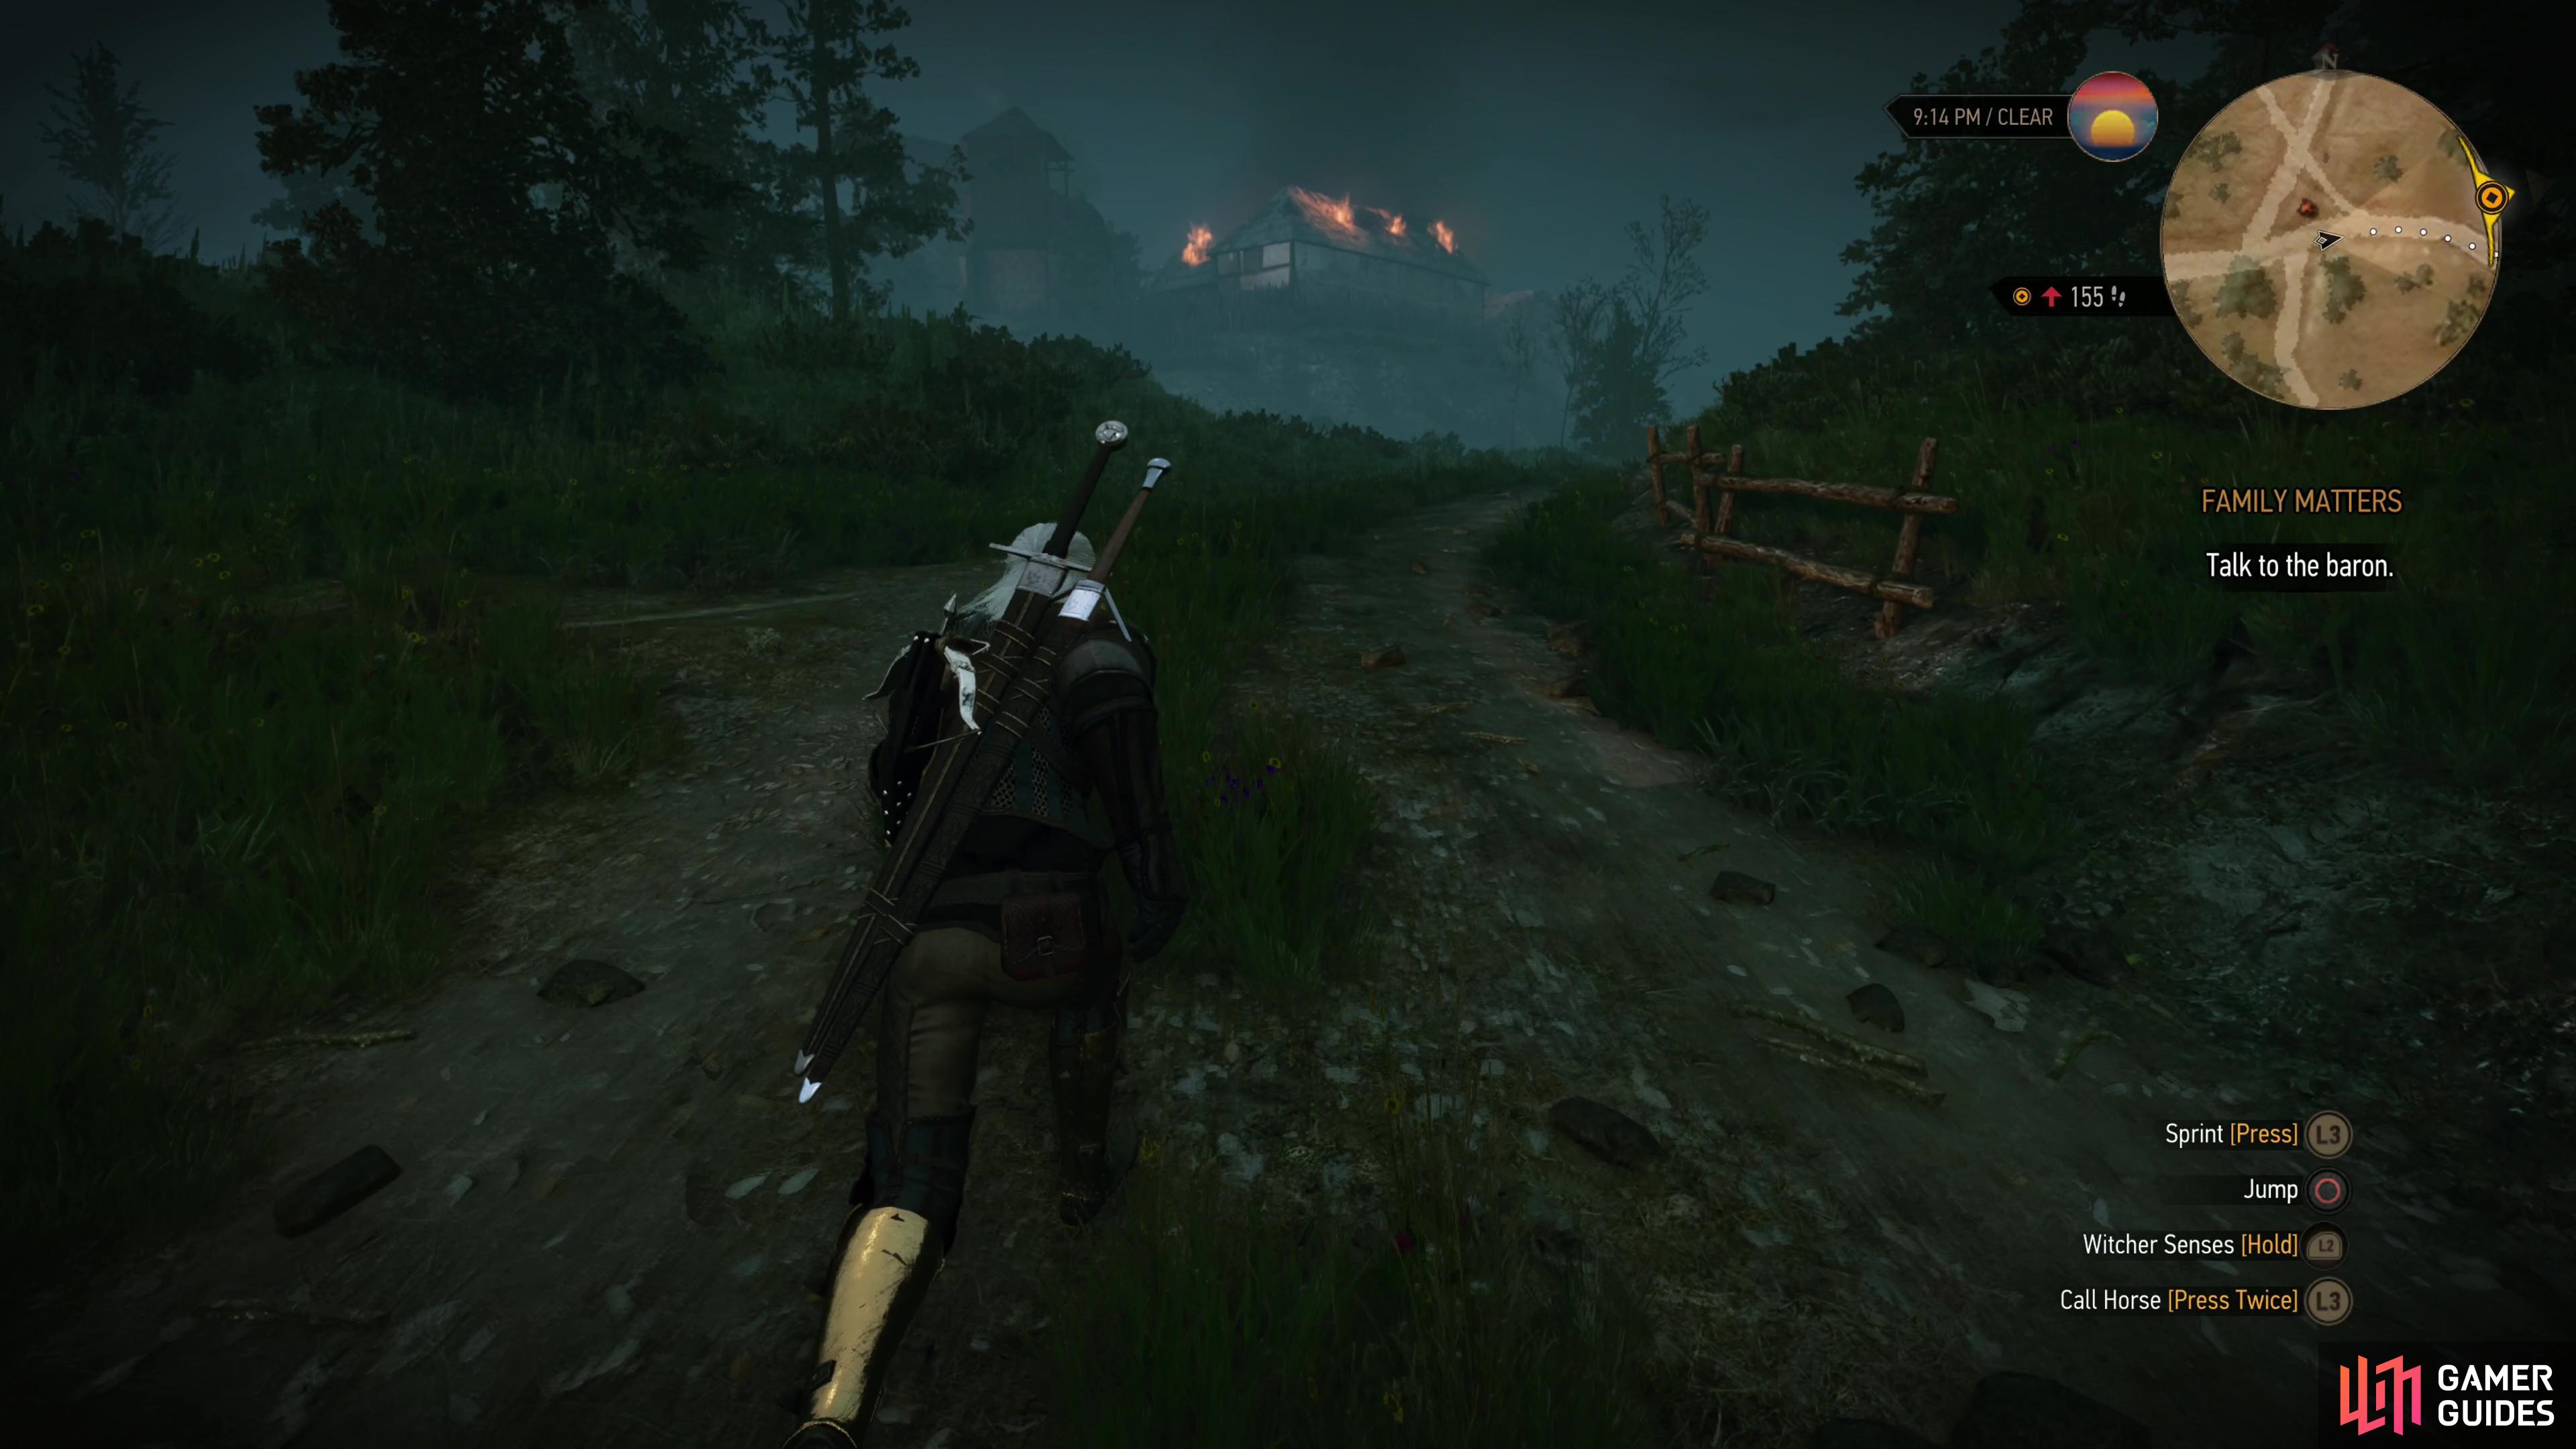

(1 of 3) Return to Crow’s Perch and you’ll spot the stables burning in the distance.
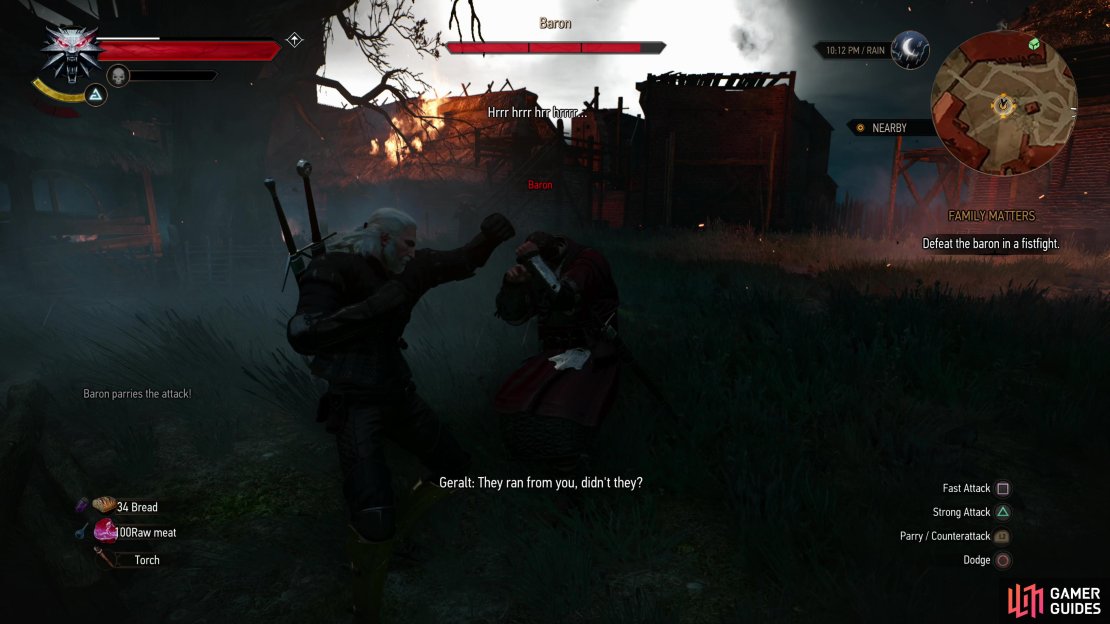
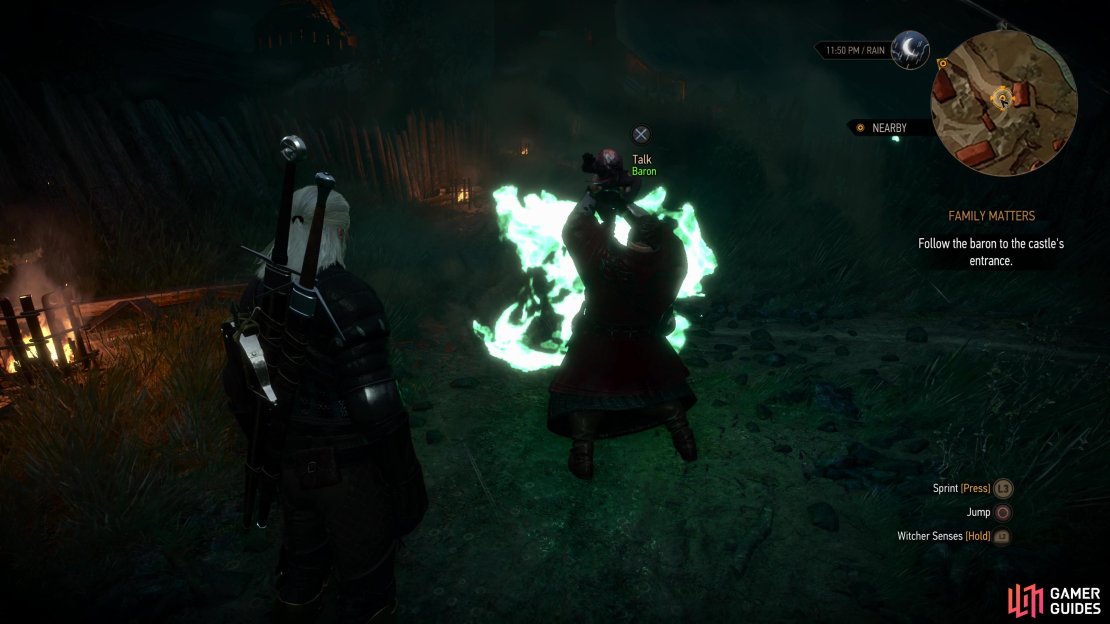
Defeat the Bloody Baron in a Fistfight
If you don’t care to help save the stable hand and horses, head over to the Bloody Baron and talk to him to bypass the whole affair. On the other hand, if you helped them you’ll end up chatting with the Bloody Baron immediately after escaping the stables. Either way, the two will exchange words and the Baron, sauced beyond rational thought, decides picking a fight with the only person who has a chance at fighting his family is a good idea. Engage in fisticuffs - the Bloody Baron is not a formidable opponent, and as long as you have a passable grasp at timing how to parry and counterattack he should fall without issue.
After issuing a stern reprimand (and a well-deserved dunk) Geralt will force the whole story from the Bloody Baron and at the end you’ll be left with two choices: ”Let’s do this.” will continue the main quest and force you to make a choice regarding the Botchling, while ”Come get you later.” will put this quest on pause in case you want to do something else before making this decision, or even just save your game at an ideal spot. There are some fights coming up that may prove a bit difficult, at least on Death March! difficulty, so you may want to wax indecisive here just in case something goes awry - hitting level seven may allow you to upgrade to Thousand ![]() Flowers gear set, which is a significant increase over those Viper Swords from back in White Orchard.
Flowers gear set, which is a significant increase over those Viper Swords from back in White Orchard.
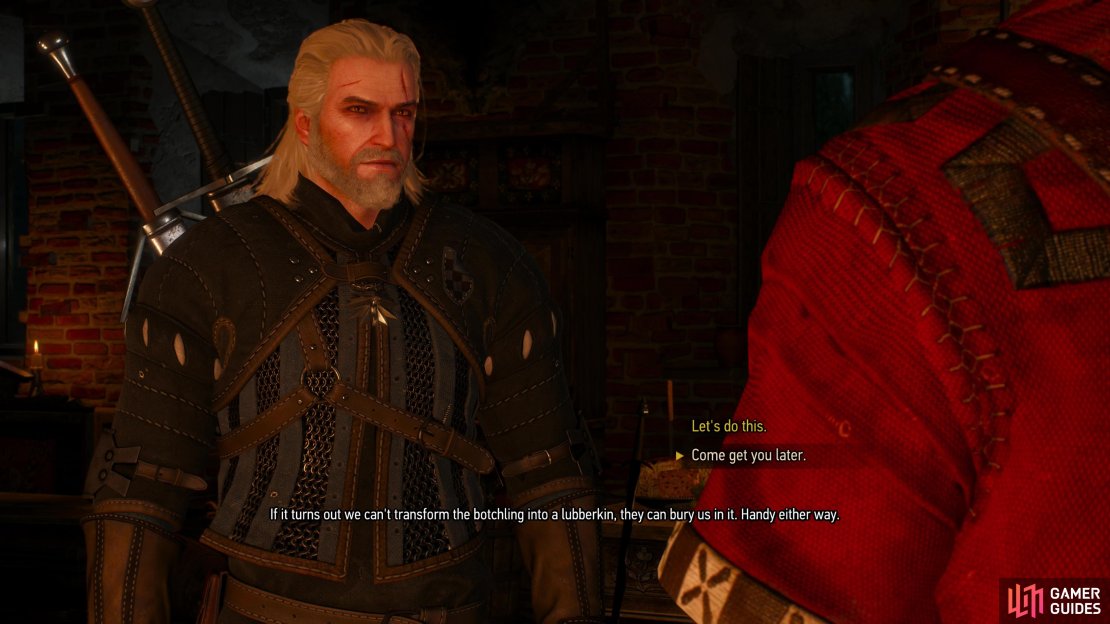
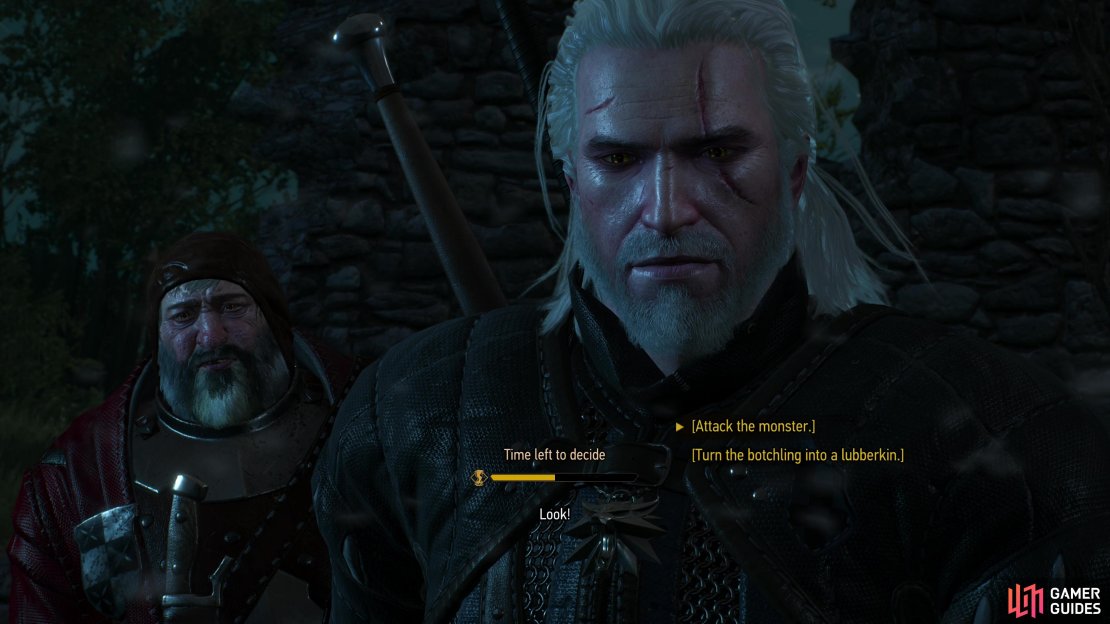
When you’re ready, talk to the Bloody Baron and inform him. You won’t make your choice yet, but rather you’ll follow him to where he disposed of his daughter’s body. This is on the southeastern edge of the island Crow’s Perch is located on, and you’ll travel most of the way there automatically. After some chatter at the graveside the Botchling will show up and you’ll get a timed decision: pick [Attack the monster.] to start a fight or [Turn the botchling into a lubberkin.] to try and lift the curse. Both routes will be covered below.

(1 of 3) Deal with the stables or ignore them, either way you’ll end up in a fistfight with the Bloody Baron.
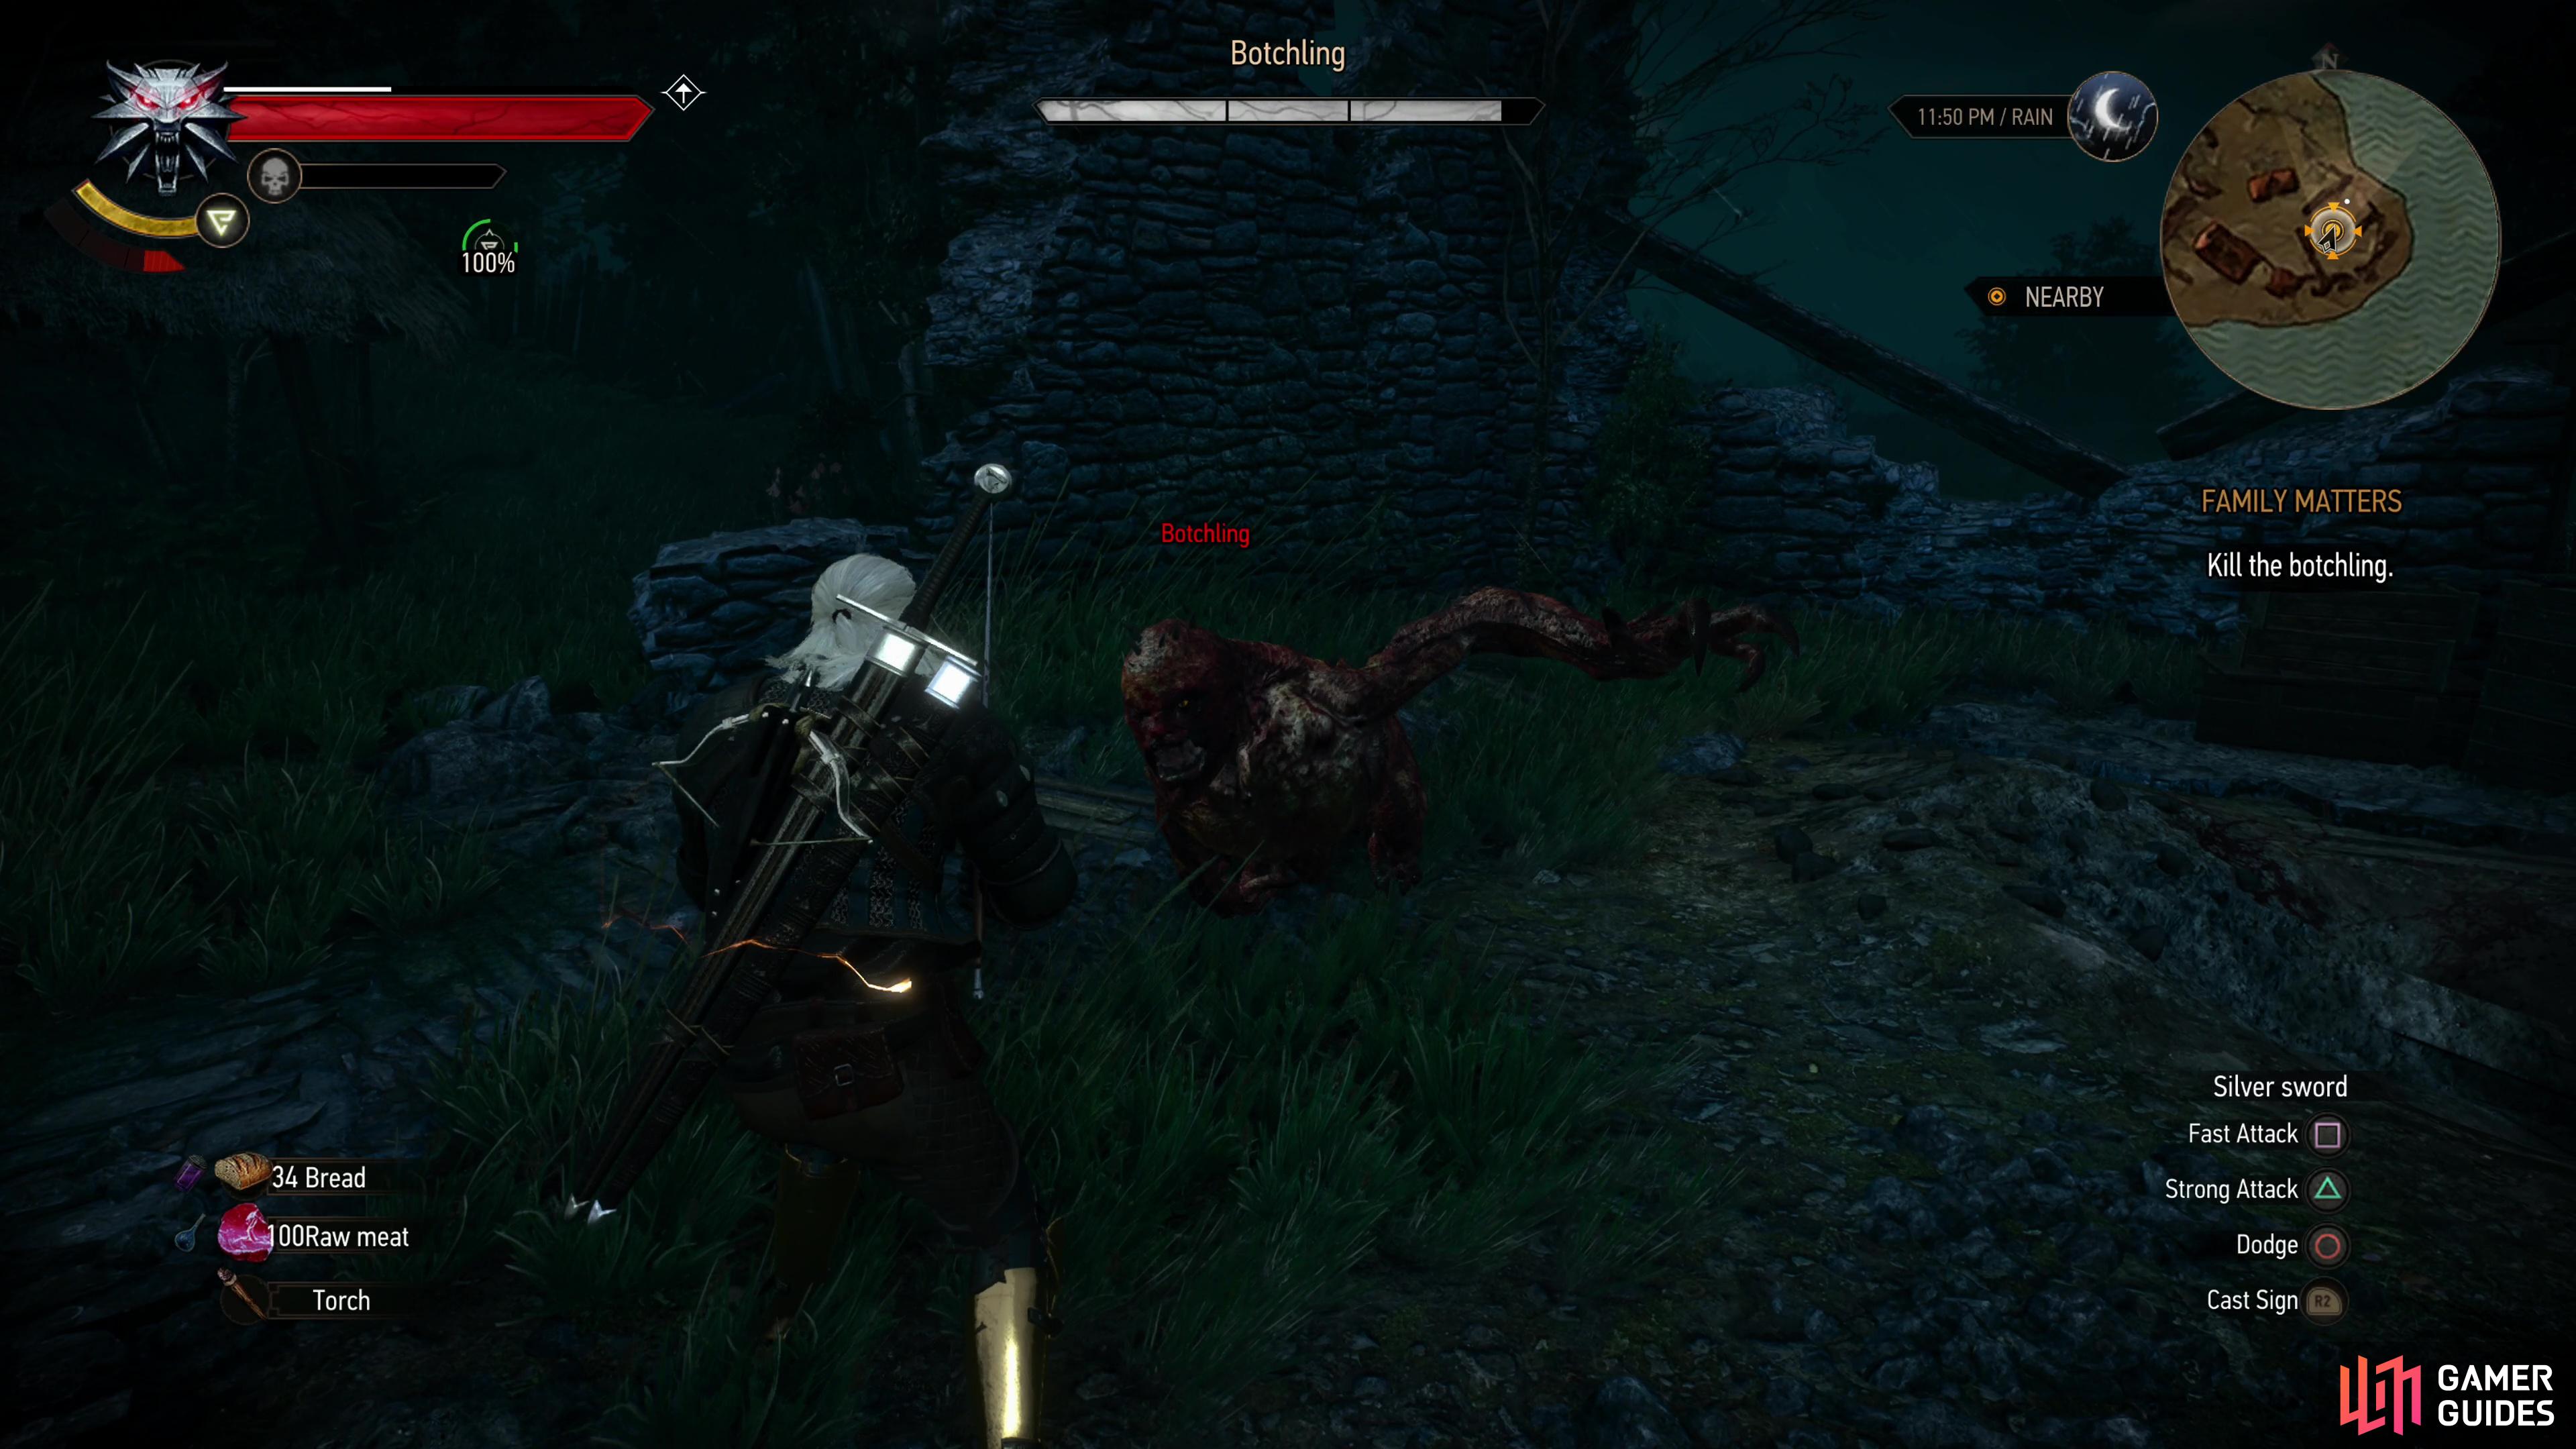
Kill the Botchling
If you pick this option you’ll start a fight with the Botchling straight away. If you’re playing on Death March! difficulty and still stuck at level six (and presumably still using the Viper ![]() Silver Sword) killing this foe will take a while, mostly because its health and your damage output conspire to slow things down.
Silver Sword) killing this foe will take a while, mostly because its health and your damage output conspire to slow things down.
On its own, the Botchling isn’t a terribly challenging foe, fighting much like a ![]() Ghoul, albeit one that only seems marginally interested in attacking most of the time. It’ll perform claw swipes and a leaping claw attack, but if you keep
Ghoul, albeit one that only seems marginally interested in attacking most of the time. It’ll perform claw swipes and a leaping claw attack, but if you keep ![]() Quen up and don’t get greedy with your own attacks, it should rarely if ever damage you. Cursed
Quen up and don’t get greedy with your own attacks, it should rarely if ever damage you. Cursed ![]() Oil will make this fight go faster, but honestly the first phase of this fight is just droll butchery on your part.
Oil will make this fight go faster, but honestly the first phase of this fight is just droll butchery on your part.
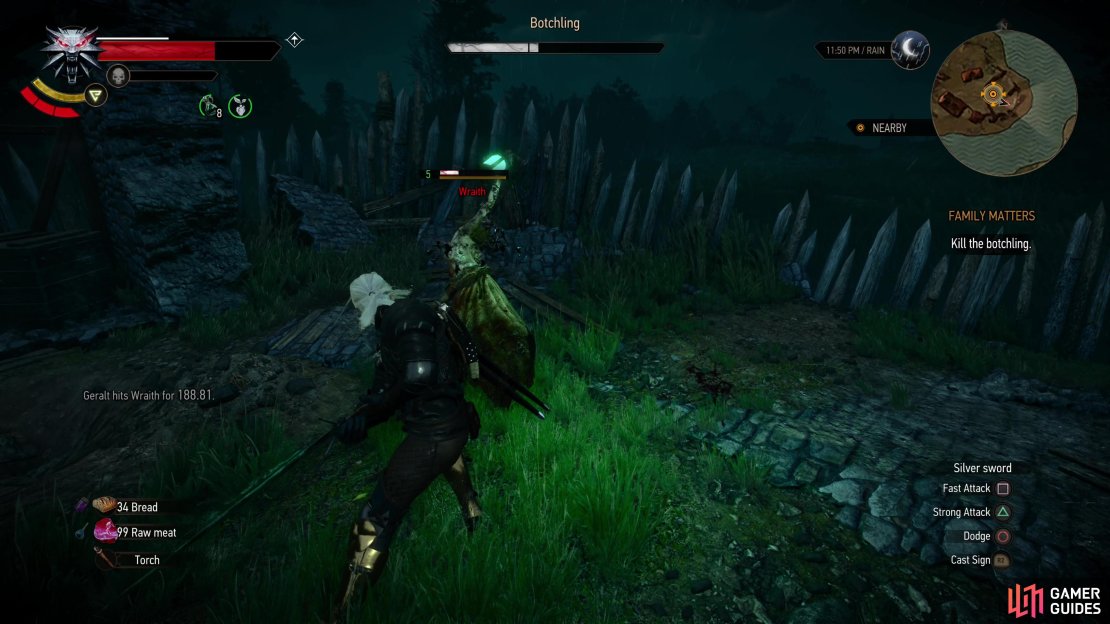
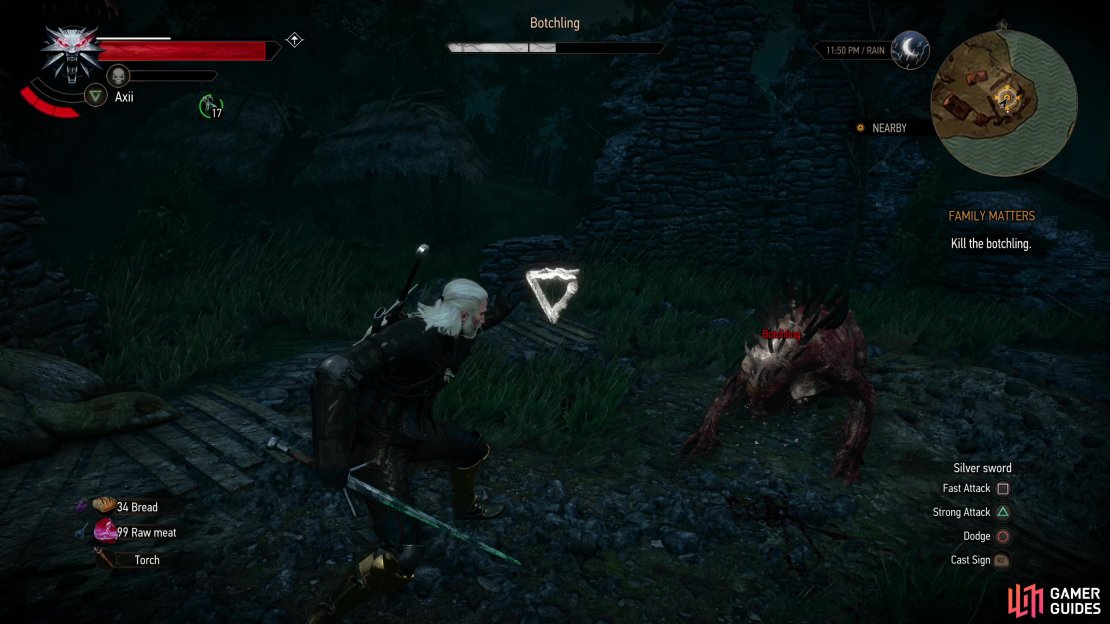
Once the Botchling’s health is reduced to around 50% it’ll drop the Ghoul facade and pick up a more dangerous behavior of an Alghoul; it’ll become more aggressive, spikes will extend from its back, and it’ll begin to quickly regenerate health. If that’s not bad enough, several ![]() Wraiths (Lv5) will be lured to the fray. If this sounds bad… it’s really not. The Wraiths are a nuisance that must be dealt with preferentially, but you should try to pelt the Botchling with Axii to compel it to retract its spines. Not only does this allow you to continue attacking without being hindered by the spines, but it’ll end the Botchling’s regeneration. As with
Wraiths (Lv5) will be lured to the fray. If this sounds bad… it’s really not. The Wraiths are a nuisance that must be dealt with preferentially, but you should try to pelt the Botchling with Axii to compel it to retract its spines. Not only does this allow you to continue attacking without being hindered by the spines, but it’ll end the Botchling’s regeneration. As with ![]() Alghouls, the effect is temporary, and before long the Botchling will extend its spines again and begin regenerating health, so be prepared with Axii lest you lose progress.
Alghouls, the effect is temporary, and before long the Botchling will extend its spines again and begin regenerating health, so be prepared with Axii lest you lose progress.

(1 of 3) During the first phase of the fight with the Botchling it fights much like a Ghoul.
Banish the Wraiths, kill the Botchling, and after the fight Geralt will collect some of the beast’s blood, despite the Bloody Baron’s complaints. Respond however you wish, after which you’ll be tasked with returning to the Pellar to complete the ritual that’ll help you track down Anna and Tamara.
Complete the Pellar’s Ritual
Return to the Pellar’s hut north of Blackbough and surprisingly there won’t be any complications. Now that you have the Botchling’s blood, the Pellar has everything else required for his ritual, and you can head on over to start it right away. A rare stroke of good luck for Geralt. Follow the Pellar and he’ll chat with Geralt, but aside from possibly running afoul of some Wolves (Lv5) little of interest happens en route to the ritual site. Once there you’ll be directed to light some fires with ![]() Igni - light all three and the ritual will begin.
Igni - light all three and the ritual will begin.
This ritual is simple enough, conceptually. Wraiths will constantly spawn and attack you, and while it may seem like you need to kill them - you know, Witcher stuff - your only real goal is to keep the fires lit. Inevitably one fire will be squelched (for us it always started with the easternmost one) and you’ll need to relight it as quickly as possible. After relighting the fire three times you should be in the clear, the ritual will end, and you’ll be free to ask the Pellar more questions. Don’t waste your time trying to kill Wraiths and don’t try to cast Igni with  /
/  to relight the fires when they go out. Instead, get close enough to them that you get a proper
  /
/  prompt to relight the fires, which is more likely to succeed rather than uselessly tracking some nearby Wraith. Casting Quen before you have to do this isn’t a bad idea, as you’ll be stationary for a bit and there’s a good chance you’ll be hit during the Igni animation -
 ![]() Tawny Owl will help keep you Stamina regeneration up and Active Quen can be used to restore any lost Vitality between the fires guttering out.
Tawny Owl will help keep you Stamina regeneration up and Active Quen can be used to restore any lost Vitality between the fires guttering out.

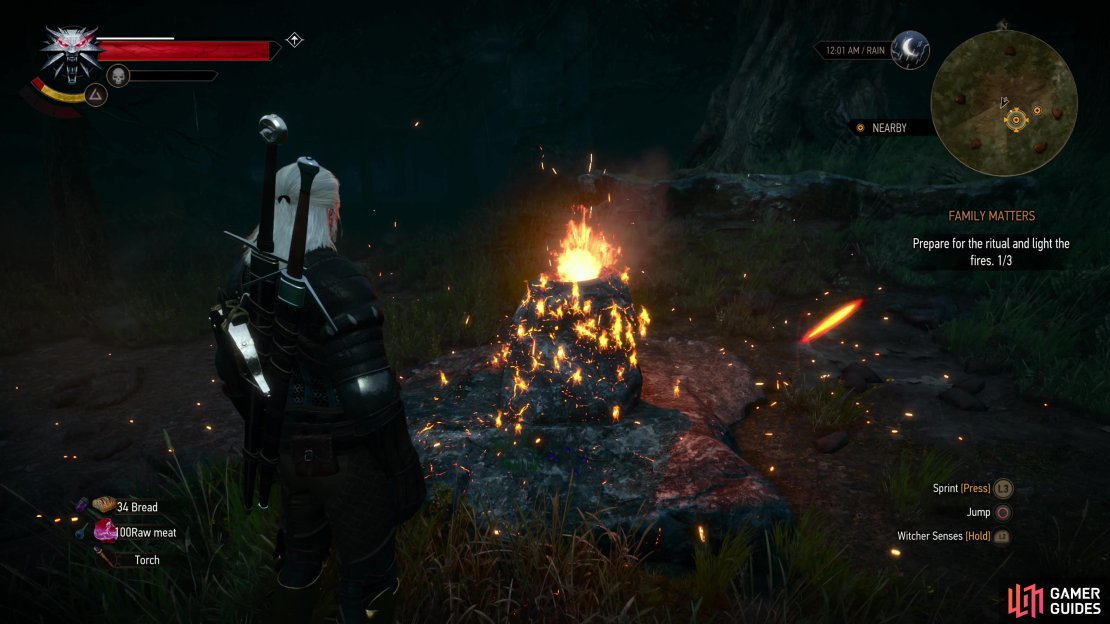

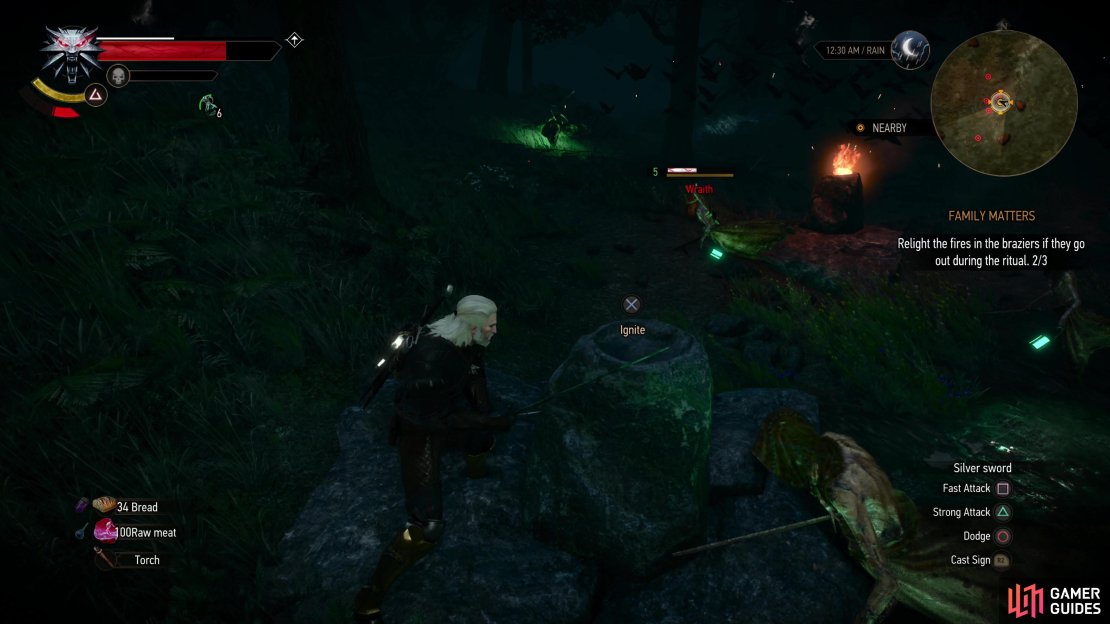
(1 of 3) Light the fires to start the ritual,
Exhaust the Pellar’s dialog options - what you say doesn’t matter - and once you part ways you’ll get a moderate amount of EXP. Through the Pellar’s ritual you’ve narrowed your lead down to the younger of two men named Voytek in the region - the one you seek is a fisherman who lives northeast of Crow’s Perch. Head to the marked location on your map and talk to Voytek, who does indeed know where Tamara is and what happened to Anna. Loot the house when you’re done chatting, if you wish, then exit - you’ll gain a significant amount of EXP for finally tracking down a solid lead, after which you’ll be tasked with reporting back to the Bloody Baron. The two routes will reunite under the header Find Tamara in Oxenfurt.
Turn the Botchling into a Lubberkin
Of the two routes, this one is arguably simpler inasmuch as there’s no boss fight, but it requires you to successfully complete an objective that’s more dangerous and tricky than anything you’ll find in the “Kill the Botchling” route. Once you set upon this path Geralt will order the Bloody Baron to pick up the Botchling, which then must be carried back up to the castle.
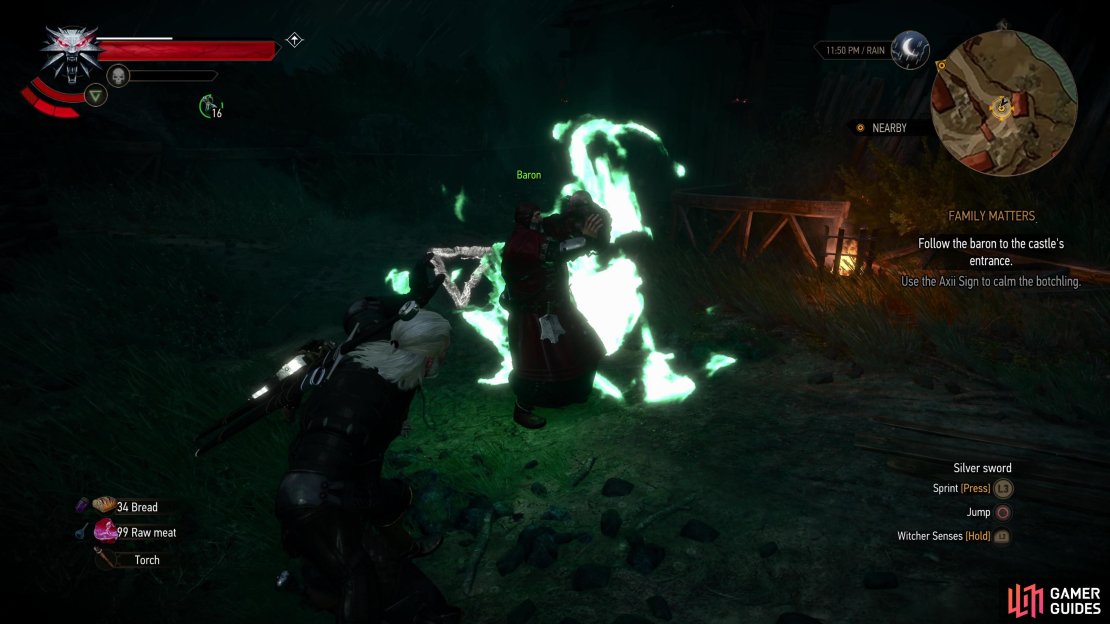
If you suspect this can’t be as easy as taking a simple stroll, you’re correct, but in this route the Botchling is, ideally, a secondary concern. As you approach the first gate the Botchling will start to struggle and its scent will lure some Wraiths (Lv5). You’ll have to dispatch two pairs or Wraiths who will appear in succession. Ignore the Bloody Baron’s struggles, fighting safe is better than trying to be quick - haste makes waste, and all, and there’s another, more difficult fight to come. Once you vanquish all four Wraiths you’ll need to calm the Botchling down with Axii - wait for the Bloody Baron to cry out for help, then hit the Botchling with Axii… or just spam Axii to be safe. If you take too long to calm the Botchling down it’ll turn hostile and you’ll have to kill it, in which case see the text under Kill the Botchling, above.
Survive the Wraiths and Axii the Botchling until it calms, then the Bloody Baron will start his march back towards the castle. You’ll make it past the first gate this time, but not the second, as the Botchling will stir again and you’ll have to endure most Wraith attacks. This time you’ll face two pairs of three Wraiths (Lv5), and the same rules apply - focus on keeping yourself alive, use Quen to soak damage, and when the Wraiths are defeated hit the Botchling with Axii to calm it down. This fight will be more difficult simply due to having a third Wraith pestering you, which means a lot more dodge-spamming.

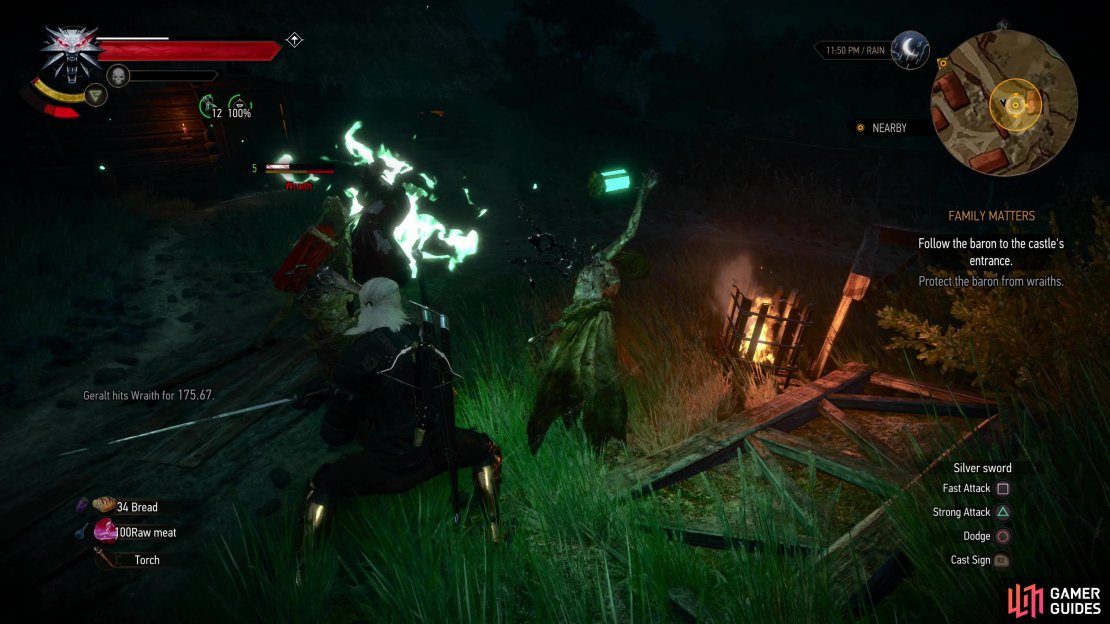
(1 of 3) As you escort the Bloody Baron, the Botchling will grow restless,
After the second wave of Wraiths you’re all clear. Escort the Bloody Baron to the castle and after a scene Geralt will send the Bloody Baron away. To continue on you’ll need to interact with the newly-dug burial site to sit and wait for the following midnight - no need to meditate or anything, just interact with the mound and the quest will continue. Of course, if you’d rather run off and do other business, you’re free to do that, too.
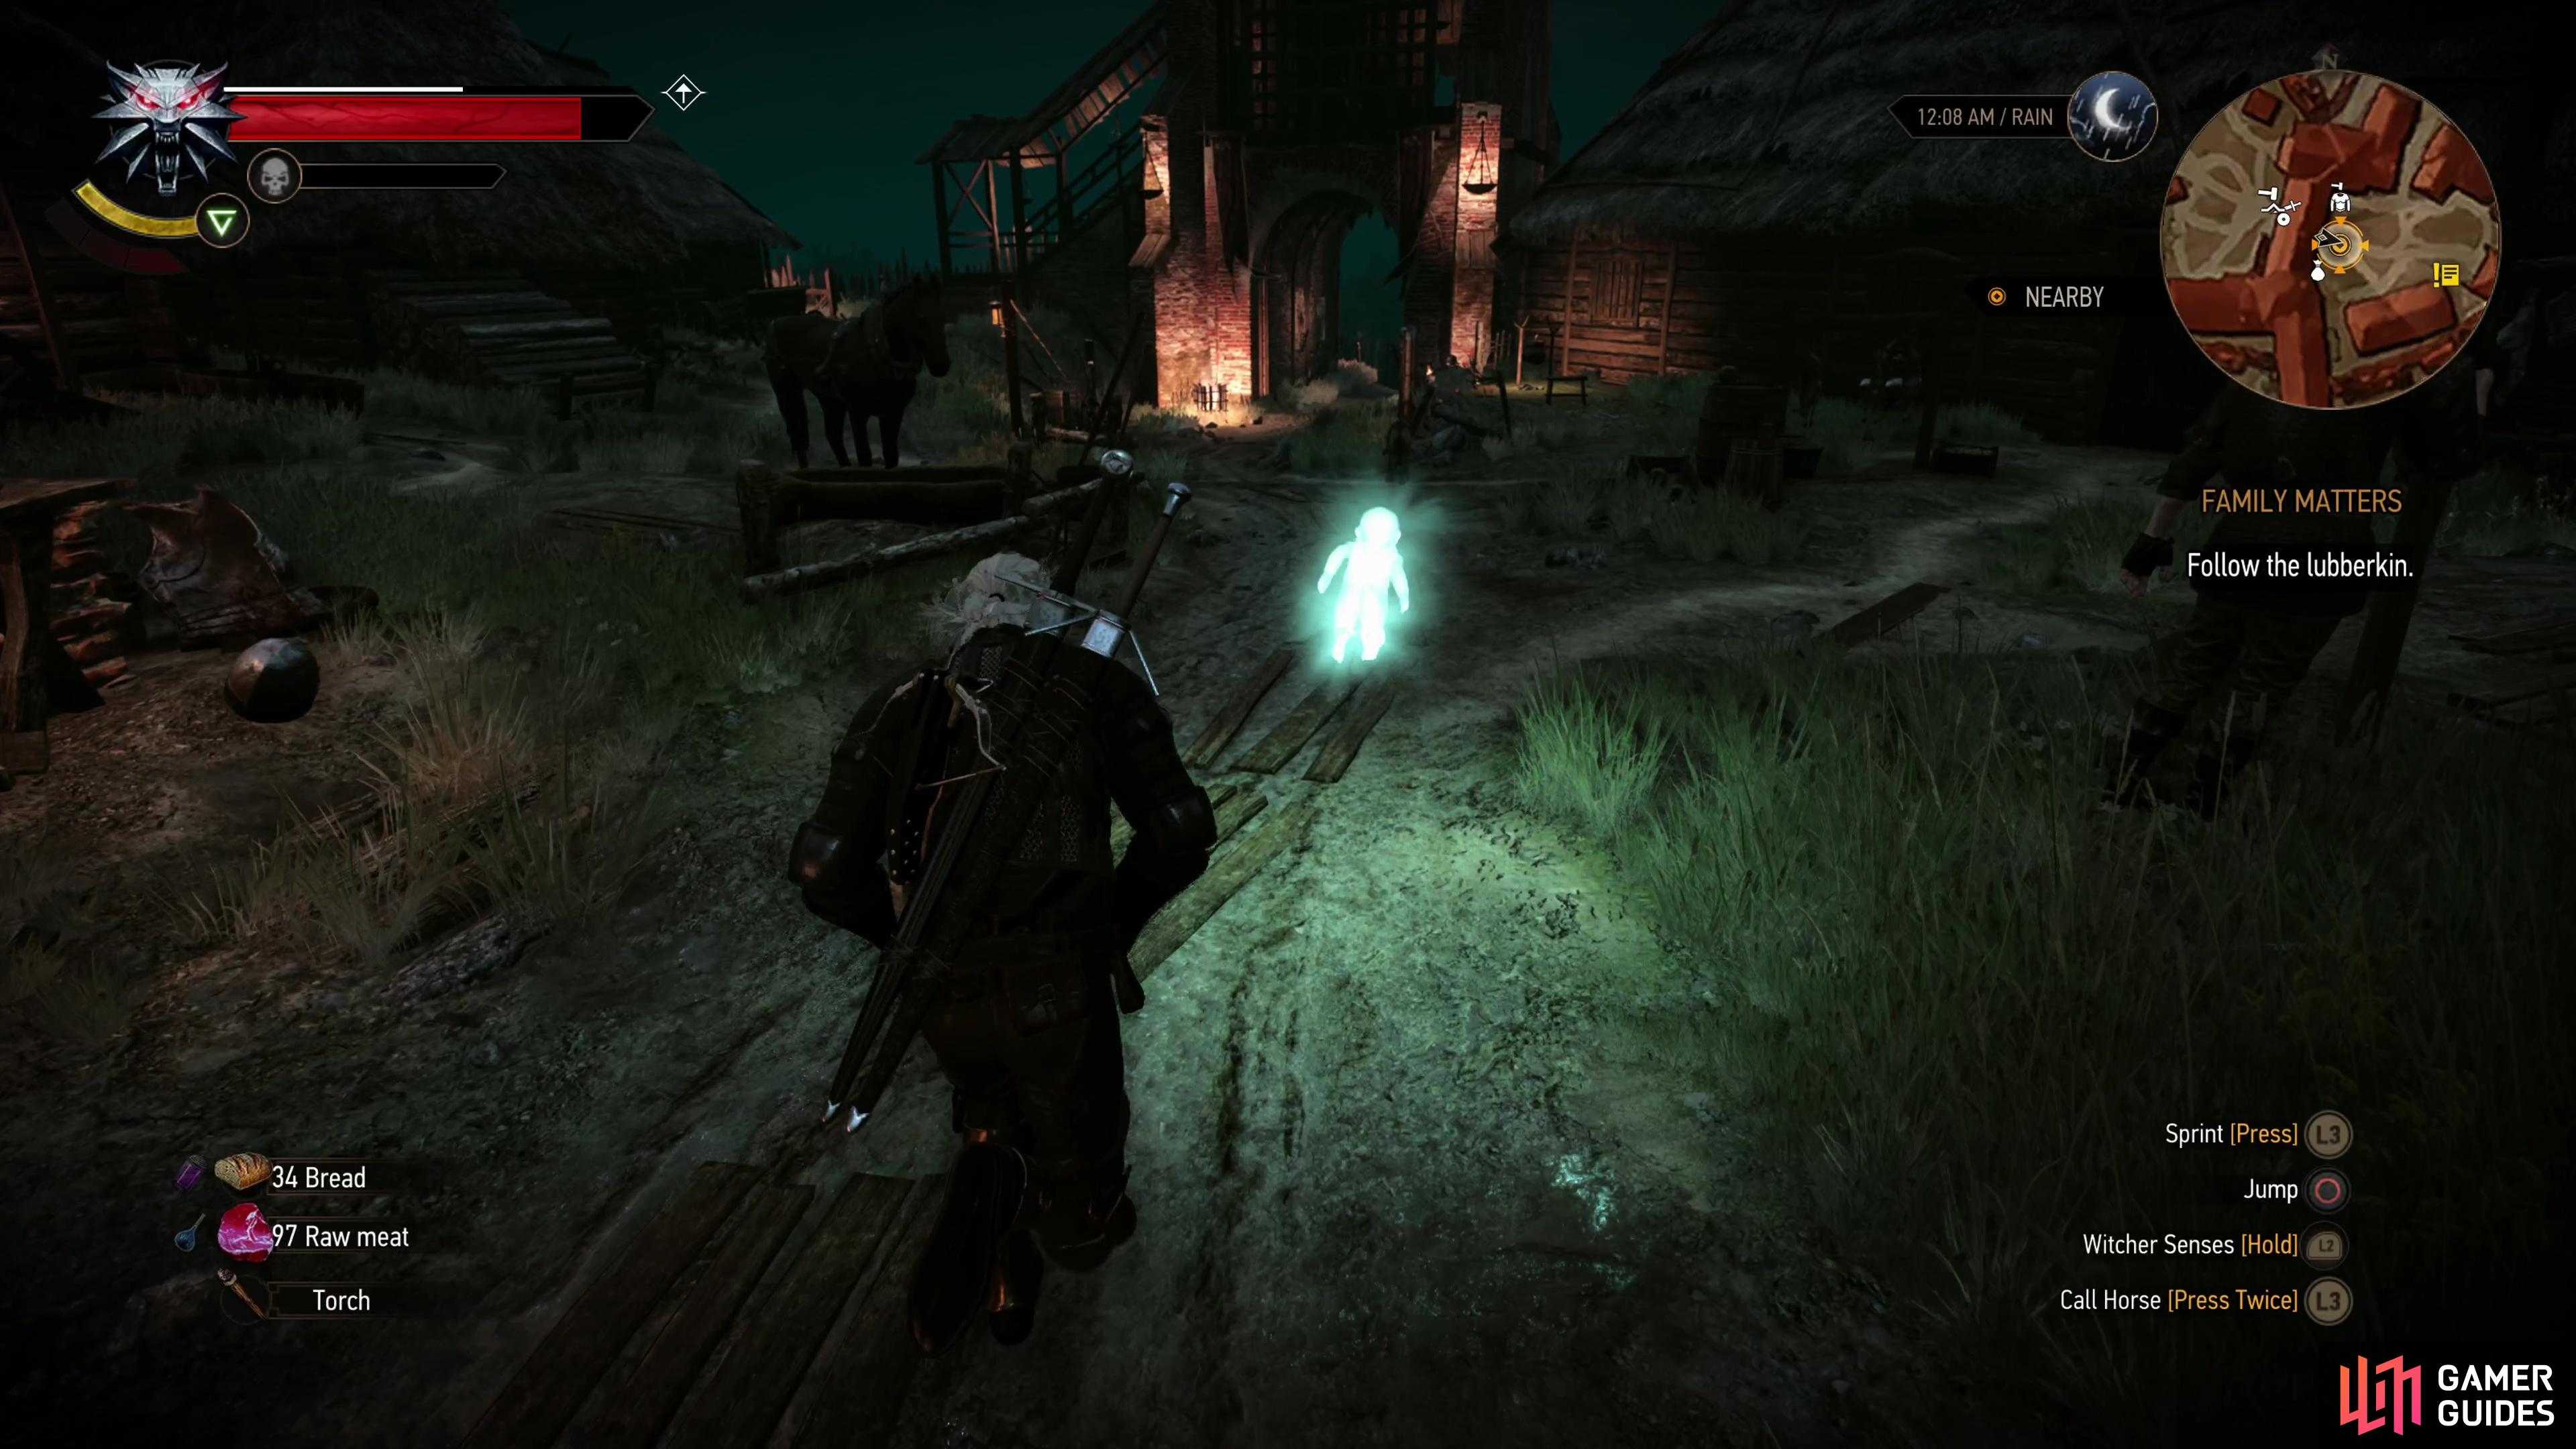
Follow the Lubberkin
When you’re ready to continue, interact with the burial mound near the castle and Geralt will summon the Lubberkin. Follow the ghostly infant as it flies out of Crow’s Perch (it’ll stop and wait for you if you fall behind, so don’t fret too much) and to a house southeast of Crow’s Perch. When it stops behind the house, activate your Witcher sense and investigate some hoof prints, some discarded clothing and a lost bracelet.
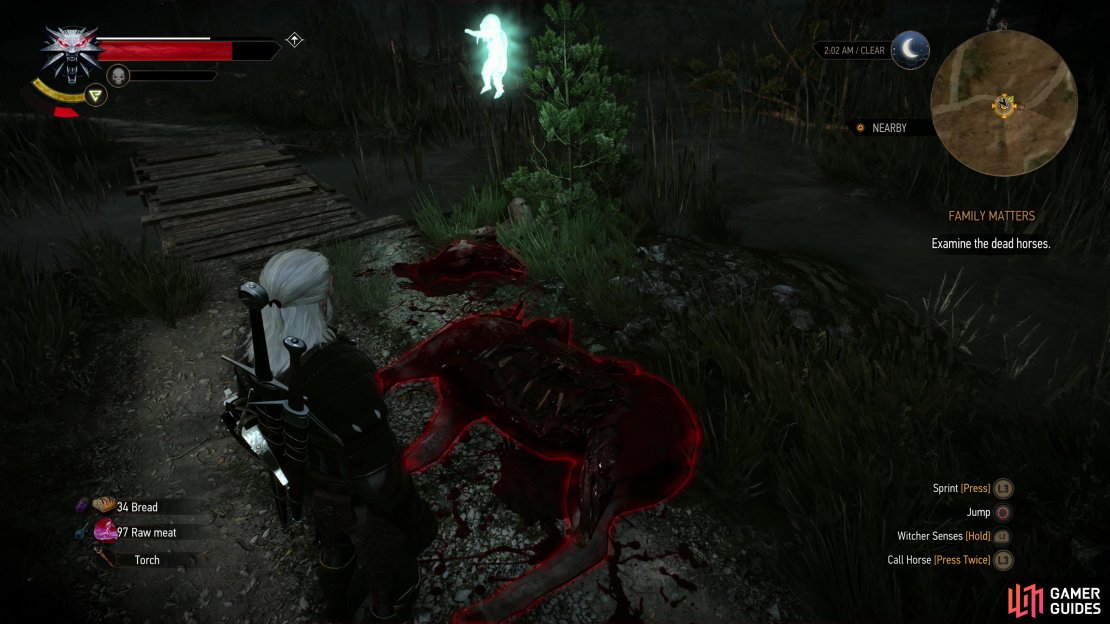
After you investigate the aforementioned objects the Lubberkin will take flight again and lead you to another point of interest relevant to Tamara and Anna’s flight. Follow the miscarried geist down the road to the northeast to reach a rickety bridge, near which is the decapitated corpse of a horse. Kill half a dozen or so ![]() Rotfiends - they’ll appear piecemeal so you shouldn’t have to fight more than 2-3 at a time - then investigate the carcass and exhaust the dialog options to get a clearer picture on what transpired here.
Rotfiends - they’ll appear piecemeal so you shouldn’t have to fight more than 2-3 at a time - then investigate the carcass and exhaust the dialog options to get a clearer picture on what transpired here.
The Lubberkin will move again, this time leading you to a fisherman’s hut northeast of Crow’s Perch. Enter, talk to the peasants within and say whatever you want to learn where Tamara fled and what happened to Anna. Details are scant on the latter bit, but suffice to say it’s not good. Still, half a family is better than none, and for finally learning something of value you’ll gain a significant amount of EXP. Loot the house, leave the house, then return to the Bloody Baron. The next phase in this quest will continue under the header Find Tamara in Oxenfurt.


Find Tamara in Oxenfurt
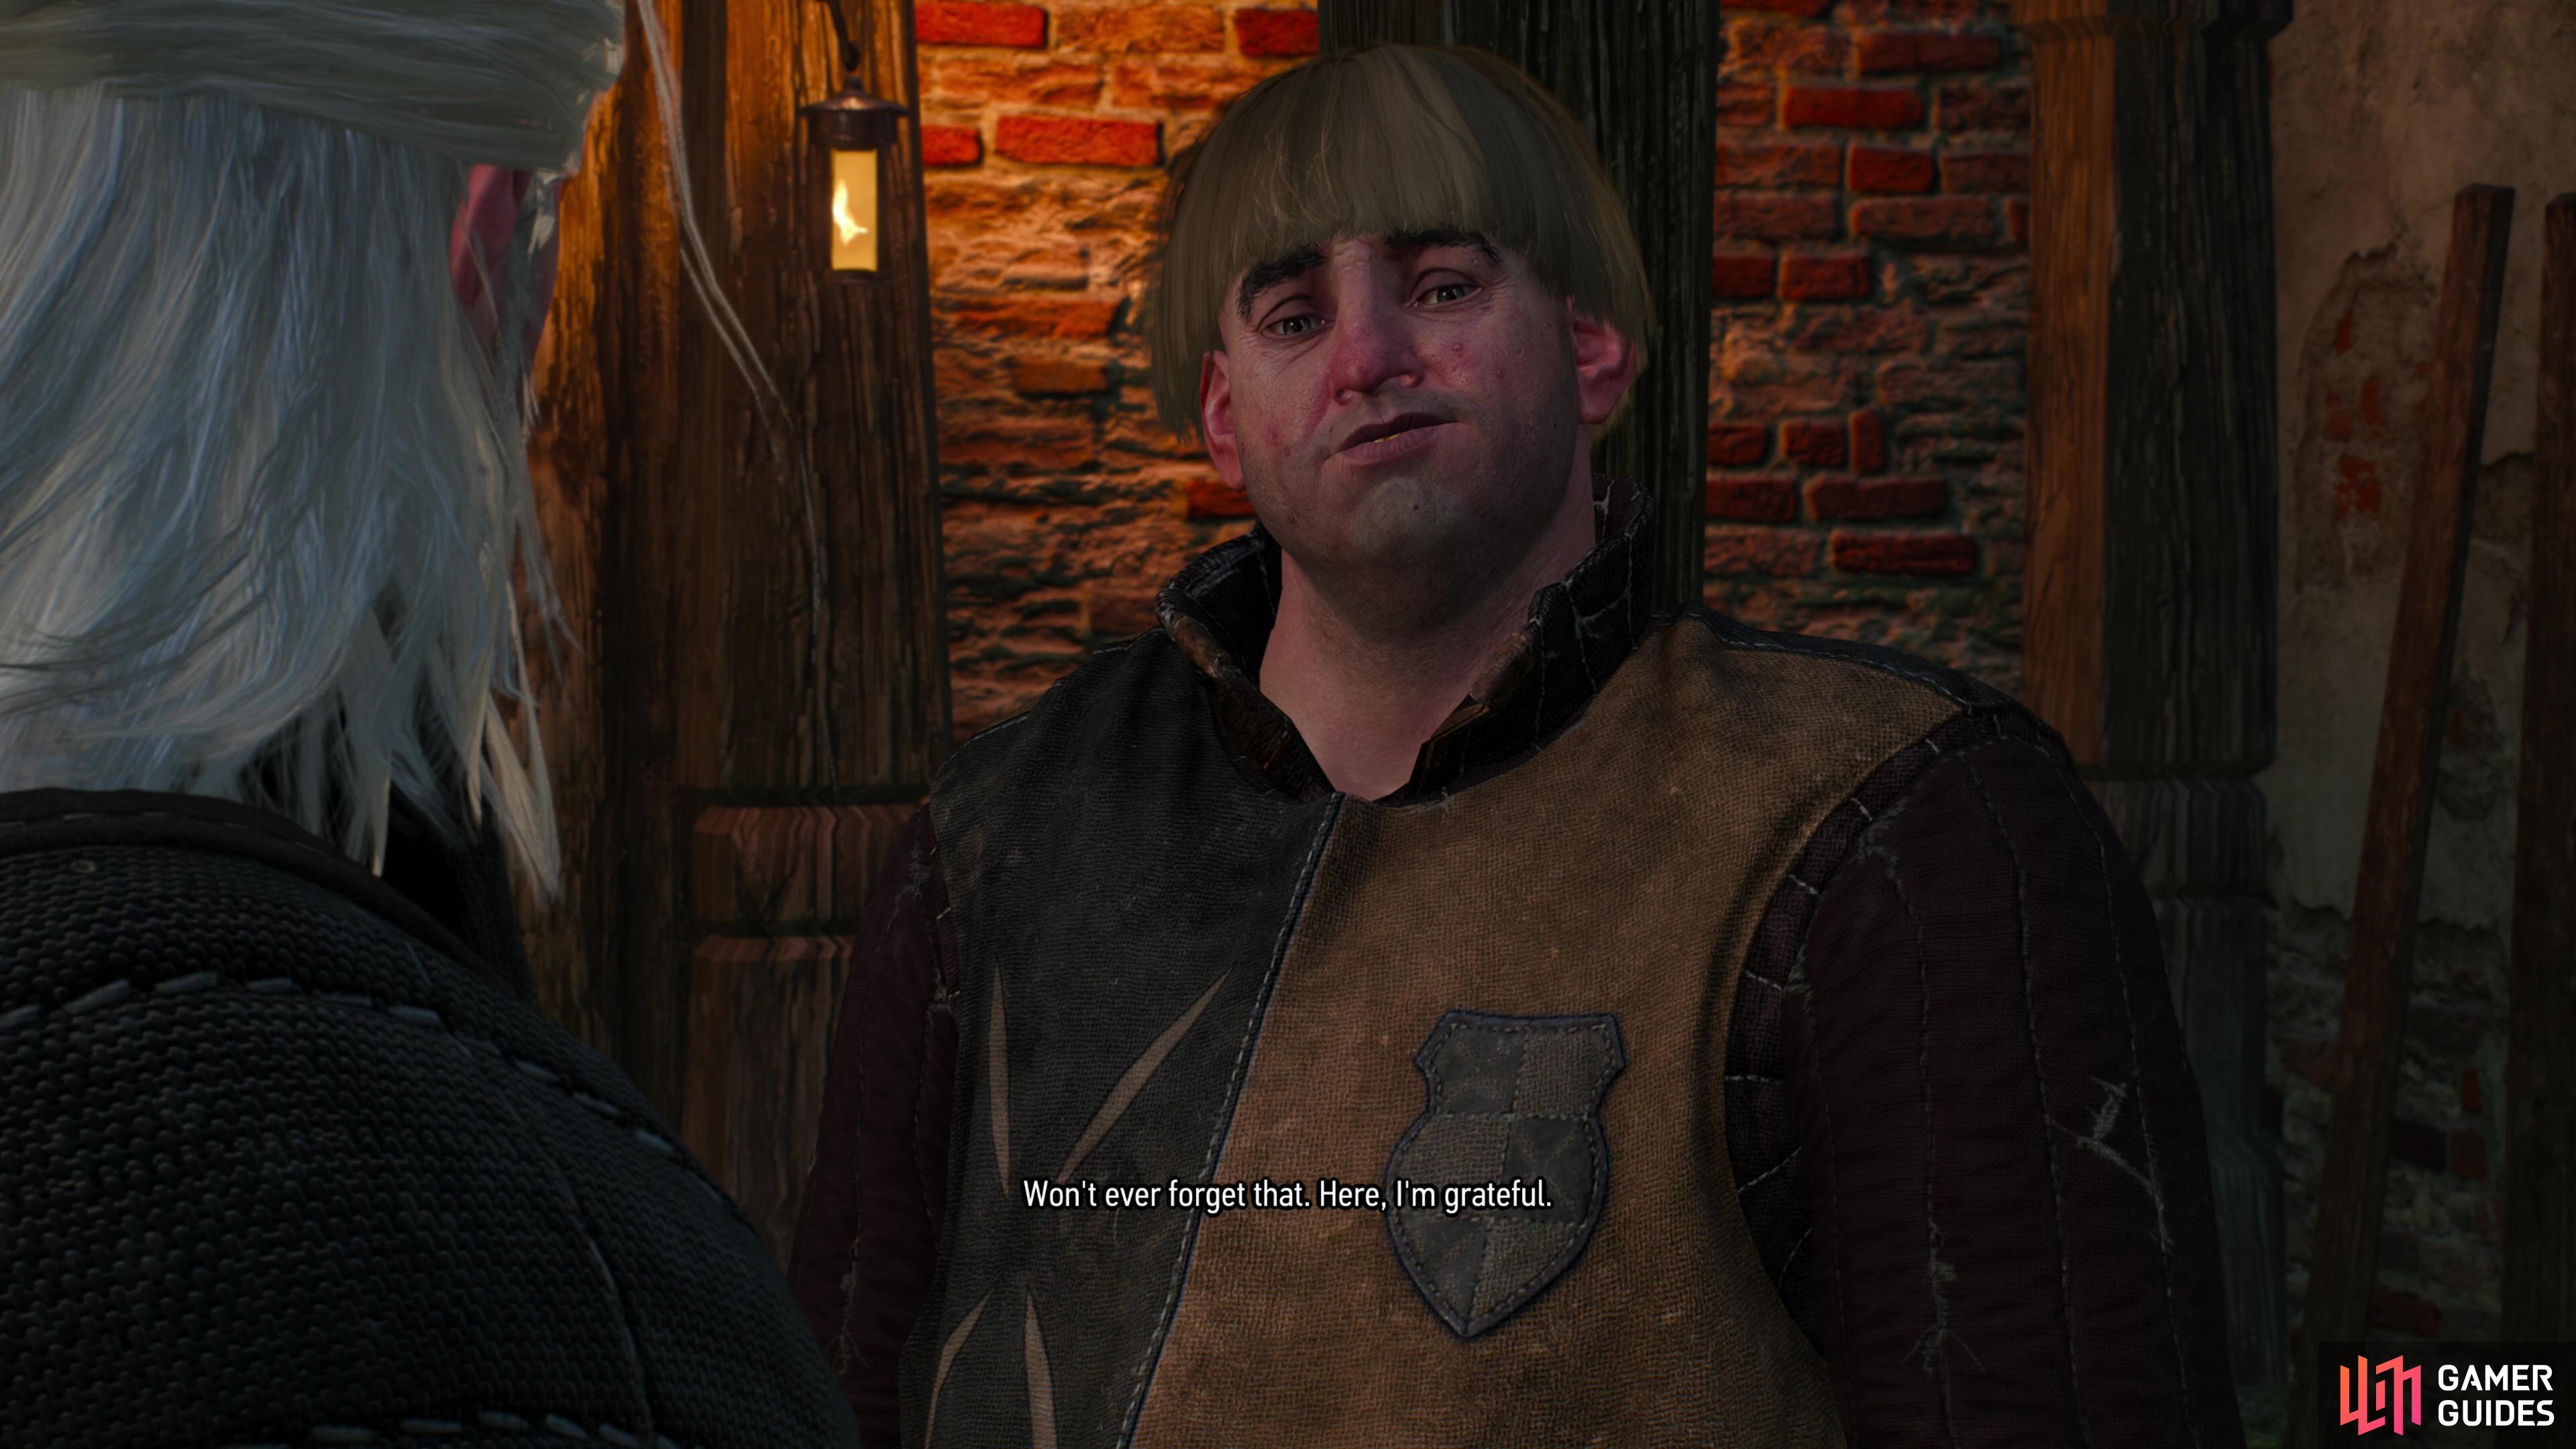
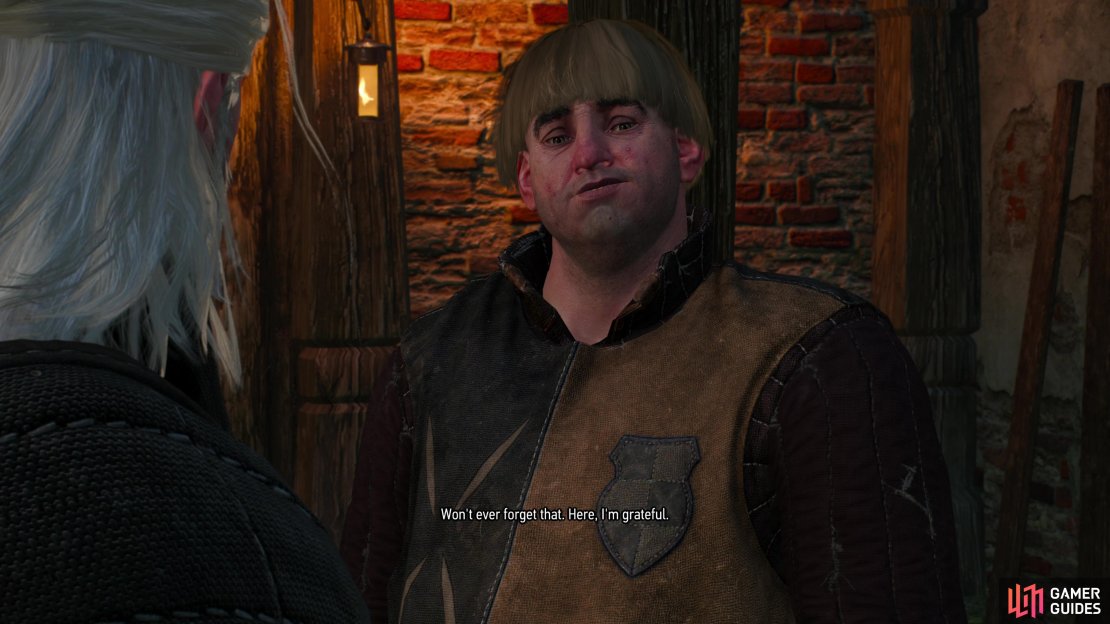
However you dealt with the Botchling, you’ll have gained the same information in the end and will need to report your findings to the Bloody Baron. Head back to Crow’s Perch and if you saved the stable hand earlier he’ll intercept you as you pass through the gates, thanking Geralt and giving him 20 ![]() Crowns. Approach the garden next to the castle and you’ll get another interruption, this time from the Bloody Baron’s Sergeant, who asks Geralt what happened on the night you dealt with the Botchling. Say what you want, then continue to find the Bloody Baron waxing nostalgic over some flowers in the garden, after which you’ll head on inside to talk shop.
Crowns. Approach the garden next to the castle and you’ll get another interruption, this time from the Bloody Baron’s Sergeant, who asks Geralt what happened on the night you dealt with the Botchling. Say what you want, then continue to find the Bloody Baron waxing nostalgic over some flowers in the garden, after which you’ll head on inside to talk shop.
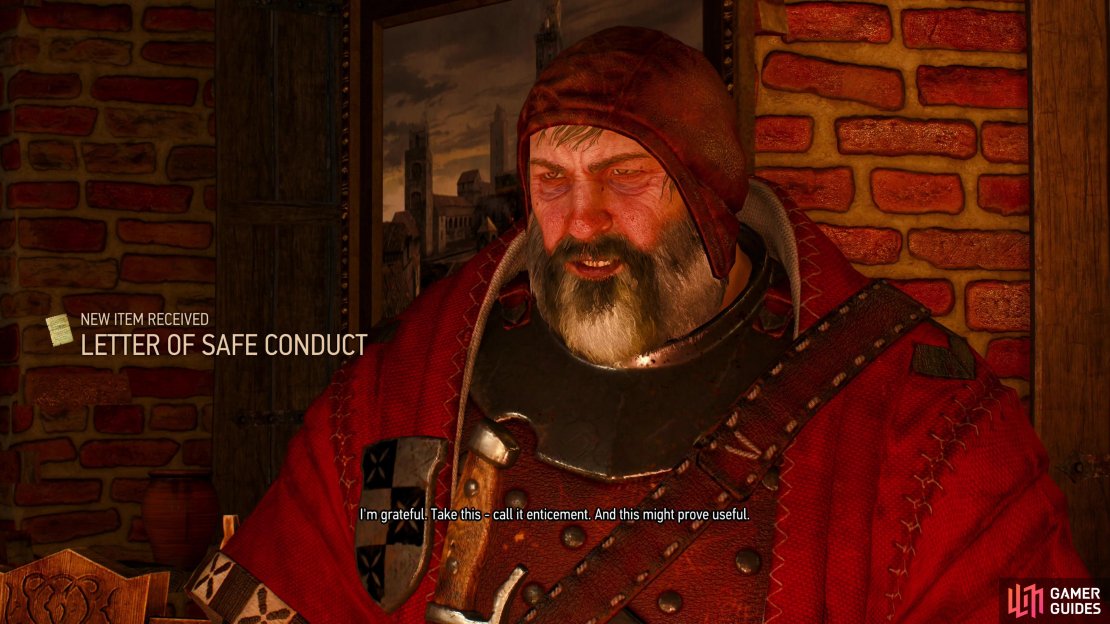
Upon hearing that Tamara is in Oxenfurt the Bloody Baron will give you a Letter of Safe Conduct, allowing you to enter Oxenfurt and Novigrad. If you already got a Transit Pass or Letter of Safe Conduct from, say Fake Papers or Contract: Woodland Beast… well, then you have another redundant pass. Agree to confirm Tamara’s presence in Oxenfurt (there’s some EXP in it for you if you do!) and Geralt will finally weasel another story about Ciri out of the Bloody Baron, starting the very brief quest Ciri’s Story: The Race.
Once that playable flashback is over the Bloody Baron will promise to tell you the rest once you find his wife, Anna. At this point you should have two objectives for this quest: Find Tamara, the baron’s daughter, in Oxenfurt. and Investigate all remaining leads in Velen and find the Baron’s wife.. You can’t advance the latter until you complete Hunting a Witch and Wandering in the Dark, but you can meet with Tamara and gain a bit of EXP in the process. As you leave the castle, the Bloody Baron will stop you and give you a doll to give to Tamara. Optimistic to the end, this guy.
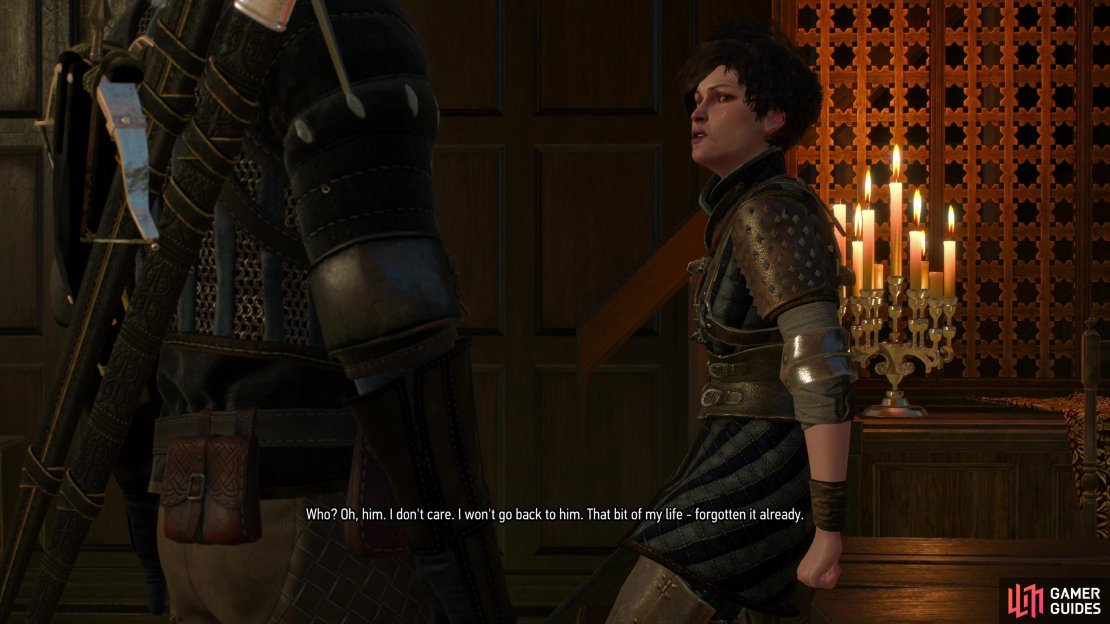
Make your way over to Oxenfurt, which is far to the northeast of Crow’s Perch, an island off the eastern coast of the larger Velen landmass where the Hanged Man’s Tree is located. It’s a bit of a ride, but it shouldn’t be easy to miss once you’re on the eastern side of this island. Cross the bridge and, provided you have a pass (either a Letter of Safe Conduct or a Transit Pass) you shouldn’t be bothered. Once across the bridge turn left and follow the harborside road north until you find the Oxenfurt Harbor signpost. The house where Tamara is staying is on the northern side of Oxenfurt, and once you find it head inside to trigger a scene. It doesn’t matter what you say here, just exhaust her dialog options and you’ll reconfirm what you’ve already heard about Anna and Tamara’s involvement with the cult of the Eternal Fire. Importantly, Tamara is emphatic that she’s not going back to her father. Loot the house if you wish, then leave - you’ll get a moderate amount of EXP for this endeavor, even though it doesn’t really lead to anything. You can report back to the Bloody Baron, if you wish, but aside from some chatter there’s no reward and it doesn’t really move the quest forward in any meaningful way.
(1 of 3) Return to the castle at Crow’s Perch and the Stable Hand, if you saved him, will reward you.
To advance this quest further you’ll now need to complete Hunting a Witch and Wandering in the Dark, if you haven’t already.
Investigate the Remaining Leads in Velen
Eventually you’ll end up with only the rather obscure objective Investigate the Remaining ![]() Leads in Velen, which is game-speak for “do all the other main quests”. You must complete Hunting a Witch and Wandering in the Dark to get a lead on the witches Ciri clashed with, staring the quest Ladies in the Wood. During this quest you’ll find that the Bloody Baron’s family troubles and Geralt’s own are more connected than they originally seemed, and in order to get an audience with these “
Leads in Velen, which is game-speak for “do all the other main quests”. You must complete Hunting a Witch and Wandering in the Dark to get a lead on the witches Ciri clashed with, staring the quest Ladies in the Wood. During this quest you’ll find that the Bloody Baron’s family troubles and Geralt’s own are more connected than they originally seemed, and in order to get an audience with these “![]() Ladies of the Wood” you’ll need to complete the secondary quest The Whispering Hillock, during which your choices will determine how the Bloody Baron’s questline will play out. Following that you’ll meet the “Ladies of the Wood”, aka the
Ladies of the Wood” you’ll need to complete the secondary quest The Whispering Hillock, during which your choices will determine how the Bloody Baron’s questline will play out. Following that you’ll meet the “Ladies of the Wood”, aka the ![]() Crones of Crookback Bog who will relate Ciri’s Story: Fleeing the Bog to Geralt. Only after all this will Family Matters finally become active again, and even then, only to task you with returning to the Bloody Baron in Crow’s Perch and telling him what you learned of his wife. To compensate you he’ll tell you his third and final “Ciri’s Story”, Ciri’s Story: Out of the Shadows (respond however you wish to his attempt to spread the blame around for his marital woes - your choices don’t matter).
Crones of Crookback Bog who will relate Ciri’s Story: Fleeing the Bog to Geralt. Only after all this will Family Matters finally become active again, and even then, only to task you with returning to the Bloody Baron in Crow’s Perch and telling him what you learned of his wife. To compensate you he’ll tell you his third and final “Ciri’s Story”, Ciri’s Story: Out of the Shadows (respond however you wish to his attempt to spread the blame around for his marital woes - your choices don’t matter).
You’ll earn a great deal of EXP and Family Matters will finally end, and the followup quest, and culmination of the Bloody Baron questline, Return to Crookback Bog will begin.
No Comments