Fast travel back to the Plegmund’s Bridge signpost and return to Liam and Matilda, where Geralt will explain the malevolence behind their woes… provided you followed the guide’s advice and completed the quests Wine Wars: Coronata, Wine Wars: Vermentino and Wine Wars: The Deus in the Machina. Count Crespi, the deceased owner of Belgaard, was the saboteur all along, attempting to undermine his rivals to keep them from uniting and competing against him. It seems the Beast did Toussaint a favor by ridding the world of such a wretched man.
If you only completed one of either Wine Wars: Coronata or Wine Wars: Vermentino, only that vineyard’s owner will be free to purchase Belgaard, and hence, be satisfied with your decision. If you helped both, the Ducal Clerk will insist on a compromise between the two, offering them joint stewardship of the Belgaard Vineyard. Peaceful collaboration, or the formation of a massive wine-producing juggernaut that’ll soon be able to exercise too much economic power? Such things are beyond the concern of a Witcher (although perhaps not beyond the concern of a witcher who owns his own, soon-to-be competing vineyard…).
Belgaard Vineyard isn’t without its own issues, however, as many of the same issues that plagued the other vineyards have also struck Belgaard. Coincidence? Poetic justice? Whatever the case, whichever client now owns the Belgaard Vineyard needs your help to resolve its problems and become productive again. After you agree, you should earn the quest rewards for whatever Wine Wars quest(s) you’ve completed above (the exact rewards are listed at the end of each quest), which should end up being quite a bit of Crowns, even if you didn’t haggle - well over 1,000 Crowns if you completed both Wine Wars: Coronata and Wine Wars: Vermentino.
Such generous rewards should be all the incentive you need to continue on with Wine Wars: Belgaard, which is nearly identical to the two aforementioned Wine Wars quests in that there are five map markers you’ll need to clear to rid the land of its troubles.
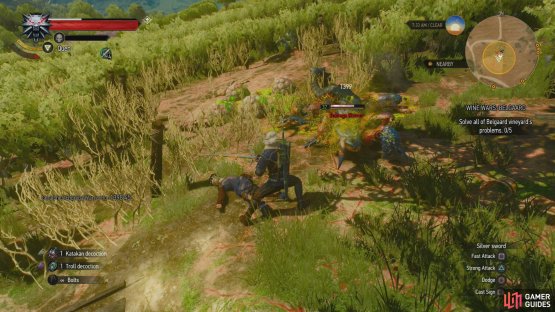
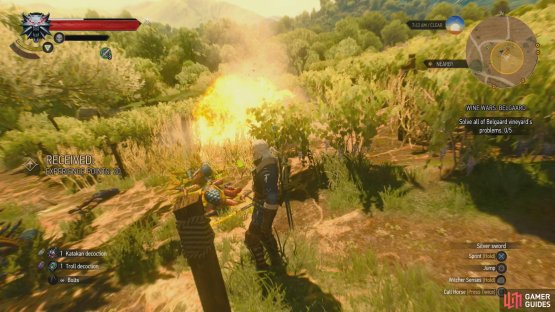
(1 of 2) Kill several Endrega variants,
Kill several Endrega variants, (left), then bomb their nest. (right)
Belgaard Site: Vineyard Infestation
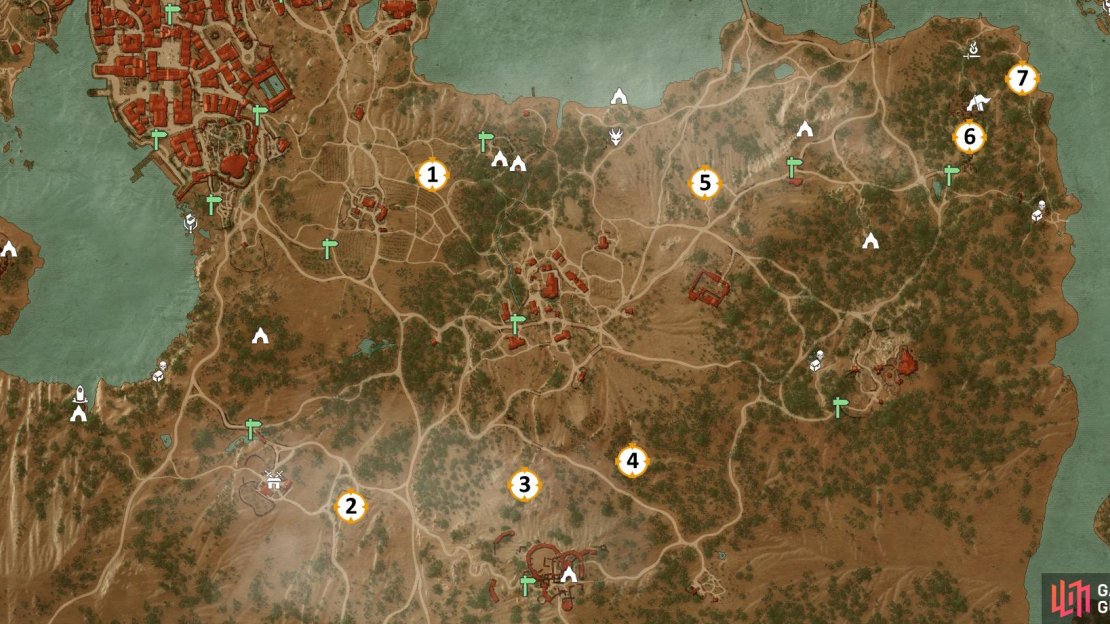
First step in this quest is to head southwest of the Belgaard Vineyard to locate its signpost, if you don’t already have it (there’s a good chance you ran across it on your way to Francollarts earlier, during the quest Turn and Face the Strange). Once you’re certain you have that signpost, make your way northeast from the Belgaard Vineyard where - halfway between the vineyard and the Mere-Lachaiselongue Cemetery - you’ll find a Vineyard Infestation event (#1 on the map). Instead of new critters native to Toussaint, you’ll find some good old Endregas have moved into these fields, including an Endrega Warrior, Endrega Drone, and Endrega Workers (level thirty-seven). Kill them, blow up their nest, and loot a nearby body to find “Thierry Pires’ Journal”, for what that’s worth.
| Reward: For destroying the Endrega Nest |
|---|
| 20 XP |
Belgaard Site: Abandoned Site
Francollarts will serve as a fine hub for the next two locations you must clear, both of which are south of the village. Well, southwest and southeast, to be more precise. Make your way southeast to Francollarts, and from there head to the southwestern marker first until you find the indicated location - an Abandoned Site (#2 on the map). in another change of pace, this site isn’t guarded by any weeds, but rather by a Slyzard.
While they possess neither the size or intelligence of a proper dragon, their reptilian appearance (albeit, somewhat abberative), wings and fiery breath may confuse the untrained. Sharing a body similar to that of a Wyvern or Forktail, you can expect some of the same attacks, including a dive, a leaping claw attack, and a lunging bite. In addition, however, Slyzards can breath fire, both as a gout of flame (while on the ground) or as a fiery blast (while flying). If you see fire in its mouth, assume it intends to breathe fire, and if it’s flying… well, it’s probably up to some mischief involving fire there, too. They can also emit a sonic blast which will stun unprotected opponents, which they like to tack advantage of with a tail sweep. Use the Quen sign to protect yourself, as well as Draconid Oil to increase your damage, and when they’re flying about, try to shoot them down with your crossbow before they can hit you with their breath weapon.
Once the Slyzard is dead, Geralt will take his mandatory post-fight nap so that the Abandoned Site can become… somewhat less abandoned. When the peasants return, loot the containers about the field, then search a body in a wagon along the northern end of the field, upon which you’ll find a “Letter bearing Castel Ravello’s seal”.
Wine Wars Monster Nest
The nest target in service of Belgaard is to the east, northeast, but en route you’ll probably run across another Monster Nest (#3 on the map), which is guarded by two Giant Centipedes (level forty-three). Smite the insects, blow up their nest, then loot a corpse to find - among other trivial treasures - a “Love letter from Bella de Gunness”. Guy should have left hunting monsters to professionals.
| Reward: For destroying the Giant Centipede Nest |
|---|
| 20 XP |
(1 of 2) Kill some more giant centipedes,
Kill some more giant centipedes, (left), then destroy their nest. (right)
Belgaard Site: Monster Nest
Continue east to reach the next Belgaard objective, which… is another Giant Centipede Monster Nest (#4 on the map)! The insects here are only (level thirty-eight), however, so they should die somewhat easier than the last pair did. Kill them, bomb their nest, then walk away like a badass… before geekily returning to loot the mess you made.
| Reward: For destroying the Giant Centipede Nest |
|---|
| 20 XP |
Belgaard Site: Guarded Treasure
Return to Francollarts once again, and from there journey a good distance northeast to the next quest marker. When you arrive you’ll discover a Guarded Treasure event (#5 on the map), where… more Giant Centipedes (level thirty-eight) lurk near a ravaged campsite. Okay, getting kind of old now. Kill the tedious bugs, then loot the containers lying about before grabbing the “Letter to Gregory Pyxide” off a terribly mangled corpse. How mangled? The lootable part includes one and a half legs. Ouch. Looks like the handiwork of Count Crespi again. Indirectly of course.
(1 of 2) Knock a hole in a weak section of wall,
Knock a hole in a weak section of wall, (left), then draw from a Place of Power. (right)
Turmes Palace Ruins
The final Belgaard site is further northeast, and while getting there isn’t really much of a problem, doing so without tripping over several quests and map markers you don’t want to bother with might be. From the Guarded Treasure head south to find a road, which you should follow northeast until it forks. At this fork you’ll find the Gelenser Farm signpost, and if you go exploring off the road to the north you’ll find a cave, near which is a Vintner’s Contract location. Something to keep in mind for later.
Back at the fork in the road near the Gelenser Farm signpost, take the southern of the two roads and continue east, ignoring any forks to the north or south as you go until you hit a bridge. Continue east past the bridge to find the Termes Palace Ruins signpost, at which turn northeast and head towards the ruins (#6 on the map) the signpost presumably names.
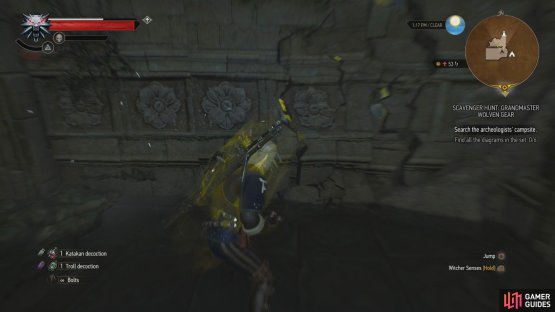
When you reach the southern end of the ruins, note two sets of stairs, one going up to the top of the ruins, and another flight descending into the earth to the east. Head upstairs first, loot all the crates and the chest there, then descend back down, head east, and go down the second flight of stairs. These stairs terminate at a ledge which a humble waterfall decorates. Climb this ledge and pass through a doorway beyond the waterfall to enter a chamber where, against the western wall you’ll find some containers to loot. Plunder the ruins, then search the northern wall near the doorway you used to enter to find a breakable section of wall. Liberate the stones from their vertical prison with the Aard sign, then enter the chamber beyond to find a Place of Power.
:::note:
If you’ve started the quest Scavenger Hunt: Grandmaster Wolven Gear by talking to Lazarus Lafargues in Beauclaire, you can actually move the chains on that quest, as it takes place nearby. We’ll get to it after we’re done with our current quest - if you have the Termes Palace Ruins signpost it should be easy enough to return here.
:::
Belgaard Site: Person(s) in Distress
Leave the elven ruins one Ability Point richer and continue your trek to the northeast until, near the shore of a river, you’ll finally reach the last Belgaard event (#7 on the map). Predictably enough, it’s a Person(s) in Distress event, albeit this time with a higher number of Bandits (level forty) than usual. Kill the half-dozen or so opponents here to free their captive, a Blacksmith who will return to the Belgaard Vineyard in your company, or alone if you dismiss him. Choose the latter to loot the campsite and the victims of your latest murder… err… justice spree.
The End of the Wine Wars
When you’re done looting, return to the Belgaard Vineyard and talk to Liam and/or Matilda again. After the Ducal Clerk officially grants ownership to whichever party (or parties) you helped during the earlier Wine Wars quests. Not only will you be thanked for your work, but you’ll be handsomely rewarded, as well. If you completed both Wine Wars: Coronata and Wine Wars: Vermentino, the two will invite you back in three days, as they have a special reward brewing for you.
| Reward: For resolving the problems plaguing the Belgaard Vineyard |
|---|
| 150 XP / 900 Crowns |
Meditate for three days, or otherwise busy yourself, after which you’ll return to find that the benevolent vintners have created a wine in your honor. An odd reward, generally speaking, but in context of the work you’ve done to restore the vineyards and unite the two, it’s rather fitting. You’ll get a choice of three names for this beverage: Geralt of Rivia, Butcher of Blaviken and White Wolf. Make whatever choice you will, it’s mostly just flavor-text, anyways, although the Butcher of Blaviken brew does have twice the duration as the other two, if that matters to you. It’s largely irrelevant, however, as it’s doubtful anybody is chugging wine to heal at this stage in the game.

The Grapes of Wrath Stomped
Help unite the warring vineyards and have a wine named in your honor.

35
Speaking of busying yourself, there’s still plenty of quests you can do before consigning yourself to advancing the main story, if that’s your wish. By now you should be around level forty, at least (we were approaching level forty-three), meaning we could contemplate taking on quests that were beyond our means earlier on. At least, without having to see any skulls.
The remaining non-story quests you have left include (sorted by level):
- Vintner’s Contract: RIvecalme Storehouse (level thirty-seven)
- Contract: Bovine Blues (level thirty-eight)
- Big Feet to Fill (level forty)
- Extreme Cosplay (level forty)
- The Words of the Prophets Are Written on a Sarcophagi (level forty)
- Vintner’s Contract: Dun Tynne Hillside (level forty)
- The Hunger Game (level forty-two)
- A Potrait of the Witcher as an Old Man (level forty-three)
- Of Sheers and a Witcher I Sing (level forty-three)
- Vintner’s Contract: Cleaning Those Hard-to-Reach Places (level forty-three)
- Vintner’s Contract: Duchaton Crest (level forty-three)
- Equine Phantoms (level forty-four)
- Feet as Cold as Ice (level forty-five)
- Mutual of Beauclair’s Wild Kingdom (level forty-six)
- Duck, Duck, Goosed! (level forty-seven)
- Contract: The Tufo Monster (level forty-eight)
But before we do any of those, we came awfully close to Wolven Gear back at Termes Palace, so let’s go back there and finish up the quest Scavenger Hunt: Grandmaster Wolven Gear, after which we’ll collect all the Witcher sets. This new gear will help us on the higher-level quests in Touissant and will give us plenty of excuse to run around and explore.






No Comments