
The ![]() Griffin school gear - the lowest-level Witcher set armor in the game aside from the Viper Swords - will serve you well when you craft them… ideally around level eleven. Nothing lasts forever, however, and you’ll eventually outgrow them. As you approach level eighteen, however, the sign of the Griffin will once again promise you great gains, as you can seek out the enhanced Griffin diagrams and use them to upgrade your gear. This page will provide a walkthrough for the treasure hunt
Griffin school gear - the lowest-level Witcher set armor in the game aside from the Viper Swords - will serve you well when you craft them… ideally around level eleven. Nothing lasts forever, however, and you’ll eventually outgrow them. As you approach level eighteen, however, the sign of the Griffin will once again promise you great gains, as you can seek out the enhanced Griffin diagrams and use them to upgrade your gear. This page will provide a walkthrough for the treasure hunt ![]() Scavenger Hunt: Griffin School Gear Upgrade Diagrams - Part 2 in The Witcher 3, which will help you find the diagrams for the Griffin
Scavenger Hunt: Griffin School Gear Upgrade Diagrams - Part 2 in The Witcher 3, which will help you find the diagrams for the Griffin ![]() Silver Sword - Enhanced, the Enhanced Griffin Armor and the Enhanced Griffin Gauntlets.
Silver Sword - Enhanced, the Enhanced Griffin Armor and the Enhanced Griffin Gauntlets.
Quest Objectives
| Quick Search |
|---|
| Starting Scavenger Hunt: Griffin School Gear Upgrade Diagrams - Part 2 |
| Griffin Silver Sword - Enhanced Location |
| Enhanced Griffin Armor Location |
| Enhanced Griffin Gauntlets Location |
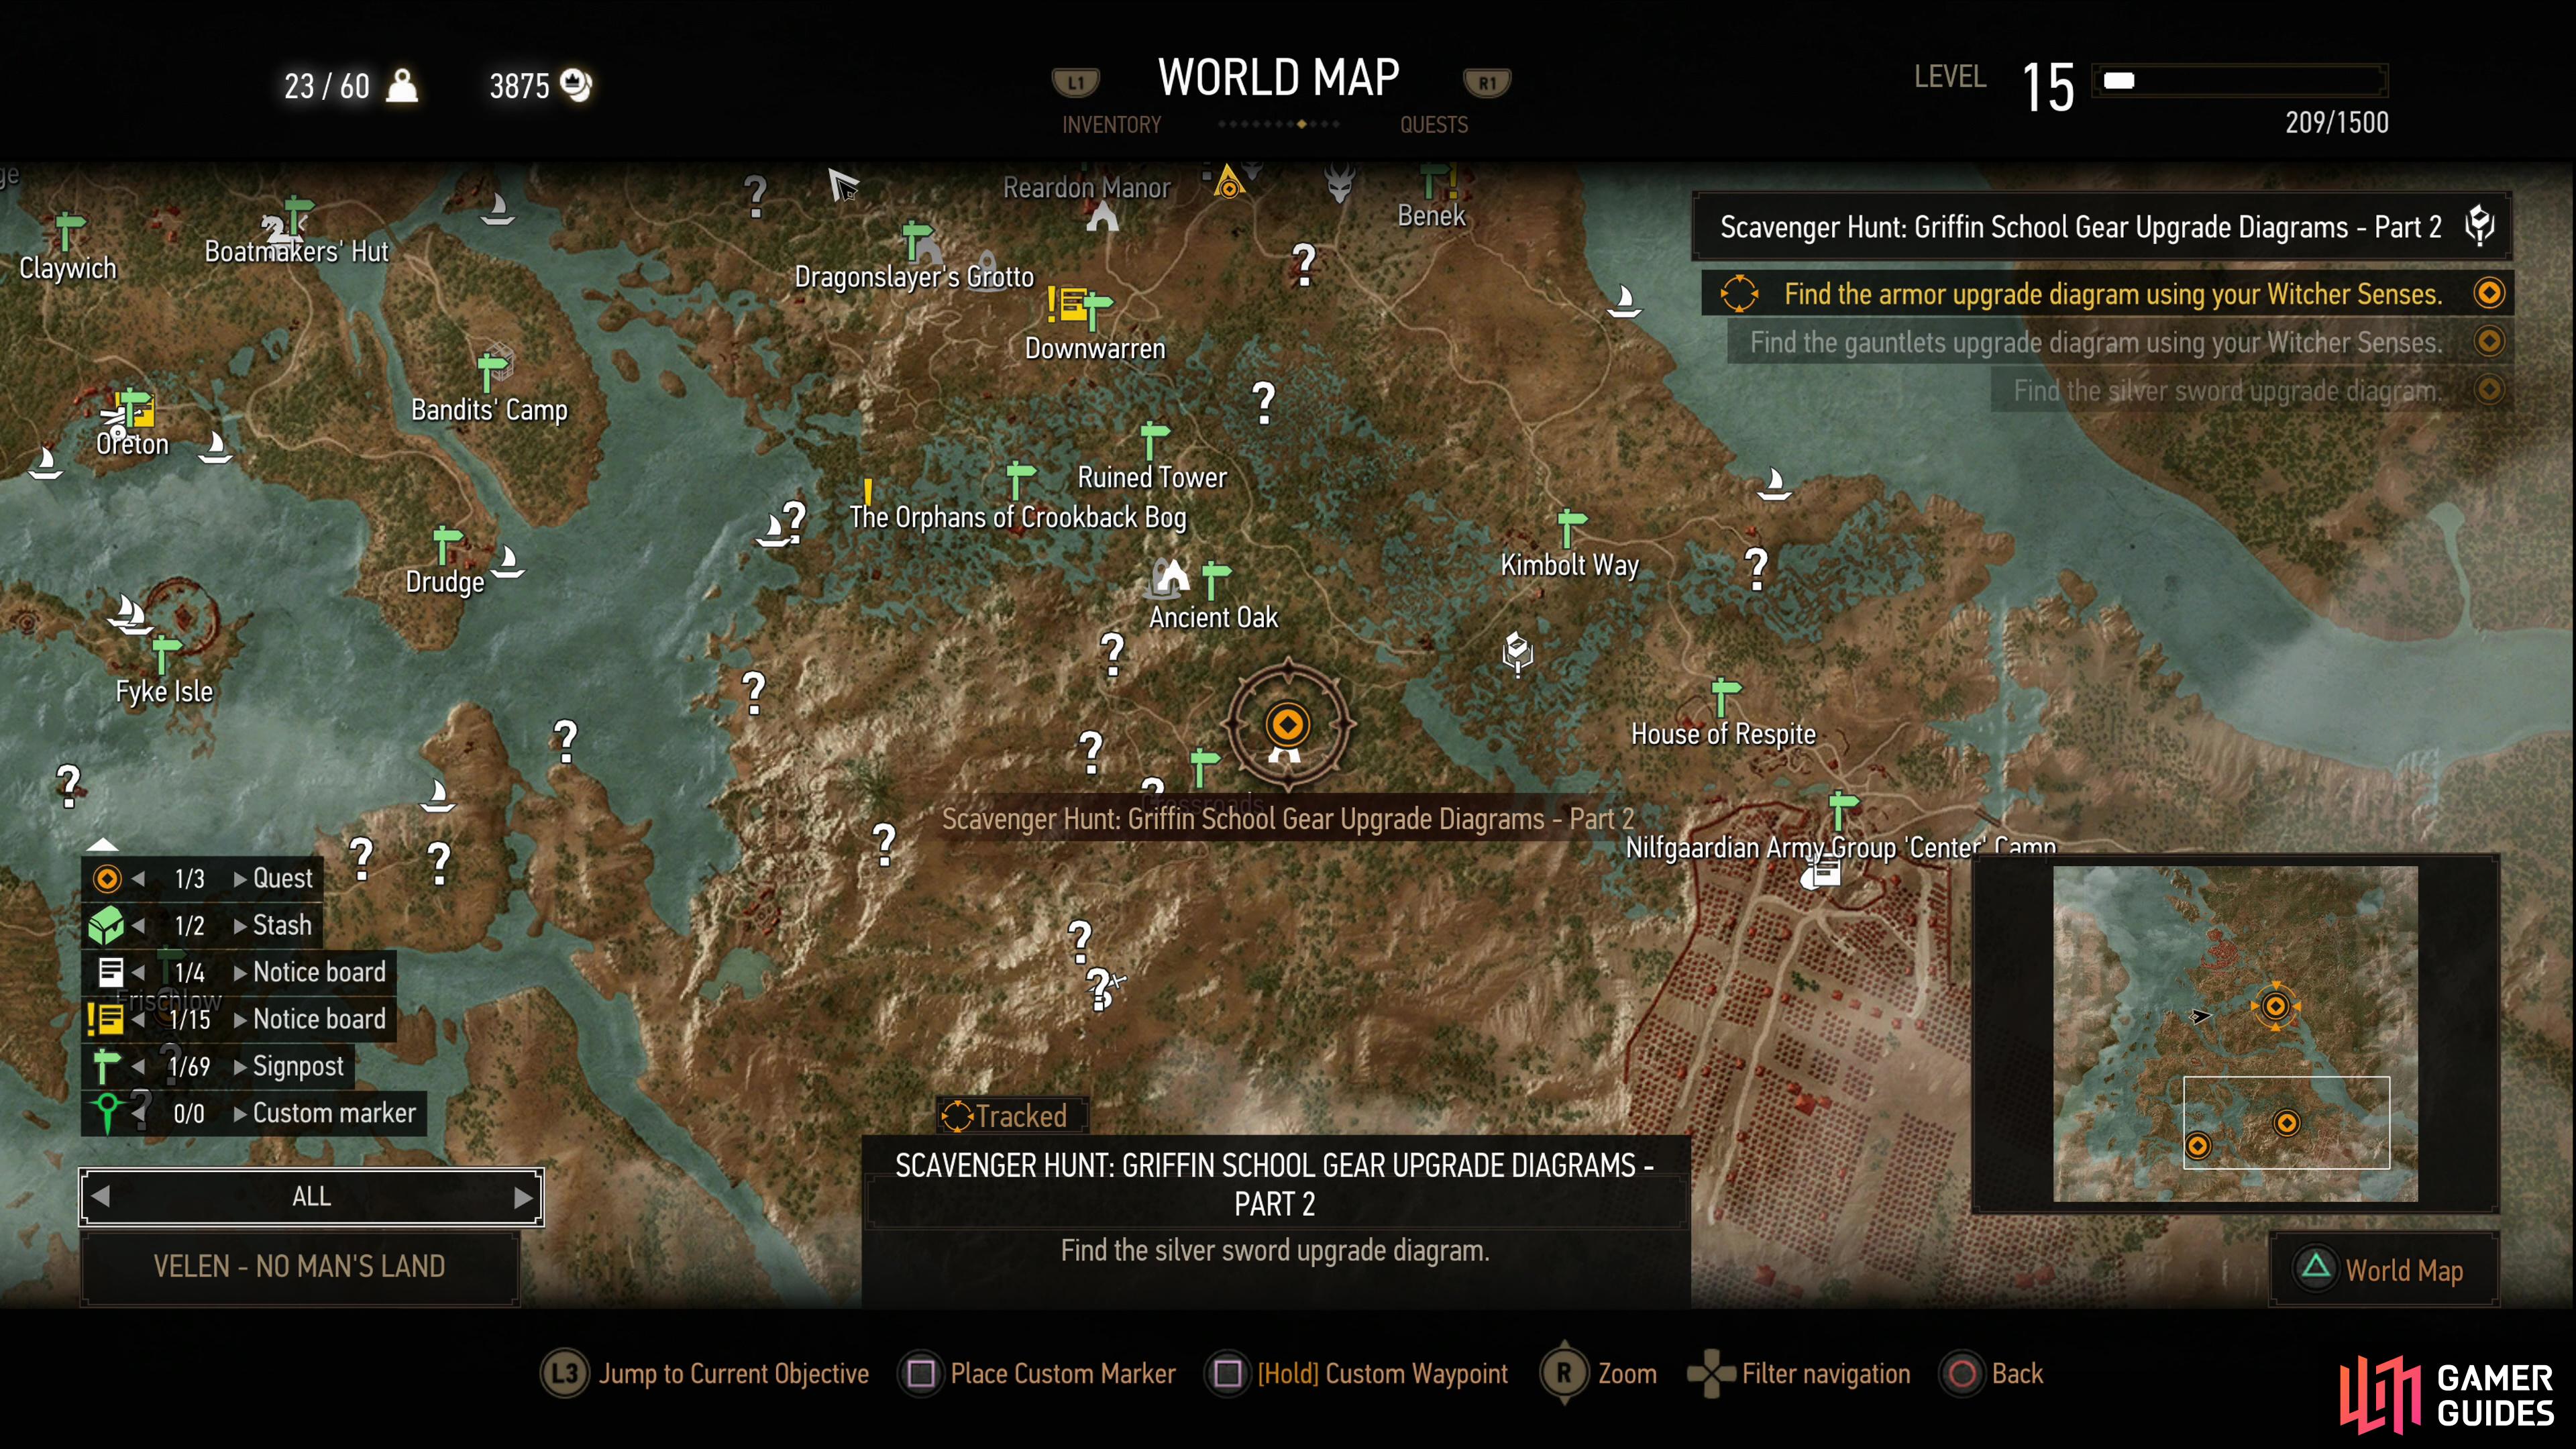
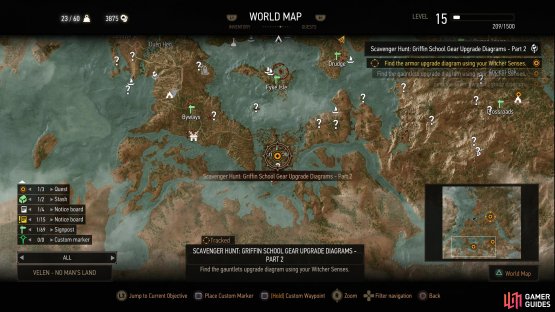
Starting Scavenger Hunt: Griffin School Gear Upgrade Diagrams - Part 2
Once again you’ll need to turn to scraps of paper sold by merchants to start this quest, lest you’re keen on finding these blind. Purchase Edwin Grelof’s Second Map from the Armorer at Midcopse and read it to start this quest. While the quest markers this provides can be useful, they’re not essential - if you know where to look you don’t need this quest. It’s also worth noting that the markers themselves aren’t that accurate, they’re going to point you to the right general area, but they don’t precisely mark the treasure chests you’re looking for.
Griffin Silver Sword - Enhanced Location
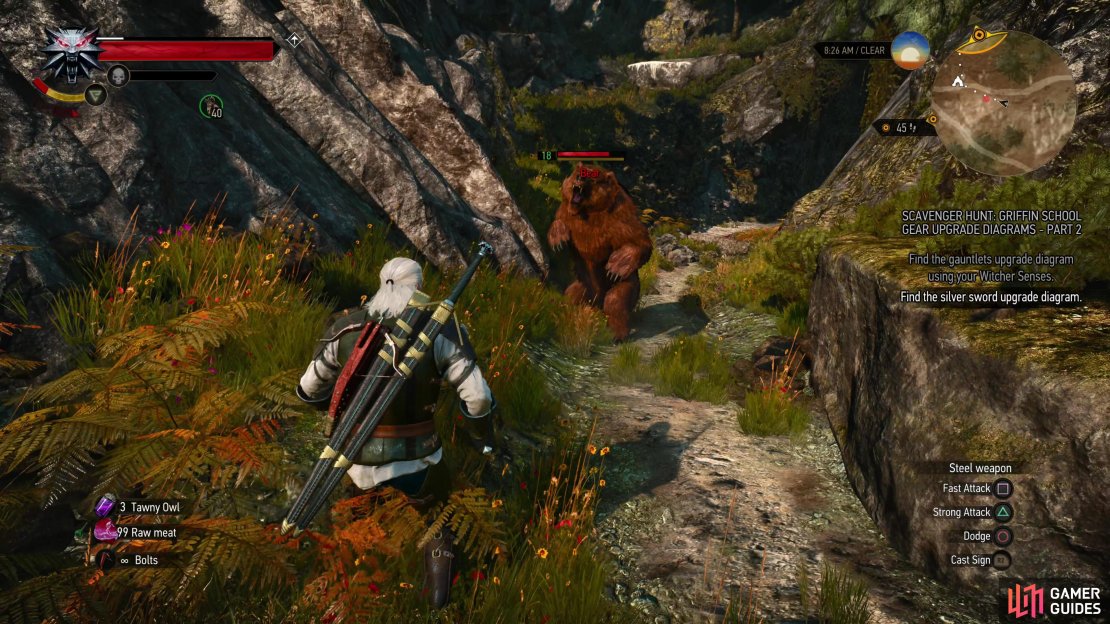
The diagram for the Griffin Silver Sword - Enhanced, is in a cave east of the Crossroads signpost in the southeastern corner of Velen. This is far away from what anybody could reasonably call civilization, but there’s a road that runs from the aforementioned Crossroads signpost to the cave itself. Follow the trail, drop down a ledge when you must, then turn east and drop down another ledge to find yourself right outside of the cave. It should also be noted that some tracks will lead you here during Contract: Patrol Gone Missing, as this cave is an optional objective you can explore to learn the truth about what the Nilfgaardian scouts were doing out here. Geralt will call it a ![]() Ghoul nest when he finds it - during the quest or not - but there are in fact no
Ghoul nest when he finds it - during the quest or not - but there are in fact no ![]() Ghouls to be found within. You may, however, encounter a Bear (Lv18) if you approach from the west, so keep that in mind.
Ghouls to be found within. You may, however, encounter a Bear (Lv18) if you approach from the west, so keep that in mind.
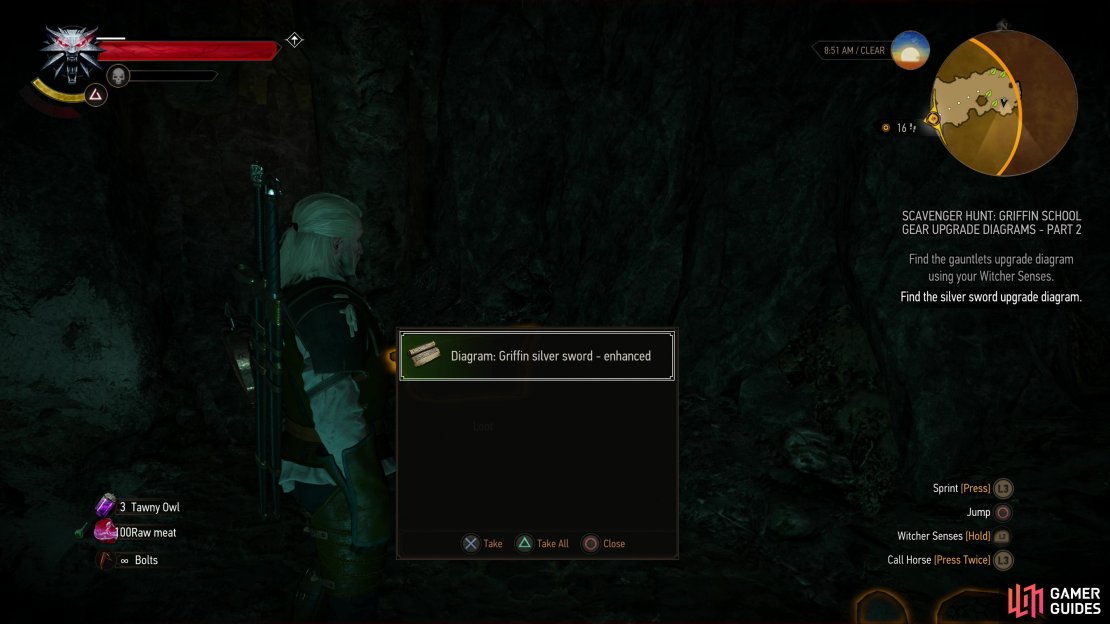
Inside the cave, make your way north, then northeast until you reach the end of the cave. At this point just look south and you should see the chest containing this diagram along the wall.

(1 of 3) The location of the Griffin Silver Sword - Enhanced diagram on the map.
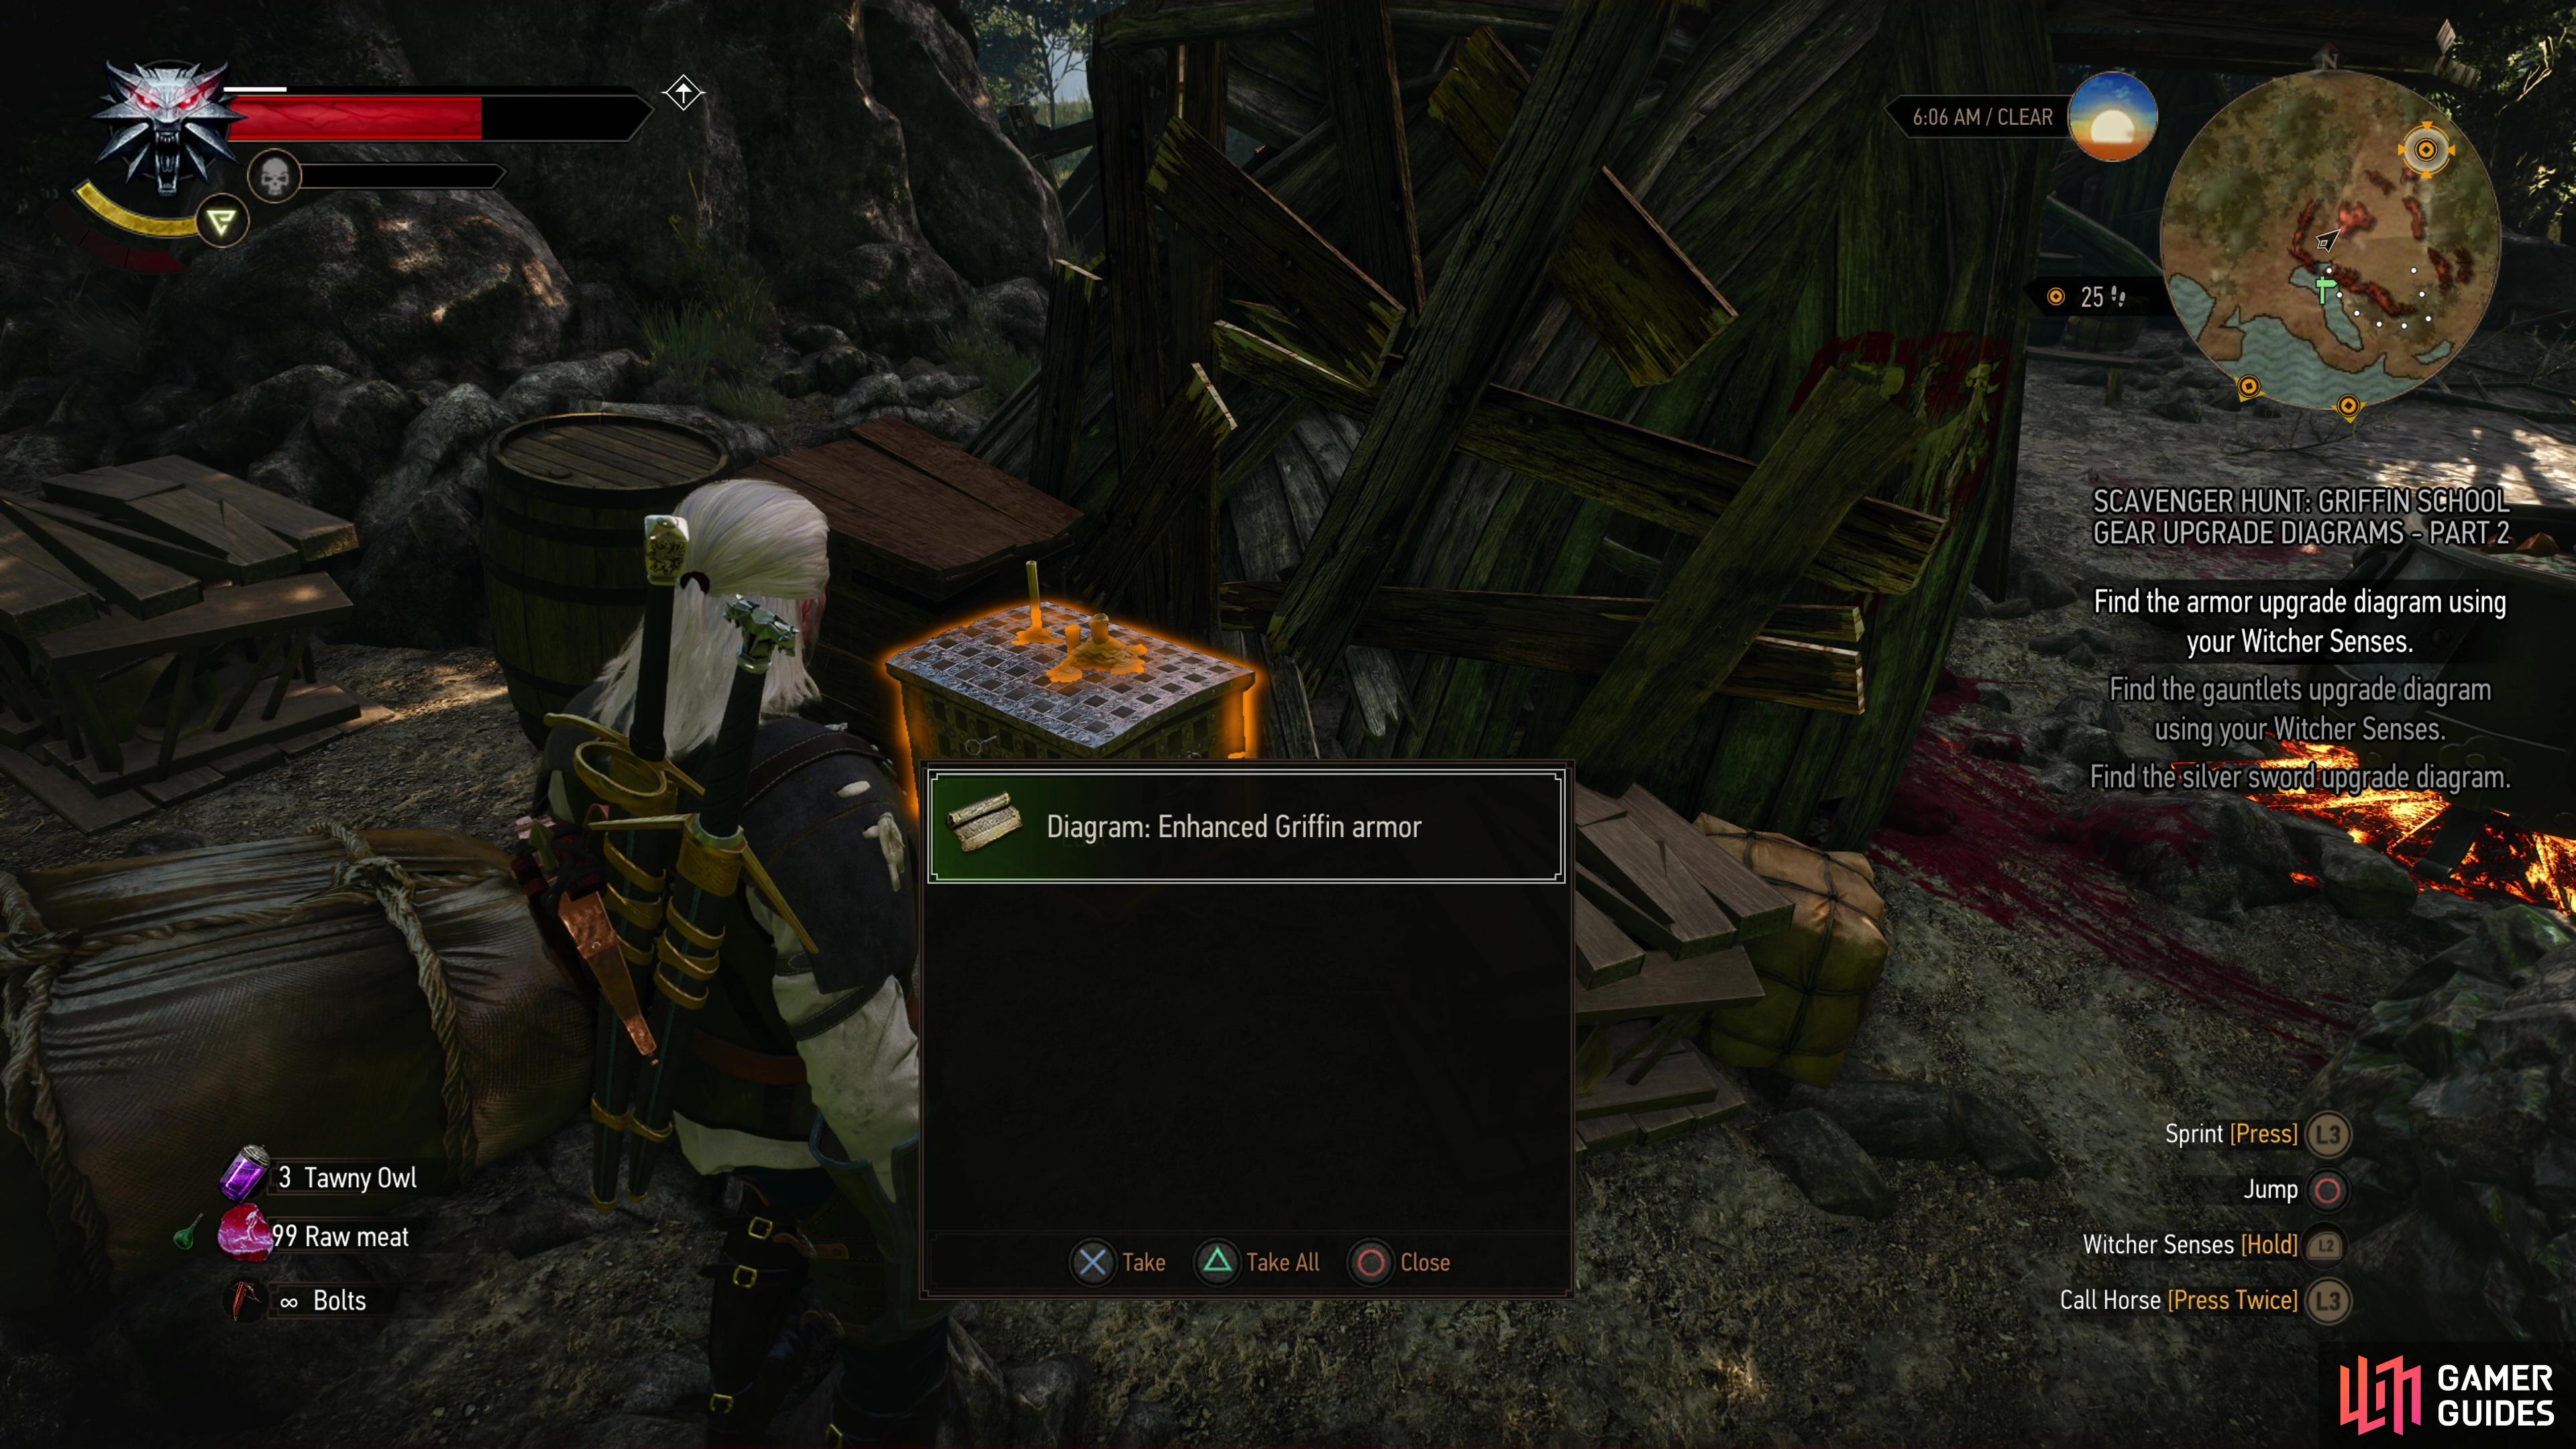
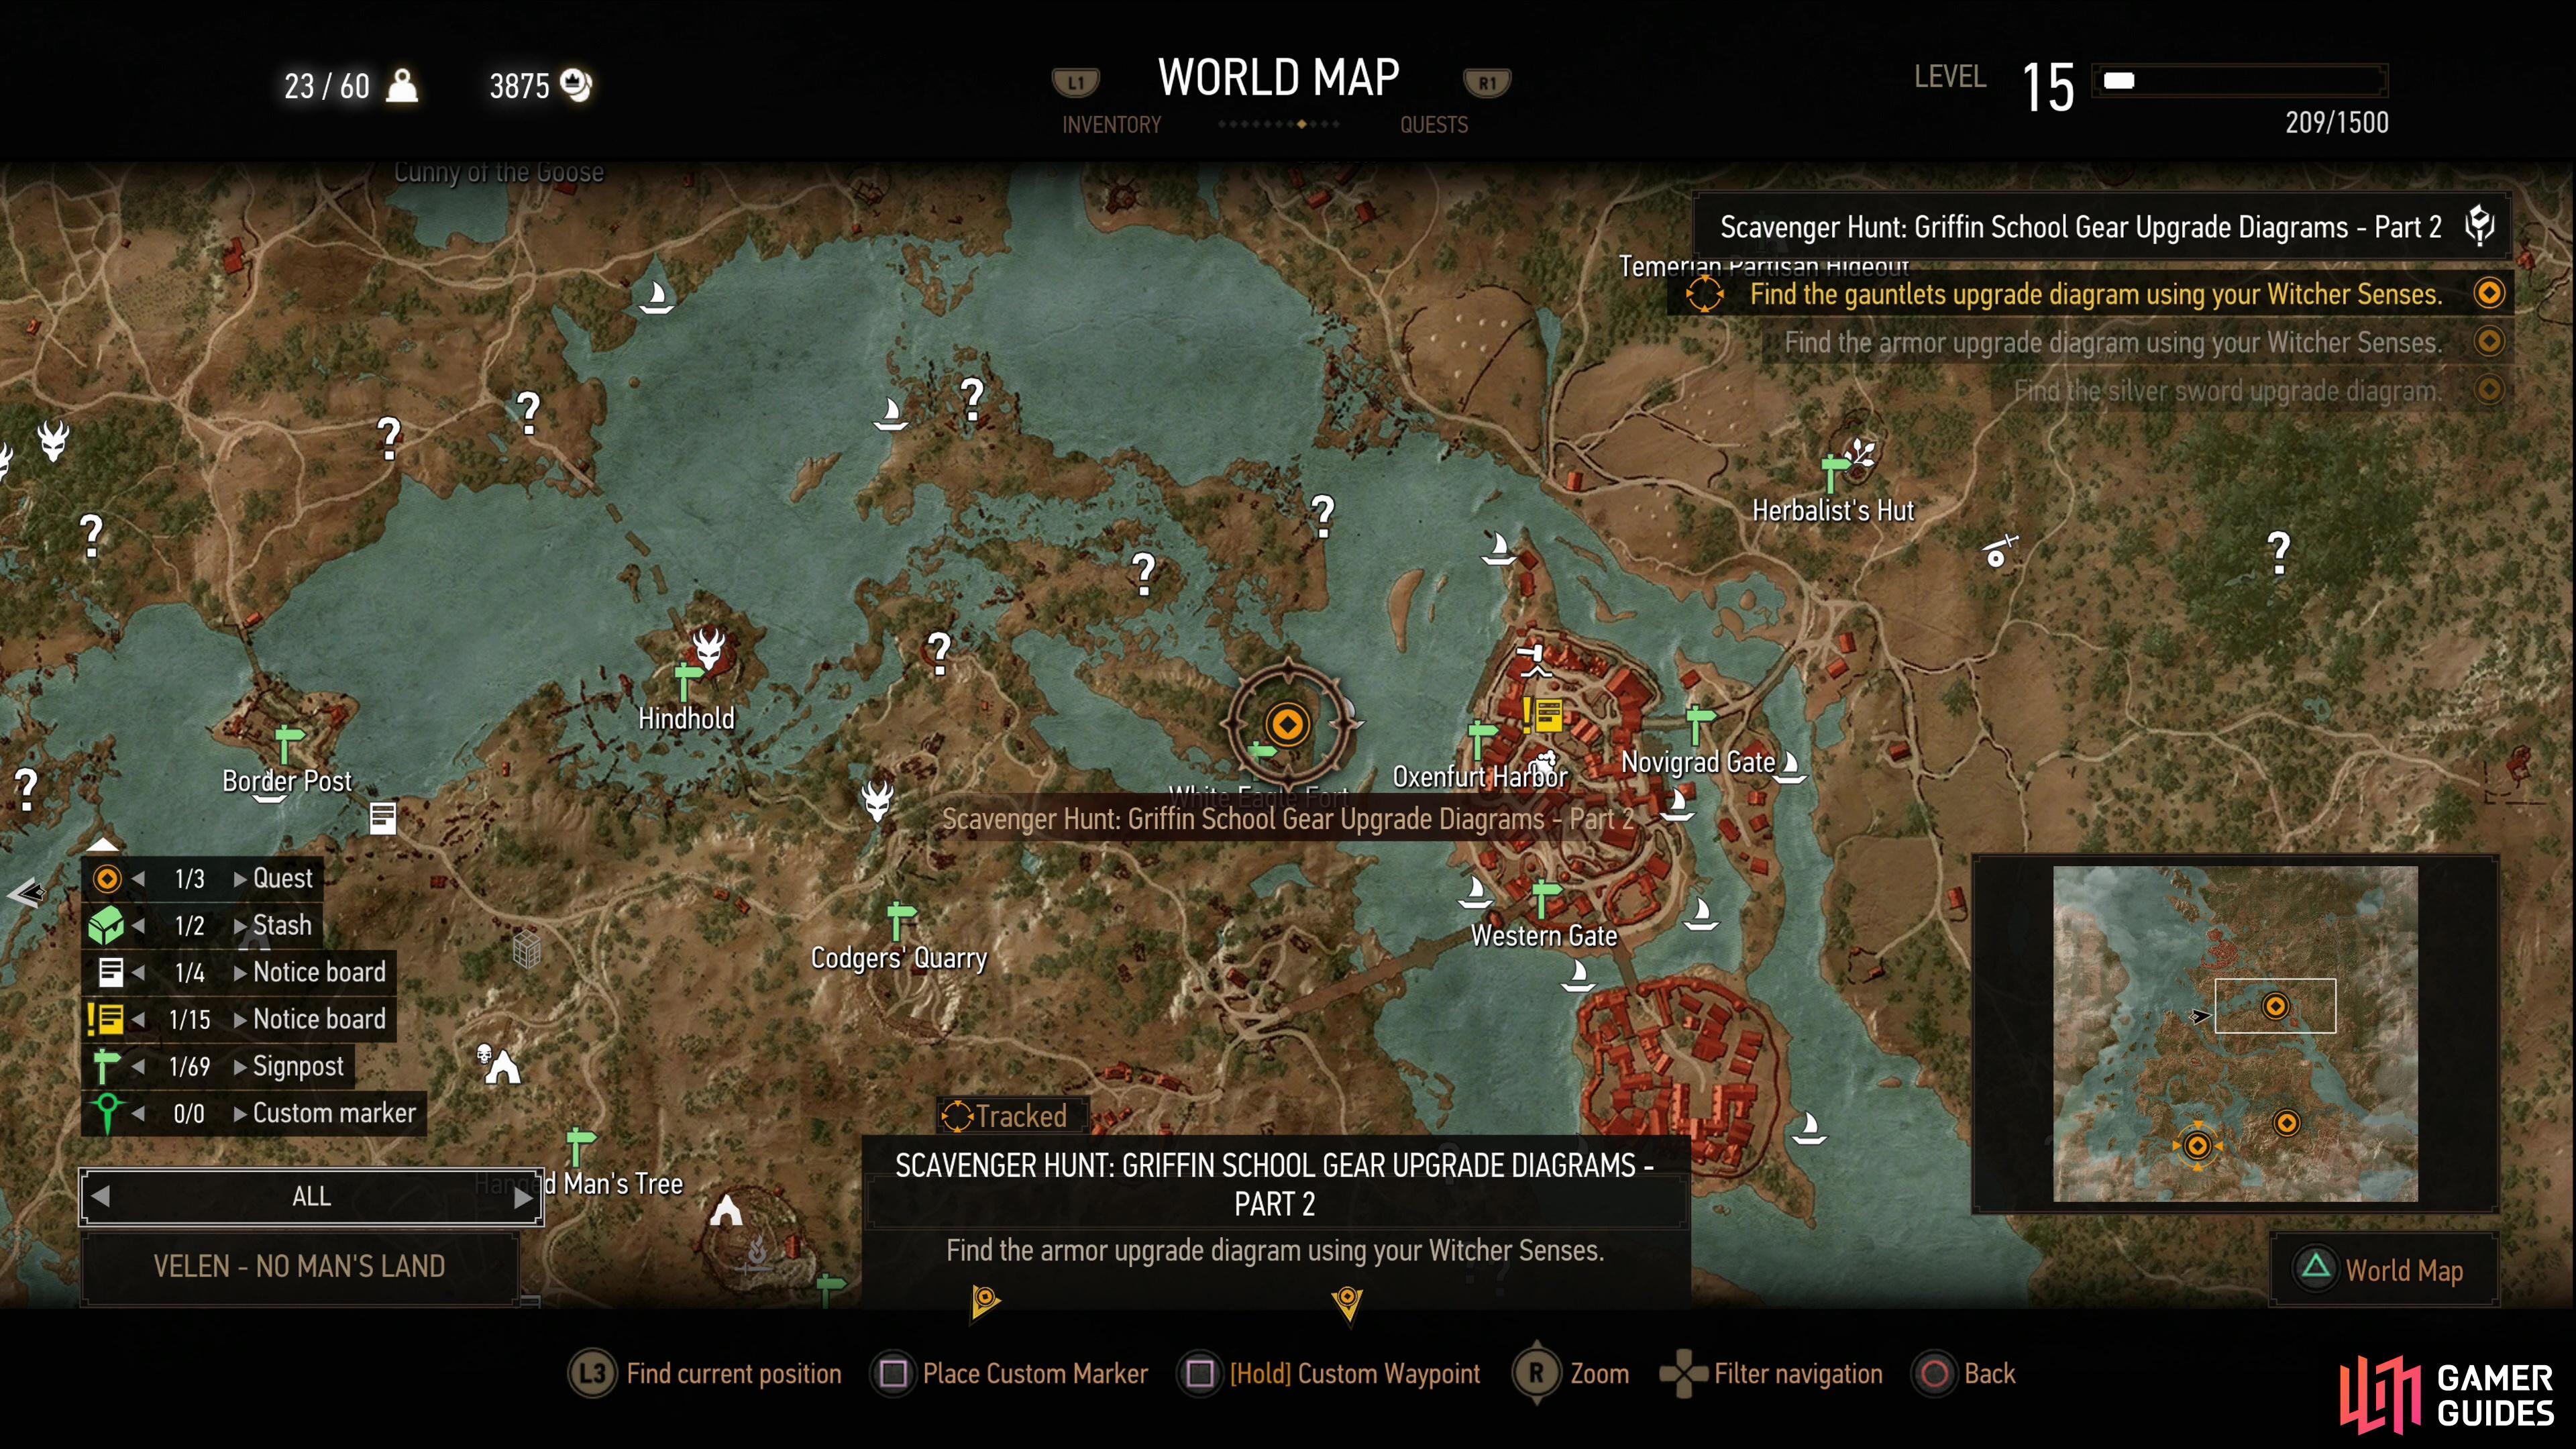
Enhanced Griffin Armor Location
Perhaps the easiest of these three diagrams to obtain, you’ll find it on an island west of Oxenfurt. There are, in fact, four such islands (don’t get hung up on terminology, they all may be connected to each other and one of them to the mainland, but we’ll still just call them islands as they’re distinct landmasses almost completely surrounded by water) and on the southernmost of these islands you’ll find the White Eagle Fort signpost. This Redanian fort is now only home to a singing Rock Troll, who is the subject of the quest The Volunteer, and if you start the aforementioned quest you’ll ultimately be directed to come to this island fort.
You don’t need to start this quest to get this diagram, however, as the two merely interlap with each other, they don’t interfere: search the interior of the fort just north of the signpost to find a chest - among many other containers - surrounding the shelter the troll has built for itself out of the remains of various boats - the large cooking cauldron in front of said shelter should make it easy to find. The diagram is within this chest.


(1 of 2) The location of the Enhanced Griffin Armor diagram on the map.
The location of the Enhanced Griffin Armor diagram on the map. (left), Find a chest near a Rock Troll’s shelter to obtain the diagram for the Enhanced Griffin Armor. (right)
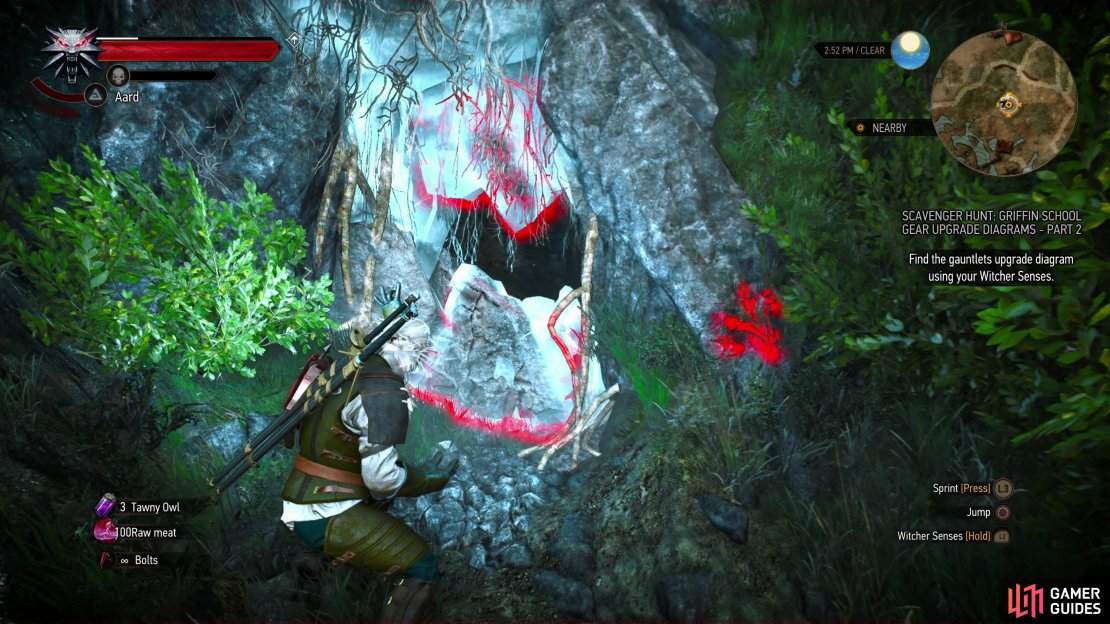
Enhanced Griffin Gauntlets Location
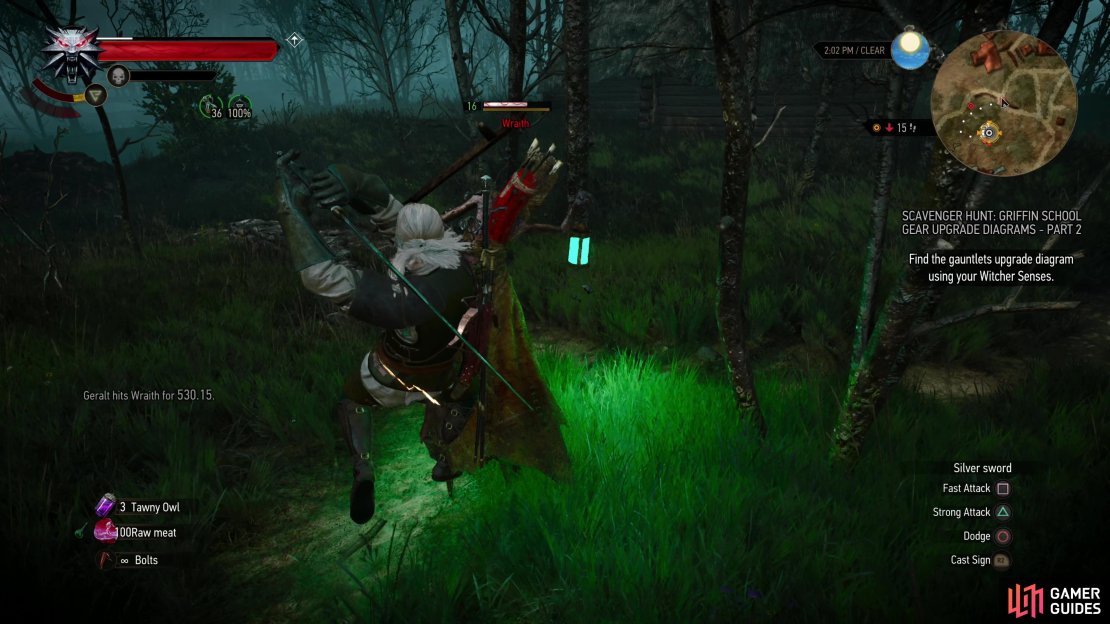
The Enhanced Griffin Gauntlets definitely require the most effort to obtain out of all the enhanced Griffin gear. First you need to head to the south-center of Velen to find the abandoned village of Frischlow, which is south of ![]() Fyke Isle. When you arrive there - a feat in itself - you’ll find the place has been infested by
Fyke Isle. When you arrive there - a feat in itself - you’ll find the place has been infested by ![]() Wraiths (Lv16), and you should expect to encounter at least half a dozen of the specters in two or more distinct groups.
Wraiths (Lv16), and you should expect to encounter at least half a dozen of the specters in two or more distinct groups.
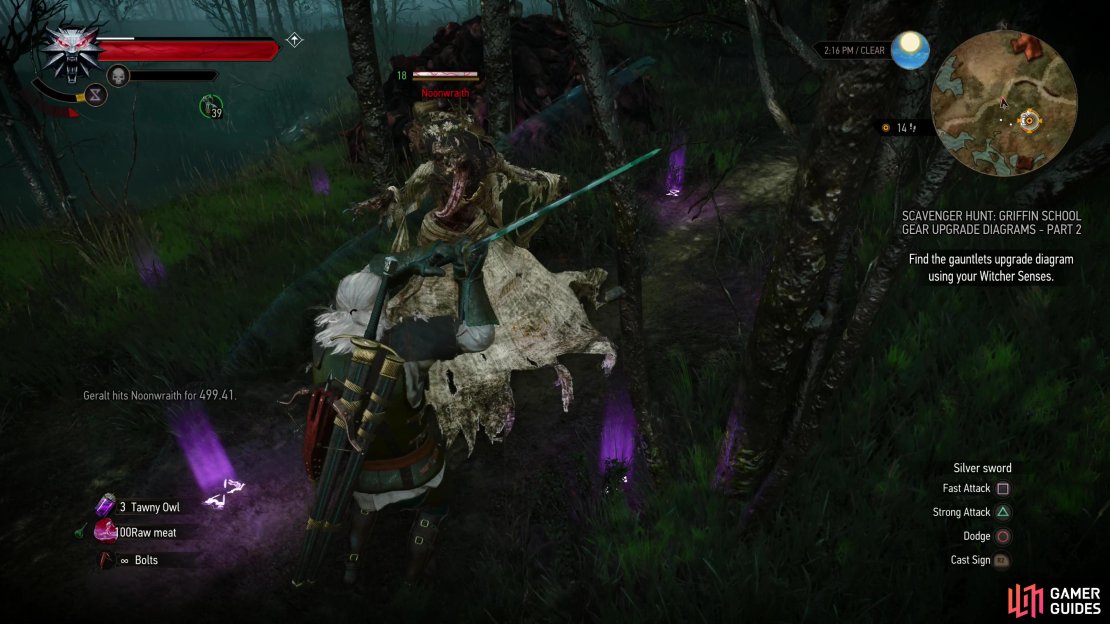
Fight your way south from the signpost and make your way to your real destination - a Guarded Treasure event just south of ![]() Frischlow, where the town’s cemetery can be found. Here you’ll find a Noonwraith (Lv18) floating about, and you can kill her just like you did the Devil by the Well; use
Frischlow, where the town’s cemetery can be found. Here you’ll find a Noonwraith (Lv18) floating about, and you can kill her just like you did the Devil by the Well; use ![]() Yrden to force the ghost to manifest enough for your silver sword to damage it fully, lure it within the Yrden circle and perform the strong attack/dodge combo until it’s dead. After excorcizing the Wraiths and Noonwraith, head to the lowground south of Frischlow to find a ruined shrine, from which head back northwest to find a cave you can blast your way into with
Yrden to force the ghost to manifest enough for your silver sword to damage it fully, lure it within the Yrden circle and perform the strong attack/dodge combo until it’s dead. After excorcizing the Wraiths and Noonwraith, head to the lowground south of Frischlow to find a ruined shrine, from which head back northwest to find a cave you can blast your way into with ![]() Aard. Inside the cave you’ll find two chests, one of which contains this diagram.
Aard. Inside the cave you’ll find two chests, one of which contains this diagram.


No Comments