
| Important Items in this Area |
|---|
| Sodden Letter |
| Ornate Key |
| Orders from Robin |
| Clan Drummond Shield Maiden Card |
| Ermion Card |
| Leather-Bound Journal |
| Escape Artist’s Journal |
| Masterly Ornamented Key |
| Gwent Players in this Area |
|---|
| Armorer - Clan Drummond Shield Maiden Card |
| Innkeep - Ermion Card |
Recall the letter that Triss/Yennefer sent you via courier - it mentioned a Professor Moreau, who researched Witcher mutations. Why your lover wants you to be more of an inhuman mutant freak is open to question, but the benefits could be worth the risk. After all, mutations are what make Geralt faster, stronger, immune to disease and able to see in the dark. Enhancing his mutations could make him… a super Witcher!
Outlandish expectation aside, your quest begins in Orlemurs Cemetery, along the southern edge of Beauclair. Head to where the quest points you and you should discover the Lebioda’s Gate signpost along the eastern edge of the search area. You can also find a “Hidden Treasure” event southwest of the search area, so you might as well clear that out now.
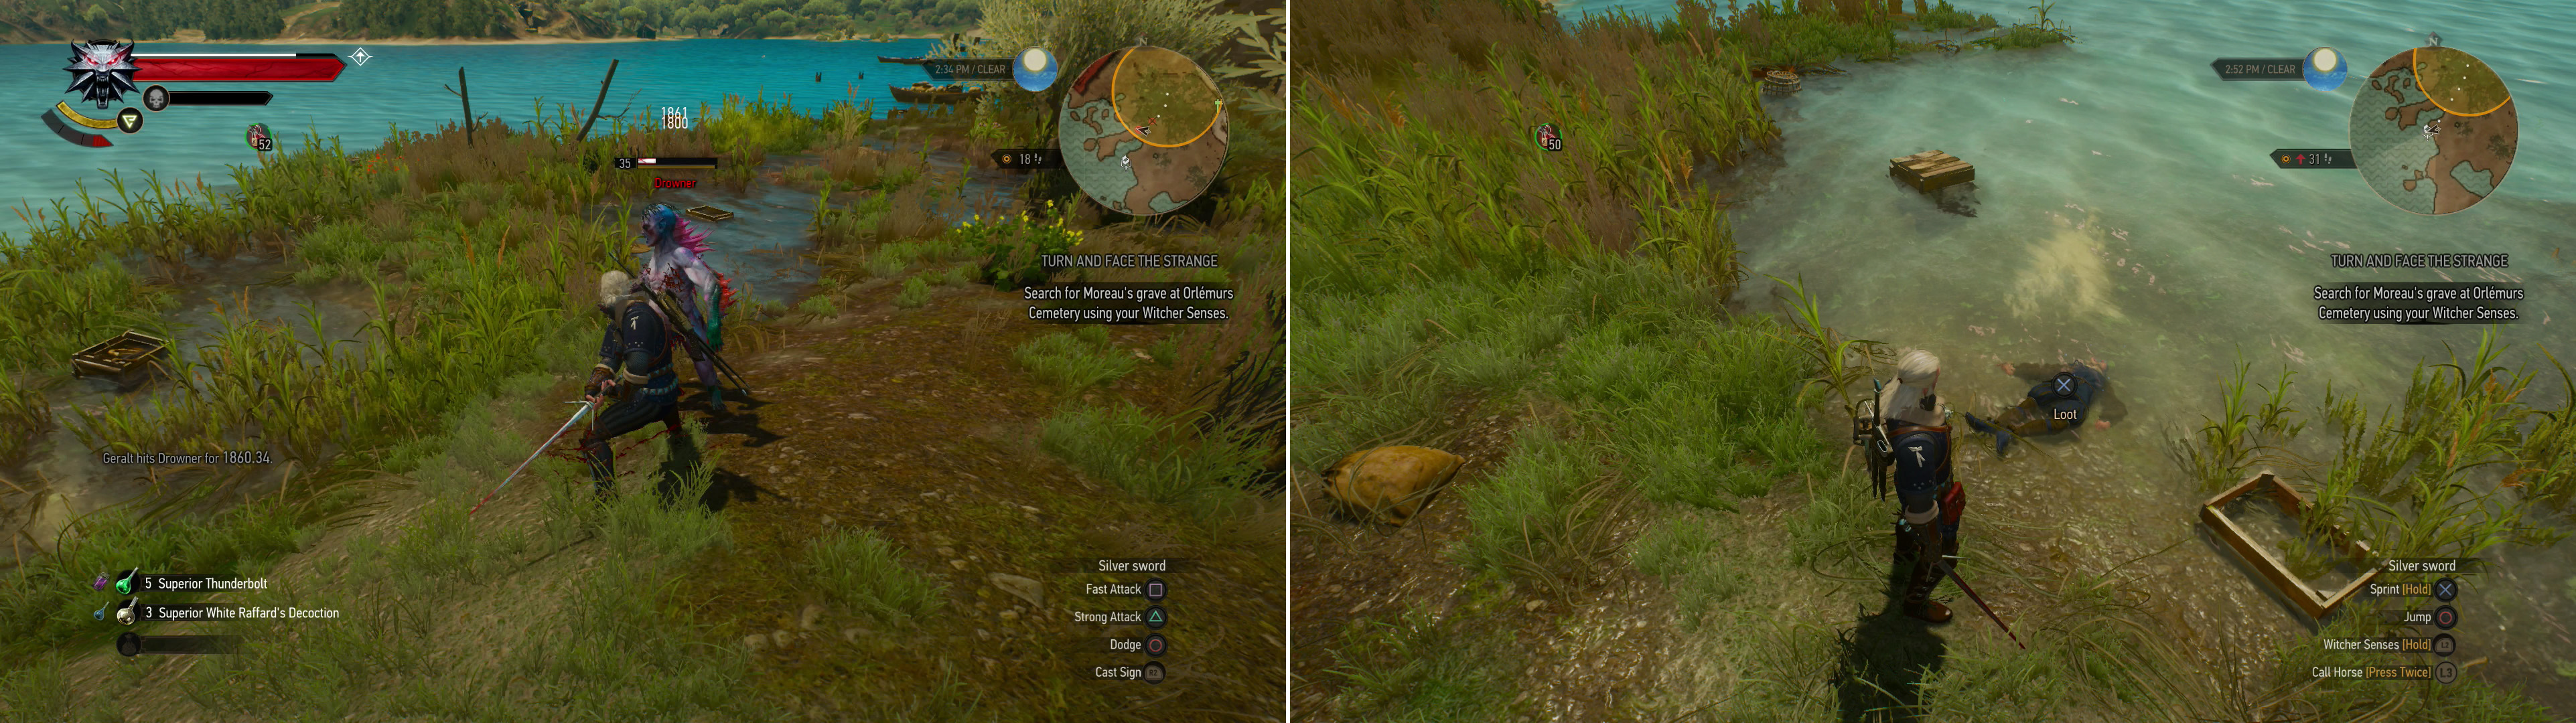
Kill the Drowners by the shore (left) then search a body in the water to start the quest “Treasure Hunt: The Last Exploits of Selina’s Gang” (right).
Treasure Hunt: The Last Exploits of Selinas Gang (Level 37) Walkthrough
Head southwest from the Lebioda’s Gate signpost to reach the shore, where you’ll find several Drowners (level thirty-five). Smite them, then search for a corpse on the shore, off which you can grab a “Sodden Letter” and an Ornate Key . Read the letter to start the quest “The Last Exploits of Selina’s Gang” .
This requires a bit of a detour, but let’s go ahead and scratch it off the ol’ quest list. Head back north into Beauclair through Lebioda’s Gate and immediately to your right (east) you should spot some stairs, which you should ascend to reach another, less decrepit cemetery. Head northeast through the cemetery to reach the shrine at its center, which is surrounded by some stairs. Descend these stairs and go through a cage door to reach some underground tombs.
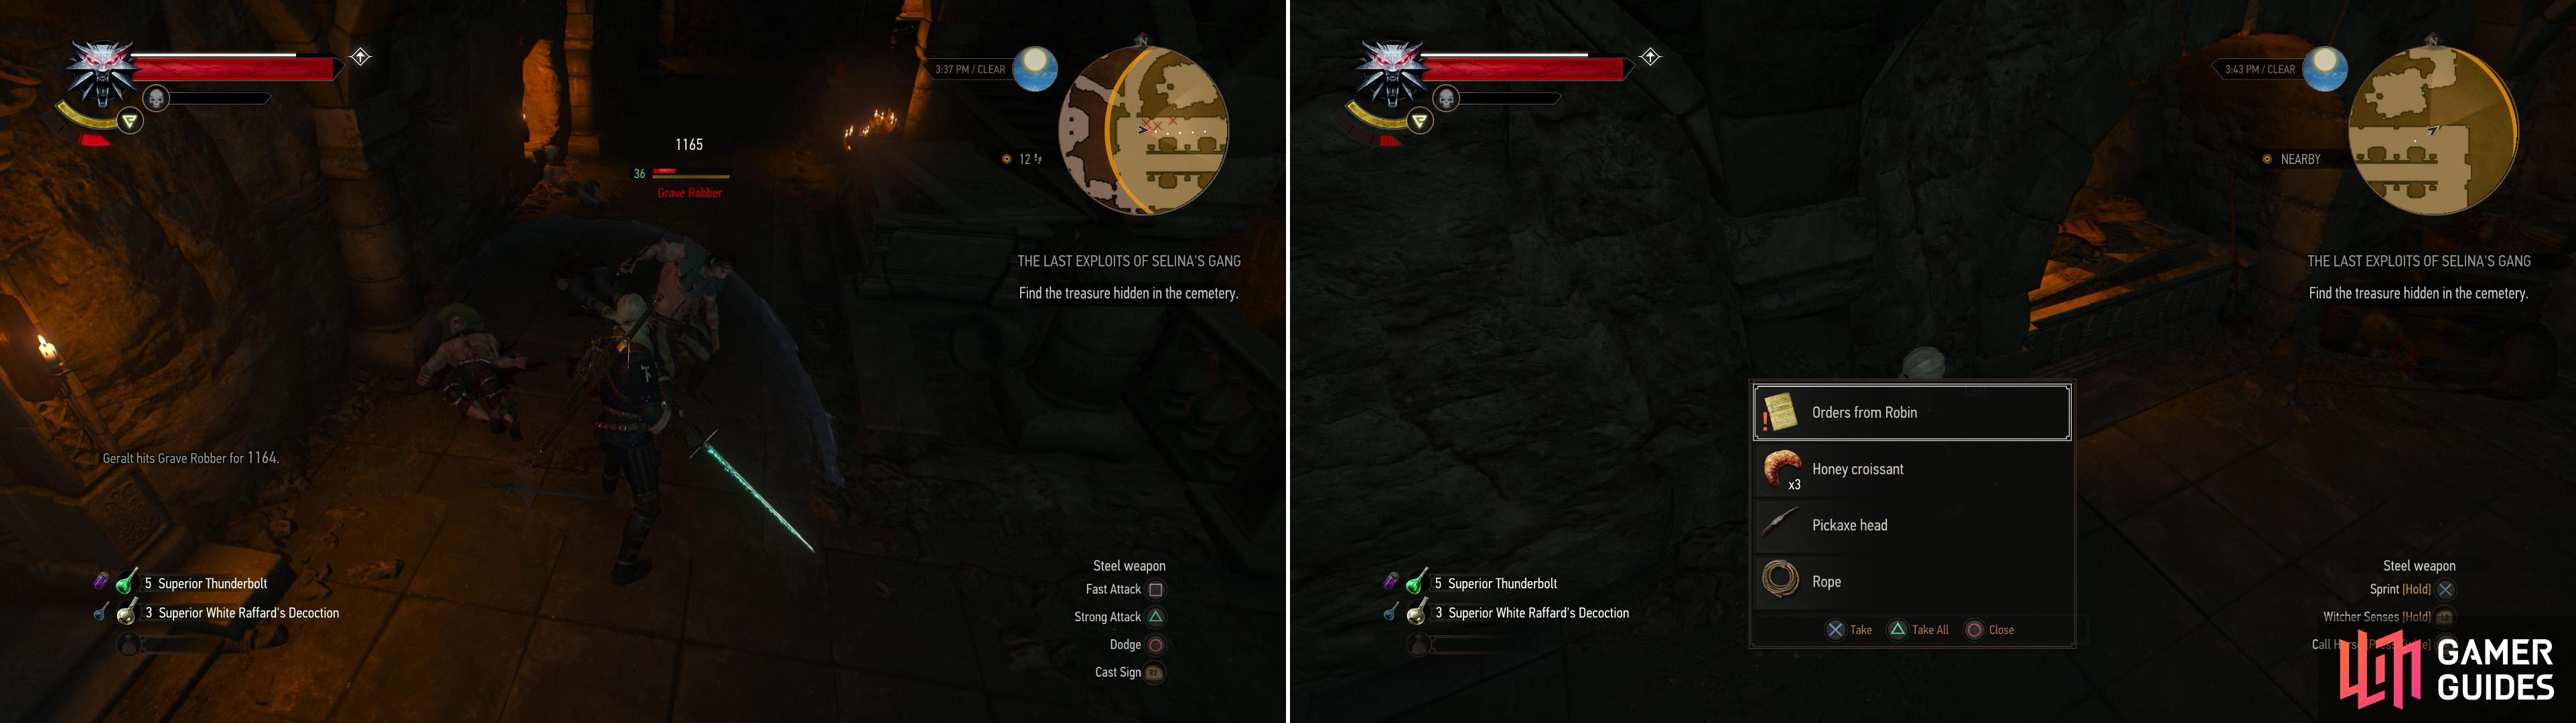
Kill the bandits in the crypt (left) then search some sacks to find some “Orders from Robin” (right).
This is where the quest “Till Death Do You Part” takes place, but that’ll be ignored for now. Head west through a doorway and down some stairs to reach a lower part of the tomb, which just so happens to be occupied by some Grave Robbers (level thirty-six), and they’re not eager to share their ill-gotten gains with you. Rout them, then search two sacks along the northeastern corner of the chamber to find the note “Orders from Robin” among other goodies. Of course, while you’re here you might as well loot the various sarcophagi and other containers. These grave robbers had the right idea - robbing the dead pays way better than honest Witchering does. Also note that killing the Grave Robbers updates the quest “Till Death Do You Part”. Just less work for you do to when you come back to Beauclair in a bit.
Corpses and Complications Walkthrough
Leave the tomb and return south through Lebioda’s Gate to the Lebioda’s Gate signpost. From there turn west to spot a tree. Next to (north of) this tree you’ll find the grave of Professor Moreau, which you can confirm by reading the tombstone. Unfortunately, you’re not the first one here, which will become apparent when you examine the exhumed grave. Activate your Witcher Senses and search the skeleton of Professor Moreau, then examine the nearby footprints. Follow them north and east to the road and examine them again to confirm you’ve lost the trail, after which Geralt will decide to consult the map your lover sent you. Enter your inventory and go to the “Quest Items” tab and study the “Old Map of Toussaint”, after which Geralt will comment on another complication. Joy.
| Objective | Reward |
|---|---|
| For discovering the location of Moreau’s laboratory | 50 XP |
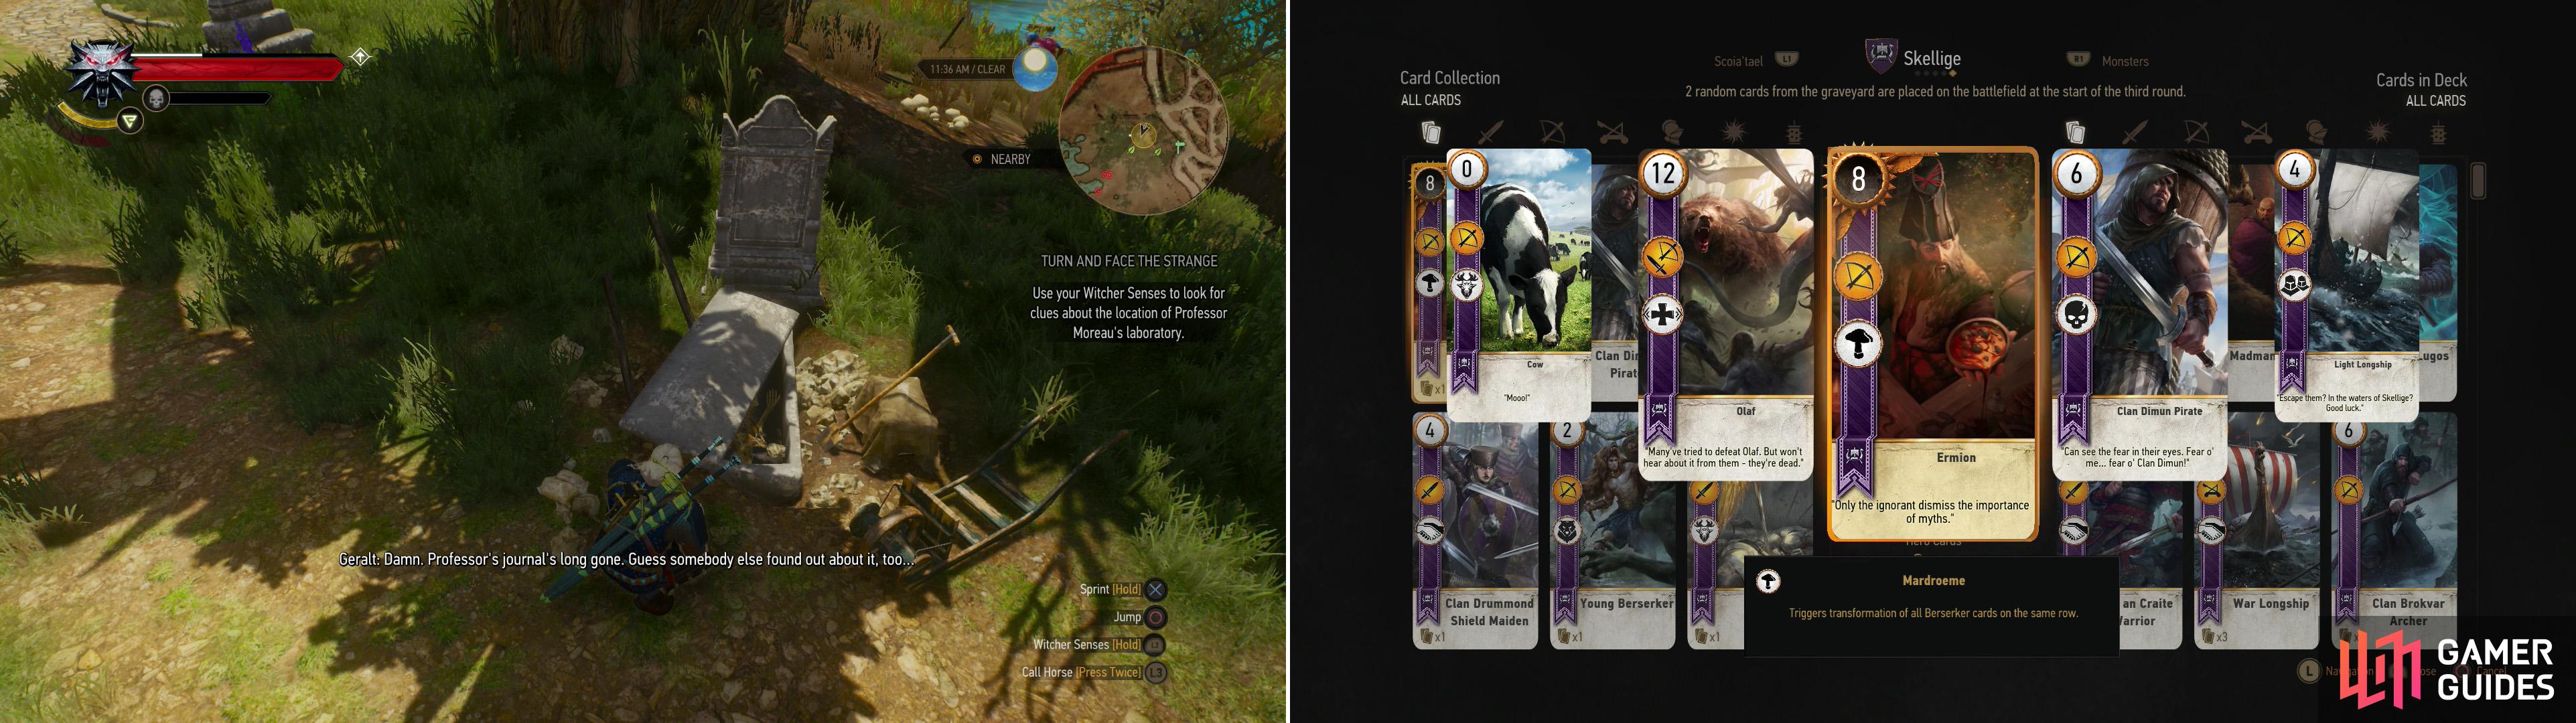
Search the grave of Professor Moreau (left), then make your way to Francollarts, where you’ll be able to win the Ermion card off an Innkeep (right).
Francollarts Walkthrough
Your next destination - the (hopeful) location of Moreau’s lab - calls for you to head east, northeast from the Lebioda’s Gate signpost to the southern shore of the lake east of Beauclair, but there’s a detour worth taking, first. Southeast of Beauclair is a Notice Board, which should be obvious on your map. On the plus side there’s not much in the way of map markers to distract you while you head there, but you can find the Belgaard Vineyard signpost southeast of the Lebioda’s Gate signpost. From there, continue southeast to reach the Francollarts signpost.
The actual notice board here won’t give you any new quests, but it’s worth reading to reveal undiscovered map markers, which will prove useful during future bouts of exploration. Also, there’s an Armorer and an Innkeep here (the latter being to proprietress of “The Scarlet Cardinal Inn”), both of whom play Gwent. Oh, come on, you knew this detour was ultimately going to be about Gwent - there’s a good chance any detour recommended in this guide is for the sake of Gwent!
The Armorer has a Northern Kingdom deck that’s got plenty of “Commander’s Horn” cards, which it can use with the “Catapult” combo to inflict some hurt on you. He’s also capable of bouncing “Spy” cards back and forth with “Medic” and “Decoy” combos, albeit not as much as the Nilfgaardian decks possessed by Pierre and the Camerlengo could. It’s also full of questionable cards, like “Trebuchet”, “Keira Metz” and “Kaedweni Siege Expert”, so a complete Northern Kingdoms deck should have no trouble besting him. Your reward for winning is a Clan Drummond Shield Maiden Card.
Speaking of the Nilfgaardian decks played by Pierre and Camerlengo, the Innkeep possesses a similar one. Fond of weak “Tight Bond” cards and plenty of “Spy” and “Medic” cards, but nothing you haven’t faced twice before, at least. Your reward for besting her is the Ermion card, which will allow you to sideline those “Mardroeme” card and still make the best use of the “Young Berserker” cards.
Monster Nest (Level 37) Walkthrough
Now it’s time to turn your attention back to the task at hand… well, after a short diversion. Don’t worry, it’s on the way, and not Gwent-related. Make your way north, northwest towards the lake east of Beauclair to find a Monster Nest south of the map marker for “Turn and Face the Strange”. You’re right here, so you might as well clear the area - and it just so happens to be occupied by a new beastie, the Archespore.
Archespores are plant monsters, alumni from the first Witcher game that have now returned for Blood and Wine (along with several other monsters). Archespores primarily attack by spitting poison at you, but they can also burrow their… heads?… in the ground and create a number of pods. These pods explode if you get too close, but they also allow injured Archespores to abandon their current position and erupt out of one of the pods - expect to see them do this if pressured in melee, after several hits.
The damage they inflict with their spit is, of course, poisonous, and hence using a Superior Golden Oriole potion basically makes you untouchable, as long as you avoid the pods. They can be stunned with Aard, but you’re probably better off just protecting yourself with Quen, getting close by rolling towards you target (not dodging), and smacking them with your silver sword (perhaps smothered with some Cursed Oil to boost the damage).
After the Archespores are dead, search near (east of) the nest to find a corpse with a “Leather-Bound Journal” on him, which talks about “elven ruins full of treasure flooded by the river centuries ago”. See? This Monster nest tied in with the quest you’re doing. Kind of. So… it made sense to clear it out en route? Whatever, blow up the Archespore nest.
| Objective | Reward |
|---|---|
| For destroying the Archespore nest | 100 XP |
Search under a tree to find the Escape Artist’s Journal (left) then swim into the submerged part of the prison to find a key on a skeleton (right).
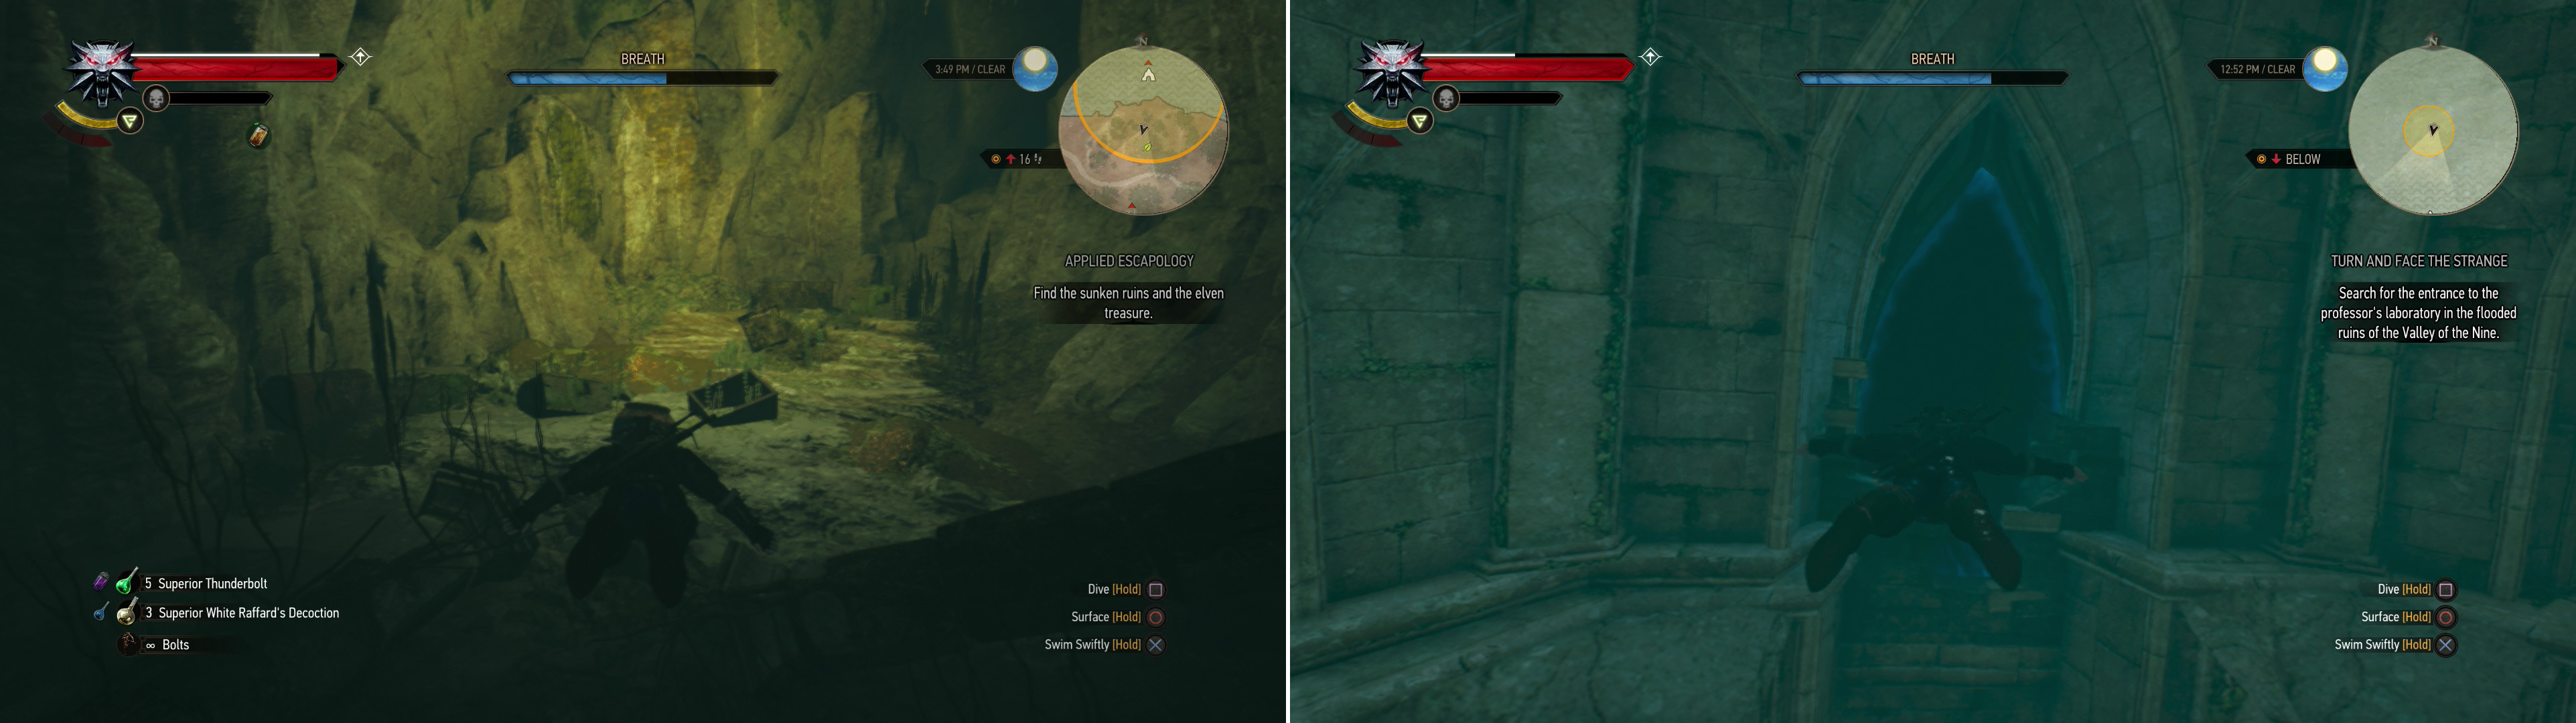
Hidden Treasure: Applied Escapology (level 40) Walkthrough
Continue north a short distance and you should finally reach the shore of the lake. Before you go swimming, however, there’s one more detour to make… Yes, yes, another diversion, but the loot involved is pretty worthwhile, and is en route to the flooded ruins you’re looking for. Make your way east along the shore of the lake, killing a group of Drowners (level thirty-five) along the way and continue following the shore east and north until you reach a bridge. Cross the bridge and follow the road beyond until you find the Toussaint Prison signpost. The actual prison lies further on up the road, but you’re not going in there, nor would you want to. Best to stay on the non-business side of prison walls, thank you.
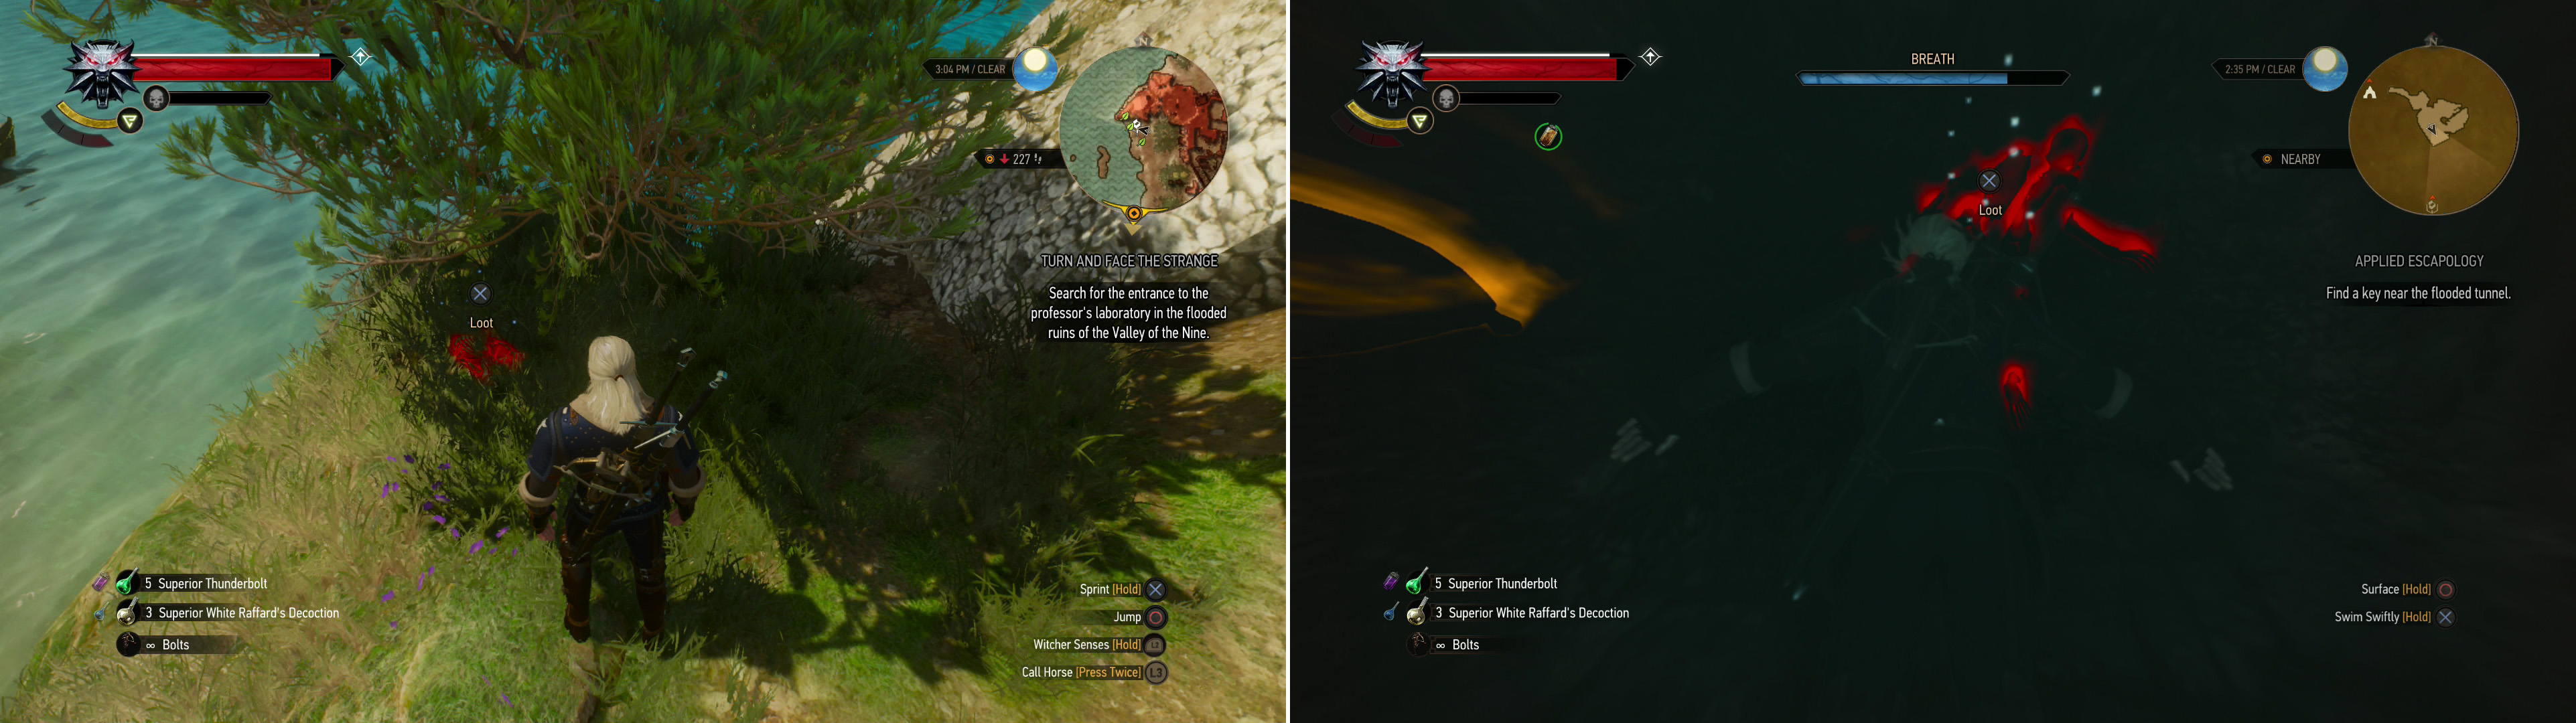
From the Toussaint Prison signpost venture southwest to find a pier with a boat just waiting for an adventurous Witcher. Hop in the boat (or swim, if you’re a-scared of boats for some reason) and make your way north to the northwestern edge of the island the prison occupies. Here you’ll find a “Hidden Treasure” map marker. Abandon your ship and head for the shore, ascend a hill and search under a tree to find an “Escape Artist’s Journal” , which will start the quest Applied Escapology when read.
Return to the water and swim (swim, not sail) north to the quest marker for “Applied Escapology”), along the way plundering a chest and a sack near some ruins. Dive at the quest marker to find a tunnel you can swim into (Killer Whale might be useful here) which leads to a subterranean section of the prison. There are plenty of skeletons to loot, and a few containers as well, but keep your Witcher Senses active and look for the red-glowing skeleton, which possesses a “Masterly Ornamented Key” - the device you’ll need to score even more treasure shortly. Most of all, don’t be lured by the apparent sunlight to the northeast, you can’t surface for air there. Dive as many times as you need to in order to obtain whatever loot you wish, but when you at least have the key, note that the quest marker has changed, directing you back south - just south of the search area for the quest “Turn and Face the Strange”. Convenient, eh?
You’ll find some treasure in some flooded elven ruins (left), as well as the portal to Moreau’s laboratory (right).
Get back in your ship and sail south to the new quest marker and prepare yourself for another dive. The first thing you’ll need to do when you’re in the water is dispatch some more Drowners (level forty), which pollute the water here. Once they’re no longer a threat, dive under the water and swim towards the “Entrance” marker near the southern shore of the lake. Pass through the elegant elven entrance and shortly beyond you’ll find a hole in the ground you can swim deeper into. Do so and swim south to find a cavern full of treasure. More importantly, there’s a pocket of air above this chamber you can surface at for air, so plundering all the loot here shouldn’t be nearly as risky as getting the key way.
Loot the container that glows red under your Witcher Senses (which requires the “Masterly Ornamented Key”) to complete the quest Applied Escapology. There’s lots of other trinkets to pick up, too, including chests, urns, and piles of Crowns that are yours for the taking. Well worth a bit of a detour.
No Comments