
| Important Items in this Area |
|---|
| Golyat Trophy |
| Handkerchief monogrammed d.l.C. |
| Information for Tournament Participants |
| Clan Drummond Shield Maiden Card |
| Pouch Filled with Florins |
| Unusual Severed Hand |
| Gwent Players in this Area |
|---|
| Innkeep - Clan Drummond Shield Maiden Card |
Geralt Versus Golyat
Ah, Toussaint - a land out of a fairy tale, which chivalric knights, a decidedly brighter color palette… and giants, apparently. So much for proving that Toussaintois aren’t strange, eh? Geralt and his companions arrive on the scene in time to aid the hard-pressed knight, but alas, poor horse, poor windmill. Golyat, despite his fearsome size, isn’t terribly powerful and possesses only four attacks: a quick swipe with his improvised club, and overhand smash with his cudgel (sometimes appending a charge), a spinning, three-rotation attack which he advertises well in advance, and a stomp, the force of which somehow he’s able to project in a cone in front of him.
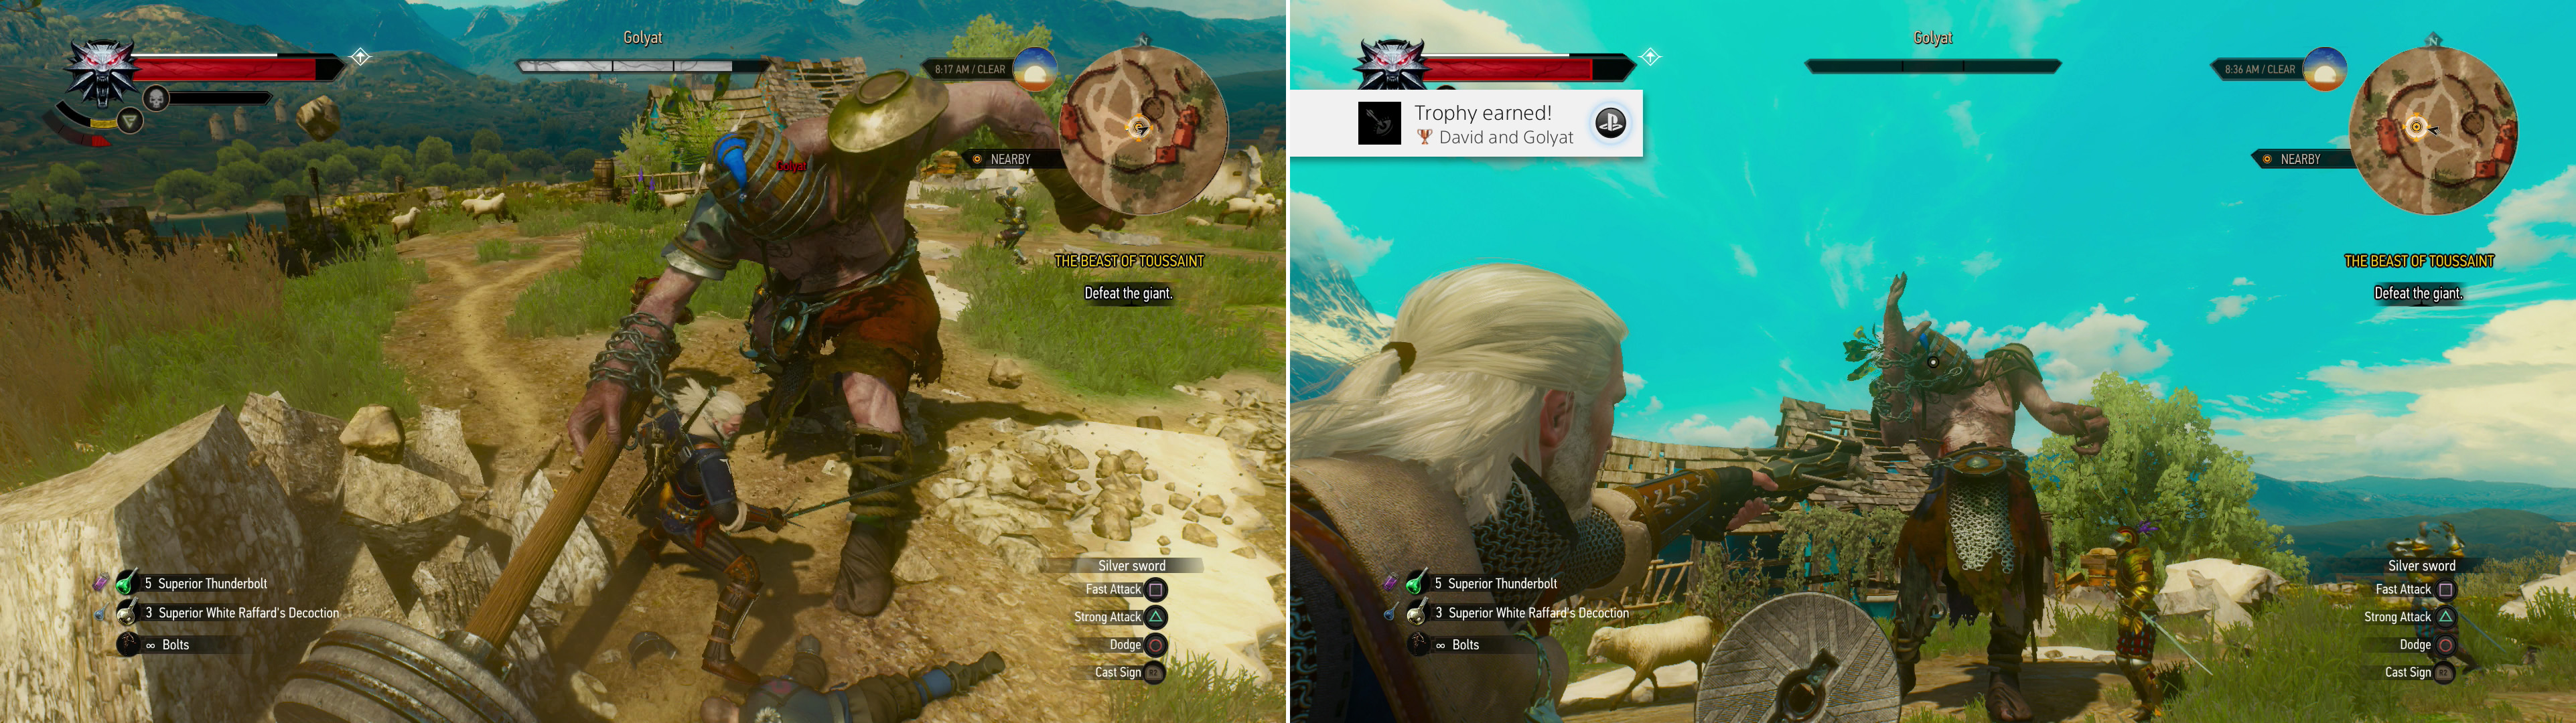
Golyat, despite his fearsome size and reach, doesn’t deal too much damage, and is easily dodged (left). While it’s a simple matter to cut down the giant with your swords, you can also use your crossbow and aim for the eye to score a one-shot kill… and a trophy (right).
All of these can be blocked and absorbed with Quen, as well as simply dodged. Hitting him with a strong attack before dodging his inevitable counter will suffice to whittle him down, and setting him on fire with Igni will do a bit of damage, as well. If you want to take him out more creatively, however, use your crossbow and aim at his eye, or rather, at the eye slit in center-left of his barrel helmet (left from your perspective, not Golyat’s left). You don’t need to whittle the giant down or anything, one well-placed shot will fell the monster. Of course, considering the inherent inaccuracy of the crossbow and the fact that Golyat probably won’t deign to stand still while you aim, this will probably be more a matter of repetition and luck than one of accuracy and finesse.
| Objective | Reward |
|---|---|
| For killing Golyat | 450 XP / Golyat Trophy |


However you manage to do it, once Golyat has been felled the three knights and Geralt will chat. The knight you rescued - Guillaume - will reveal the reason for his fight with the giant before delivering some bad news; apparently the beast you were hired to slay has struck again, and some locals are probably in the process of destroying any evidence through their ignorance and incompetence. Palmerin de Launfal will part company with you, and you’ll be instructed to rendezvous with them near Guillaume’s tent at the tourney grounds… after your investigation, of course.
First, look at your world map and note that Toussaint is not exactly a small place. You’re getting your money’s worth out of this expansion! Right now you’re near the middle of the map, just south of the Dulcinea Windmill signpost. Also note that there are no fewer than seven Notice Boards on the map - plenty to see and do in Toussaint. The walkthrough for Blood and Wine will handle exploration a bit different from the main walkthrough, and especially compared to Hearts of Stone.
The previous expansion’s quests had a suggested level range of thirty-two to thirty-six. By comparison, you’ll see the range of suggested levels for quests in Blood and Wine vary from thirty-four to around fifty. Simply put, there was likely nothing in Hearts of Stone that you couldn’t defeat from the outset. In Blood and Wine, the old “no skulls” rule will come back into play, and in order to avoid fighting beasties that are six or more levels higher, you’ll have to pick your battles. That said, quests in this expansion will be tackled largely depending on their suggested level (and in early cases, the benefits obtained from completing them), rather than based on simple geography… although at times geography, too, will come in to play, for the sake of convenience.
Corpse Near the Cockatrice
Speaking of which, let’s buck another trend in this expansion by actually sticking to the main quest for a little while! Don’t worry, it won’t be long before this guide will take you back to all that exploration and side questing everybody loves so much, but for now, there’s no good reason to ignore the main quest and a significant quality-of-life reason to continue on with it. Loot the various containers nearby (and Golyat’s corpse!) then mount Roach and follow Milton down to the river, enduring his chatter and some tutorial menus telling you about new gear and character development options in Blood and Wine. All in good time, game, all in good time…
When you reach the river, Milton will dismount. Follow suit and activate your Witcher Senses to discover some footprints on the ground. Examine them, then follow the trail southeast to find some Scurvers (level thirty-five), which are a variant of Rotfiend. These necrophages aren’t too dangerous, just smack them with a fast attack and dodge, protecting yourself with Quen, and remember that - like their smaller cousins - when they’re low on health (around 25% remaining) they’ll start to convulse. Dodge or roll away from them, as they’ll explode when their health bar depletes, and their grisly shrapnel is by far their most dangerous attack.
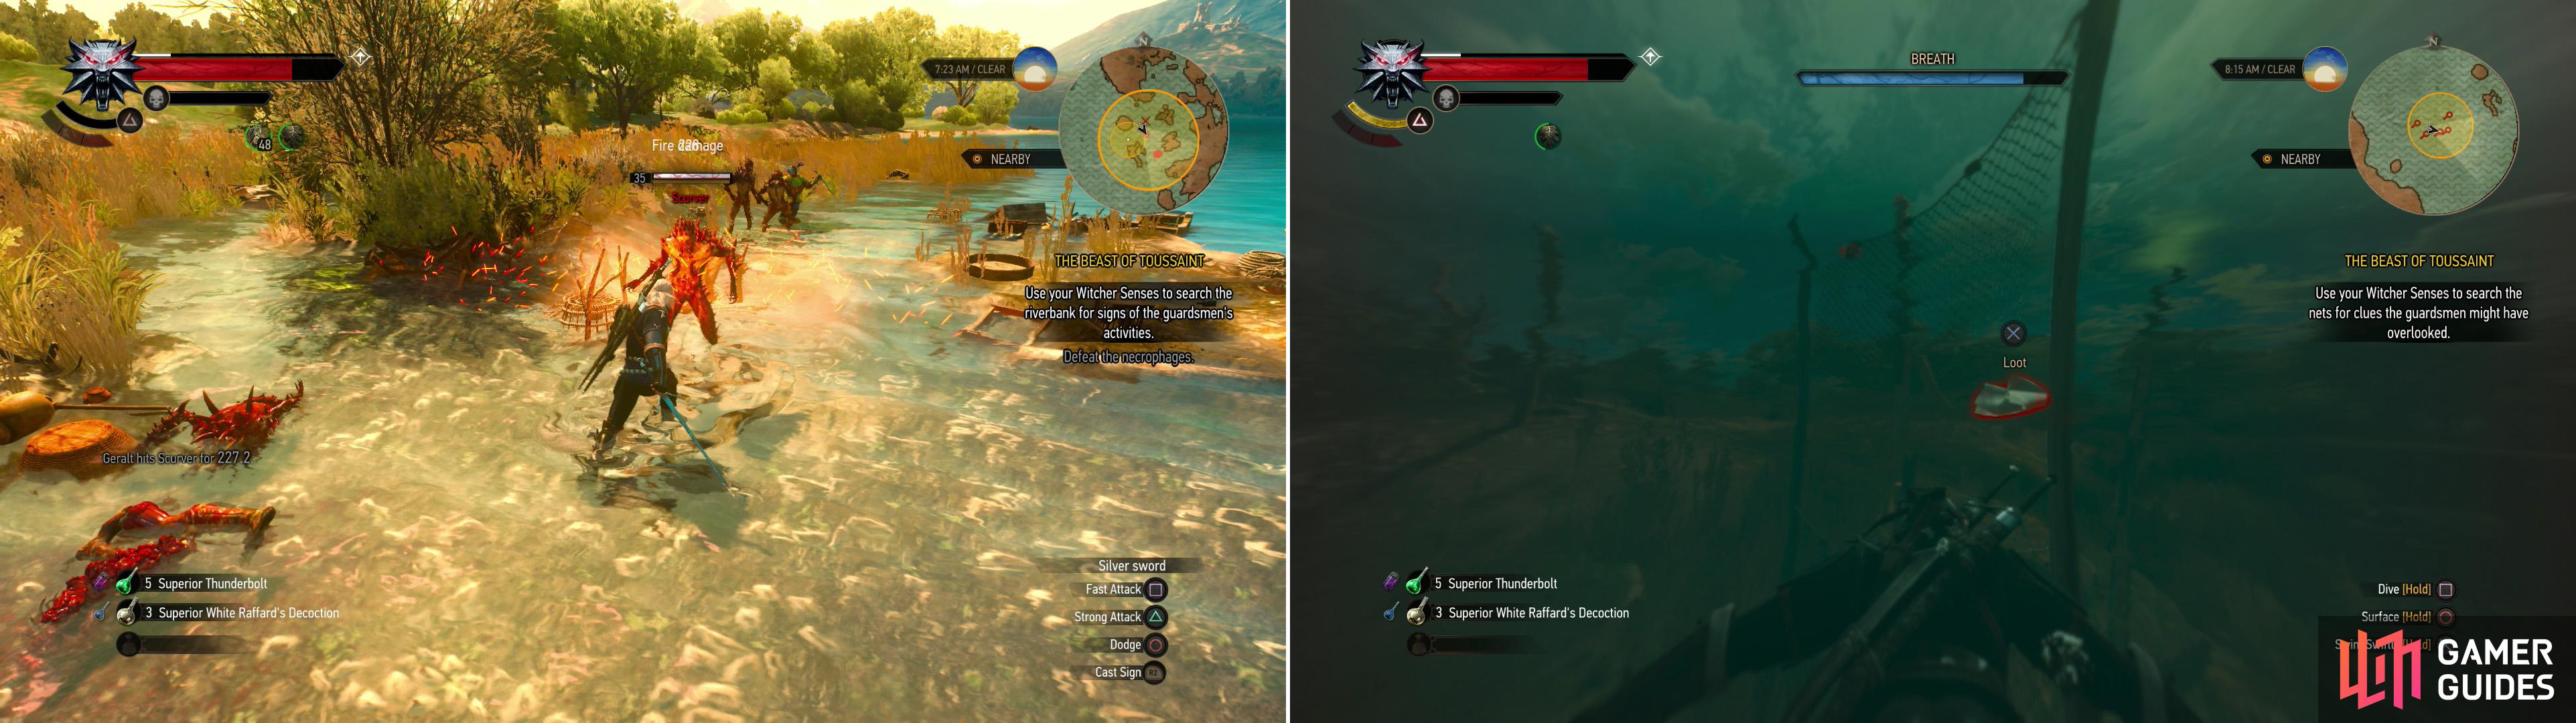
Defeat the necrophages on the shore (left) then search some fishing nets to find a monogrammed handkerchief (right).
After the Scurvers are slain you’ll be free to activate your Witcher senses and explore the nearby shallows, where all sorts of junk accumulates. Ignore the junk and search the rut and nets on the small island where Milton will stand to determine that… well, a bit of diving is in order. Dive into the river to the west and search a net just south of the center of the search area to find a Handkerchief monogrammed d.l.C. … and before you return to Milton, you may as well grab the submerged chest nearby.
Once you’re back on shore Geralt will confer with Milton, who will identify the latest victim and suggest you check out the nearby Cockatrice Inn. There’s history there, but Milton refuses to elaborate too much before leading you north along the river, towards the Cockatrice Inn. Enter the inn and you’ll find yourself in the company of some men who belittle Milton’s courage, and a peasant who is fixated with telling his tale about the corpse… and red skies. Fortunately, Geralt does learn where the corpse was taken from the annoying peasant - Corvo Bianco. After spotting an overly suspicious woman (comically, even), the conversation will degenerate into noble gossip about their scandalous peers, and peasant prophecies of doom based on the impropriety of the modern knight. After learning that the beast you’re after seems to have a mind for religious holidays, and that Milton has been granted a rather dubious honor, Geralt will finally take his leave.
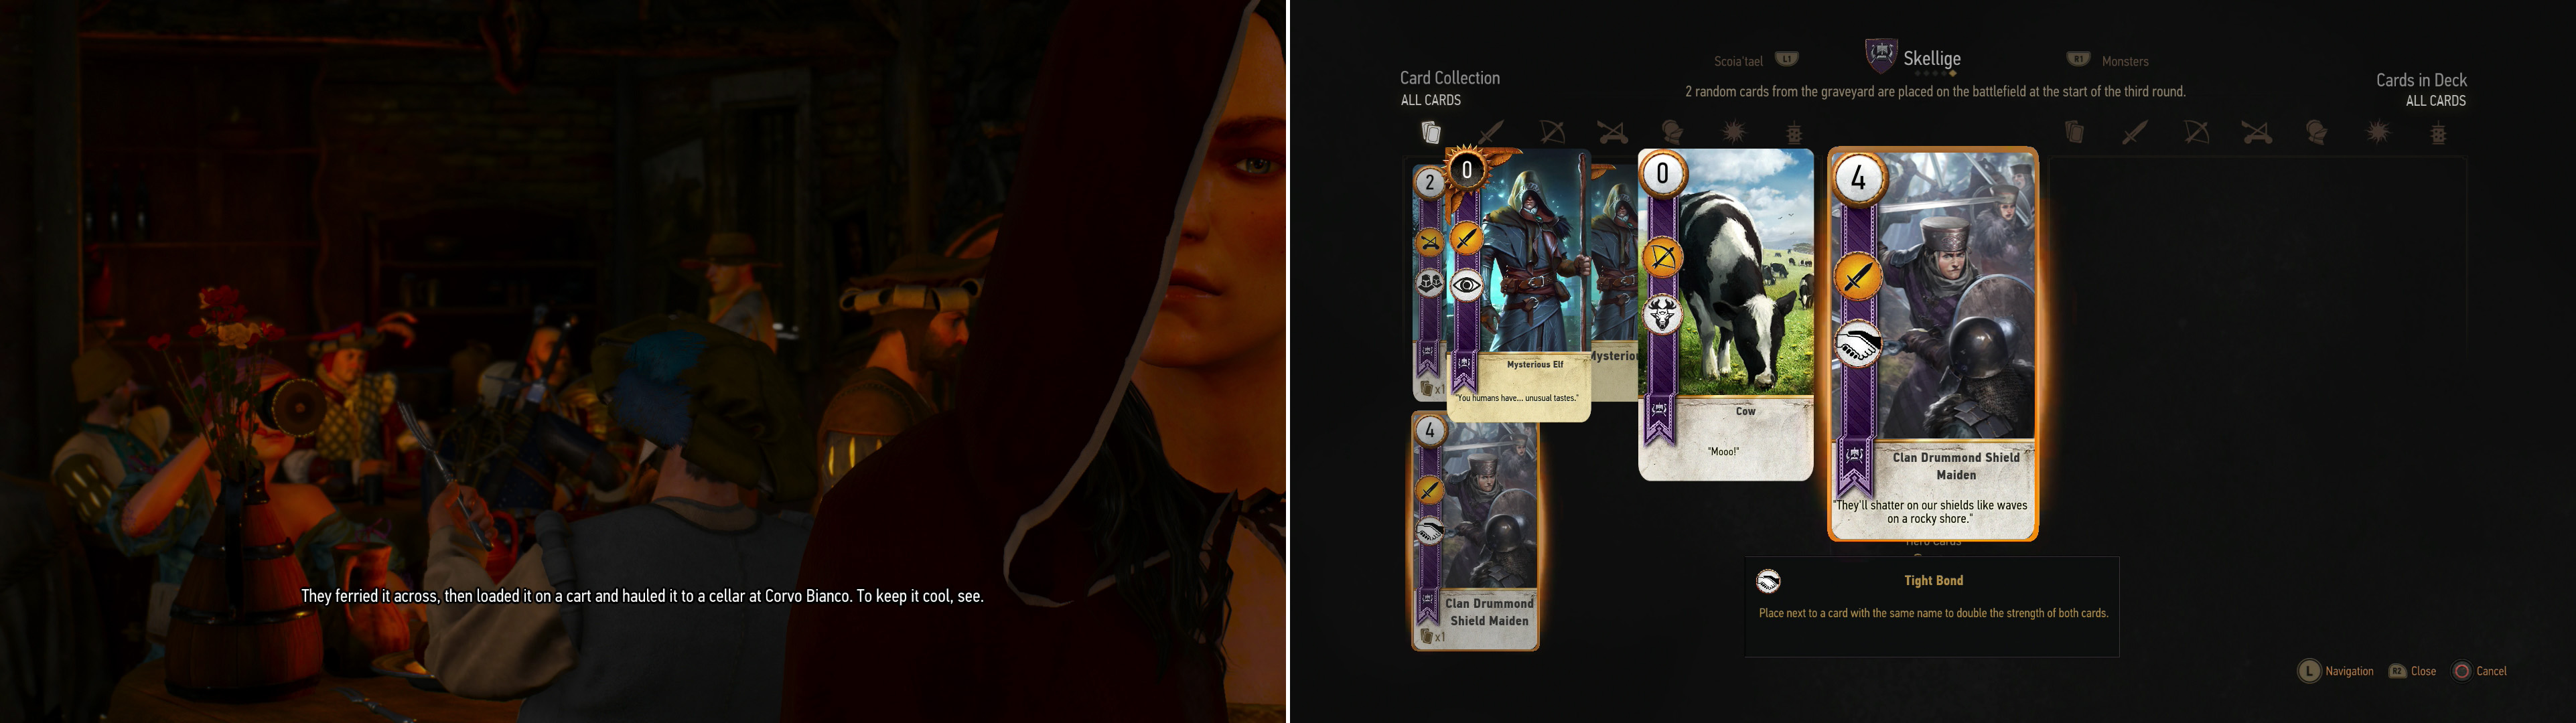
Visit the Cockatrice Inn and Geralt will learn about the body fished out of the river… but he’s not the only one looking for such information (left). Despite the implied expediency, waste some time playing Gwent with the Innkeep to score your first Skellige card (right).
Gwent in Toussaint
Whew. That’s a lot of story tid-bits to digest, so let’s take a bit of a break by indulging everybody’s favorite diversion - Gwent! Talk to the Innkeep and challenge him to a game of Gwent (you can bet up to 50 Crowns per game here in Toussaint, so take advantage of this opportunity to earn some scratch, especially if you have a potent deck from the main game).
Aside from the higher bet you can make, this game is special in another way, as it should be your first match against the new Skellige deck. This deck is actually quite interesting, as it boasts a mix of “Tight Bond” and “Muster” cards. It also has a new mechanic - the “Berserker” ability - which causes the card in question to transform when a “Mardroeme” card (or a card with “Mardroeme” effect) is played on the same row. You’ll likely see this in practice during this game, as the Innkeep is fond of playing two “Young Berserker” cards (2 Strength, “Berserk” ability) and turning them into “Transformed Young Vildkaari” (8 Strength, “Tight Bond” ability) cards.
As for general notes about the Skellige deck, be wary of two things: their faction-specific ability allows them to play two random cards from their graveyard if the game reaches round three, and most Skellige players will use the “Crach an Craite” leader card, which “shuffles all cards from each player’s graveyard back into their decks”. When the former is used before the latter, this can give Skellige a huge edge in the third round, and it also makes relying on “Medic”/“Decoy” rather risky, and of course, it can breathe new life into their “Muster” cards.
The deck has plenty of new hero units, too, and you should expect almost every opponent in Toussaint to be able to “Decoy” or “Medic” your Spy cards back at you, make use of “Scorch” cards and/or “Villentretenmerth” and to possess a number of hero unit cards. Simply put, if you started a new character for this expansion, your cards probably aren’t up to snuff… which isn’t to say you can’t build a competent Skellige deck of your own, but you’ll have to secure a starter deck, first, and… well, expect to have a lot more trouble early on.
Speaking of which, winning this game will earn you your first card from the Skellige deck, a Clan Drummond Shield Maiden (4 Strength, “Tight Bond” ability), and will start the quests “Gwent: to Everything - Turn, Turn, Tournament!” and “Gwent: Never Fear, Skellige’s Here” . The latter tasks you with playing various characters across Toussaint and earning their Skellige cards from them, and helpfully marks each and every one of them on your map.
The Cockatrice Inn Notice Board
Loot the inn, if you want (although you’ll mostly just find junk and some books and notes which are more backstory and flavor than anything else) then head outside to find the local notice board - the best source of new quests! In this case, you can pick the the notice “The Great Beauclair Gwent Tournament” to start “Gwent: To Everything - Turn, Turn, Tournament!” if you didn’t start it earlier by beating the Innkeep at Gwent (you can also find the note “Information for Tournament Participants” to start the same quest on a table in the inn).
Also be sure to pick up the notice “Wanted: The White Wolf” to start the quest Big Game Hunter , while the “Notice from the Ducal Camerlengo” starts Knight for Hire . The “Announcement from the Office of Internal Revenue of the Duchy of Toussaint” will begin the quest “Wine Wars: Belgaard” and finally pick up the “Contract for a Witcher/Witchers: Caravan Escort” to commence the quest “Mutual of Beauclair’s Wild Kingdom” .
Vampires and Vineyards
Now that you have a fine collection of Witcher’s work, promptly ignore these contracts and return to the task at hand; you’ve got a date with a corpse at Corvo Bianco. To get there, just cross the bridge to the southwest and follow the road there. Couldn’t be easier if you have a breadcrumb trail, a mini-map, and quest markers… which you do! When you approach the estate, however, you’ll discover that all is not well. Follow the sounds of combat the rest of the way to the estate and you’ll witness a grisly scene.
Activate your Witcher senses and search (and loot!) the first few bodies to identify the killer (applying some Vampire Oil to your sword wouldn’t be a bad idea), then continue west, examining a discarded dress, an overturned cart, and another corpse. When you’re ready to confront the beast head down some stairs into the cellar and examine yet another corpse, then use your Witcher Senses to spot some tracks you can follow. Trail the vampire west, south, then west again, surveying examples of your prey’s strength as you go.
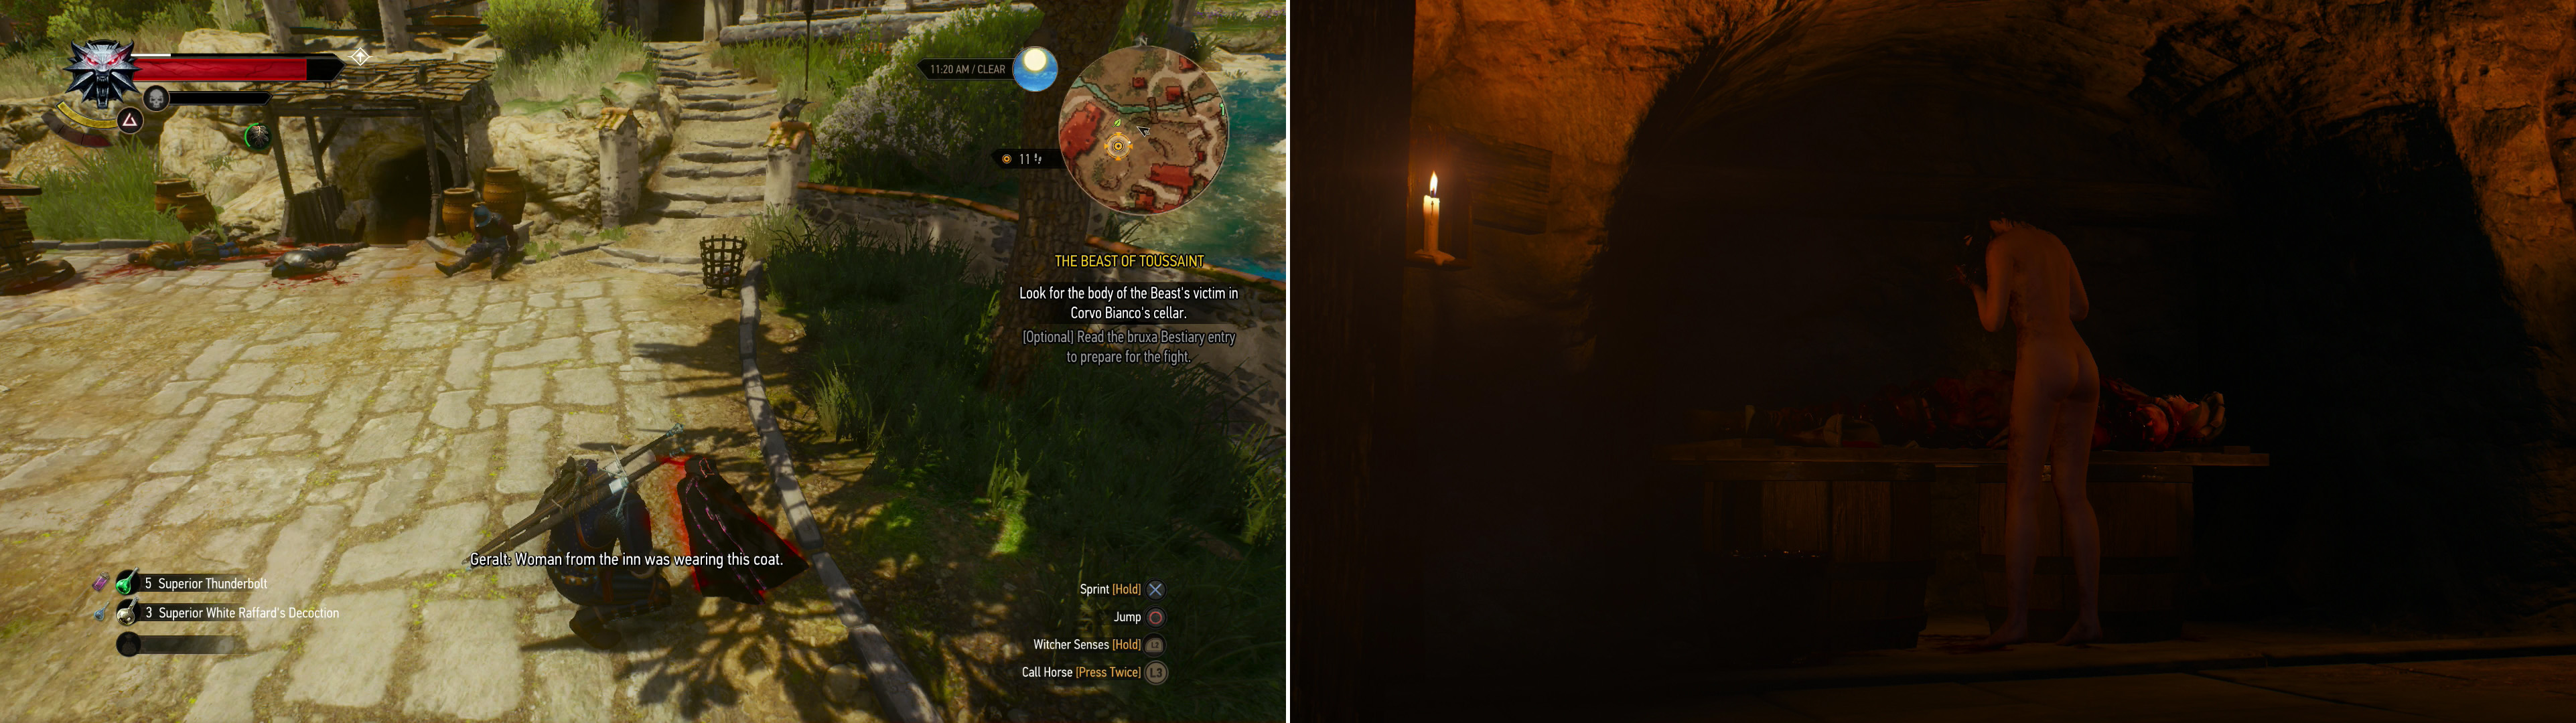
Search the clues around Corvo Bianco (left) and follow them into the cellar, where you’ll find the corpse from the river… and the other being searching for it (right).
Pass through a cage door to reach a large chamber, where you’ll find the Bruxa, who is predictably the suspicious woman you saw at The Cockatrice Inn. Some words are exchanged, and one thing becomes clear: this isn’t going to end peacefully. Make sure you have Vampire Oil on your sword, as it’ll speed up what is a fairly simple battle. The Bruxa has two main attacks, she’s fond of turning invisible and closing to launch a flurry of blows, and she’ll also perform a screech attack, which projects a cone of force.
How you choose to handle the former attack routine will impact her usage of the screech attack. If you use Quen, you can simply absorb the attacks and, if you have the “Explosive Shield” ability activated, just let down your Quen when the Bruxa is close to stun her and score some cheap hits. Afterwards she’ll likely leap away and charge her screech, which you can easily dodge.
Alternatively you can simply block her invisible onslaught (those Witcher senses sure are something else!), which will eventually frustrate her and provoke her to do a close-range screech… which of course you can take advantage of by introducing her to your silver sword while she charges up. In the latter case you’ll probably only be able to score one good hit, after which she’ll leap away (perhaps to perform another, long-range screech), but still, if you dodge the screech and block (or Quen) the invisible attacks, there’s not much she can do to hurt you.
She does have a grapple attack she’ll use when she’s low on health, drinking your blood and causing her to regenerate, but there’s a good chance you’ll dispatch her before she can pull this off. Even if she does manage to pull this move off, the regeneration’s not significant enough to really impact the outcome of the fight. If you want to prevent this, however, consider drinking a Black Blood potion. If you happen to have a superior-grade variety of this potion, all the better, as it’ll cause the Bruxa’s health to deteriorate any time she damages you as well as while she’s near you… even if you’re safely protected by Quen or actively blocking her attacks.
| Objective | Reward |
|---|---|
| For besting the Bruxa | 500 XP |
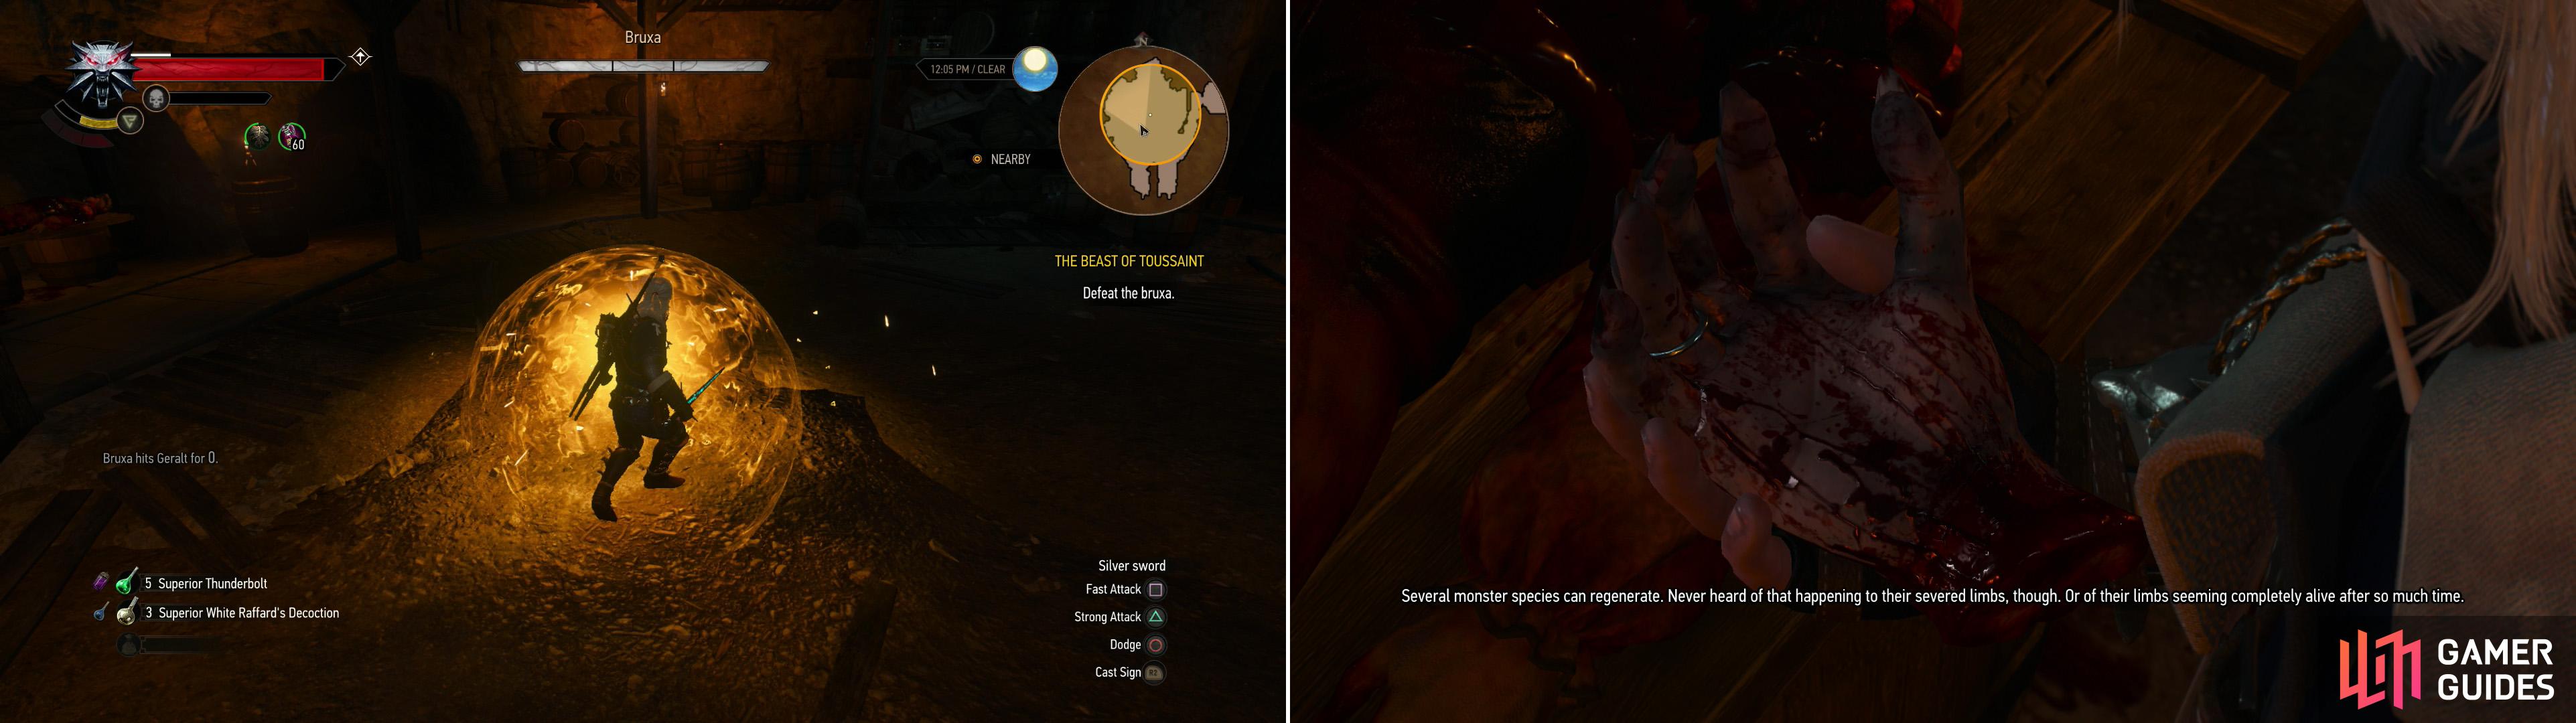
Despite her eagerness to fight, all her melee attacks can be easily repelled with Quen (left). Dispatch her, then search the beast’s third victim to discover why it drew the attention of a Bruxa (right).
After the Bruxa has been butchered, search her body to harvest some valuable vampire bits, then examine de la Croix’s corpse, which so many men died over. Be sure to examine the head to discover a Pouch Filled with Florins , then examine the severed hand - a most peculiar third hand - to obtain an Unusual Severed Hand . This endeavor ultimately opened up more questions than it answered, but every bit of knowledge is welcome against a clearly sentient killer whose crimes aren’t random acts of wanton violence.
| Objective | Reward |
|---|---|
| For discovering the coin purse in the corpse | 150 XP / Pouch Filled with Florins |
No Comments