
| Important Items in this Area |
|---|
| Ibrahim Savi’s First Map |
| Ibrahim Savi’s Second Map |
| Ibrahim Savi’s Fourth Map |
| Damp Moldy |
| Armorer - Random Card |
| Blacksmith - Random Card |
Yennefer awaits you far to the south-east… but since you’re in Kaer Trolde, you might as well help deal with some local problems and… oh, come on. You know how this works by now; it’s time to explore ![]() Skellige, and when a good bit of Ard Skellig has been explored and you’re good and ready, it’ll be time to meet up with Yennefer.
Skellige, and when a good bit of Ard Skellig has been explored and you’re good and ready, it’ll be time to meet up with Yennefer.
First let’s talk to Crach again (he’ll usually be in his room after the party, although you might have to wait for him to make it there). From the battlement on which you talked head north and go up some wooden stairs along the western wall of the keep, then through a doorway to return to the main hall. Go through a door in the south-western corner and continue south until you find a room to the east, wherein you’ll find Crach. Talk to him about Hammond to update the quest “![]() Following the Thread”, although it’ll be a while before you actually get around to bothering with this quest.
Following the Thread”, although it’ll be a while before you actually get around to bothering with this quest.
Leave the castle, but on your way out (in the chamber just before the bridge) turn north to find an Armorer and a Blacksmith. They both Journeyman-level craftsmen, they both plays Gwent, and they both sell a large (and expensive) variety of diagrams for you to buy.
In addition, the Armorer also sells two varieties of maps which start Treasure Hunt quests for Witcher set diagrams. Pick up “Ibrahim Savi’s First Map” , “Ibrahim Savi’s Second Map” and “Ibrahim Savi’s Fourth Map” , to start the quests “![]() Scavenger Hunt: Bear School Gear” , and “
Scavenger Hunt: Bear School Gear” , and “![]() Scavenger Hunt: Bear School Gear Upgrade Diagrams - Part 1” (first map), “Scavenger Hunt: Bear School Gear upgrade Plans - Part 2” (second map) and “Scavenger Hunt: Bear School Gear upgrade Plans - Part 4” (fourth map). In addition, buy the “Damp, Moldy
Scavenger Hunt: Bear School Gear Upgrade Diagrams - Part 1” (first map), “Scavenger Hunt: Bear School Gear upgrade Plans - Part 2” (second map) and “Scavenger Hunt: Bear School Gear upgrade Plans - Part 4” (fourth map). In addition, buy the “Damp, Moldy ![]() Notes by Hieronymus on the Witcher Elgar” and the “
Notes by Hieronymus on the Witcher Elgar” and the “![]() Notes on
Notes on ![]() Parchment by Hieronymus on Elgar the Witcher” to start the quests “
Parchment by Hieronymus on Elgar the Witcher” to start the quests “![]() Scavenger Hunt: Wolf School Gear Upgrade Diagrams - Part 3” and “
Scavenger Hunt: Wolf School Gear Upgrade Diagrams - Part 3” and “![]() Scavenger Hunt: Wolf School Gear Upgrade Diagrams - Part 6” , respectively. That’s a lot of new Witcher gear, and while some of it will be too high of a level to bother with at this point in the game, you will happen to stumble across a good bit of upgrade diagrams… you know, if you do all the exploration and generally follow this guide sequentially.
Scavenger Hunt: Wolf School Gear Upgrade Diagrams - Part 6” , respectively. That’s a lot of new Witcher gear, and while some of it will be too high of a level to bother with at this point in the game, you will happen to stumble across a good bit of upgrade diagrams… you know, if you do all the exploration and generally follow this guide sequentially.
Contract: Muire DYaeblen (Level 18)
Before leaving Kaer Trolde behind, let’s finish off that contract you started earlier. First step, head back down to the docks and talk to the other person of interest, a “Skellige Woman” who happens to be the widow of one of the victims.
| Objective | Reward |
|---|---|
| For talking to the Skelligers about the Drowner attacks | 25 |
Let her tell you her tale then return to the “![]() Kaer Trolde Harbor” signpost and follow the road uphill to the south-west, and at a fork continue west. Keep going until you reach a watchpost built upon a hill, where you can score a chest. To get to the coast from here head back downhill to the east by running along the edge of a cliff south of the road. Be careful, however, as the edge of the cliff is obscured by foliage. Eventually you’ll find that the sheer edge of the cliff ends and you can head down a steep - but safe - hill to the south-west.
Kaer Trolde Harbor” signpost and follow the road uphill to the south-west, and at a fork continue west. Keep going until you reach a watchpost built upon a hill, where you can score a chest. To get to the coast from here head back downhill to the east by running along the edge of a cliff south of the road. Be careful, however, as the edge of the cliff is obscured by foliage. Eventually you’ll find that the sheer edge of the cliff ends and you can head down a steep - but safe - hill to the south-west.
Make your way downhill until you find a search area, at which point kill some Drowned Dead (level eighteen) by the shore. Once the necrophages are gone, search a body along the water line to pick up a scent trail, then activate your Witcher Senses and follow the shallows along the cliff face to the south, scoring a lucrative chest as you go. When the shallows end and the trail leads into the water, jump into the water and swim south around a rocky out-cropping, then dive and swim into a cave to the east. You’ll be able to spot some tracks along the floor and wall of the cave as you swim - follow the linear tunnel as it twists and turns, then surface in the Drowner’s lair.
| Objective | Reward |
|---|---|
| For discovering the Drowner Lair | 25 |
From where you surface follow some tracks east, blast some poisonous gas with ![]() Igni, then turn north to find a watery chamber housing several
Igni, then turn north to find a watery chamber housing several ![]() Drowners (level eighteen). These Necrophages like to frolic in the gas clouds along the northern end of the room. Teach them a lesson by blasting it with Igni. Once they’re dispatched head into a tunnel east of the chamber you just cleared and investigate a corpse on the ground to determine that, while the trail may have led you to a Drowner lair, the monster you’re hunting is no Drowner. Explore the room to the east to pad your confirmation, then study some boat debris along the eastern end of the room to identify your quarry.
Drowners (level eighteen). These Necrophages like to frolic in the gas clouds along the northern end of the room. Teach them a lesson by blasting it with Igni. Once they’re dispatched head into a tunnel east of the chamber you just cleared and investigate a corpse on the ground to determine that, while the trail may have led you to a Drowner lair, the monster you’re hunting is no Drowner. Explore the room to the east to pad your confirmation, then study some boat debris along the eastern end of the room to identify your quarry.
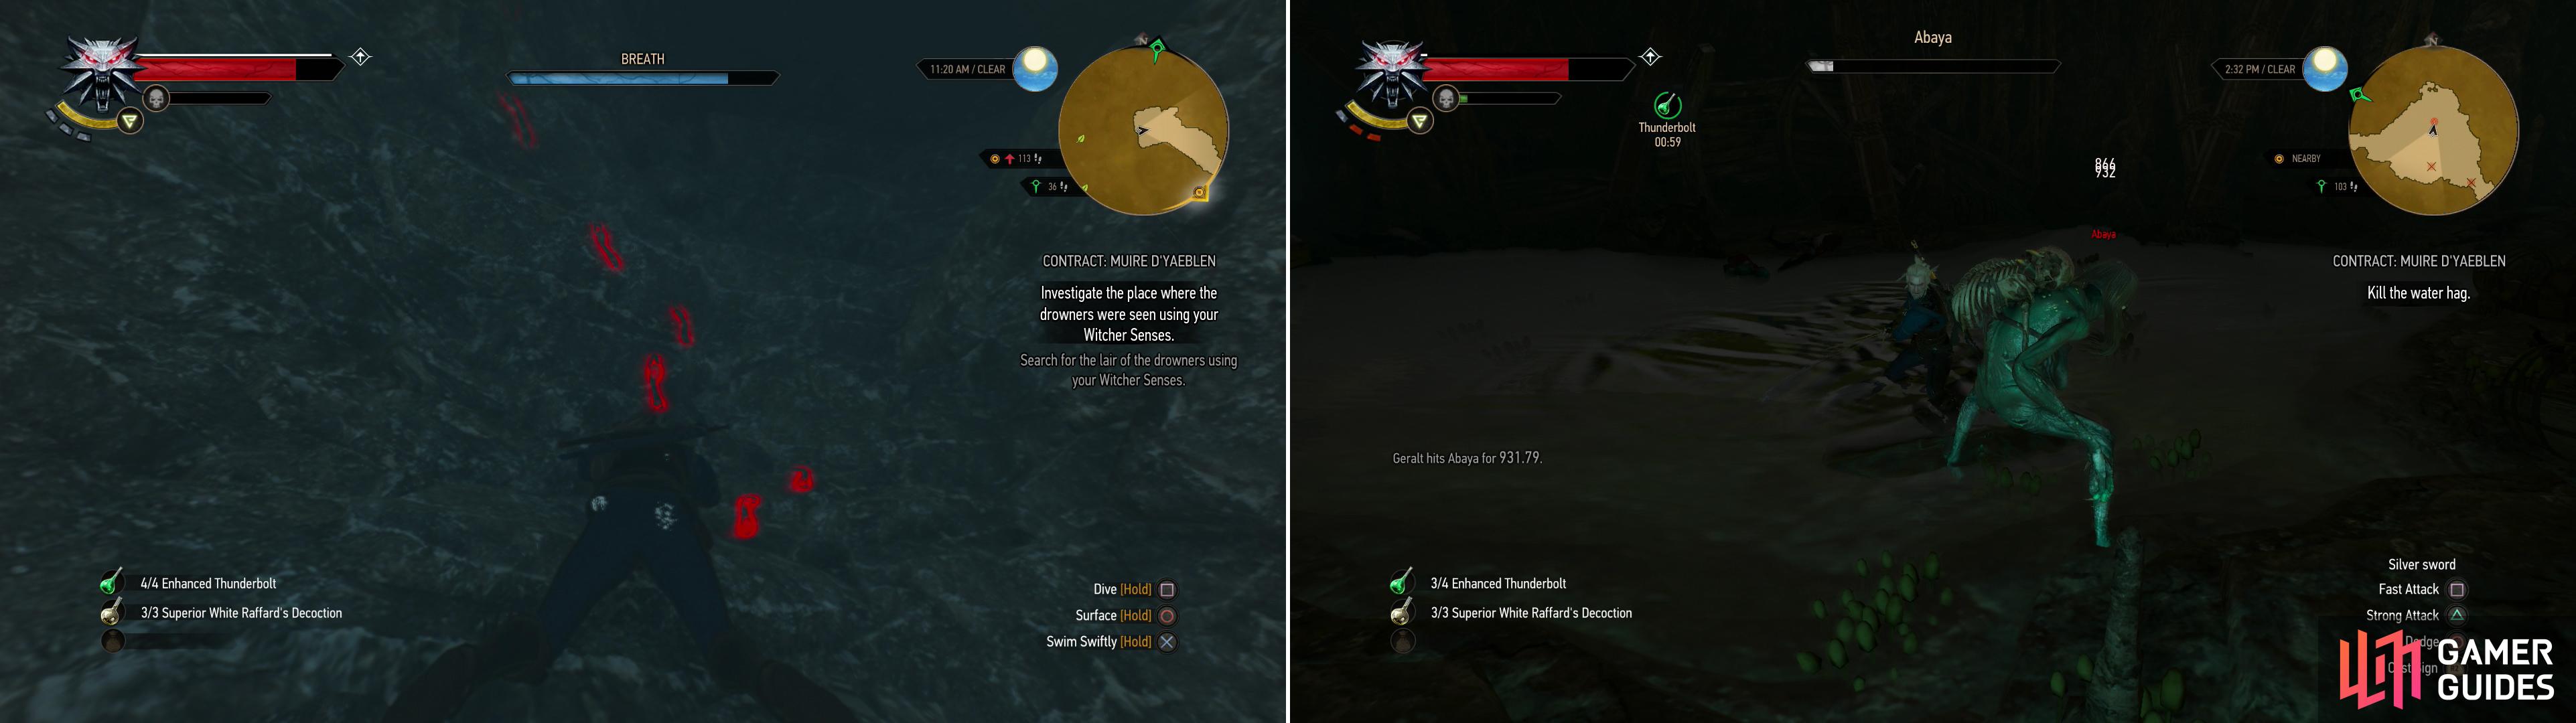
Follow the Drowner tracks to discover their lair (left). Within you’ll find the true menace terrorizing Kaer Trolde-the Water Hag, Abaya (right).
Make the Drowner Pheromones potion, which will require one dose of Dwarven Spirit, one Drowner Brain Sample, some Sewant ![]() Mushrooms and some a unit of
Mushrooms and some a unit of ![]() Puffball - the formula the game gives you for free. All of these, save the alcohol, can be found in this cave. Once it’s mixed up use the Drowner Pheromones, then head into a tunnel to the south-east, where Geralt will await the return of his prey.
Puffball - the formula the game gives you for free. All of these, save the alcohol, can be found in this cave. Once it’s mixed up use the Drowner Pheromones, then head into a tunnel to the south-east, where Geralt will await the return of his prey.
Once this occurs, return to the chamber to the north-west to find your foe, who is joined by two Drowners (level eighteen). Nothing exceptional here, just a ![]() Water Hag, so you know what to expect. She’ll throw muck, swipe at you with her clawed hands, dive into the water to resurface and repeat. Given your foes, it goes without saying that Necrophage
Water Hag, so you know what to expect. She’ll throw muck, swipe at you with her clawed hands, dive into the water to resurface and repeat. Given your foes, it goes without saying that Necrophage ![]() Oil works wonders here. Once she’s dead, loot her for the steel sword “
Oil works wonders here. Once she’s dead, loot her for the steel sword “![]() Daystar” , a “Water Hag Mutagen” , and a “Water Hag Trophy” , as well as other goodies. When the beasties have been looted, search this chamber to find a chest. Two more can be found in the tunnels to the south-east, at each end of the Y-shaped fork.
Daystar” , a “Water Hag Mutagen” , and a “Water Hag Trophy” , as well as other goodies. When the beasties have been looted, search this chamber to find a chest. Two more can be found in the tunnels to the south-east, at each end of the Y-shaped fork.
Backtrack west, then south to reach the three-way fork. If you head west you’ll return down the tunnel you entered the lair through. If you go down the unexplored path to the east you’ll find another exit out of here. From this exit, if you swim north you’ll reach an isolated shoreline where you can find two more chests. Return to Kaer Trolde Harbor and talk to Bjorg to collect your reward. If you haggle for more based on the nature of the foe you faced, you’ll get it, but it’ll make Bjorg unhappy.
Worthy of Trust
Leave Kaer Trolde Harbor and take the road running north-south from the “Kaer Trolde Harbor” signpost and the “Crossroads” signpost. Follow the road south until, midway between Kaer Trolde and the “Crossroads” signpost, you’ll find a Merchant east of the road. If you remember, he sells nothing but useless maps. Now, however, there’s a Skelliger sitting nearby with a quest for you.
Talk to him and Geralt will recognize him as the poor Merchant he gave a loan to earlier. Geralt will call him out on his thievery, after which you have three options, let him go, turn him into the Jarl, or attack him. The latter two options end with you having to kill him, starting - and ending - the quest “Worthy of Trust” . You’ll get 20 ![]() Crowns for the effort, and you can loot his body for the 150 Crowns you gave him earlier. If you let him go, you’ll just get 20 Crowns, and the conman will wander off… It might be tempting to kill him, but it’s more lucrative in the long run to let him go.
Crowns for the effort, and you can loot his body for the 150 Crowns you gave him earlier. If you let him go, you’ll just get 20 Crowns, and the conman will wander off… It might be tempting to kill him, but it’s more lucrative in the long run to let him go.
| Objective | Reward |
|---|---|
| For confronting the con-man | 20 |
Rannvaig
Continue south along the road to reach the “Crossroads” signpost. From here, head south-east and cross a bridge, following the road until it forks. At this fork continue south, then south-west at another fork to reach the village of ![]() Rannvaig. Check out the notice board outside of town and pick up the notice “Nithing” to start the quest “
Rannvaig. Check out the notice board outside of town and pick up the notice “Nithing” to start the quest “![]() The Nithing”, and the notice “
The Nithing”, and the notice “![]() Contract: Missing Son” to start a quest of the same name. You can also find an Alchemist named Jonna, who will sell you alchemical supplies, and perhaps the odd formula or two.
Contract: Missing Son” to start a quest of the same name. You can also find an Alchemist named Jonna, who will sell you alchemical supplies, and perhaps the odd formula or two.
Head south to find Odhen, who will tell you about his son, lured by tales of treasure and glory. You’ll recognize the boy by his yellow tunic. Considering the level of this quest - “Missing Son” - let’s ignore it for now. For a quest you can deal with more easily continue east, south-east along a road from the “Rannvaig” signpost, then head south when it forks. While heading south, ignore the first road east, but take the second to find the home of Lothar, whose family is suffering from the effects of a wicked curse. Geralt will present Lothar with two ways to deal with the quest… but first, you’re going to have to learn more about it… namely the identity of the curse-caster.
The Nithing
Examine the Nithing to the north, which will reveal a trail near the totem. The hexxer was wise enough to set a curse, but not smart enough to cover their tracks. Follow the tracks north-west to find a woman’s shawl, which leaves a scent trail. Follow the scent trail back to the village, where the scent is lost amongst the fragrant musk of unwashed Skelligers. Talk to a “Skellige Woman” along the south-western edge of the search area and ask about the shawl, and she’ll point you to Jonna. Somebody’s in trouble…

Odhen’s son has been cursed via the use of a Nithing (left). Track down and confront the hexxer-a jilted former lover od Odhen’s (right).
Confront Jonna and she’ll be rather unrepentant, telling her side of the story before giving some rather absurd terms for lifting the curse. Return to Lothar and tell him the news, which, predictably, he declines. Either agree to resolve things by turning the curse back on Jonna (pick the dialogue option “So be it”) or say “Can’t do that” to force Lothar to suck it up and go back to Jonna. If you choose the latter option, the quest ends, and you’ll get experience, but no Crowns. On the other hand, if you pick the former option you’ll have to inscribe Jonna’s name on the Nithing, which reverses the curse (to Jonna’s detriment), then talk to Lothar again to complete the quest.
| Objective | Reward |
|---|---|
| For breaking the Nithing | 25 XP / 60 |
"From this exit, if you swim north you’ll reach"
it's more north-west and the shore itself it's north, yes.