
| Important Items in this Area |
|---|
| Diagram: Wolven Steel Sword - Mastercrafte |
| Marauder’s Notes |
| Common Key |
| Ultimatum |
Bandit Camp (Level 5)
If you want to continue exploring, there’s plenty left to do. From the not-so Abandoned Site continue south to find a Bandit Camp. You COULD follow a road east, then south, then west from the Abandoned Site, but you don’t need a road, the land is narrow enough. The Bandit Camp consists of a crude fence, and is occupied by a number of Cannibals (levels three and five), who naturally don’t view Geralt in any way you want them to. Be wary of archers, as usual, and cut down the Cannibals, then loot a chest near the fence.
Condyle
Follow the road south from the Bandit Camp to find the village of Condyle, now overrun with Cannibals (level three). Their archers are sparse, but they’ve got numerous spearmen. Kill them and witness the brutal massacre they perpetrated, then loot the village - especially a house to the east with a chest inside of it. Be sure to get the Condyle signpost for ease of travel.
Bandit Camp (Level 5)
East of Condyle you’ll find yet another Bandit Camp occupied with even more Cannibals (levels three and five). This site appears to be a vile meat-market catering to their repugnant tastes, with humans hanging from the next like fowl. Kill the loathsome cannibals, then loot the various sacks and parcels around the grotesque market as you make your way north. At the northern end of the camp, near a crucifix, you’ll find a fresh corpse you can examine for some commentary by Geralt.
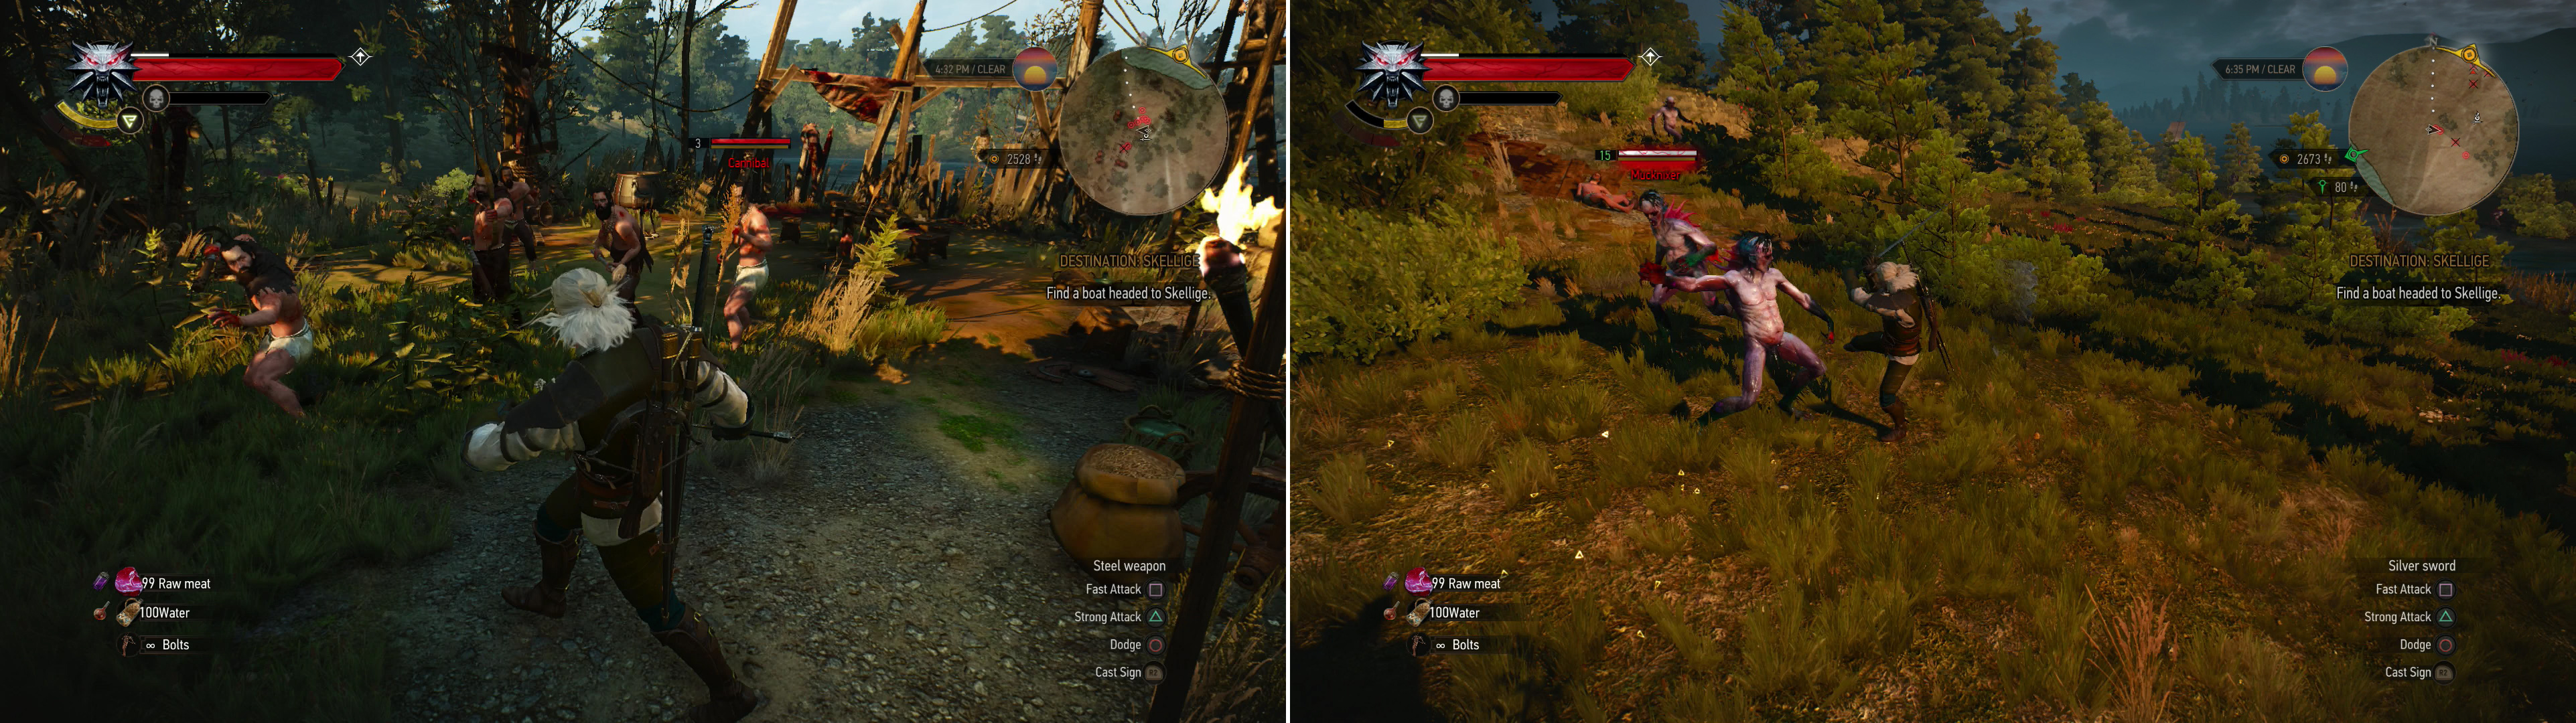
South-western Velen is plagued by cannibals (left). Other man-eaters, like Mucknixers, also dwell here (right).
Bandit Camp (Level 15)
Return south through the camp, then back up the road until you reach a fork. Continue south until you reach another fork, at which point you might as well go south-east. The western path will only take you to a peninsula capped with a Hidden Treasure event, protected by a Grave Hag that’s too high of a level to bother with. Follow the south-eastern road as it bends and ultimately comes to another fork, at which point you should go south until you find YET ANOTHER Bandit Camp. Kill the Cannibals (level three), then continue south a tiny bit past the camp to find a group of Mucknixers (level fifteen) unsettlingly close to the Bandit Camp. Both are man-eaters, and by virtue of that deed, man-eaters, so ensure both fall beneath your blade, then loot the camp to find - among other treasures - a chest that may contain a generous dose of treasure. Yum.
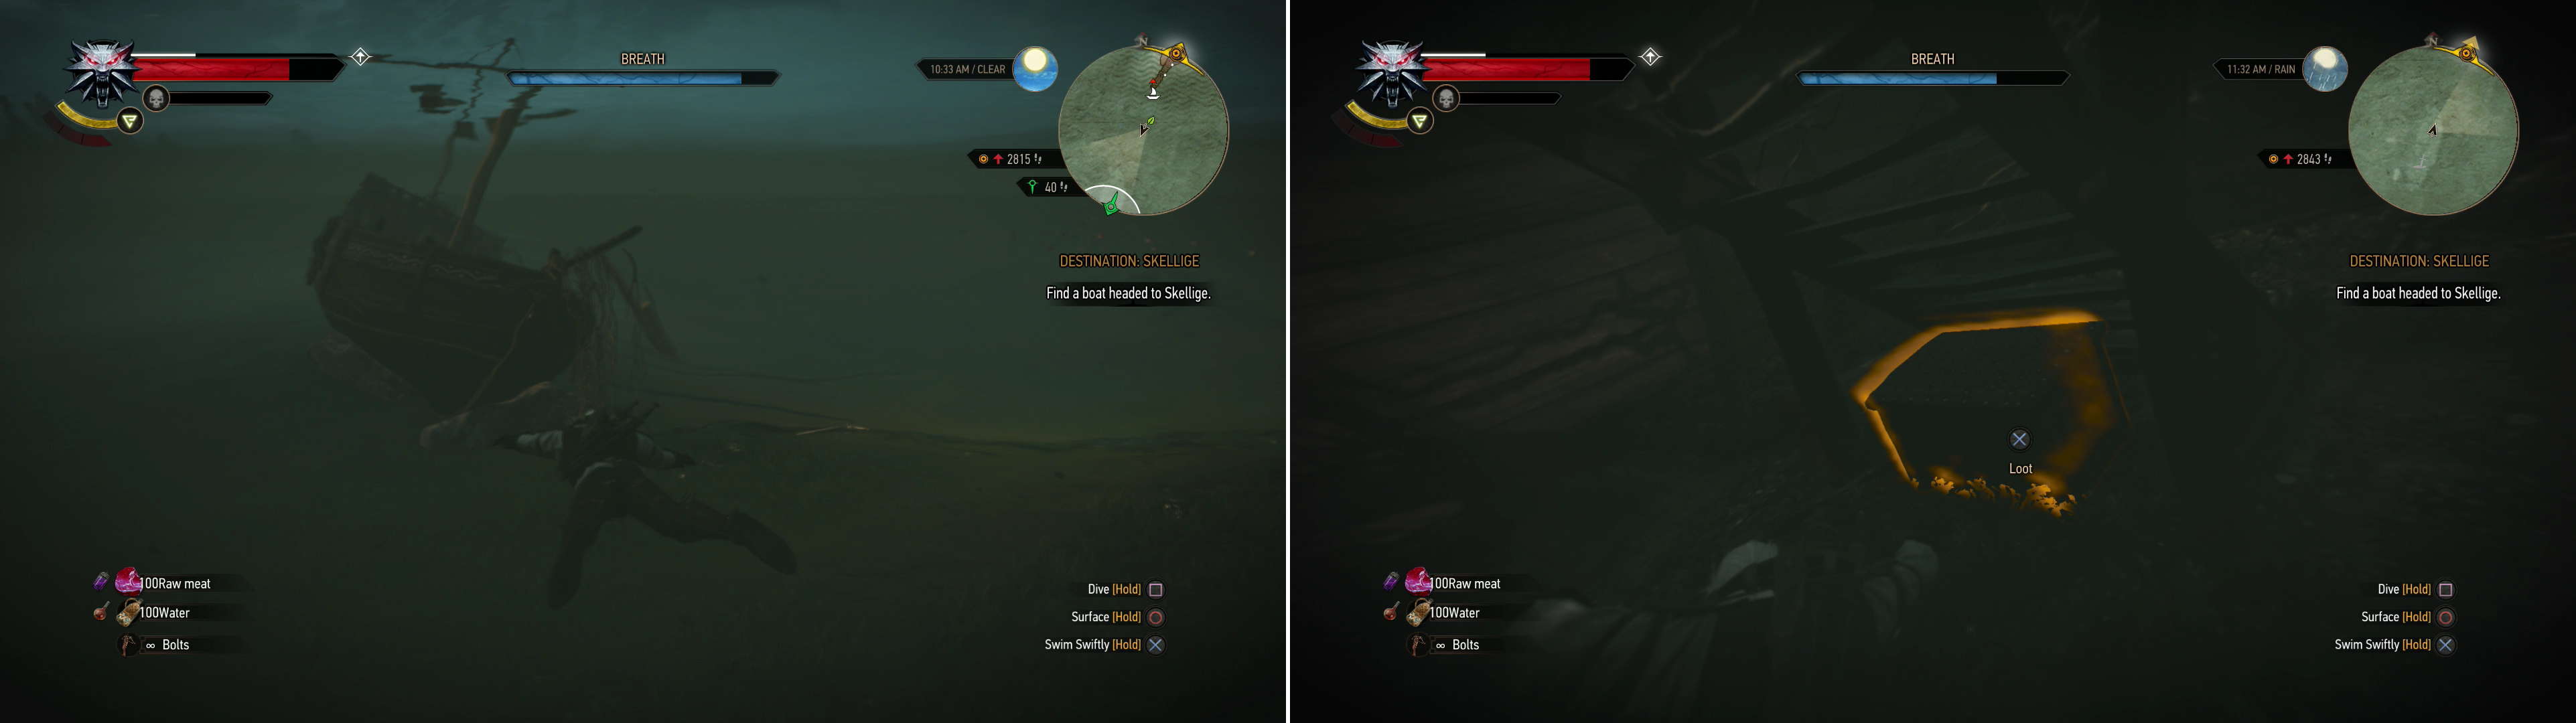
South-east of a seaside cabin you can find a sunken ship (left). Brave the wreckage to find the Diagram: Wolven Steel Sword - Mastercrafted in a chest behind some stairs (right).
Spoils of War (Level 10) Walkthrough
If you head south you’ll find the shore where Mucknixers (level fifteen) spawn obnoxiously quickly. That being the case, travel a short distance to the east to find a trail running south, just far enough away from the Mucknixers to give you a good shot at avoiding them. Follow the trail south to reach a small water-side cabin, which is worth looting.
Even better, head south to the end of a dock, then jump into the water and keep swimming south towards a sunken ship, the mast of which is still visible, as birds fly overhead. At the site you’ll find some Drowners (level ten) swimming underwater. Dive, shoot them up with your crossbow, then swim into the cabin to find a chest in the corner and a wolf symbol on the wall. Uh-oh. Looks like there might be some SERIOUS loot here. Swim out of the cabin and across the deck to the north-east to find some stairs leading down into the bowels of the ship. Swim down them, then search behind the stairs to find a chest containing the “Diagram: Wolven Steel Sword - Mastercrafted” . Epic score! Unfortunately you won’t be able to use this foe-smiting weapon until you’re level thirty-four. Kind of seems a bit over-powered for the work it took to get. Oh well. You can score two more chests in the corner to the south, just make sure you’ve got enough air!
Kill a camp full of Deserters and search a nearby body (left) then find the Deserter’s excavation site to find some treasure (right).
Read More: Witcher 3 Wolven School Gear Scavenger Hunt
The Dead Have No Defense (Level 9) Walkthrough
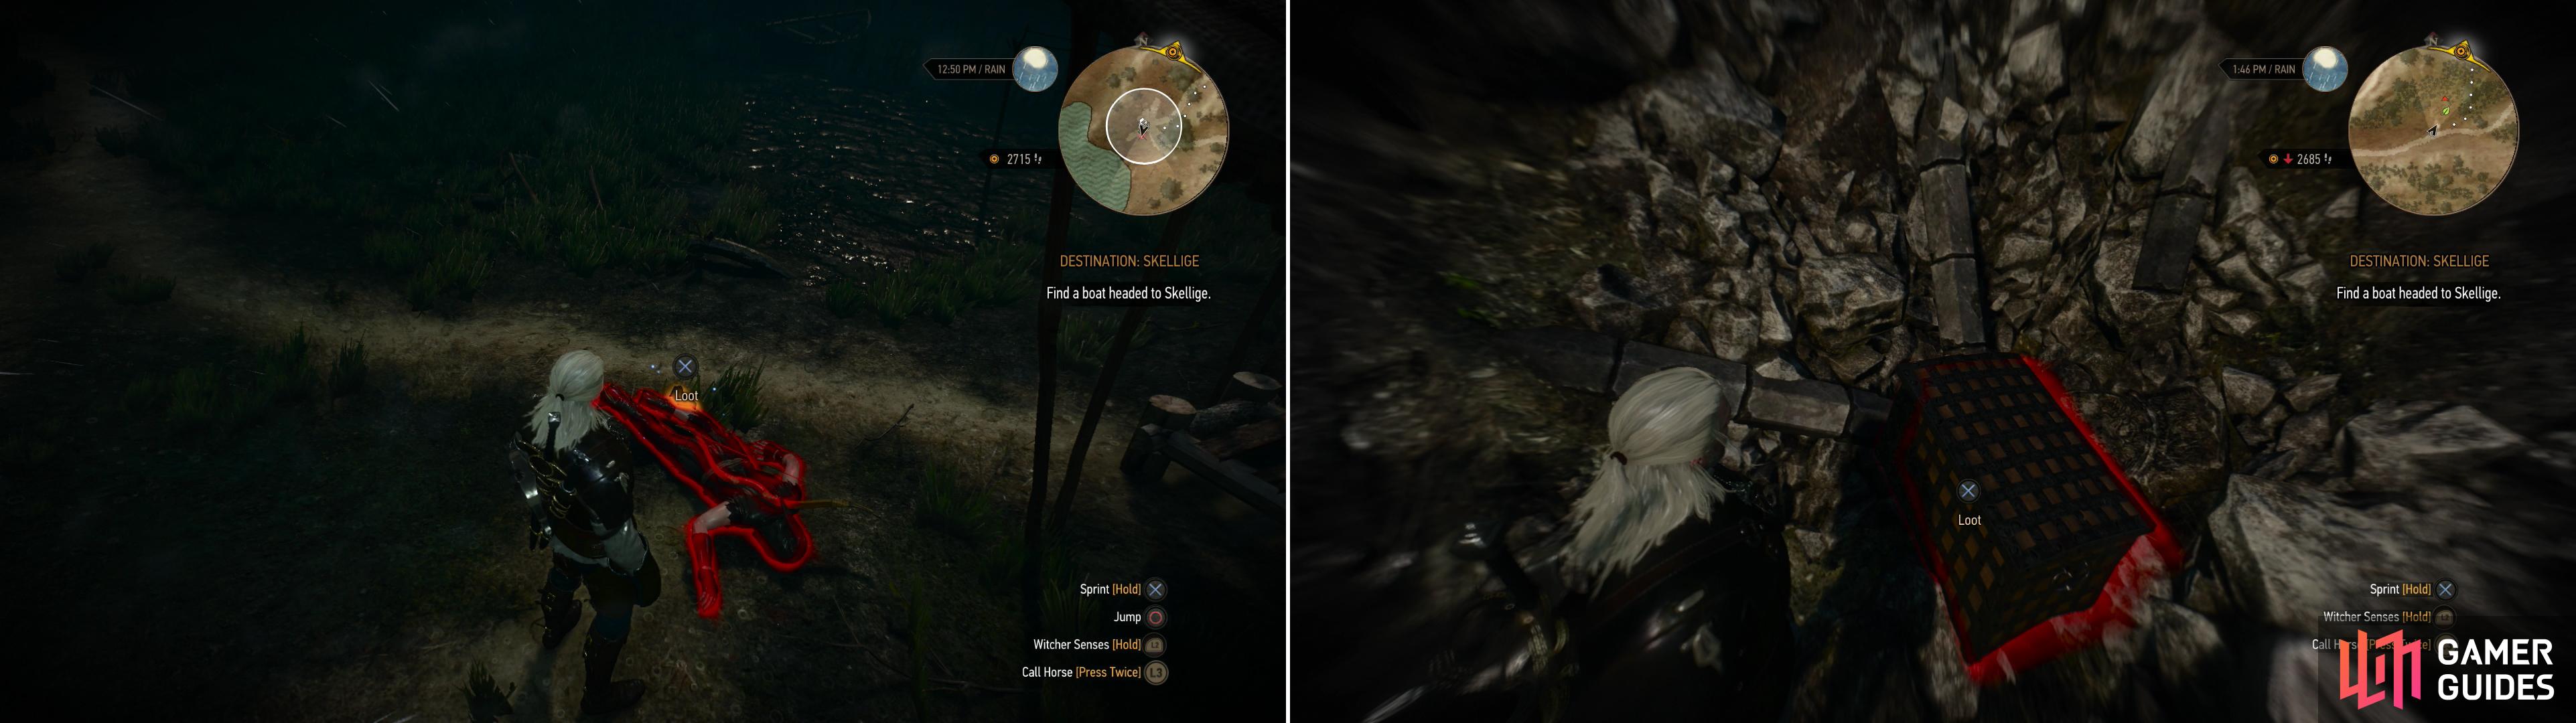
Now, let’s take a little short-cut that’ll spare you the trouble of running past a nasty monster later… or at least limit the number of times you have to do so. Return to the cabin and follow the shore north-east, then cross a narrow land-bridge to the east, after which continue east along the shore until you run into a deserter camp. Kill the Deserters (level nine), after which you should search their camp for a body, which is just east of the southern-most tent. On this body you’ll find some “Marauder’s Notes” and a “Common Key” . Read the notes to start the quest “The Dead Have No Defense”. Well, the quest’s sentiment is just not true, unfortunately. Head along a trail to the east until you spot two more Deserters (level nine), who must be dispatched. Once done, search the hill to the north to find a chest sitting in a shallow depression - the sum of the efforts these Deserters expended. Loot the chest with the key you found earlier to claim the steel sword “Ultimatum” , amongst other prizes.
Duen Hen, the Second Shrine
Backtrack to the cabin, then head up the trail to the north and ignore the first - more substantial - road branching off to the east and instead keep going north until you reach a circle of roads between the meat market Bandit Camp to the north and the Mucknixer-infested Bandit Camp to the south. Find a road running east off this loop and into some lowlands until you reach a fork, at which point head uphill to the north until you find another toppled shrine. This place is guarded by an Endrega Warrior (level eleven), which shouldn’t be any trouble to dispatch. Squash the bug, then raise the idol to restore the shrine and note the Duen Hen signpost, which will make travel easier. Before you take off, loot a chest to the north, near a grave stone.
| Objective | Reward |
|---|---|
| For repairing the shrine and Duen Hen | 20 XP |

 Sign up
No Comments