
Here’s the moment we’ve all been waiting for in the Crimson Fleet faction questline: do you side with UC SysDef or the Crimson Fleet? But before all that, you’ll have to make your way to the Legacy Ship to retrieve all of the Credits during the Eye of the Storm quest! This page offers a complete walkthrough on how to make your way to the vault of the Legacy Ship and whether you should choose UC SysDef or the Crimson Fleet. We’ll also address a puzzling bug that’s been plaguing a fair few people’s playthroughs (including ours!) and we’ll offer solutions for fixing it!
How to Start Eye of the Storm
This is the penultimate quest of the Crimson Fleet faction questline, and you can start this quest after completing Absolute Power. To finish Absolute Power, you’ll need to go and report back to Commander Ikande on the UC Vigilance Ship. After talking with him, this will commence Eye of the Storm, where you can finally choose a side!

Will you choose UC SysDef or the Crimson Fleet?
How to Reach the Legacy Ship
Your first task during the Eye of the Storm quest is to actually find the Legacy Ship, and now that you have all the components necessarily, you’ll be able to head semi-safely to reach the lost GalBank Ship!
Before you can head out, make sure to enter ship builder by talking with a ship technician (Jazz Durand at ![]() The Key will do!). Then choose the ‘Add’ category and go to the Equipment tab where you can find the ComSpike and the Conduction Grid. Add them to your ship and then confirm your alterations. You can now safely find the Legacy Ship.
The Key will do!). Then choose the ‘Add’ category and go to the Equipment tab where you can find the ComSpike and the Conduction Grid. Add them to your ship and then confirm your alterations. You can now safely find the Legacy Ship.
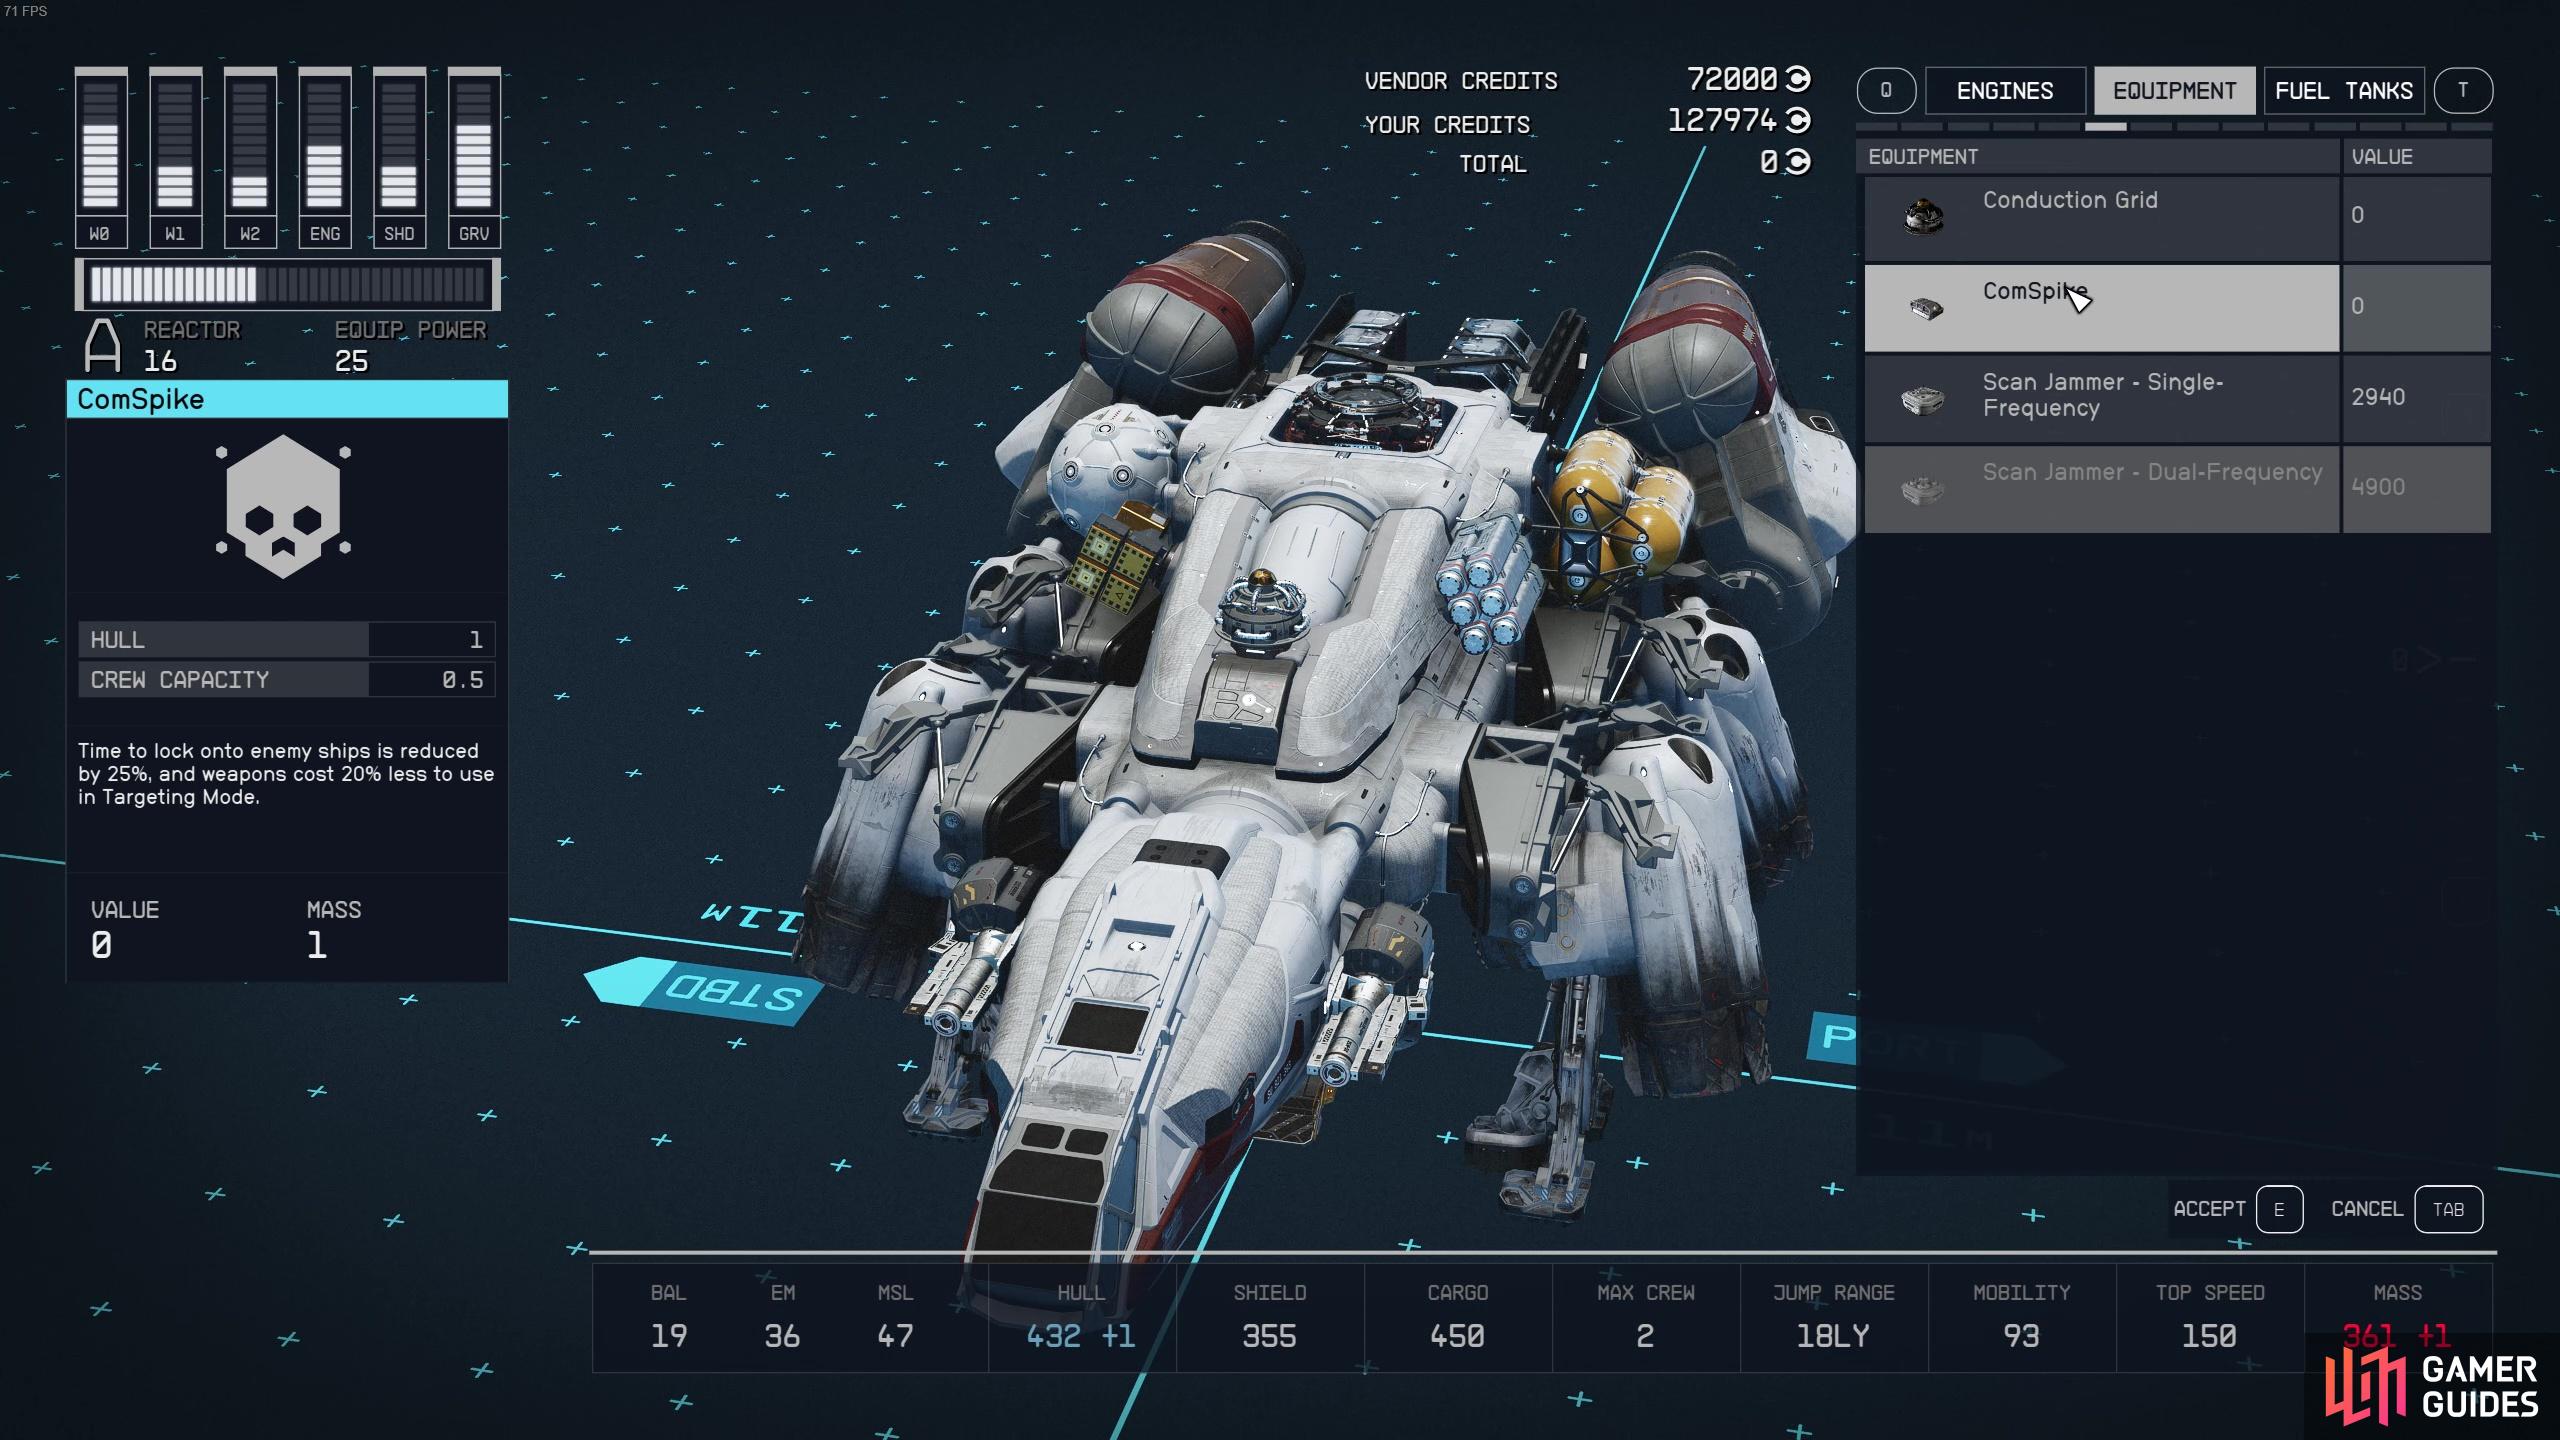
Add the ComSpike and Conduction Grid to your ship before you head off.
The ![]() Bannoc System is found in the southeast area of the Starfield, and depending on your ship’s grav system, you may need to do a couple of jumps to get there. You’ll need to head to Bannoc IV in the Bannoc System and once there you’ll notice that the atmosphere is filled with gas and lightning - not fun. Your ship will slowly take damage so it’s important you put a good few energy bars into the engine and fly quickly (whilst avoiding the meteors!) to the Legacy Ship, which is several thousand meters away!
Bannoc System is found in the southeast area of the Starfield, and depending on your ship’s grav system, you may need to do a couple of jumps to get there. You’ll need to head to Bannoc IV in the Bannoc System and once there you’ll notice that the atmosphere is filled with gas and lightning - not fun. Your ship will slowly take damage so it’s important you put a good few energy bars into the engine and fly quickly (whilst avoiding the meteors!) to the Legacy Ship, which is several thousand meters away!
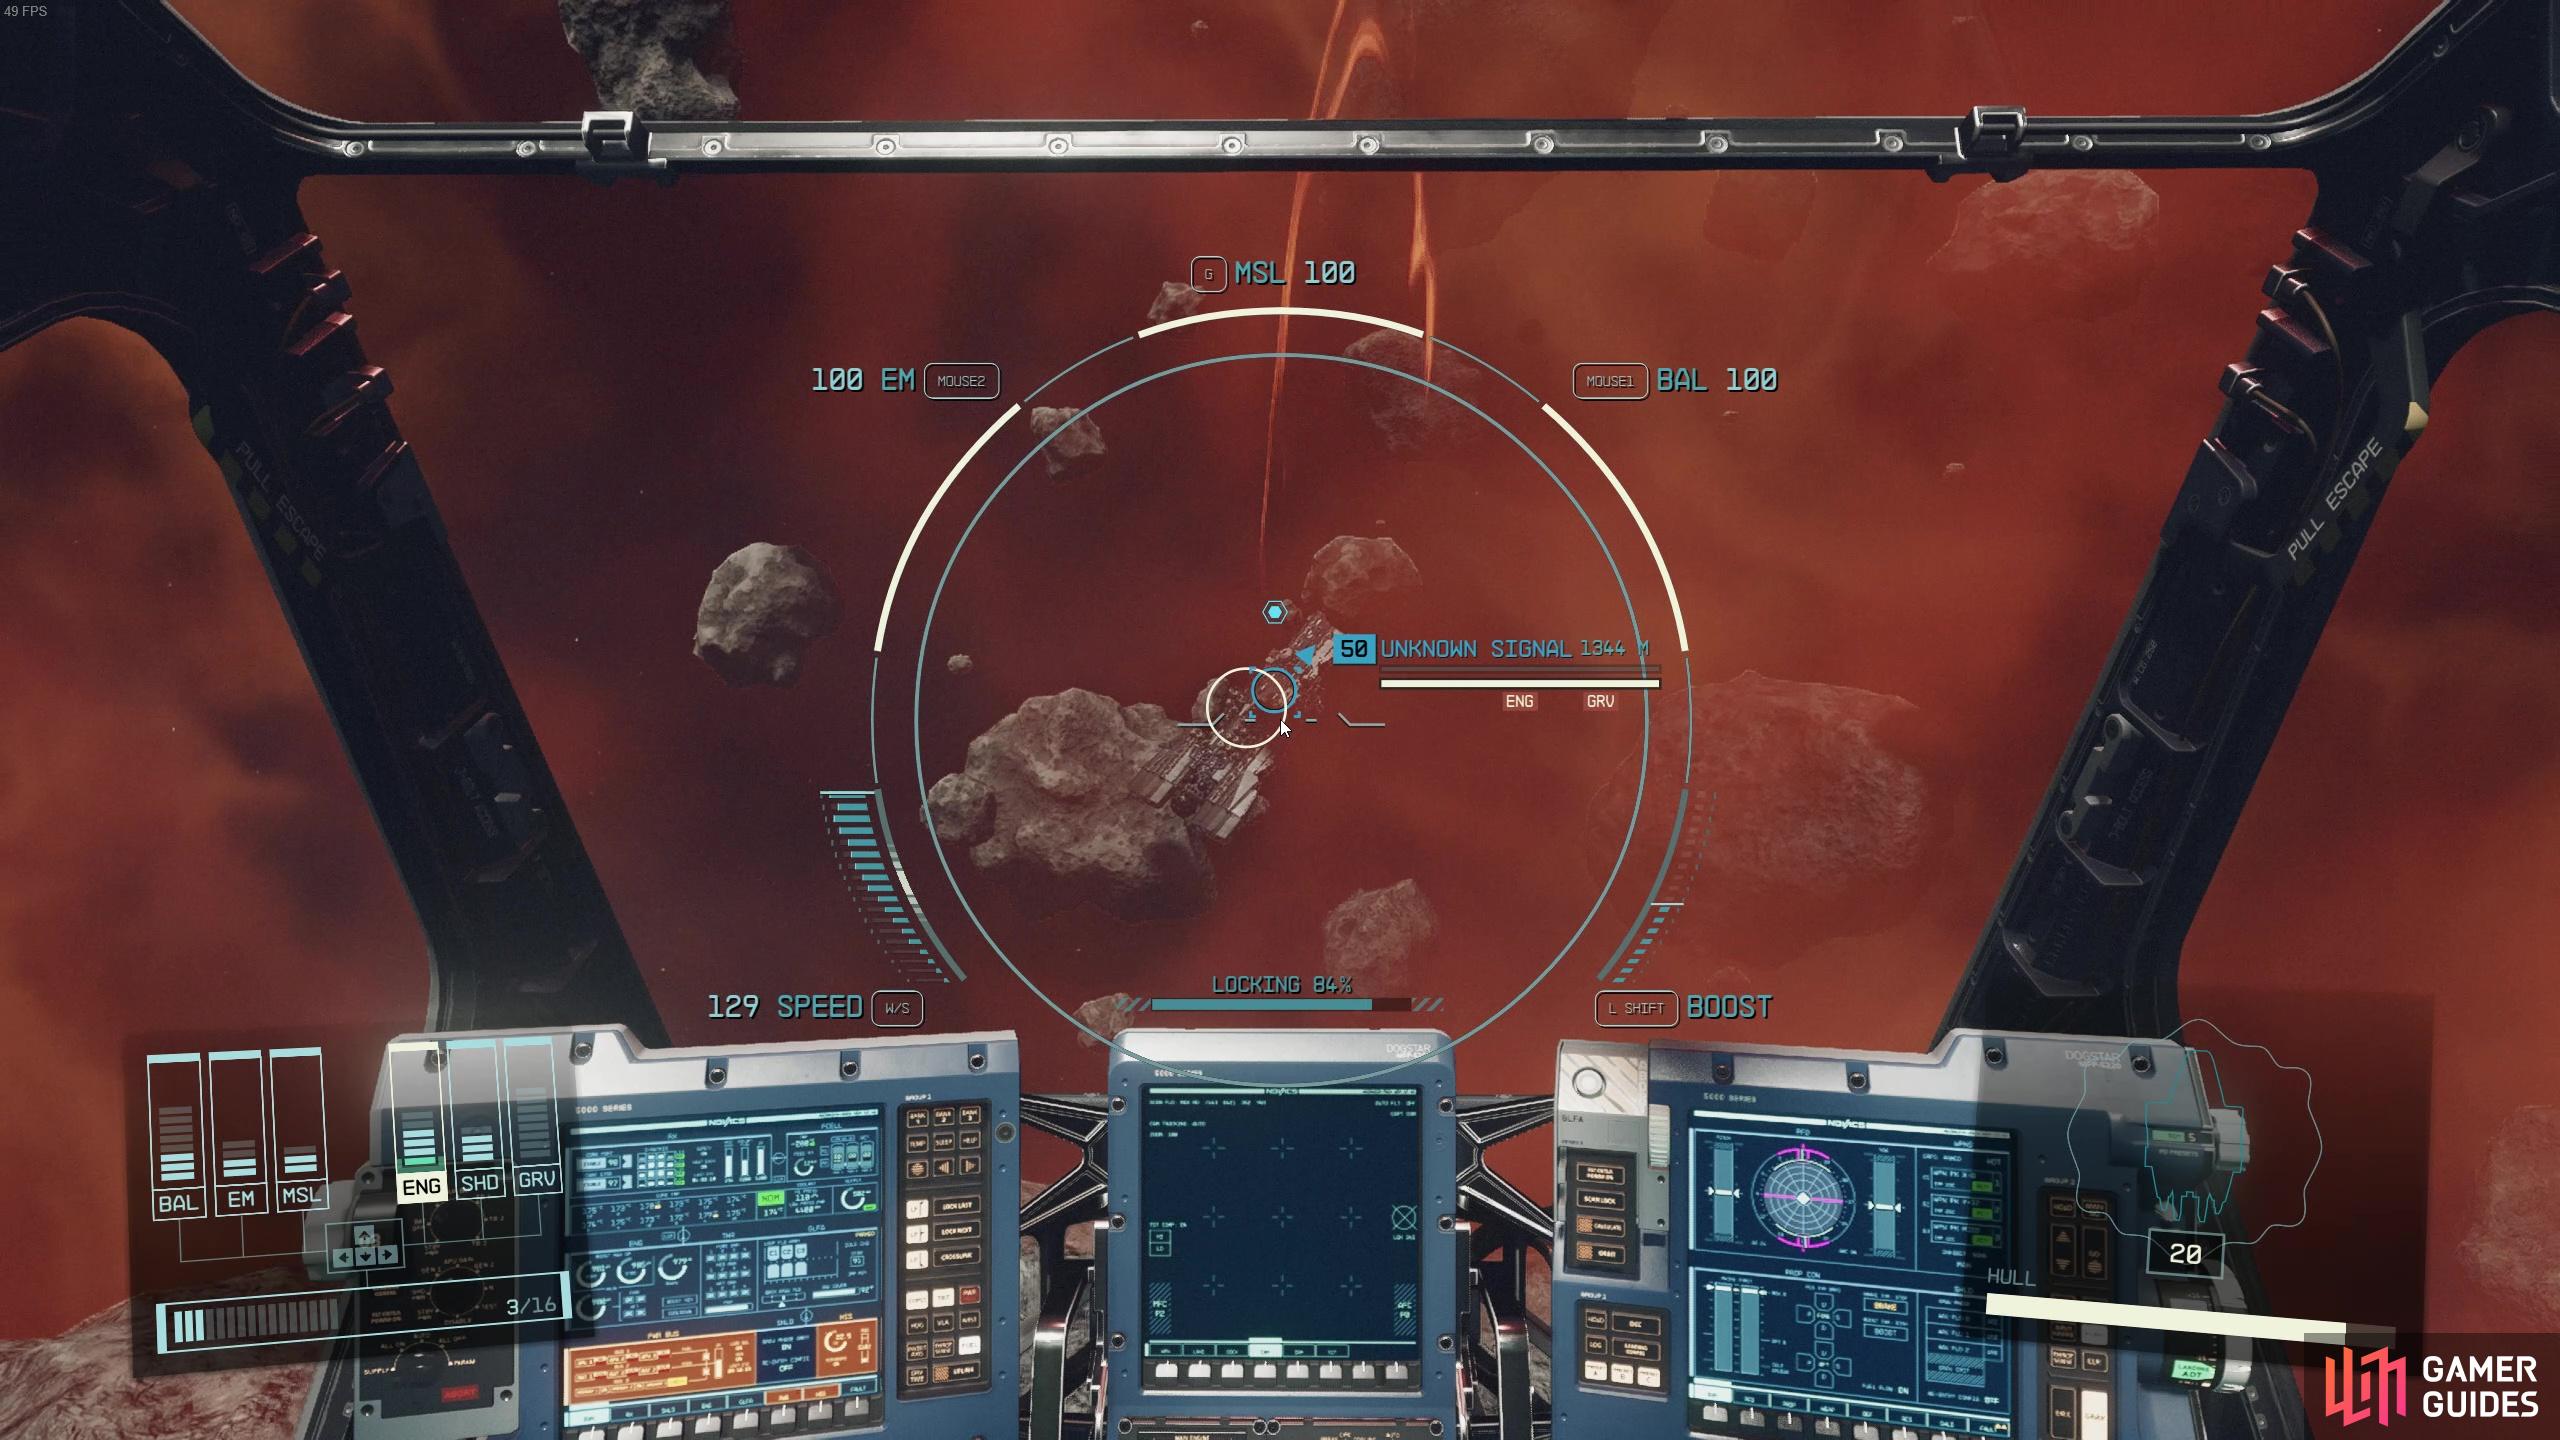
Fly quickly to reach the Legacy ship before your ship deteriorates!
How to Find the Vault on the Legacy Ship
Once you’ve docked and boarded the ship, finding the vault is relatively easy and quite a linear path. First, head up the steps and then to the left to find more steps. Continue down the hall and you’ll find even more steps. At the top of the stairs, you’ll be able to pick up the first transfer module lock. Luckily the transfer module is right next to a dead body by the steps, so you can pick that up and open up the door in front using the transfer module lock.
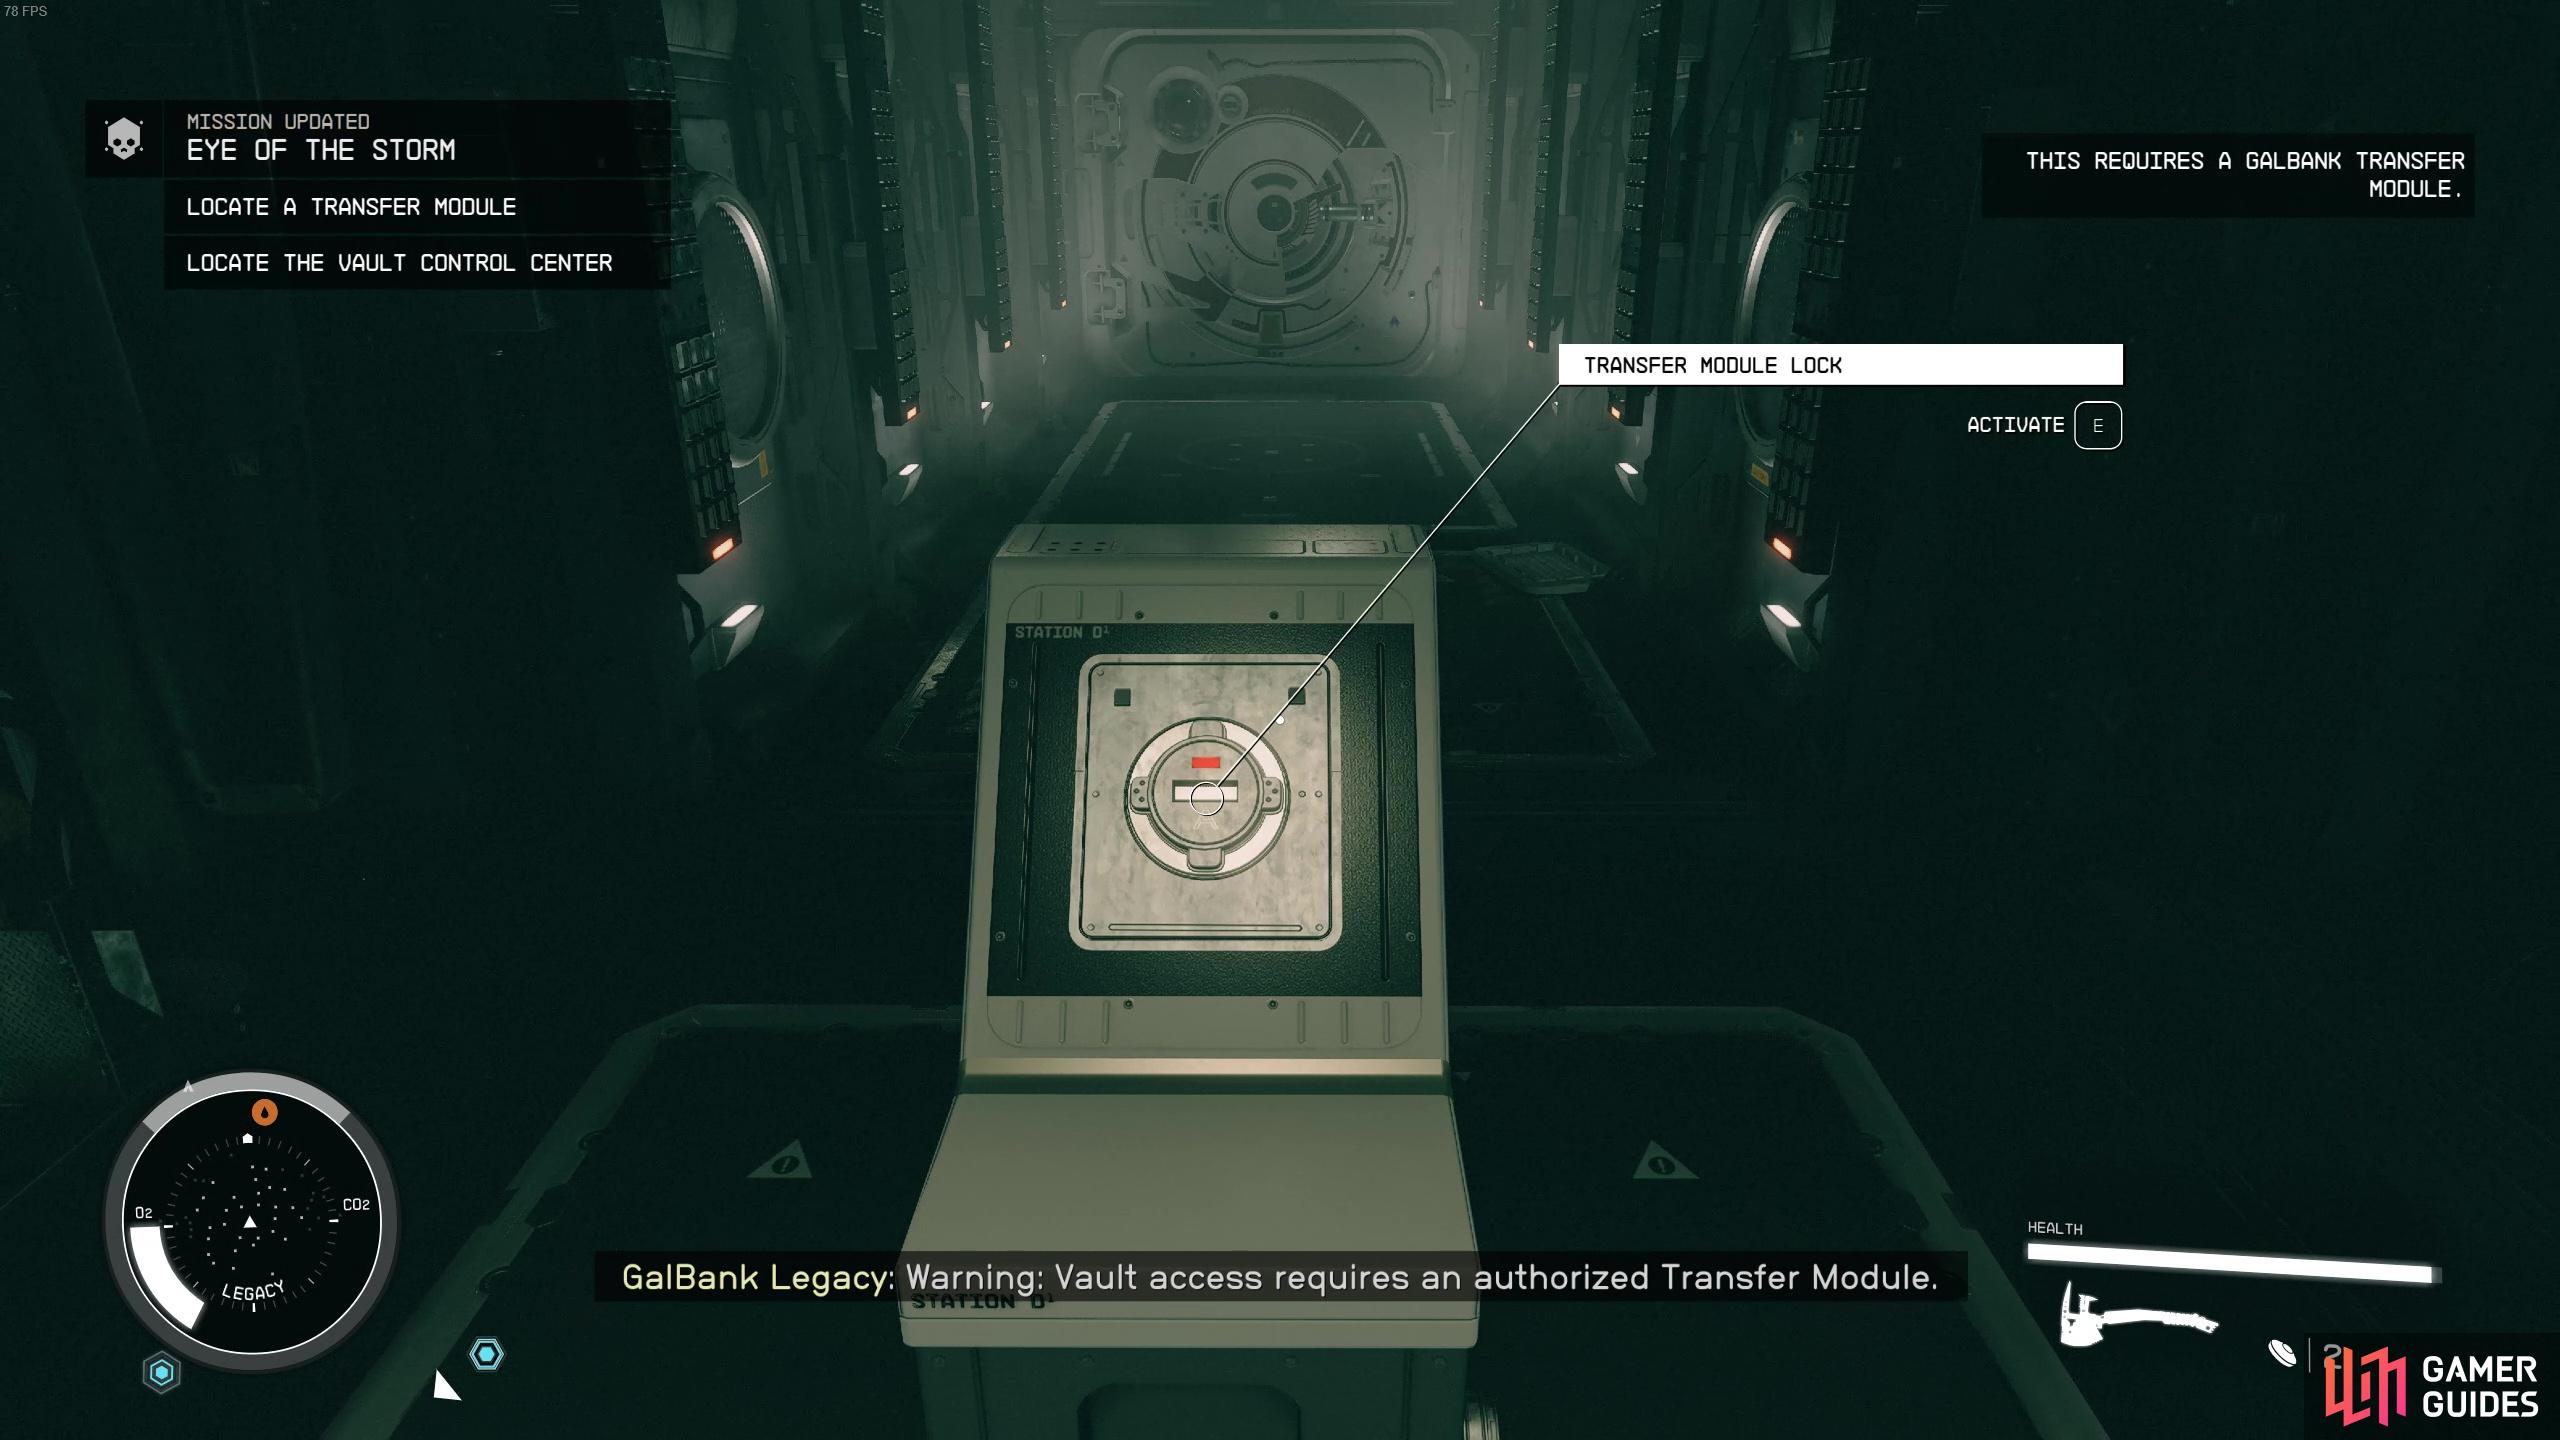
To open the transfer module lock
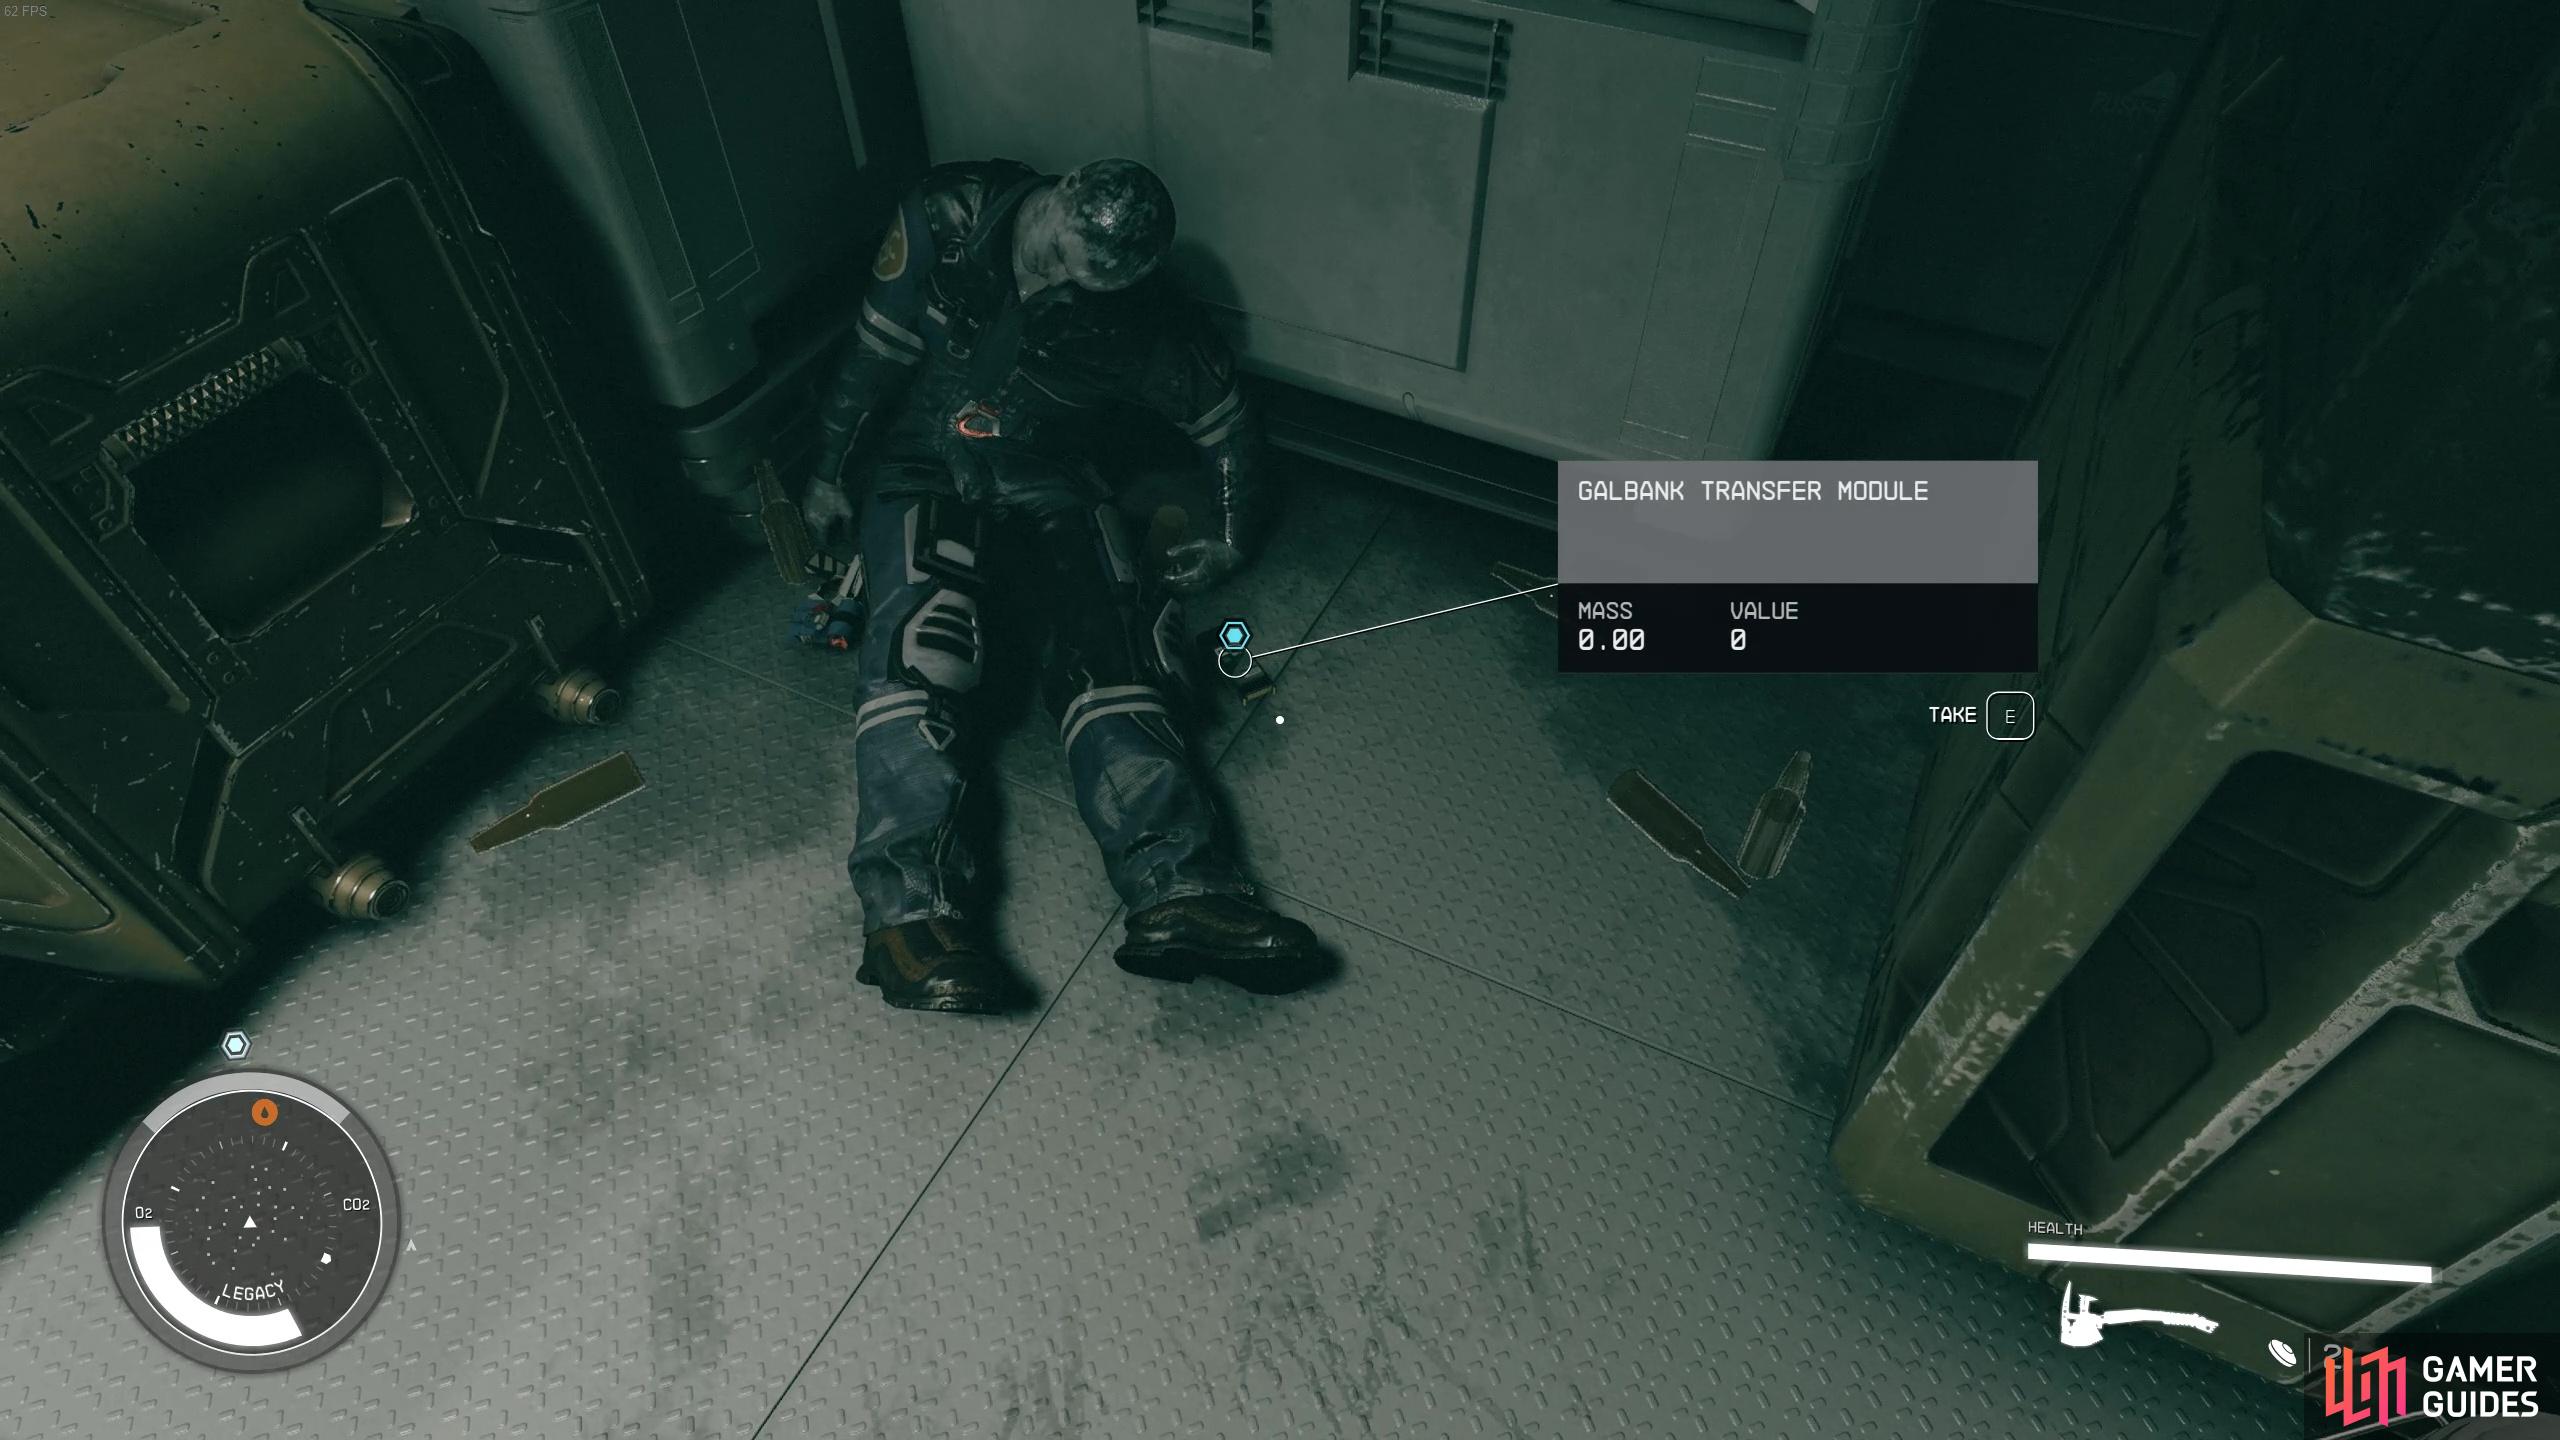
you’ll need to locate the GalBank tranfer module, nearby the corpse by the stairs.
Once that door’s opened, proceed through and to the left. In this corridor, you’ll find an additional credtank filled with credits, and all you need to do to activate it is interact with it and it’ll deposit 4,380 credits!
Head past this and through the closed orange door. In this room, you’ll encounter your first wave of security - mounted turrets and robots. Both should be relatively easy to deal with provided you have a decent weapon. The robots can use both melee weapons and ranged guns so watch out!
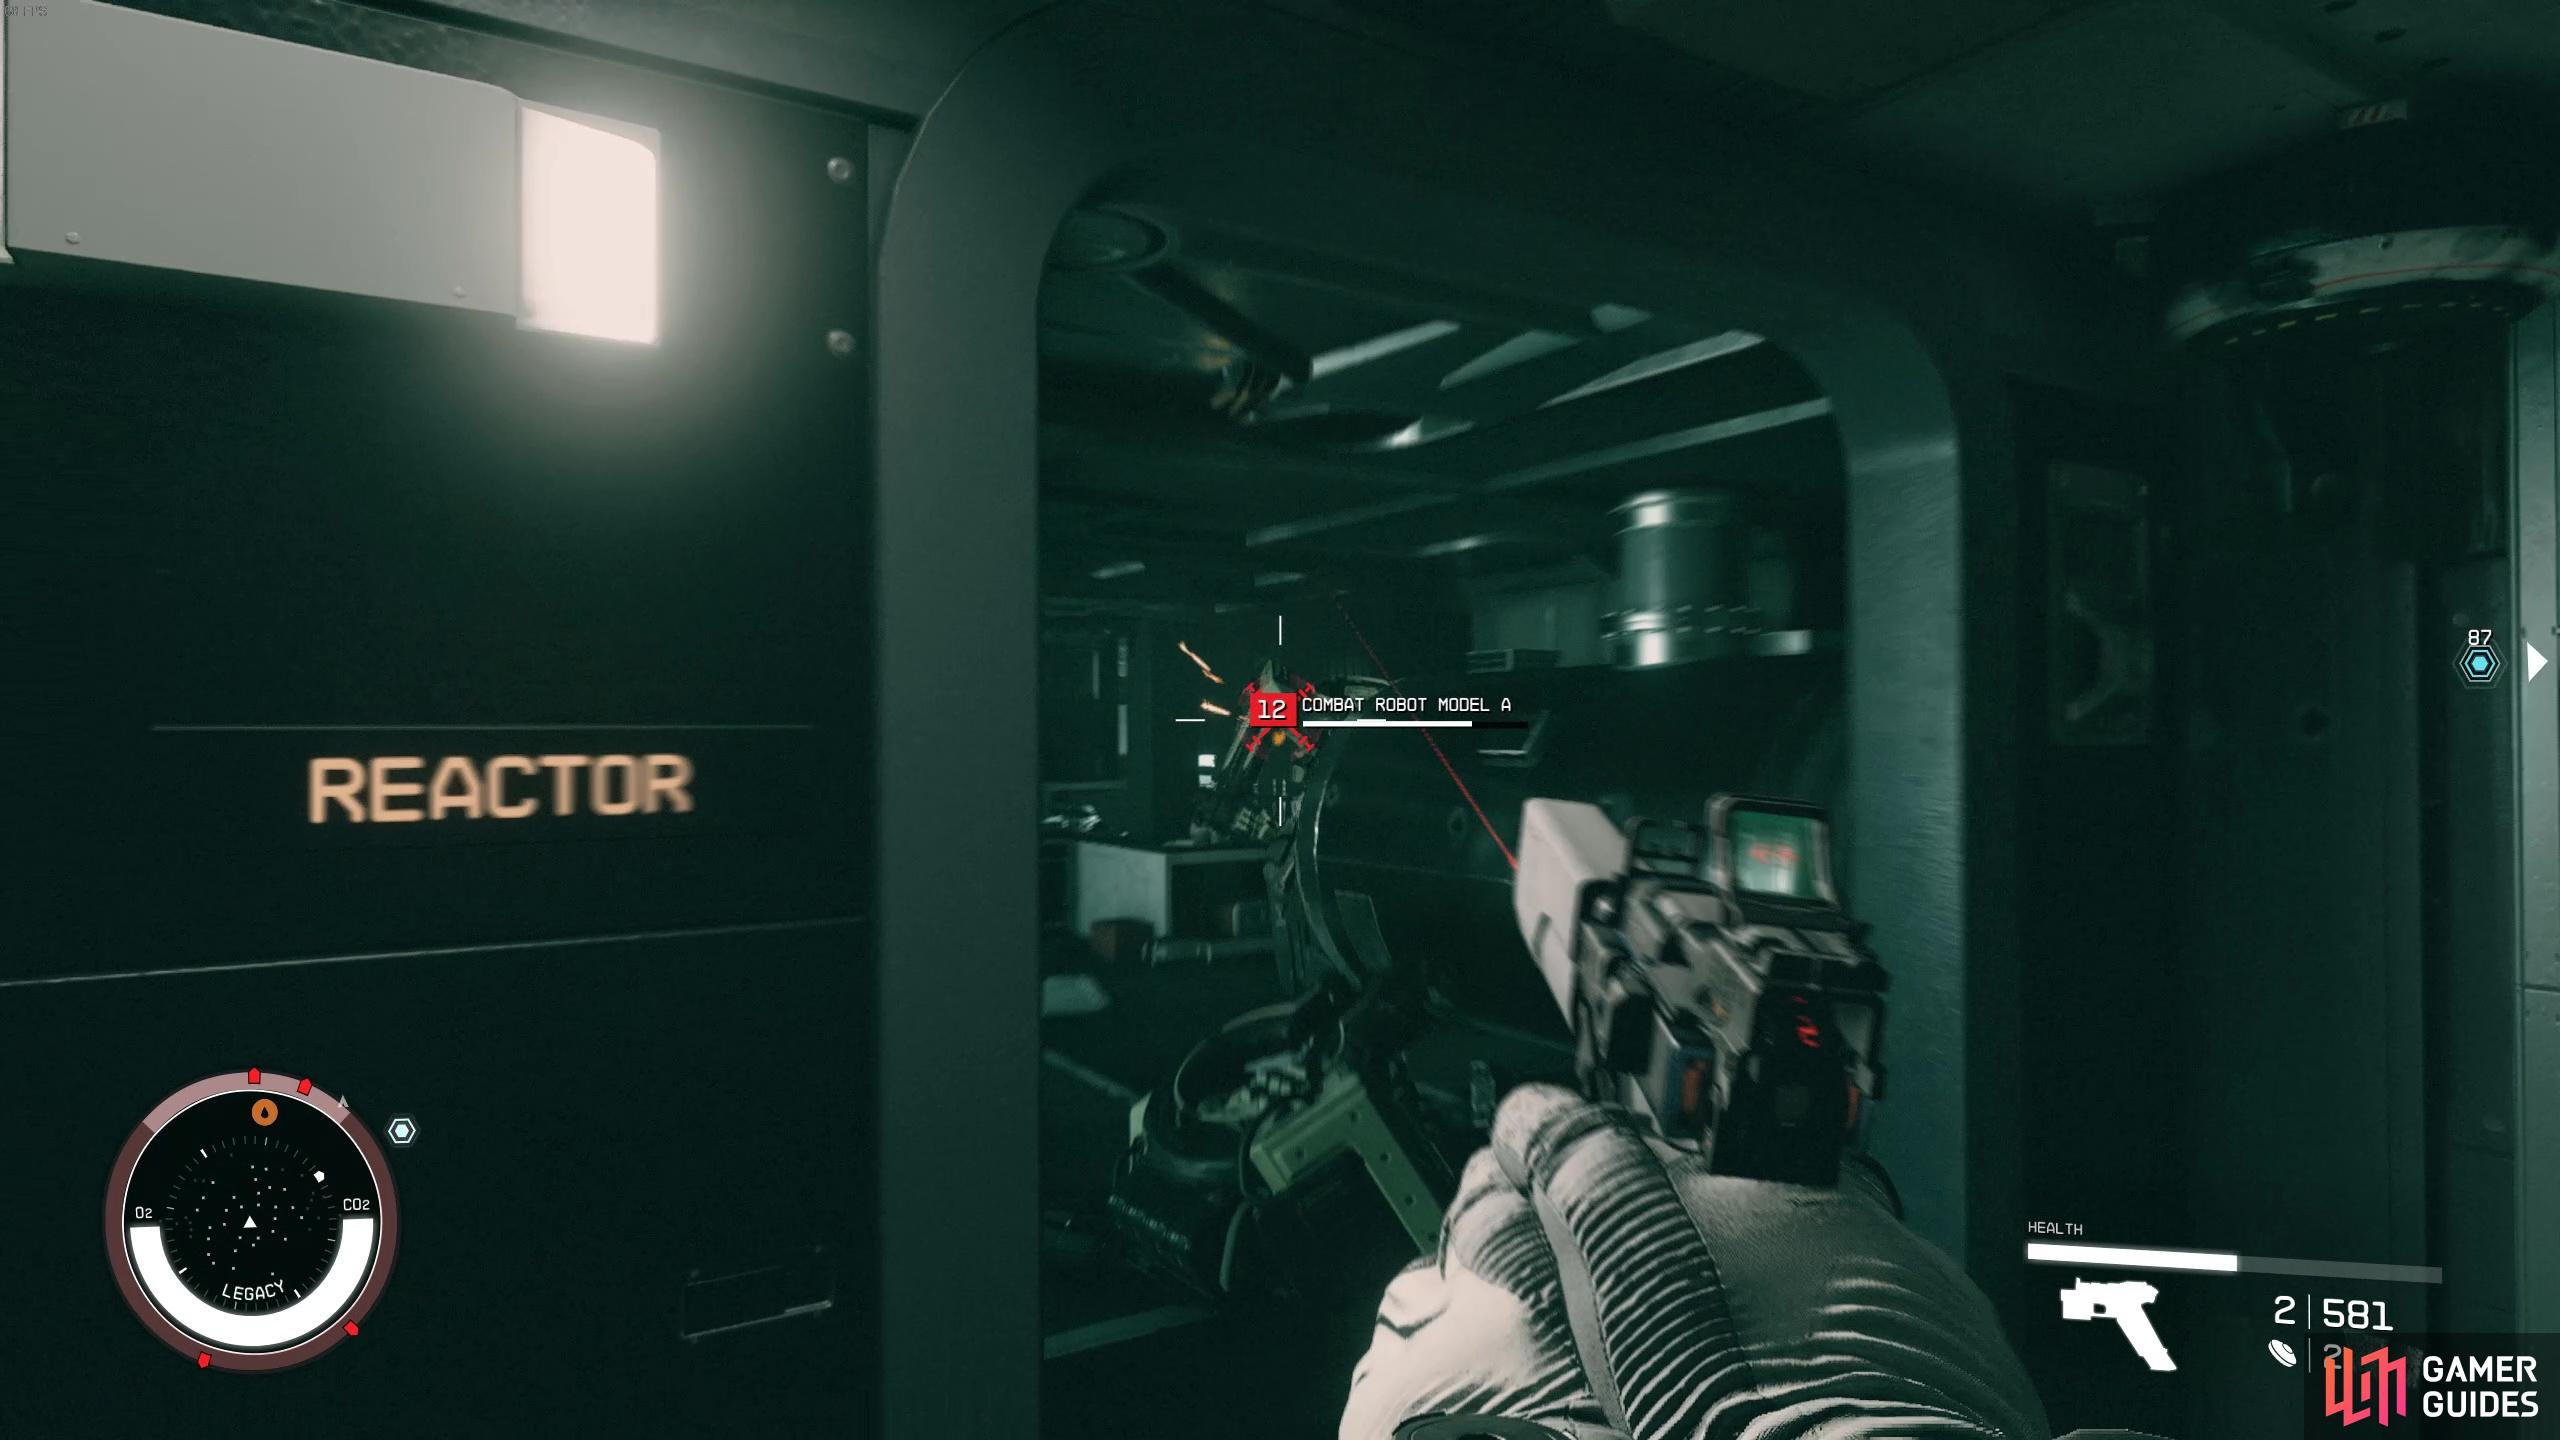
After all this time, there are still robots patrolling the ship!
After dealing with the first wave of robots, continue through to the next area and open up the door labeled ‘Hydraulics’. In this room, you’ll need to head north to the closed door and then proceed into the hall to then take the room on the left, beneath the stairs. Follow this path around until you make your way into a new room with more enemies.
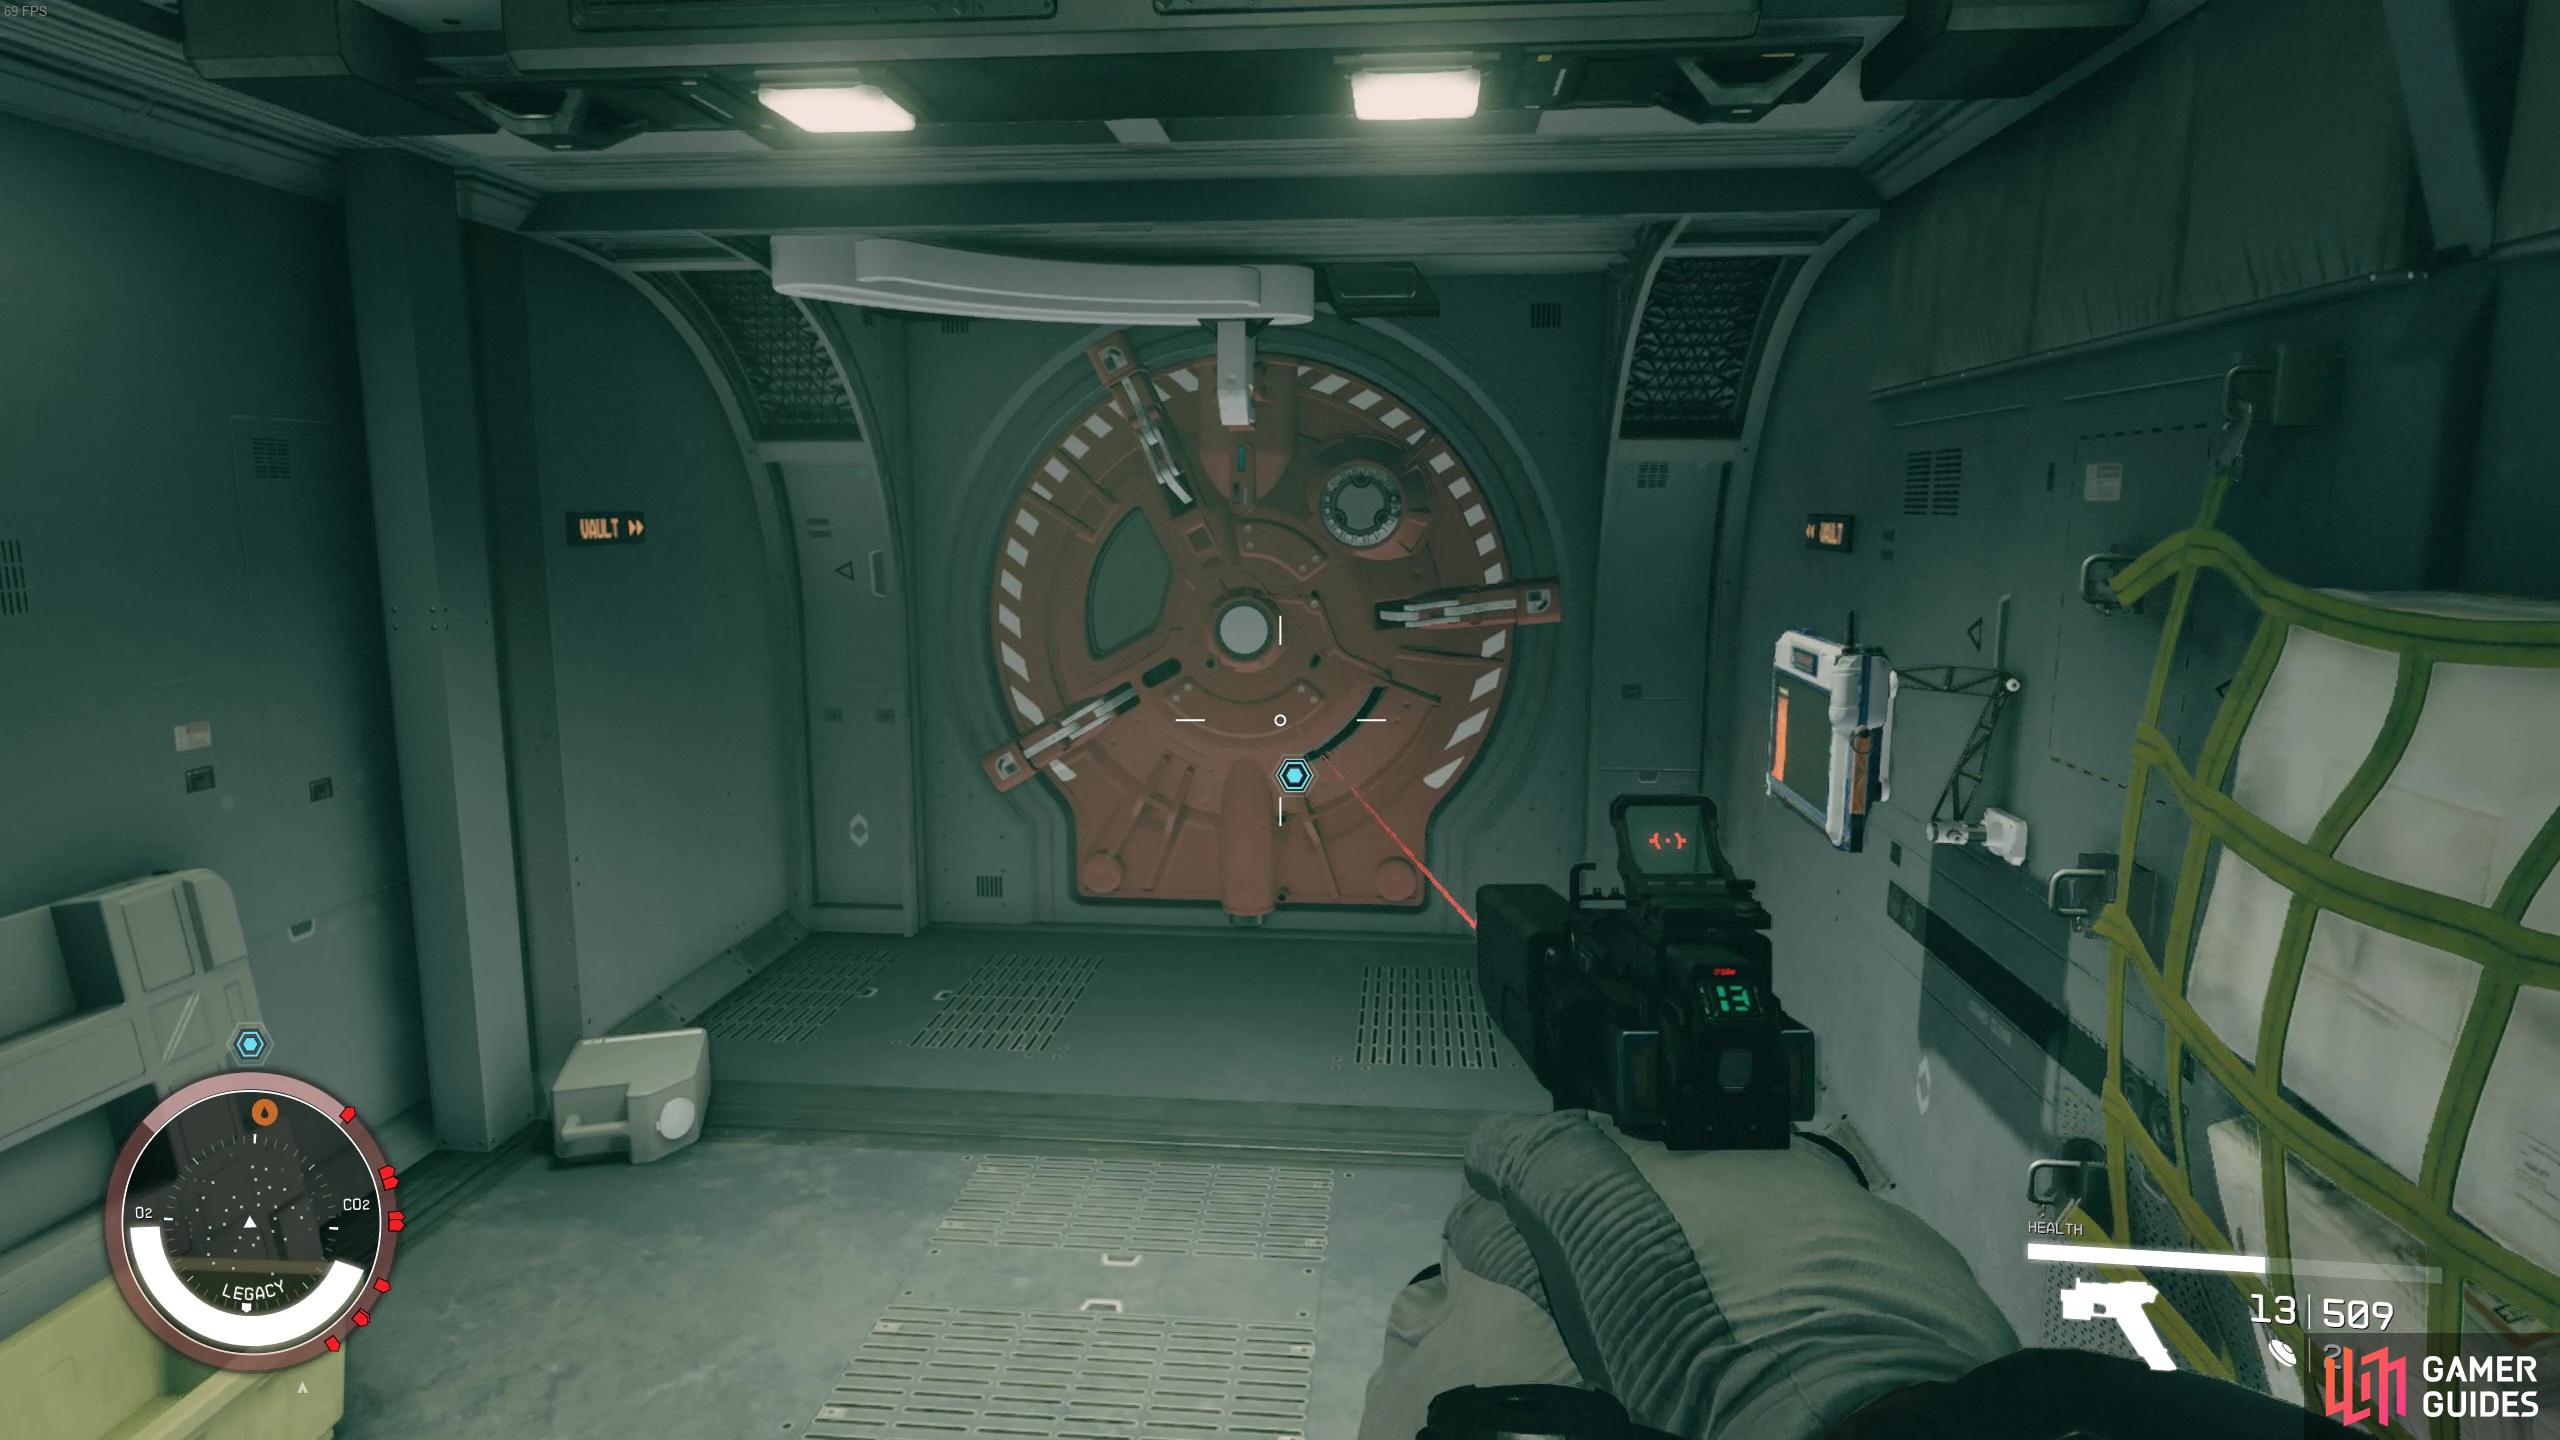
Up the stairs you’ll find a door to the Physics Plant, and in here you’ll want to proceed through the door on the right. Follow the path around and you’ll come into some more robots and turrets. Open up the door up ahead once you’ve dealt with them, then head through the hall to the white door. Ignore the red vault door as you can’t open this one. In this next room, you’ll want to make your way across the walkway and deal with the enemies before dropping to the first floor to take a separate set of stairs up to another hallway with a red door.
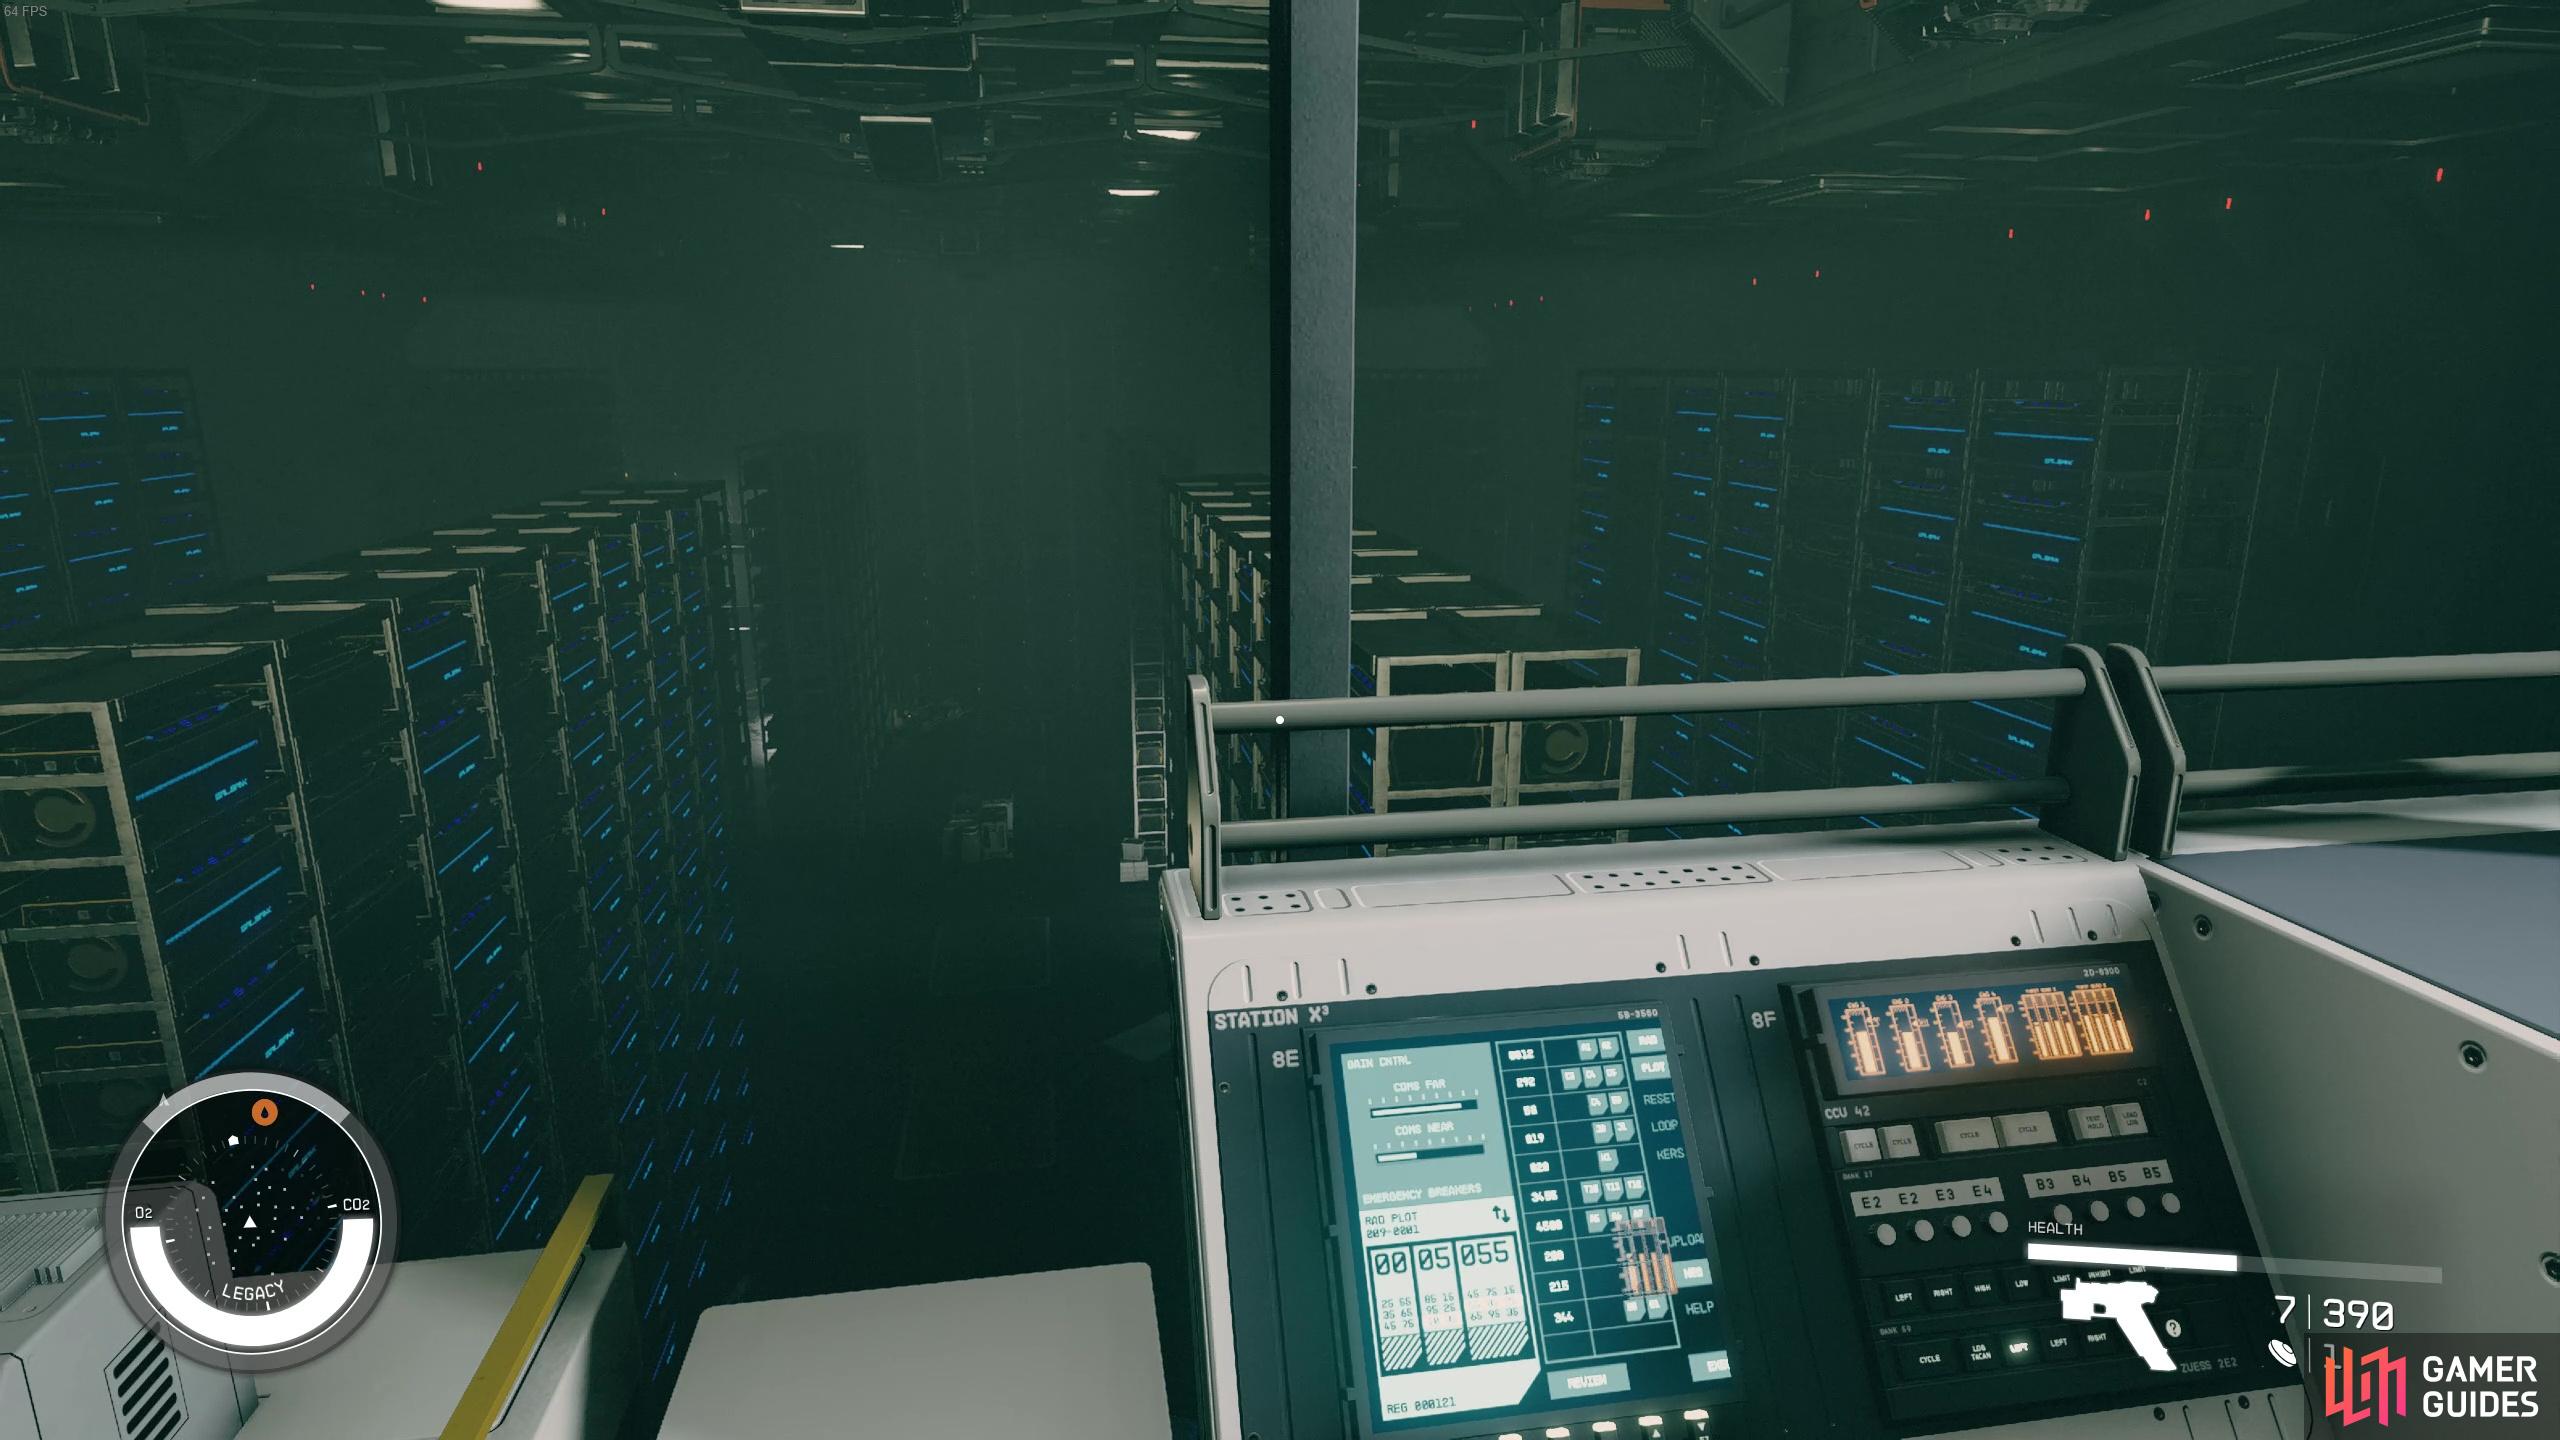
This red door can be opened, and to do so, you’ll need to interact with the vault door computer on the right. Once this door is opened, you’ve finally found the vault! The controls room is on the other side of this huge room full of credtanks though, so you’re gonna have to make your way down the aisles. As you do, you’ll find that there’s a whole bunch of robot enemies. Again, you’ll need to deal with these guys before you can proceed further as they’re kinda blocking the way. There’s even a robot dog that’s pretty tanky and will run at you quite quickly!
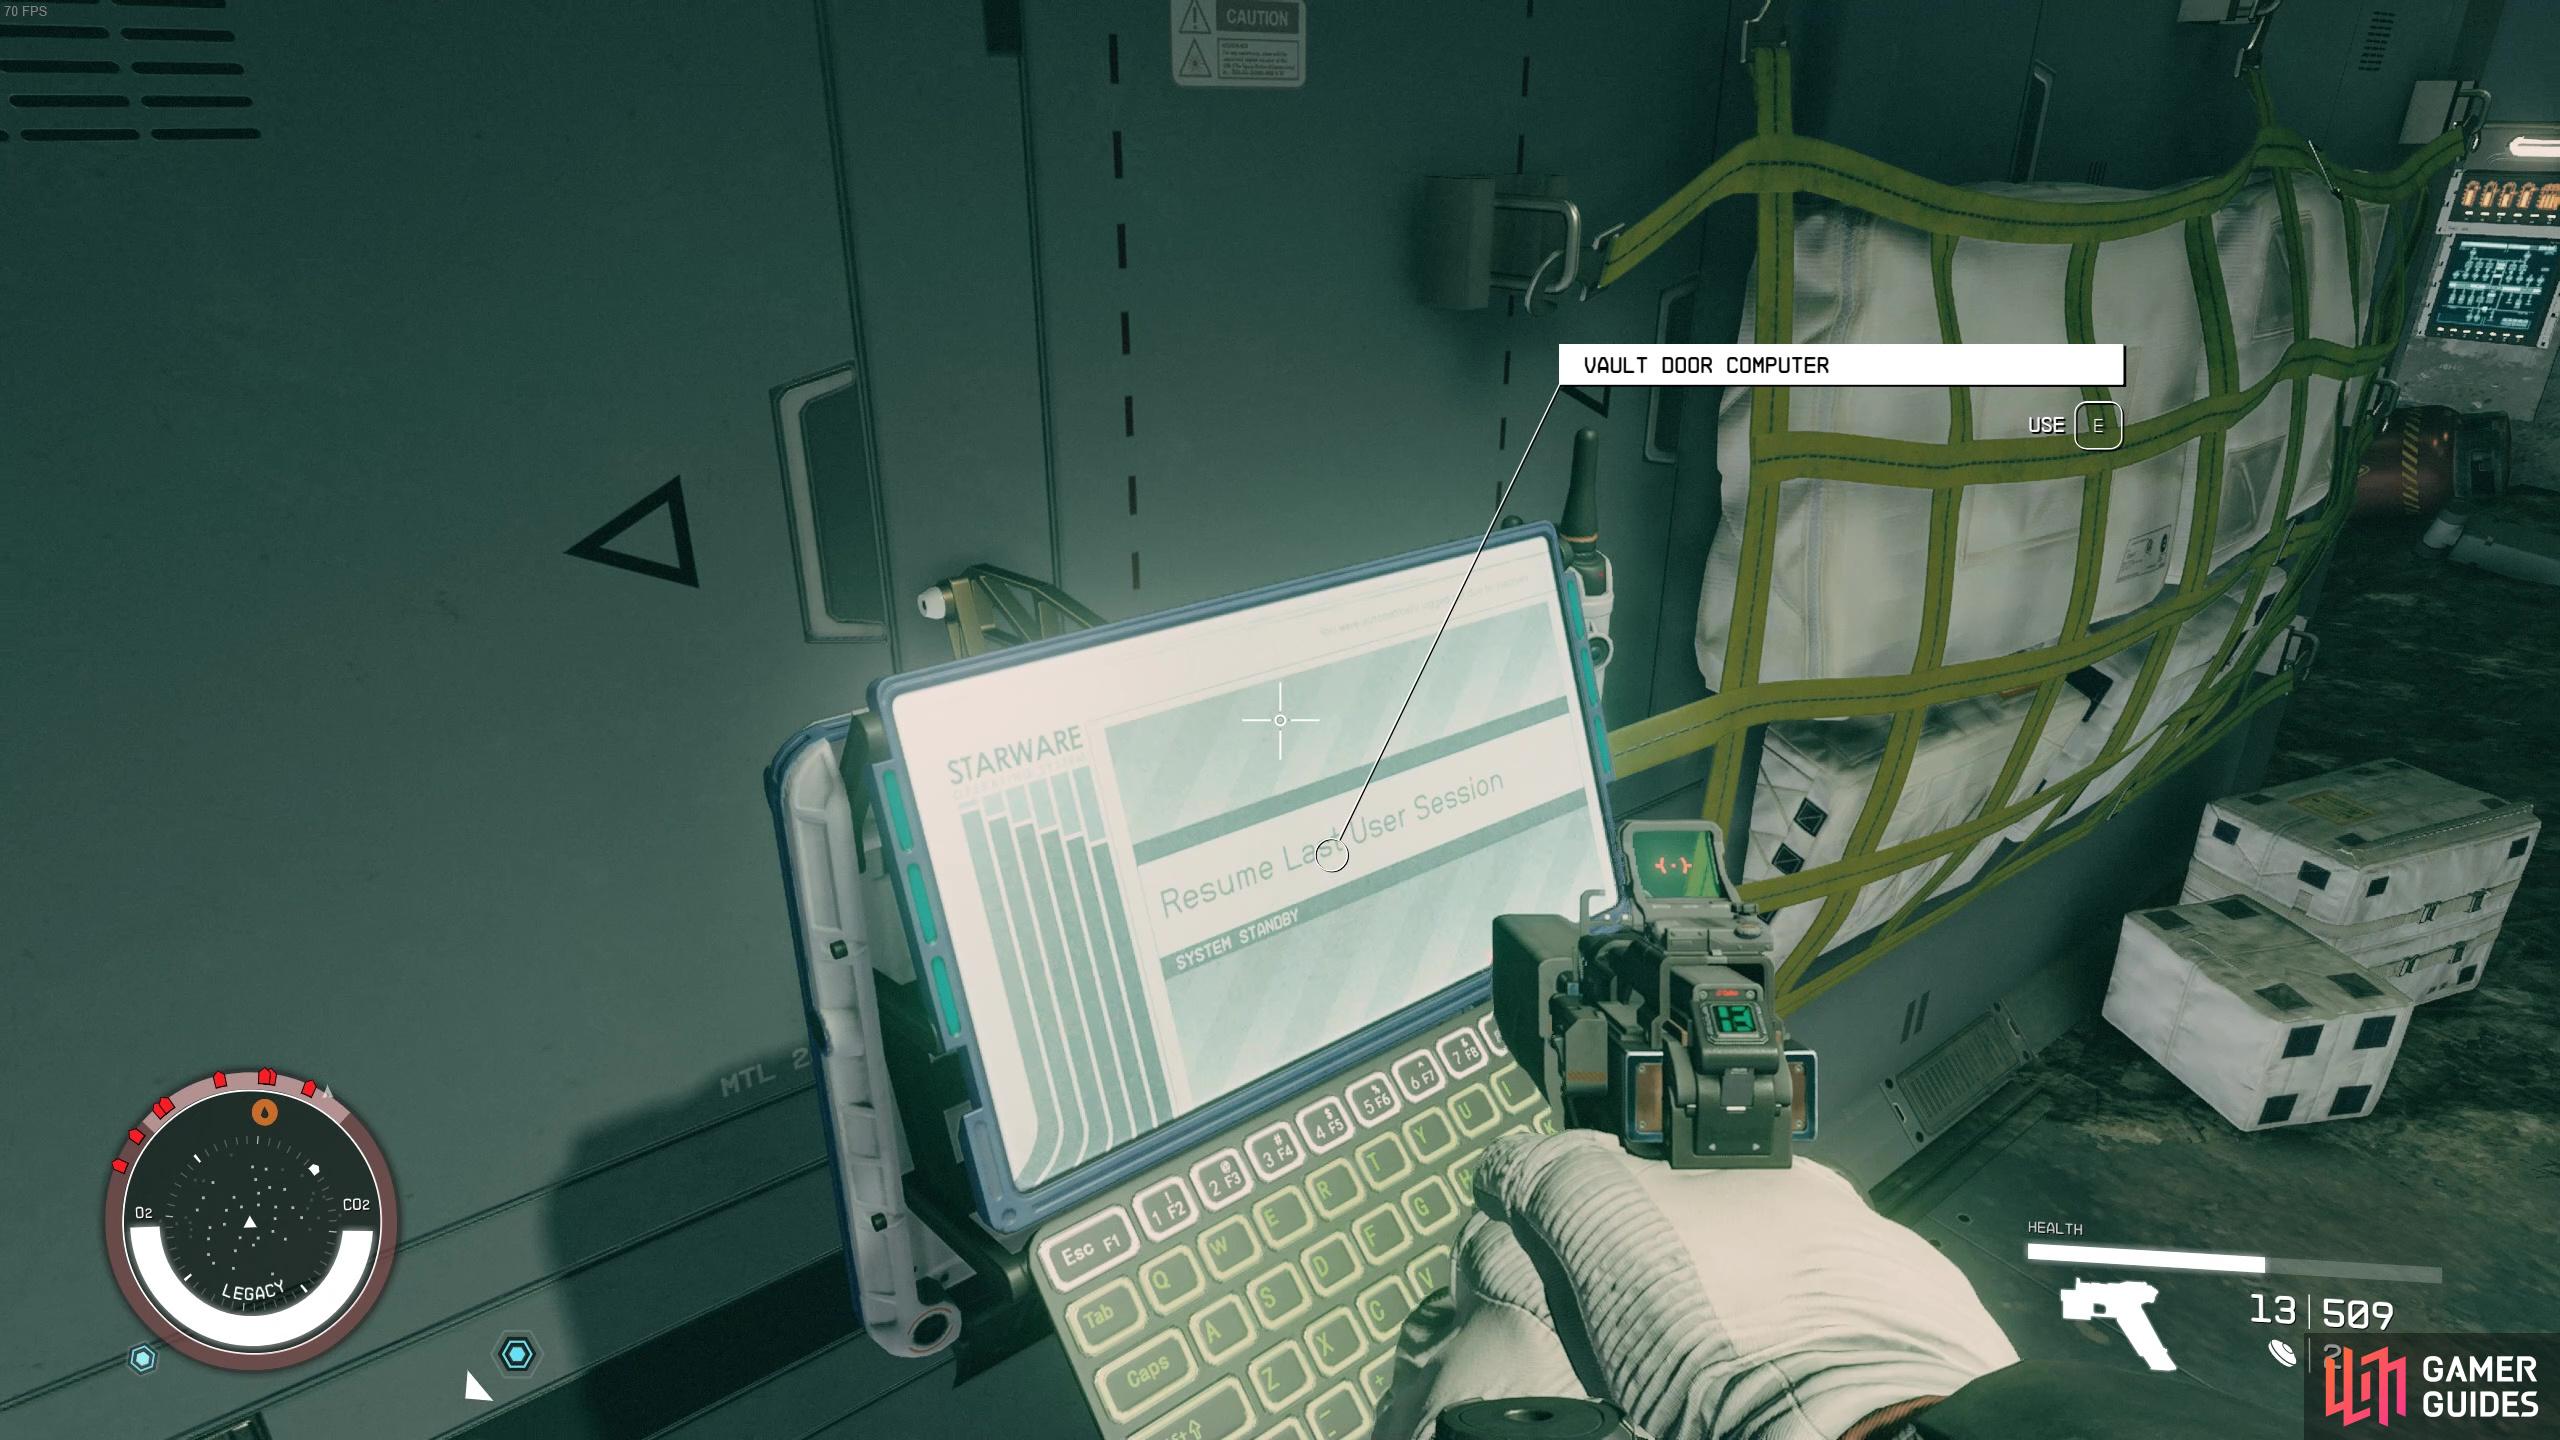
Use the vault door computer
so you can open up the red door and finally enter the vault where all the credits are stored!
Once the enemies are dealt with, you can proceed up the stairs then across to another set of stairs that’ll take you to the control center. Now that you’re in the main vault control center, you’ll first wanna do a bit of looting. On the desk in front of Jasper Kryx’s corpse, you’ll find his powerful ![]() Revenant rifle.
Revenant rifle.

Kryx’s Revenant rifle.
This bad boy has an extended magazine, the capacity to lacerate (can apply bleed) and has a titanium build making it light as a feather! Behind the weapon you’ll find a slate called The Waiting Game. You’ll need to listen to this whole thing before you can continue with the mission. There’s also a bit of evidence on the ground near Kryx’s corpse that you can submit to the Burden of Proof mission. A quick thing to mention that is if you accidentally abort The Waiting Game recording, you can go into your inventory and start it again. It’s important to listen to the whole thing or the next objective won’t get triggered.
After the recording has stopped, it’s finally time to download the credits! First you’ll need to turn the two levers at the back of the room. Make sure to save your game here as there is a known bug in the next sequence (see below). Once you’ve saved, you’ll need to turn the two transfer module locks and then place the Data Core in the middle. Then, pull the lever in front to start uploading all of the credits!
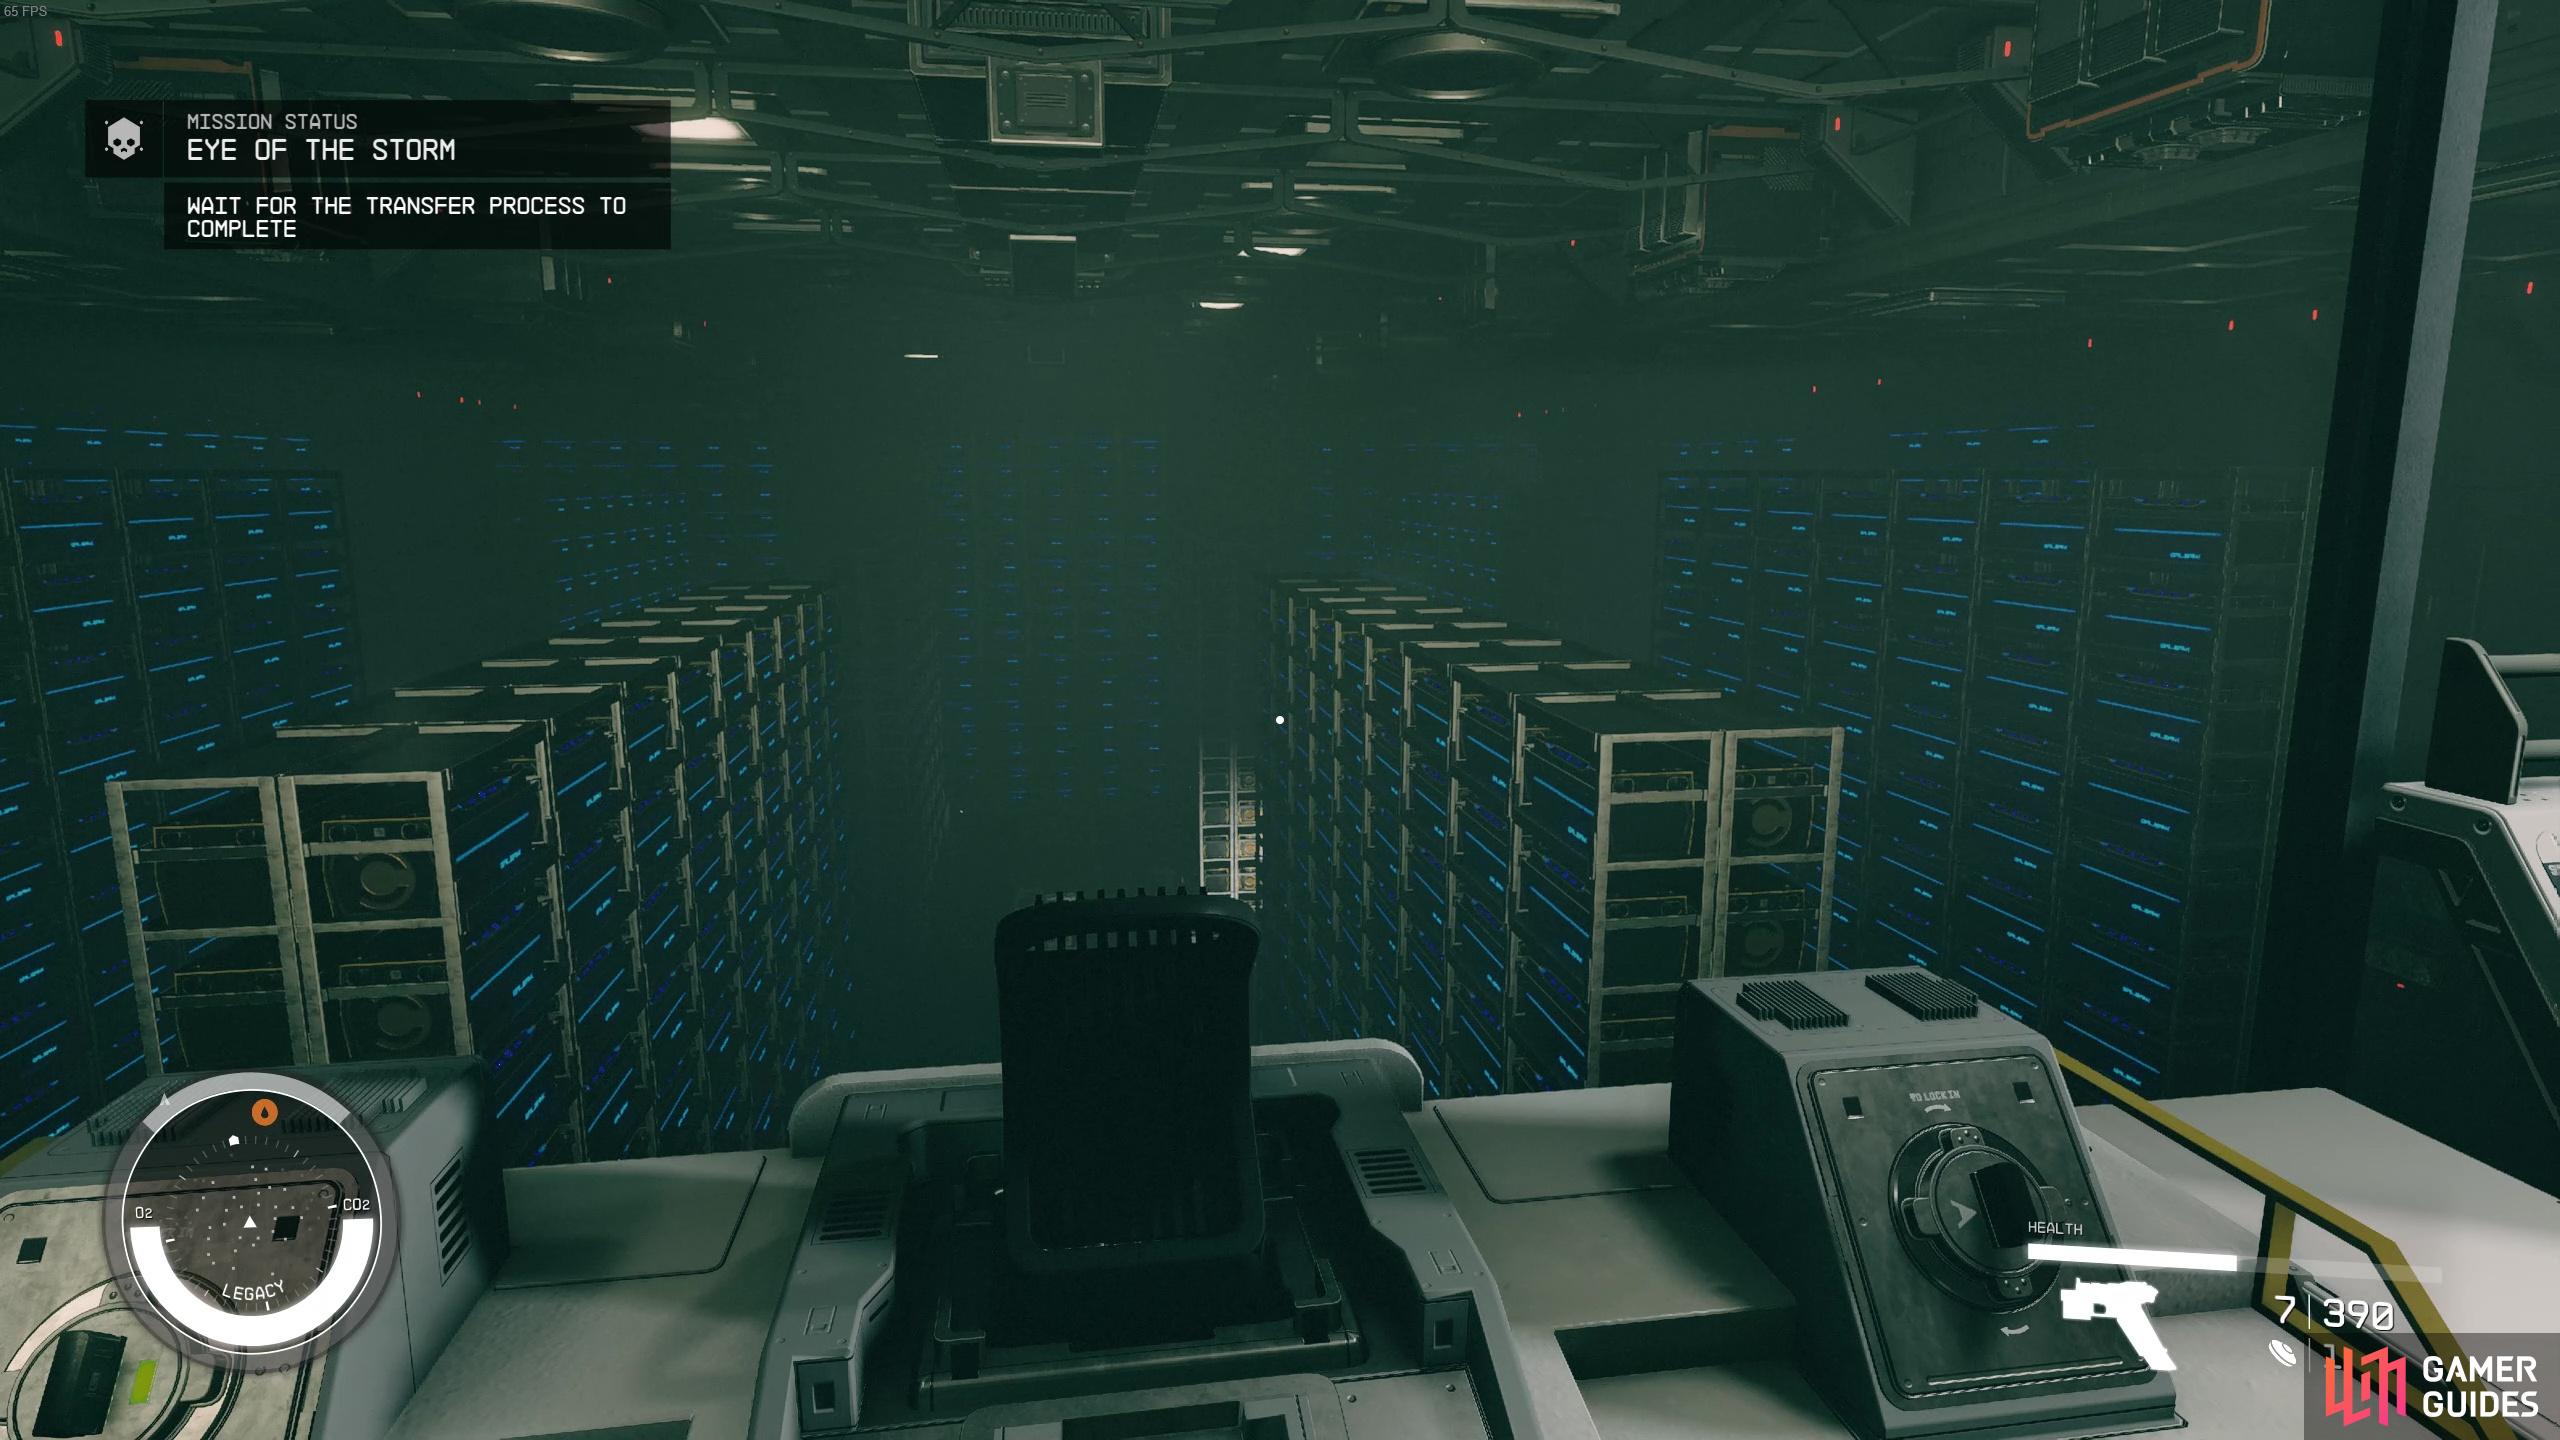
Credits upload pending!
Eye of the Storm Legacy Ship Bug
We experienced a pretty common bug that a lot of other people in the community have also been experiencing where all of the credit chests don’t light up and the upload sequence never finishes! It’s obviously a very frustrating bug that basically breaks the quest, but luckily there’s a relatively easy solution. As we mentioned before, make sure to save before turning the two transfer module locks and inserting the Data Core. When you pull the final central lever the lights should all turn on in a wave motion, so it’s very obvious when the bug happens as the lights won’t continue to turn on or they’ll turn on in a weird pattern and never finish.
If your chests light up something like this, it’s time to reload as your game’s bugged out!
When this happens, you’ll need to reload to the save before you turned the switches and then close and restart your game. The latter part is important because for some reason just reloading a save doesn’t work. Some people in the community have also reported having to close and reload a couple of times before it works, but this solution does appear to work and hopefully they’ll patch it out soon…and if they don’t mods will! Credit to this Reddit thread for helping solve the bug!
Now that you’ve successfully uploaded all the credits, you’ll need to pick up the GalBank Data Core. Shortly after you do this, the ship will start falling apart and you’re going to need to run back to your ship. This is actually easier said than done because there’s gas everywhere and robots intercepting you at every step of the way! The best way to do this is to just turn on your scanner ( on the controller, “F” on the keyboard). Given the low visibility and gas everywhere, it’d be too difficult to follow a step-by-step guide for how to get out, so using the scanner and following the arrows on the ground can be a great solution in this fast-paced scenario.
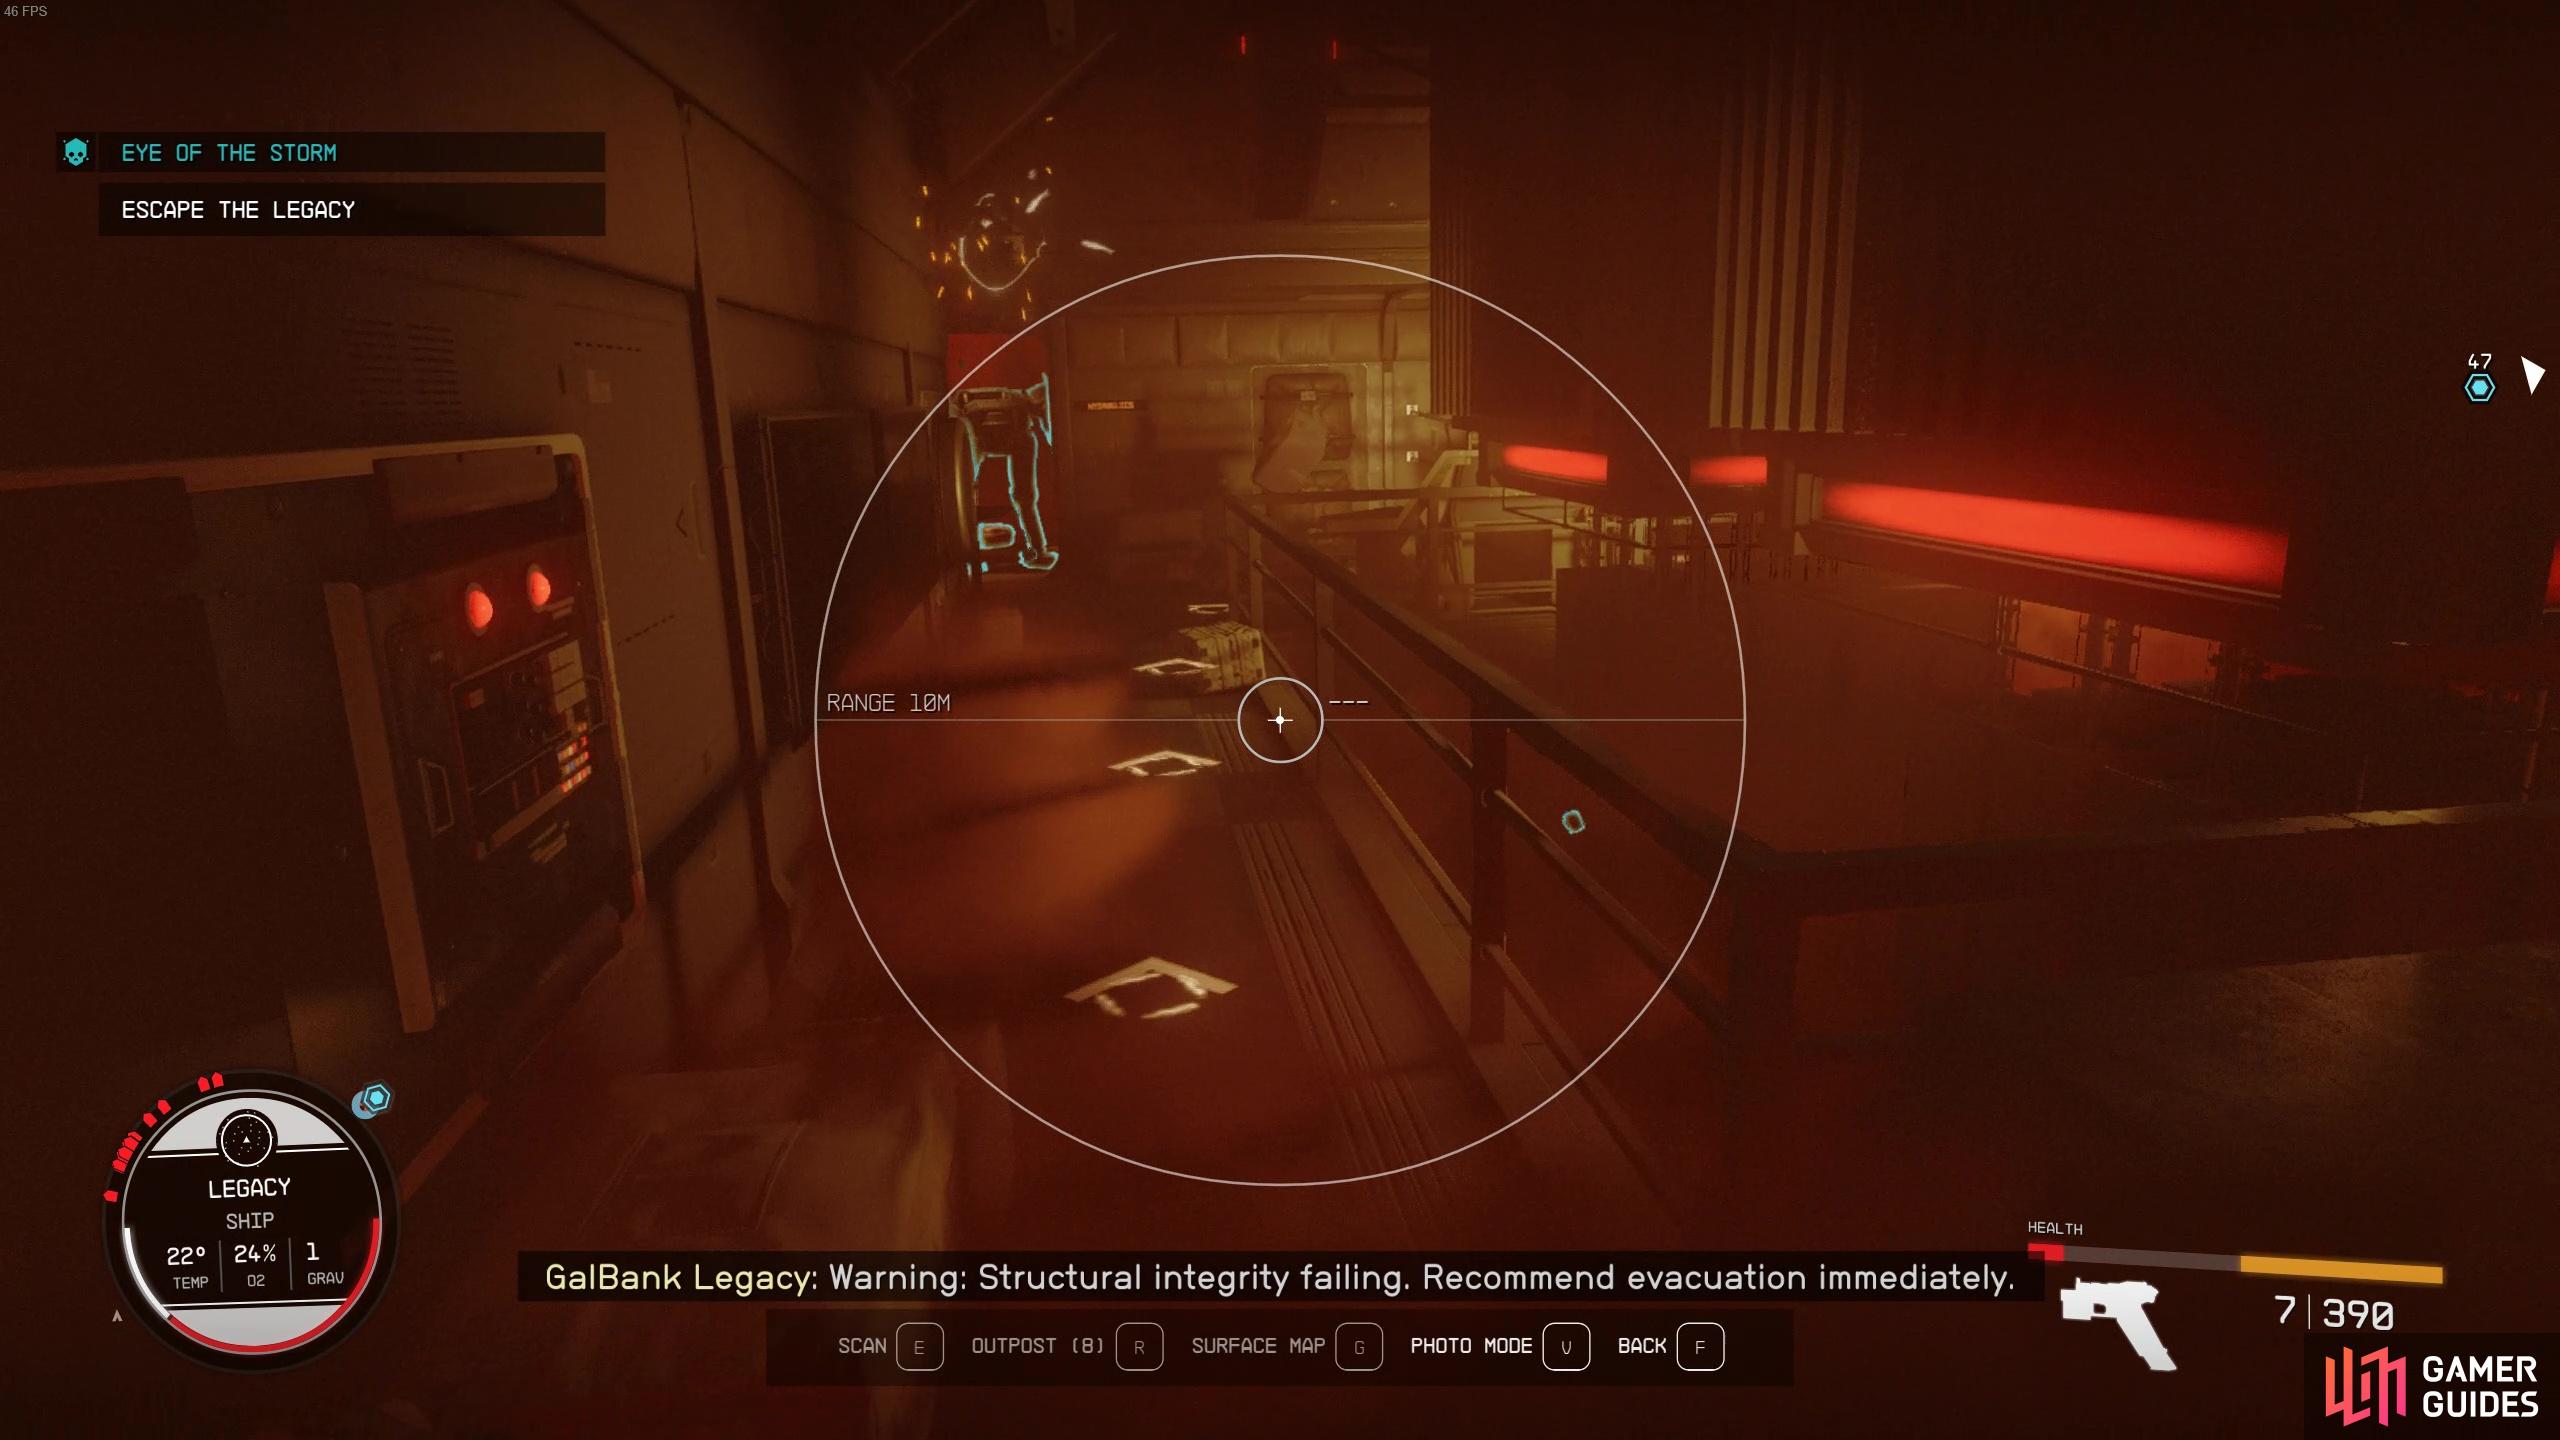
You’ll need to follow your scanner to make your way out of the collapsing ship
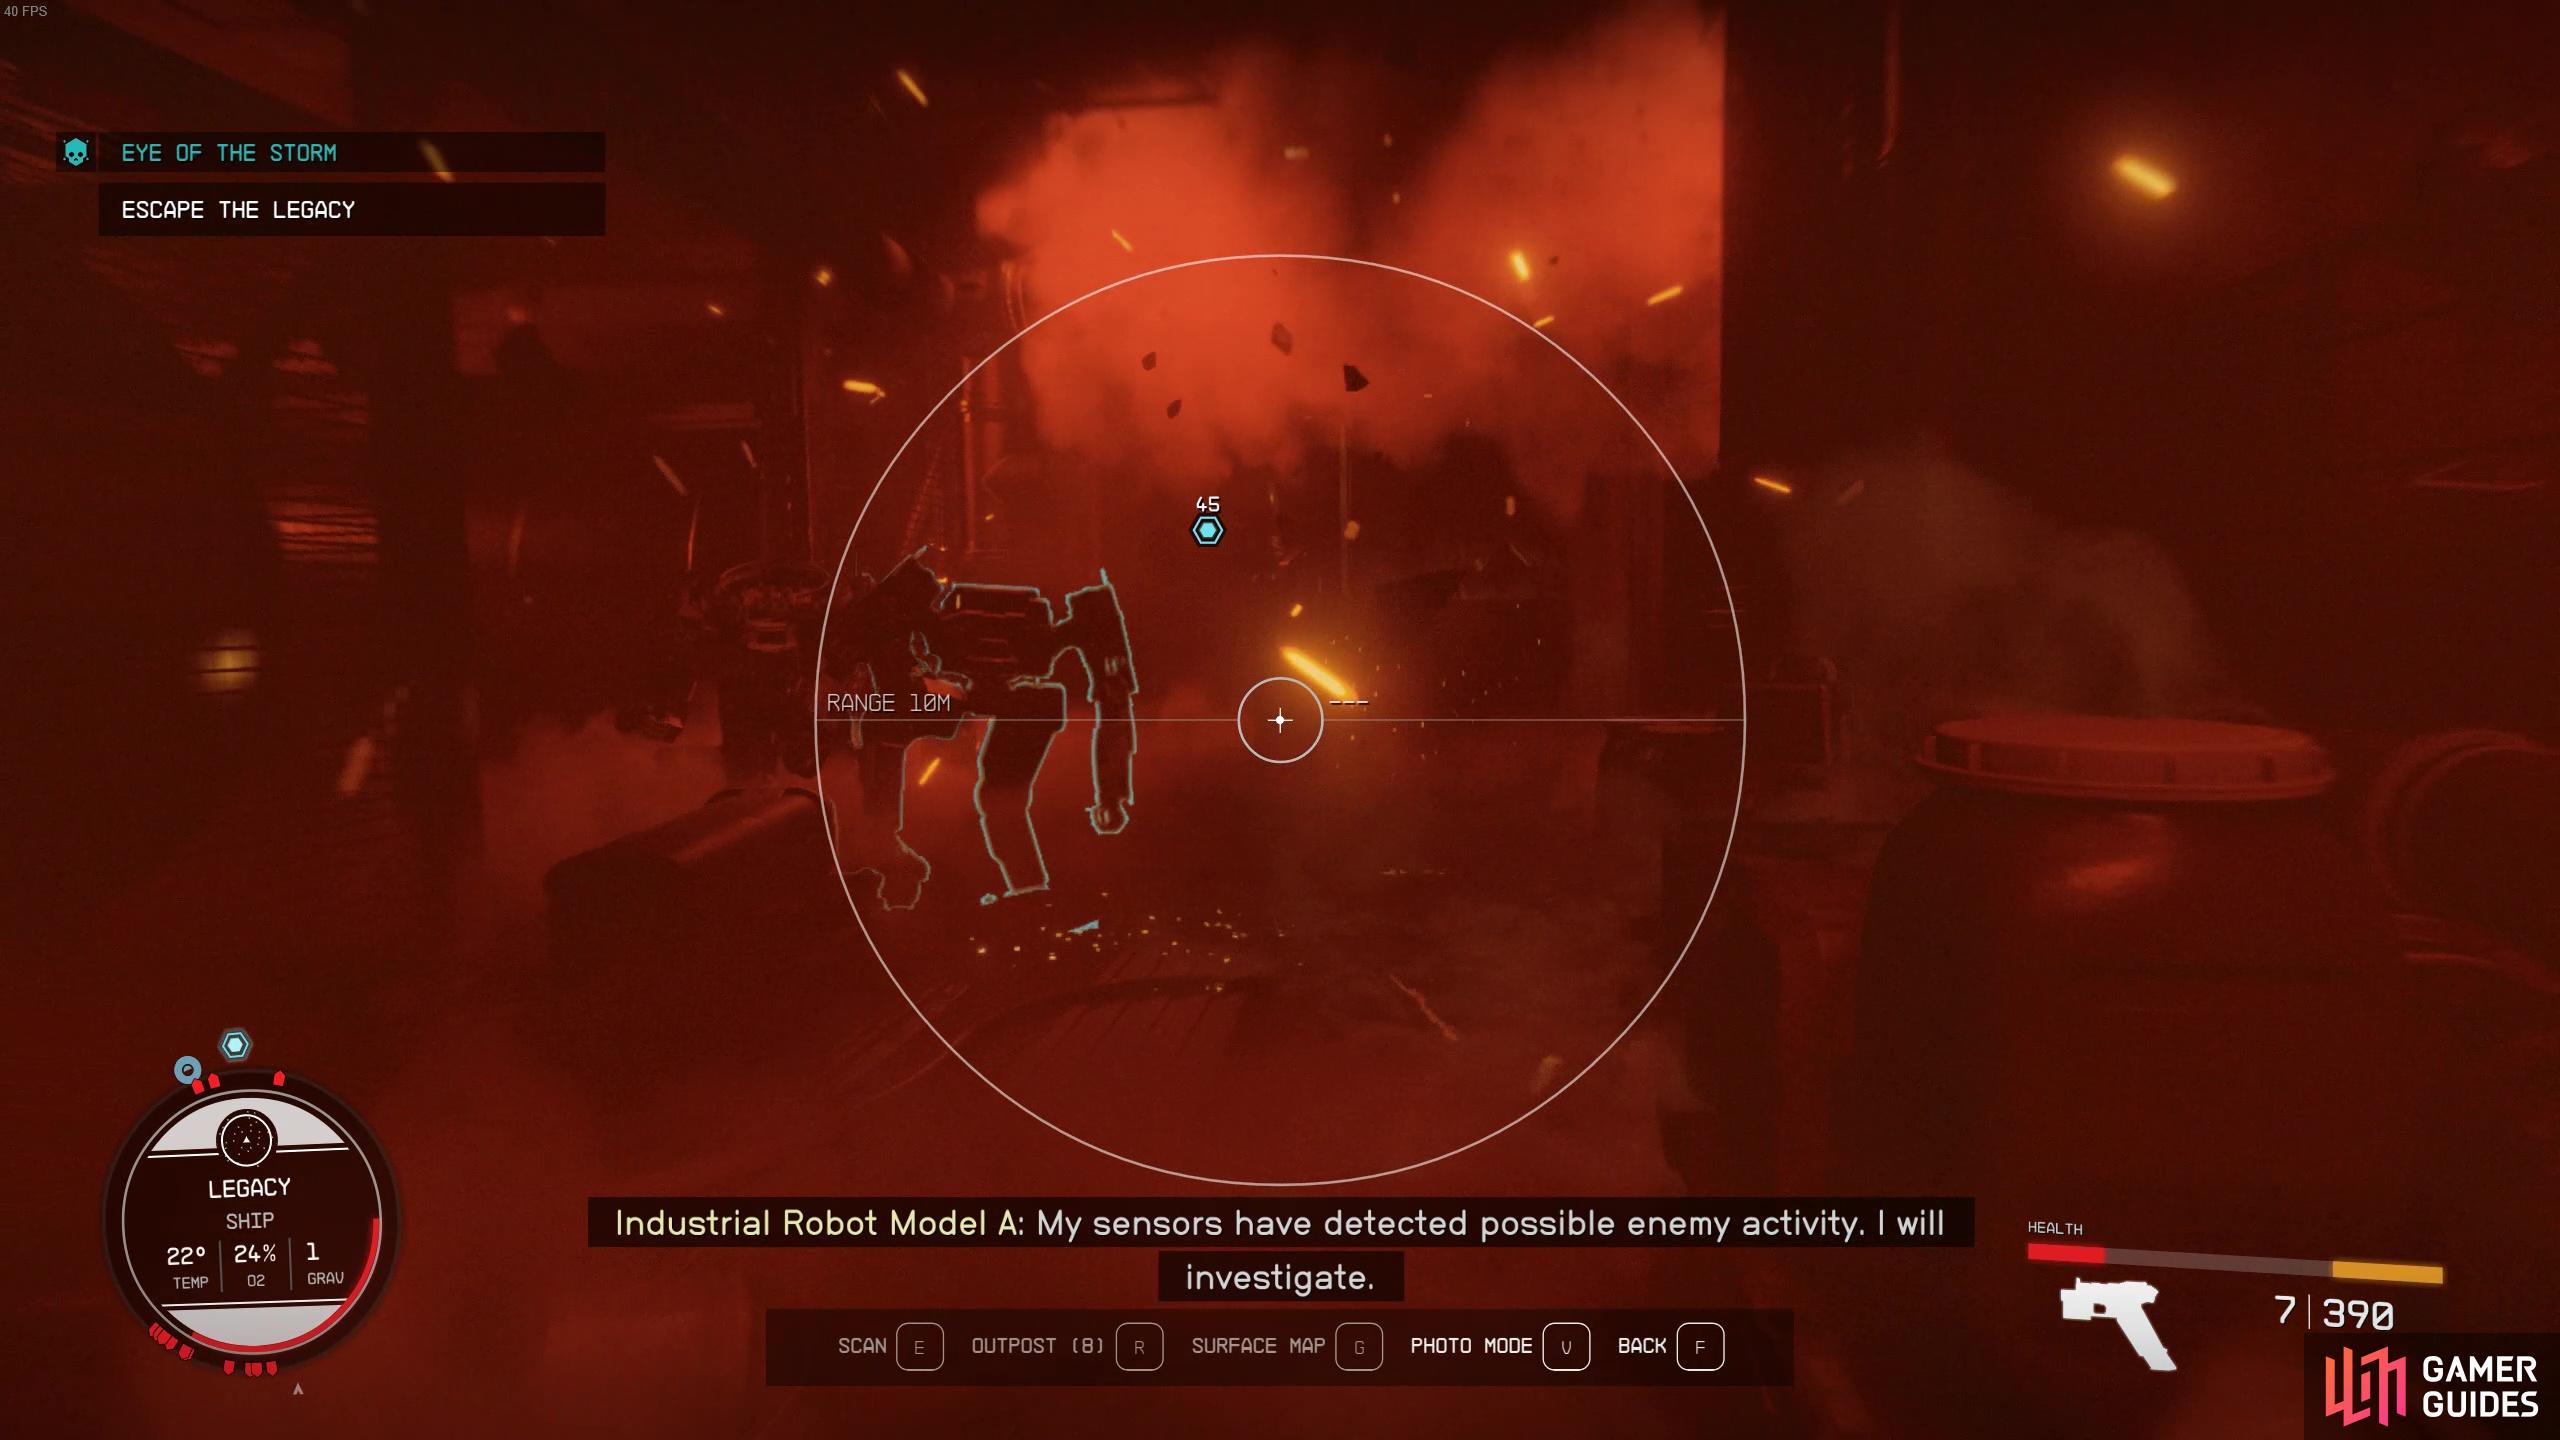
watch out for the explosions and the robots!
Don’t spend too long fending off the robots as you make your way back as you’re also taking lung damage from the gas, and it’ll continue to increase until you reach your ship! It isn’t necessarily a timed event, as the ship won’t collapse around you, but the lung damage may pose a problem if you spend too long.
When you’re finally aboard your ship, you’ll get the prompt that wherever you travel to with the credits (The Key or the Vigilance), will determine who you’ve sided with!

After escaping the Legacy, you’ll be forced to choose a side finally!
But who do you side with? Well, without spoiling the final quest Legacy’s End, whoever you don’t side with will become hostile to you throughout the rest of this playthrough. If you side with the SysDef, you will no longer be able to access The Key and all its vendors. But, if you side with the Crimson Fleet, the UC SysDef will always be hostile to you and your morally good companions will dislike this choice. Once you’ve made your choice, the final quest Legacy’s End will commence!
No Comments