
This is a guide for the “Grasping My Future” Ascension Quest in Xenoblade Chronicles 3. It’ll navigate you through the necessary steps to starting the Quest and upgrading Nia’s Class, Lifesage.
How to Start the “Grasping My Future” Quest
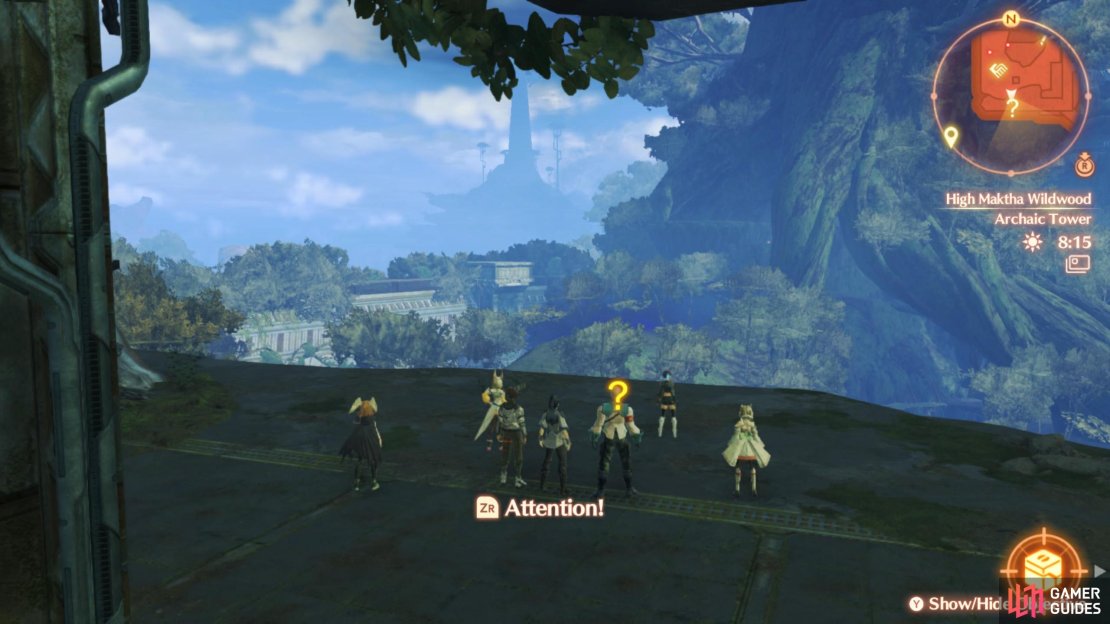
(1 of 3) Visit four specific locations to gather Nia’s Memories.
There are two steps for ascending Nia.
First, you need to visit four specific locations with Nia to obtain 4 pieces of Nia’s Memory.
- Archaic Tower at High Maktha Wildwood in the Pentelas Region, accessible via the Tower Camp rest spot.
- The Ascension Grounds atop Agnus Castle.
- Tthe Saffronia Tree at Rae-Bel Tableland in the Fornis Region.
- Memorial Hall at the City.
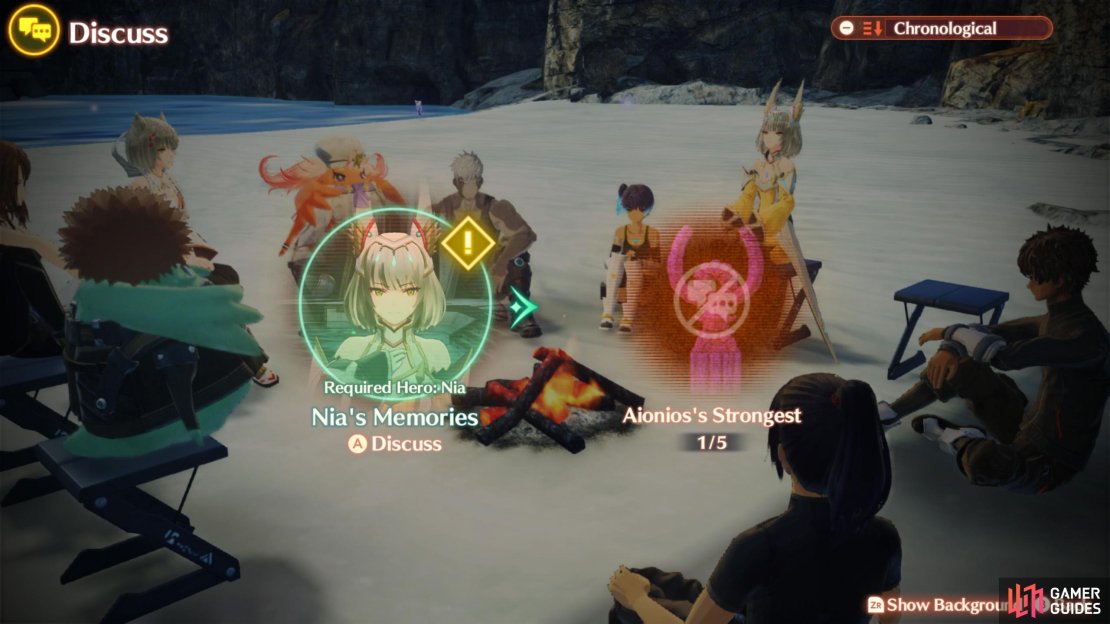
Next, Mio must reach Rank 10 in Nia’s Lifesage class. If you have spare Silver Nopon Coins, this is a good opportunity to use them, although keep in mind there’s one more postgame Hero class.
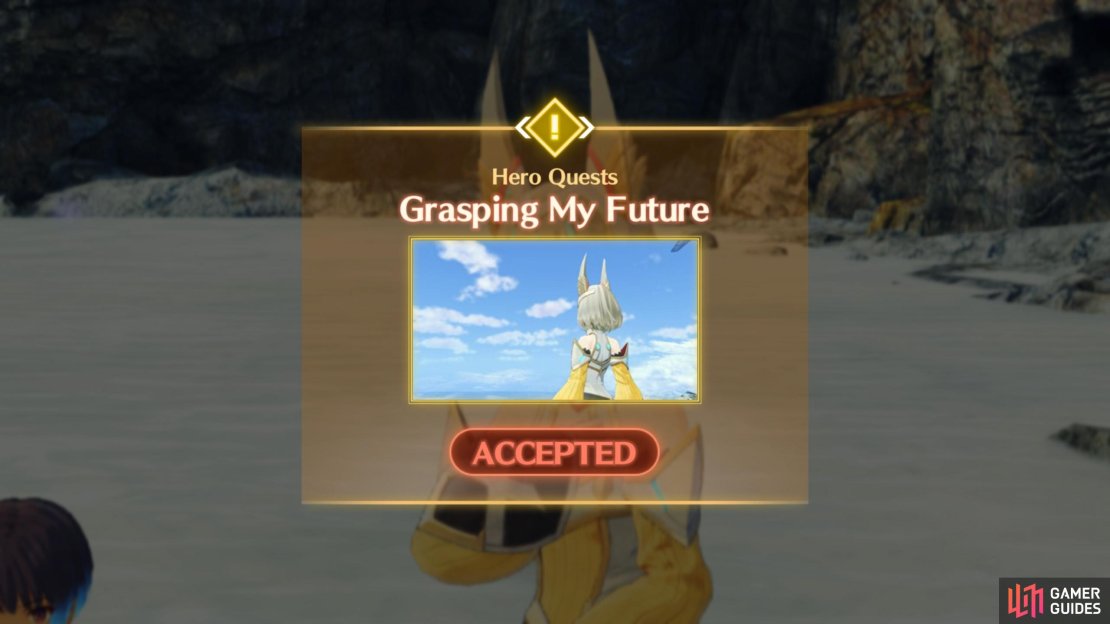
Once you’ve done both things, discuss the “Nia’s Memories” topic at a rest spot. This will unlock Nia’s Ascension Quest.
How to Complete the “Grasping My Future” Quest
Nia’s Ascension Quest is relatively straightforward; most of the hard work came before, when you were touring Aionios with Nia.
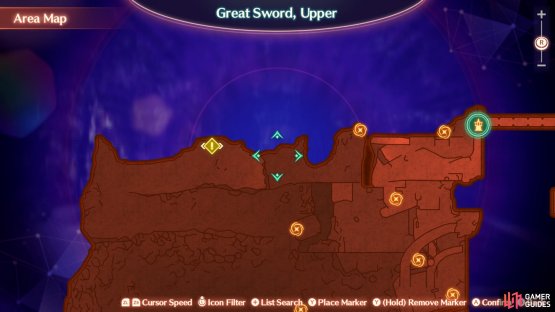
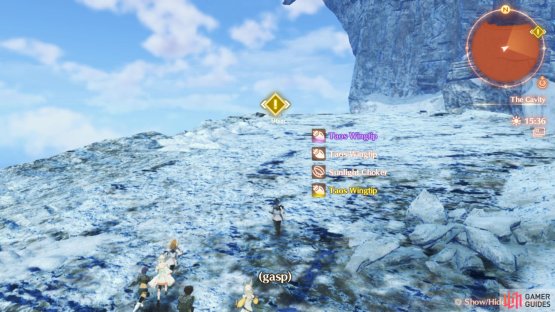
(1 of 2) The Cavity is home to some high level foes.

The Cavity is home to some high level foes. (left), With some good planning, you can avoid most of the foes though. (right)
With Nia in your battle party, head for the north-west corner of The Cavity atop Swordmarch, where the City was previously located. Depending on your party level, the enemies here can be challenging, as their levels hover in the high 80s. However, the Anloods don’t aggro and if you play it smart, you can avoid/run from most of the other creatures.
That said, there are no landmarks apart from the entrance, so you want to avoid getting KO’d or you’ll have to come all the way back.
First, follow the steps down through Anlood territory. There are some Taos circling high up that can spot you if you’re too close. After a while, there’s an Elite Taos perched on a pillar. Carefully drop down onto the ramp behind it. Then drop down to the sides, suffering heavy fall damage, but surviving.
From here, travel west, then north into Bunnit territory. These fella are fairly passive, but may aggro. If in doubt, control a tank with higher HP while you run. Or lure them in one at a time and kick their butts. Further west, drop down to the south.
This is the final stretch. Towards the far west, an Elite Taos will spawn and begin flying east. You can try and run backwards until it’s safe. Or face it head on. Either way, turn around at the corner and keep going east to where the quest-related marker is. There’s also a container nearby.

(1 of 2) Some things never change.

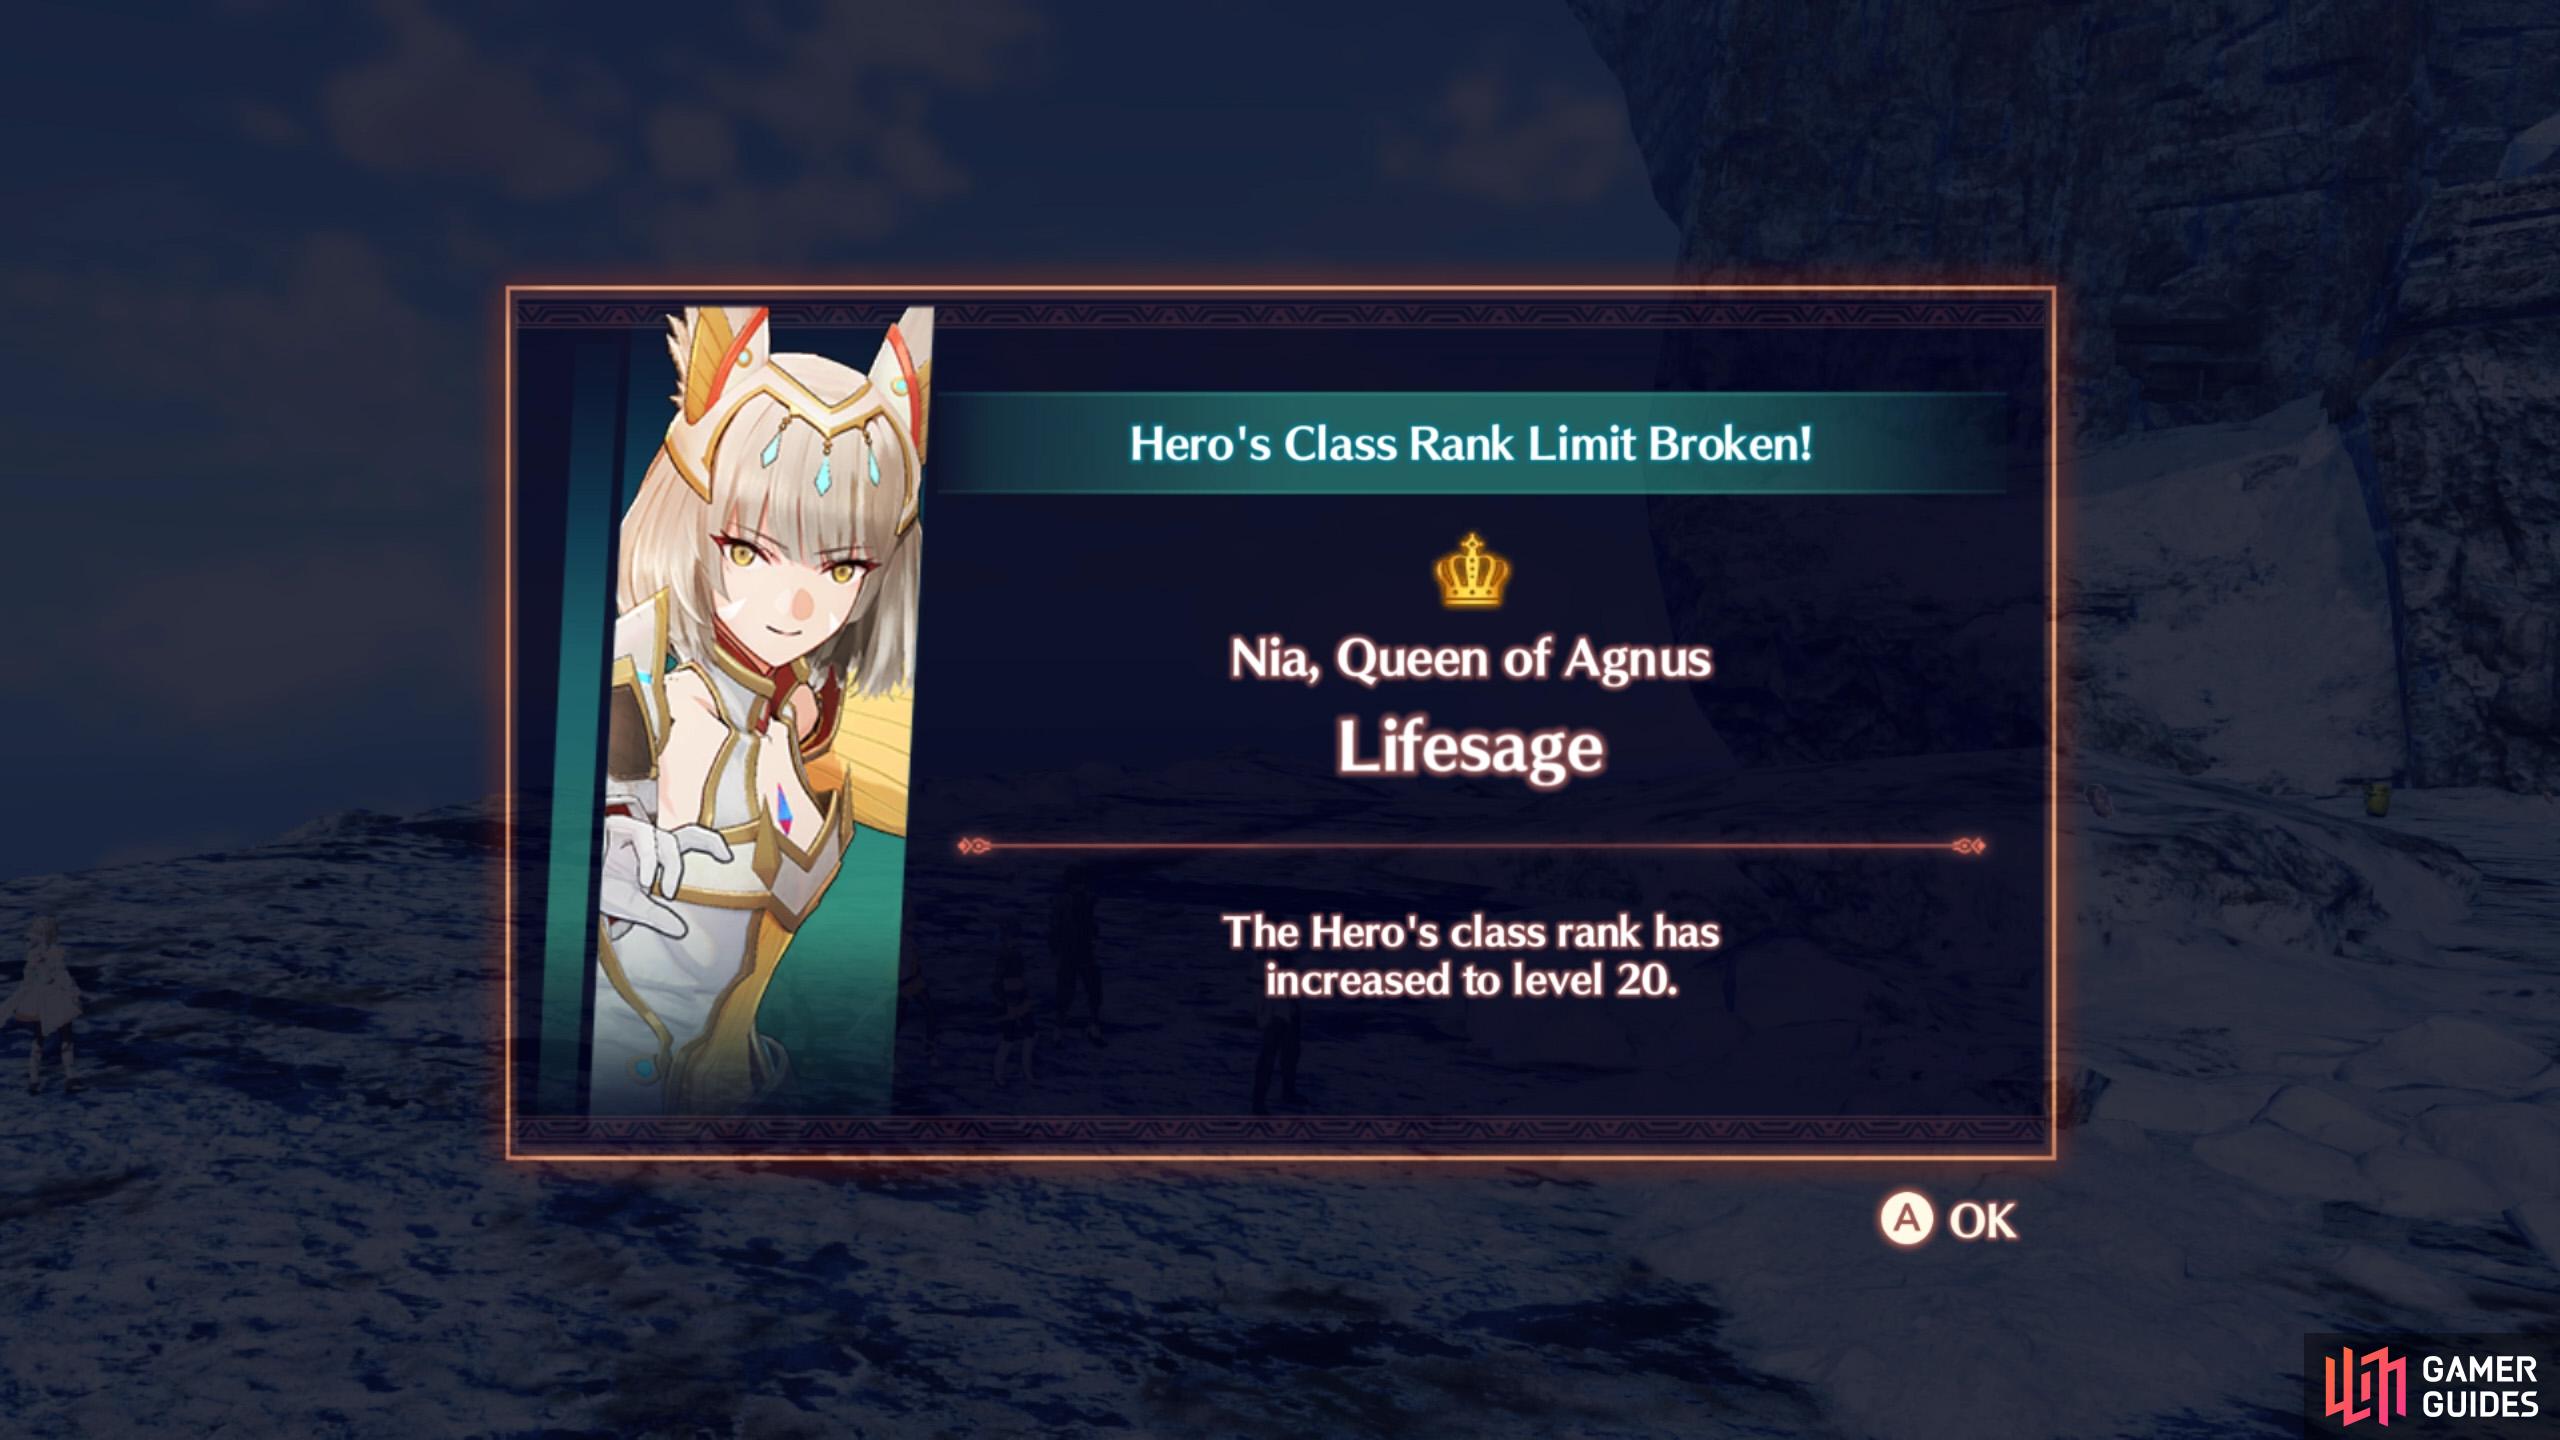
Some things never change. (left), Rank 20 will be unlocked for the Lifesage class. (right)
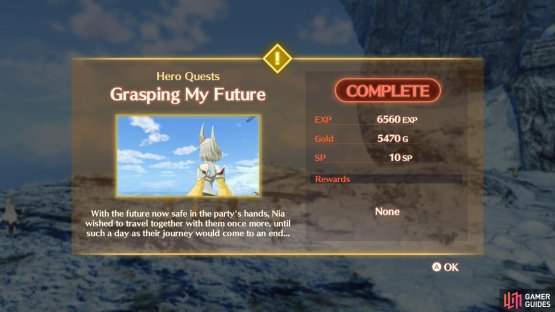
After the ensuing cutscene, Nia’s Ascension Quest will conclude. Doing so will unlock Rank 20 for Nia’s Lifesage class.
Quest Rewards
| EXP | Gold | SP | Rewards |
|---|---|---|---|
| 6560 | 5470 | 10 | None |
No Comments