
This is a guide for the “Payback for Treason” Ascension Quest in Xenoblade Chronicles 3. It’ll navigate you through the necessary steps to starting the Quest and upgrading Gray’s Class, Full Metal Jaguar.
Payback for Treason is Gray’s Ascension Quest in Xenoblade Chronicles 3.
Some Lost Number hardliners are up to something. Work with Rozana to stop their scheme.
| Icon | Character | Prerequisite | Level | Rewards |
|---|---|---|---|---|
 |
Gray | Chapter 5 - Complete Lovebirds, Eunie Full Metal Jaguar at Rank 10 | 50 | 4900 EXP, 4600 G, 10 SP |
How to Start the Payback for Treason Ascension Quest
Ascension Quests will start becoming available once you reach Chapter 5 in the main story. Beyond just simple story progress, there are several other steps for unlocking Ascension Quests which usually involve completing the Colony related Questlines (for Heroes that belong to one) along with ensuring that the Inheritor is at Rank 10 of the Class.
For Gray’s Ascension Quest, you’ll need to first ensure that Eunie has reached Rank 10 with the Full Metal Jaguar Class. If she’s yet to do this, remember you can use Silver Nopon Coins to raise the levels of a Class.
The final step needed for Gray’s Ascension Quest to become available is to complete the Lovebirds Quest that becomes available in the City once you gain access to the Boundary. Return to the City with Gray in your party and head to the Caelum Residential Quarter to find an Info Fragment. Return to the Rest Spot and discuss the Gray’s Autonomy Topic to learn that Gray has a partner in the City.
Once you’ve achieved all of these steps, head west through the Caelum Residential Quarter with Gray in your party to trigger a scene that begins this Quest.
How to Complete the Payback for Treason Ascension Quest
Follow Rozana to a secure location
After your initial conversation with Rozana, follow her to a secure location in the Lost Numbers Dormitory to learn about a sinister plot. You’ll eventually learn that you’ll need to make your way to Daedal Island in the Cadensia region for a meeting.
Head to the meeting on Daedal Island
Daedal Island can be found in the center of the Cadensia Region and once you arrive on the shores, you’ll need to make your way up the slope to your west and then over to the northwest to reach the Tengate Ruins. Make your way around and up to the top of this structure and you’ll find a Zipline you can use to cross over to the center of this island.
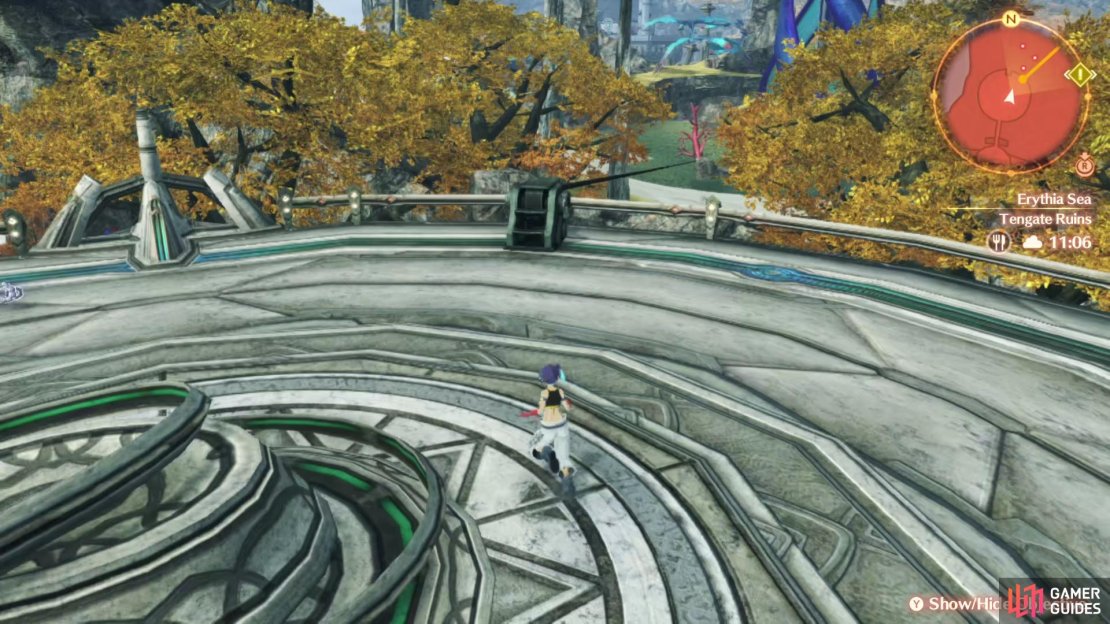


(1 of 3) Head to Tengate Ruins and climb to the top to find a zipline
At this point, if you’re doing this Quest as soon as it’s available (and around Level 50) then you’ll need to be very careful here. All of these gargantuan creatures are around Level 70+ and will make short work of your party should you try to get into combat with them. If you do happen to get spotted, try to dash as far away as possible as a death will bring you back to the top of the Tengate Ruins.
From where you land, make your way east and look where the water leads to find a cave. You’ll need to drop down here, make a mad dash through the cave and then leap onto the Climbing Point to lose aggro of the enemies chasing you. Climb to the top here and you’ll find your location marker where an ambush awaits.
Defeat the Hardliner LNs
You’re up against five Hardliners in this battle, and the start can be chaotic while you get your bearings. None of your foes are anything special in terms of Arts, but it’s their sheer number that can overpower you, especially at the start. Ensure you have at least two Healers in your party so they can deal with revival duty early on if needed.
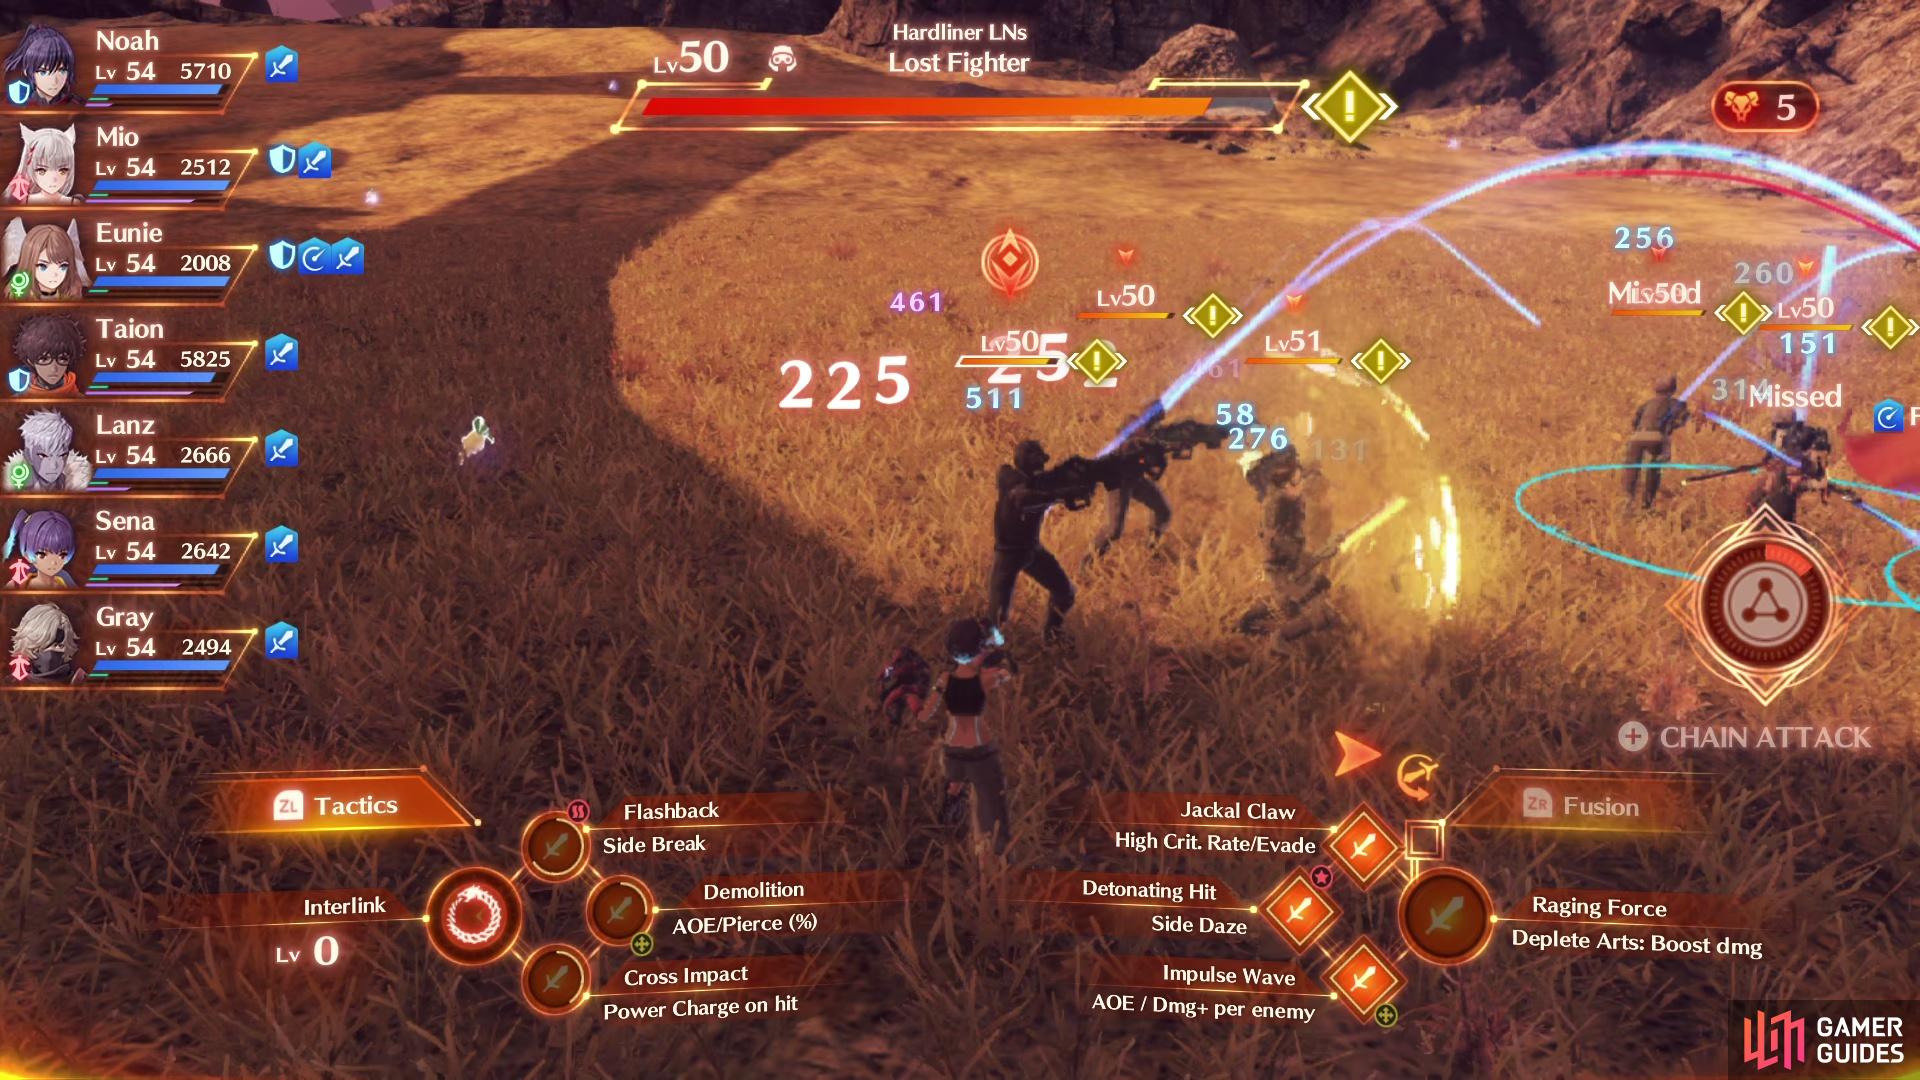
The Hardliners here can overwhelm you to begin with if you’re not careful.
There are no enemy Healers to worry about, so feel free to pick any of your targets and get your party to focus on them one-by-one. It can help to have one of your Healers as a Signifier for this battle, the buffs will help massively, especially at the start of the battle. Once the last Hardliner falls, the party will discuss how their location could have possibly been leaked.
Return to the City
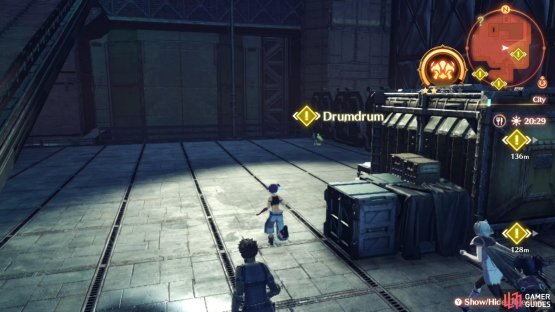
Your next task is to return to the City to learn just why someone wanted Gray out of the picture. Return to the landing pad in the City and Travis will speak to the party and gives them some troubling news. To learn more on the situation, Gray suggests speaking to three of his associates.
Head east from your current location to find Drumdrum, a Nopon mechanic. Then head to the Remembrance Stones to find Clara before finally heading to the Medical Center to speak to Hollis. Once you’ve spoken to all three of them, head to a Rest Spot and discuss the Rozana’s Whereabouts topic.
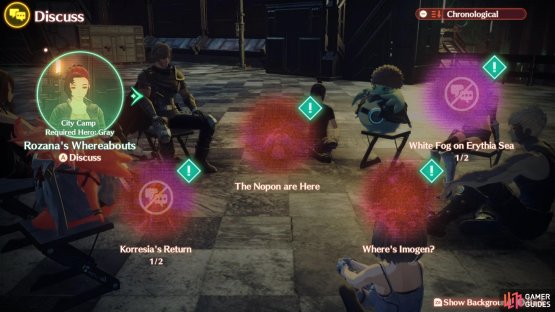
(1 of 2) Speak to Gray’s contacts around the city


Speak to Gray’s contacts around the city (left), then discuss the topic at the Rest Spot. (right)
The party will pin down a location they think the Hardliners may be hiding so Skip Travel to the Swordface Landmark in the Cadensia region and proceed north to have Gray discover a hidden passage. Follow this passage to the end to reach their hideout and be forced into battle!
Defeat the Evolved Sentry
You’ll have two battles here, one after the other and you’ll begin with a battle against the Evolved Sentry. Being a single target, this Levnis shouldn’t cause your party too many issues. Raider’s Blade will strike a single target for moderate damage while Machine Gun Sweep is definitely an Art to pay attention too. It will hit all targets in front of it dealing up to major damage if you’re unfortunate enough to have every hit land.
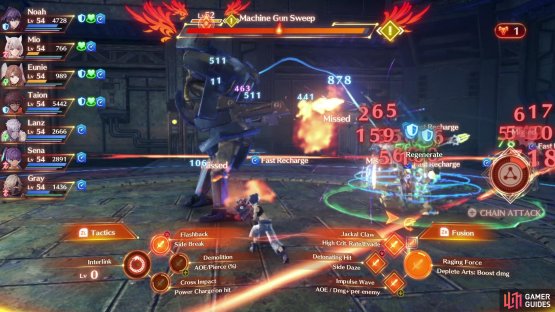

(1 of 2) Machine Gun Sweep is a devastating Art


Machine Gun Sweep is a devastating Art (left), and it only gets stronger as it becomes Enraged. (right)
The main threat, however, comes when you Enrage the Evolved Sentry, upgrading the previous Art to Machine Gun Sweep Mk. II which further increases the damage of the Art. Still, with that in mind, if you have a Signifier to provide buffs along with another Healer, you should be able to weather the storm. If for any reason your Healers can’t keep up with the damage, use a Chain Attack to buy yourself some time.
Defeat the Hardliner LNs
Despite there being four targets for the follow-up battle, this is a much easier fight than the Evolved Sentry, none of your foes have any Arts on the level of Machine Gun Sweep. Focus taking Broo down first as he’ll use Target Lock to force you to fight him regardless. Once he’s defeated, turn your attention to the Lost Fighter and Lost Protector, they don’t have much HP so they should go down quickly.
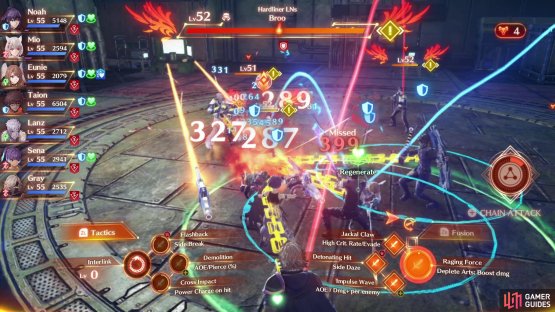
(1 of 2) Focus your attention on Broo at the start of the battle


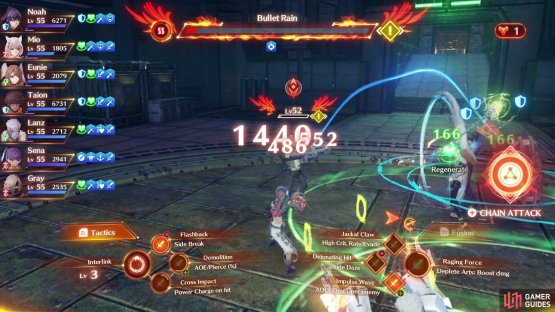
Focus your attention on Broo at the start of the battle (left), Yarmil has deadly Arts that are easy to deal with once she’s the last one standing. (right)
This will leave you with just Yarmil who deals the most damage out of the group. Bullet Rain can cause some issues, but if she’s the only target left alive, your Healers can easily cover the damage you may sustain. To make life easier, Yarmil is susceptible to Combos and debuffs, so look to Bind her to nullify her completely and use Combos to finish her, and the battle.
Following the battle, you’ll release the Class Rank Limit on the Full Metal Jaguar Class and Gray himself will be raised to Rank 20.
No Comments