In Pairs, the Swallows Come Home to Roost - Difficulty 4
Objective
No more than 20 escaped monsters.
Introduction
This stage is a little tougher because in the later waves, the enemies will start coming from three portals in two different directions. By bolstering up in front of your portal (Blue) first, makes it easier to hit them where both lanes converge, creating a chokepoint.
Recommended Characters
Premium Party
| Characters |
What they offer |
 |
She can use her Elemental Skill to pick up the smaller enemies and throw them off ledges. |
 |
Her bow attacks can target and stun Ruin Guards, and her charged attack can put Cryo on in enemies in an AoE. |
 |
His Geo pillar from his Elemental Skill can stop enemies from moving forward if it’s placed in their path. |
 |
She can get around the arena quickly by using her Elemental Skill and she can also deal the Electro status on enemies in an AoE. |
 |
Has a Claymore which can break a lot of the enemies physical shields, he also has quick cooldowns and that can put Pyro elements on enemies quickly. |
Free to Play Party
| Characters |
What they offer |
 |
They can place their Geo construct in the way of the enemies to stop them moving, similar to Zhongli. |
 |
They can push enemies of the side, similar to Jean but not as easily. |
 |
Similar to Ganyu, she can target the enemies weakpoints and stun them briefly. |
 |
Has a Claymore to break enemies physical shields, can also lay down a Cryo field to put on the enemies if needed. |
 |
Can put Pyro on enemies and because of his low cooldowns, he can do it often. |
Recommended Mechanici
| Mechanici |
Level |
Name |
Effect |
 |
6 |
Veneficus Mechanicus: Inferno |
Attacks opponents with Blazing Sparks that explode, dealing Pyro DMG in a medium AoE and leaving behind Burning Flames that deal Pyro DMG to opponents passing through. |
 |
6 |
Veneficus Mechanicus: Furious Discharge |
Attacks 3 opponents at a time with Thunder Strikes that deal Electro DMG. Additionally, Veneficus Mechanicus: Furious Discharge periodically strikes one nearby opponent with a Lightning strike that deals Electro DMG. |
 |
6 |
Veneficus Mechanicus: Glacial Bloom |
Periodically fires a Frost Bullet in a straight line. On hit, an icy explosion occurs, dealing Cryo DMG to opponents in its AoE and reducing their Movement SPD. |
 |
6 |
Veneficus Mechanicus: Glacial Bloom |
Periodically fires a Frost Bullet in a straight line. On hit, an icy explosion occurs, dealing Cryo DMG to opponents in its AoE and reducing their Movement SPD. |
 |
6 |
Veneficus Mechanicus: Rippling Reflections |
Attacks opponents in a larger AoE with Water Cannons that deal Hydro DMG and apply the Wet Status. Additionally, Veneficus Mechanicus: Rippling Reflections periodically creates Mist Bubbles in the surrounding area that temporarily imprison opponents who come in contact with them. |
Recommended Mystic Arts
| Mystic Art Type |
Effect |
| Other |
Pyro Mechanici perform 2 consecutive attacks against a single opponent |
| Other |
Max constructible Mechanici +1 |
| Other |
Cryo Mechanici fire at +1 target(s) per shot and deal +150% DMG against Frozen opponents |
| Other |
Electro Mechanici get a 50% DMG Bonus with each attack. Lasts for 30s. Max 5 stacks. |
| Other |
Pyro Mechanici ATK +50% |
| Other |
Electro Mechanici ATK +50% |
| Other |
Cryo Mechanici ATK +75% |
Enemies
| Wave |
Enemies |
| 1 |
24 |
| 2 |
20 |
| 3 |
20 |
| 4 |
16 |
| 5 |
14 |
Strategy
Wave 1
Monster Types
| Icon |
Name |
 |
Hilichurl |
 |
Hilichurl Berserker |
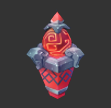
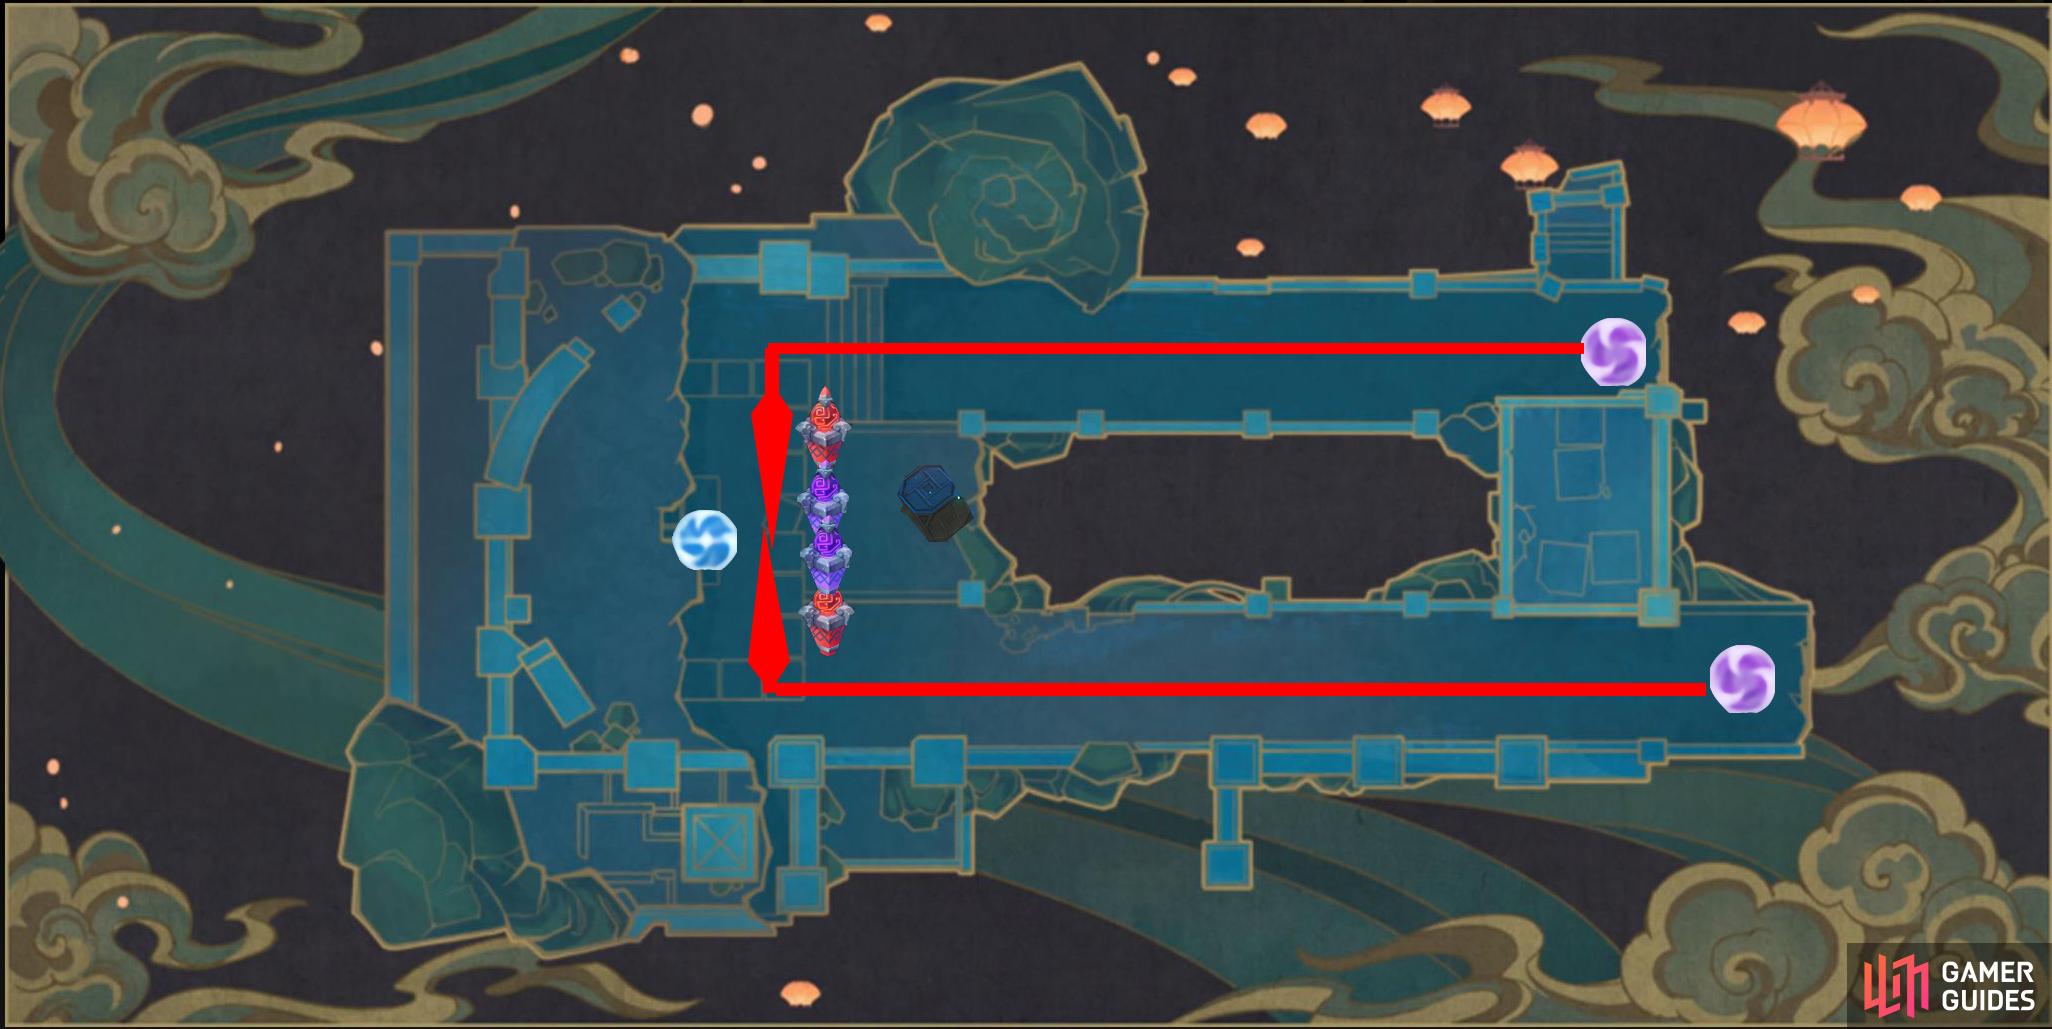
The enemies will come from both of the purple portals and they’ll meet in the middle in front of your portal, this is the chokepoint for this map. Start by placing two Electro Mechanicis on the middle panels, in front of the blue portal, then place two Pyro Mechanicis on the panels either side of the Electros, attack the enemies, preferably with a Claymore or an Anemo character to slow them down and keep them at bay whilst your Mechanici put in the work. The Hilichurl Berserkers like to sprint through and should be the priority for this wave.
Wave 2
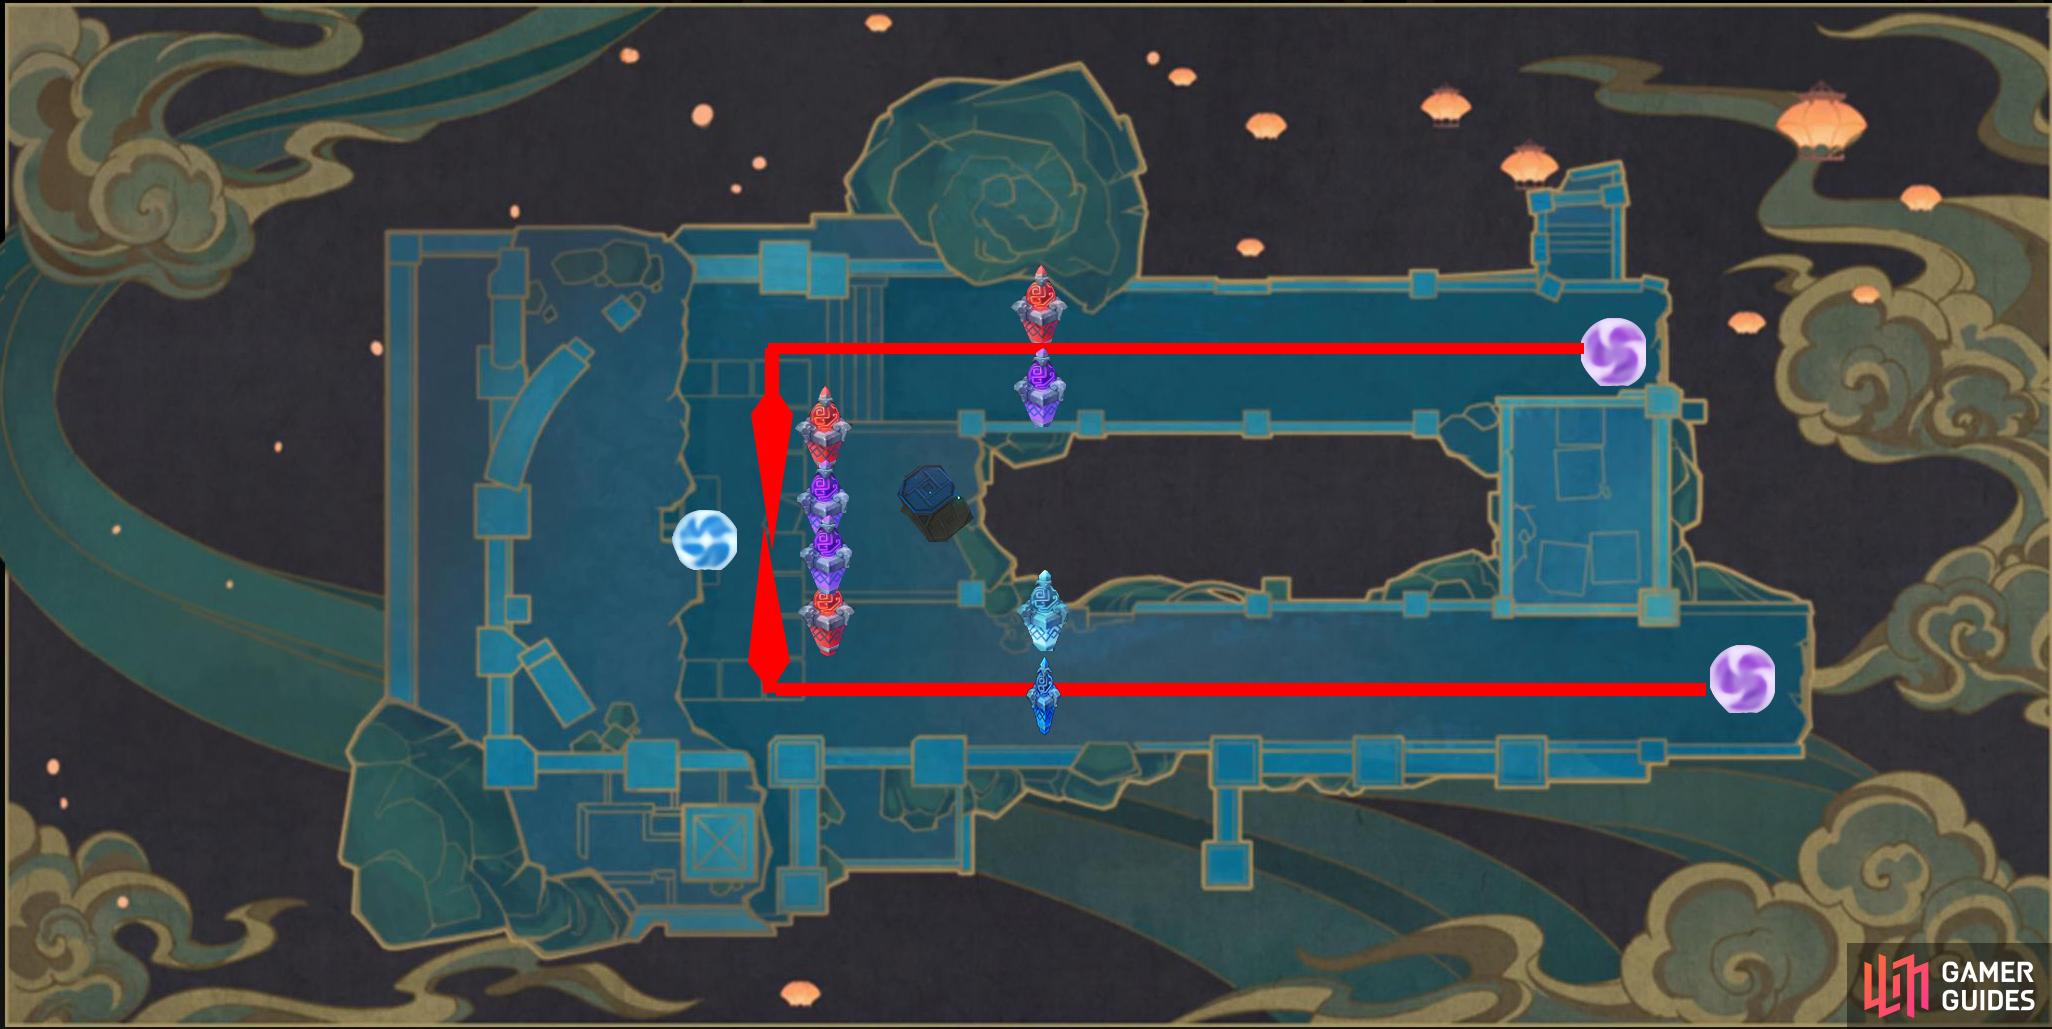
Now that you have the chokepoint setup, you can start by placing Mechanici nearer to the enemies portals, start by placing one Hydro and one Cryo Mechanic together on the panels nearest to your portal but on the right lane, then, head over to the left lane and replicate the same positions but place a Pyro and an Electro Mechanici, this time the Samachurls will be the priority as they like to sprint through.
Monster Types
| Icon |
Name |
 |
Pyro Slime |
|
Hilichurl |
 |
Ice Shield Hilichurl Guard |
 |
Ice Shieldwall Mitachurl |
 |
Cryo Samachurl |
Wave 3
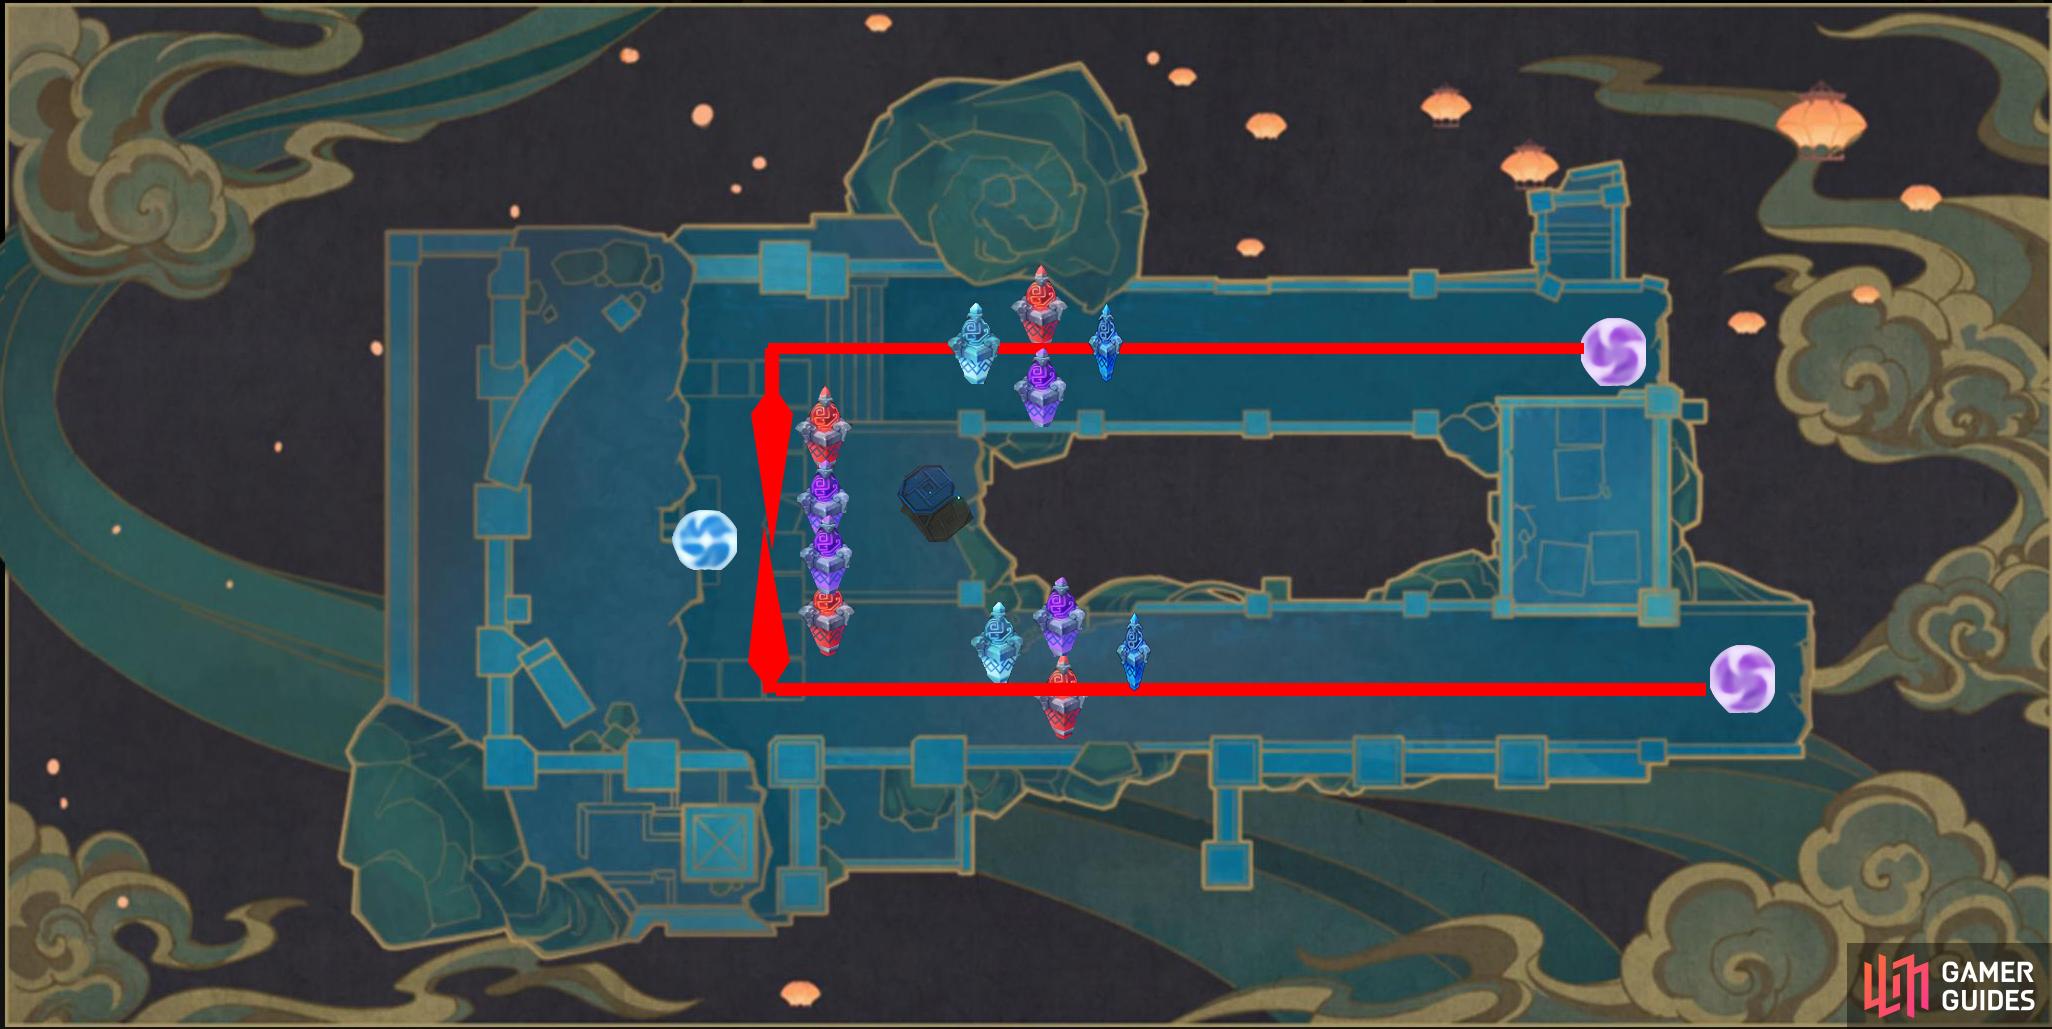
On this wave, do the same as the last wave but switch the lanes, so, put a Cryo and Hydro Mechanici in front of the Electro and Pyro Mechanici on the left lane and then place an Electro and Pyro Mechanici in front of the Cryo and Hydro on the right lane to complete the setup for this wave, again, make sure to slow down the Samachurl and shoot the Mitachurls in the head with an Archer to make them flinch which can buy you a second here and there.
Monster Types
| Icon |
Name |
 |
Large Anemo Slime |
|
Hilichurl |
|
Ice Shieldwall Mitachurl |
|
Cryo Samachurl |
Wave 4
This wave is a little tougher due to the Ruin Guards, place one more Pyro Mechanici on both of the lanes which will take you to the maximum Mechanici allowed, focus on shooting the Ruin Guards at their core which is on their head with a charged shot from an Archer to stun them briefly, other than that attack the enemies to slow them down.
Monster Types
| Icon |
Name |
 |
Cryo Slime |
 |
Large Cryo Slime |
 |
Ruin Guard |
Wave 5
The last wave seems easier, keep the Mechanici as is and focus on using an archer character to make the Lawachurls flinch briefly by shooting them at their heads, and attack the Abyss Mages with a Pyro character to help take their shields down.
Monster Types
| Icon |
Name |
|
Cryo Slime |
 |
Stonehide Lawachurl |
 |
Cryo Abyss Mage |


No Comments