Updated Title Publisher
Updated Title
Published Title Score Editor's Choice Publisher
Published Title Publisher

Genshin Impact

The Lost Valley

By
Matt Chard
Post a Comment

This page is designed to help you defeat The Lost Valley domain with minimal problems. Here you’ll find what Ley Lines to expect, what enemies you’ll face with each challenge, a recommended party, and all the rewards that you can earn in this domain.

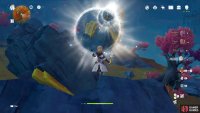
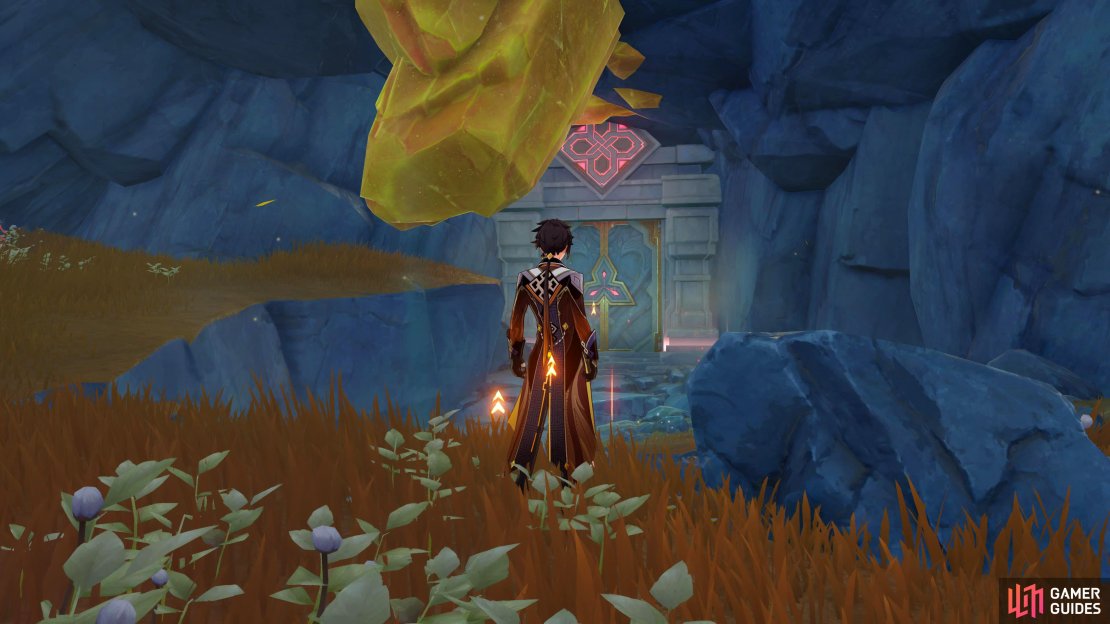
The entrance to The Lost Valley Domain in The Chasm, Liyue.

How to Unlock Location
Reach Adventure Rank 30 Fuao Vale, The Chasm, Liyue

Description

The ancient ritual grounds were buried beneath the earth amidst a cataclysm that tore heaven and earth asunder before being uplifted by the descent of an alien object, and finally unveiled by a destructive battle that resulted from a betrayal. Nonetheless, those who once frequented this place are no more.

Name The Lost Valley
Type Domain of Blessing
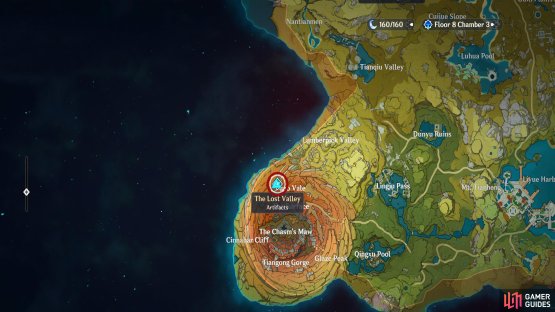
Location Fuao Vale, The Chasm, Liyue
Adventure Rank: 30
Recommended Party Level: 59
Recommended Elements: Electro_Icon_Art_Genshin_Impact.png Pyro_Icon_Art_Genshin_Impact.png Anemo_Icon_Art_Genshin_Impact.png Geo_Icon_Art_Genshin_Impact.png

How to Unlock The Lost Valley

You can find The Lost Valley in Fuao Vale, in The Chasm, Liyue. Teleport to the Statue of the Seven in The Chasm, and head northeast towards the locked domain. Drop to the floor below, and you’ll see a unique rock with a geo sigil on it. Just to the southeast of it, you should notice a circular stone platform amongst the grass. Place a Geo Construct (Traveler, Zhongli, Albedo Elemental Skill) and it’ll light up and produce some wind rings to the southeast.

(1 of 2) The Lost Valley is northeast of the Statue of the Seven in The Chasm.

The Lost Valley is northeast of the Statue of the Seven in The Chasm. (left), When you get there, you’ll notice a unique rock with a Geo Sigil on it. (right)

Head over to them, and ride them to the large geo rock and drop another Geo Construct on top of it. As you place the construct down, you’ll notice a large geo ring emanate from it and head towards the unique rock. The problem that arises is that it will fall just short from the rock. What you’ll want to do is have another Geo user in your party, so you have two in there, and place one Geo construct on the circular seal near the rock.

(1 of 2) Place a Geo construct on the circular seal

Place a Geo construct on the circular seal (left), and some wind rings will appear to your southeast. (right)

Finally, head back to the large geo rock and place another there. This will set off a chain reaction and destroy the unique rock giving you access to what’s behind it. Head through the new entrance, and you’ll see the domain to your right. Activate it to unlock it as a fast travel and farm to your heart’s content!

Circular Seal

Wind Rings

Completing the Puzzle

Ley Line Disorder

Level Ley Line Disorder
I - IV When characters use Elemental Skills, a shockwave will be unleashed, dealing True Damage.

Enemies

Icon Name Altar Challenge
Ruin_Guard_Enemies_Genshin_Impact.png1 Ruin_Destroyer_Enemies_Genshin_Impact.png1 Ruin Guard, Ruin Destroyer Machine Nest I Defeat 2 enemies within 360 seconds.
Ruin_Guard_Enemies_Genshin_Impact.png1 Ruin_Destroyer_Enemies_Genshin_Impact.png1 Ruin_Scout_Enemies_Genshin_Impact.png1 Ruin_Cruiser_Enemies_Genshin_Impact.png1 Ruin Guard, Ruin Destroyer, Ruin Scout , Ruin Cruiser Machine Nest II Defeat 4 enemies within 360 seconds.
Ruin_Destroyer_Enemies_Genshin_Impact.png2 Ruin_Scout_Enemies_Genshin_Impact.png1 Ruin_Cruiser_Enemies_Genshin_Impact.png2 Ruin Scout, Ruin Destroyers, Ruin Cruisers Machine Nest III Defeat 5 enemies within 360 seconds
Ruin_Grader_Enemies_Genshin_Impact.png1 Ruin_Destroyer_Enemies_Genshin_Impact.png1 Ruin_Cruiser_Enemies_Genshin_Impact.png1 Ruin Grader, Ruin Destroyers, Ruin Cruiser Machine Nest IV Defeat 3 enemies within 360 seconds.

Recommended Party

Main DPS Sub DPS Support Support
Ayaka_Character_Icon_Characters_Genshin_Impact.png Ayaka Razor_Character_Icon_Characters_Genshin_Impact.png Razor Kokomi_Character_Icon_Characters_Genshin_Impact.png Kokomi Zhongli_Character_Icon_Characters_Genshin_Impact.png Zhongli

Due to the Ley Line Disorder favoring Elemental Skills, Ayaka and Razor seemed the best choice due to their Elemental Skills having short cooldowns whilst still dealing high damage. Then we have Kokomi as our healer who has a good synergy with both Ayaka and Razor to apply both Electro-Charged and Frozen which will keep the enemies in place. Finally, Zhongli is taken for his overall shield support whilst still having a short enough cooldown to add to the damage needed to bring the enemies down.
The Lost Valley Rewards

Name AR Party Level Artifacts
Domain of Blessing: Machine Site I 30 59 Martial_Artists_Mix1_Artifacts_Genshin_Impact.png Martial_Artists_Mix2_Artifacts_Genshin_Impact.png Gambler_Mix1_Artifacts_Genshin_Impact.png Gambler_Mix2_Artifacts_Genshin_Impact.png
Domain of Blessing: Machine Site II 35 69 Martial_Artists_Mix1_Artifacts_Genshin_Impact.png Martial_Artists_Mix2_Artifacts_Genshin_Impact.png Gambler_Mix1_Artifacts_Genshin_Impact.png Gambler_Mix2_Artifacts_Genshin_Impact.png
Domain of Blessing: Machine Site III 40 80 Martial_Artists_Mix1_Artifacts_Genshin_Impact.png Martial_Artists_Mix2_Artifacts_Genshin_Impact.png Gambler_Mix1_Artifacts_Genshin_Impact.png Gambler_Mix2_Artifacts_Genshin_Impact.png Vermillion_Hereafter_Mix2_Genshin_Impact.png Echoes_of_an_Offering_Mix2_Artifacts_Genshin_Impact.png
Domain of Blessing: Machine Site IV 45 90 Martial_Artists_Mix1_Artifacts_Genshin_Impact.png Martial_Artists_Mix2_Artifacts_Genshin_Impact.png Gambler_Mix1_Artifacts_Genshin_Impact.png Gambler_Mix2_Artifacts_Genshin_Impact.png Vermillion_Hereafter_Mix2_Genshin_Impact.png Echoes_of_an_Offering_Mix2_Artifacts_Genshin_Impact.png
No Comments
No Upvotes
User profile pic

Comment submission error:

The comment must be at least 1 character in length.

Guide Information
  • Publisher
    miHoYo
  • Platforms,
    Android, iOS, PC, PS4, PS5, Switch
  • Genre
    Action RPG, Adventure
  • Guide Release
    31 October 2020
  • Last Updated
    31 July 2023
    Version History
  • Guide Author

Share this free guide:

This guide for Genshin Impact includes the following:

  • Based on version 3.0.
  • An interactive Map of Teyvat showing the location of all; Anemoculus, Geoculus, Statues of the Seven, World Quests, Shrines, Plants, Monsters, Enemies, Chests and Minerals.
  • Knowledge on all of the current known regions of Teyvat.
  • Detailed Character pages of all playable characters showing talent trees, skill builds and Ascension tables.
  • Character Tier Lists.
  • Combat Information and Elemental Effects & Combinations.
  • Weapons - Showing the current best and highest rated weapons in the game.
  • All Archon Quests including the new Sumeru Archon Quests.
  • All World Quests that are unlocked by speaking to NPCs through Teyvat. They give insight into the various locations and stories of the world.
  • All Story Quests consisting of chapters related to the background and personalities of each playable character.
  • All Domains laid bare with expert strategies including the new Sumeru Domains.
  • How to conquer the Spiral Abyss.
  • All Weekly Bosses covered with expert strategies.
  • How to get all the optimal outcomes on Hangout Events
  • Housing guide using the Serenitea Pot including a full blueprint and furnishings list.
  • All details on Gardening and Fishing.
  • Bonus Content, including Interviews from voice actors.

Get a Gamer Guides Premium account:

GG logo

Register to continue…

Already have an account?

Log in to continue…

Forgot?
Gamer Guides Premium


Get access to this feature and a lot more by upgrading to a premium account.

Find out more

Already subscribed?