
Details about the ![]() Thicket Excavations area in Fallout 4, as well as information about the quest
Thicket Excavations area in Fallout 4, as well as information about the quest ![]() Pull the Plug, which must be completed to gain full access to the area.
Pull the Plug, which must be completed to gain full access to the area.

Thicket Excavations, prior to being drained.
| Important Items in This Area |
|---|
| Taboo Tattoos |
Thicket Excavations can be found northeast of Concord, northwest of Bedford Station and west and slightly south from Tenpines Bluff. It’s almost due east from the Red Rocket Truck Stop, although you probably won’t be able to see the icon from here.
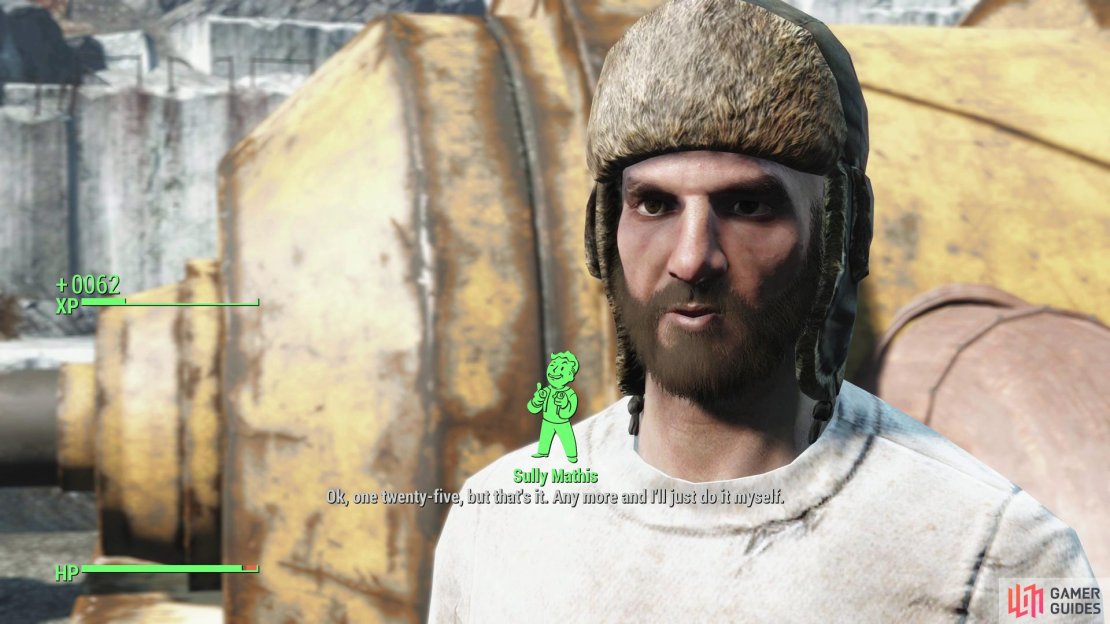
(1 of 4) You can haggle with Sully to earn more Caps.
Pull the Plug
When you arrive at Thicket Excavations, you’ll find little more than a large, water-filled pit and a man named Sully Mathis fussing over a large yellow water pump. He wants the pump fixed so he can drain the quarry, which will allow him to reach the submerged scrap… and he’s willing to pay for help. Talking to him starts the quest Pull the Plug, which you’ll need to complete before you can explore this area in depth… or explore the depths of this area?
He’s willing to pay 50 Caps for your aid, but you can haggle the price up via three successive persuasion checks to boost the reward by 25 Caps, each one more difficult than the last. If you ask him ”Help with what?” you can follow up with a moderate persuasion attempt, which will get him to mention some “friends” and generally expose a less friendly aspect of his personality. Otherwise, succeeding at these checks is more useful for the XP you’ll gain than the Caps or intel.
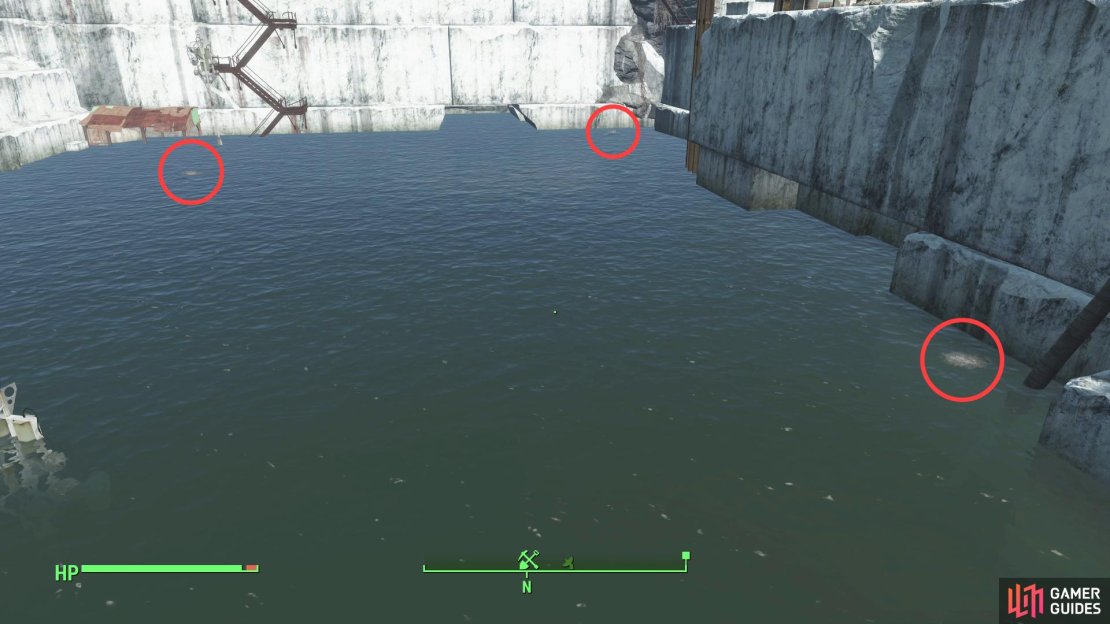
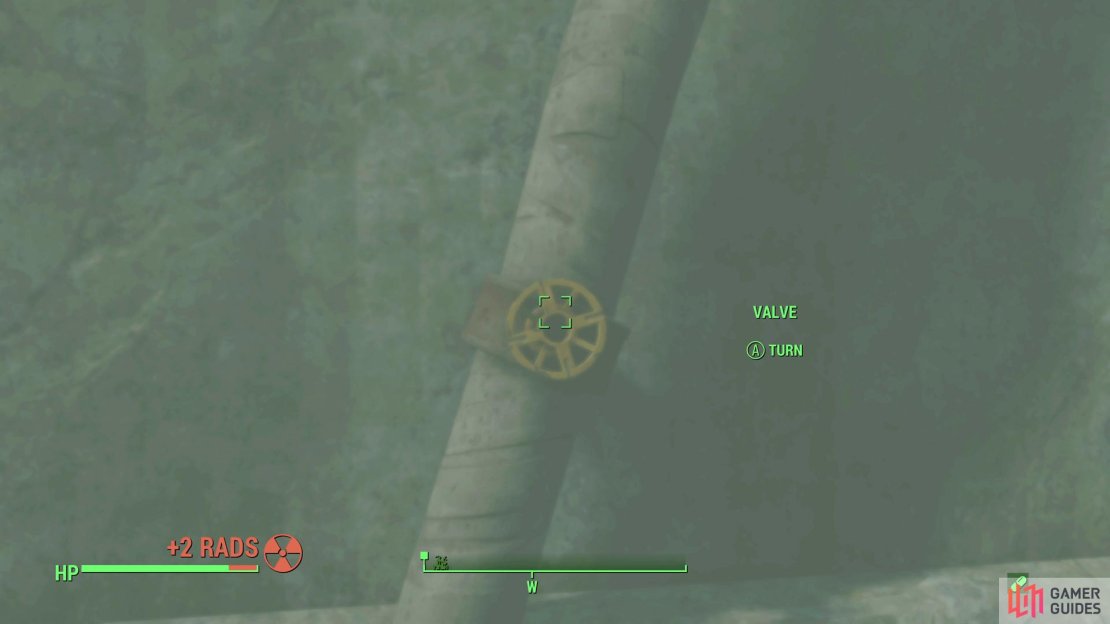
Agree to help and he’ll tell you that there are some underwater leaks that are compromising the pump. Go look over the watery pit and you should be able to spot them, due to the bubbles rising from the water. Under each of the three spouts of bubbles is a yellow valve you’ll have to close, and this, of course, means diving, and diving means you’re going to catch some Rads. About 10 Rads/second, in fact, barring resistances. If you’re got a ![]() Hazmat Suit or some
Hazmat Suit or some ![]() Rad-X, you should consider wearing/consuming it before diving in to mitigate the damage you take.
Rad-X, you should consider wearing/consuming it before diving in to mitigate the damage you take.
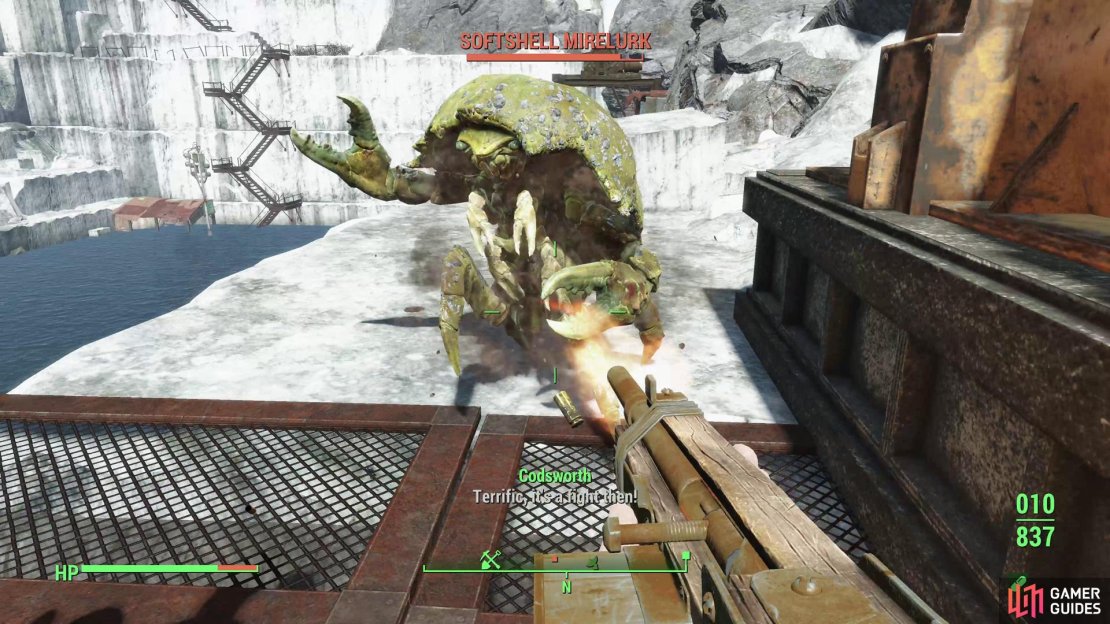
Mark the location of each bubble spout, then swim underwater to find the valve they mark and close it. Once you’ve closed all three valves, surface, take some Rad Away and heal yourself, then talk to Sully Mathis, who will give you the honor of restarting the generator. Do so and the generator will lurch back to life, disturbing some ![]() Mirelurks in the process.
Mirelurks in the process.
Mirelurks are nasty enemies, especially at low levels, as their shells provide excellent protection from most attacks. If you’ve got a powerful enough weapon - a Hunting Rifle, perhaps - you can deal some damage to them despite their defenses, but if you’re stuck with pipe weapons, you’ll need to ain for their vulnerable faces and undersides. Explosives are also useful, and may even destroy the mutated crustacean’s shell.
Put them down, then talk to Sully to earn your reward and complete the quest.
| Objective | Reward |
|---|---|
| For helping Sully drain the quarry | 230 XP 50, 75, 100 or 125 Caps |

(1 of 3) You can find a copy of Taboo Tattoos in a trailer southwest of the pump.
Exploring Thicket Excavations
After some time passes, you can return to Thicket Excavations to find out that Sully and his friends have been busy. The water is drained, and Sully’s friends have set up shacks, cages and other infrastructure, allowing them to occupy the quarry. They even have some pet Mirelurks! Unfortunately, Sully’s friends happen to be Raiders, and they’re not friendly.
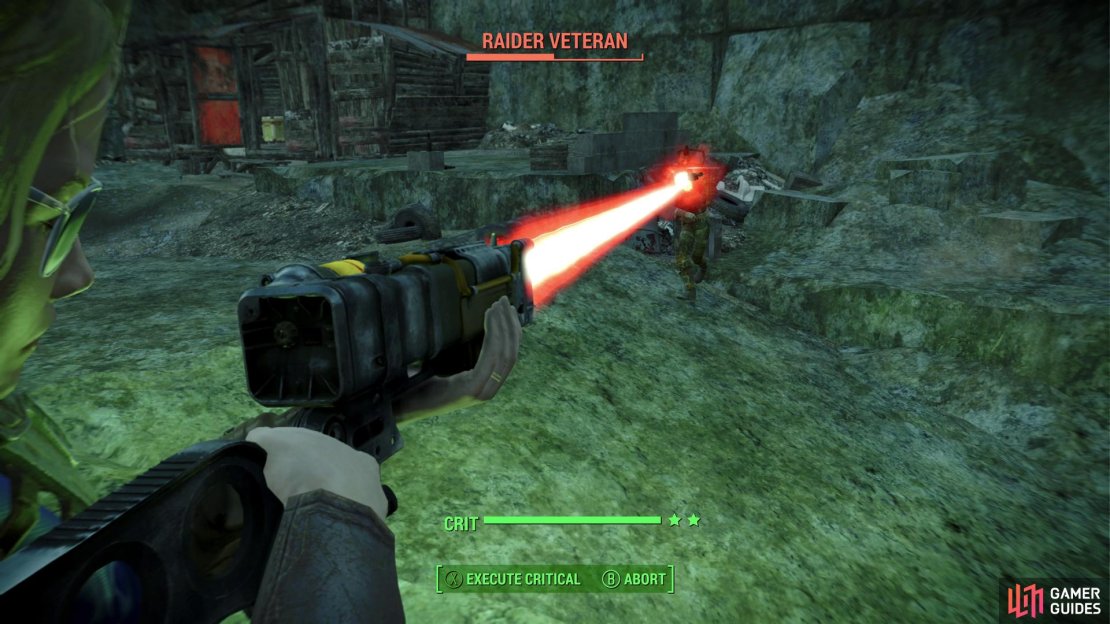
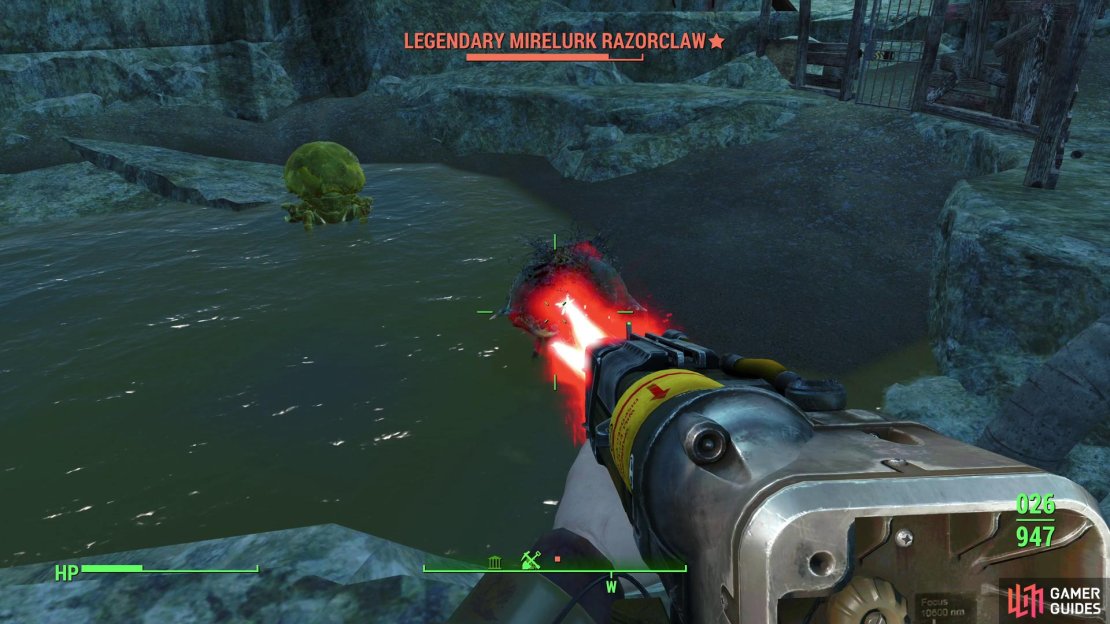
Once drained, Thicket Excavations is a massive, multi-layered pit crawling with leveled Raiders. Depending on your level you should expect to encounter Raider Scum, ![]() Psychos, Wasters and Scavvers, while Sully Mathis himself - the ringleader of this nest of vipers - scales quite aggressively with the player, and can prove to be a very dangerous foe. While the Raiders are your primary enemies, they’ve also got seven Mirelurks locked up in three separate pens. As long as you don’t open the doors, you can gun down the crabs without much trouble (note that explosives can break open the doors to their pens). The Mirelruks are generally unleveled, being either
Psychos, Wasters and Scavvers, while Sully Mathis himself - the ringleader of this nest of vipers - scales quite aggressively with the player, and can prove to be a very dangerous foe. While the Raiders are your primary enemies, they’ve also got seven Mirelurks locked up in three separate pens. As long as you don’t open the doors, you can gun down the crabs without much trouble (note that explosives can break open the doors to their pens). The Mirelruks are generally unleveled, being either ![]() Softshell Mirelurks or generic Mirelurks, although one of the three Mirelurks in a lower pen can scale to the player’s level somewhat.
Softshell Mirelurks or generic Mirelurks, although one of the three Mirelurks in a lower pen can scale to the player’s level somewhat.
There’s plenty of loot in the area, including an issue of Taboo Tattoos in a trailer to the southwest of the pump. That’s the sole bit of unique loot here, although it can still be very lucrative to plunder the area. You can expect chems, ammo and plenty of junk, in addition to whatever arms and armor the Raiders possess. Since this is an outdoor area, it will respawn quickly, enabling you to clear out the Raiders and Mirelurks and loot the area on roughly a weekly basis. If you kill Sully Mathis, he’ll be replaced by a high level Raider (up to a Raider Veteran) on subsequent runs.
No Comments