
Walkthrough for the ![]() Lexington area in Fallout 4, including the Pharmacy, Parking Garage,
Lexington area in Fallout 4, including the Pharmacy, Parking Garage, ![]() Slocum Joe’s Basement and Laundromat subareas.
Slocum Joe’s Basement and Laundromat subareas.
The ruins of Lexington aren’t just a geographic region in Fallout 4, they’re given their own map marker. Oddly enough, fast traveling to this map marker will place you northwest of Super Duper Mart, while the marker for Lexington itself is southeast of ![]() Super Duper Mart. If you have a choice, you should fast travel to the Lexington map marker instead of the Super Duper Mart marker, as the latter will spawn you in a very dangerous location, as we’ll soon discuss.
Super Duper Mart. If you have a choice, you should fast travel to the Lexington map marker instead of the Super Duper Mart marker, as the latter will spawn you in a very dangerous location, as we’ll soon discuss.
The region of Lexington includes the Super Duper Mart, Lexington Apartments, Mystic Pines and Corvega Assembly Plant areas, all of which are covered in their own pages, In addition, Lexington contains several points of interest including a number of subareas that you have to zone into - a Pharmacy, a Parking Garage, Slocum Joe’s Basement and a Laundromat.
Exploring Lexington
The eastern and southern fringes of the city, starting at Mystic Pines in the northeast, continuing south through Lexington Apartments and ending at the Corvega Assembly Plant, are all Raider-controlled territory, with the greatest number of Raiders being located at the Corvega Assembly Plant. This serves as a base for these brigands, and is a likely target for the quest [![]() The First Step], although the most dangerous Raiders in Lexington can be found elsewhere.
The First Step], although the most dangerous Raiders in Lexington can be found elsewhere.


(1 of 3) You can find some Raiders in the ruins near Mystic Pines.
Raider Ruins
If you follow the road south from Mystic Pines you’ll find a ruined brick building to your right (opposite a lot with some yellow parked construction vehicles). Two leveled Raiders (you can see Raider Scavvers here, depending on your level - expect serious opposition) and two Machinegun Turrets can be found in these ruined buildings, which guard several containers and a Safe [Expert].
Roof Raider
Make your way to the western end of the Raider-occupied brick buildings and turn south to spot a fenced-in basketball court. South of this basketball court you’ll find a fire escape leading to the upper floor of another, larger, brick building. Ascend the stairs and you’ll encounter a power armor clad, leveled Raider (likely a Raider ![]() Psycho).
Psycho).
If you’re sneaky and perhaps a bit lucky you can sneak up and steal the ![]() Fusion Core from his power armor, which will force him out of said power armor and allow you to claim it after the fight. This is true for every enemy you encounter in power armor, but this particular Raider is noteworthy for two reasons: 1) he respawns, and 2) there are no other enemies nearby to play spoiler. This makes for a great opportunity to acquire power armor frames, should your stealth be up to snuff.
Fusion Core from his power armor, which will force him out of said power armor and allow you to claim it after the fight. This is true for every enemy you encounter in power armor, but this particular Raider is noteworthy for two reasons: 1) he respawns, and 2) there are no other enemies nearby to play spoiler. This makes for a great opportunity to acquire power armor frames, should your stealth be up to snuff.
More likely, however, you’ll just need to put this Raider down. You can then loot the exposed apartment at the top of the building, and while there’s plenty of worthwhile plunder up here, the most noteworthy is a Trunk, which you can reach by using a collapsed section of roof as a ramp, then jump across to a ledge to the northwest. You can also find a Weapons Workbench in a side room.
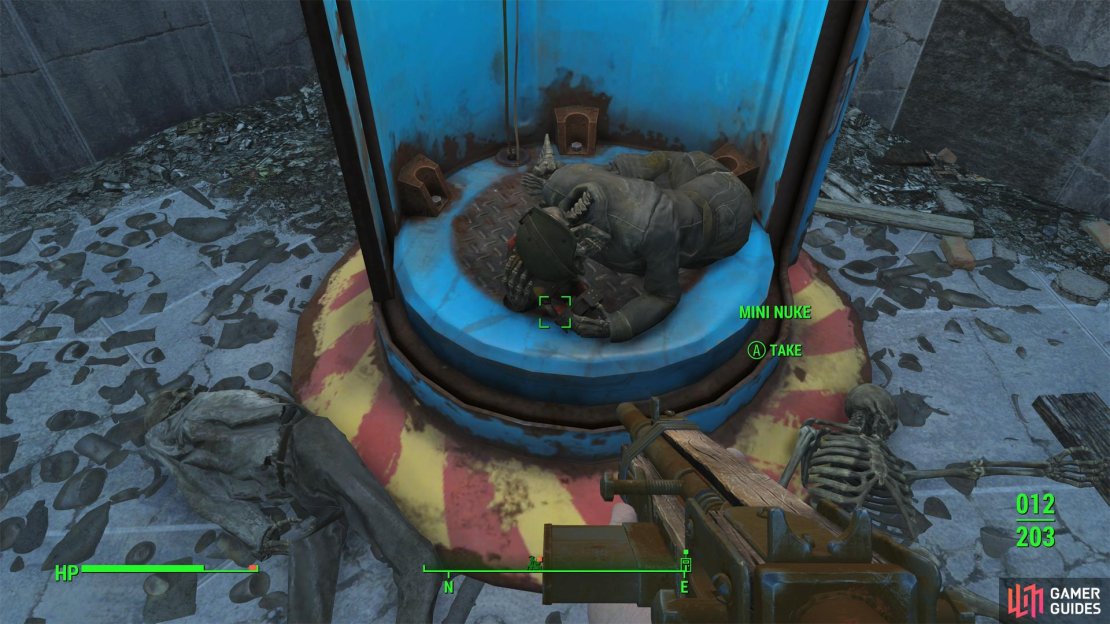


(1 of 5) You can find a long-dead soldier clutching a Mini Nuke inside a Pulowski Preservation Shelter.
Raider Bridge
Along the southeastern end of Lexington you’ll find the Lexington Apartments area, which for the moment is more interesting as a landmark than a location. Fast travel there and from where you spawn, head north to find some stairs leading up to a pool. Kill any Raiders and Ghouls you find here (this is where they’re most likely to mingle in Lexington) and turn left (west), passing around the pool and through an arched passageway to reach the street beyond.
If you haven’t cleared this area, you should consider sneaking at this point, as there’s a nasty Raider atop a walkway between two buildings. He’s the point of interest for this bout of exploration, but he’s incredibly dangerous, as he possesses a ![]() Fat Man and the will to use it recklessly. Best case scenario, he uses it at close range against some Ghouls and frags himself, or at least wastes his ammo. He’s also fond of taking potshots at the Behemoth that may later spawn in the square to the west, near Super Duper Mart, but he’s not reluctant to shoot it at the player, so don’t give him the option.
Fat Man and the will to use it recklessly. Best case scenario, he uses it at close range against some Ghouls and frags himself, or at least wastes his ammo. He’s also fond of taking potshots at the Behemoth that may later spawn in the square to the west, near Super Duper Mart, but he’s not reluctant to shoot it at the player, so don’t give him the option.
Turn south on the street and note a Pulowski Preservation Shelter to the left, which contains the skeleton of a prewar soldier clutching a ![]() Mini Nuke. This Mini Nuke will not respawn. Continue to an intersection and from here keep heading south until the road forks again. If you turn southeast you’ll find the white door leading to the Pharmacy subarea, while if you search between two buildings to the southwest you’ll find a gate, beyond which are some stairs leading to a pipe, which you can enter to find a back entrance to the Corvega Assembly Plant.
Mini Nuke. This Mini Nuke will not respawn. Continue to an intersection and from here keep heading south until the road forks again. If you turn southeast you’ll find the white door leading to the Pharmacy subarea, while if you search between two buildings to the southwest you’ll find a gate, beyond which are some stairs leading to a pipe, which you can enter to find a back entrance to the Corvega Assembly Plant.
While worth knowing, neither of these are the current objective, which lies down the street to the west. Head west until you find a fire escape along a building to the right (north), then ascend the stairs and ramps, being mindful of the Feral Ghouls lying in wait in the buildings nearby - they likely won’t stir unless provoked, or until fighting starts nearby. Ascend to the roof and work your way around a crashed truck, being wary of two more Feral Ghouls hiding in some debris (VATS can sniff them out). These Ghouls aren’t content to remain passive and will likely surface when you get near, or worse, if you start exchanging bullets with the Raiders nearby. You don’t need this complication, but on the other hand, the Fat Man wielding Raider may be alerted by any fighting, and he has no restraint when it comes to launching Mini Nukes.
If you can get past the Ghouls you’ll find two Raiders on a bridge connecting two buildings, one scrub Raider of little consequence (they will claim the Fat Man and use it should they be given the opportunity, however) and the power armor clad, Fat Man wielding menace - there may also be a Machinegun Turret up here, which is temperamental about respawning, for whatever reason. Using Critical Hits to take out the more dangerous Raider comes highly advised, after which you shouldn’t have much trouble finishing up, provided the other Raider doesn’t get their hands on the Fat Man, and assuming no Ghouls were roused by the fighting and make their way up the fire escape.
Your prize for dispatching this threat? A Cooler, a Chem Cooler and a Duffle Bag, as well as some Sleeping Bags you can use to recover lost Hit Points… and, of course, the security of knowing that this threat looming over Lexington has been dispatched.
If you press on northeast into the other building at the far side of the bridge you’ll find a mostly barren apartment building with some stairs - two separate flights - you can take to reach the streets of Lexington, exiting the building just to the southwest of the building atop of which the last power armor clad Raider prowled. This is also a stone’s throw northwest of the arched passageway leading to the pool near the entrance to Lexington Apartments. Small town.
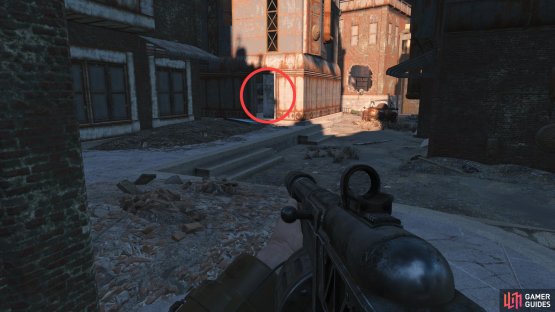
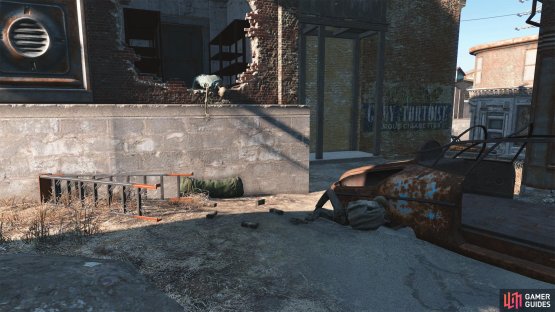
(1 of 2) You can find a door leading to a building occupied by ghouls,

You can find a door leading to a building occupied by ghouls, (left), down the street from which is a bank robbery, preserved in time. (right)
Lexington Bank
From this building you can turn west to find another building with an open door nearby. Enter cautiously, as the building is crawling with Feral Ghouls, assuming they weren’t roused by your earlier activities. Clear them out, then search just opposite of the door from which you entered to find a sealed door and a terminal [Advanced], which you can use to unlock the sealed door. If you can get the door open, your reward will be a Safe [Advanced]. Up to you if it’s worth the effort.
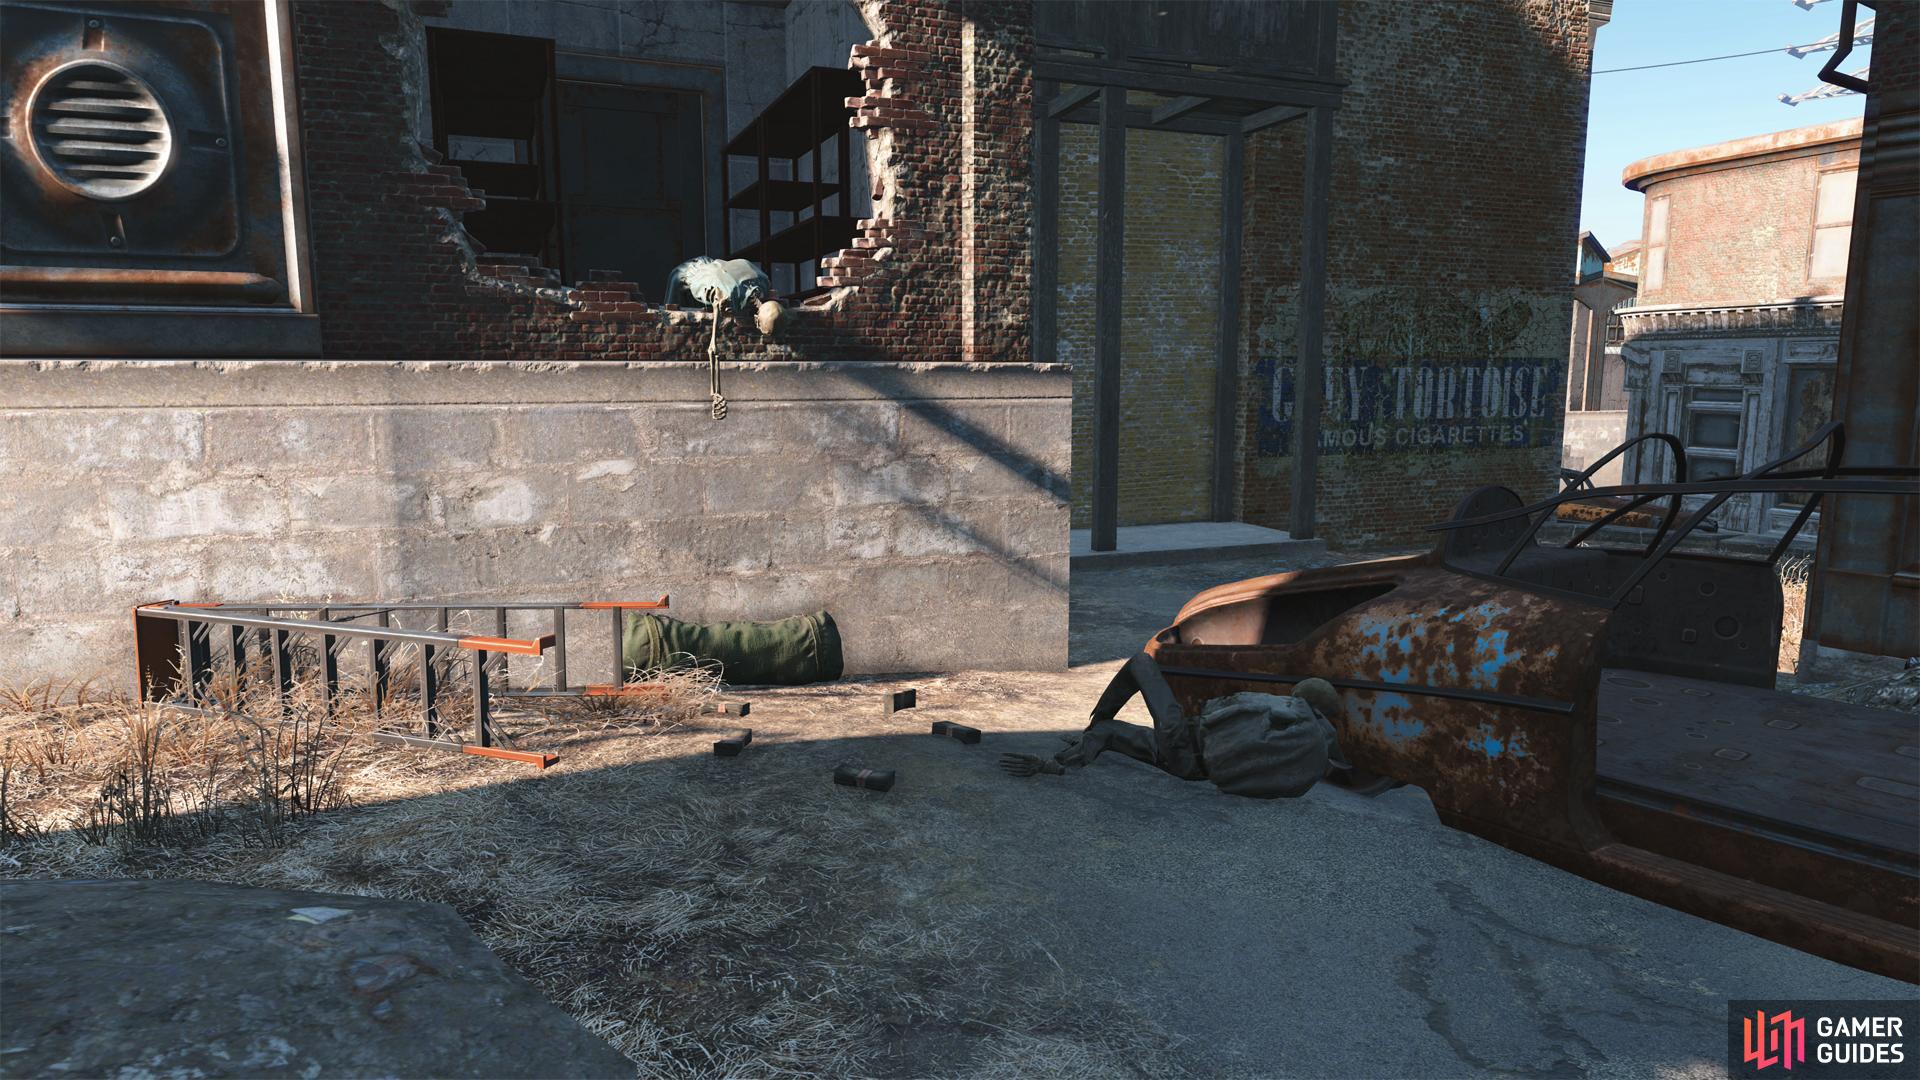
More interesting - if not more lucrative - is a scene down an alley to the northwest from this building, where you’ll find a smashed brick wall and two skeletons caught amidst the heist they were committing when the bombs dropped. Profit from the perfidy by pocketing the Pre-War Money they plundered, most of which can be found in a Duffle Bag. Surely commentary on how useless fiat currency will become in the case of societal collapse.
If you want to explore this building that was being robbed - a bank - make your way down an alley to the southwest from the crime scene, turn right (northwest), then go through the white double doors (also to the right). The Cash Registers will yield more Pre-War Money, should you need something to stuff bedding with, and you can use a Terminal to open a sealed door nearby, although there’s little practical reason to bother.
From the front doors to the bank, you’re a short distance away from Super Duper Mart, which can be found to the north. This massive building dominates the northwestern end of Lexington, and while it’s not our next destination, it’s a convenient landmark we’ll use for navigation.
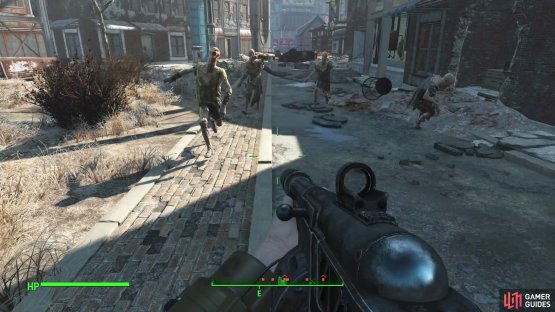

(1 of 2) While the eastern side of Lexington was controlled by Raiders, near Super Duper Mart you’ll find Feral Ghouls.
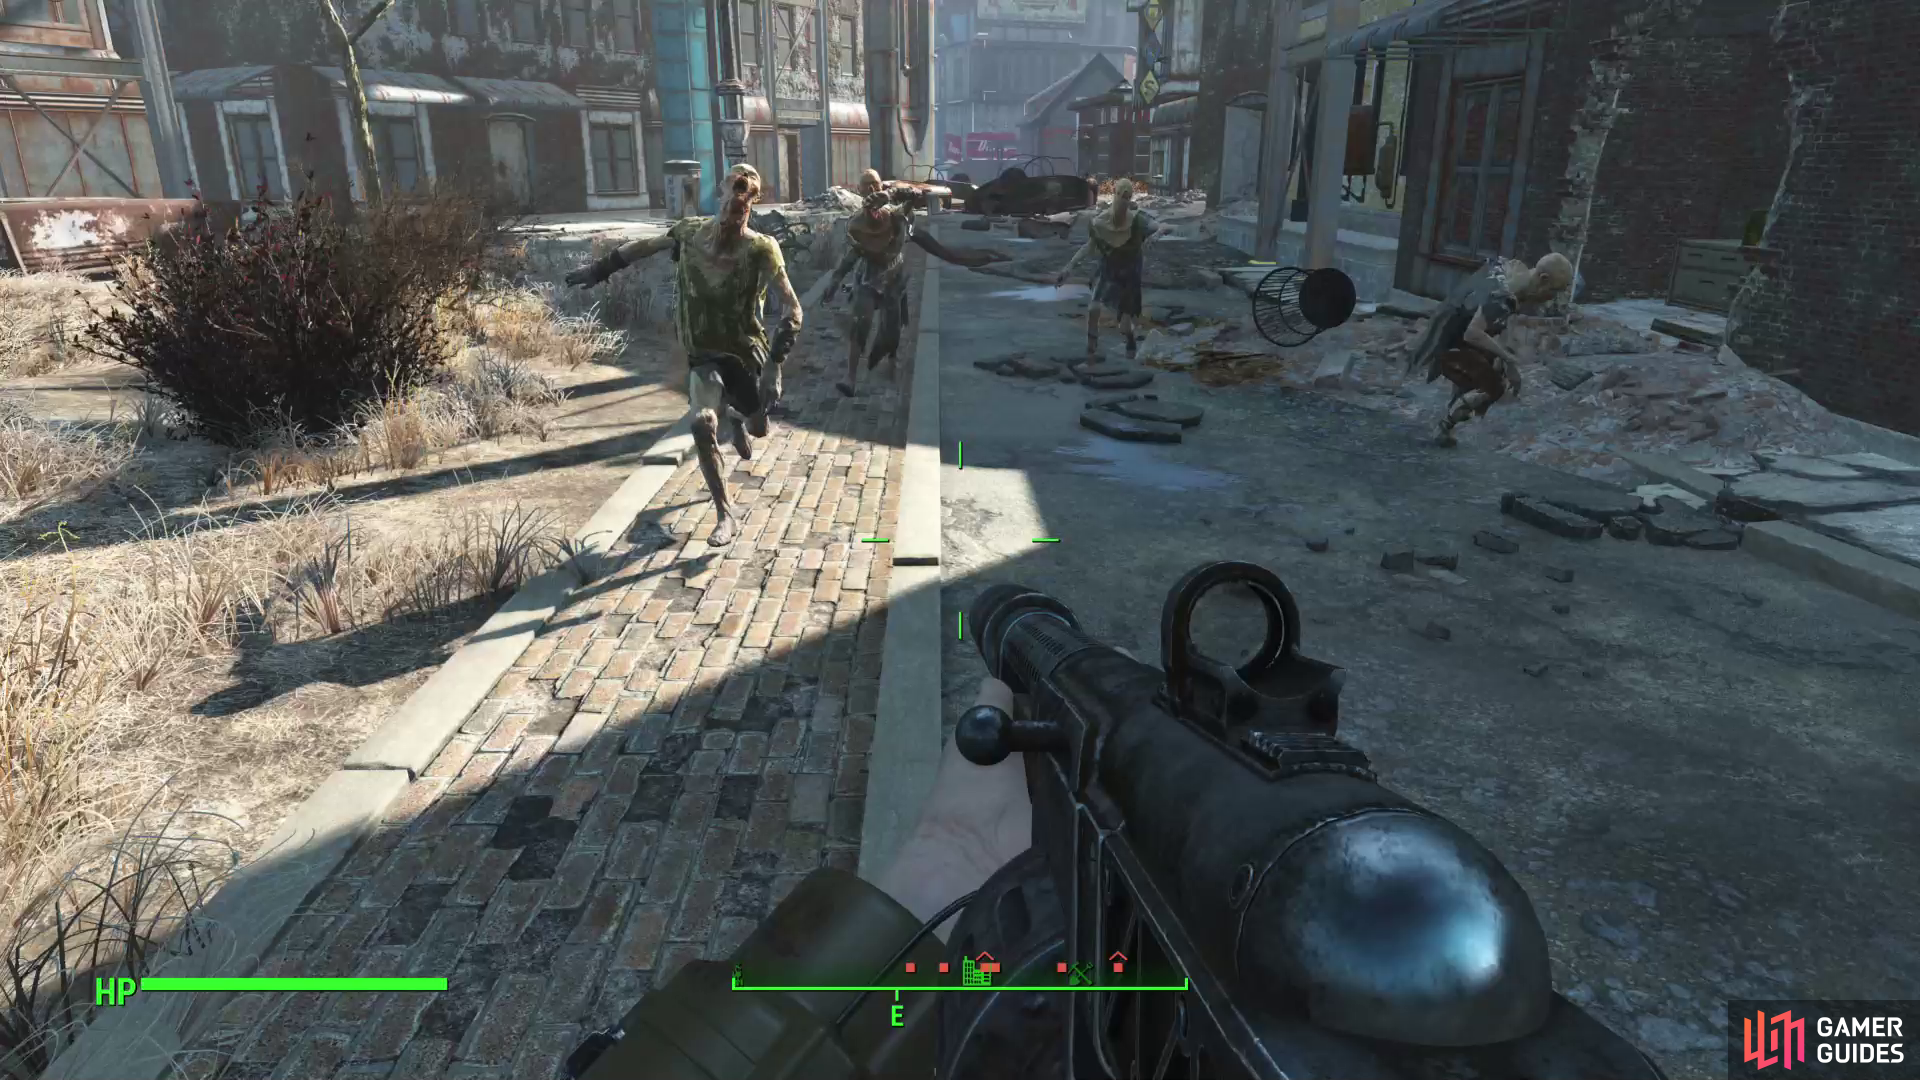
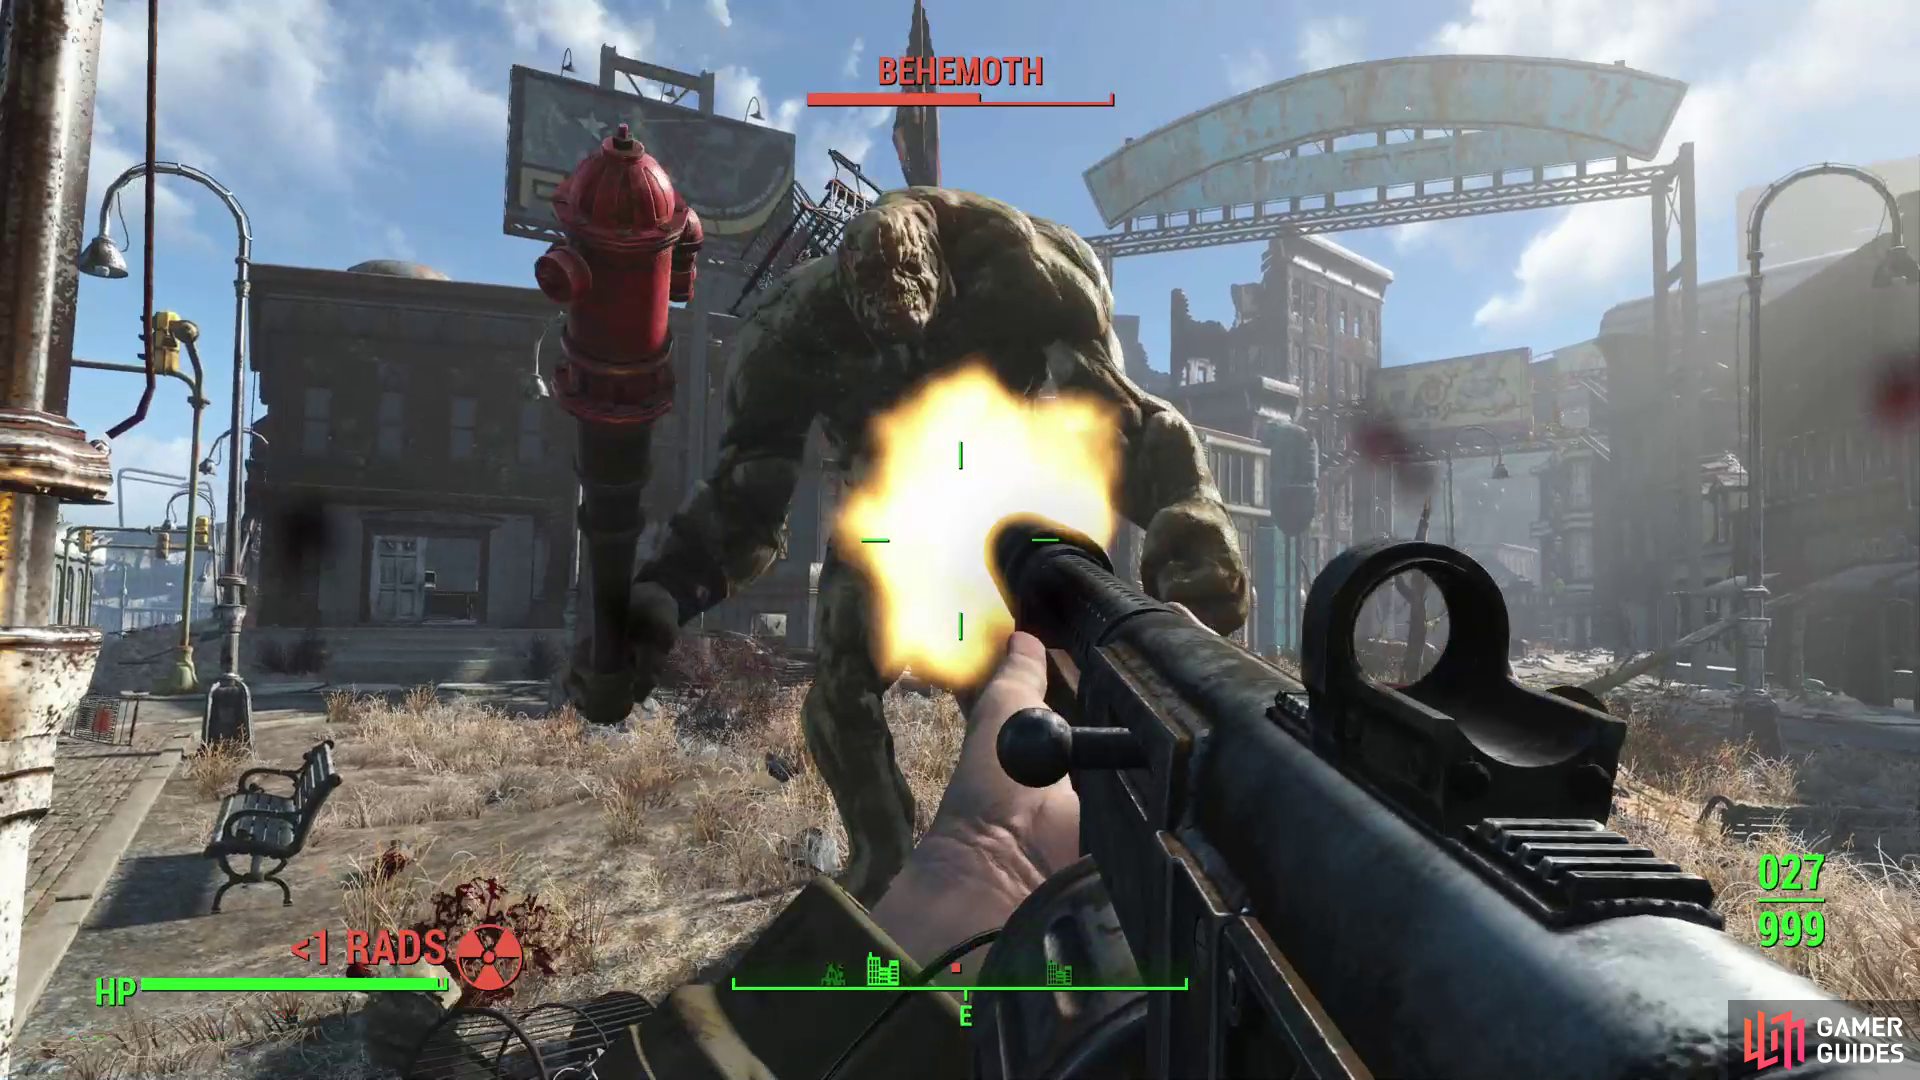
While the eastern side of Lexington was controlled by Raiders, near Super Duper Mart you’ll find Feral Ghouls. (left), At higher levels a Behemoth will spawn in the clearing near Super Duper Mart. (right)
At lower levels, the grassy square opposite the entrance to Super Duper Mart will probably be fairly uninteresting, unless you’ve managed to stir up the local Ghouls. At higher levels, however, a Behemoth may spawn here, and it’ll almost certainly draw the attention of Ghouls, who will, in turn, prove to be tempting targets for the Fat Man wielding Raider atop the bridge in the distance. Suffice to say, at higher levels or with bad luck, this area can be very quiet, or very busy.
Head down the road towards, then past, the entrance to Super Duper Mart and follow the road as it bends southwest. To your right you’ll find a parking garage, while if you keep following the road you’ll be in a clearing with a Red Rocket station to the south. On the corner to the east is Slocum Joes, a donuts and coffee shop and down the street to the southeast, adjacent to Slocum Joes, is a white door leading to the Laundromat subarea.
Most of Lexington’s remaining points of interest all clustered up around the Red Rocket station. Convenient.

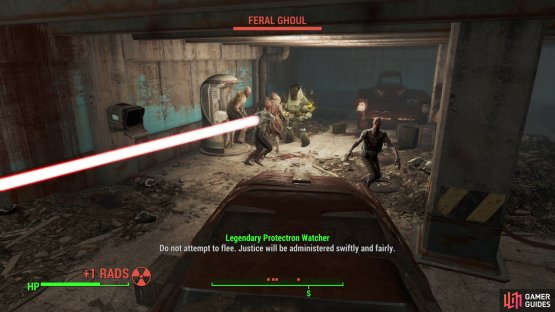
(1 of 2) Depending on which door you use to enter, you can either light an oil slick to blunt the charge of some Ghouls,
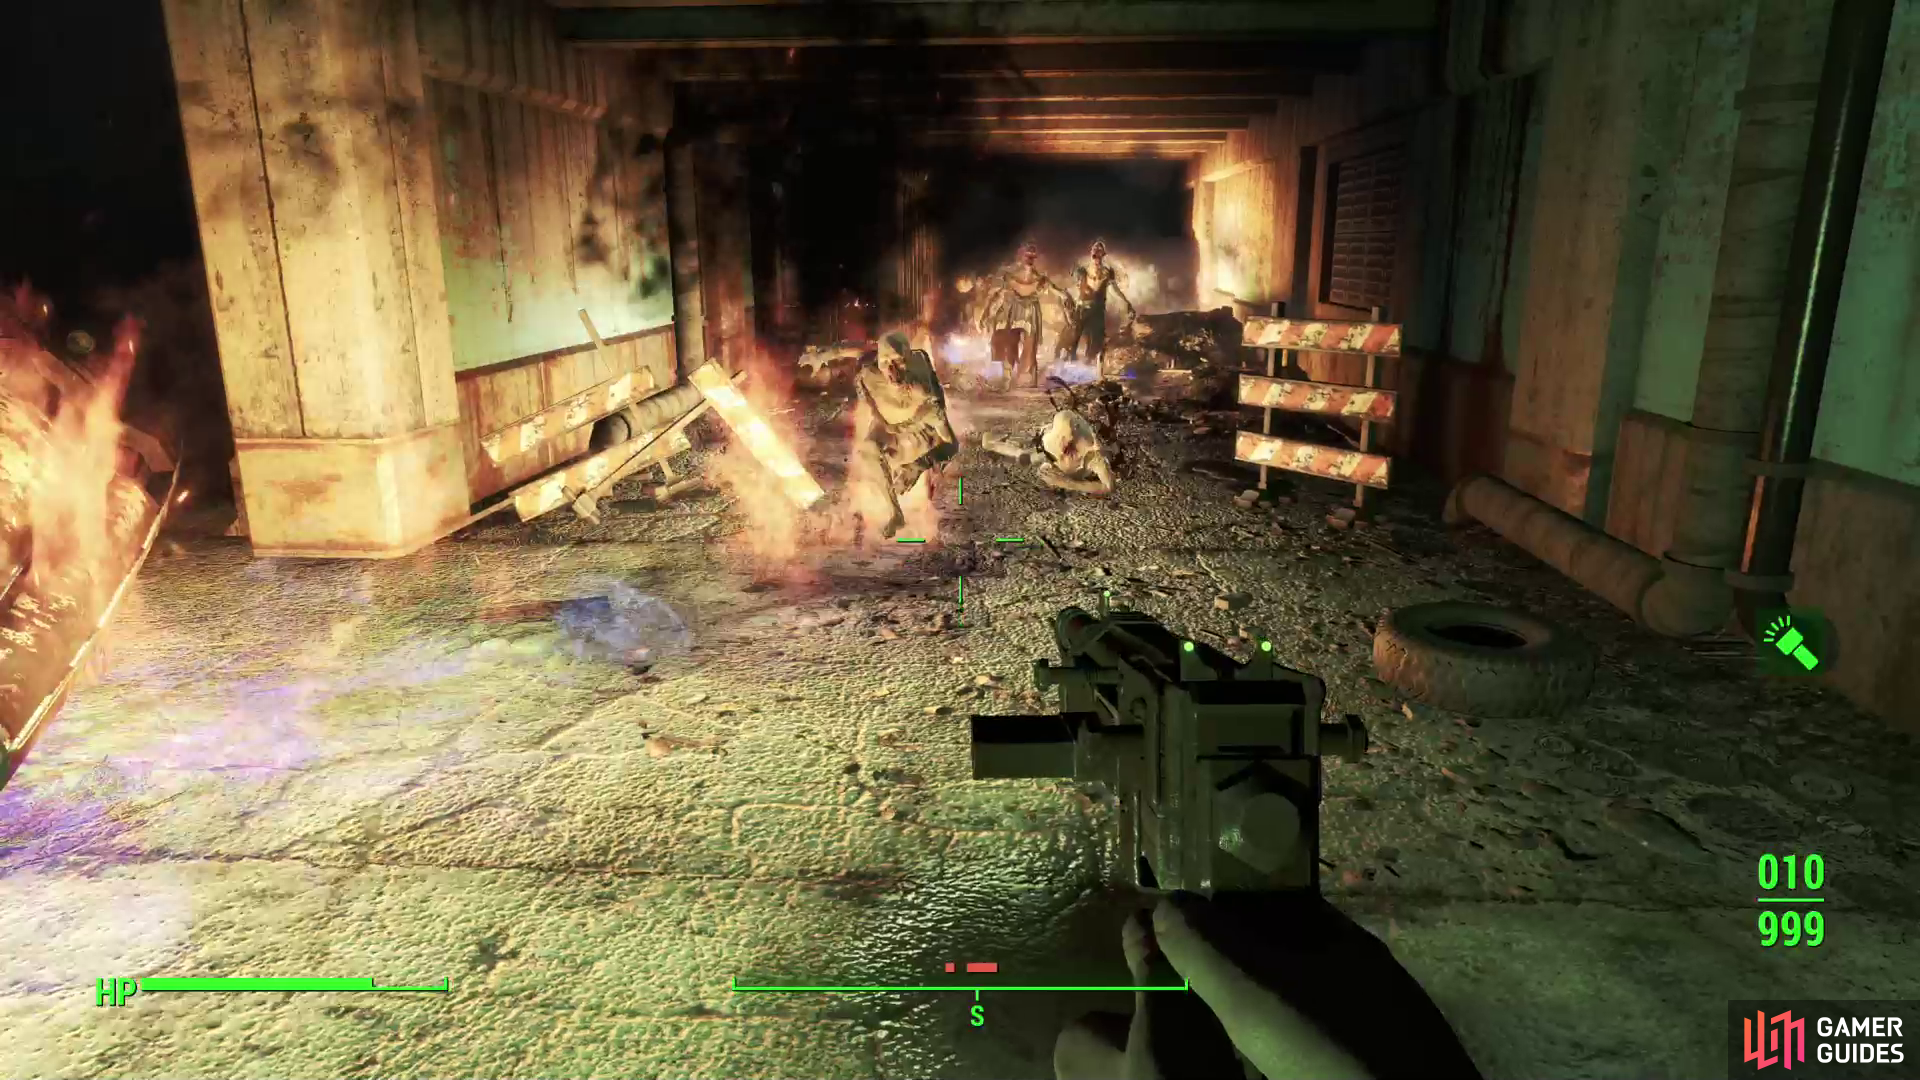

Depending on which door you use to enter, you can either light an oil slick to blunt the charge of some Ghouls, (left), or hack a terminal to distract the Ghouls with a Protectron. (right)
Parking Garage
The Parking Garage, just northwest of Super Duper Mart, has an office you can loot, but there’s relatively little of interest to be found above ground. Two doors - one down some stairs - will take you to the more interesting underground area. It doesn’t matter which you go down, both have their advantages. There’s a mob of Ghouls down below, and if you go the stairs route, you can hack a Terminal [Novice] to activate a Protectron to draw their attention. If you go the door route, you can lure them to you and shoot an oil slick, which should harm or kill the Feral Ghouls caught in the inferno. Either way, once they’re dead, pick the locked door [Novice] to the caged-in area, beyond which you can find an Explosives Box and a First Aid Box.
Note that some of these Ghouls can be moderately leveled (you can see Roamers and Stalkers, depending on your level). Because there’s numerous enemies in such a small area, and you zone into this area, it’s not a terrible spot to farm for legendary items. The relatively low maximum level of enemies and the fact that the Protectron can spawn as the area’s legendary critter does hinder the area’s attractiveness as a legendary farm, however.
Slocum Joe’s Basement
On the corner north of the Red Rocket station you can find the door to Slocum Joe’s a cafe with some scrap you can salvage, but little in the way of standout loot. If you head downstairs you’ll find a door leading to Slocum Joe’s Basement, which at the moment isn’t much more interesting than the aboveground area. There’s some junk you can pick up and a Bookcase you can interact with to reveal a nonfunctional elevator. This will become active during the quest [![]() Tradecraft] later on in the game, making this place more interesting, but at the moment, there’s little to recommend it.
Tradecraft] later on in the game, making this place more interesting, but at the moment, there’s little to recommend it.
Laundromat
The Laundromat is located in a building adjacent to Slocum Joe’s, east of the Red Rocket station. There’s not much to recommend this area save some scrap and a First Aid box.
Pharmacy
The Pharmacy can be found along the southeastern edge of Lexington, and despite the promise of such a business, you’ll find little beyond a few scattered chems and a First Aid box inside.
No Comments