
| Important Items in This Area |
|---|
| Astoundingly Awesome Tales #6 |
| Astoundingly Awesome Tales #7 |
| Railway Rifle |
| Total Hack |
Tenpines Bluff
Continue east from ![]() USAF Satellite Station Olivia to finally reach Tenpines bluff, the town the Minutemen need to protect, but don’t have the manpower to handle. When you arrive you’ll be accosted by a Settler, whose welcome includes pointing a gun in your face. How rude. Tell him you’re with the Minutemen and then ask about their troubles and he’ll ask you to eliminate some Raiders for him, who happen to have made their base in the
USAF Satellite Station Olivia to finally reach Tenpines bluff, the town the Minutemen need to protect, but don’t have the manpower to handle. When you arrive you’ll be accosted by a Settler, whose welcome includes pointing a gun in your face. How rude. Tell him you’re with the Minutemen and then ask about their troubles and he’ll ask you to eliminate some Raiders for him, who happen to have made their base in the ![]() Corvega Assembly Plant, a ways to the south. Looks like there’s some more exploring to do. It’s a bit of a detour, but there’s no reason not to explore everything from
Corvega Assembly Plant, a ways to the south. Looks like there’s some more exploring to do. It’s a bit of a detour, but there’s no reason not to explore everything from ![]() Tenpines Bluff to the Corvega Assembly Plant, which is located in
Tenpines Bluff to the Corvega Assembly Plant, which is located in ![]() Lexington.
Lexington.
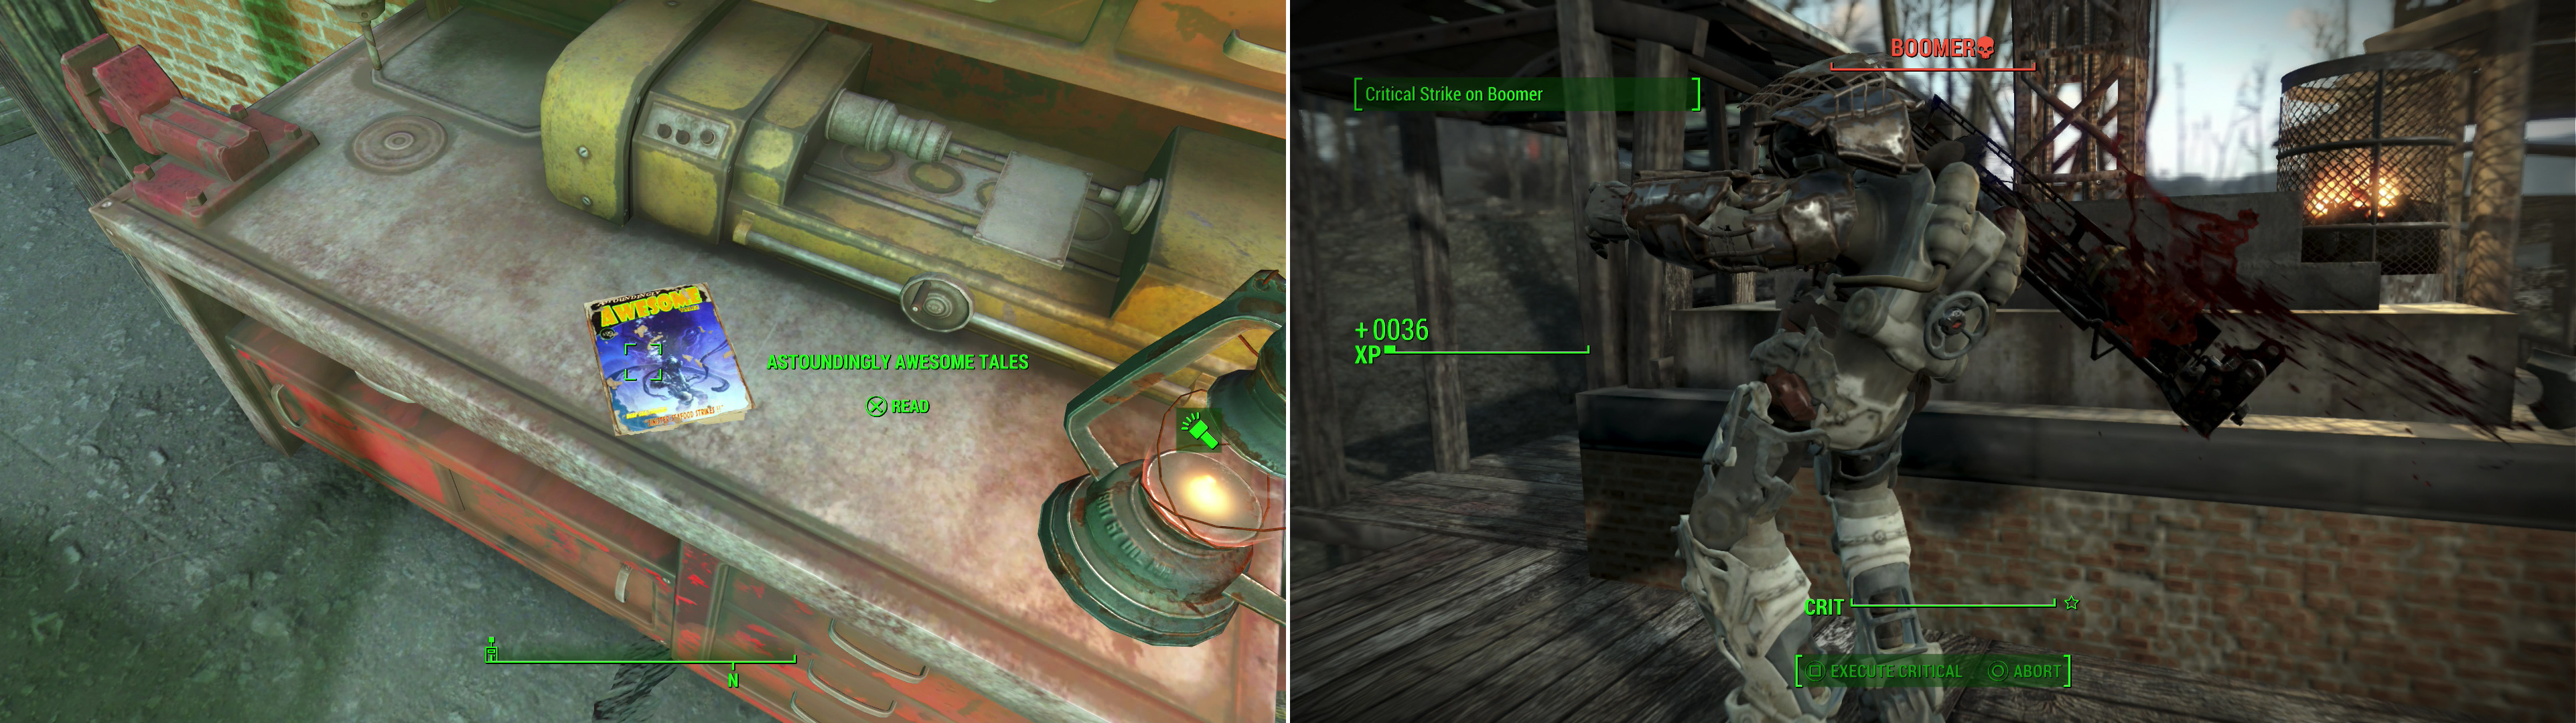
Search the Workshop at Outpost Zimonja for an issue of Astoundingly Amazing Tales (left), but first you’ll need to deal with the Power Armor-clad, Fat Man-armed Raider named Boomer (right).
Outpost Zimonja
North-east of Tenpines Bluffs you can find an unmarked house, where a random encounter can occur, making this place potentially very boring, or very interesting, depending on what encounter you get. Something guaranteed to be interesting can be found to the west, however. West of this random encounter house you’ll find some tracks, which you should follow south, past a blue boxcar, then beyond an orange boxcar. Beyond these boxcars you’ll find a suit of Power Armor in a cage and another blue boxcar on the tracks. If you go inside this second blue boxcar you can find a Terminal [Advanced], which, if you can hack, will open the cage door and give you access to the partial suit of Power Armor in the cage. This could help out in a tough encounter shortly, or you could just drop it off at ![]() Sanctuary next to your other suit of Power Armor.
Sanctuary next to your other suit of Power Armor.
Press on once you’ve cleared the place (if in fact it needed clearing), as there’s an opportunity to gain some nice loot… at the cost of having to fight some very powerful enemies. Foes that may be too powerful at this point in time, but they can be beaten. Have a long ranged weapon (a Hunting Rifle, a ![]() Pipe Sniper Rifle or a Pipe Bolt Rifle will all work) and Continue north-east to find a ramp leading up to an elevated highway. From here head north along the road until you find a Raider outpost to the east. Here you’ll find the unique Raider named Boomer. He’s wearing Power Armor and has a
Pipe Sniper Rifle or a Pipe Bolt Rifle will all work) and Continue north-east to find a ramp leading up to an elevated highway. From here head north along the road until you find a Raider outpost to the east. Here you’ll find the unique Raider named Boomer. He’s wearing Power Armor and has a ![]() Fat Man… and he’s not afraid to use it. He is also accompanied by some mid-level Raiders, including Raider Scum and Raider
Fat Man… and he’s not afraid to use it. He is also accompanied by some mid-level Raiders, including Raider Scum and Raider ![]() Psychos. For all that, however, you have the advantage of range and distance, although it’s possible you could be detected if you make too much commotion, and they can find their way up here, if you’re cautious you should be safe.
Psychos. For all that, however, you have the advantage of range and distance, although it’s possible you could be detected if you make too much commotion, and they can find their way up here, if you’re cautious you should be safe.
The goal, then, is to make sure you’re undetected, sneak out of cover (use the large concrete support pylons for cover) and take a shot at Boomer with your long range weapon. If you’re feeling lazy, use VATS to line up the shot, then cancel out of VATS without firing, and take the shot on your own. After shooting, duck behind cover again. Repeat until he’s dead. After that, the rest of the Raiders can be eliminated in the same way, but they really don’t require so much caution. When you go to storm the camp, be wary of a Machinegun Turret MK I, which can absorb a fair bit of punishment. On Boomer’s body you can find some pieces of Raider Power Armor as well as his Fat Man. Also, on a Workshop in the camp you can find an issue of Astoundingly Awesome Tales . Grab it, then activate the Workshop to claim this area. Before you move on, search the garden to the east of the tower to find a ![]() Mini Nuke half buried in the dirt.
Mini Nuke half buried in the dirt.
From ![]() Outpost Zimonja follow a dirt road south-east to find the front checkpoint to Outpost Zimonja, consisting of a truck, enhanced with two Machinegun Turrets MK I. There are also bound to be Attack Dogs and a Raider nearby, so stay frosty. Once they’re dead, loot the back of the truck to find an Explosives Box [Novice].
Outpost Zimonja follow a dirt road south-east to find the front checkpoint to Outpost Zimonja, consisting of a truck, enhanced with two Machinegun Turrets MK I. There are also bound to be Attack Dogs and a Raider nearby, so stay frosty. Once they’re dead, loot the back of the truck to find an Explosives Box [Novice].
General Atomics Galleria
Continue following the dirt road to the south-east until you find an asphalt road, near which you’ll find the ![]() General Atomics Galleria. As you enter the Galleria you’ll be pestered by a Greeter. Say whatever you want and he’ll direct you to The Director, who has an office in the center of the plaza.
General Atomics Galleria. As you enter the Galleria you’ll be pestered by a Greeter. Say whatever you want and he’ll direct you to The Director, who has an office in the center of the plaza.
Head to the northern end of the large Mr. Handy statue and take an elevator up to reach The Director, who will accuse you of being a criminal. Say whatever you want and the robot will ask if you’re the supervisor for the “Grand Reopening”. Say that you are (saying no will turn The Director hostile), after which it’ll ask for your ID. Pass a moderate speech check by saying “Manual Activation” to learn more about automatic activation. Alternatively you can ask about ID to get the hard speech check “Dropped It”, or you can pick the other hard speech check “Fake it”. Failing those speech checks, you can always hack the “Director Override Terminal’ [Master] - but if you’re following this guide, you’re probably not level twenty-one. If you pass any of the checks The Director will install a firmware update, reinstate combat inhibitors, designate you as the new supervisor and give you Pre-War Money x15. This makes all the encounters in the rest of this area much easier and allows you to take pretty much every item in the area without it counting as stealing, but it’s also less rewarding than going through the encounters, first. If you want to earn a bit more XP, pass on The Director for now. Either way, the encounters here will all be discussed.
From the entry arch, head into the first building to the north-west; this area will be explored clockwise, and this is the first stop on the way. Anyway, enter this building, Madden’s Boxing Gym, and you’ll find the robots Mack, Danny and The Champ. The Champ will, when you get too close, challenge you to a boxing match but will malfunction and use lethal attacks on you. He’s not too strong, just be sure to grab - and equip - some ![]() Boxing Gloves off the shelves to the south-east before you attack The Champ, or all the robots in the Galleria will turn hostile. Beat The Champ to scrap, then loot him. If you want to grab the weights around, they can be turned in to a lot of Lead - probably more than you’ll ever need. If you hack a door [Advanced] to the north-west you can find an already-opened safe with some
Boxing Gloves off the shelves to the south-east before you attack The Champ, or all the robots in the Galleria will turn hostile. Beat The Champ to scrap, then loot him. If you want to grab the weights around, they can be turned in to a lot of Lead - probably more than you’ll ever need. If you hack a door [Advanced] to the north-west you can find an already-opened safe with some ![]() Stimpaks and Pre-War Money inside. You can also hack the Madden’s Office Terminal [Novice] on a desk nearby which you can use to enforce a 25% Manager’s Sale in the Galleria. Nice. If you talked to The Director, The Champ will already be dead.
Stimpaks and Pre-War Money inside. You can also hack the Madden’s Office Terminal [Novice] on a desk nearby which you can use to enforce a 25% Manager’s Sale in the Galleria. Nice. If you talked to The Director, The Champ will already be dead.
Next stop is the General Atomics Outlet building, where a robot named Sprocket will show off some Mr. Handy robots, which all malfunction, then it’ll present a Mr. Gutsy, who goes berserk and attacks. It’s a fairly dangerous foe, so you may want to avoid this encounter if you can’t take the robot out, a task which will be easier if you take cover during Sprocket’s demonstration. If you talked to The Director, all the robots save Sprocket will already be disabled. However you deal with the situation, there’s a locked door [Expert], beyond which you can find a Tool Chest [Novice]. If you don’t have enough ranks in Locksmith you can also search the Cash Register to find the Galleria Outlet Workroom Key, which opens this lock.
Make your way over to the Handy Eats building next door and talk to the Waitron, who will direct you to take a seat at the empty booth; the only one without skeletons polluting it. Once you’re seated, the Waitron will ask how you want your meal; pass a moderate speech check “Not hungry” or the Waitron and the Cook Handy will both attack you. If you dealt with The Director, the Waitron will sell you food, instead.
Now head over to the Back Alley Bowling building, where the attendant Tenpin will charge you $5,000 for a game and it won’t accept Caps. Pass an easy speech check “Can I just look?” to gain the freedom to explore - and loot - the bowling alley. If you handled The Director, you’ll be allowed to explore without passing any checks. There are plenty of Bowling Balls and Bowling Pins lying around which can be broken down into Plastic, should you need it. For more interesting loot, however, search some Nuka Cola Vending Machines to the east, one of which contains a Nuka Cola Quantum and two Nuka Cola Cherrys. In a room behind (east of) Tenpin’s counter you can find a Jangles the Moon Monkey doll and a Safe [Advanced]. Next head down a walkway along the lanes to reach some back rooms, one of which is occupied by a robot named Kingpin. More importantly you can loot some useful items here, as well as a Steamer Trunk and a Tool Case. Head upstairs using the stairs west of the room Kingpin occupies to reach a small room with some ammo on a shelf. The rest of the bowling alley is less interesting.
The next building is ![]() Fallon’s Department Store, where you’ll find the extremely irritable Reg. He’ll let you look at items - look, but not touch. Move anything around, whether it’s stealing or not, and Reg will turn hostile and attack. If you talked to The Director Reg will sell you clothes.
Fallon’s Department Store, where you’ll find the extremely irritable Reg. He’ll let you look at items - look, but not touch. Move anything around, whether it’s stealing or not, and Reg will turn hostile and attack. If you talked to The Director Reg will sell you clothes.
The building to the south is a bakery, where a bored Mr. Handy named Crisp will count the bakery orders numbers. He’ll count from 12 to number 20, but after reaching twenty he’ll just restart. In the Pulowski Preservation Shelter to the south you can find a corpse with a Bakery Ticker #47 which does nothing to help you get service. A skeleton in the bakery has the equally useless #22, while Bakery Tickets #82, #83 and #84 are on the counter. In the back room a Mr. Handy named Torte will complain about you being in his kitchen, but he won’t act against you. If you dealt with The Director you’ll be able to buy food from Crisp.
Finally, head south-west into a coffee shop to find Bean, who will offer to serve you coffee. Ask about a gas leak to learn that, well, there indeed is one. If you ask for coffee, make a run for it, as an explosion will rip through the shop as Bean makes the coffee. If you talked to The Director, the robot will still offer you coffee, but it’ll switch to self-serve. You can also buy some junk from him, for what that’s worth.
You’re now done with the General Atomics Galleria. If you haven’t yet, go deal with The Director, then grab everything that previously required you to steal, which no longer does.
Lake Quannapowitt
North of General Atomics Galleria you can find the heavily irradiated ![]() Lake Quannapowitt, which is infested with
Lake Quannapowitt, which is infested with ![]() Mirelurks, both weak and strong. Their numbers make them a real nuisance, however, so there’s no shame in avoiding this place until you have better means of dealing with them. If you can manage it, however (shotgun blasts to the face at close range are the best means of dealing with them) make your way to the northern part of the lake to find a small building, inside of which you can find the Monitoring Station Terminal (seems this lake was radioactive even before the Great War) and the notes “Legal Notice” and “Fishing Tournament Ad”. Loot a Large Toolbox [Novice] then… well, that’s pretty much it for this place. Not very exciting.
Mirelurks, both weak and strong. Their numbers make them a real nuisance, however, so there’s no shame in avoiding this place until you have better means of dealing with them. If you can manage it, however (shotgun blasts to the face at close range are the best means of dealing with them) make your way to the northern part of the lake to find a small building, inside of which you can find the Monitoring Station Terminal (seems this lake was radioactive even before the Great War) and the notes “Legal Notice” and “Fishing Tournament Ad”. Loot a Large Toolbox [Novice] then… well, that’s pretty much it for this place. Not very exciting.
Dark Hollow Pond
You can find a body of water to the south of the General Atomics Galleria as well, the somewhat more humble ![]() Dark Hollow Pond. Around (and within) the lake you can find several Mirelurks, and along the northern end of the pond dwell two Raiders, likely in conflict with the nasty mutant crabs. Ensure you’re the last thing living around the pond and you can secure for yourself all the… nothing… that is around here. Huh. Oh well. Ignore the buildings further south for now and return to the General Atomics Galleria.
Dark Hollow Pond. Around (and within) the lake you can find several Mirelurks, and along the northern end of the pond dwell two Raiders, likely in conflict with the nasty mutant crabs. Ensure you’re the last thing living around the pond and you can secure for yourself all the… nothing… that is around here. Huh. Oh well. Ignore the buildings further south for now and return to the General Atomics Galleria.
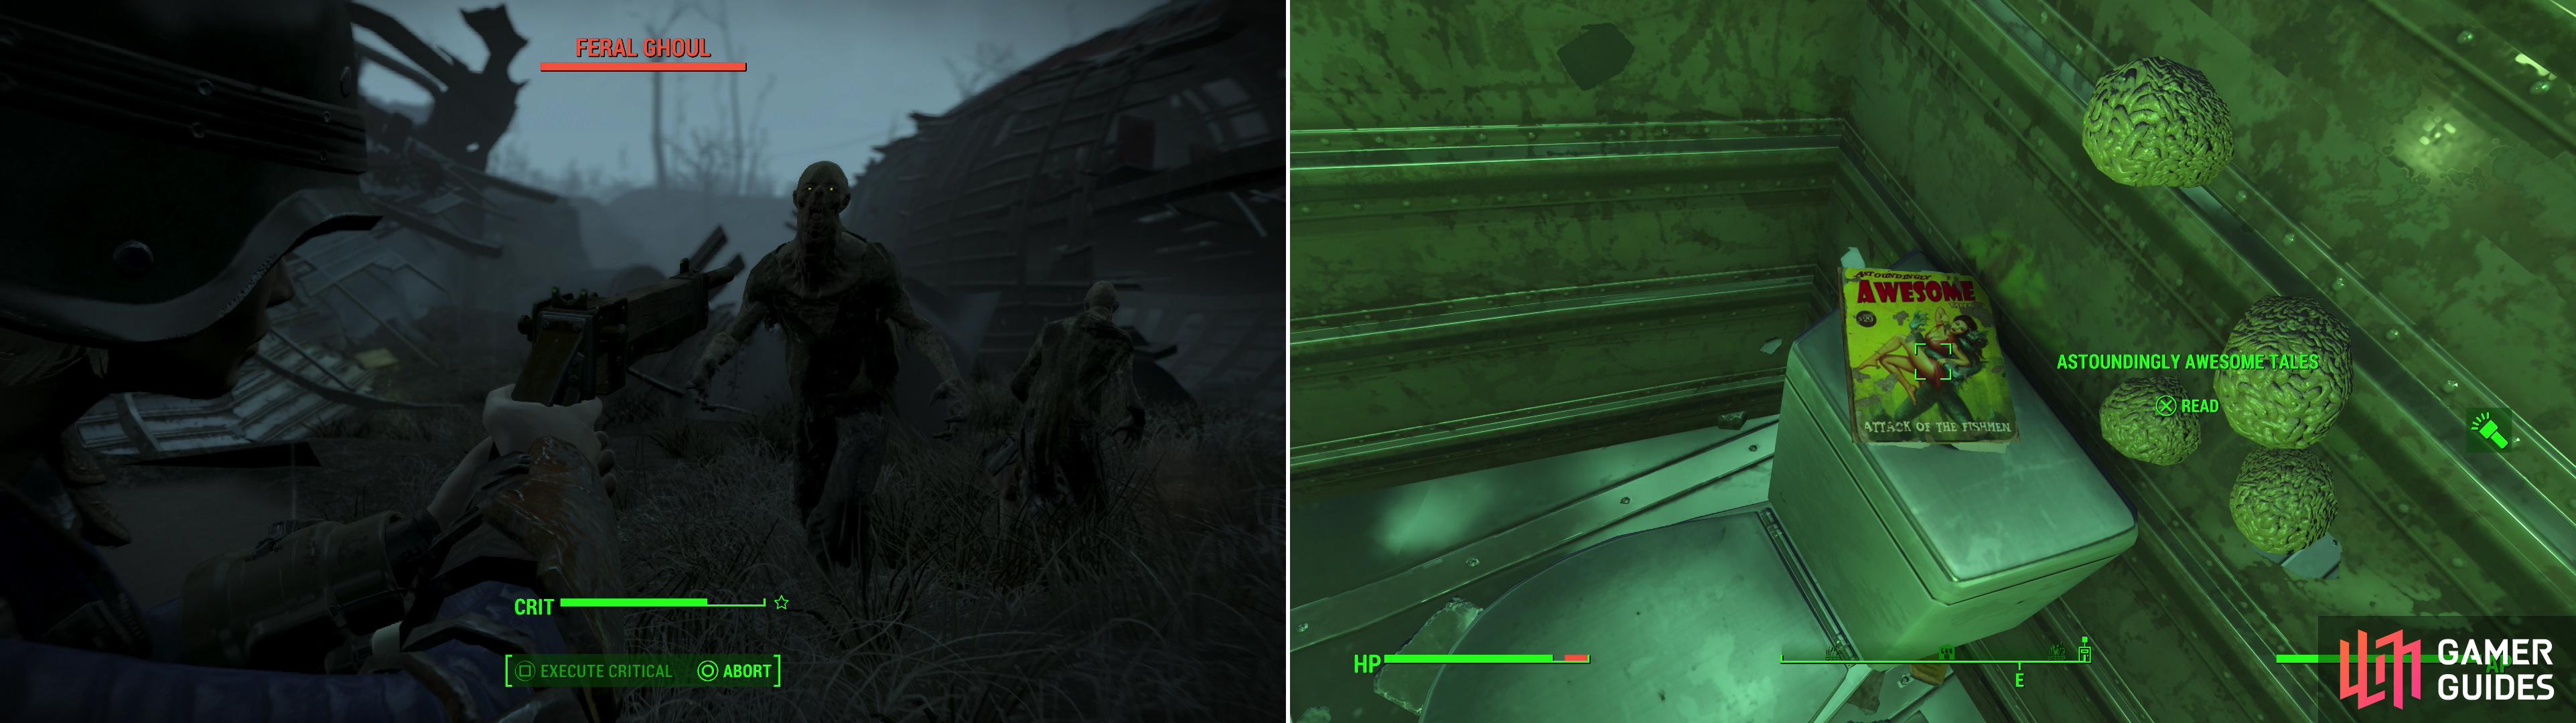
Clear out whatever foes are lurking around the Skylanes Flight 1981 (left) then search the wreckage for another issue of Astoundingly Awesome Tales (right).
Skylanes Flight 1981
More interestingly, head into the hills west of General Atomics Galleria to find a crashed plane, marked on your map as “![]() Skylanes Flight 1981”. At this area you may find some Feral Ghouls of varying types, although this encounter isn’t guaranteed. You can also find a random encounter here, even on subsequent visits.
Skylanes Flight 1981”. At this area you may find some Feral Ghouls of varying types, although this encounter isn’t guaranteed. You can also find a random encounter here, even on subsequent visits.
Kill them all, then turn your attention to the wreckage. There are three cylindrical compartments to loot, running north-west and two wings. In the south-eastern most compartment there’s an Ammo Box and a Suitcase [Novice], a Duffle Bag and a Hidden Compartment [Master] you can loot on the bottom half, and on the top half you can find a dead Scavenger, a First Aid Box and in the two bathrooms you can find some ![]() Rad-X and a Stimpak (southern bathroom) and a copy of Astounding Awesome Tales #6 in the northern bathroom. If you go upstairs into the cockpit you can find another suitcase [Novice] and the “Flight Data Recorder”.
Rad-X and a Stimpak (southern bathroom) and a copy of Astounding Awesome Tales #6 in the northern bathroom. If you go upstairs into the cockpit you can find another suitcase [Novice] and the “Flight Data Recorder”.
At the base of the wing you can find another dead Scavenger, while in the bottom half of the second section of the plane you can find two Suitcases [Novice] and a Safe [Expert]. A third dead Scavenger and yet another Suitcase [Novice] awaits above you. The third compartment, like all the others, has some unlocked containers for you to pillage, but nothing worth mentioning. Finally make your way up to the cliffs to the south to find the second wing, which requires some jumping to get onto. Your reward for this feat of agility? Some toys, a Suitcase and a First Aid Box.
Wildwood Cemetery
From Skylanes Flight 1981 head south-west to find ![]() Wildwood Cemetery. For now, focus on a road north of the cemetery, where a random encounter may occur. While what you encounter may vary (a Legendary foe isn’t unlikely) there tends to be some Bloodbug Hatchlings clinging to a truck and some nearby rocks, and a Glowing Radroach on the road.
Wildwood Cemetery. For now, focus on a road north of the cemetery, where a random encounter may occur. While what you encounter may vary (a Legendary foe isn’t unlikely) there tends to be some Bloodbug Hatchlings clinging to a truck and some nearby rocks, and a Glowing Radroach on the road.
Once the random encounter is done with (if indeed you experience one) turn your attention to the cemetery to the south. Near a tree (from which many paved paths radiate out) you’ll find a host of zombies… err… “Ghouls” wandering about, including a Glowing One. Put them down, then search the north-eastern end of this tree to find an issue of Total Hack lying on the ground. Once that’s yours, you can explore the mausoleums on a hill to the north and east which are… uninteresting, to say the least. In one building to the south with a red door, however, you’ll find a creepy shrine, inside of which a Raider dwells. Further south you can find a small house, inside of which is an Explosives Crate near a bed.
Rotten Landfill
Leave Wildwood Cemetery and head west and slightly south to find the ![]() Rotten Landfill, the main feature of which is a hill into which some Mole Rats have built a surprisingly spacious den. Kill the Mole Rats (both Rabid and normal) inside and loot a Steamer Trunk full of goodies, then exit the Mole Rat mound via a tunnel to the south to find a small shack, around which are plenty of dead Mole Rats and a dead Settler. Loot them all, then loot a First Aid Box in the shack itself. Uphill to the west you can find an unmarked shack which seems pretty innocuous, but inside you’ll encounter a burrowed Radscorpion. Put it down, then loot a cage [Expert], inside of which is a radioactive barrel. You’ll catch RADS, but there are four
Rotten Landfill, the main feature of which is a hill into which some Mole Rats have built a surprisingly spacious den. Kill the Mole Rats (both Rabid and normal) inside and loot a Steamer Trunk full of goodies, then exit the Mole Rat mound via a tunnel to the south to find a small shack, around which are plenty of dead Mole Rats and a dead Settler. Loot them all, then loot a First Aid Box in the shack itself. Uphill to the west you can find an unmarked shack which seems pretty innocuous, but inside you’ll encounter a burrowed Radscorpion. Put it down, then loot a cage [Expert], inside of which is a radioactive barrel. You’ll catch RADS, but there are four ![]() RadAway inside the cage, three of which are on the barrel, so it’s a worthwhile trade-off.
RadAway inside the cage, three of which are on the barrel, so it’s a worthwhile trade-off.
Bedford Station
Travel north-west to find some train tracks, which lead to ![]() Bedford Station. Follow these tracks north, killing the Feral Ghouls lurking (and lying) around and searching boxcars as you go. Eventually you’ll find a building - a white tower also west of the tracks - you can find the Stationmaster’s Terminal, which contains the
Bedford Station. Follow these tracks north, killing the Feral Ghouls lurking (and lying) around and searching boxcars as you go. Eventually you’ll find a building - a white tower also west of the tracks - you can find the Stationmaster’s Terminal, which contains the ![]() Holotape: Bedford Station Recording. After you listen to it, you can find the body of Dutchman outside, on which is the note “Dutchman’s Instructions”, as well as some other loot. Continue north until you find another building west of the tracks, inside of which you can find a Steamer Trunk full of loot in the south-western corner of the building, on a loft. Reach it by using a red shipping crate as a ramp. You can also grab the “Cargo Handler’s Note” on the ground near a trashbin, for what that’s worth.
Holotape: Bedford Station Recording. After you listen to it, you can find the body of Dutchman outside, on which is the note “Dutchman’s Instructions”, as well as some other loot. Continue north until you find another building west of the tracks, inside of which you can find a Steamer Trunk full of loot in the south-western corner of the building, on a loft. Reach it by using a red shipping crate as a ramp. You can also grab the “Cargo Handler’s Note” on the ground near a trashbin, for what that’s worth.
Before you head off, there’s one more bit of loot to gain. The Bedford Station Recording alluded to some imminent struggle and the Cargo Handler’s Note mentioned some corporate malfeasance, but the Dutchman’s Instructions note indicated some hidden loot lying around. Return south to the white tower, then continue south a ways along the tracks until you find a blue boxcar. Hop on inside (there’s a ramp on the eastern side) and search the southern end of the boxcar to find a skeleton near a Sleeping Bag (if you need a bit of a nap - and a save, you Survival Mode players). Of more interest is a Railway Rifle lying atop a a Cooler, with some ![]() Railway Spikes lying on the ground nearby. This is a rather powerful, quite rare gun, but you should avoid using it recklessly, as its ammo can be quite rare.
Railway Spikes lying on the ground nearby. This is a rather powerful, quite rare gun, but you should avoid using it recklessly, as its ammo can be quite rare.
Starlight Drive-In
Next stop on this exploration run is the ![]() Starlight Drive In, which is south-west of the Bedford Station - you can just follow the tracks south and, when you reach a bridge, follow a road below it to the west. In the parking lot you’ll be attacked by Mole Rats, but the blue building that dominates the drive-in is more interesting. First, disarm a
Starlight Drive In, which is south-west of the Bedford Station - you can just follow the tracks south and, when you reach a bridge, follow a road below it to the west. In the parking lot you’ll be attacked by Mole Rats, but the blue building that dominates the drive-in is more interesting. First, disarm a ![]() Bottlecap Mine on the counter, then try to safely trigger another bomb under a sink near the door. Head inside the building, grab a Nuka Cola Cherry on a shelf under the counter then climb two flights of stairs to find a skeleton on a mattress with a gun near it. Leave the building and find a shack to the west [Novice], within which you’ll find a Workshop, which, when activated, will give you control over this area. Just be sure to pop some Rad-X and remove all the junk in the radioactive pool in the middle of the parking lot. Not just the barrels, either, you need to get rid of the traffic cones, the mannequin, everything. Break it all down and the pit should no longer be radioactive. As for the building/screen to the south-west, the only interesting thing here is a Footlocker on top of the screen which contains the Back Storage Key, which in turn bypasses the [Novice] lock leading to the Workshop.
Bottlecap Mine on the counter, then try to safely trigger another bomb under a sink near the door. Head inside the building, grab a Nuka Cola Cherry on a shelf under the counter then climb two flights of stairs to find a skeleton on a mattress with a gun near it. Leave the building and find a shack to the west [Novice], within which you’ll find a Workshop, which, when activated, will give you control over this area. Just be sure to pop some Rad-X and remove all the junk in the radioactive pool in the middle of the parking lot. Not just the barrels, either, you need to get rid of the traffic cones, the mannequin, everything. Break it all down and the pit should no longer be radioactive. As for the building/screen to the south-west, the only interesting thing here is a Footlocker on top of the screen which contains the Back Storage Key, which in turn bypasses the [Novice] lock leading to the Workshop.
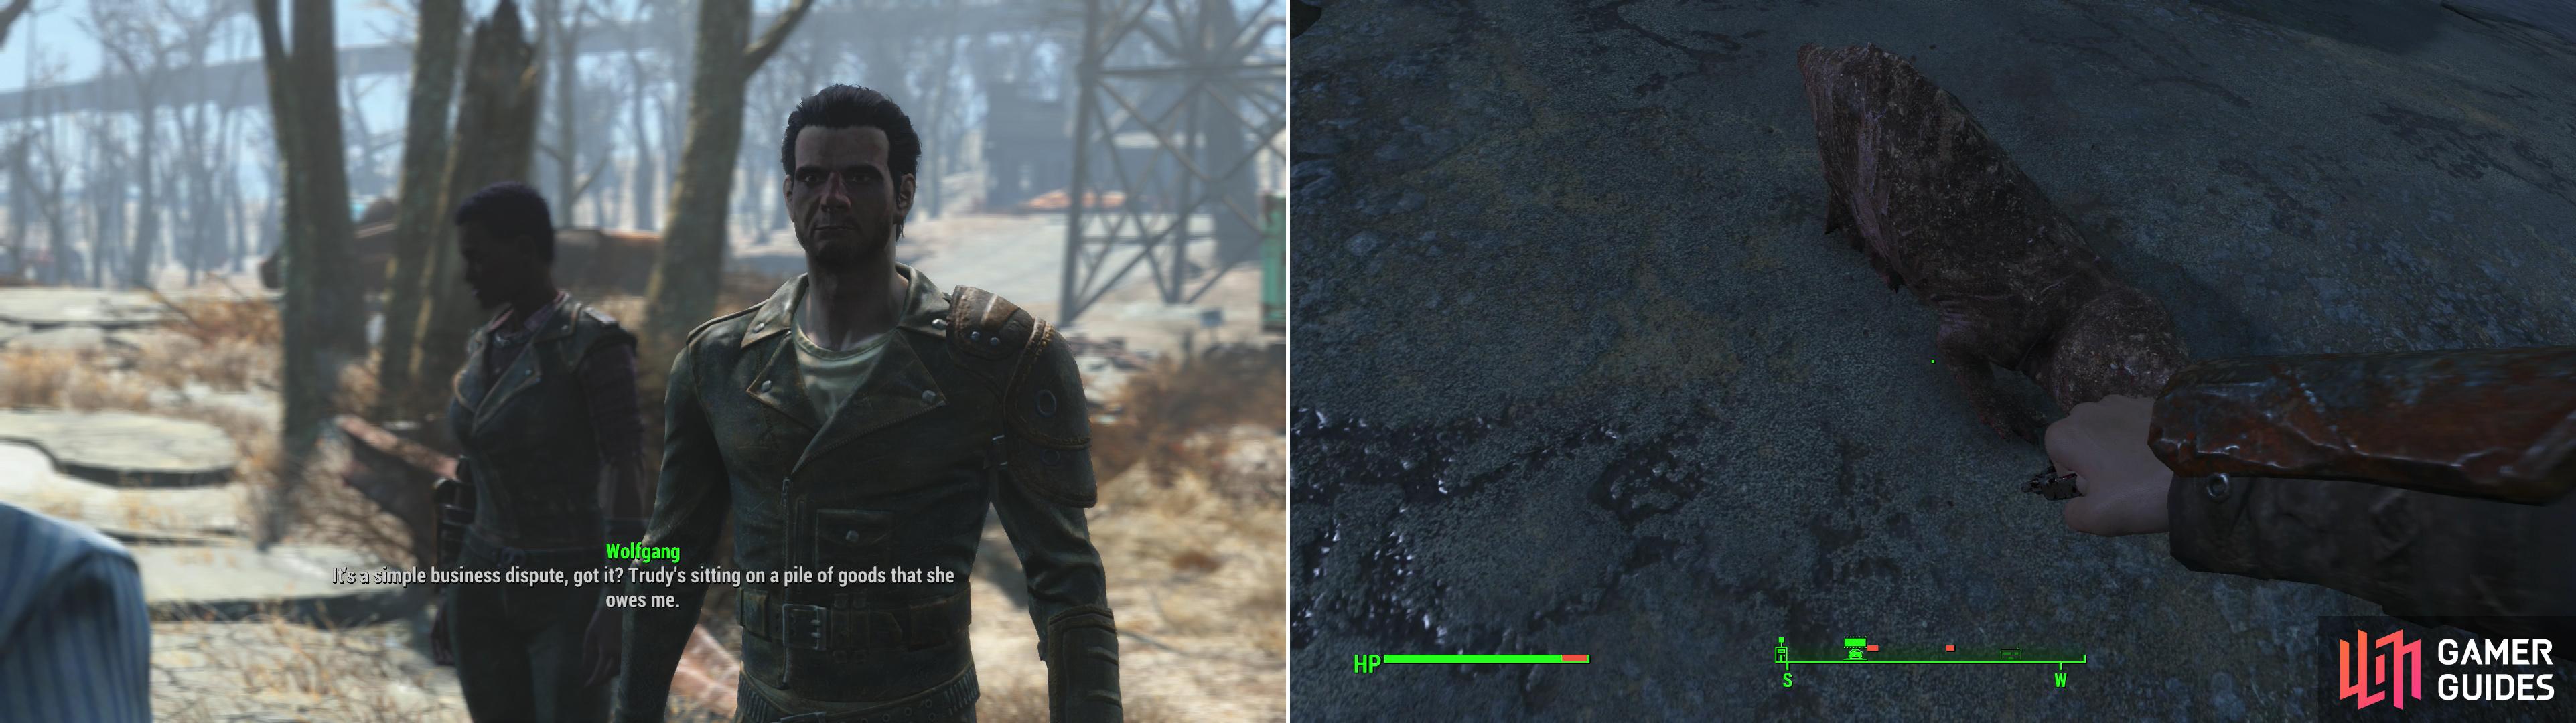
Wolfgang and Trudy are having a dispute, which is on the very of turning violent (left). Kill the Mole Rats infesting the Starlight Drive-In to claim the place as a new settlement (right).
Drumlin Diner
There’s one more place worth exploring before you head down towards Lexington, and that’s the ![]() Drumlin Diner, which can be found to the west and slightly south of the Starlight Drive-In. Outside the diner you’ll hear two people arguing: Wolfgang (who is joined by his bodyguard, Simone) and Trudy. Approach Wolfgang and he’ll give you the ol’ wasteland greeting. Seems the two sides are arguing about money, and you came along at just the right moment to arbitrate between the two sides (talking to either of them starts the quest “
Drumlin Diner, which can be found to the west and slightly south of the Starlight Drive-In. Outside the diner you’ll hear two people arguing: Wolfgang (who is joined by his bodyguard, Simone) and Trudy. Approach Wolfgang and he’ll give you the ol’ wasteland greeting. Seems the two sides are arguing about money, and you came along at just the right moment to arbitrate between the two sides (talking to either of them starts the quest “![]() Order Up” ).
Order Up” ).
Your first option is to pass a series of speech checks with escalating difficulties to get Wolfgang to lower his gun, then you can rob him (46 Caps) and finally you can convince him to flee. This obviously ends the encounter in favor of Trudy. Alternatively you can decide to work for Wolfgang to get the money Trudy owes him. Pass the speech check “Ask For Money” and he’ll raise your base pay from 100 Caps to 125. A moderate and difficult speech check raise your pay by 25 Caps for each success, but a failure at any stage will drop you back down to 100, and if you robbed him earlier, you can only attempt the easiest of these checks.
Offer to talk to Trudy and head inside, where you’ll get two speech checks: “Threaten her” or “End peacefully”, either of which ends things peacefully. On the other hand, she’ll make you an offer similar to Wolfgang’s, paying you 100 Caps (which can be raised by 25 Caps the same way with speech checks) to kill Wolfgang. If you side with Trudy, she’ll sell you a selection of ammo and junk afterwards whereas if you help Wolfgang by killing Trudy he’ll take over the diner and sell you drugs. If you side with Wolfgang and talk Trudy into paying up, Trudy will stay in the diner, and Wolfgang will continue to hang around outside, in which case you’ll have access to both their wares.
| Objective | Reward |
|---|---|
| For resolving the dispute between Trudy and Wolfgang | 173 XP 100, 125 or 150 Caps |
No Comments