
| Important Items in This Area |
|---|
| Alien Blaster |
| Grognak the Barbarian |
| Picket Fences |
| Wasteland Survival Guide |
Time to get on with the trek to ![]() Diamond City. Fast-travel to the
Diamond City. Fast-travel to the ![]() Weston Water Treatment Plant and head south along the river to find a concrete structure. Climb up on it and ascend some stairs, then turn east to find a bridge spanning the river. This is the closest, easiest way to reach the island upon which Diamond City is located, but for now, let’s just use it to reach some areas of interest in the north-western corner of the island. Namely, the settlement of Oberlund Station and the
Weston Water Treatment Plant and head south along the river to find a concrete structure. Climb up on it and ascend some stairs, then turn east to find a bridge spanning the river. This is the closest, easiest way to reach the island upon which Diamond City is located, but for now, let’s just use it to reach some areas of interest in the north-western corner of the island. Namely, the settlement of Oberlund Station and the ![]() Beantown Brewery, which houses the Raiders who were rivals to the miscreants in the
Beantown Brewery, which houses the Raiders who were rivals to the miscreants in the ![]() Federal Ration Stockpile.
Federal Ration Stockpile.
Relay Tower 1DL-109
At the eastern end of the bridge head uphill to the south-east to find ![]() Relay Tower 1DL-109, where you’ll find a Relay Tower Terminal. Activate it and you should get several new radio signals, including a “Garbled Radio Beacon”, a “Distress Signal” and “Boston City Works Beacon”. Start things out by playing the “Boston City Works Beacon”, then head back west across the bridge, but keep your eyes south as you cross it to find a blue door leading to the “Operations” area. A reactor malfunction in Sublevel D? Sounds fun.
Relay Tower 1DL-109, where you’ll find a Relay Tower Terminal. Activate it and you should get several new radio signals, including a “Garbled Radio Beacon”, a “Distress Signal” and “Boston City Works Beacon”. Start things out by playing the “Boston City Works Beacon”, then head back west across the bridge, but keep your eyes south as you cross it to find a blue door leading to the “Operations” area. A reactor malfunction in Sublevel D? Sounds fun.
Head in the Operations building and loot the room you find yourself in to score a Wooden Crate [Novice]. Search behind some cardboard boxes in the south-western corner of the building to find a trap door leading to the Reactor Level. When you arrive, turn east and search a small room to find the Ham Radio from whence the signal originated. Turn it off and let the poor mechanic rest, then head into another room to the west to find a Tool Chest [Novice] and some junk near a leaky reactor that’s probably not worth picking up.
Return to the surface then make your way back to Relay Tower 1DL-109. Once there, bring up your Pip-Boy and play the “Distress Signal”, then head south-east to find some train tracks, which you should follow south, noting that the radio signal becomes clearer as you go. Find an overturned blue boxcar and search along its top (western side) to find a hatch on the roof, hidden behind a bush. Enter the box car and search around to find a body - presumably that of the woman on the radio. Other than that, however, there’s only a Wooden Crate [Novice] worth looting. Leave the boxcar and continue following the tracks south, south-east to find a white tower, in which you can find a trap door leading to a Waystation, in which you’ll find another dead woman… presumably the victim of some surgery gone very, very wrong. Grab some melee weapons, return to the surface and head back to Relay Tower 1DL-109.
Alien Blaster
If you were lucky enough to get the “Garbled Radio Beacon”, tune your Pip-Boy to that, then follow the faint signal north-east to ![]() Oberland Station. This area will be covered in detail soon enough, but for now, just get the map marker and from here, continue east to find some broken trees and a large, fiery, smoking trench in the ground. Oh yeah, and the UFO that caused the wreck. That’s right, the proverbial flying saucer that’s made an appearance in so many Fallout games. Examine the wreckage if you wish and from it head north-east over some mushroom covered rocks, then descend a dirt slope between two rock formations to find a cave in the rocks to the north. Inside this cave you’ll find an Alien, who is not friendly. Kill it and loot it for its coveted Alien Blaste r - a Fallout mainstay. It’ll also leave behind a healthy - but by no means adequate - supply of Alien Blaster Ammo. If you really, really love silly energy weapons, this is a weapon you’ll treasure, and if you get four ranks in the Science! perk, you can modify it to fire the much more common
Oberland Station. This area will be covered in detail soon enough, but for now, just get the map marker and from here, continue east to find some broken trees and a large, fiery, smoking trench in the ground. Oh yeah, and the UFO that caused the wreck. That’s right, the proverbial flying saucer that’s made an appearance in so many Fallout games. Examine the wreckage if you wish and from it head north-east over some mushroom covered rocks, then descend a dirt slope between two rock formations to find a cave in the rocks to the north. Inside this cave you’ll find an Alien, who is not friendly. Kill it and loot it for its coveted Alien Blaste r - a Fallout mainstay. It’ll also leave behind a healthy - but by no means adequate - supply of Alien Blaster Ammo. If you really, really love silly energy weapons, this is a weapon you’ll treasure, and if you get four ranks in the Science! perk, you can modify it to fire the much more common ![]() Fusion Cells. Just something to keep in mind.
Fusion Cells. Just something to keep in mind.
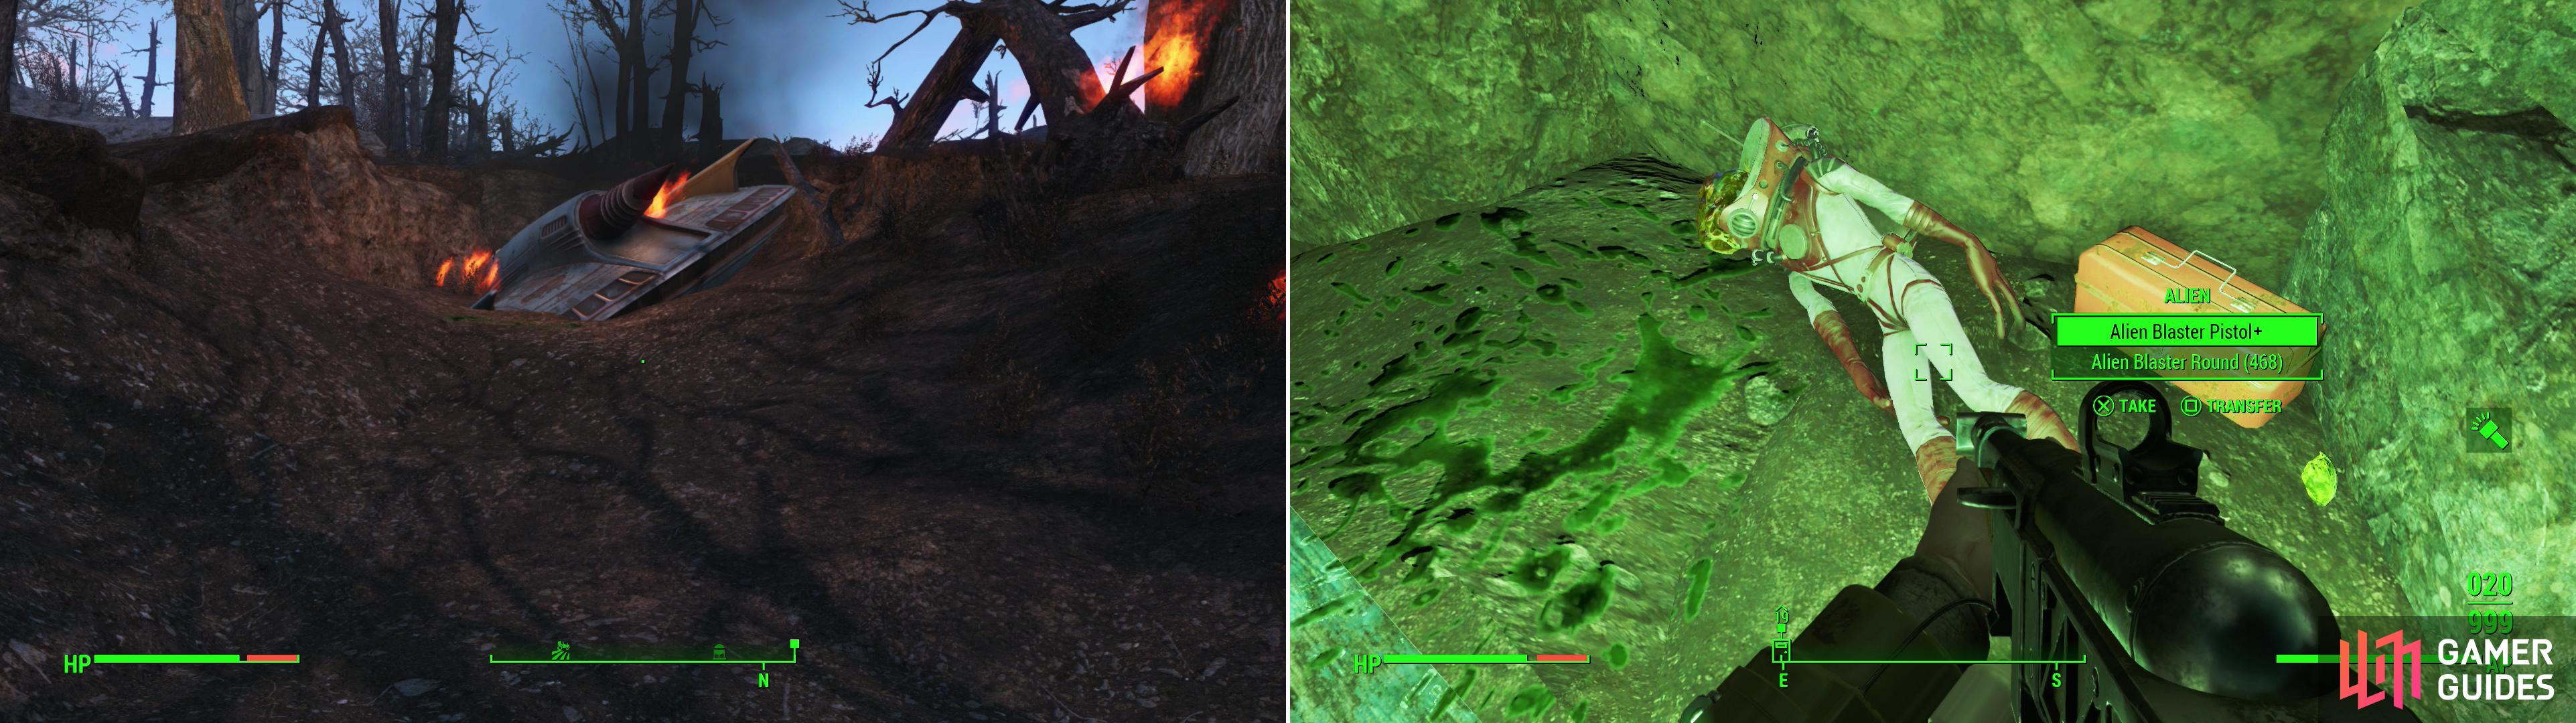
Follow the “Garbled Radio Beacon” to find a crashed alien ship (left) then track some green blood to a nearby cave to find a hostile Alien. Kill it and claim its might Alien Blaster (right).
Oberland Station
Return to the surface and backtrack to Oberland Station. When you reach the settlement, a Settler will talk to you about their troubles, telling you about some Raiders harassing them at ![]() Back Street Apparel. Agree to help out to start the quest “Raider Troubles at Oberlund” . It’s possible Preston may have given you this quest (or a similar one) after “First Steps” , but either way, it’ll play out the same way. So, new goal: head east across the northern part of this island, along the river, and find Back Street Apparel, but first…
Back Street Apparel. Agree to help out to start the quest “Raider Troubles at Oberlund” . It’s possible Preston may have given you this quest (or a similar one) after “First Steps” , but either way, it’ll play out the same way. So, new goal: head east across the northern part of this island, along the river, and find Back Street Apparel, but first…
Beantown Brewery
…Just north of Oberlund Station is Beantown Brewery, which is occupied by Raiders who opposed those at the Federal Ration Stockpile. If you’re going to beat up some Raiders for Oberland Station, why not clear out the Raiders on their doorstep, too? Outside you’ll notice the curious absence of any guards, which even the lamest of Raider factions can muster. Oh well. There are two entrances: the unlocked single door on the eastern side of the building, and the locked double doors [Advanced] on the western side. If you can pick the lock, there’s no reason not to take that route, but assuming the lowest common denominator, the approach will be covered from the front, instead.
Enter the building and head west to reach the reception room of the brewery. You’ll find your first Raider in this room or perhaps sleeping in the gift shop to the north. Go up some stairs to the west, then turn north down a hallway to reach the large brewery floor. From here, there are four ways to go: head east to reach a metal walkway, then descend some stairs, head west to reach a metal walkway after which you can find some stairs down to the south or to the west. Be wary of the western path, though, as there are Tripwires tied to explosives along this route. Finally, you can head up some stairs, across a metal walkway, and into a concrete structure in which the leader of these Raiders - Tower Tom - resides. There are also several other Raiders lurking on the factory floor and on the metal walkway here.
On the ground floor of the brewing area you can find a tunnel in the south-western corner of the room which leads to some stairs. Ascend the stairs and enter a passage to the west, ascending some concrete stairs to the south, where two more Raiders lurk. Kill them, then go through a door to the east [Novice], beyond which is a small office room occupied by some Radroaches. There’s also a Terminal which you can use to look at some data entries, most of which are corrupt, and none of which are terribly interesting.
Return to the ground floor and this time explore down a tunnel in the north-eastern corner of the chamber. Disarm the Tripwire rigged to a Combat Shotgun in the doorway, then head up an elevator to reach the room in which Tower Tom resides. Yeah, just another way to reach the big man. After he and his Raiders are dead, search his room to find a copy of Picket Fences on the floor between a mattress and a Steamer Trunk. Next, search the desk in the corner of the room to find the “![]() Gwinnett Brew Recipe”
Gwinnett Brew Recipe” ![]() Holotape , then hack Tower Tom’s Terminal [Novice], which mentions his feud with Red’s gang over at the Federal Ration Stockpile, and a Raider named Sparta he sent over to the
Holotape , then hack Tower Tom’s Terminal [Novice], which mentions his feud with Red’s gang over at the Federal Ration Stockpile, and a Raider named Sparta he sent over to the ![]() BADTFL Regional Office. It’ll also contain commentary about Red and Jared, if you killed them.
BADTFL Regional Office. It’ll also contain commentary about Red and Jared, if you killed them.
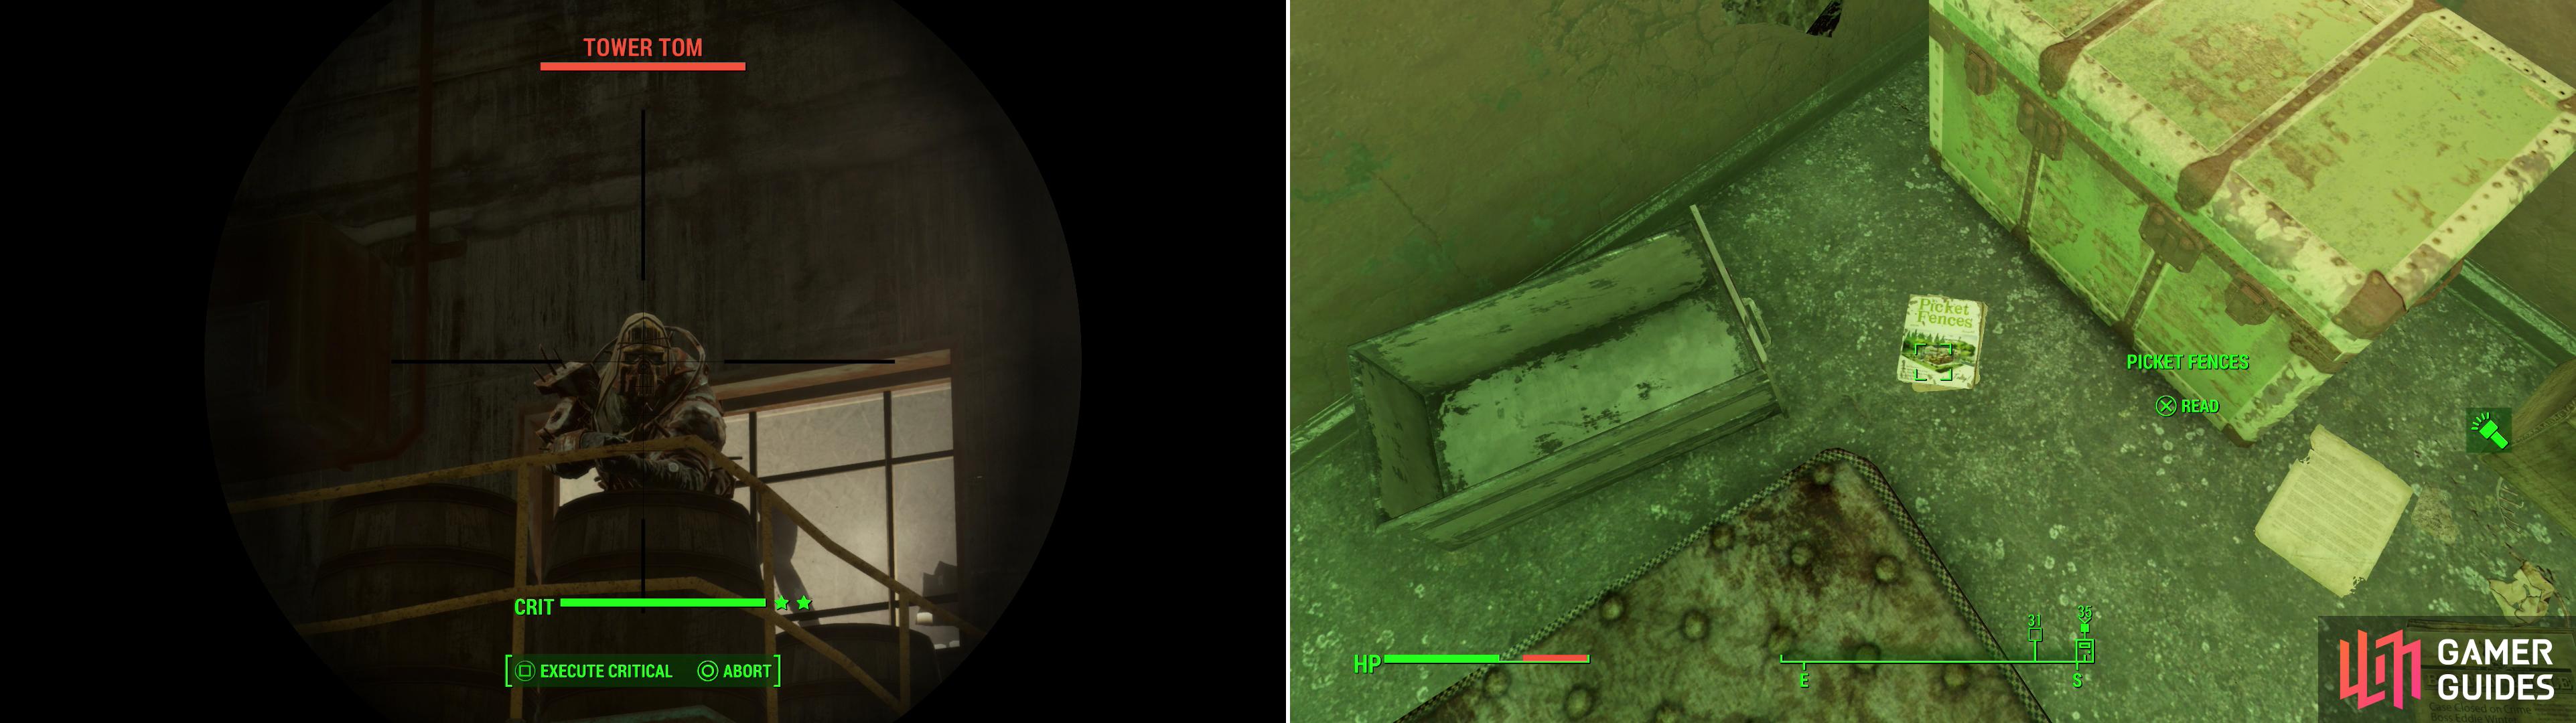
The Raiders at Beantown Brewery are led by a powerful Raider named Tower Tom (left). In the office he occupies you can find an issue of Picket Fences (right).
Wreck of the USS Riptide
With Tower Tom and his crew dead, there’s nothing left to keep you at the Beantown Brewery. Follow the coast south, then south-east, and finally east, ignoring any map markers that may pop up further south. Their time will come soon enough. Eventually you should find a road running along the river, which, if you follow will take you to a bridge. Near here you’ll find the only area worth exploring along the way; the ![]() Wreck of the USS Riptide.
Wreck of the USS Riptide.
There are a few ways to get aboard the ship, but first, if you’ve got a good long-ranged weapon, you can easily clear the ship of some - if not all - of the Raiders aboard. Once you’re ready, you can choose to swim across, catching yucky RADS and leaving yourself a sitting duck for any Raiders yet alive, or you can cross the bridge and, at the rusty, metal, formerly raise-able section, turn east north of the green control station to find some ladders leading down onto the ship. Onboard you’ll find several Raiders, including one wearing Power Armor, and the obligatory attack dog. When they’re dead, loot the eastern end of the ship (connected by wooden planks) to find a Steamer Trunk in the back of a APV. There’s also an Ammo Box [Novice] up a ladder to the east. On the western side of the ship, make your way past some metal stairs to reach the cabin, where you’ll find a Wasteland Survival Guide on a table.
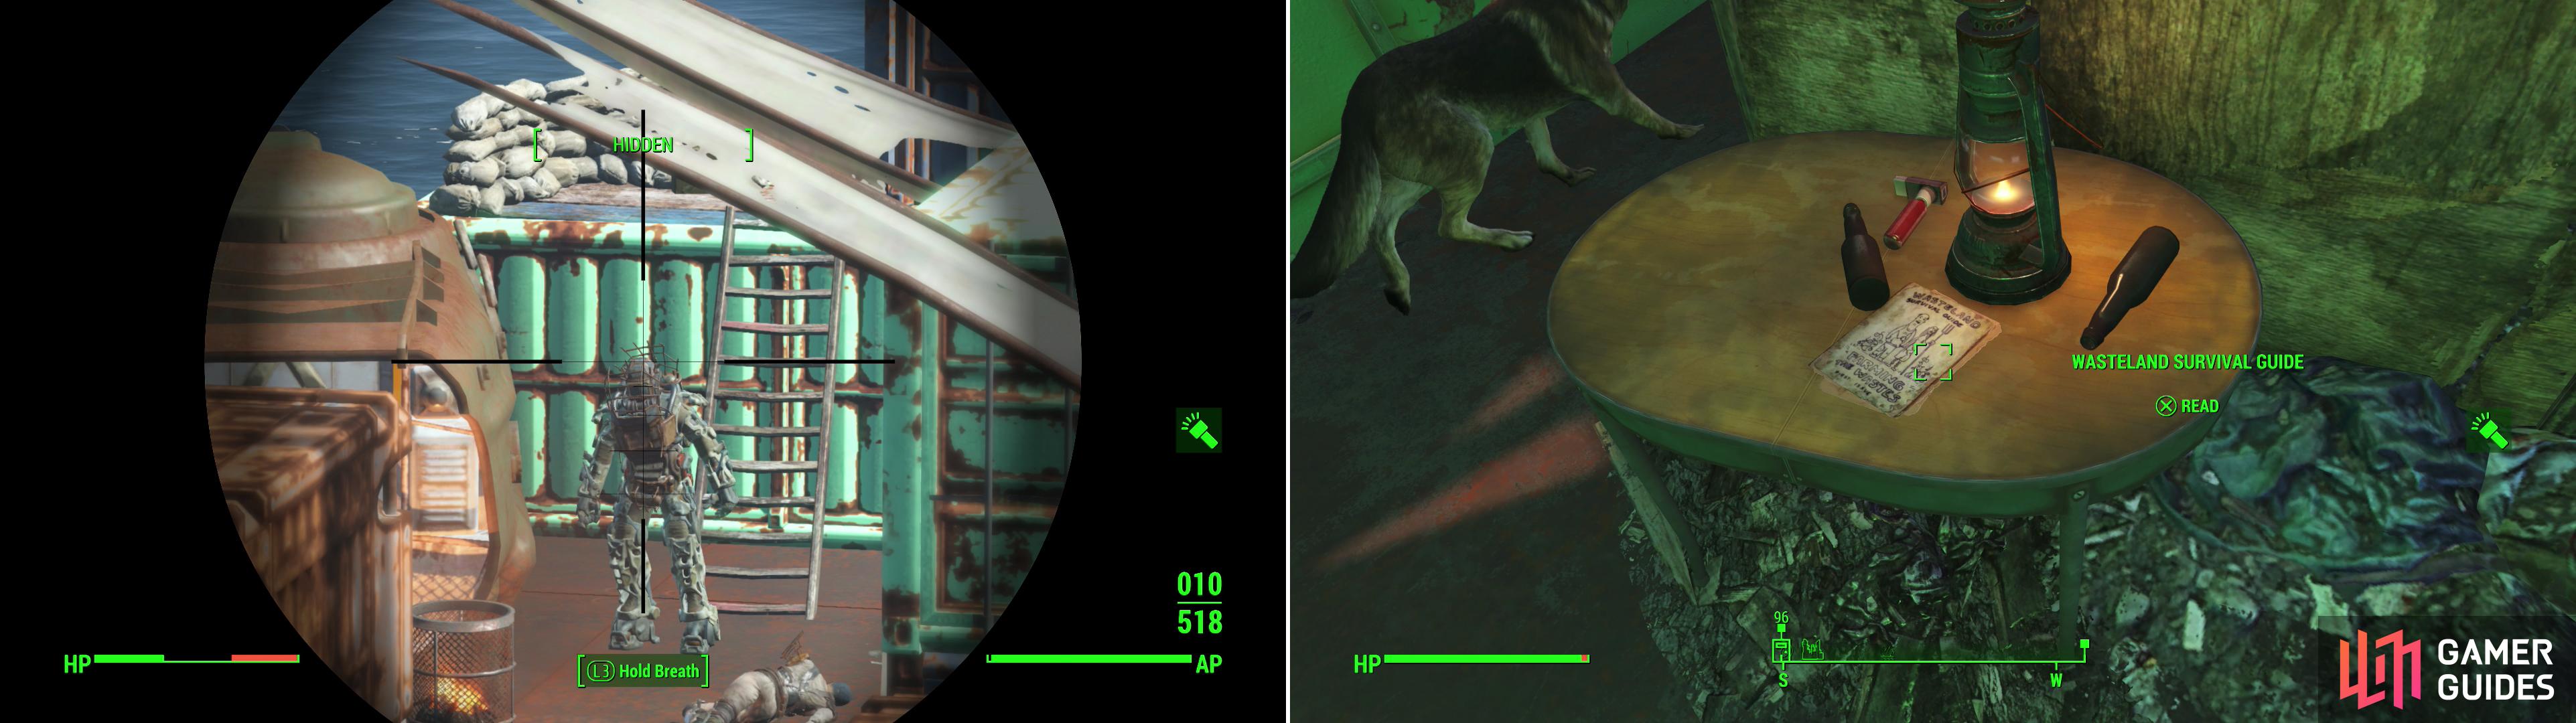
A dangerous Raider in Power Armor leads the Raiders who occupy the Wreck of the USS Riptide (left). If you can fight your way through them, you’ll be able to claim a Wasteland Survival Guide (right).
Back Street Apparel
Leave the ship, return to the bridge and cross it back south, then follow the road along the river to the east until you reach your destination. You’ll know you’re close when you find Raiders and some Machinegun Turrets MK I. Kill whatever man or machine is stupid enough to be outside, then use their truck-platform to reach the landing upon which the Back Street Apparel store is located.
Once inside, you’ll likely immediately find yourself in a firefight when you enter. There’s plenty of cover for them - for you, your options are more limited. There are also Tripwires at the front of either aisle, so rushing them isn’t a good idea, either. The eastern Tripwire is attached to a Combat Shotgun, and the western one will trigger a Grenade Bouquet, and ignite the oil nearby, too. There’s also a Machinegun Turret MK I further north, but for now, clear the Raiders on the store floor, first.
When they’re dead, proceed north, looting whatever you want. Dispose of the isolated Machinegun Turret MK I, then head east beyond the doorway it’s guarding to find a locked blue door [Novice] to the south, beyond which you can find a ![]() Stealth Boy on a metal shelf. Grab it, then return to the store floor and go through a door to the north. In the hallway beyond you’ll find three doors: two to the west and one to the north. Enter the first (northern-most) door to the west to find Clutch - the leader of these Raiders - and another accompanying Raider. Kill them, loot them, then search the room to find a Cooler [Novice], a Steamer Trunk, and Terminal [Advanced] which you can use to open a wall Safe [Advanced].
Stealth Boy on a metal shelf. Grab it, then return to the store floor and go through a door to the north. In the hallway beyond you’ll find three doors: two to the west and one to the north. Enter the first (northern-most) door to the west to find Clutch - the leader of these Raiders - and another accompanying Raider. Kill them, loot them, then search the room to find a Cooler [Novice], a Steamer Trunk, and Terminal [Advanced] which you can use to open a wall Safe [Advanced].
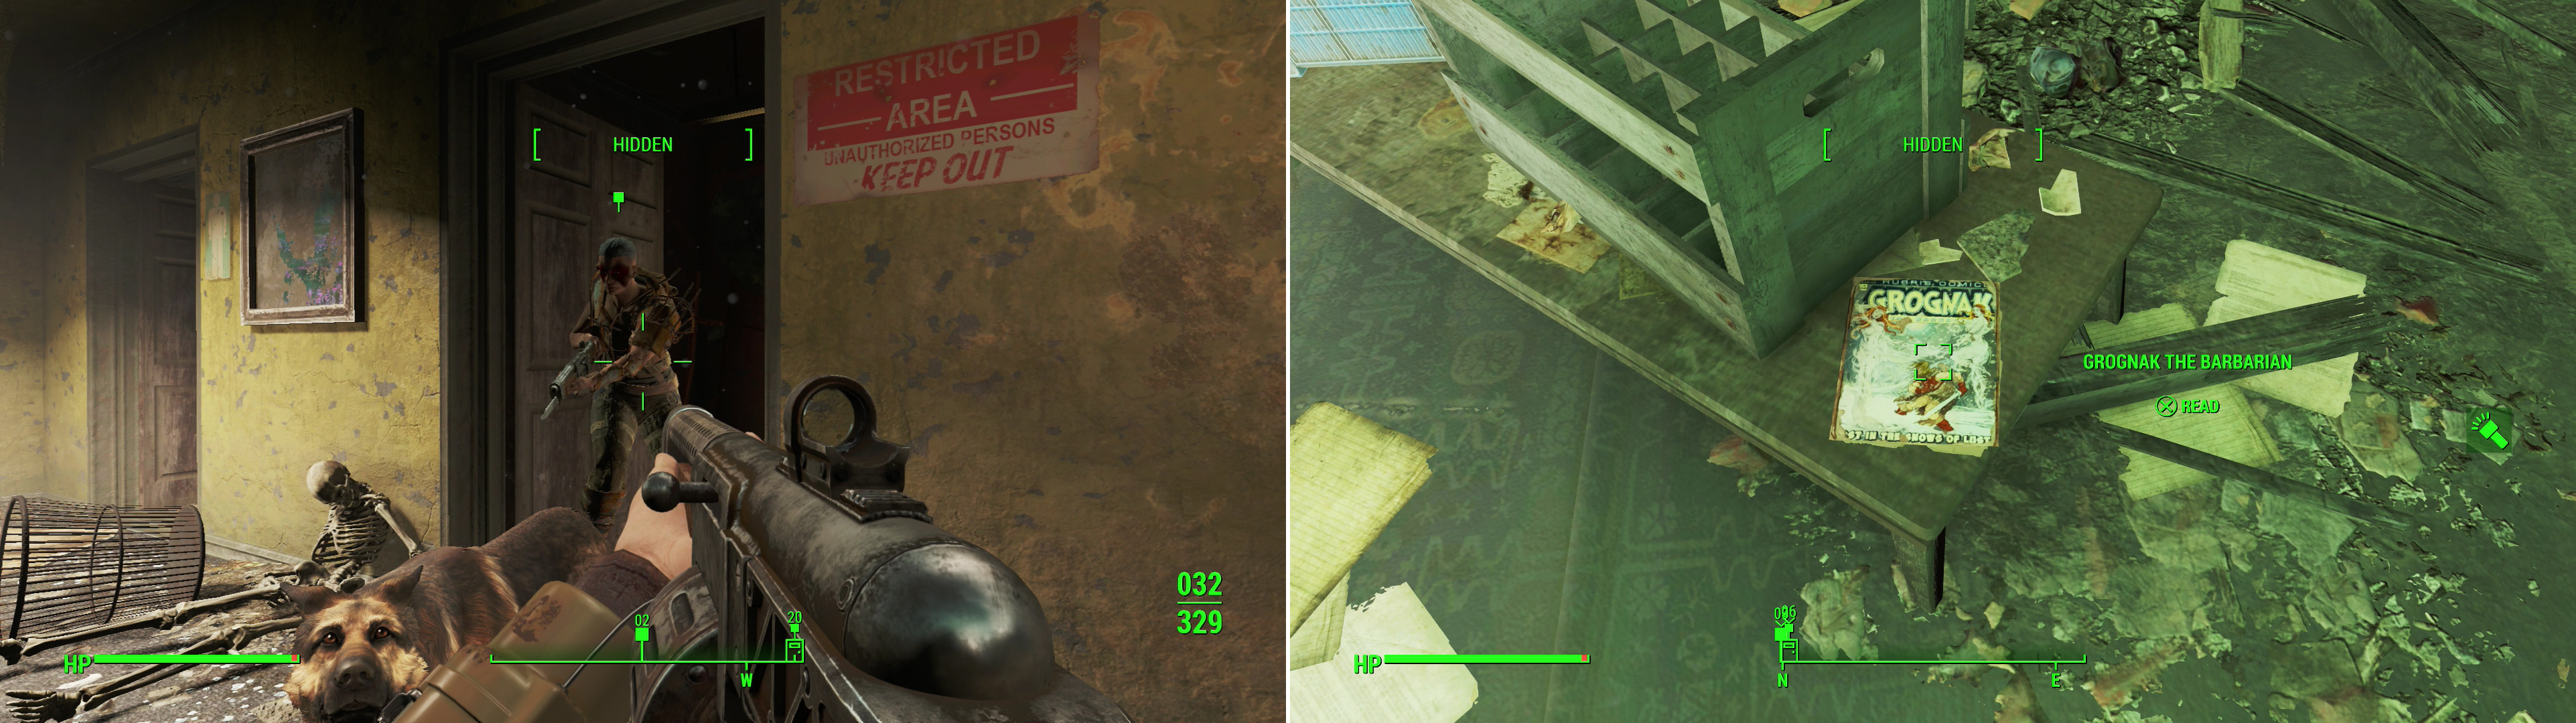
A game of shotgun peek-a-boo with the Raider Leader - Clutch - might set the settlers at Oberlund Station at ease (left). Pillage Back Street Apparel for an issue of everybody’s favorite comic book barbarian - Grognak the Barbarian! (right).
The boss may be dead, but there’s still a bit of loot to gain in the store. Return back to the hallway and - considering the two doors in the hallway beyond lead to uninteresting bathrooms - head up some stairs to the east. Ascend several flights of stairs killing whatever Raiders oppose your progress until you reach a room, where more Raiders may be lurking. Grab an issue of Grognak the Barbarian from off a table near a couch, then note a Safe [Master] in the north-eastern corner of the room. Get the safe open if you can, then continue east up some stairs then, when you reach a ladder, turn south and loot a Large Toolbox [Novice] on some metal shelves. Climb the ladder to reach the roof, from which you can fast-travel back to Oberlund Station and report the good news to the Settler here, then talk to Preston to complete the quest. Oberlund Station is now yours to control.
| Objective | Reward |
|---|---|
| For helping the Oberlund Station settlement | 230 XP, 98 Caps |
No Comments