
| Important Items in This Area |
|---|
| Overdue Book |
| Picket Fences |
| Total Hack |
Pearwood Residences
Fast-travel back to the ![]() Mass Bay Medical Center and from here head north to reach a brick building. Turn east and head down some stairs to find a locked door [Novice], behind which you’ll find a truck trailer to the east [Advanced] which, despite being locked is entirely empty. Head north into a parking garage and ascend the ramps to find a random encounter. Deal with whatever you face, then head back to the bottom floor of the parking garage and continue north until you reach a street, which you should follow west, past a pit filled with radioactive barrels. Shortly beyond this you should locate a house occupied by Super Mutants and their hound. Kill them and head through a bright red door to reach the Pearwood Residences building, which you won’t find on any maps.
Mass Bay Medical Center and from here head north to reach a brick building. Turn east and head down some stairs to find a locked door [Novice], behind which you’ll find a truck trailer to the east [Advanced] which, despite being locked is entirely empty. Head north into a parking garage and ascend the ramps to find a random encounter. Deal with whatever you face, then head back to the bottom floor of the parking garage and continue north until you reach a street, which you should follow west, past a pit filled with radioactive barrels. Shortly beyond this you should locate a house occupied by Super Mutants and their hound. Kill them and head through a bright red door to reach the Pearwood Residences building, which you won’t find on any maps.
Drop down through a collapsed floor and ride an elevator to a higher floor you couldn’t otherwise reach. Loot a First Aid Box in the bathroom you find yourself, then go south through a hole in the wall to reach a roof where you can find an Ammo Box. From here you can continue to descend to lower roofs to the south, taking stairs when possible, using caution and gravity when it’s not. On your way down, try to pick off some Raiders to the west and south-west, then when you reach the ground continue west to reach your next destination: The ![]() Combat Zone.
Combat Zone.
The Combat Zone
After entering the Combat Zone, you will undoubtedly notice the prisoners on the left. “Rule Breakers”, the sign says. Speaking of rules, you can find the three rules to the right of the door (which are basically no fighting, bring money, don’t beg or loiter). Note that you can actually “free” the prisoners here by hacking the nearby [Advanced] terminal and opening the door. However even after you open the door, the prisoners will just stay where they are, because they are dumb. Heh. There is however an [Expert] safe here that you can pick, so open the door anyways just for that.
Head further into the Combat Zone now and get ready for combat (quicksave, just to be safe). This place is actually full of Raiders, who will attack as soon as they recognize an outsider is here, which won’t take long with the announcer, Tommy, pointing you out. Get to cover now and get ready to take on the glut of Raiders they send for you. Clear out anyone out in the open and head to the back, where to the right you can get on the upper-level catwalks and clear those out (use the middle room area for cover). You will have a good “upper ground” position up here and can wipe out the rest of the enemies easily.
Once you’ve killed all the Raiders, put on your ![]() Charisma gear and head to the cage to talk to Tommy. He will talk with
Charisma gear and head to the cage to talk to Tommy. He will talk with ![]() Cait (the fighter) for awhile and will soon recommend you take the contract for her from him while he focuses on cleaning out the Combat Zone and getting it back to business… there is a moderate speech check here (Why?) that you should try to pass but eventually you will have to say yes or no. Since Cait is a possible companion, definitely say yes. Cait will go along with this (amazingly), but as Tommy says since she is a user this may be the best change of pace for her (he even gives you caps to take her!). Well then! Cait will go wait for you nearby giving you a chance to explore.
Cait (the fighter) for awhile and will soon recommend you take the contract for her from him while he focuses on cleaning out the Combat Zone and getting it back to business… there is a moderate speech check here (Why?) that you should try to pass but eventually you will have to say yes or no. Since Cait is a possible companion, definitely say yes. Cait will go along with this (amazingly), but as Tommy says since she is a user this may be the best change of pace for her (he even gives you caps to take her!). Well then! Cait will go wait for you nearby giving you a chance to explore.
Go ahead and loot all the dead bodies here. There is quite a bit of junk here as well, including various crafting stations for just about everything. Of note here is the “weapon shop” area near the start (first shop on the right) that has a [Novice] locked First Aid Box, and directly above the shop you can find a [Novice] locked ammo box. Lastly, be sure to check a table near the pit for a Picket Fences magazine. This particular one says “You are now able to build potted plants at settlement workshops”, which is a plus right? Anyone up for some gardening?!
You’re officially done here, so tell Cait to come with you to recruit her as a companion and leave Combat Zone. Kill the Raider Prisoners on your way out, if you wish. You monster.
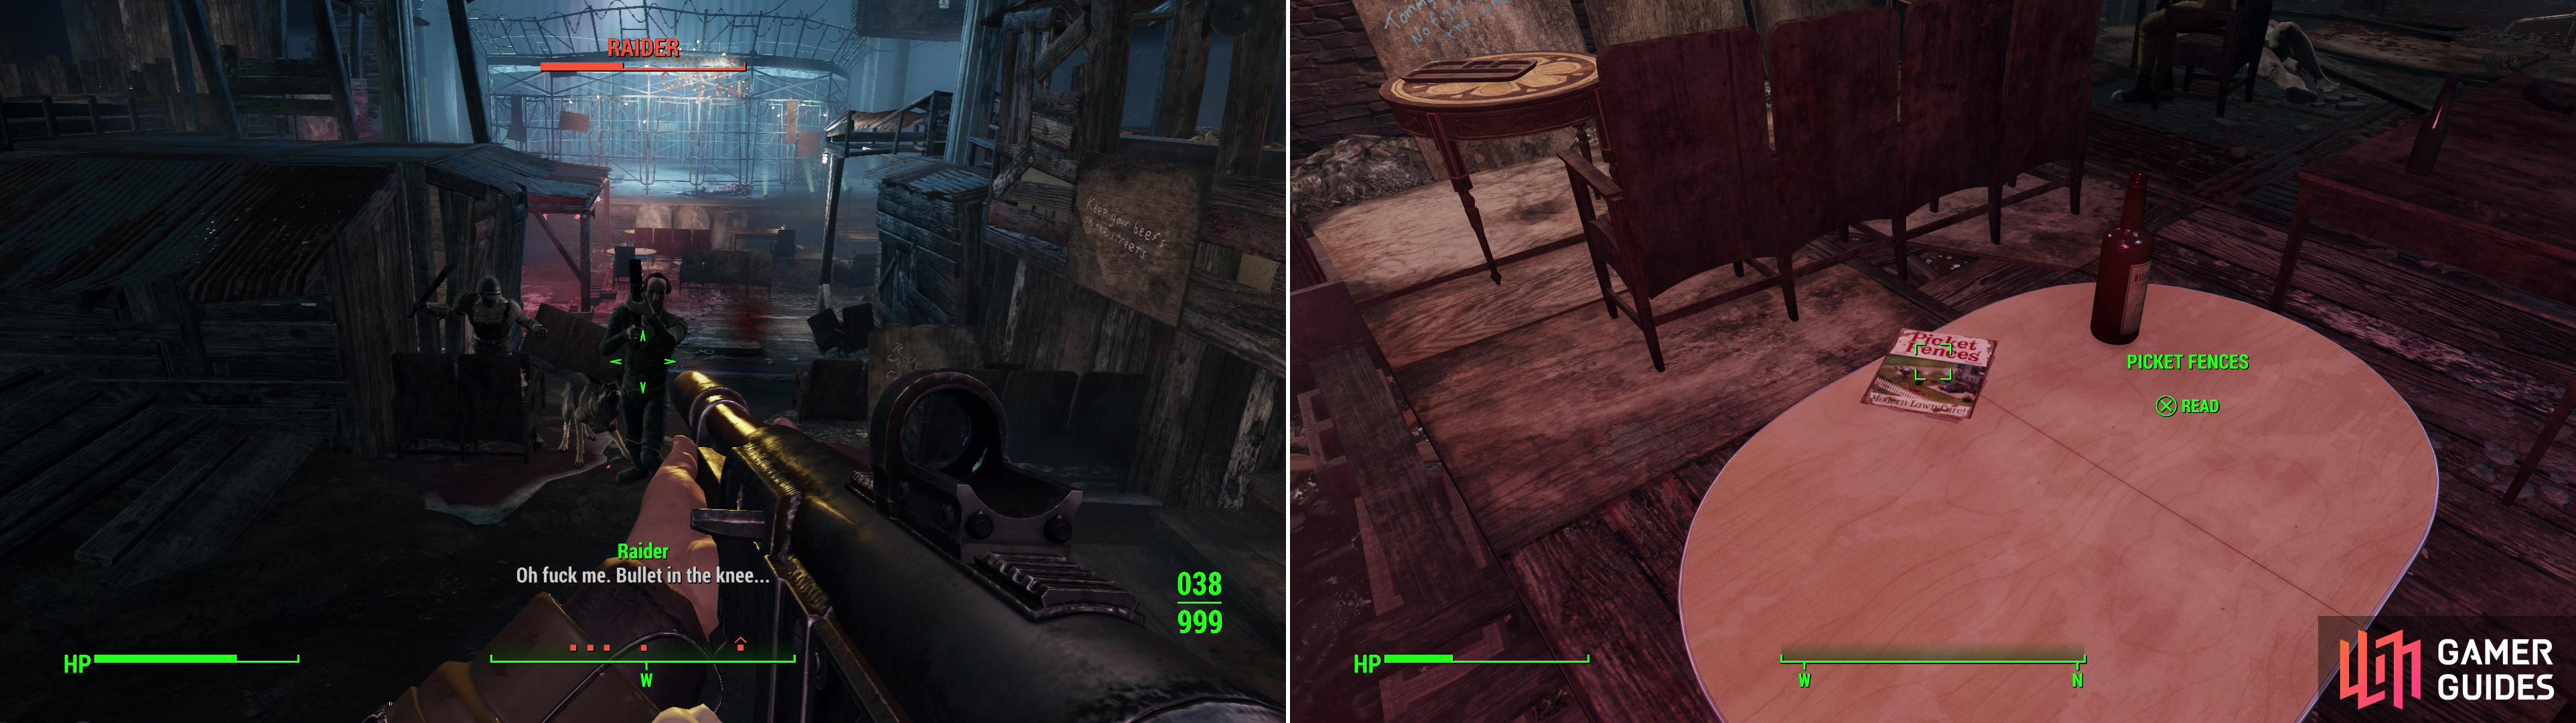
Kill the Raiders inside the Combat Zone and make the area live up to its name (left) then search around for an issue of Picket Fences (right).
Hub 360 Building
Leave the Combat Zone and return to the road that ran east-west past the Pearwood Residences building. Follow it east past the radioactive pit again and continue until you find some barricades, beyond which a Super Mutant Camp sits. Clear the muties out then head through a door near the barricades to reach the Hub 360 building.
Inside you’ll find your typical Super Mutant decorations: bags of unspeakable meat, wooden spikes, plenty of blood… all the things that say “home” to a mutie. Disarm a ![]() Bottlecap Mine near a counter to the north-west then head up some stairs and take an elevator to reach an otherwise inaccessible floor. Be wary of Super Mutants lurking on the high ground and work your way around some rubble to reach a door leading to the “Cafe Patio”. Kill any muties out here then return inside, ascend the rubble you walked across earlier and ascend some ramps to the next level. Massacre some more Super Mutants then ride another elevator to reach another exterior area where leveled Super Mutant lurks. Murder it, loot a Steamer Chest, then take the elevator back down. Now head through a door leading to the “Rooftop Pool”. Head west past the pool and take some stairs down to reach a highway, which is marked on the map as the
Bottlecap Mine near a counter to the north-west then head up some stairs and take an elevator to reach an otherwise inaccessible floor. Be wary of Super Mutants lurking on the high ground and work your way around some rubble to reach a door leading to the “Cafe Patio”. Kill any muties out here then return inside, ascend the rubble you walked across earlier and ascend some ramps to the next level. Massacre some more Super Mutants then ride another elevator to reach another exterior area where leveled Super Mutant lurks. Murder it, loot a Steamer Chest, then take the elevator back down. Now head through a door leading to the “Rooftop Pool”. Head west past the pool and take some stairs down to reach a highway, which is marked on the map as the ![]() Fallen Skybridge.
Fallen Skybridge.
Fallen Skybridge
This place is, like the lower areas, crawling with Super Mutants. Kill any of them you see, preferably from stealth, if possible, then explore the ramp they were guarding to find a door to the Ruined Skyscraper. It’s a place that’s definitely worth exploring, but first, head head a highway to the south until the road ends to find an elevated shack, within which you can find a Safe [Master]. If you can get through this lock, it’s a fine bit of loot to score. Return back to the Ruined Skyscraper and head on inside.
Ruined Skyscraper
The Ruined Skyscraper is occupied by Super Mutants, too, but they don’t see have to decorated yet. The dead Gunners in this room may be a clue as to why. Maybe they just haven’t had time to decorate yet? Head up some stairs and kill a Super Mutant lurking around in a room, then go back downstairs and take an elevator down. You should hear the sounds of fighting when you reach this level. Venture down a hallway to the east to find some Gunners fighting a group of Super Mutants. Make sure you’re the last biped standing, then take an elevator down to find the lobby, which is occupied by Gunners. Super Mutants at the top, Gunners at the bottom. Wonderful. You can go west, then turn north down a hallway to find a locked door [Advanced], which, aside from XP, there’s no point in unlocking. Wee… Head down a hallway north from the elevator to find a door leading back out into the “Financial District”.
From the door (marked as leading to the “Pinnacle Highrise”) head north to find a red structure. If you turn east there’s a metal walkway you can use to reach the roof of this red structure. From here you can find a collapsed metal support which you can use to walk east to another building. From here head down a ramp to the south to find a Safe [Advanced] which you can plunder. Backtrack to the door outside of “Pinnacle Highrise” (aka, the Ruined Skyscraper) and turn west to find some stairs leading to the ground. Be cautious as you descend, however, as on an elevated road to the west lurk some Raiders. When you reach the ground travel north to reach a ramp leading to the highway. Clear out the Raiders here and loot their shack further down the road, which has some chems lying around, but little else of interest.
Follow the road west, then north-west until you reach the ground again past a red car. From here turn south then turn east at a bus and continue east until you find a parking garage to the south. If you ascend the parking garage you’ll encounter some Raiders, and your prize for reaching the top is a Steamer Trunk. Descend back down to the street and continue east until you find some double doors leading to the Water Street Apartments building to the north. You’ll be coming back here shortly on a quest, but there’s no harm in learning where this area is now. On the ground floor you’ll find a door [Advanced], which there’s absolutely no point in picking. Go up an elevator then turn north to find some boards leading… back to the Raider-occupied highway you were just on. Oh well, didn’t make it very far, but at least it can’t be said that you didn’t explore these areas.
Postal Square
Get back on the highway and follow it back east, then north. When you reach the ground turn east and head between a building and a traffic light, at which turn south to find the Joe’s Spuckies building, which is near the “![]() Postal Square” map marker. Kill a handful of Gunners lurking around out here, then save your game. There’s some stiff resistance inside this building and little room to maneuver. Stealth comes highly recommended. Head inside to find several Gunners (one of which may have a
Postal Square” map marker. Kill a handful of Gunners lurking around out here, then save your game. There’s some stiff resistance inside this building and little room to maneuver. Stealth comes highly recommended. Head inside to find several Gunners (one of which may have a ![]() Missile Launcher), a Mr. Gutsy and a Gunner Commander. Your prize for defeating these foes is a Steamer Trunk on the top floor. There’s also a grenade trap in a bathroom stall, so be wary.
Missile Launcher), a Mr. Gutsy and a Gunner Commander. Your prize for defeating these foes is a Steamer Trunk on the top floor. There’s also a grenade trap in a bathroom stall, so be wary.
35 Court
Leave the building and head south-east to reach a barricade, which you should head east from, either passing over it or under it. When you run out of east turn north to find a green building with a red door: the 35 Court building. Inside you’ll find a mess of dead Raiders. Wonder what killed them? Turn east and disarm a Laser Tripwire, then head into a small office room to the north, which contains a Security Terminal [Expert] and a Safe [Advanced]. You can use the terminal to open the safe, activate a Protectron, or manipulate some turrets. Once you’re done in here, take an elevator up and, when you reach your destination, head down a hallway to find a locked door [Novice], beyond which you’ll find a safe [Expert] you can loot. Return into the hallway and climb a ramp to reach a roof, but tread carefully, as two powerful robots lie in wait for trespassers in small rooms to the north and south. When you reach the floor of this level the robots - an Assaultron and a Sentry Bot - will activate and attack. Remaining hidden is a good idea, and starting with a sneak attack critical is an even better one. Use up whatever Critical Hits you have and hopefully you’ll come out victorious. If you need further aid, if you’re quick and brave, you know what doors they’ll come out of. You can always plant some mines in front of one of the doors (you probably won’t have time for both) get some distance, and blow them up when the robots emerge. When they’re scrap enter each room and press a button, after which a door to the east will open up, giving you access to a small chamber containing a suit of random, leveled Power Armor… perhaps even the coveted X-01 Power Armor.
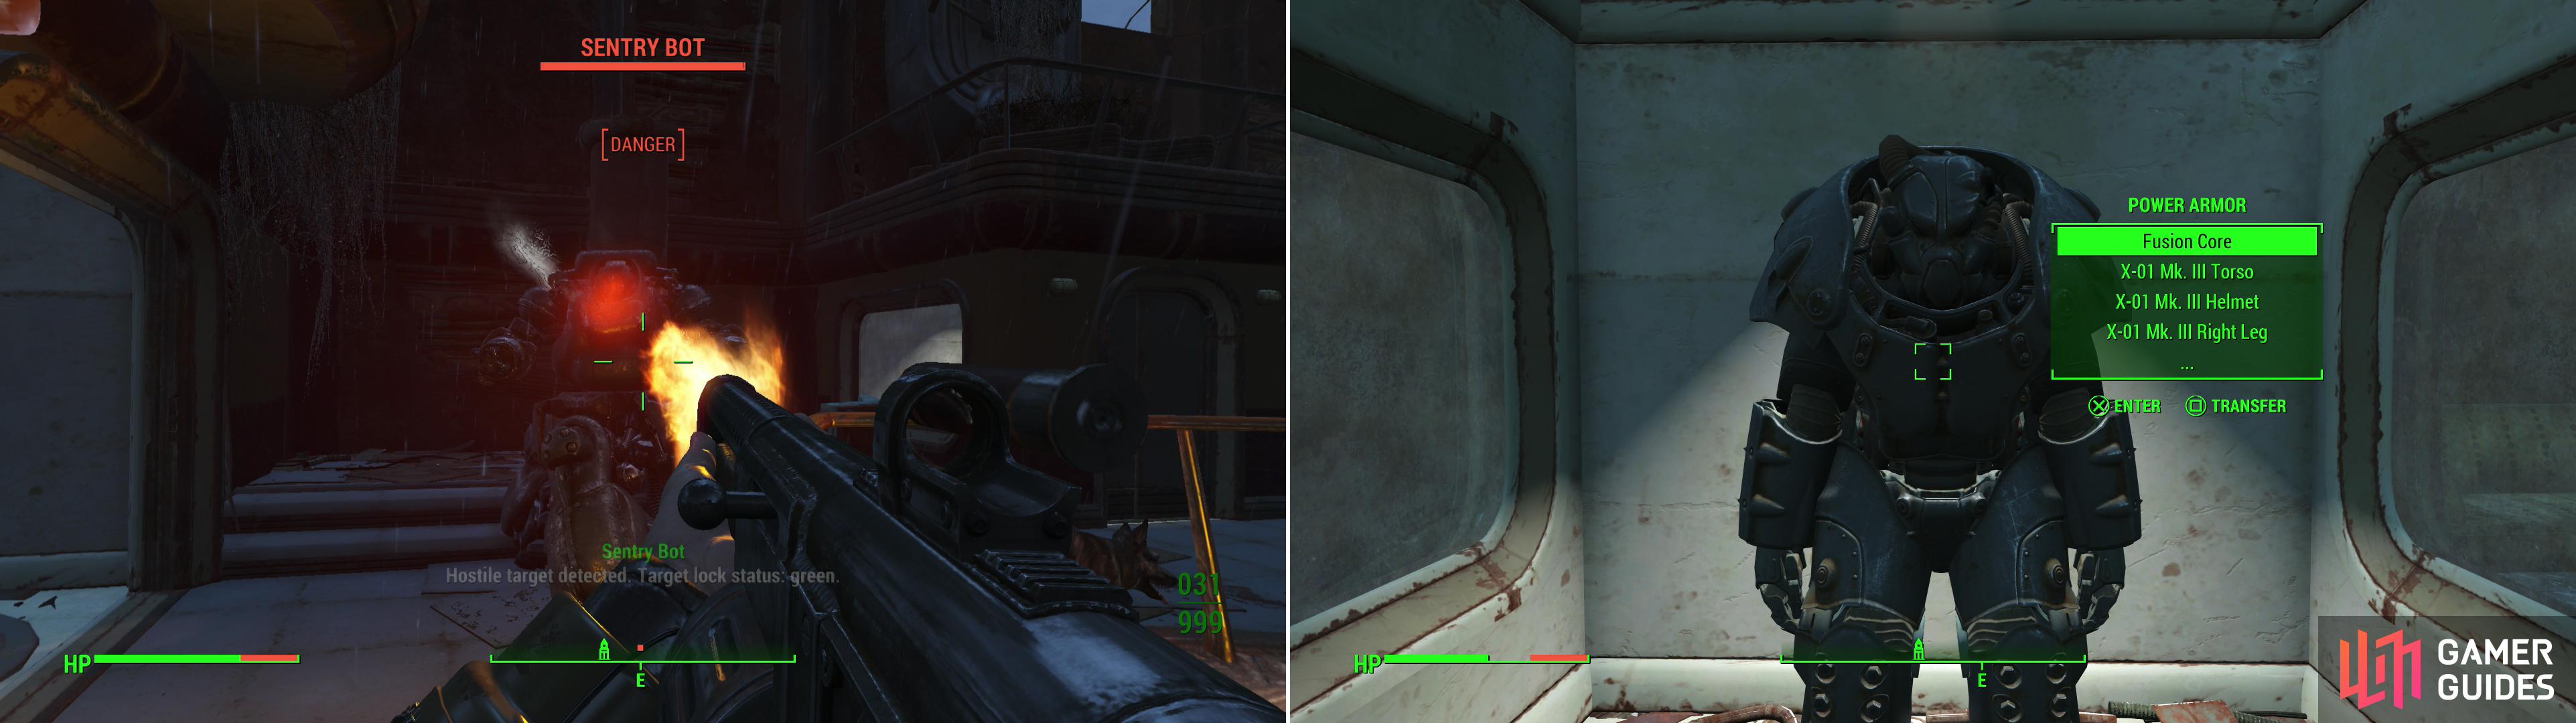
When you arrive on the top (extant) floor of the 35 Court building you’ll be attacked by a Sentry Bot and an Assaultron (left). Defeat them both and you can claim a suit of leveled Power Armor as your prize (right).
The Shamrock Taphouse
You probably won’t find anything anywhere near as good in the rest of this run, but you might as well explore the rest of the way to ![]() Goodneighbor, so you need not worry about these areas again. Leave the 35 Court building and return down the alley between buildings to the south, south-east to find
Goodneighbor, so you need not worry about these areas again. Leave the 35 Court building and return down the alley between buildings to the south, south-east to find ![]() The Shamrock Taphouse, with the obligatory green door. Enter the building and disable the Can Chimes then continue north-east through the bar, where you’ll encounter a Raider lurking around. Behind the bar you’ll find a Tripwire which triggers a rigged gun, but otherwise, this room isn’t very interesting.
The Shamrock Taphouse, with the obligatory green door. Enter the building and disable the Can Chimes then continue north-east through the bar, where you’ll encounter a Raider lurking around. Behind the bar you’ll find a Tripwire which triggers a rigged gun, but otherwise, this room isn’t very interesting.
Pass some stairs and enter a hallway, turning south-east to find a door [Advanced] to the north-east, which is trapped. Loot a bunch of chems and alcohol from a door-table, then marvel at the bad behavior of some yard flamingos. Return to the hallway and head south-west into, and through, a bathroom. Dust another Raider, then continue south-west into a kitchen before heading north-west to reach an area behind the bar which is otherwise inaccessible, where you can find a floor Safe [Advanced] and another ![]() Gwinnett Lager Recipe
Gwinnett Lager Recipe ![]() Holotape. Return to the kitchen and go through some doors to the south-west to find a pantry, wherein you’ll find two Radroaches and two Nuka Cola Quantums. Next head south-east through a doorway to reach a small room with a mannequin standing on a table. Give the figure a look and you’ll notice that it’s holding an issue of Total Hack in its hand. Sneaky. Grab the skill book, loot whatever else you want out of the room, then continue through a doorway to the south-west to reach the basement.
Holotape. Return to the kitchen and go through some doors to the south-west to find a pantry, wherein you’ll find two Radroaches and two Nuka Cola Quantums. Next head south-east through a doorway to reach a small room with a mannequin standing on a table. Give the figure a look and you’ll notice that it’s holding an issue of Total Hack in its hand. Sneaky. Grab the skill book, loot whatever else you want out of the room, then continue through a doorway to the south-west to reach the basement.
Down here you can find a handful of Mole Rats, who will burrow out of the ground and attack. Once they’re gone, search a cabinet to the south-east to find a “Patrick’s Terminal”, which details Patrick’s attempt to build a beer-bot. You can also find the Shamrock Taphouse Key nearby, which will allow you to bypass a few locks remaining in the building. Hack a Terminal [Expert] to the north-east, which will activate Drinking Buddy. If you activate the odd robot it’ll give you some alcohol and ask for some feedback. Tell it what you wish, then get on with its other functions, namely you can send it to ![]() Hotel Rexford (which you’ll be prompted to follow it to), you can get beer from it, if you’ve found alcohol recipe holotapes you can give those to it, or you can teach it jokes. You can also keep Buddy for yourself and send it to one of your settlements, which is just all kinds of cool. Patrick was a genius!
Hotel Rexford (which you’ll be prompted to follow it to), you can get beer from it, if you’ve found alcohol recipe holotapes you can give those to it, or you can teach it jokes. You can also keep Buddy for yourself and send it to one of your settlements, which is just all kinds of cool. Patrick was a genius!
Before you escort your new buddy, however, there’s some unfinished business left both inside and outside the bar. Downstairs is explore, but there’s still the upper level that needs to be ransacked. You can pick a trapdoor [Expert] to reach an uninteresting fenced-in area outside, but aside from getting a little XP, there’s no point. Instead, head back upstairs into the room occupied by the generous mannequin, then continue north-west into a hallway. Make your way to the end of the hallway, then go up some stairs. Disable the Can Chimes at the top of the stairs, then note a large room to the south-west, and a smaller office to the north-east. In the latter you’ll find the Raider leader, Gaff, and in the former are several of his henchmen. Annihilate them, then loot a Steamer Trunk and an elevated Safe [Expert] in the office (you can also find another Shamrock Taphouse Key on the desk). The larger room is less interesting.
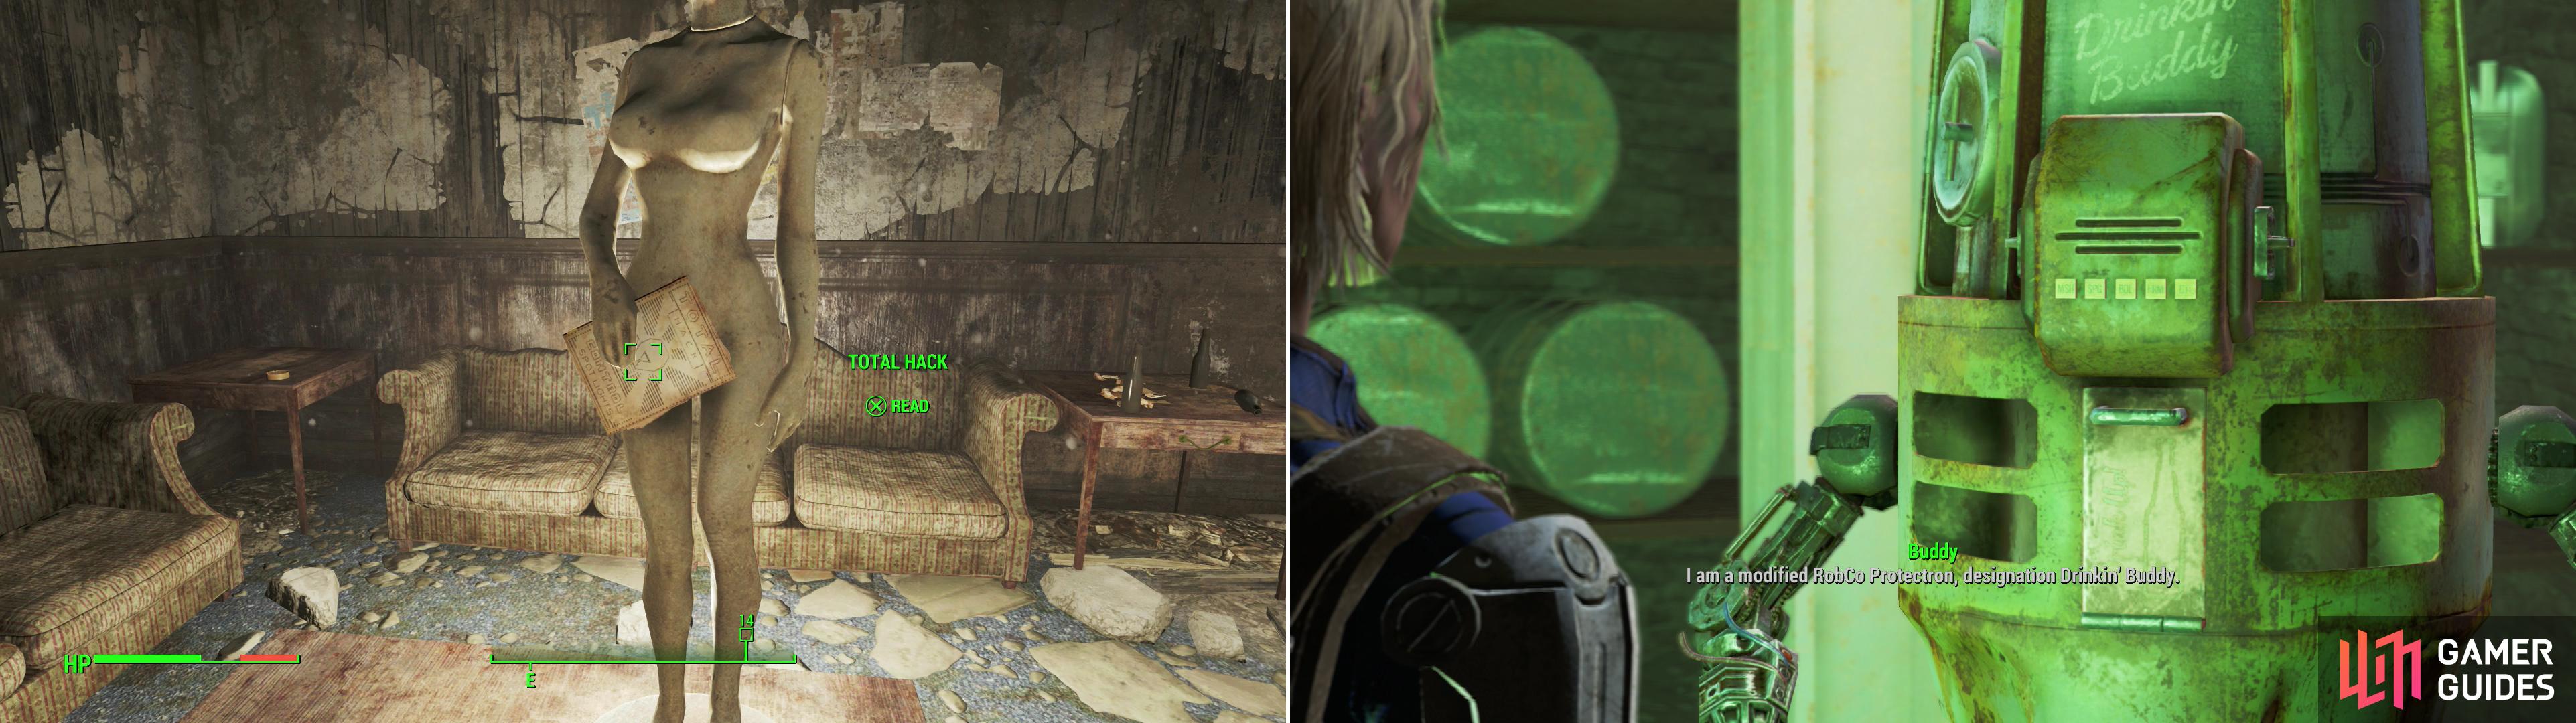
This mannequin is practicing some modesty with an issue of Total Hack (left). Drinking Buddy is a modified Protectron/mobile brewing unit (right).
Here There Be Monsters
Leave The Shamrock Taphouse and from the mandatory green door to the establishment head north-east to reach the end of the building, then turn south-east to find some docks. Head east to then end of the largest pier to find Donny, who is quite enraptured by something he claims to see in the water. Talk to him and listen to his story to start the quest “![]() Here There Be Monsters” , after which you’ll be tasked by the almighty quest marker to go find this “sea monster”. Pop some
Here There Be Monsters” , after which you’ll be tasked by the almighty quest marker to go find this “sea monster”. Pop some ![]() Rad-X, dive into the sea and swim east and you will, sure enough, find the “eye” that Donny has detected. Instead of a sea monster, however, it’s part of a sunken submarine - the
Rad-X, dive into the sea and swim east and you will, sure enough, find the “eye” that Donny has detected. Instead of a sea monster, however, it’s part of a sunken submarine - the ![]() Yangtze - which obviously still has some life in it.
Yangtze - which obviously still has some life in it.
Well, you didn’t catch those RADS for nothing. Open the hatch to the submarine and head through a door to find Captain Zao, a ghoulified Chinese remnant from the war that destroyed the world. Talk to him and learn that he’s just a war-weary soldier who is a little too attached to his submarine, which he dreams of making sea-worthy again. Question him as you wish, then agree to help him and he’ll ask you to find a new Dampening Coil for him, which can be found in ![]() Saugus Ironworks, a place you won’t be going to for quite a long time, if you’re following this guide. Be sure to pass a series of speech checks to sweeten the reward you’ll get; the first two checks will only secure you money, but the third (hard) check will get him to offer up his sword. A unique weapon? Score.
Saugus Ironworks, a place you won’t be going to for quite a long time, if you’re following this guide. Be sure to pass a series of speech checks to sweeten the reward you’ll get; the first two checks will only secure you money, but the third (hard) check will get him to offer up his sword. A unique weapon? Score.
Harbormaster Hotel
Put this quest on the back-burner for now and leave the Yangtze. Report back to Donny if you wish and tell him any silly story that comes to mind, but when you’re done, return to the front of The Shamrock Taphouse and head south, over a barricade, and turn east past a yellow bulldozer to find the ![]() Harbormaster Hotel. In the lobby loot a Suit Case [Novice] then head up an elevator. When it stops, loot a Caps Stash off a table, then go through a door to room 61 [Advanced]. Inside you’ll find a macabre scene of a skeletal grandmother being entertained by a bunch of toys. Weird. Take an Overdue Book off the grandmother’s lap, then return outside and go through a door to the south-west to reach an exterior area, where two Raiders lurk. Kill them, then loot around for the meager pickings to be found here.
Harbormaster Hotel. In the lobby loot a Suit Case [Novice] then head up an elevator. When it stops, loot a Caps Stash off a table, then go through a door to room 61 [Advanced]. Inside you’ll find a macabre scene of a skeletal grandmother being entertained by a bunch of toys. Weird. Take an Overdue Book off the grandmother’s lap, then return outside and go through a door to the south-west to reach an exterior area, where two Raiders lurk. Kill them, then loot around for the meager pickings to be found here.
Custom House Tower
Leave the hotel and return back north past The Shamrock Taphouse to find the Custom House Tower building, outside of which are the remains of an old-fashioned political speaking event. Pick your way past the bodies of dead men and their equally dead flags and enter the building through a “door” which looks like the bricks that make up the rest of the building. Odd. Inside you’ll find a Halloween party gone horribly wrong. Loot an Ammo Box and a First Aid Box, then leave the building. To the east you can find a Super Mutant camp at the end of a dock, but otherwise, it’s time to head back to The Shamrock Taphouse.
No Comments