| Important Items in This Area |
|---|
| Tales of a Junktown Jerky Vendor |
| Wasteland Survival Guide |
| U.S. Covert Operations Manual |
Finding Loot Around Walden Pond
Fast-travel to a place closer to your destination (![]() Abernathy Farm and
Abernathy Farm and ![]() Wicked Shipping Fleet Lockup does fine) then head south to find a small lake. Along the north-western edge of this lake you can find a dry, muddy stream bed, lying in which is a dead Raider who possesses the note “Raider’s Note”, which will tell you about some Caps to the south-east in a place called
Wicked Shipping Fleet Lockup does fine) then head south to find a small lake. Along the north-western edge of this lake you can find a dry, muddy stream bed, lying in which is a dead Raider who possesses the note “Raider’s Note”, which will tell you about some Caps to the south-east in a place called ![]() Walden Pond. Well… a small detour never hurt anybody, right? Head east along the northern end of the lake until you find a bridge running south-west. Cross the bridge and kill whatever Raiders get in your way, then continue uphill to the west to find Sunshine Tidings Co-op. Just get close enough to get the map marker, then turn west.
Walden Pond. Well… a small detour never hurt anybody, right? Head east along the northern end of the lake until you find a bridge running south-west. Cross the bridge and kill whatever Raiders get in your way, then continue uphill to the west to find Sunshine Tidings Co-op. Just get close enough to get the map marker, then turn west.
Between the lake and the pond you can find an abandoned shop, inside of which you’ll find a few Makeshift Bomb traps, a Suitcase [Novice] and a door to the Gift Shop [Master]. On the wall near this door you’ll find a “Note to Tweez”, which will direct you to a sewer pipe. You’ll find this pipe downhill, near the edge of the water, to the east, but if you can pick the lock to the door, you might as well give it a shot for the XP. Most will probably use the sewer pipe, however, so that’s the assumption the guide will make. Along the way, be sure to visit David Thoreau’s cabin to the east and listen to the automated tour, or, alternatively, you’re a savage who doesn’t care to learn about a weirdo living out in the wilderness to prove… something about not eating meat and being self reliant, or something.
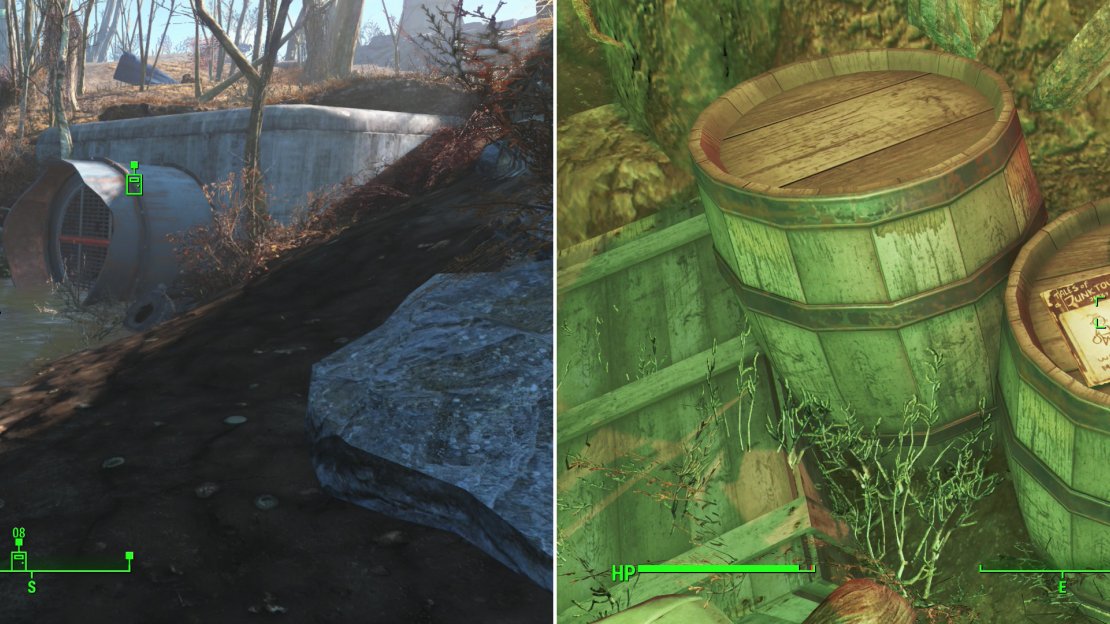
Find a drainage pipe near Walden Pond (left) which leads to a Raider Den. Inside you’ll find a Tale of a Junktown Jerky Vendor magazine (right).
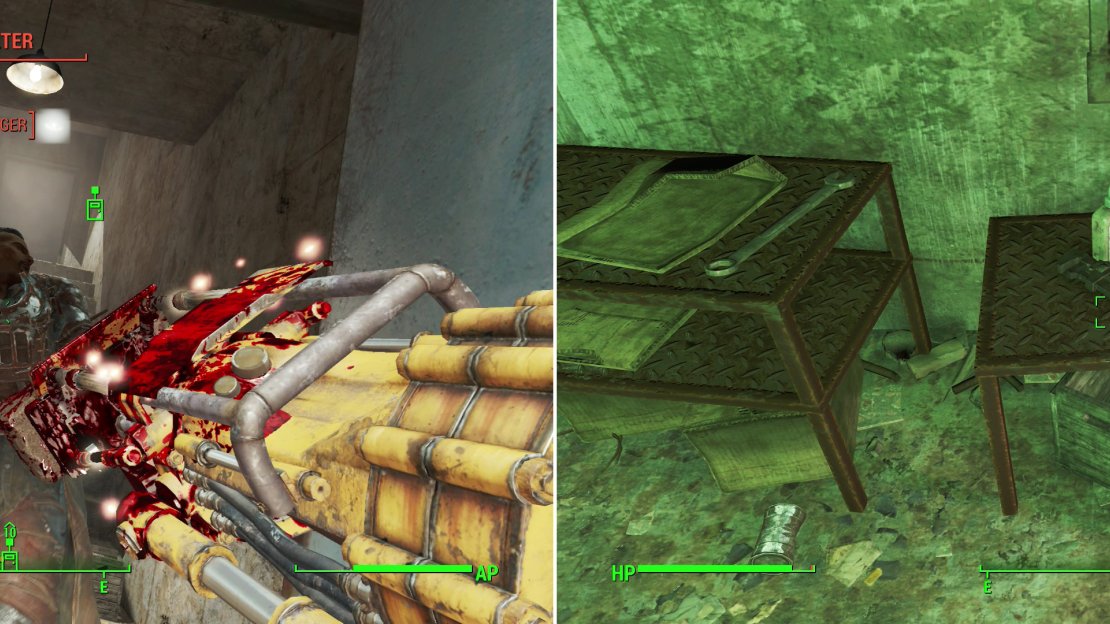
Reach and enter the drainage pipe and continue through it until you find a small chamber occupied by two Raiders; Bear and Tweez. Kill them, then grab an issue of Tales of a Junktown Jerky Vendor from atop a barrel to the south-east. Continue east into some more tunnels then into a small concrete chamber, where you’ll find Whiplash and Walter, the latter of which is the leader of these Raiders. Kill them and loot Walter to obtain the Gift Shop Key, which opens the door to the surface and a Safe [Master] in the room where Walter lurked. Once this safe has been plundered, your goal of looting Walden Pond is completed. Be sure to loot the Ammo Box in this room, then grab the unique Wrench, ![]() Big Jim , off a metal table to the south-east.
Big Jim , off a metal table to the south-east.
Kill Walter, the leader of the Walden Pond Raider (left) then grab the unique Tire Iron, “Big Jim” (right).
The Behemoth of Walden Pond
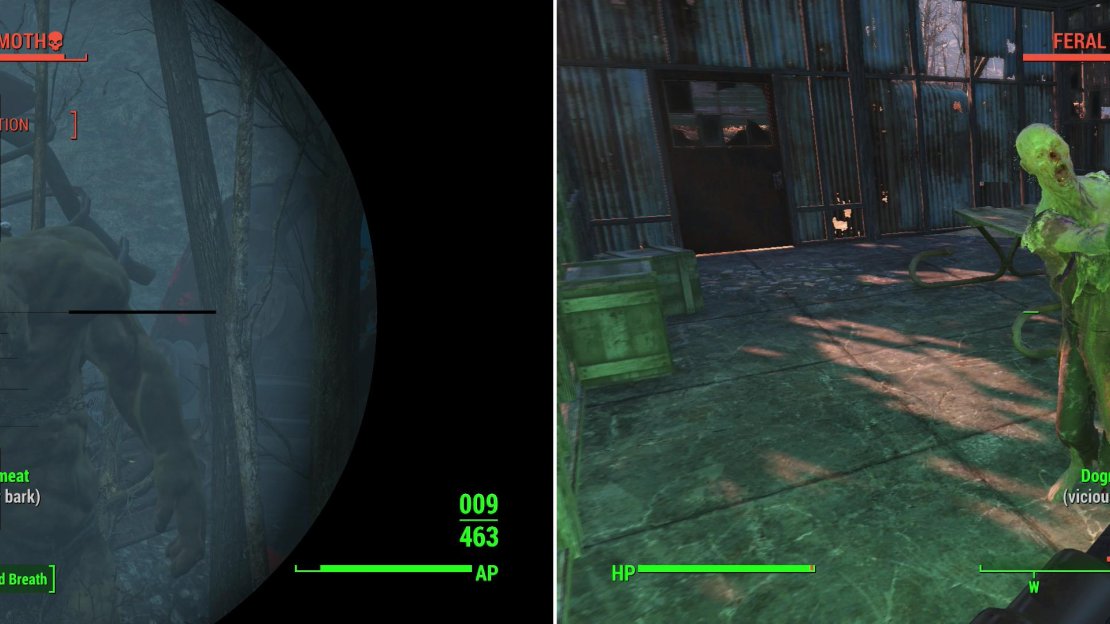
There’s one more challenge you can take before you make your way to Sunshine Tidings Co-op. Find the Walden Pond area to the east and from there, head south to find an elevated highway, south of which you’ll find the lair of a ![]() Super Mutant Behemoth. In a straight fight without Power Armor, you’re probably going to have trouble, but there are ways to take this beast down. First, you can plant some mines as close to the camp as possible, shoot the beast to provoke it, then shoot the explosives when the Behemoth nears the mines. A
Super Mutant Behemoth. In a straight fight without Power Armor, you’re probably going to have trouble, but there are ways to take this beast down. First, you can plant some mines as close to the camp as possible, shoot the beast to provoke it, then shoot the explosives when the Behemoth nears the mines. A ![]() Bottlecap Mine and a few Frag Mines should be enough to take it down. Otherwise, using sneak attack criticals to start out the fight and a few critical hits with a Sniper Rifle will do the trick, too. After it’s dead, loot its peculiar take on Stonehenge, as there are a few containers with goodies lying around.
Bottlecap Mine and a few Frag Mines should be enough to take it down. Otherwise, using sneak attack criticals to start out the fight and a few critical hits with a Sniper Rifle will do the trick, too. After it’s dead, loot its peculiar take on Stonehenge, as there are a few containers with goodies lying around.
Backtrack to the Walden Pond map marker and from there head east. Along the way you can find a shack populated by a Trader and about a half dozen cats. Yeah, crazy cat-people still apparently thrive in the wasteland. They’ll sell you junk, but otherwise aren’t too interesting. Continue east following the elevated highway to the south and eventually you’ll find a more terrestrial road running north/south, near which the elevated highway splits, and a turn off runs to meet the ground. Under this turn off you can find a random encounter, and atop the turn off some Gunners - a band of Mercenaries replacing the Black Talons from Fallout 3 - have made a camp. Simply put, this can be a busy spot on the map, and considering that three factions may be fighting it out here, you’ll probably hear the fighting before you see it. Kill any hostiles on the highway, then follow the curving off-ramp until it reunites with the main highway far above the ground. Up on this highway the Gunners have the main part of their base, noticeable by the large windmill erected on the road. Kill any defense it may still have then loot some Footlockers in the back of a sheared-off subway car. If you follow another turn off to the south, you’ll find another Gunner checkpoint you can sack.
Near Walden Pond you’ll find a Super Mutant Behemoth lurking around (left). Clear Sunset Tidings Co-op to claim the location as a settlement (right).
Sunshine Tidings Co-op
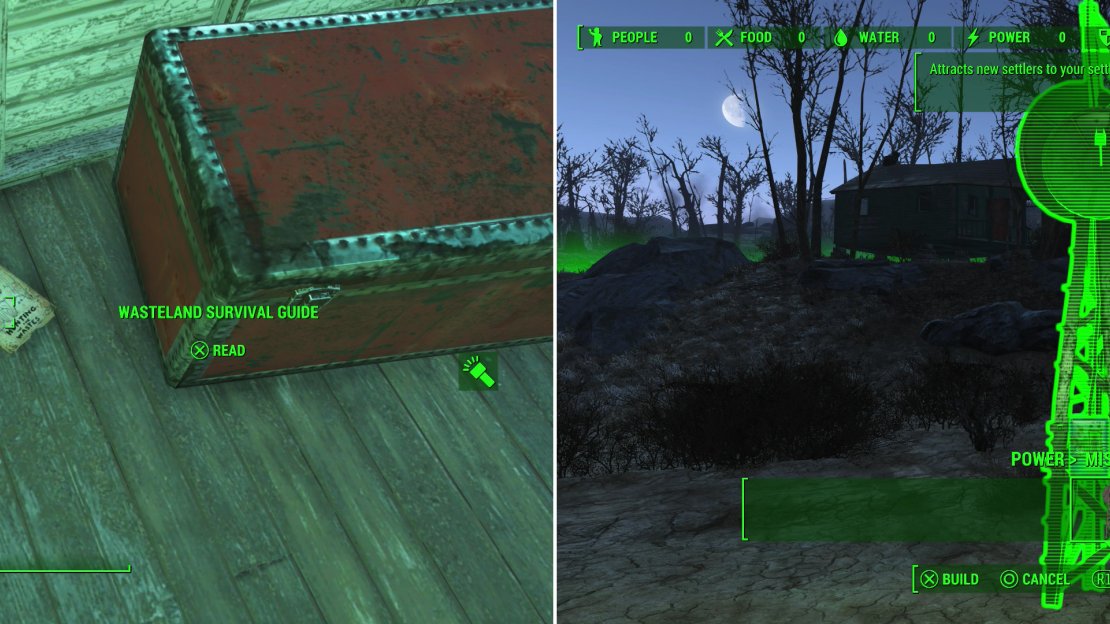
Leave the highway and return west to reach Sunshine Tidings Co-op and enter a shack along the north-eastern end of the complex, where you’ll find some Feral Ghouls. Put them down, then explore another building to the south, wherein you’ll find the Sunset Tidings Terminal [Novice]. Hack the terminal to find out that some robot freedom radicals hacked the Mr. Handy here to be… well, useless. Select the entry “[ > Mr. Handy Control]” and you’ll get the option to “[Choose Protocols]”, which will allow you to set the Mr. Handy, Professor Goodfeels, to act as a guard or a maintenance bot. In the latter case, the robot will return to Hester’s Consumer Electronics, which is east of ![]() Diamond City. Whatever you do with the robot, head north-west to find a green house [Novice], inside of which you can find some chems then head uphill to the west and clear out the cabin there. Doesn’t look like anybody in Sunshine Tidings survived, but it’s still a perfectly serviceable settlement. Loot an Industrial Trunk in the house, then grab a copy of the Wasteland Survival Guide off the floor nearby.
Diamond City. Whatever you do with the robot, head north-west to find a green house [Novice], inside of which you can find some chems then head uphill to the west and clear out the cabin there. Doesn’t look like anybody in Sunshine Tidings survived, but it’s still a perfectly serviceable settlement. Loot an Industrial Trunk in the house, then grab a copy of the Wasteland Survival Guide off the floor nearby.
At Sunset Tidings Co-op you’ll find an issue of the Wasteland Survival Guide (left). With ample space and plenty of ready-made structures, Sunset Tidings Co-op is a fine settlement to quickly develop. It just needs you to build some creature comforts and lure in settlers with a Recruitment Radio Beacon (right).
Return to the building with the terminal and activate the workshop to make this place yours. Your goal now? Build a Recruitment Radio Beacon (Power > Miscellaneous) which requires Circuitry x2, Crystal x2, Copper x6, Steel x10, Ceramic x3 and Rubber x1 . You may or may not have done this on your own in the other settlements you should have by now (Abernathy Farm, ![]() Red Rocket Truck Stop,
Red Rocket Truck Stop, ![]() Tenpines Bluff,
Tenpines Bluff, ![]() Outpost Zimonja, Starlight Drive-In and
Outpost Zimonja, Starlight Drive-In and ![]() Graygarden), but simply put, you need to get this settlement up to snuff. There are plenty of houses around to put beds in, and you have some to start. Just plant some crops, build some Water Pumps, then build turrets until your settlement’s defense score equals the sum of its food and water scores. Once done, build a generator and a Recruitment Radio Beacon and watch the settlers pour in. Once that’s done, you can return to Preston and claim your reward, if he gave you the quest to explore this place.
Graygarden), but simply put, you need to get this settlement up to snuff. There are plenty of houses around to put beds in, and you have some to start. Just plant some crops, build some Water Pumps, then build turrets until your settlement’s defense score equals the sum of its food and water scores. Once done, build a generator and a Recruitment Radio Beacon and watch the settlers pour in. Once that’s done, you can return to Preston and claim your reward, if he gave you the quest to explore this place.
| Objective | Reward |
|---|---|
| For claiming Sunshine Tidings Co-op | 115 XP, 92 Caps |
Lonely Chapel/Federal Ration Stockpile
That settlement’s been claimed, but since you’re down here, and Diamond City awaits further to the south… well, why not press on ahead? Exactly, no good reason. Head south-west from Sunshine Tidings Co-op to find the ![]() Lonely Chapel, which isn’t just lonely; it’s also pretty boring. Head inside and loot what you can, then search the northern end of the chapel to find a trap door leading to the
Lonely Chapel, which isn’t just lonely; it’s also pretty boring. Head inside and loot what you can, then search the northern end of the chapel to find a trap door leading to the ![]() Federal Ration Stockpile.
Federal Ration Stockpile.
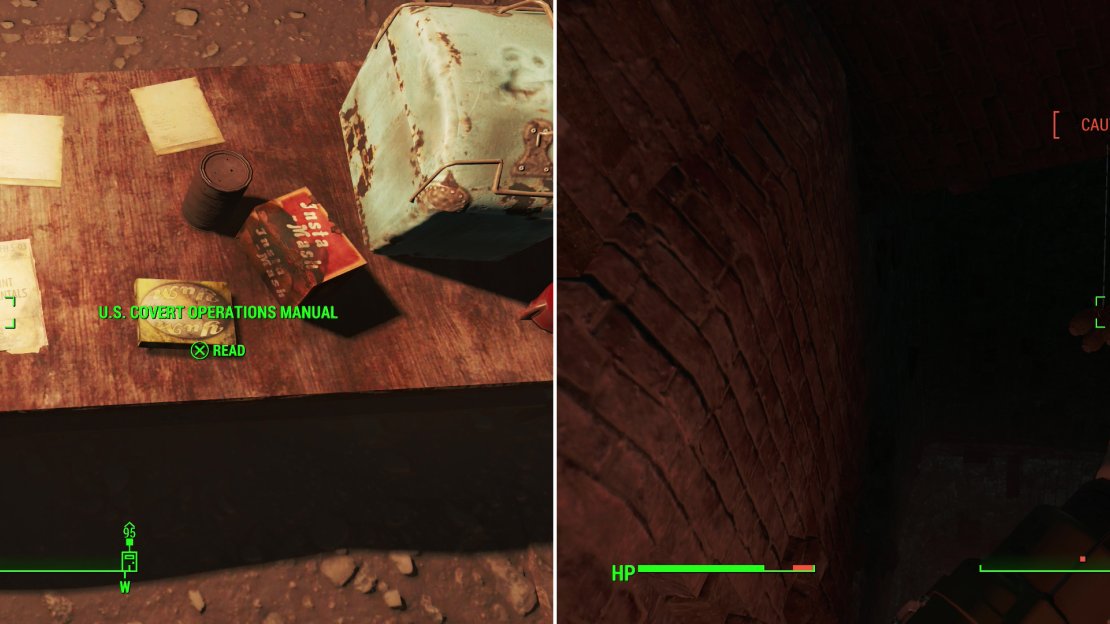
Use the trap door and go down a tunnel to the north-east, then east, pass between some pillars and turn south, then south-east. Eventually you’ll reach a chamber occupied by the rather powerful Raider named Red Tourette, several Machinegun Turrets MK III and a backup Raider. Kill Red, then loot her for the Federal Ration Stockpile Password, then ascend some stairs and enter a room to the south-west, where you can find a U.S. Covert Operations Manual on a table, a Nuka Cherry, a Nuka Cola Quantum, and the notes “Red! It’s Lily!”, “To My Big Sister Red” and “Don’t Worry, Sis”. Seems the Raiders over at ![]() Beantown Brewery were extorting the Raiders here. Live by the sword, die by the sword… Hack Red Tourette’s Terminal [Novice] to learn more about the conflict. Once done, you can loot another, smaller, less interesting cubby nearby.
Beantown Brewery were extorting the Raiders here. Live by the sword, die by the sword… Hack Red Tourette’s Terminal [Novice] to learn more about the conflict. Once done, you can loot another, smaller, less interesting cubby nearby.
In the Federal Ration Stockpile you can obtain another U.S. Covert Operations Manual, to permanently improve your stealth (left). Be wary, however, the Raiders who occupy the structure - and their traps - can be lethal (right).
After looting this chamber head down some stairs to the north, through a doorway, then through a blue door to reach another large chamber. Execute the two Raiders here, then continue north to find the Storage Lockup Terminal [Master], which can be opened with the password you got off Red earlier. Use the terminal to open the doors to the north, but before you head into the room you just opened, instead search the southern wall to find a wall Safe [Expert], then go through a yellow door to the west.
In the tunnel beyond the yellow door you’ll have to face another pair of Raiders on high ground. Kill them, then continue west and head up some stairs to the north before turning west and going down some more stairs. Be wary of a Grenade Bouquet on these stairs, however; there’s a Bathroom Scale at the bottom of the stairs that triggers this trap, and it’s a triple-grenade bouquet, meaning your odds of surviving it are very low outside of Power Armor. In the small room at the bottom of the stairs you’ll find another Raider and a Machinegun Turret MK I, who are less dangerous by far than the Grenade Bouquet was. Loot a Tool Case [Novice] on a metal shelf to the south, then continue north into a watery room and kill whatever Raiders are here. Once done, turn west and loot an Ammo Box [Novice] and open a door [Novice], beyond which you’ll find a small room worth looting, as you can pry a ![]() Fusion Core out of a machine.
Fusion Core out of a machine.
Return to the watery chamber to the east and continue east into another similar chamber, following the metal walkway until you reach the standard brick tunnel you should be used to. Head up some stairs to reach a room which is north of the room unlocked by the Storage Lockup Terminal. Huh. Kill the Raiders here, then grab a ![]() Fat Man off a metal shelf to the east, then turn south and loot the stockpile room. In here you can find, well, plenty of food, including two Nuka Cola Quantums. There’s also a Trunk with some random goodies inside. Make those items yours, then continue north, looting your way through that room until you find some blue double-doors guarded by some… cans. Defeat these aluminum sentries and make your way up some stairs until you reach the door outside.
Fat Man off a metal shelf to the east, then turn south and loot the stockpile room. In here you can find, well, plenty of food, including two Nuka Cola Quantums. There’s also a Trunk with some random goodies inside. Make those items yours, then continue north, looting your way through that room until you find some blue double-doors guarded by some… cans. Defeat these aluminum sentries and make your way up some stairs until you reach the door outside.
The grounds of the Federal Ration Stockpile are crawling with potent Raiders, including one in Power Armor. Yikes. You can get the drop on the ones in the building, after which the structure will serve as a fine defensive strong-point for you to fight from, with the notable exception concerning grenades; those can be bad. You can use the Stockpile Reception Terminal in the building to sic the turrets on the Raiders, or at least deactivate them. The distraction may just help. After fighting your way through the Raiders, their Attack Dog, and perhaps their turrets, you can hack a terminal in a shack to the east which… does the same thing as the one in the building. Oh well. It’s still worth XP to tinker with.
You’re now done with the areas (loosely) around Sunshine Tidings Co-op, but before you move on with the next leg of your journey, head south-east from the Federal Ration Stockpile to find a road, which you should follow south-east to reach an unmarked gas station. In here you can find a Nuka Cola Vending Machine with a Nuka Cola Quantum inside, and behind the counter you’ll find a floor Safe [Expert].
No Comments