
Walkthrough for the Wattz Consumer Electronics area in Fallout 4.
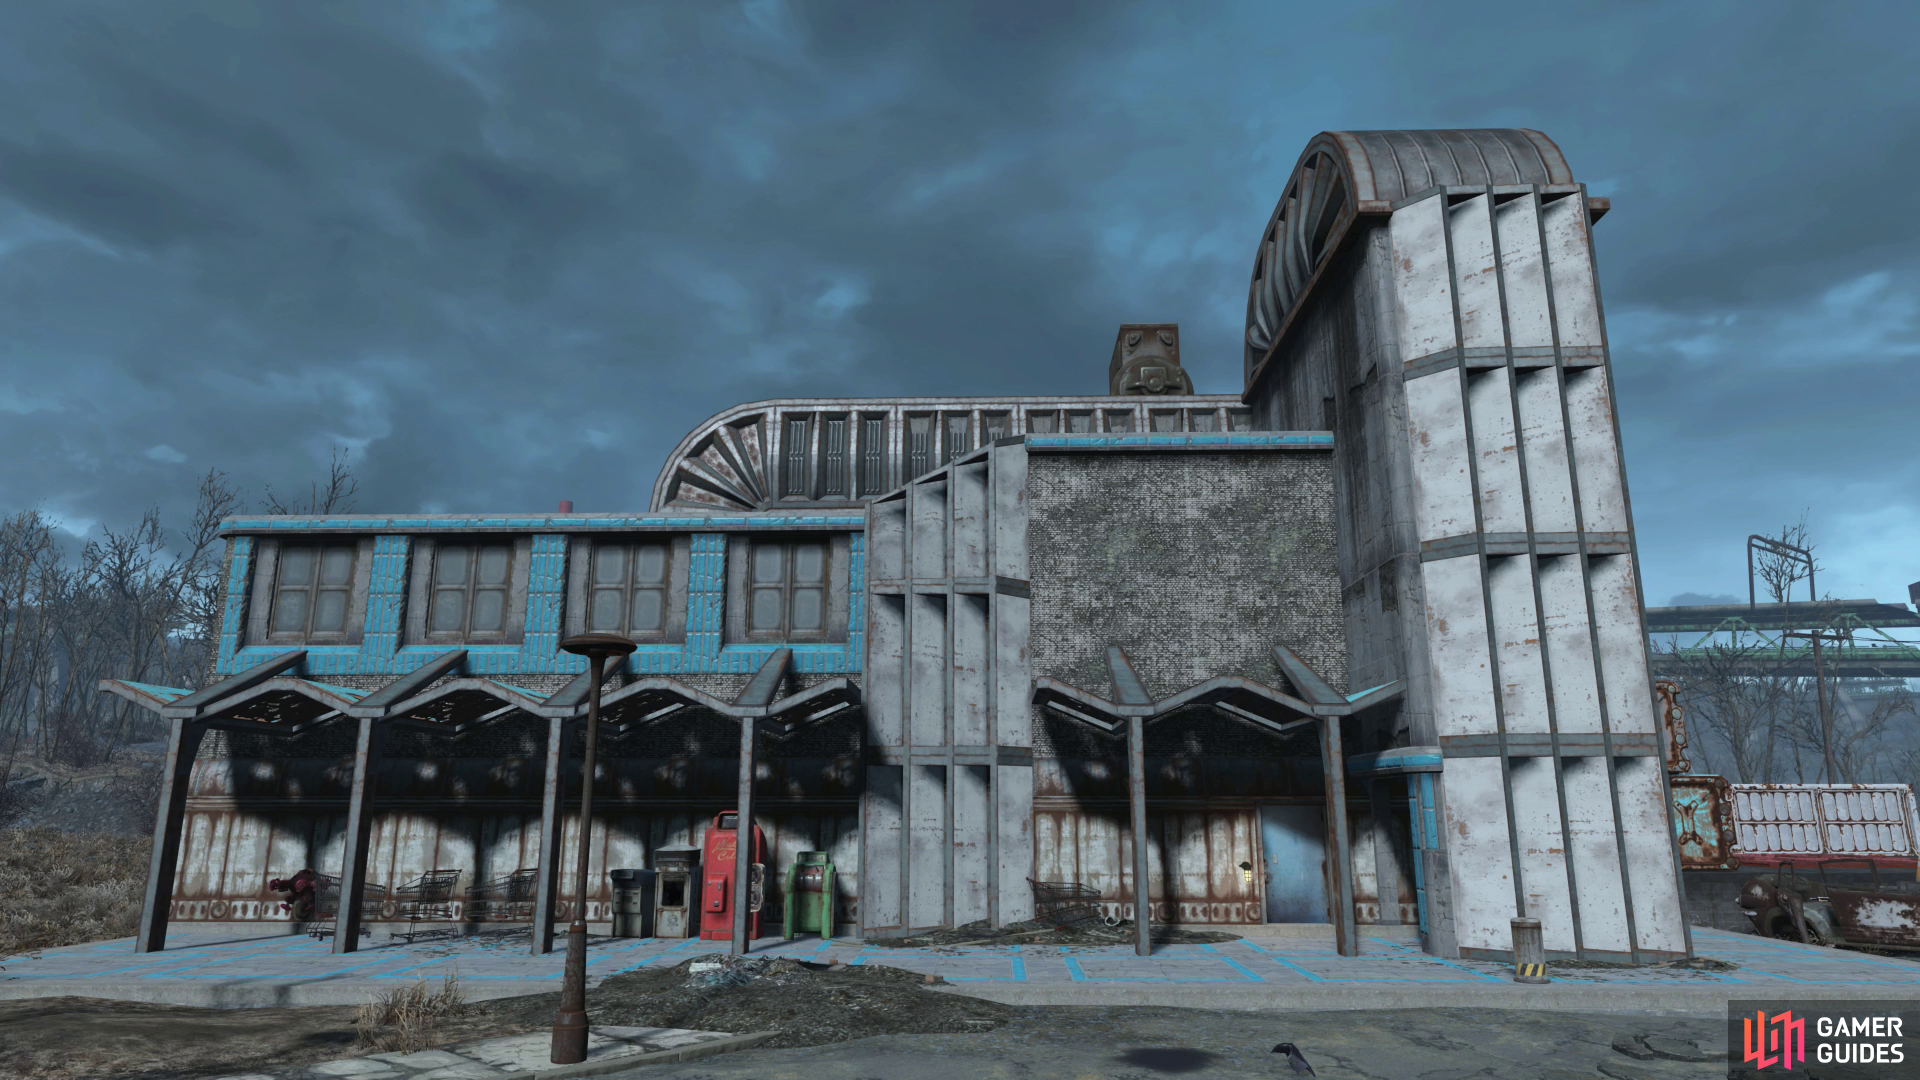
Wattz Consumer Electronics.
| Important Items in This Area |
|---|
| Total Hack |
One of the more northeasterly areas on the outskirts of [Cambridge], Wattz Consumer Electronics can be found just southwest from the Tucker Memorial Bridge, or east and slightly south from [Mass Gravel & Sand].


(1 of 2) East of Wattz Consumer Electronics you’ll find some robots fightings.
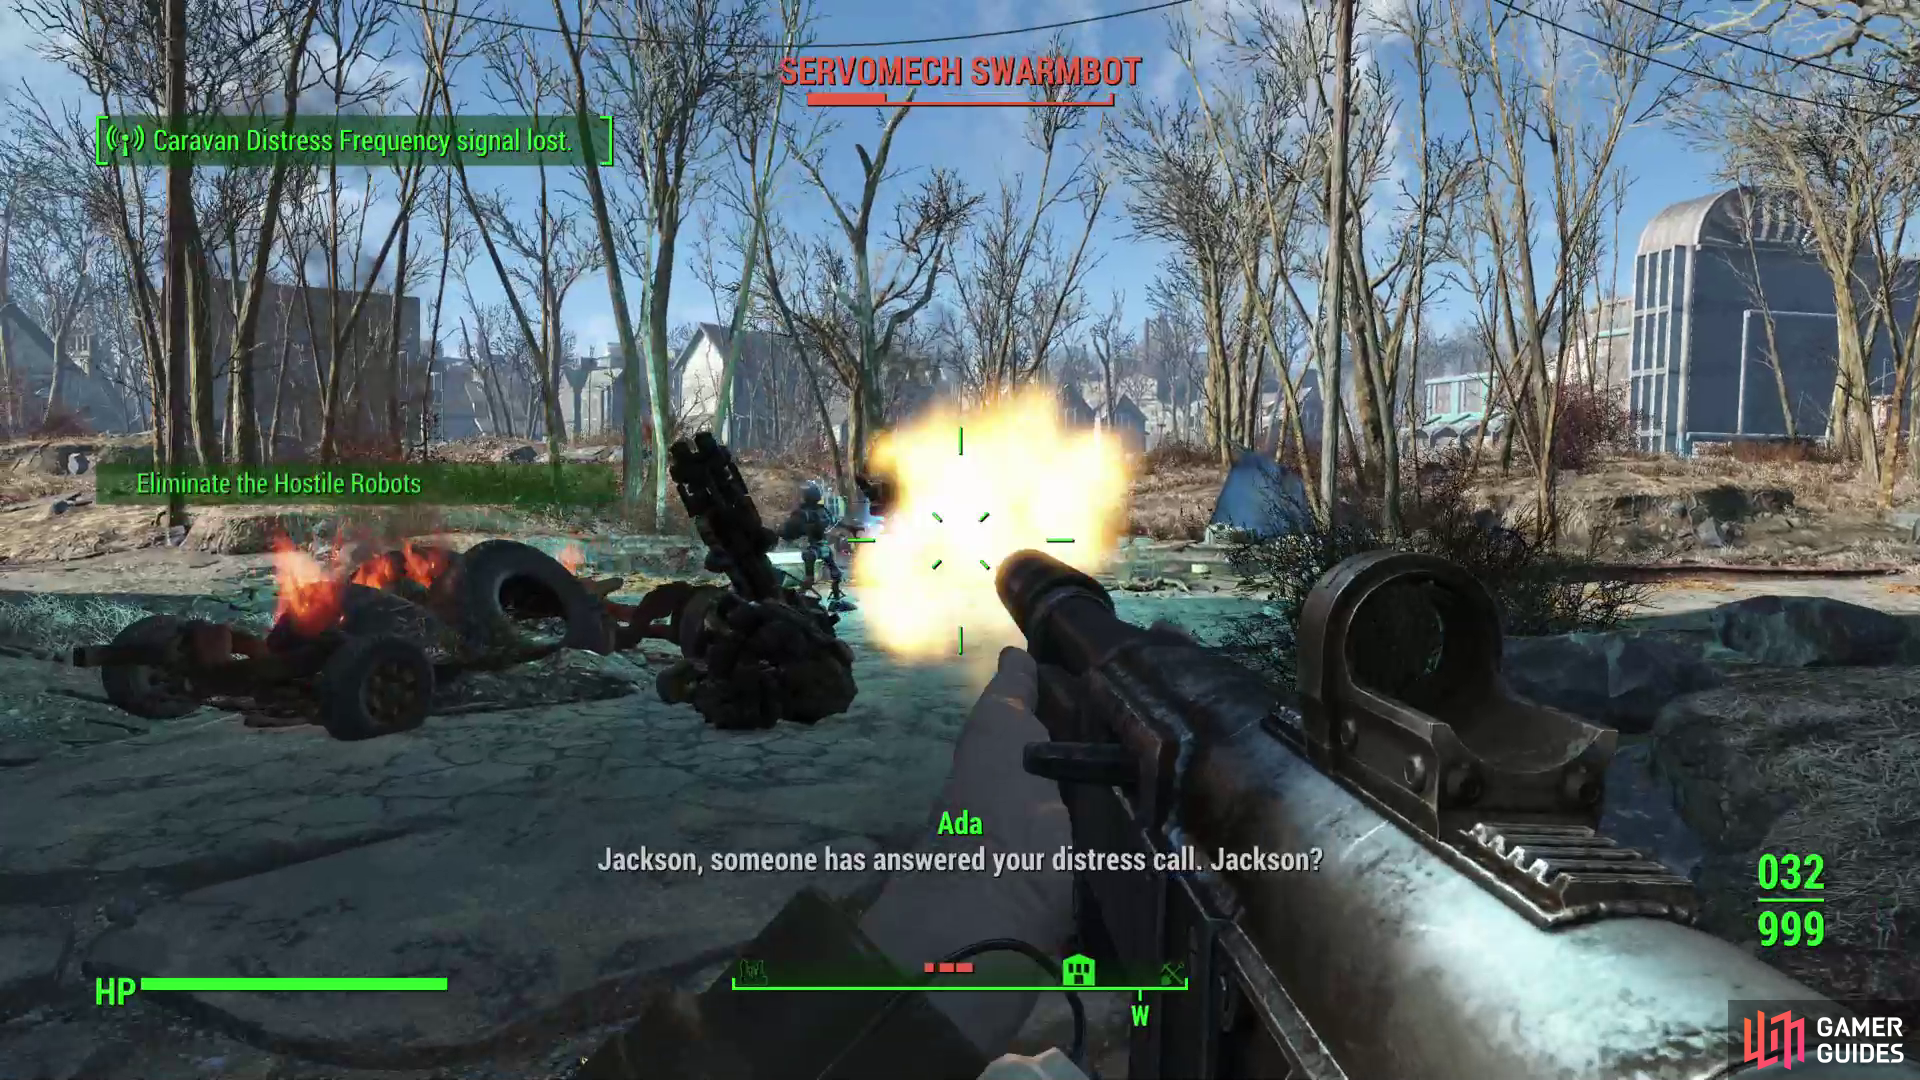
East of Wattz Consumer Electronics you’ll find some robots fightings. (left), Defeat the hostile robots and talk to Ada to start the Mechanist questline. (right)
Automatron: Mechanical Menace
This area is either moderately interesting, or quite interesting, depending on what DLC you have installed. If you have the Automatron DLC installed and your character is level 15 or higher you should pick up the Caravan Distress Frequency on your Pip-Boy. If you listen to it, you’ll be informed of a caravan being attacked by “hostile robots” near Wattz Consumer Electronics. Merely getting in range of the broadcast - which extends throughout much of [Lexington] and [Cambridge] - will start the first Automatron quest Mechanical Menace.
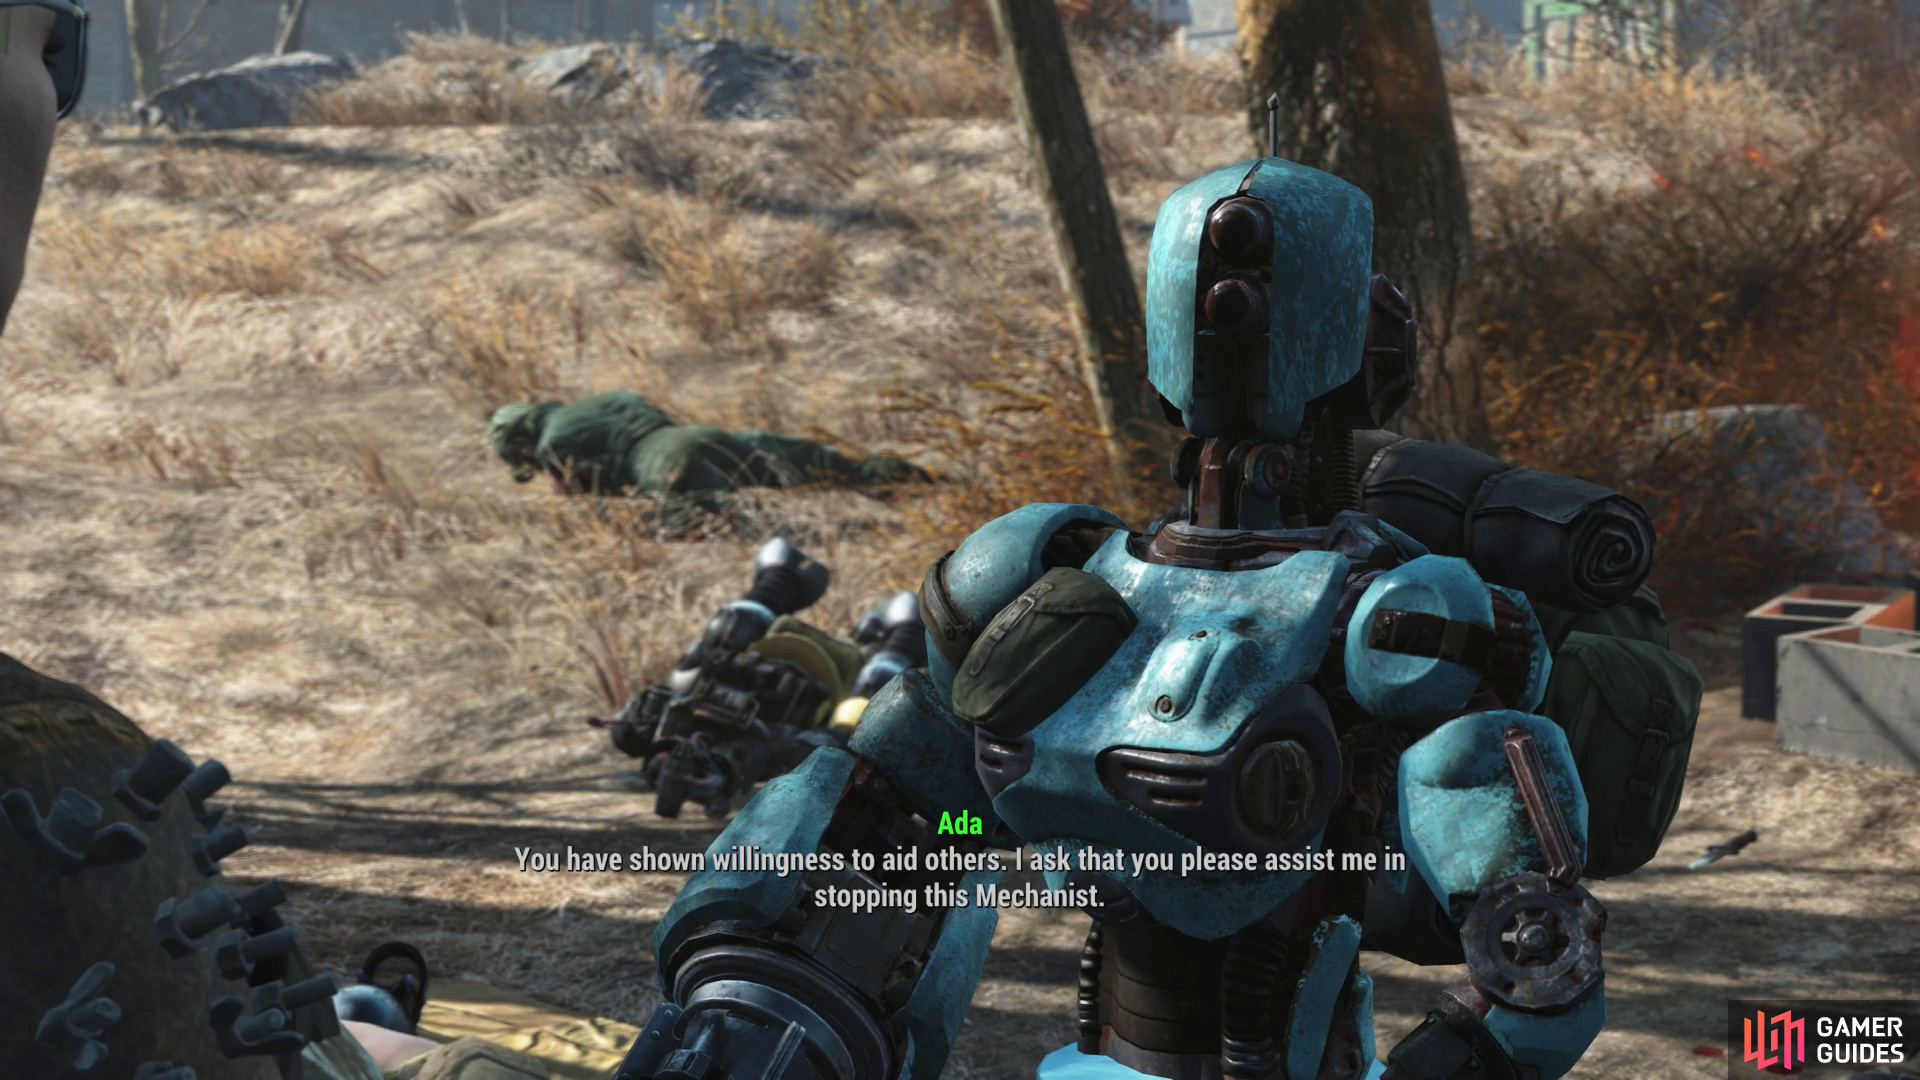
With this quest active you’ll find a large group of robots east of Wattz Consumer Electronics, and one may indeed accurately portray them as hostile. The robots are attacking another, neutral robot named Ada, and you can engage or avoid the conflict as you see fit. After the fight, Ada will try to talk to you, drawing you deeper into the Mechanical Menace questline… which is fine, save for the fact that you’ll be pestered by hostile robots periodically until you resolve the Automatron questline once you start pursuing it. If you’re not ready for such an endeavor, and would rather avoid the nuisance of being attacked by Rust Devils and their pet robots for the time being, you’ll need to steer clear of this fight. Alternatively, if you want to deviate from the walkthrough, follow the link to Mechanical Menace.
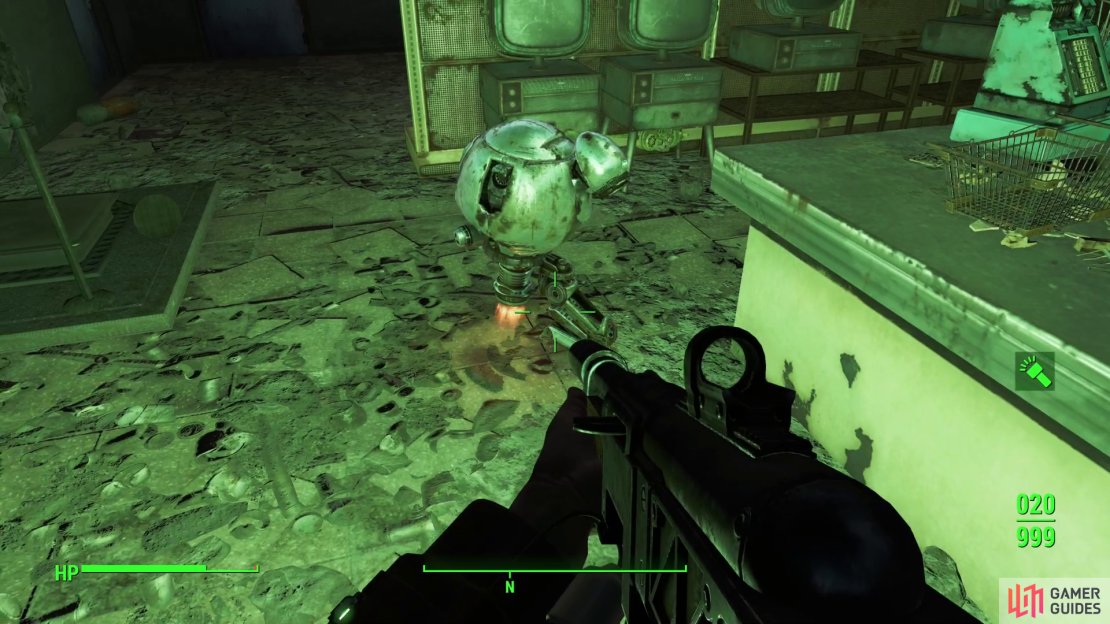
(1 of 3) Throughout Wattz Consumer Electronics you’ll find numerous dormant robots.
Exploring Wattz Consumer Electronics
Assuming you intend to explore Wattz Consumer Electronics, make your way to the building’s northwestern side to find its lone entrance door. Around the northeastern side of the building you’ll find a trailer containing a terminal, which hints at shady business behavior, but is otherwise of limited interest.
Enter via the front door and you’ll find yourself on the store’s showroom floor, although “floor” might be a bit aspirational in this case, as the center of the floor has collapsed into the storage area, below. If you work your way north you’ll find some shelves on which you can find some junk you can collect, including desk fans and lamps, both of which contain a variety of materials that may interest you.
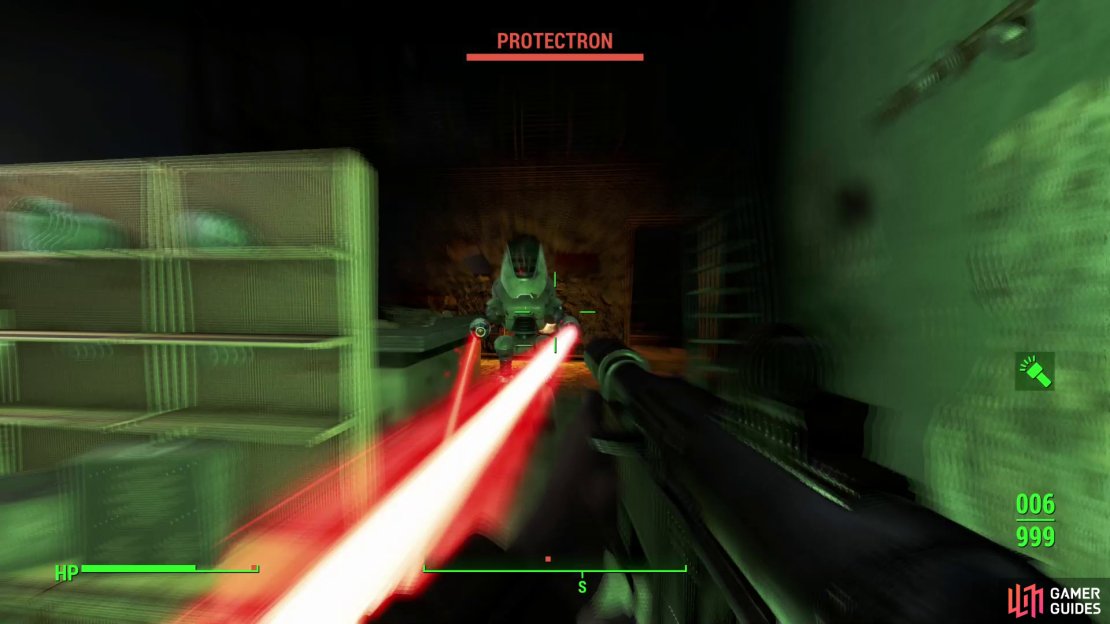
Also note the dormant robots as you explore, typically including Mr Handy and Protectron models. While they’re inactive, a quick VATS prodding will make it clear they’re not non-functional. You can destroy them now for XP and loot, or leave them be, as you prefer.
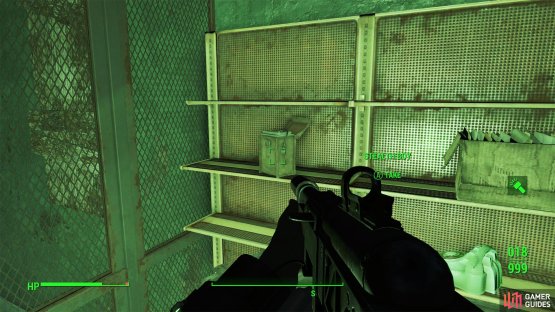
There are various side rooms you can loot and aside from the slumbering robots the only opposition you’ll face is the odd Radroach, which may be leveled. The plunder is generally not noteworthy aside from the odd chem and scrap containing oil, copper, circuitry and adhesive. Noteworthy exceptions include an elevated office along the northern end of the store, some stairs through a door to the northwest, and an elevated caged-off area in the southwestern corner.

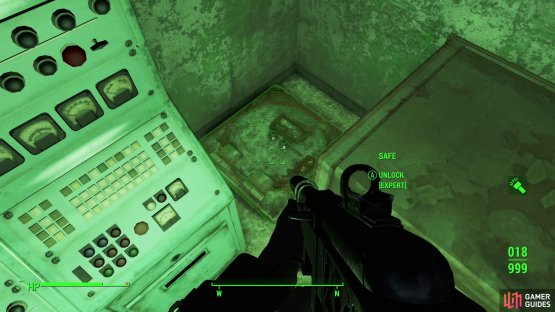
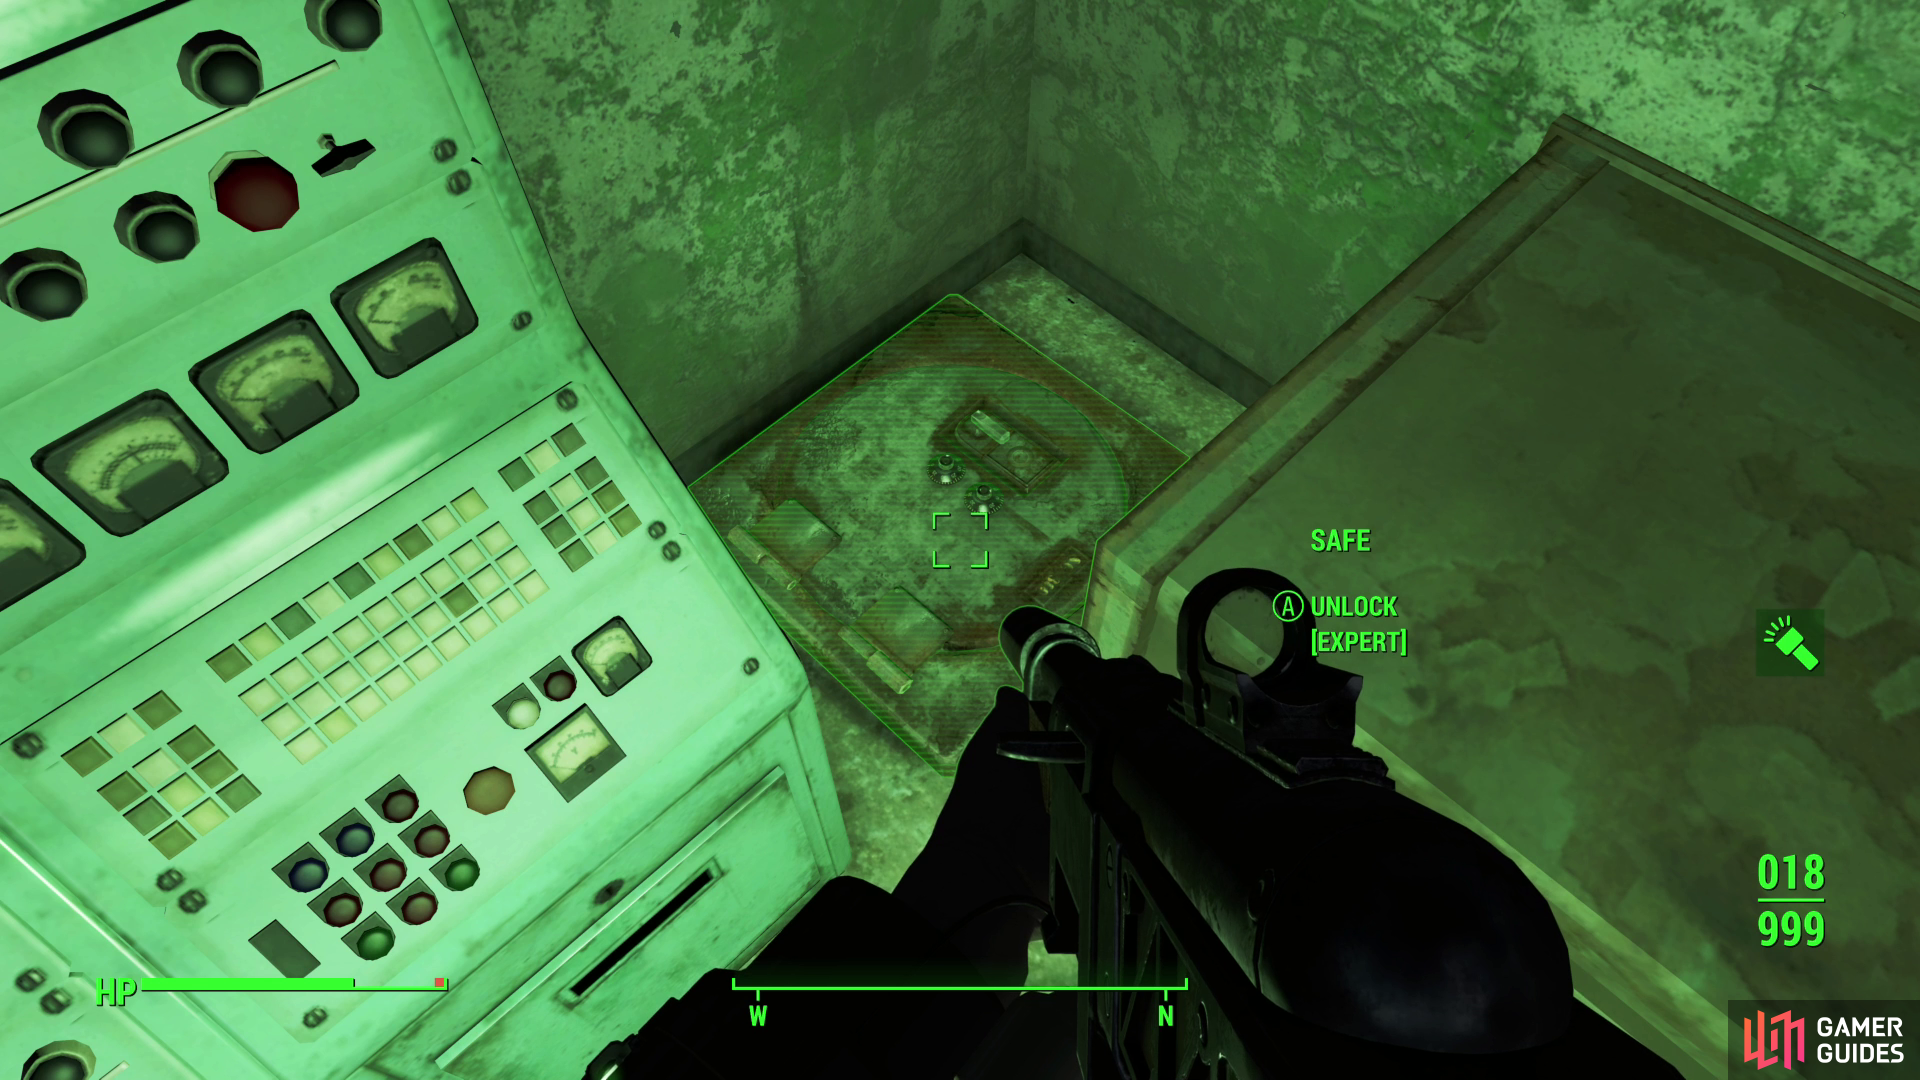
(1 of 2) Pick a lock to get through a caged-off area, where you’ll find a Mini Nuke in a safe,


Pick a lock to get through a caged-off area, where you’ll find a Mini Nuke in a safe, (left), and a Stealth Boy on a shelf. (right)
If you go up some stairs in the southwestern corner of the store you’ll find a cage-off area. You’ll have to pick a locked [Expert] door to gain access, but if you do you’ll obtain a Mini Nuke in a safe and a Stealth Boy on a shelf. Most of the noteworthy loot in the area can be found here.
Another flight of stairs along the northern end of the room leads to the manager’s office, wherein you’ll find a Steamer Trunk and a terminal. Loot the former and investigate the latter to find some info on why the bots are dormant, then use the Terminal to unlock a wall Safe to the west, which you can also plunder.

(1 of 2) In the basement you can find an issue of Total Hack,
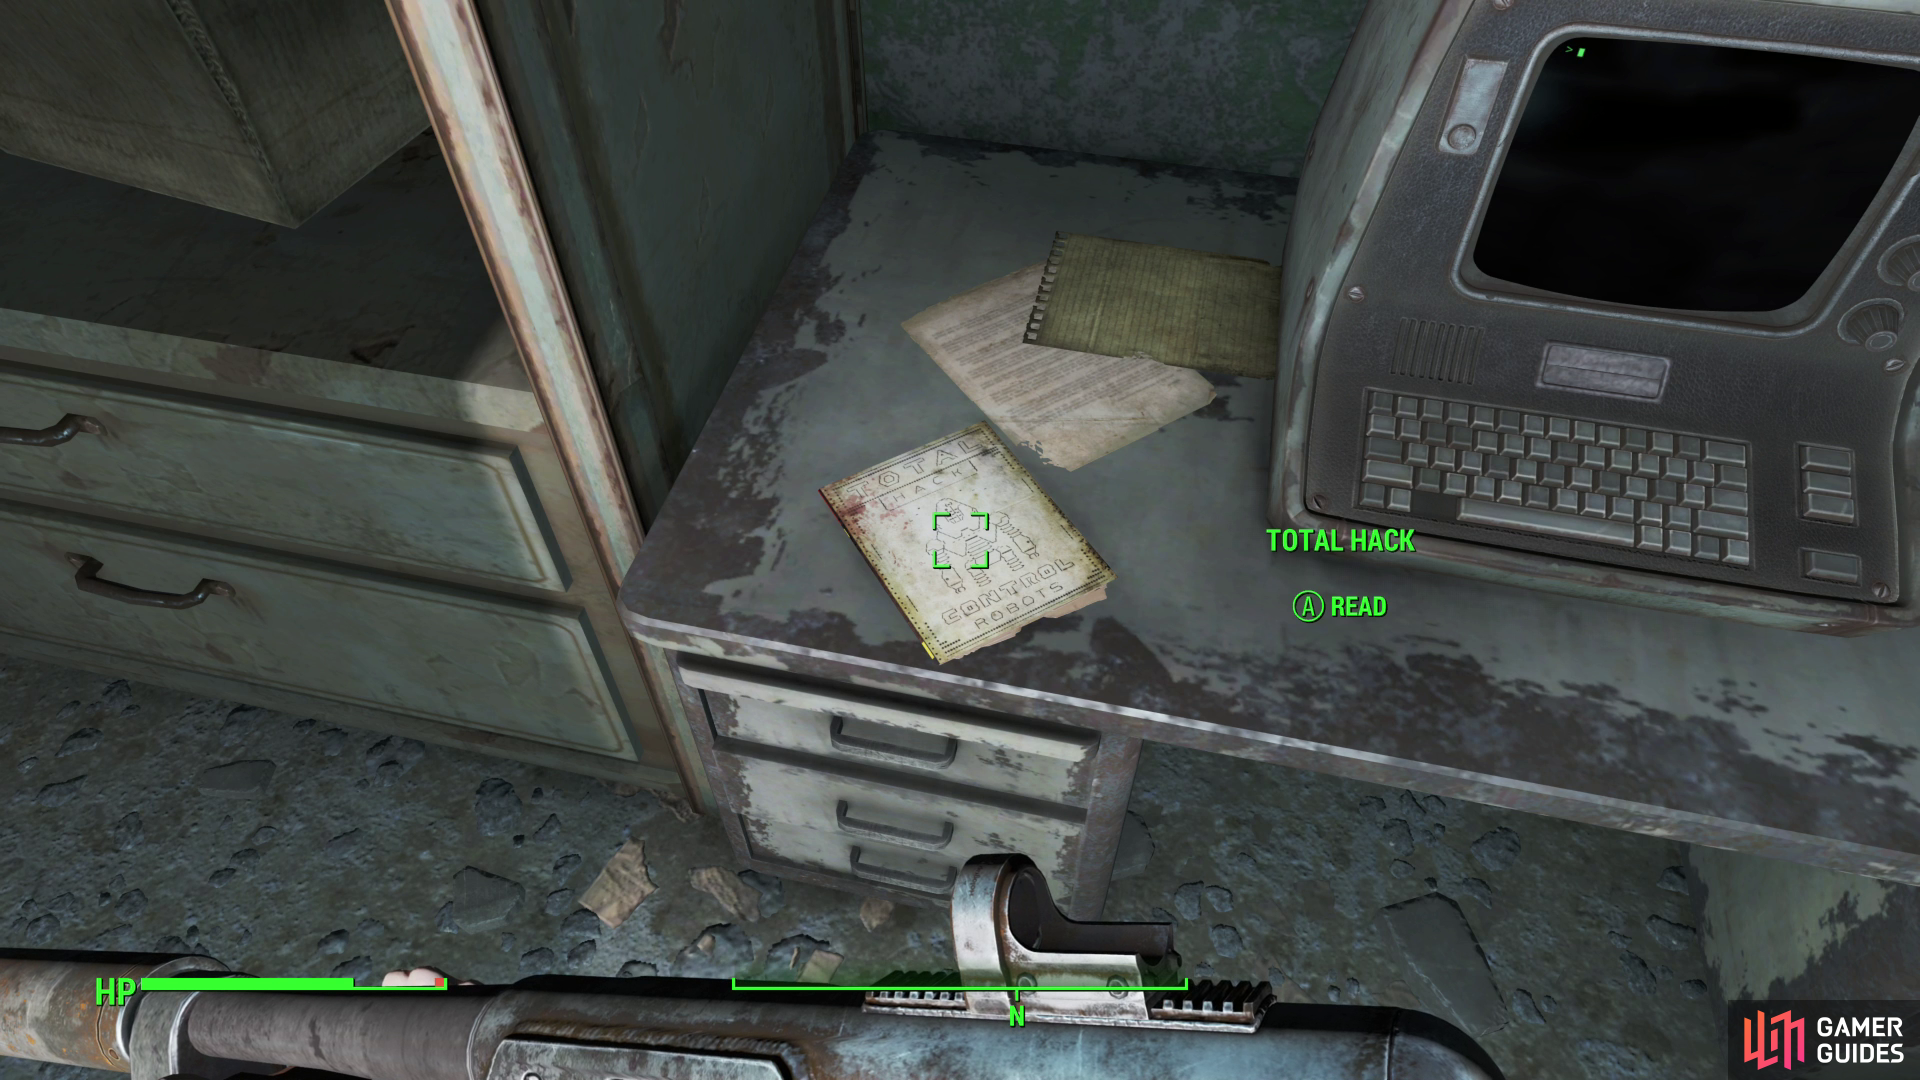
In the basement you can find an issue of Total Hack, (left), and in the corner is a hidden Safe. (right)
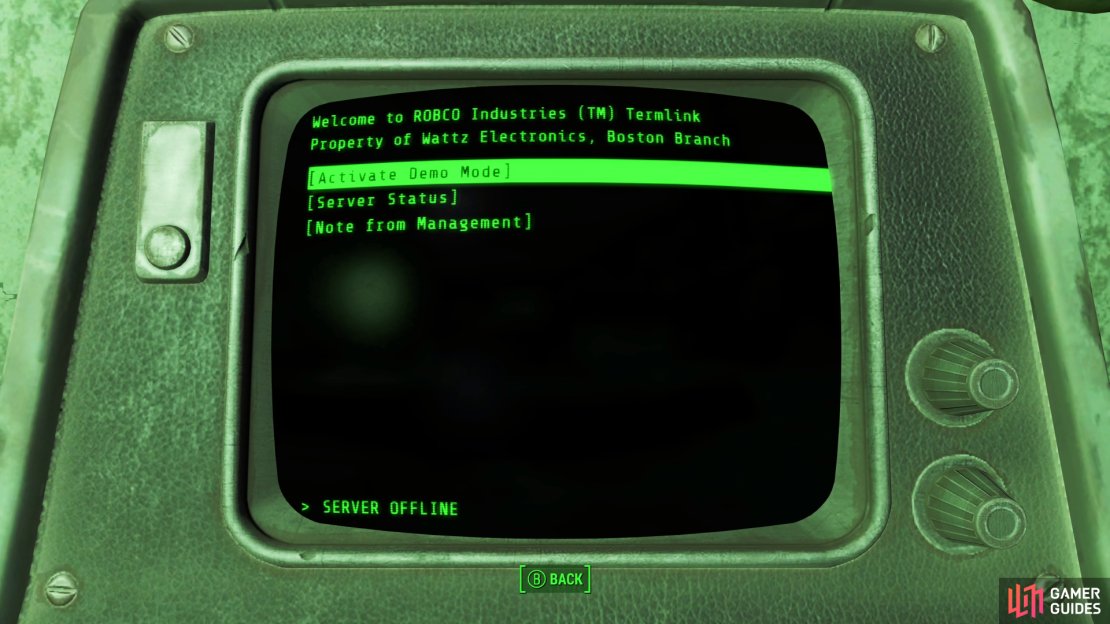
Return down to the show floor and go through the aforementioned door to the northwest and head downstairs. There’s not a lot to see in the basement aside from shipping containers and dormant robots. Go through a door to the north, use a Terminal on the wall to unlock a door, beyond which is another, less fancy office. Dispose of another Radroach and interact with a Terminal on a desk, which has the [Activate Demo Mode] command on it. This will, predictably enough, activate the robots without disabling their undesired military protocols, meaning they’ll attack intruders - that’s you - on sight. There’s no real benefit to doing this over killing them while dormant, so only select this command if you want a pointless fight.
Less pointless, however, is the issue of Total Hack on the same desk. You can also search the northwestern corner of the room to find a floor Safe [Expert].
No Comments