
| Important Items in This Area |
|---|
| Eyebot Schematics |
| Mechanist’s Armor |
| Mechanist’s Helmet |
| Spotlight Schematics |
Go ahead and talk to Ada like the game says and the two of you will share information and you’ll learn where the Mechanist is as well as what you need to do to access their lair. In particular, you’ll need that “M-SAT” Jezebel told you of, so after you talk to Ada, get on the Robot Workshop and install one on her. It is under the “Special Modifications” and uses rather common parts (tag and locate if needed).
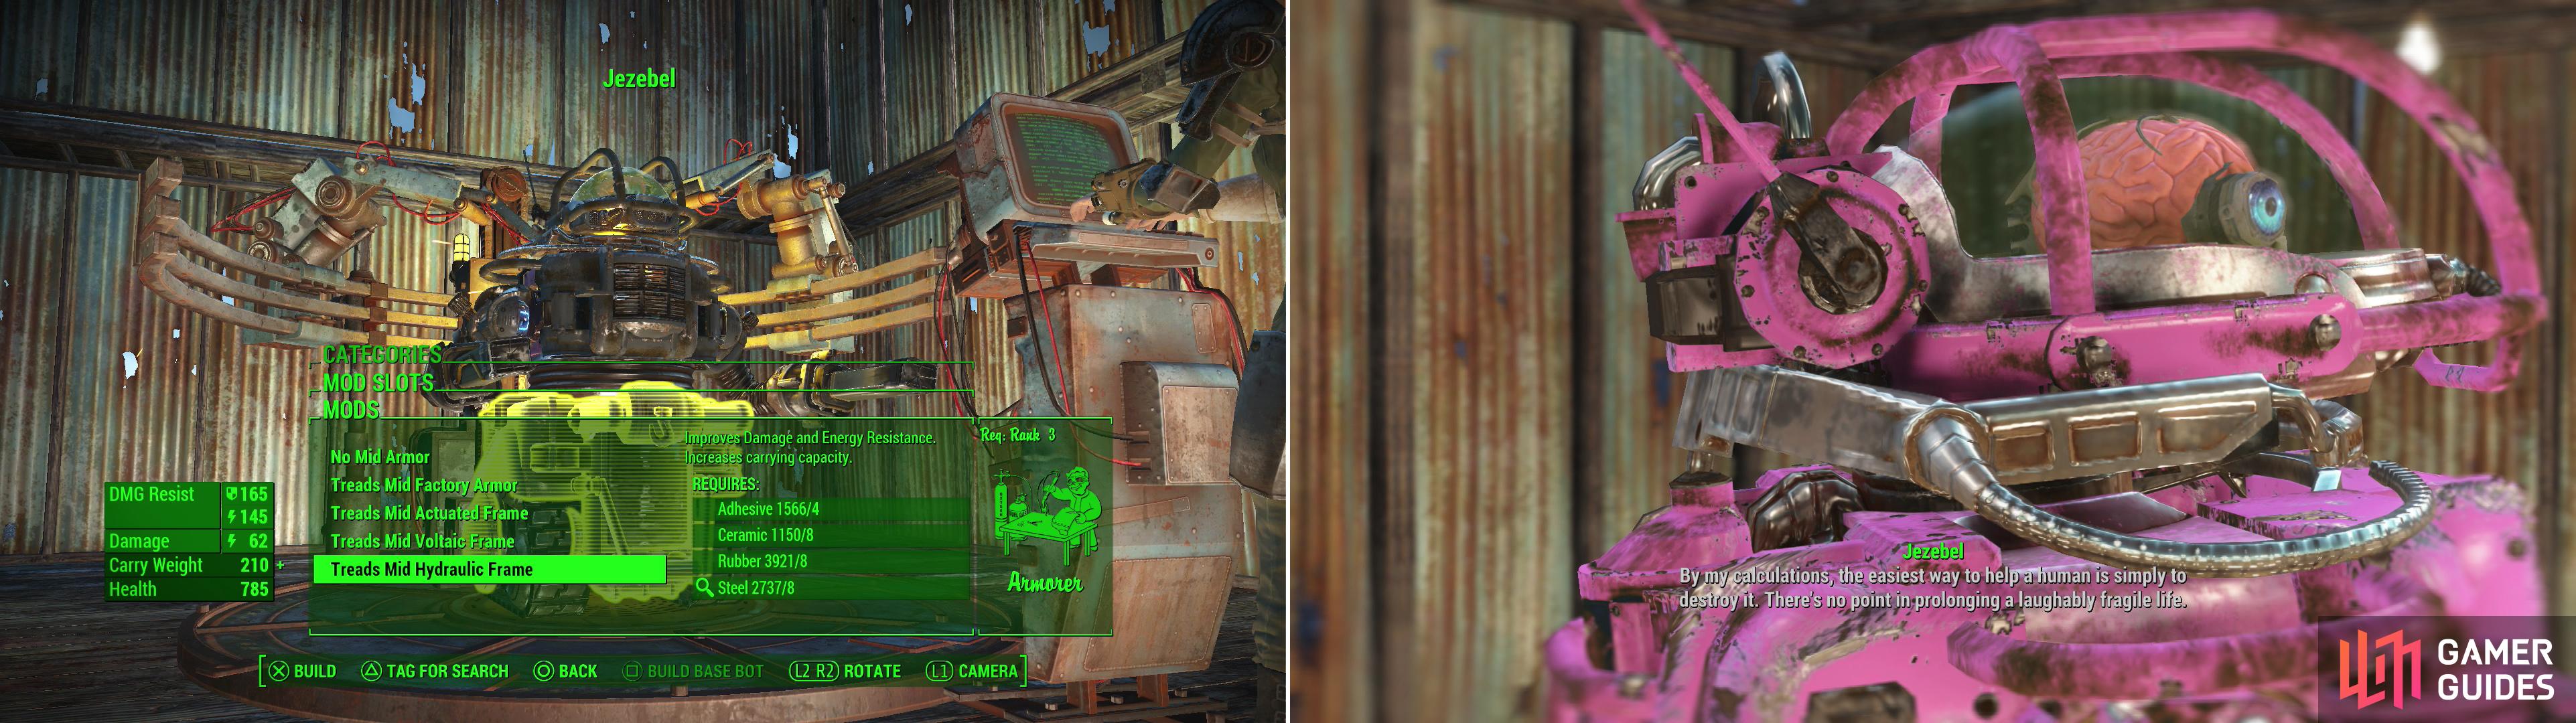
Build Jezebel a new body (left) and she’ll give unique insight into what went wrong with the Robobrain programming (right).
After that, you’ll be tasked with infiltrating the Mechanist Lair, which is located at the “RobCo Sales & Service Center”, just north of Boston Airport. This area is new to the Automatron DLC, so consider it another new dungeon for you to explore. Consider heading there after Fast Traveling from the “East Boston Police Station”, if you want to follow along.
From the “East Boston Police Station”, it is a short way south to find the very unassuming “RobCo Sales & Service Center”. There is a back entrance here, but the front one is unlocked and has some goodies so enter it to proceed.
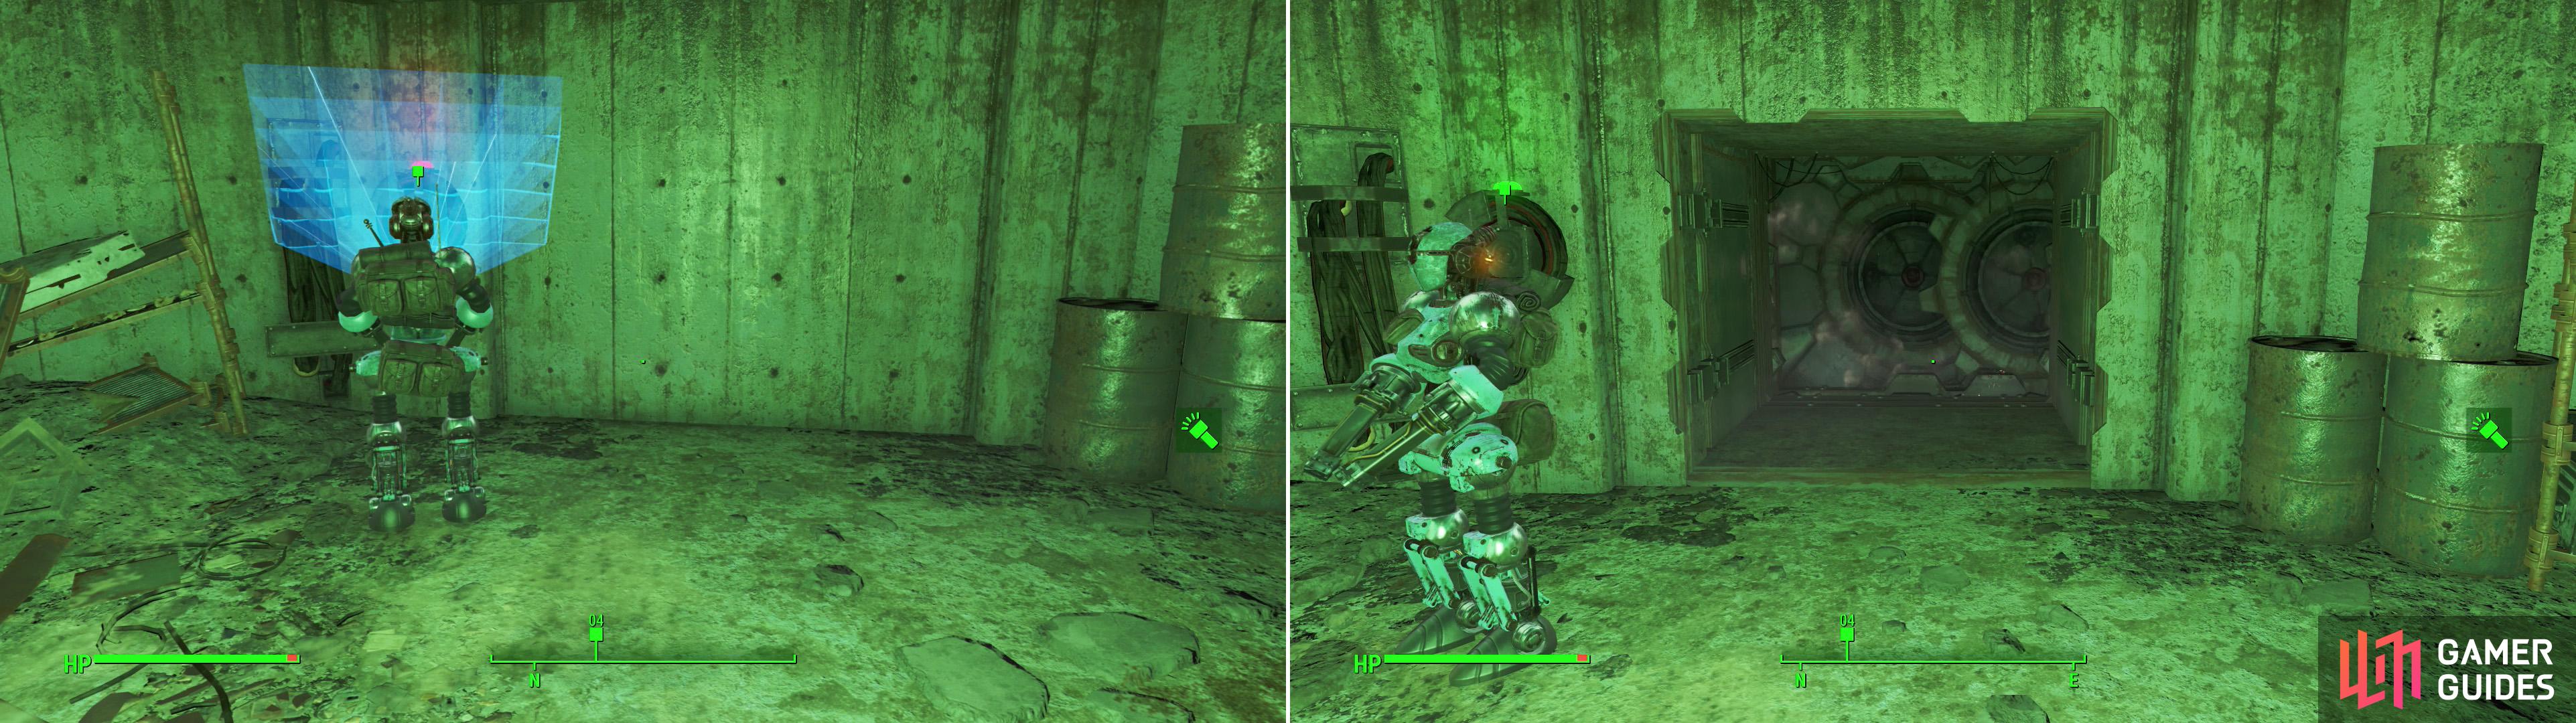
Take Ada to the RobCo Sales & Service Center and she’ll open the way to the Mechanist’s lair (left) which of course is wonderfully convoluted in a way that suits a super hero (villain?) (right)
RobCo Sales & Service Center
The entrance of this place is a mess, but typical of most stores nowadays. The main register has some money for you as well as a [Novice] terminal. If you hack this, you can unlock the [Advanced] safe directly below, but again, there’s no harm in doing both to scum for extra XP. The door nearby has a tripwrie, so disarm it and head into the basement. Now, down here near the door on the left you can find the RobCo Sales & Service Center Key . This door leads to the back entrance, so don’t bother. Instead, locate the odd terminal on the opposite wall and examine it. Ada will scan it and open up the way into the facility within. Fascinating.
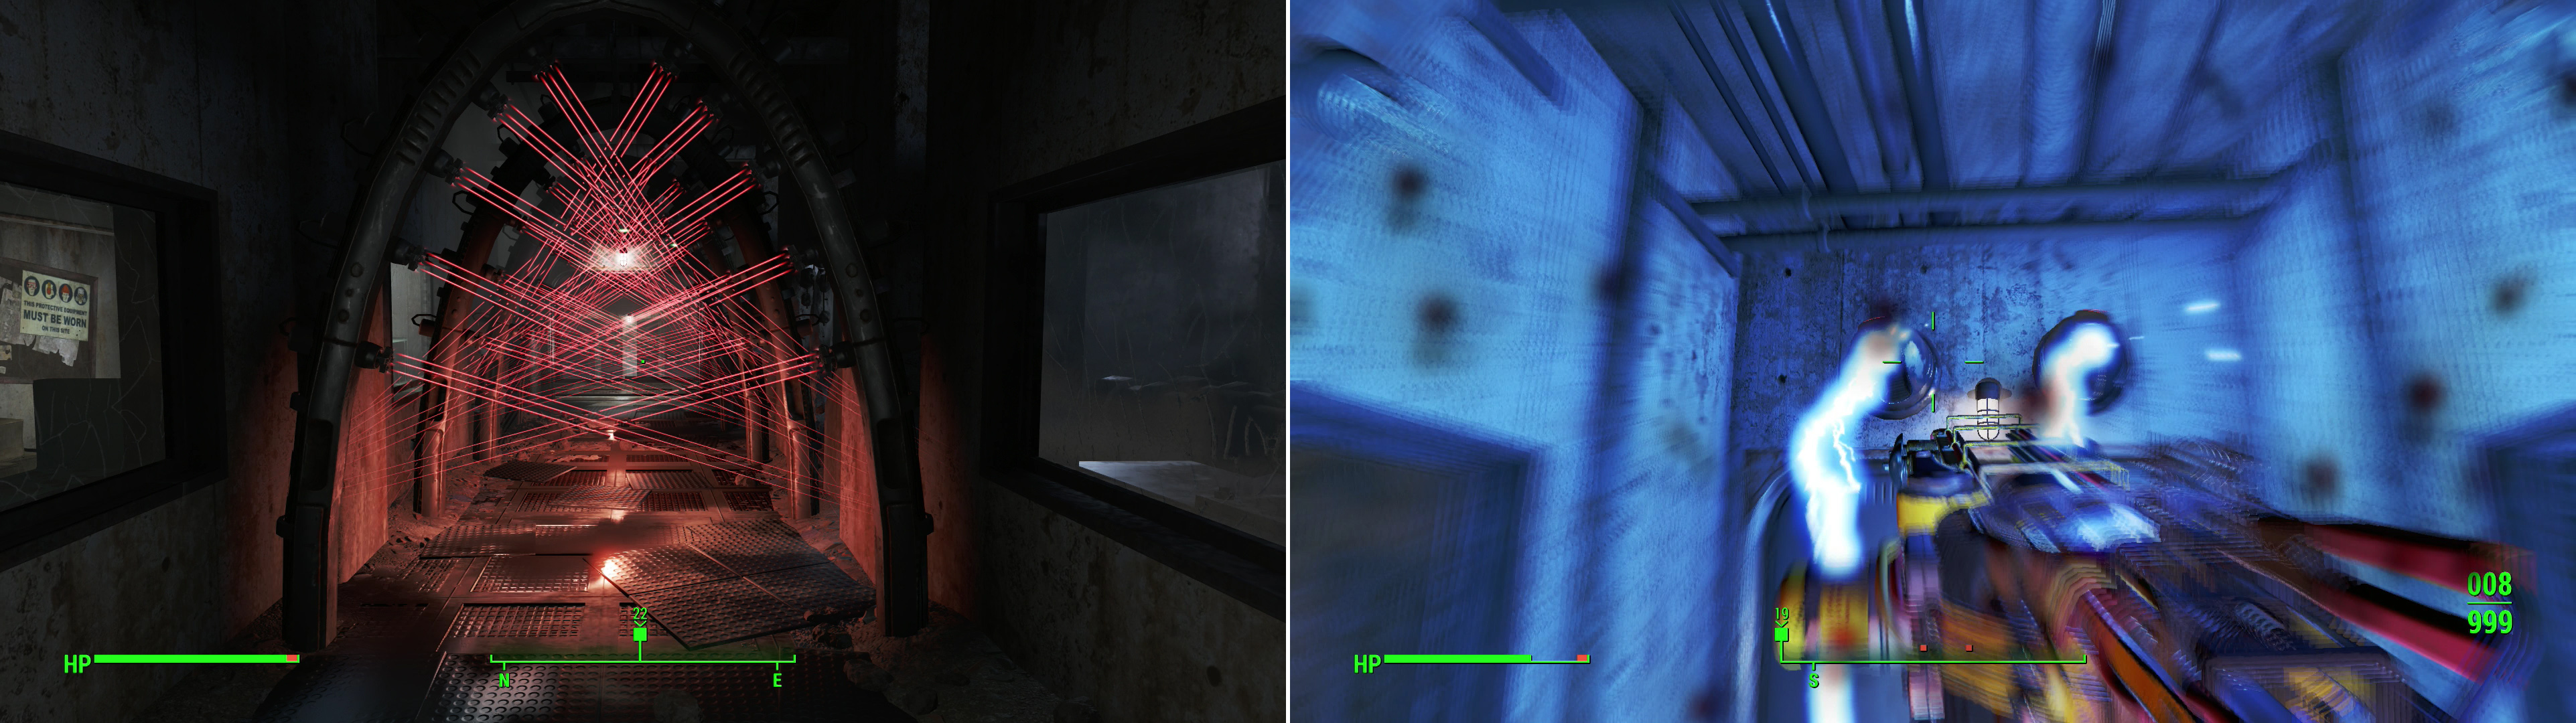
A grid of lasers impedes your progress (left). Should you alert the automated security here, a couple of Tesla Turrets will punish your transgression (right).
Past all of the doors you will find military-grade surroundings. Check out the lockers to the left and round the corner to see dozens of laser wires. To the right is an [Advanced] lock door you can pick for goodies (especially the “Eyebot Model” on the far end). To the left of the lasers is a Fusion Core reactor you can steal from and to the left a tunnel leading to an observation area by the lasers.
Here you can check out a “Security Office Terminal” for some interesting info. There are several computers to hack in this area too. First up is the middle “Decontamination Control Terminal” with an [Advanced] lock. With this you can shut the door, turn on the lasers (they are off? that’s weird…) to short circuit them (now they are off!) and even turn on some turrets.
The door just to the left though makes all of that unneccesary, as you can pick its [Expert] lock and skip everything. There is also a terminal to an elevator here that has a [Master] lock that, even if you do hack won’t let you use the elevator without authorization (which you don’t heave).
Choose your way past the lasers and an Eyebot will address you once you do, accusing you of attacking and then attacking you. Kill it off and be ready to face four junkbot enemies down below, with two coming from either side. Again, it’s recommended that you shoot off their ranged weapons to turn them into scrap easier. Also note that there is a [Novice] locked Toolbox just to the left of the security door and a Wooden Box on the right you can likely get some grenades from.
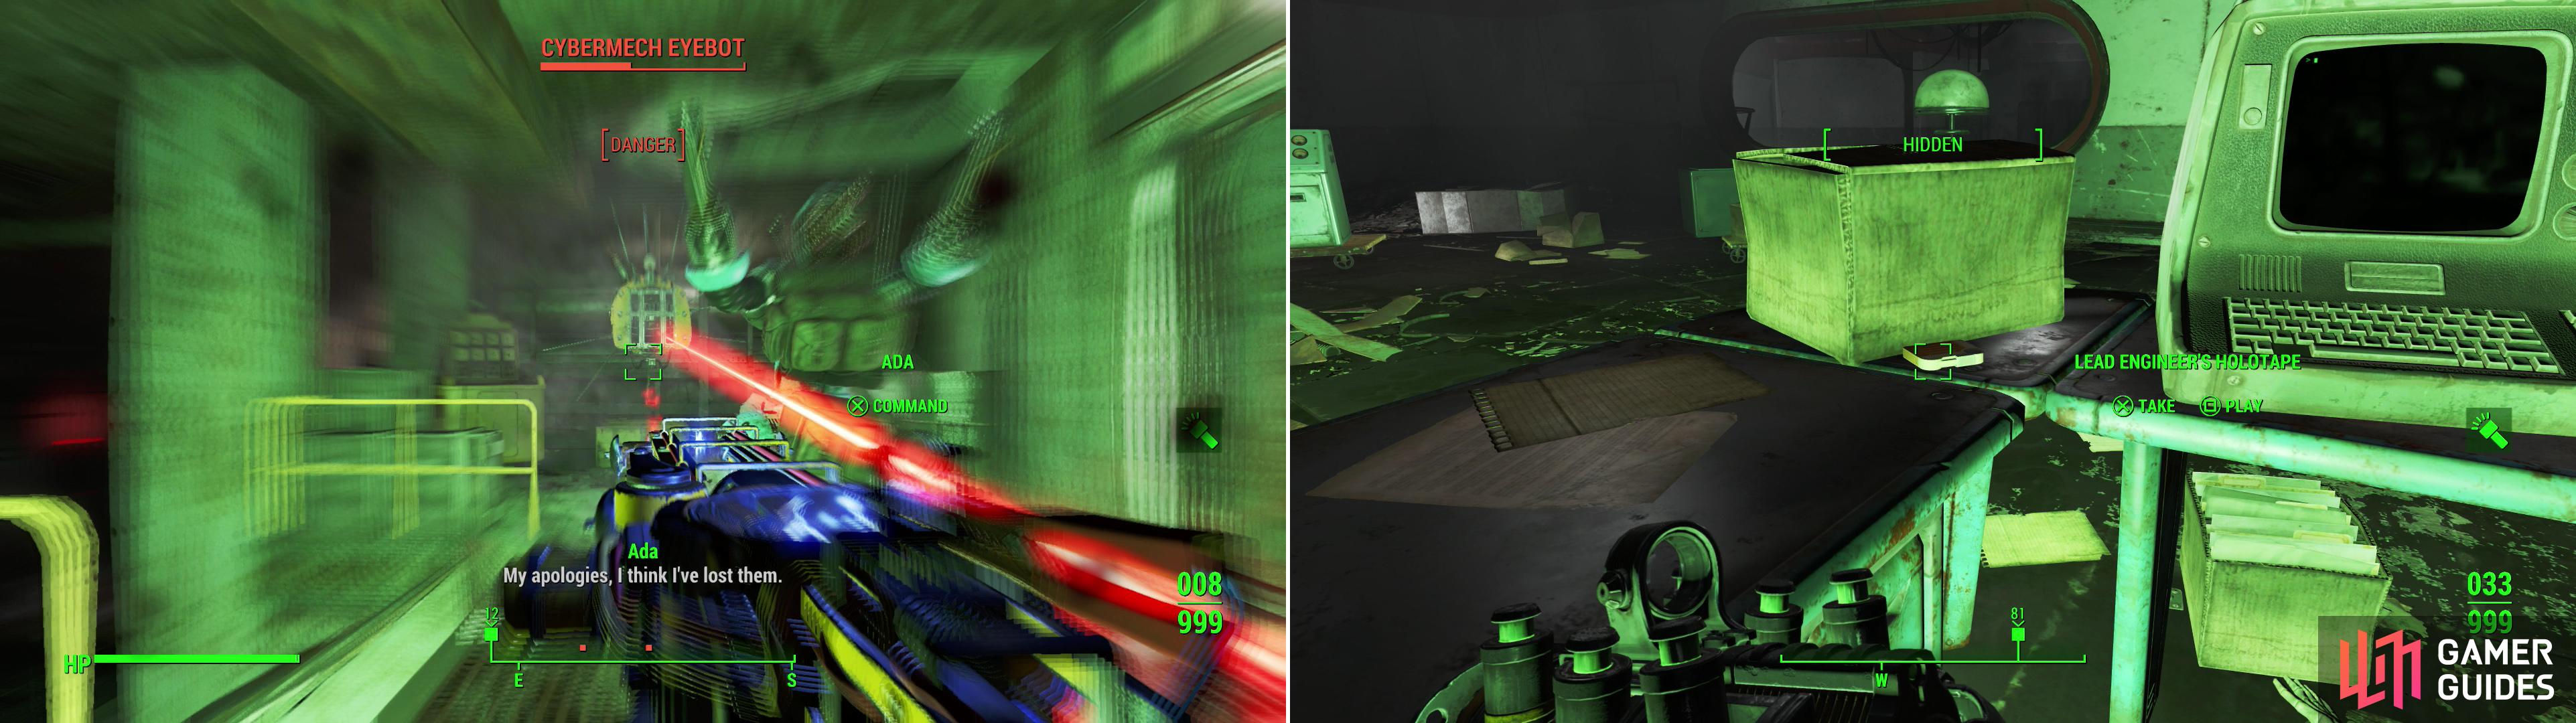
After breaking through the initial defenses of the Mechanist’s lair you’ll be confronted by the Mechanist’s Eyebot, with words, then with lasers! (left) Grabbing the holotapes of important pre-war figures may lead to opportunities later on… (right).
Mechanists Lair: Production Wing
Now that the Mechanist knows you are here, use the access port to the right to continue. You’ll enter a bare room with a [Novice] Ammo Box on the right. Continue down to a staircase and a wide-open area. You know there is a fight up ahead. Get on the right side for cover and sneak attack the tankbot you see up ahead to start the fight. It has a couple of junkbots to help and a turret in the distance, but take them out. On the left side, in the second work area is a “Robot Control Terminal” [Novice], which you can use to activate these robots and kill them off as well.
Continue on through a work area to another room, with robots up above you. Before you take them out though, you can check out the “Chief Engineer’s Terminal” to learn a bit about the Robobrains construction. Interesting. There is also a Mr. Handy model on his desk as well as the Lead Engineer’s Holotape just to the left of the terminal. Head upstairs now and take out the two junkbots you find.
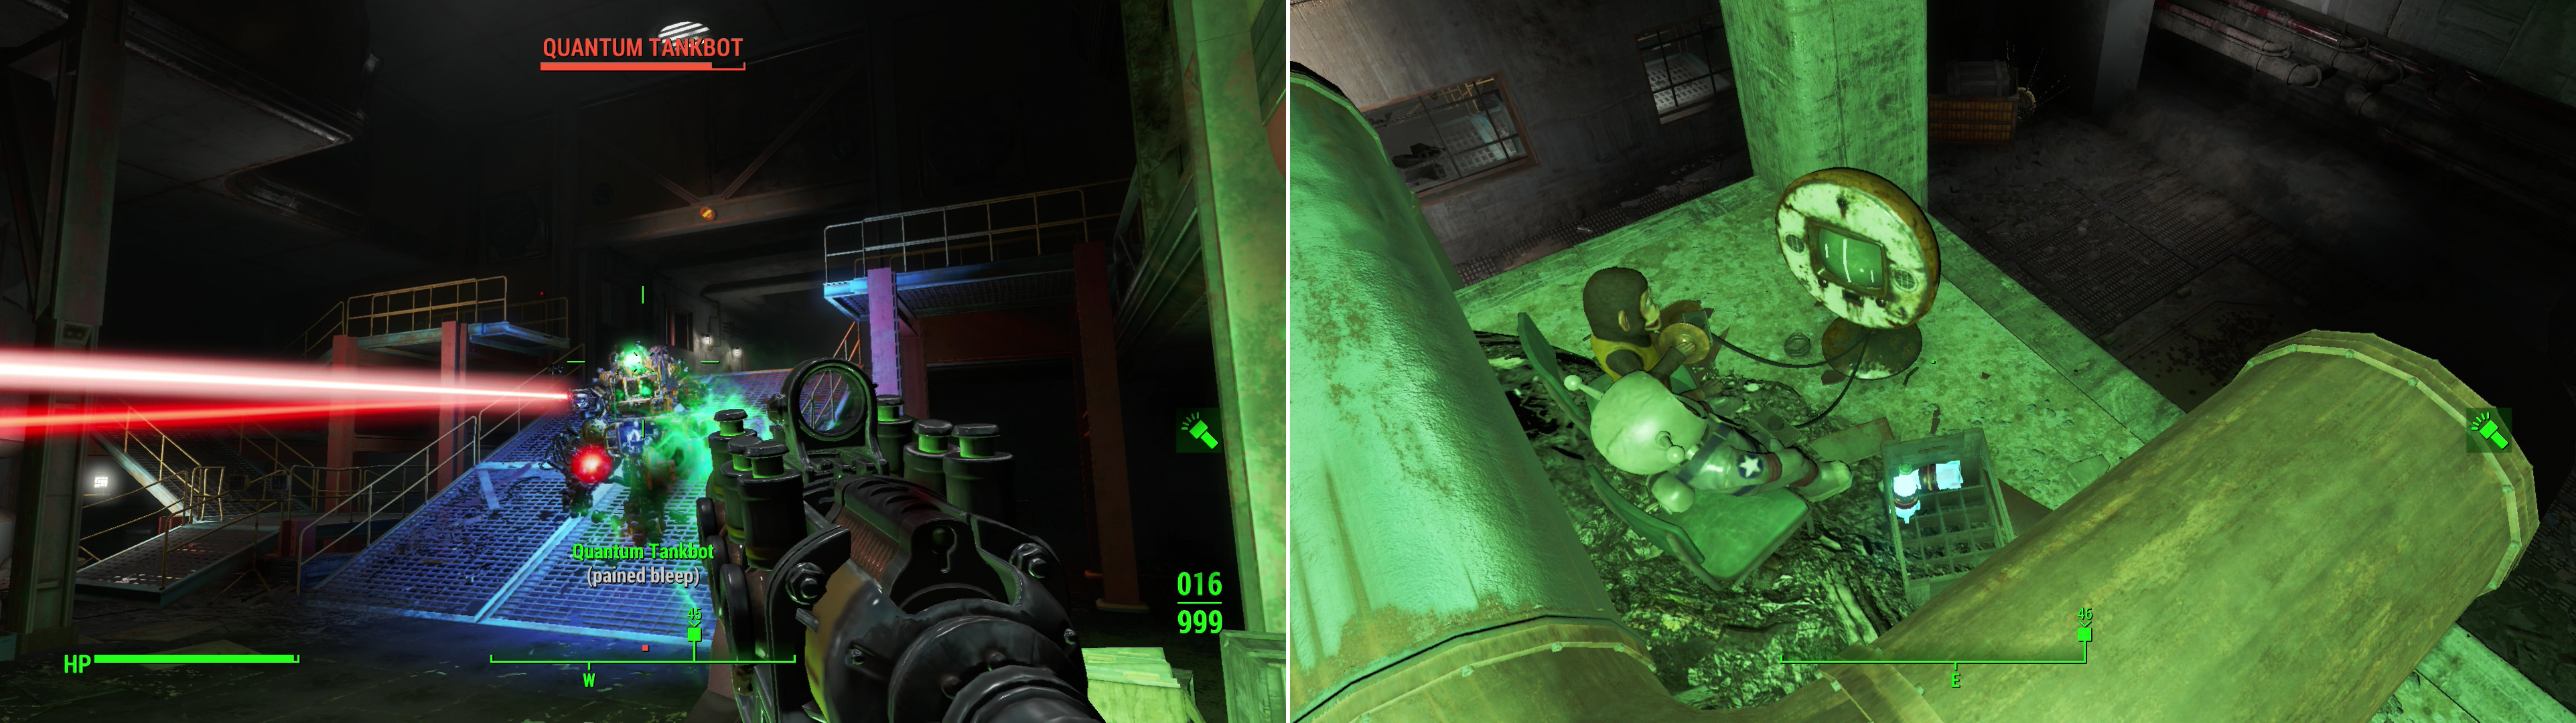
Expect the Mechanist to pull out all stops defending their lair, even by deploying Tankbots (left)! Fortunately, gaming culture is alive and well in post-apocalyptia (right).
The room up above had junkbots being produced over and over, being shipped along the ceiling. If you shoot these things they will fall down and start a fight, so best to let them be until, at the very least, the enemies below are taken care of. Now, to kill these enemies below smartly… This is the prime time for a quicksave, by the way.
First of all, from the balcony there is a turret to the left, out a ledge. Take it out first (they wanted you to go down below and take it from two directions, didn’t they?!). After taking it out, enemies will come to check things out, so get the drop on them as well. Use a critical on their legs to stop their sprint at you if you can and shoot them up as they try to rush you. Head down below now and as you head north, a tankbot will come down the ramp at you. This thing will be leveled around your level, but Ada may distract him and you can use the boxes on the right of the room for cover as you shoot off its arms and take it out.
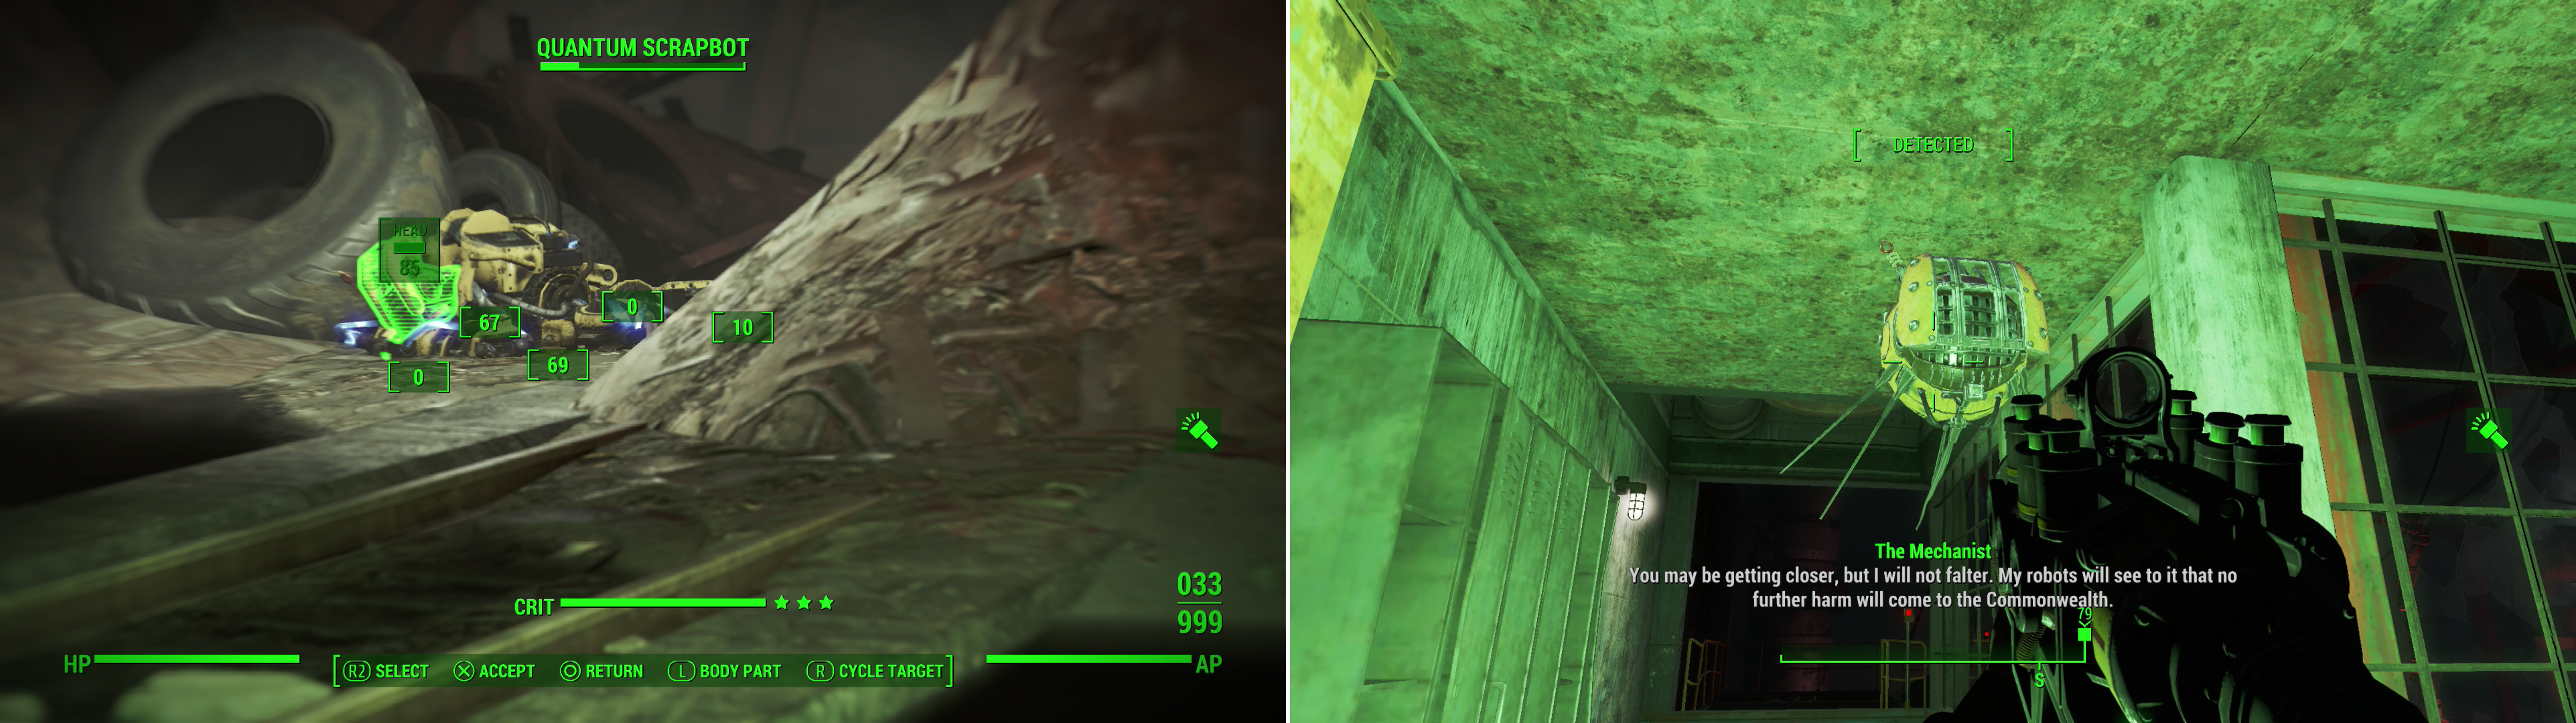
Be wary of robots playing possum amonst the scrap (left). After making it through the scrapyard, the Mechanist will confront you again via Eyebot (right).
Once it is destroyed and looted, you can head up the ramp and hit the button to extend the walkway, then follow it to another room. There is a First Aid Box and an Ammo Box on the right in here, on a table. Use the access port here to continue, following the hallway to another access port. Past that you can check the cabinet on the left for a [Novice] Toolbox, but as you round the corner you’ll get another message from the Mechanist. Lovely. Kill the Eyebot and the robots that follow him from around the left corner. Follow this path down to a path split. Going right leads to a terminal with some flavor text if you want to read it, but otherwise go straight, killing the mech as you go (who is pretending to be disabled for some reason). You’ll reach a dead end soon, but press the button you find to enter a giant room of waste.
This area looks like their waste center, with giant mounds of junk just piled up. Still, in the back are some enemies (some lying down again), so sneak forward and take them out (there should be about four of them in total, just watch your back). Continue through the waste area (leave the nuclear cores alone) and go up some stairs. Go through a few rooms and on the left by the Weapons Crafting center is a [Novice] locked ammo box. The manager’s terminal is here as well, along with the Facilities Director’s Holotape you can pick up and play (it is hidden right by the Ammo Box).
Continue on to get another visit from the Mechanist via Eyebot. It will lecture you some more, saying you are close before attacking. Kill it off and get on the lift past it, hitting the button to head past the junk yard and to the “Research Wing”. Use the access port to enter.
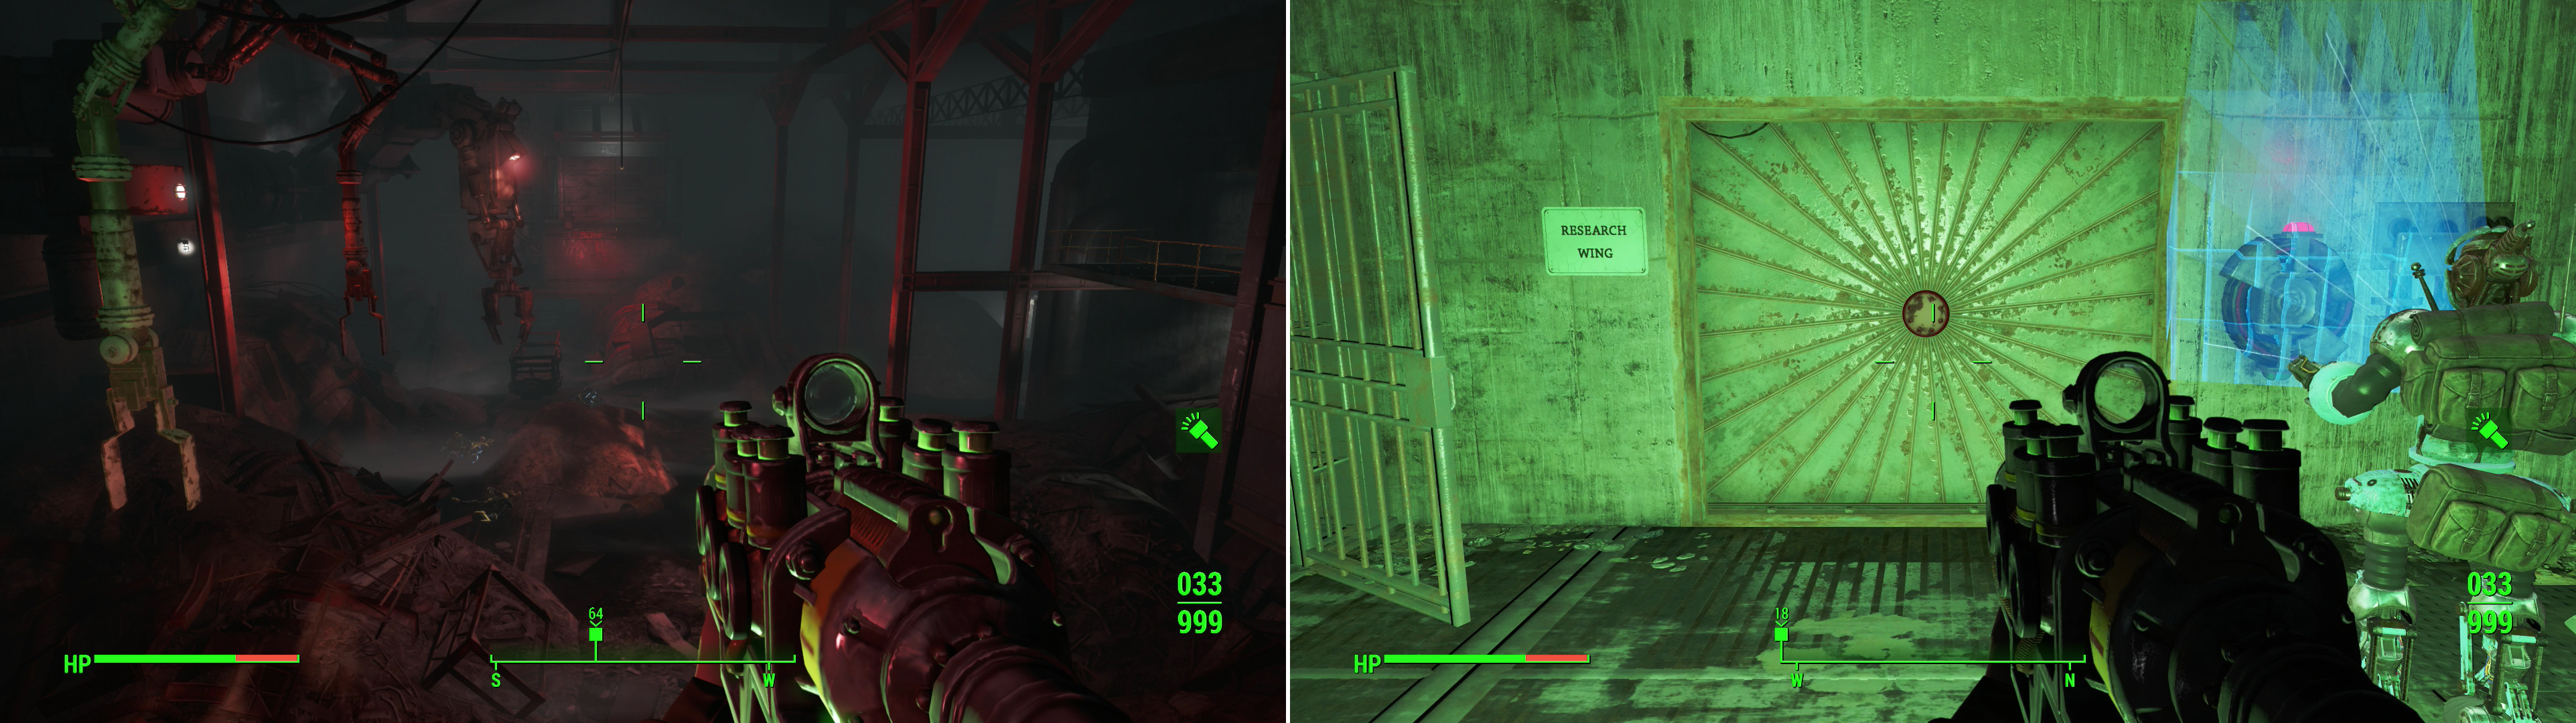
Ride an elevator over the scrap heap! (left) Then get Ada’s aid in accessing the Research Wing of the Mechanist’s stronghold (right).
Mechanists Lair: Research Wing
Head into the first room on the left here and then hang a left to go into the back. Back here is a [Master] locked “Property Storage Lockup Terminal” you can hack. Inside is a wealth of ammo and sad weapons, along with various drugs, a “Robot Parts” model, and even a bar of gold. How nice. Continue outside to the first station, where you can find more drugs and a Mr. Gutsy model. There is also the Forfeiture Terminal Password here (for the “Property Storage Terminal” you may have just hacked) and the watch station terminal where you can read some more story. Keep on going to the holding cells.
Wow! They were, uh… well, Robobrains needed humans at some point, right? And here you are. Hopefully you like lock-picking, because there is a total of sixteen [Advanced] locked doors here to pick if you wish. Several of them have Feral Ghoul enemies in them (if it has an enemy lying down, chances are it is still alive!).Use VATS to sniff out fakers and make their act more convincing. With death. Many have drugs lying in them as well. There is also a Bobby Pin Box in the first right cell and a Fire Aid Box on the last left cell. Overall, lots of XP and some kills to be gotten here if you wish.
At the end of the cells you can hit a button to call a service elevator, but while you are waiting on it head upstairs. This leads to the cell observation area. There is a terminal up here (in the middle) with some info on the subjects you can read and the cart next to it has a Protectron Model on it. You can also find a Stealth Boy at the very end.
Head back to the elevator and loot the corpse, then head down. You’ll be in the research labs. Head forward to the path split, which gives us three choices on where to go: left, right and straight. There is also a First Aid Box in here on a shelf if you look.
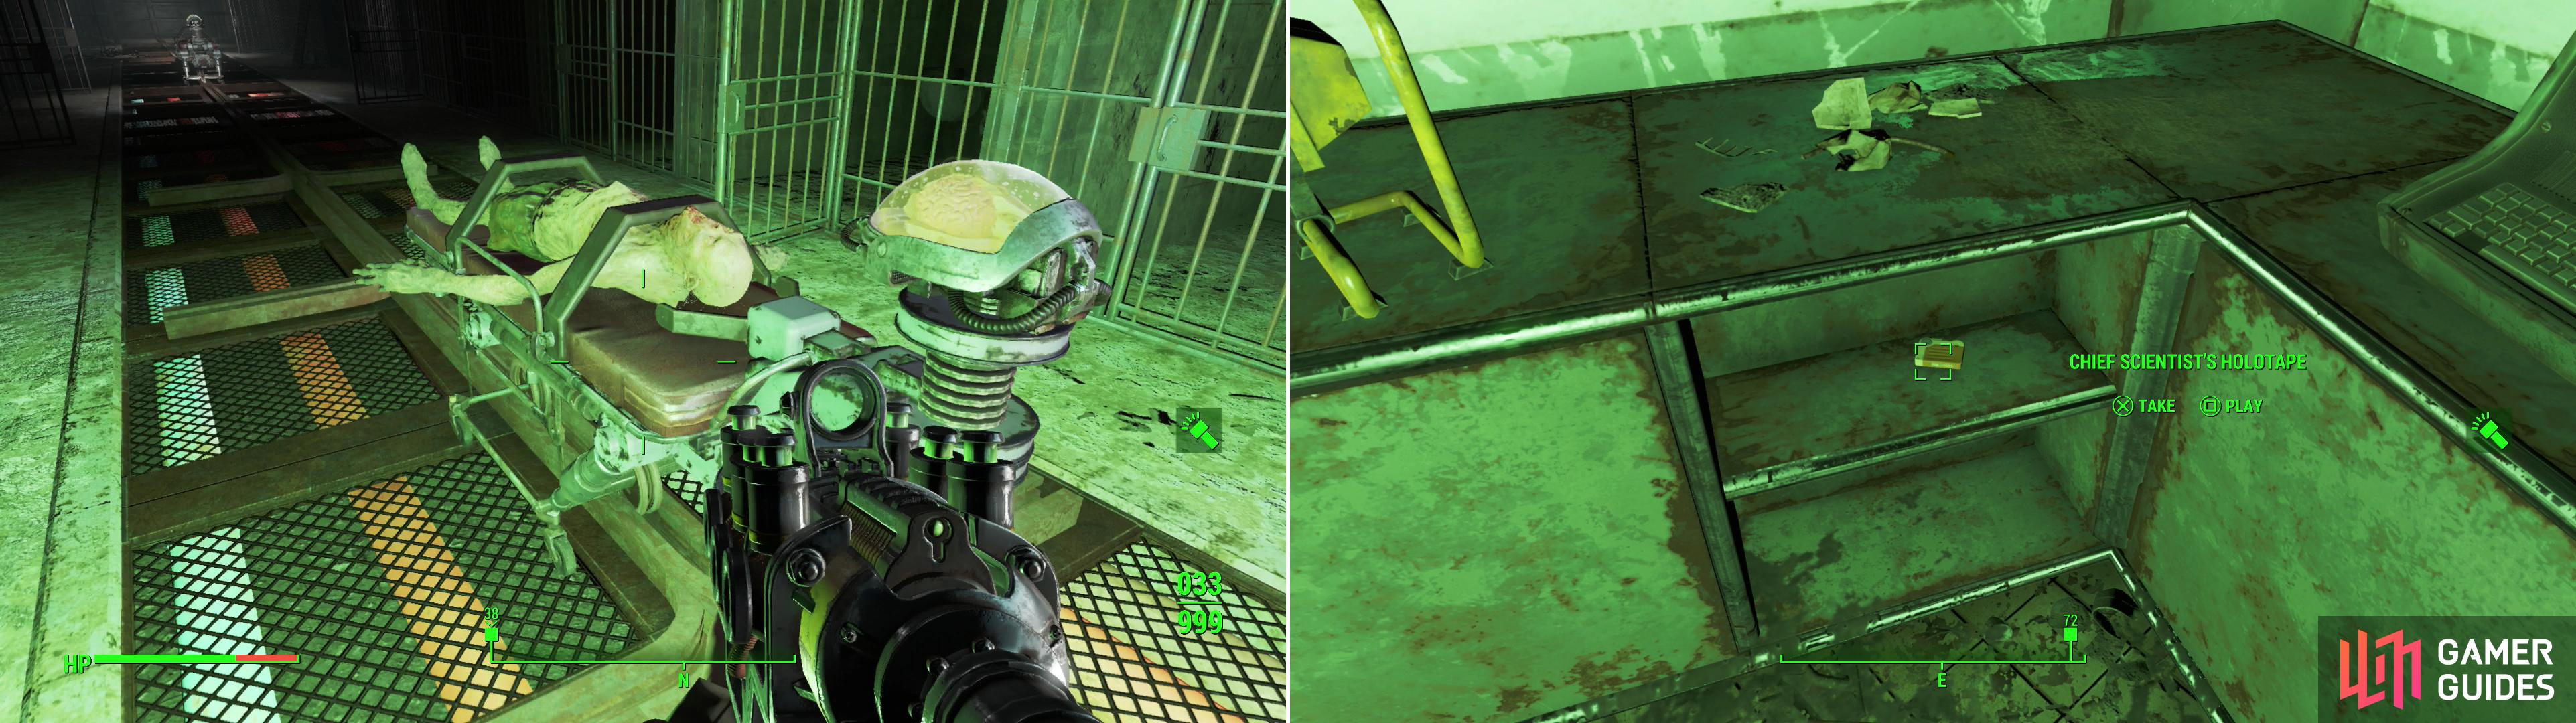
Well, those brains had to come from somewhere… (left). Grab the Chief Scientist’s Holotape on your way through the Research Wing (right).
Head to the right first, to explore the “Cerebral Reconditioning” and “Brain Extraction” room. The right room has a terminal and a first aid kit for you (as well as some purified water under the first aid kit, on the shelving) and the other room has another Robot Parts model as well as another terminal and the Chief Scientist’s Holotape . Be sure to read this terminal, as it is fantastic. There is also something special you can do now that you have this third holotape. First, however, let’s continue on with the guide until you have to make this choice (it is coming up soon, don’t worry), but read the “Dealing with the Mechanist” section below if you want to do something out of ordinary.
Continue heading south now into “Robobrain R&D”. This room has another first aid kit and plenty of drugs on a cart. Head back to the hub now, as that room finishes our “right and straight” paths from earlier and now head to the right, towards “Robobrain Assembly” and the “Incinerator”. This should be fun!
Head inward and note the path to the right. This is the “incinerator” area, but has a ton of enemies down that path. If you want, you can go straight ahead to find the “Robobrain Production Terminal”. This is a [Master] level hack, but if you can do it you don’t have to fight the robots down the dead end area to the right. If you can’t, just go shoot them up and loot them. In particular, check out the “Quantum Robobrain” to find the “Medical Terminal Password”, which will unlock the door.
You have to make a choice here: a direct confrontation, a direct confrontation with a twist, or… a sneaky confrontation. Well… which will it be?
Confronting the Mechanist: Direct Confrontation
The direction confrontation is the option most people will opt for. To do this, you have to use the terminal password you just got and continue onward to a large room. Here you will be confronted by The Mechanist, who you get a single chance to talk to before you are attacked. Say what you will, you aren’t getting out of this without a fight. Save your criticals for two specific bots coming up…
Here you will have to fight a waves of robots. This starts off fairly simple with Eyebots and various Junkbots as the Mechanist throws enemies at you. The will mainly come from the floor (using lifts) and the sides, as well as from behind you. Stay on the move and take them all on one by one. Use the columns and/or catwalks in the area if you need a break and stay on top of your health.
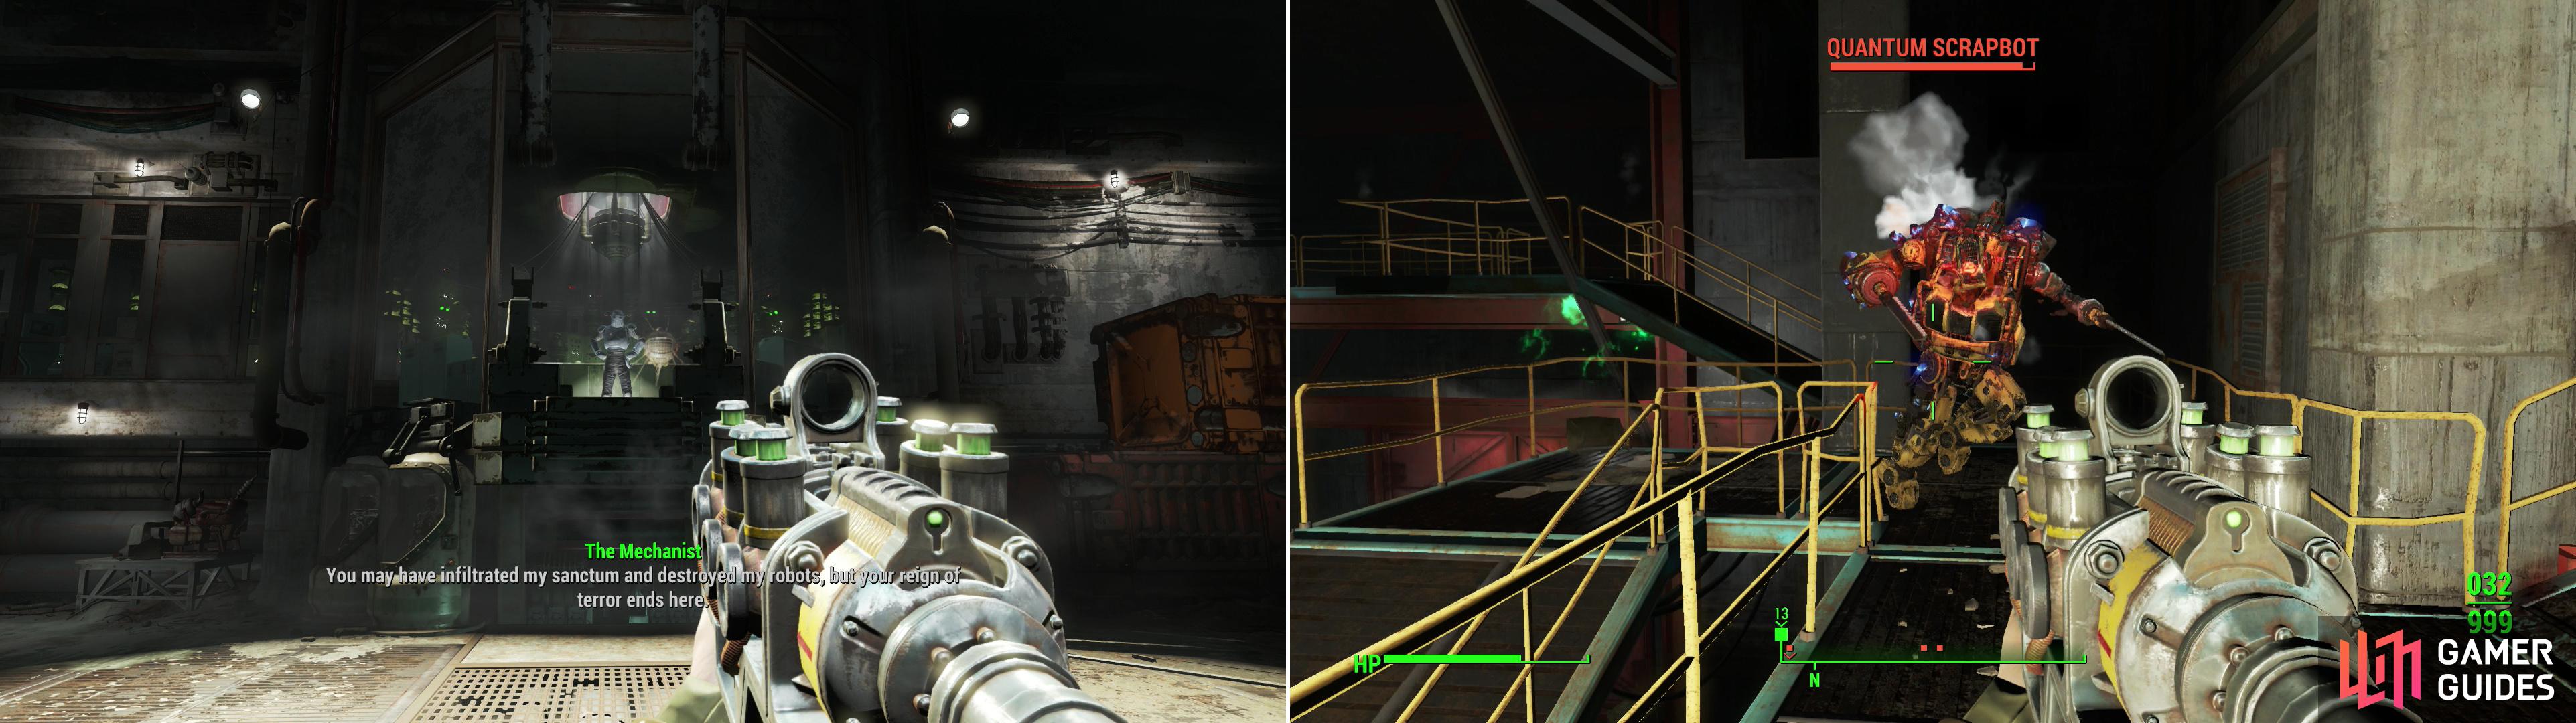
The Mechanist introduces themselves in dramatic fashion… of course (left). To defeat the Mechanist you’ll have to survive hordes of robots (right) and hope the power fails before you do.
When the Mechanist mentions the “Turretbot”, look across from where the Mechanist stands to take it out. This is where one of your criticals should be placed: take out one of its turrets in a split-second, disabling its offense quite a bit as you take it out in subsequent shots. Easy.
The Mechanist will stop and show you just how many robots they have, which as you look up and around is quite impressive. However, the facility seems to be having problems with its power output, as it starts to count down. This signals the second wave, where we have to fight more junkbots and eyebots as the facility warns us of its low power. You may want to stay on the move on the catwalks as you fight, waiting for the percentage to get low. Soon, Sparky will send out the second bot to be wary of, the Duelbot. This thing is powerful and quick, and is where your second critical should come in. One shot to its legs and you will neuter the thing. Be wary of its eye lasers from here, as that is literally the only thing he can do to hurt you as he crawls towards you.
Soon the facility will be on back-up power, prompting the Mechanist to “throw everything” at you. Everything in this case is trash bots, which are honestly not much trouble. Stay on the move still and take them out as you can to end this final wave.
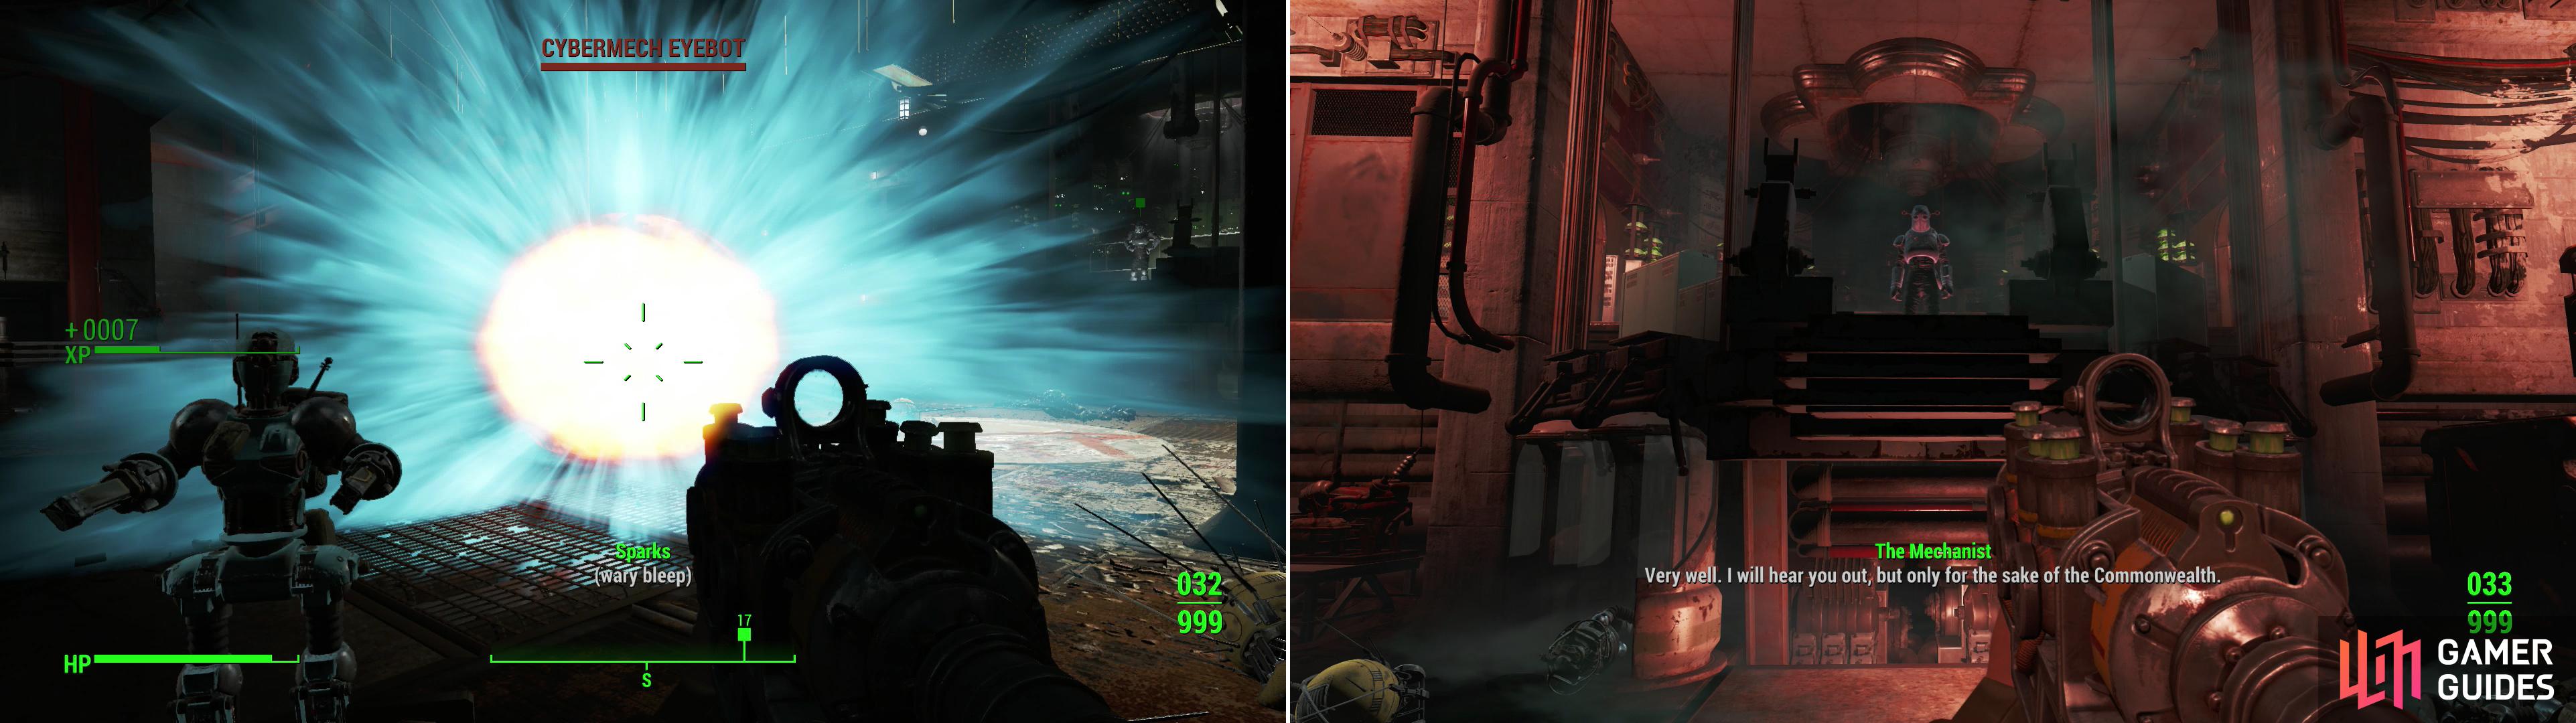
Not all robots want to fight conventionally, however, some just want to kamikaze (left). After the facility can’t handle the stress anymore, the Mechanist will agree to parley (right).
With the last of their robots destroyed (or… well, at least with power in short supply), the Mechanist will stop to treaty with you. You will want to pop on your Charisma gear here as there are two moderate speech checks here, but overall it is very easy to convince the Mechanist they are in the wrong even if you can’t pass them.
In the end, the Mechanist will see what the problem is and give you the key to the facility with the RB-285 Master Control Password . Head up the ramp the Mechanist used and locate the “Master Control Terminal”. Use the password to shut things down and you’ll be done.
After this, just talk with Ada and you will finish this quest. Congrats!
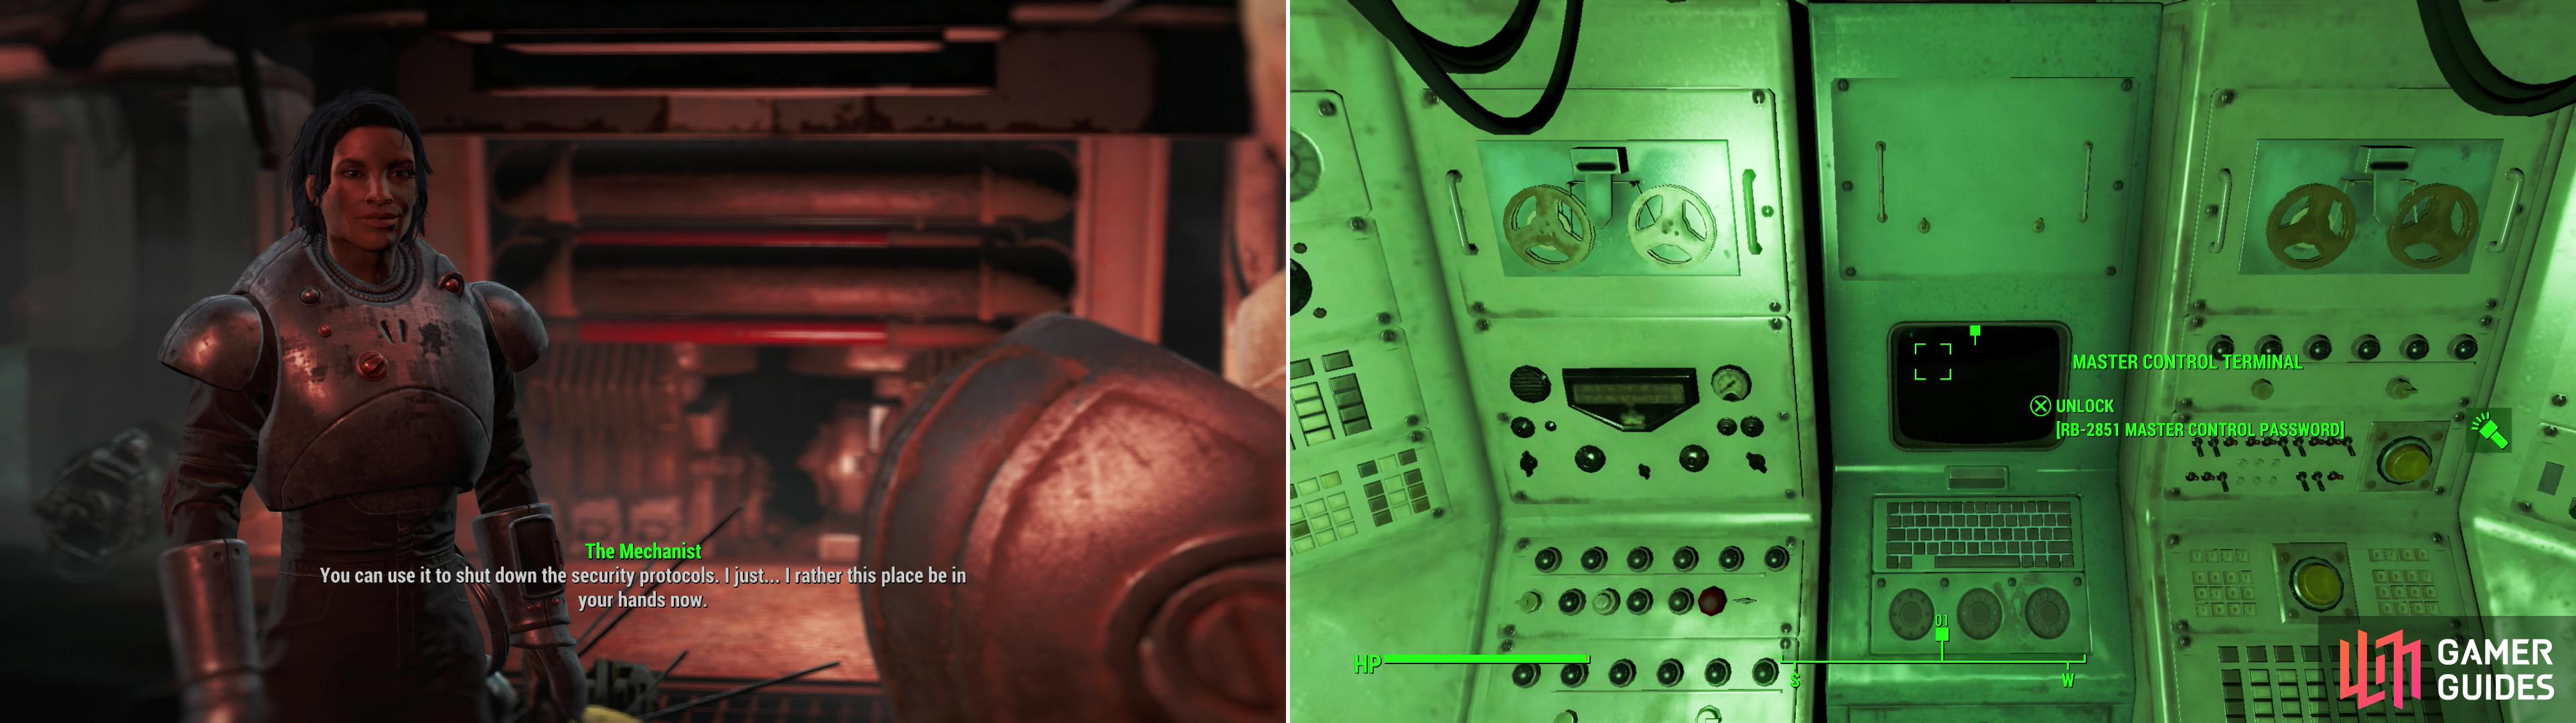
Talk sense into Isabela (left) and she’ll give you the codes ot the Master Control Terminal (right) in effect putting you in control of the facility.
Confronting the Mechanist: Battle of the Super Heroes!
This is the same thing as the above option, but BEFORE you head in to meet with the Mechanist, equip the Silver Shroud armor. This will give you some unique dialog options with The Mechanist so you can “Speak as the Shroud” before and after you fight. There is an odd part right after the fight where you don’t, but still, speaking as the Shroud is a rare opportunity, so if you want to enjoy it this is your chance.
Be extra careful during the fight however, as your reduced (likely reduced) defense may come back and bite you. Save between waves in order to make this easier on yourself and be quick with the stimpacks.
Other than that, this option is much like the first one, but with much more super hero talk! Enjoy!

If words won’t suffice, you can bring justice to the Mechanist the good old violent way! (left) Once the Mechanist is dead, you can claim her mantle for yourself (right).
Confronting the Mechanist: Sneaky Confrontation
This option is easy to miss, and is a bit of a pain to do but also lets you skip the giant robot fight that the other two approaches require.
Remember that elevator at the very beginning of this section? The one that needed authorization? Well, thanks to the three holotapes we picked up we have it! If you wish, you can head back to that elevator now and use it. Yes, it takes quite awhile to get back there, but no choice other than backtracking now… Once you get to the computer, use the three holotapes you found as you went through this area, namely the Lead Engineer’s Holotape, the Facilities Director’s Holotape and the Chief Scientist’s Holotape
Load up each of these tapes and let them play. You’ll see the authorization number count up and once they are all played the elevator will be unlocked. You can now ride it down but put on your charisma gear as you head down. You will hang a left to head straight to the Mechanist.
Once you confront the Mechanist you can use a moderate speech check to talk face to face and another to convince her you are not the enemy. From here the talk is much like the talk up above: tell her what is going on out in the Commonwealth and tell her the “logic” of her Robobrains. In the end you can either forgive or attack the Mechanist just like the other options.
And all without a giant robot fight! Fun!
| Objective | Reward |
|---|---|
| For ending the Mechanist’s threat to the Commonwealth | 390 XP |


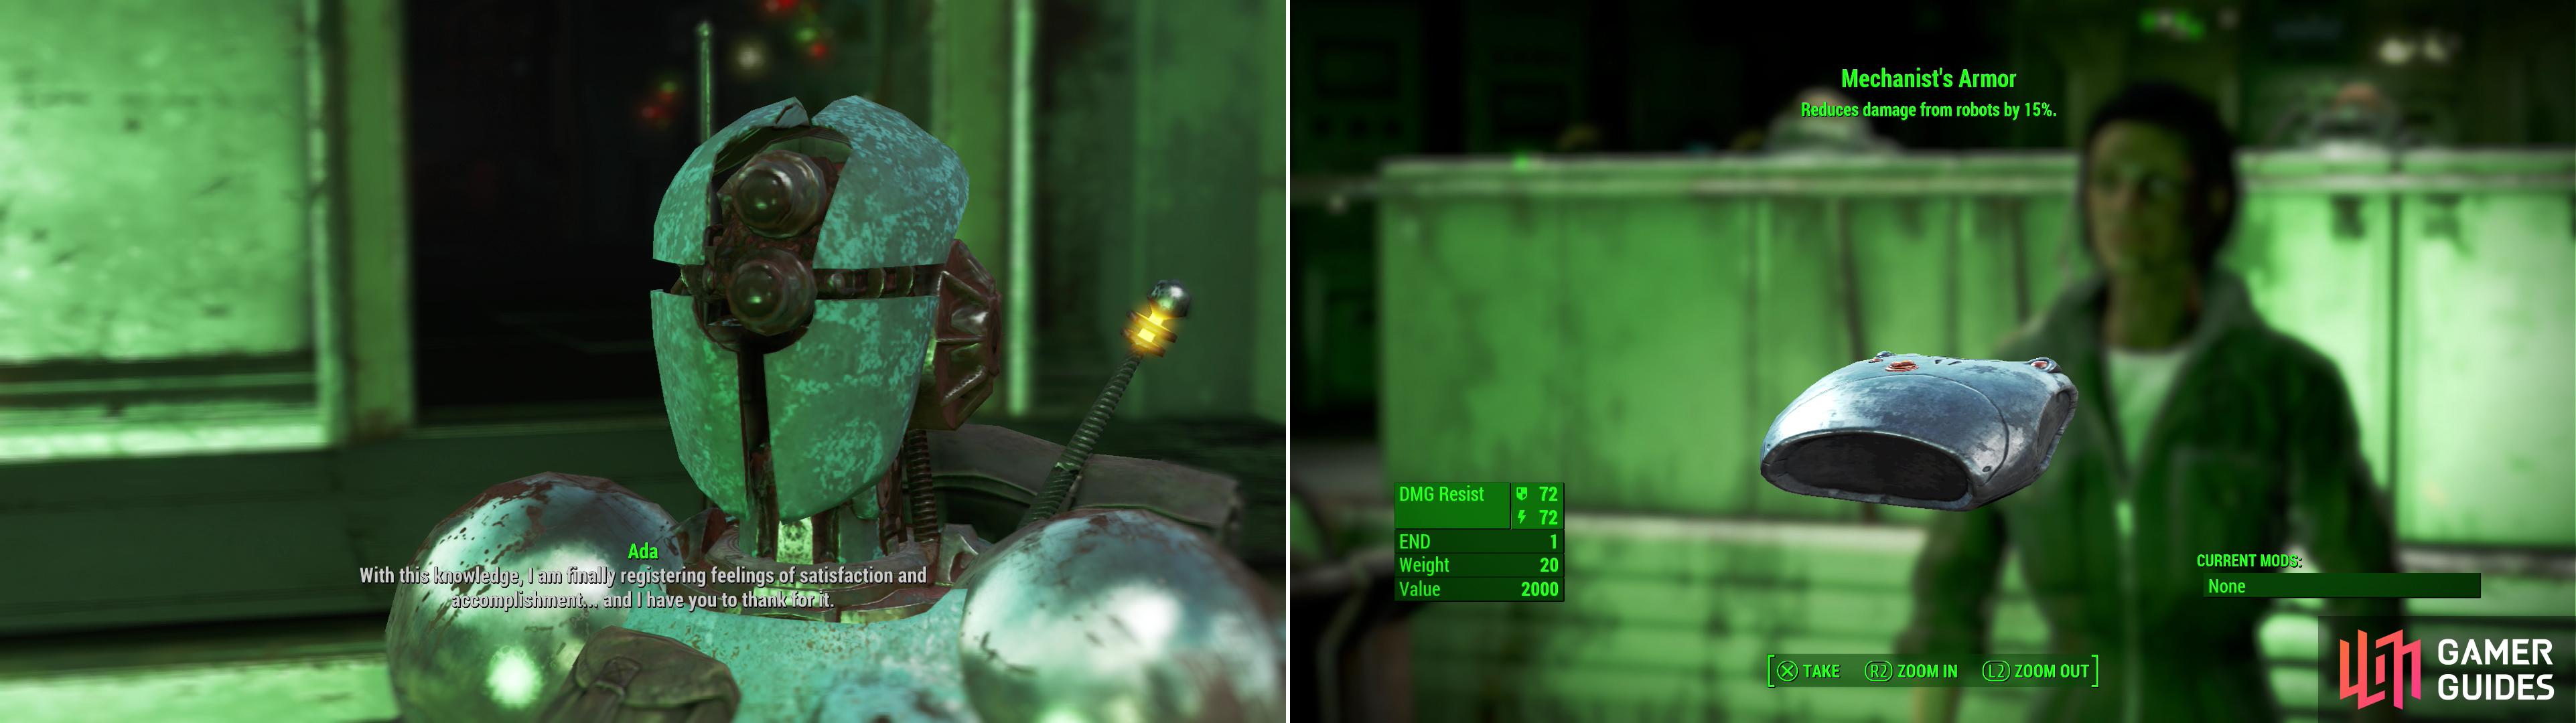
After the confrontation with the Mechanist, Ada will feel rightfully accomplished (left) and even if Cruz survived, she’ll hand over her Mechanist outfit (right). Everybody wins!
Exploring the Mechanists Lair
After taking over the station and officially “ending” the DLC, you have a bit of exploring to do. First of all, talk to the Mechan…, er, Isabel Cruz to receive two pieces of unique armor: the Mechanist’s Armor and the Mechanist’s Helmet .. You will also get the quest “Rogue Robot” from her as well, which is a radiant quest and can be done multiple times in a row.
Now, from the command center take the western door and the first right. This leads to the Mechanist’s bedroom. In here on the first table you can find the Eyebot Schematics . There is also a Steamer Trunk as well. On the table by the bed is also the Mechanist’s Log item.
Head back to the hallway and take a right. This elevator goes back to the start of this dungeon, so use it if you wish (no need to now). Back past the elevator is a room full of workshops, and more importantly, there is also a ton of ammo. On one of the computers, you can also find the Spotlight Schematics as well as a Mini Nuke and a [Novice] locked Toolbox.
It should also be pointed out that the doors along the upper walkways lead to various areas (shortcuts) around the facility. Not needed whatsoever unless you want to remember being ambushed by robots fondly or something…
Finally, you can head to the area across from the command center (on the ground) to find a cargo lift. Around the cargo lift is a [Novice] Toolbox to loot. This cargo lift leads to an easy way to get back to the Commonwealkh, so make use of it.
And with all of that, you are now essentially done with the DLC! There is the radiant quest below, but you can do that as you wish as it is repeatable.
Rogue Robot
This quest is a Radiant Quest, which means that once you get it, it will send you to various places around the Commonwealth. Still, talk to the Mechanist to start it.
Once you have the quest, head to the marker as indicated and take out the rogue robot. It will likely be a leveled enemy to be around your level (a tankbot or something), and may come with other enemies (or it may be alone).
After you defeat it you will automatically get the XP from the quest without needing to go back to the Mechanist.
No Comments