| Important Items in This Area |
|---|
| Fog Condenser Component x3 |
| Modified Bowling Ball Schematics |
| Mark Wilson’s Holotape |
| Striker |
Pearls Request
When you return to Far Harbor you’ll be accosted by a white Ms. Nanny robot named… Pearl. She can’t find the local police force, and decided some random, so-called detective would do the job just as well. Succeed at the typical trio of easy, moderate and hard speech checks to ask for money (gaining successively more Pre-War money each time, and the promise of a positive recommendation for the hard check), then pass another three successively more difficult speech checks inquiring into the details of the case before finally accepting. At this point she’ll offer to escort you there, but there’s no need to bother; you’ll find your own way there soon enough.
Safe Passage
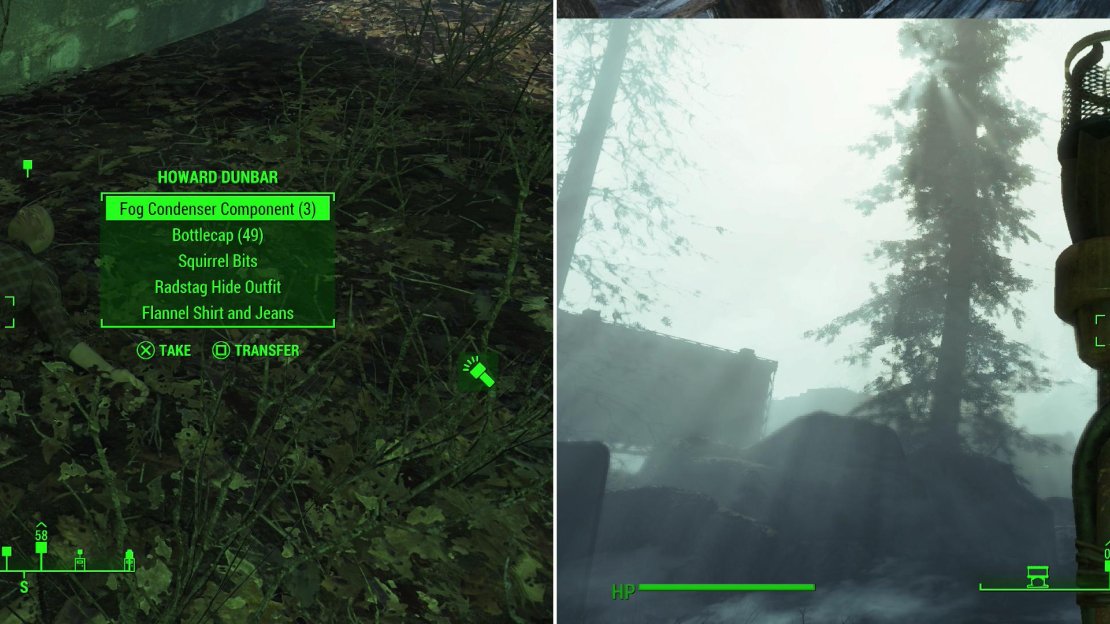
In the meantime, there’s a few quests to continue along the way. From the entrance to Far Harbor head south-west through the ruined houses (aside from a church with a Safe [Advanced] on the second floor, there’s not much loot to be had here) until you locate the body of Howard Dunbar, which is occupying the attention of some Mirelurks. Kill the crabs, then loot the unfortunate harborman to obtain his Fog Condenser Component x3 .
Kill some Mirelurks which were doing unspeakable things to poor Howard and relieve him of his Fog Condenser Components (left), then use the parts to repair three Fog Condensers (right).
With these in hand, you merely need to find the three Fog Condensers and install the components. The first one is just around the nearby house to the south-east, the second is a bit further afield to the south, south-west (just follow the road, you’ll find the second Fog Condenser to the right of the road), and the third requires you to continue following the road uphill to the south, where you’ll again find the Fog Condenser on the right, near some water purifiers. Aside from some Mirelurks at the third Fog Condenser (and the ravages of the ever-present fog), you shouldn’t have to deal with too much trouble along the way.
Beaver Creek Lanes
That’s a far south as you need to go on this trip, all you need to do is return back north and report to Captain Avery… along the way, though, there’s an area you can explore. Follow the road back into the ruined town outside of Far Harbor and look for a bus to the right, just south-east of where you found Howard Dunbar’s body. Beyond that bus you can find another bus, beyond which is the Beaver Creek Lanes building. Exterminate the Feral Ghouls lying around outside of the building, then head on inside.
What was once a modest bowling alley pre-war is now a lair for Ghouls. From the entrance head west to reach a large room housing the lanes, on which you’ll find several Fog Ghouls lurking about. Smite whatever shuffles around, then loot the area for meager goods. You can play with a Terminal to find out 200 year old bowling information (there’s also a Vault-Tec Lunchbox on the counter nearby) and loot some Vim vending machines to get a bottle of Vim and Vim Refresh, but otherwise, there’s not much to see here. Ignore a hole in the wall to the north and go through a locked door [Novice] west of the entrance.
Continue west down a hallway until you find some stairs going down to the west - again, ignore a hole in the wall to the north and some stairs going up to the east. Eventually you should reach some white double doors that lead to a room occupied by a generator and some Ghouls, including a Glowing One. Dispose of them, then loot a First Aid Box on the wall near the double door, grab the Fusion Core out of the generator, and continue north through another white door.
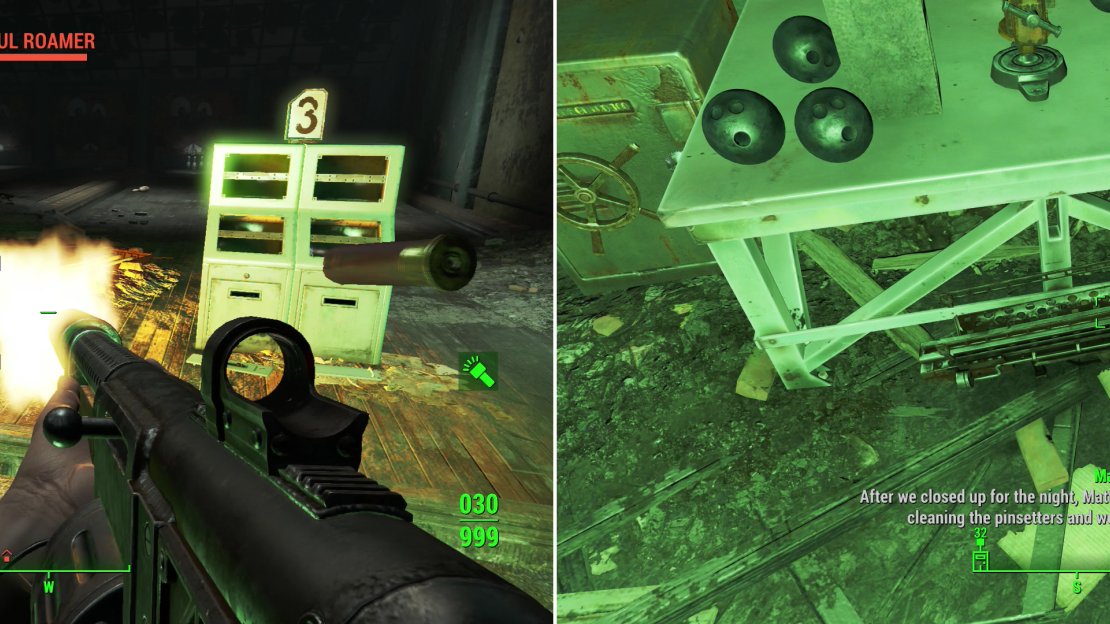
The Beaver Creek Lanes bowling alley is now a haven for Ghouls (left). Upstairs you’ll find some treasure worth braving the Ghouls for - a modified Fat Man that shoots bowling balls - The Striker! (right)
Now note that you have two ways you can proceed; up some stairs, or through some double doors to the east. Go upstairs first to reach an office, where you’ll find a Terminal in a room with a Weapons Workbench and a Chemistry Station. Peruse the first two options of the terminal to find out some whack-jobs were - for whatever insane reason - trying to turn a Fat Man into a modified bowling-ball launcher. Doing so will get you the “Modified Bowling Ball Schematics” , which allows you to create Modified Bowling Balls at any Chemistry Station. Be sure to eject (and listen to!) “Mark Wilson’s Holotape” , then turn around to find the fruits of their labors; the “Striker” , and some Modified Bowling Balls to serve as ammunition for this poor, abused Fat Man. Nearby is also a Safe [Master] which can be bypassed by using the nearby Terminal.
If you go through a doorway to the south you can reach some stairs which take you to an upper room that has little of interest, aside from some Bowling Pins, if you need the Wood. Backtrack to the office, then return downstairs and go through the neglected chained door to the east to reach a diner and kitchen, which is down a hallway and past two uninteresting bathrooms. Kill any Ghouls lurking around, be wary of mines on the ground, then loot a Duffle Bag, an Ammo Box and a Toolbox, as you will. Once done, leave the diner and head into the kitchen to find a weird Cash Register, which appears unlocked, but really has an [Expert] lock. Alas, it’s empty. Go through a door [Novice] to the east to reach a closet with an Ammo Box and a First Aid Box on some metal shelves. Return to the diner and head south to return to the main room of the bowling alley. If you fancy shooting Bowling Balls at things, you might as well grab any you find lying around.
Safe Passage, Continued
Leave the bowling alley, return back to Far Harbor and report to Captain Avery to put the quest “Safe Passage” in the books, then get ready to head out on your next excursion. If you say “He’s Mirelurk food” Longfellow will disapprove, meanwhile if you say “He gave his life” you’ll make Longfellow happy. Either way, she’ll offer you 200 Caps for your work afterwards… but you can, of course, talk her up to 400 Caps with the standard three speech checks. Longfellow will also approve of you bilking her for more money.
| Objective | Reward |
|---|---|
| For repairing the Fog Condensers | 390 XP, 400 Caps |


No Comments