
Floor 4F

Hopefully your legs aren’t getting tired. From the north-east corner, head south into the upper corridor, then go all the way west to pick up a Spider’s Web . Next, go back a few paces and follow the passage leading south that you skipped by, into the lower corridor.
From here, descend the stairs in the south-west corner to return to the 4th floor, where a chest with a Staff of Life awaits your grubby fingers. Back up on the 5th floor, head all the east, past the first set of stairs for now. As you approach the south-weast corner, take the passage leading north.
After turning the first corner, stop for a moment. If you look at the map, you should be standing to the east of an inaccessible chest near the centre of the floor. Except it’s not inaccessible of course. Hug the south-west corner and go right while pushing against the wall.
Ta-da! You’ve found a secret passage. From here, follow the passage left to reach the central chest, which is hiding a Rod of Fire . Backtrack to the lower corridor and go up the stairs in the south-east corner. Keep going to find an Enopu Mushroom growing on the floor.
Finally, return to the 4th floor and go up the middle stairs along the lower corridor to proceed.
Floor 5F

The renovation work is even more obvious here; in the days of Bravely Default, this floor wasn’t separated into two sections at all. In any case, follow the corridors clock-wise to reach the Adventurer and the stairs to the final floor.
Top Floor
Like in the Black Mage vs Ranger sidequest, we’ll try our best not to spoil the details. Begin by going forward, towards the group of people near the middle. You’ll learn the details of the case, including the identity of the victim and the key witnesses. Try your best to ignore Sholmes.
Afterwards, chat to Heinkel just ahead and Kikyo by the corner on the left to progress the investigation. Eventually, you’ll be taken back to the 5th floor. Here, speak to Sholmes to the right and Whittson by the south-west corner to learn about their backgrounds.
Once you’re done, head back down to the 4th floor and say “hi” to Heinkel standing near the south-west corner. Just as the gang starts to get cozy, events takes a turn for the worse. Back on the top floor, talk to Heinkel just ahead to re-evaluate the situation.
Finally, head for the corner where Kikyo was and speak to Sholmes to trigger the fateful choice.
Boss: Argent Heinkel
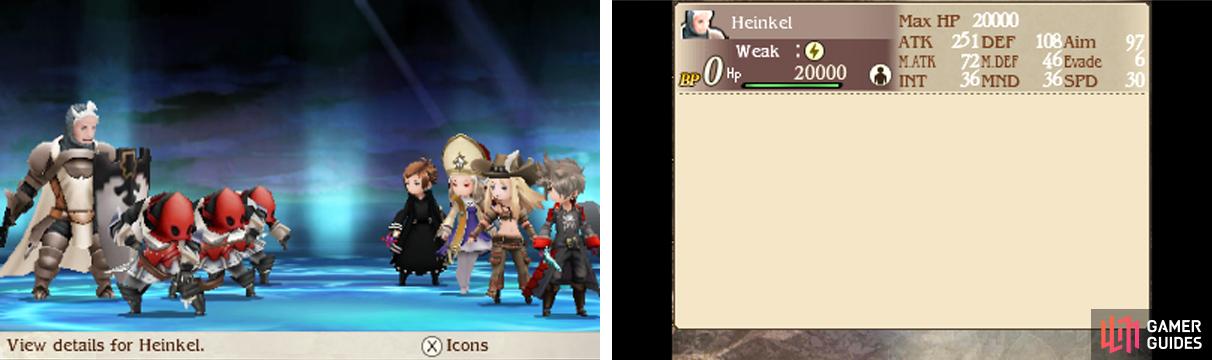
| Boss | Level | HP | Weakness |
|---|---|---|---|
| Heinkel | 36 | 20000 | Lightning |
| Sky Dueler | 36 | 4050 | Lightning |
| Sky Pikeman | 36 | 2700 | Lightning |
| Sky Archer | 36 | 2700 | Lightning |
Heinkel uses Shield Strike to damage one and boost his physical defence or Ironclad to maximise his physical defence for one turn. In addition, he will automatically use Protect Ally to absorb single-target physical hits for his allies.
His lackeys are mean business too. The Sky Dueler uses Prey on Weak to hurt the character with the least HP. Meanwhile the Sky Pikeman uses Mow Down to damage the party. Finally, the Sky Archer uses Poison Arrow to hurt one and cause poison.
All of the enemies hit like a truck, so hopefully you followed our advice earlier and kitted everyone with high physical defence equipment such as the Ninja Garb. You can also use Physical Ward Blast to quickly bolster your party’s defence.
Once your characters are able to stand their ground, you’ll want to eliminate Heinkel’s lackeys first. However avoid attacking them individually as Heinkel will step in to deflect the hit. Instead, use magic or group-based attacks like the Hawkeye’s Sidewinder.
Fortunately, all of your opponents are weak to Lightning, so use that to your advantage. The Archer and Pikeman have the least HP so focus on one of them–preferably the Pikeman because Mow Down is nasty. Once the lackeys start dropping, the battle should become manageable.
After you’ve singled out Heinkel, he will repeatedly use Shield Strike. At this stage, he’ll shrug off most physical attacks like they’re nothing, so fight back with your magic users. If you have a high level Hawkeye, use Harpoon to pierce the Knight’s defence.
Succeed in halving Heinkel’s HP and he’ll change his tactics, instead using Stomp to deal high damage, while lowering his defences. On occasions, he’ll Brave for two lots of Stomp and go immobile for one turn. Watch your party’s HP and unleash your fury while he’s recovering!
Boss: Konoe Kikyo
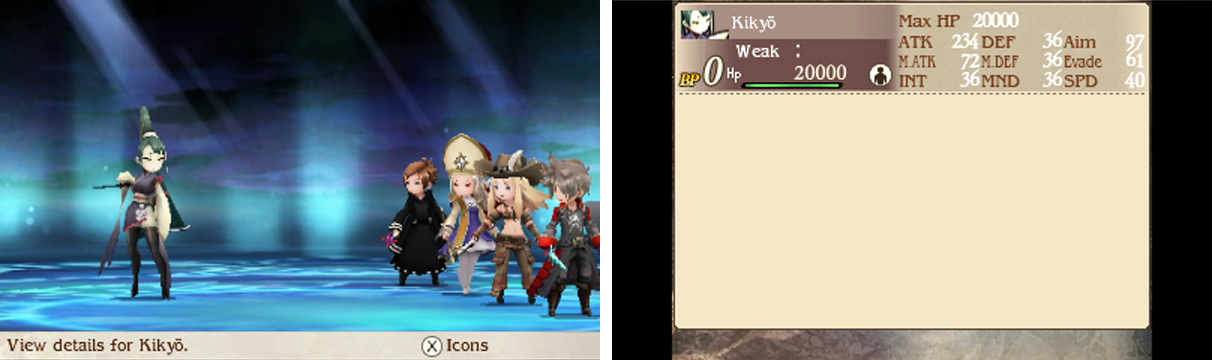
| Level | HP | Weakness |
|---|---|---|
| 36 | 20000 | Lightning |
It’s four heroes versus one Ninja, but be careful or she’ll be making you see double… The Ninja can use Shippujinrai to attack one character with great speed. On occasions, she Defaults to build up BP and weaken your attacks. She can also Brave to unleash two lots of Shippujinrai.
Throughout the fight, try to keep your party’s HP high so Shippujinrai doesn’t take you by surprise. To reduce the risk of casualties, your characters should be wearing high physical defence equipment as we suggested–in particular, the Ninja Garb is a perfect fit for this battle.
To further improve your odds, cast Physical Ward Blast to enhance your defence further. If you’re lucky, Kikyo may Brave at 0 HP, rendering her defenceless for one turn–an excellent opportunity to lick your wounds and unleash your attacks while she’s got nowhere to hide.
The Ninja’s other trick is Utsusemi, which completely evades one physical attack. Not only that, but after evading an attack, she will counter with Transcience. To fight Utsusemi, stick with magic or have a sturdy physical character attack once to remove Utsusemi’s veil.
Unlike other bosses, Kikyo is good at keeping her cool and thus her attack patterns don’t really change as the battle progresses. As long as you play safely, you should be able to get the hang of the battle flow–and from there, victory is assured.
No Comments