The Jackal and DeRosa
In this sidequest, you’ll pick between the Thief and Red Mage jobs.
To begin this sidequest, head for the oasis north-west from Al-Khampis. In case you missed it, you can pass through Al-Khampis from its north, by using the exit to the right of the Armory. Bravely Default players will recognise the oasis as the place where you first encounter The Jackal.
Times have changed, but The Jackal is still rooted to the desert life. Trouble is, all of the nearby oases are running out of water and the reason may lie within the mysterious Wellspring Gem. After the discussion, return to Al-Khampis and cross the bridge to the east side of town.
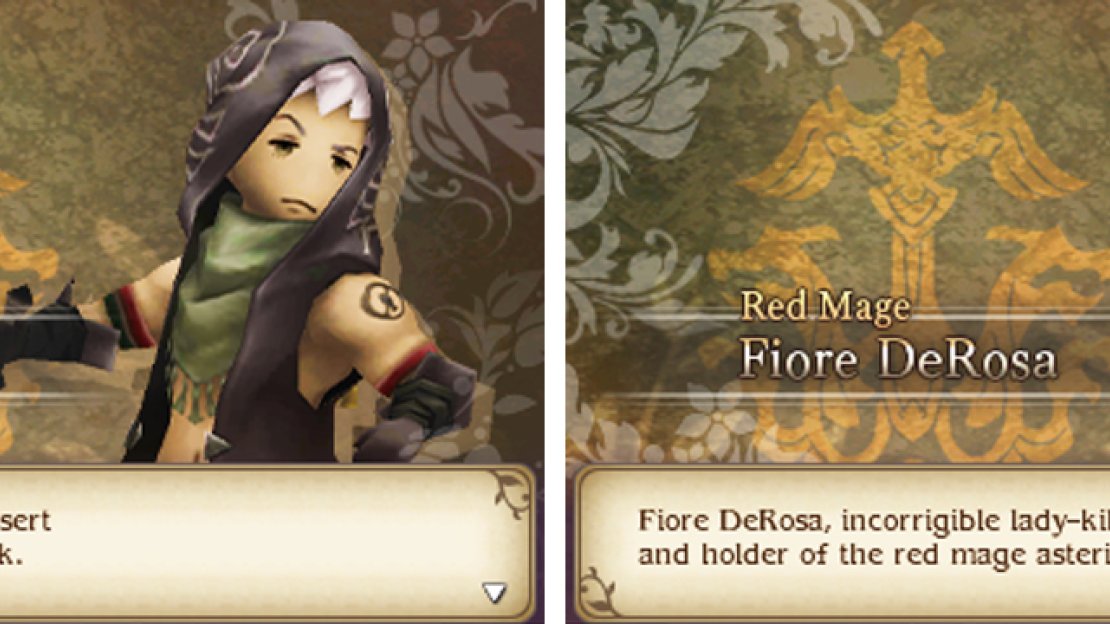
In front of the Magics store, speak to the man in red discussing with a student. Of course, the man is none other than DeRosa, another of Edea’s old acquaintances. However, unlike his usual villainous self, DeRosa seems genuinely interested in harnessing a new form of energy.
After DeRosa’s treat, cross the bridge again and enter the school ahead. Thanks to Yew’s research and Tiz’s ability to remain awake, the group manage to identify the possible location of the Wellspring Gem. Leave Al-Khampis via its north exit and go back to the oasis to report to The Jackal.
As a result, The Jackal remembers a secret tunnel at the end of his hideout, which could lead to the Wellspring Gem. Back outside on the world map, head north-west from the oasis and enter the cave on the mountainside–the Harena Ruins dungeon.
Harena Ruins - 1F
Be careful where you walk as dotted around are various statues that spew blind gas when you walk in front of them. If you’re quick on your feet, you should be able to avoid the gas; alternatively, equip the Dungeon Master (Freelancer Level 4) ability to negate the gas.
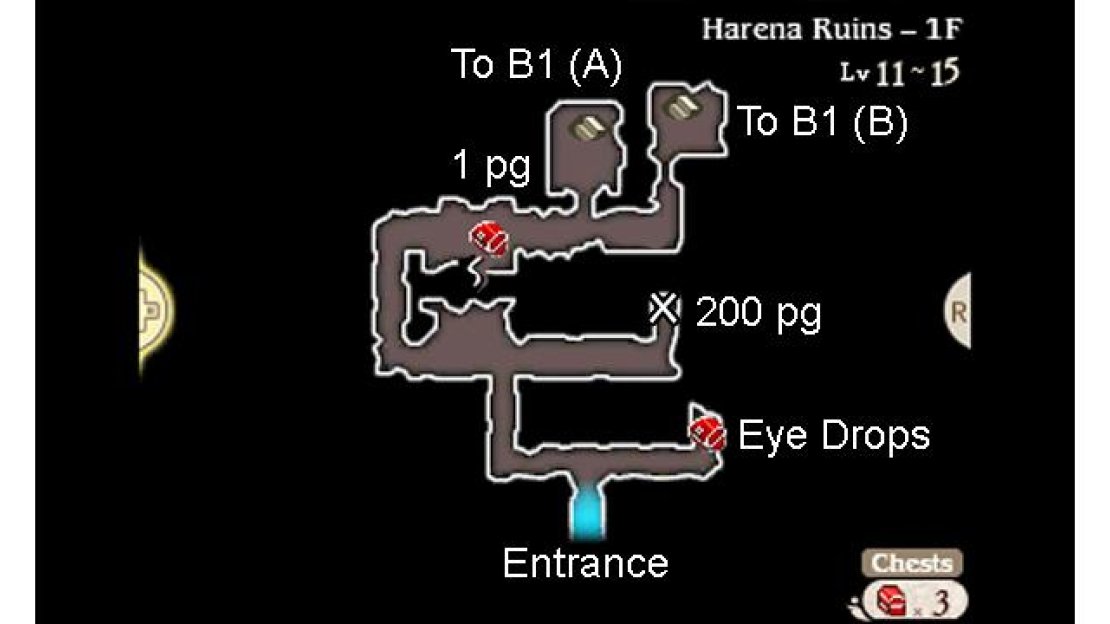
From the entrance, take the passage leading east first to find a chest with some Eye Drops ; hopefully you won’t have to use them! Next, take the westward passage and when the path splits, head east once more. At the end of the road is 200 pg for your wallet.
Backtrack and head west, then around the corner. As you turn the second corner, a chest will be within sight. Don’t open the chest head on, or you’ll be in range of the gas-spewing statue above; instead, follow the chamber along the south and open the chest from its east.
Further east, there are two gateways with stairs going down. First, go down the east-most stairs. Downstairs, pause and observe the layout of the room. In the corner just beyond is a chest, but to its left and directly in front of the entrance is a gas-spewing statue.
If you don’t have Dungeon Master, you can run diagonally forward, narrowly avoiding the gas by a few seconds. Or you can edge forward to trigger the gas and step back, then run in for real after the gas dissipates. Either way, the prize for your effort is a Kalasiris .
After your little adventure, return to floor 1F and descend the remaining set of stairs.
Floor B1
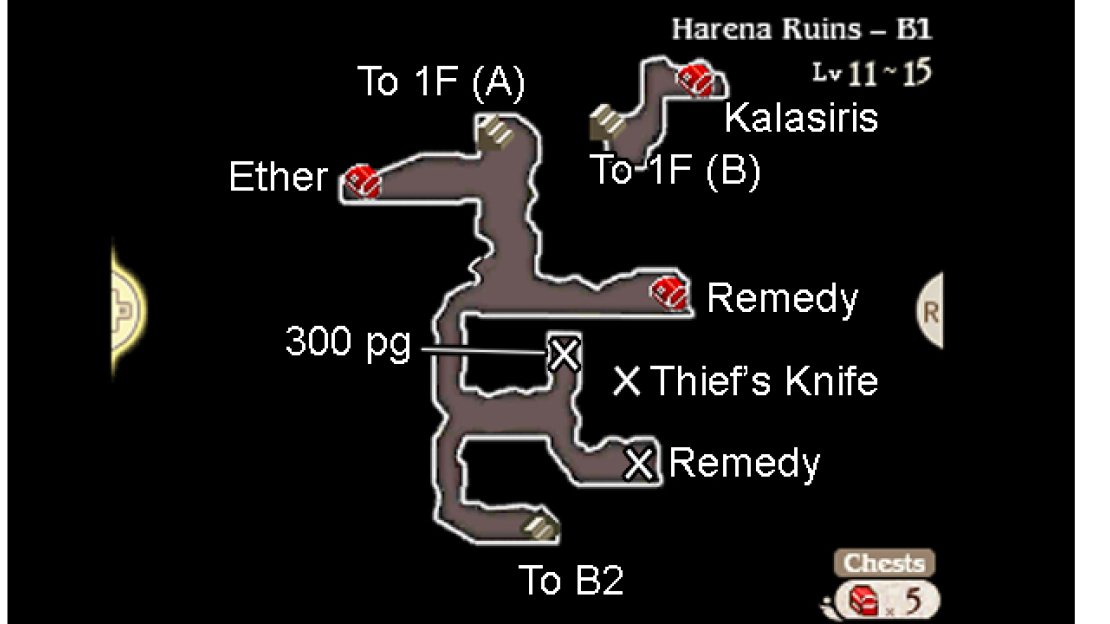
Downstairs, don’t rush blindly! A few paces south of the stairs is another gas-spewing statue on the right. Now that you know it’s there, you can easily run past or avoid it. Anyway, start by heading west for a chest holding an Ether . Return east and head south from the gas statue.
When the path splits, head east first, but hug the wall towards the south. At the far end is a chest, but behind it is another gas statue ready to make your world go dark. But if you’re standing to the south, you can safely open the chest from its south and pick up the Remedy sitting inside.
Before going back, continue east past the chest towards the corner. Once you hit the corner, head south and you’ll pass straight through the wall. After several paces, you’ll stop; from here, turn to the west and you’ll discover a Thief’s Knife that’s out of sight.
Back at the path split, head west then slowly follow the passage south. At the centre of the wall opposite the next corridor is yet another gas statue. From the statue, head east and stop underneath the torch on the wall above. Pause to see a statue on the right and a shiny object to its north.
Having ascertained the situation, hug the wall to the south and then continue east. When you’re below the statue, run past it north and pick up the 300 pg on the floor. After the gas disappears, run back down and follow the passage east for another Remedy .
Finally, return west, hugging the wall to the south to avoid the gas statues. When you’re back at the statue facing east, head south to find the stairs leading further down.
Floor B2
We’ve reached the final floor of the Harena Ruins, but you’re only just halfway there. Thankfully, there’s a pit stop at the end of this floor if you need to rest. Anyway, from the stairs, head east and follow the passage as it twists and turns.
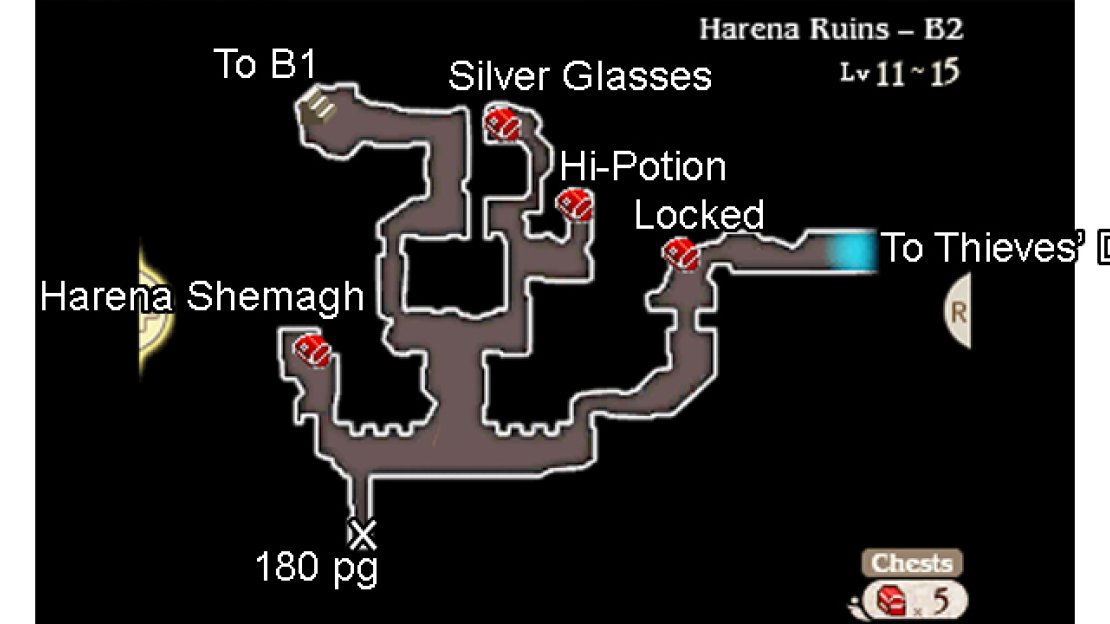
After turning the fourth corner, the path will split towards the south and the east. For the time being, head east and then slowly inch north from the torch. Just ahead is a gas-spewing statue peering down; dash forward and to the right and loot the chest for a Hi-Potion .
Next, carefully approach the statue from before and quickly dash diagonally left and forward to avoid its gas. Once the gas has cleared, dash right past the statue; at the end of this passage is a chest containing a pair of eye-protecting Silver Glasses .
Patiently make your way back to where the path split and this time head directly south, stopping once you near the cavern wall. Pause to survey the surroundings and you should see sinister statues lining the northern walls along the corridors going east and the west.
Keep close to the bottom wall and run west; at the third statue, run south to find 180 pg shining prettily on the floor. Next, run in a north-westerly direction, stopping only after going past the chest and the fifth statue above it. Open the chest from its left side to uncover a Harena Shemagh .
Run back to before the line of statues and continue east past three more statues. That’s it, you’ve conquered all the statues! Now follow the passage in a north-easterly direction, ignoring the blue locked chest in the corner. Then exit the ruins to the east.


No Comments