
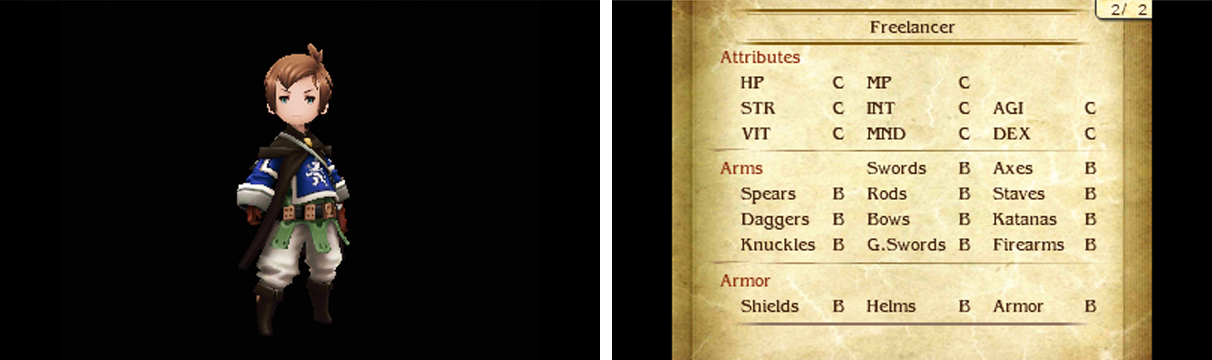
This is the job that everyone starts in and, fittingly, it’s a jack of all trades and a master of none. Its stats are average and it can wield every weapon and equipment decently, so it has no real weaknesses. But with no strengths to speak of, you should swap out of it sooner than later.
That said, it’s worth staying in a Freelancer for a while as some of its early abilities are immensely useful–in particular Halfsies, Divining Rod and Dungeon Master. If you have space, you could consider keeping it as a secondary job to make use of Examine and Halfsies.
Specialty: Stand Ground
The character has a 75% chance of surviving an attack that would reduce them to 0 HP, leaving them with 1 HP instead. Cannot trigger when already at 1 HP.
This ability used to be learned at Level 13 and it’s a lot more useful when it’s there at the very beginning. Essentially, it acts as a safety net of sorts, in case you slip and mess up–which can often happen early on.
Level 1: Examine
| Type | Cost |
|---|---|
| Command | None |
Examines a enemy, revealing their HP, MP, elemental weakness and monster family. After examining an enemy, you can press Left on the Circle Pad to review the enemy’s detailed stats.
This ability is a god-send, allowing you to learn everything about an enemy at once, without the aid of a guide. Once you know an enemy’s weakness and family, you can exploit their weak points to inflict greater damage. As they say, knowledge is power!
Even better, unlike Bravely Default, once you’ve examined one enemy, you can view the current HP for all enemies of the same type. This is useful for determining how far along the battle is–particularly long boss battles, so you know when to Brave or Default.
Level 2: Halfsies
| Type | Cost |
|---|---|
| Command | 8 MP |
Allows the use of a single-target consumable item on all party members at 50% of the item’s usual potency.
This ability lets you share, say, a Potion between all party members. Keep in mind that it’s a flat 50%, so if you have four party members, they’ll each receive 50% of the item’s effects, effectively doubling the potency of your item.
Early on, this is a fantastic way to patch up your party when group-casting healing spells isn’t nearly as effective. You can also use Halfsies to share items that cure status ailments, curing your entire party of that status ailment.
Level 3: Divining Rod
| Type | Cost |
|---|---|
| Support | 1 slot |
Shows the number of unopened treasure chests, hidden items or items on the floor in the bottom-right corner of the top screen.
Perfect for treasure-hunters who want to leave no stone unturned. It also lets you know if there are any secret treasure chests, if you’ve discovered all the treasure chests, yet one remains according to the indicator.
Level 4: Dungeon Master
| Type | Cost |
|---|---|
| Support | 1 slot |
Negates damage and status ailments caused by dungeon traps or hostile terrain. Applies for the whole party.
Compared to the previous game, there are a lot less traps and tricky terrain during the main quest, but plenty during sidequests. As such, it’s still advisable to learn this ability ASAP, to save yourself many potential headaches.
Level 5: Stand Ground
| Type | Cost |
|---|---|
| Support | 2 slots |
The character has a 75% chance of surviving an attack that would reduce them to 0 HP, leaving them with 1 HP instead. Cannot trigger when already at 1 HP.
Basically the Freelancer’s Specialty in Support Ability form. Slightly better than in Bravely Default since it costs 1 less slot, but if you take precautions to avoid being KO’d, there are better abilities that you could be equipping instead.
Level 6: Physical Defence 20% Up
| Type | Cost |
|---|---|
| Support | 1 slot |
Boosts the character’s Physical Defence stat by 20%.
Stat-enhancing abilities are rarer than in Bravely Default, but better since they boost the stat by 20% at the cost of 1 slot, rather than 2. This one in particular is handy for tanks or if you’ve got nothing better to equip, but otherwise not worth grinding to Level 6 for.
Level 7: Waste Not
| Type | Cost |
|---|---|
| Support | 1 slot |
When an item is used in battle, there’s a 50% chance it won’t be removed from your inventory.
An interesting ability to be sure, but hardly something you should rely on. That said, it’s nice for getting more out of rare items like Elixirs or Megalixirs.
Level 8: JP Up
| Type | Cost |
|---|---|
| Support | 1 slot |
Job Points earned after battle are increased by 1.2 times. Stacks with JP-boosting effects from items.
20% more JP isn’t a lot, but it helps in the long run, especially when you’re grinding multiple jobs. Later, you can combine it with the Growth Egg to get 2.4 times the usual JP.
Level 9: Square One
| Type | Cost |
|---|---|
| Command | None |
Cancels all buffs and debuffs for all combatants, such as regen, stop, re-raise, those that increase/decrease stats or make characters weak/resistant to elements.
This is the “emergency reset button” when the enemy has managed to amass a mountain of buffs and/or your party is inflicted with a sea of debuffs. Which shouldn’t happen often, but is common when facing certain lategame bosses.
Level 10: Mimic
| Type | Cost |
|---|---|
| Command | None |
The character performs the same action as the previous one (whether it was an ally’s or their own, but without expending HP, MP, BP, pg or items.
For example, if the previous action was Curaga, the character using Mimic will also perform Curaga, but without the associated costs. This ability is as crazy as you think, allowing you to spam high-cost moves with no additional charges.
Lategame, this is the reason you want to keep Miscellany as a Job Command.
Level 11: Late Bloomer
| Type | Cost |
|---|---|
| Support | 2 slots |
Maximum HP, Maximum MP, Physical Attack, Magic Attack and Physical Defence each increase by 1% for every job where that character has reached Level 10.
With all jobs at Level 10 or higher, your character can benefit from a 30% boost to key stats. Even better, unlike Bravely Default, you don’t need to be a Freelancer to use this ability. It’s fantastic if you can put in the effort, but not essential.
No Comments