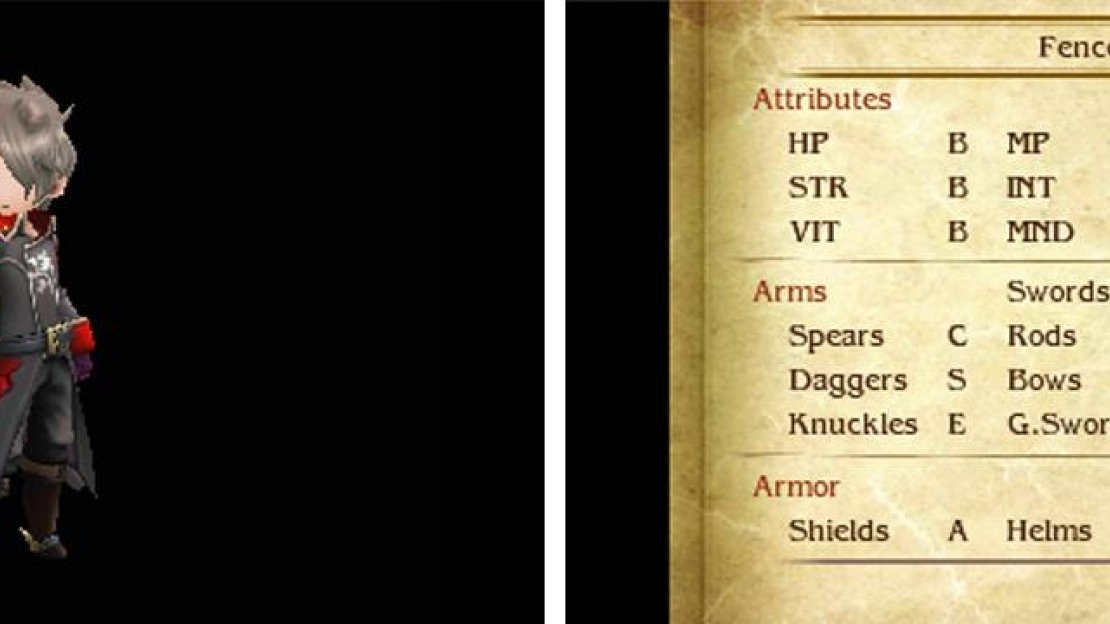
The second physical job you acquire. Whereas Charioteer specialises in brute force and fighting without defence, Fencer is a balanced fighter with considerable fangs. Stat-wise, it’s slightly weaker than a Charioteer, but has better agility and an amazing affinity for swords and daggers.
What makes the Fencer unique is its ability to assume “stances” during battle–these provide a 25% stat boost, on top of any other boosts its receives. By using certain moves, Fencers can switch to different stances to receive different boosts, making them highly adaptable to the flow of battle.
Specialty: Muscle Memory
The user retains stat boosts from a particular stance for 10 turns after switching to a different stance.
While in the Fencer job, characters can easily accumulate stat boosts from stances they’ve recently assumed. This is particularly useful when using Wolf Fang and Goring Aurochs to alternate between wolf stance and aurochs stance.
Level 1: Blazing Wolf
| Type | Cost |
|---|---|
| Command | None |
Assume the wolf stance, increasing Physical Attack and Magical Attack by 25% each. Applies on top of other stat boosts.
At the start, all Blazing Wolf does is boost your Physical Attack (ignore the Magical Attack since you won’t be using magic), which isn’t half bad considering it costs nothing. Not to mention you can stack this boost with other Physical Attack buffs to vastly improve your damage.
Level 2: Stalwart Aurochs
| Type | Cost |
|---|---|
| Command | None |
Assume the aurochs stance, increasing Physical Defence and Magical Defence by 25% each. Applies on top of other stat boosts.
Like Blazing Wolf, this is a nice way of boosting your character’s defences for no effort. A little defence can go a long way, nevermind 25% more!
Level 3: Wolf Fang
| Type | Cost |
|---|---|
| Command | 5 MP |
Only usable in wolf stance. Inflict 1.5 times damage to an enemy and switch to aurochs stance afterwards.
This is where things start getting interesting. After using Blazing Wolf, you can use Wolf Fang to inflict decent damage and immediately go on the defensive with aurochs stance. Because of Muscle Memory, your Fencer will retain the buffs from wolf stance too.
Level 4: Goring Aurochs
| Type | Cost |
|---|---|
| Command | 10 MP |
Only usable in aurochs stance. Inflict 1.5 times damage to an enemy and switch to wolf stance afterwards.
Here’s the game-changer. Wolf Fang lets you transition from wolf stance to aurochs stance, while Goring Aurochs lets you transition from aurochs stance to wolf stance. Therefore you can alternate between Wolf Fang and Goring Aurochs to retain buffs from both stances and routinely rack up good damage.
Level 5: Soaring Falcon
| Type | Cost |
|---|---|
| Command | None |
Assume the falcon stance, increasing Speed by 50%. Applies on top of other stat boosts.
Speed is a very important stat, determining when a character gets to perform an action. So a whopping 50% boost that can be stacked with other speed boosts is nothing to laugh at. It’s a bit of a shame that the falcon stance doesn’t synergise well with the other two stances.
Level 6: Stampede
| Type | Cost |
|---|---|
| Support | 1 slot |
When in aurochs stance, single-target physical hits on the user have a 75% chance of triggering a counter-attack, inflicting 1 times damage. Doesn’t trigger for reflected attacks.
If you’re good at playing defensively, Stampede is really fun to use. Try to end your attacks in aurochs stance, so you can laugh at all the silly enemies eating a hefty counter-attack. Can be combined with the Swordmaster’s Counter Amp for harsher punishment.
Level 7: Muscle Memory
| Type | Cost |
|---|---|
| Support | 1 slot |
The user retains stat boosts from a particular stance for 10 turns after switching to a different stance.
Obviously the Fencer already has this as its Specialty, so you want to equip this when you’re in a different job and you have Fencer assigned as a secondary job. Otherwise, you won’t be able to retain buffs after switching stances.
Level 8: Eye of the Wolf
| Type | Cost |
|---|---|
| Support | 1 slot |
The user starts in wolf stance at the beginning of each battle. Doesn’t apply for consecutive battles.
This essentially saves you one turn of using Blazing Wolf. Handy when Braving the maximum of times to obliterate enemy mobs, allowing you to perform one more Fencer attack.
Level 9: Sword Lore
| Type | Cost |
|---|---|
| Support | 1 slot |
Increases the user’s sword proficiency to S.
Fencer has a natural proficiency of S in swords, so you’ll want to equip this when you’re in a different physical job, but still want to use swords. Well, swords are cool, so we don’t blame you.
Level 10: Falcon Claw
| Type | Cost |
|---|---|
| Command | 1 BP |
Only usable in falcon stance. Inflict four hits on random targets, dealing 80% damage each.
A pretty nifty attack that inflicts 60% more damage per turn. Better yet, each of the four hits can reach the damage cap, so you could potentially inflict 4 times 9999 damage without Bravely Second.
Level 11: Bloody Wolf
| Type | Cost |
|---|---|
| Command | None |
Assume the wolf stance, increasing Physical Attack and Magical Attack to their maximum values.
On paper, this ability sounds underwhelming for a final ability, but one ability makes it worthwhile: the Astrologian’s Limit Break. With it, you can reach a whopping 225% Physical Attack in an instant, which equates to a helluva lot of damage.

No Comments