
To the Sea Caves
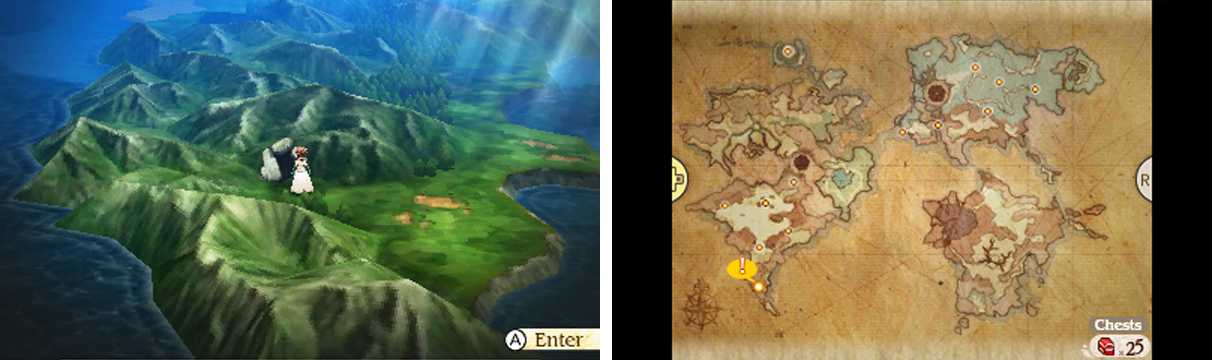
The Harena Sea Caves lie at the south-most edge of the Harena continent.
Once you’re ready to search for the Compass of Space and Time, exit Al-Khampis from its north. A cutscene will play, not-so-subtly letting you know that Minette the Catmancer will be the next imperial boss you’ll be going toe-to-toe with.
To reach your destination, start by heading west through the desert; then turn towards the south when the mountains below give way. Next, go around the Temple of Wind and carry on south. Further down, pass through the narrow path of trees between the mountains.
On the other side, follow the coastline south and at the end, the sea cave will sitting on your left.
West

Finally, a dungeon that taxes your brain! This dungeon features colour-coded crystal switches that lower or raise a corresponding pillar nearby. To reach the dungeon’s end and get all the treasure, you’ll need to mess around with the switches a fair amount.
From the entrance, follow the path ahead and inspect the green crystal switch to lower the green pillar on the right. Use the pillar as a bridge to cross onto the other side, then continue onwards. As you begin to turn towards the red pillar, head north-east under the land bridge.
On the other side, pick up the Hi-Potion lying on the floor at the end, then approach the anchorite waiting nearby. If you have the Summoner asterisk, you can speak to the anchorite to begin a one-sided battle where the anchorite blasts you party with Ziusudra’s Sin.
Survive the anchorite’s attack to receive Ziusudra’s Sin ; otherwise if everybody hits the floor, it’s a no-nonsense Game Over. To improve your odds of survival, ensure at least one character is a Bishop and has the Magic Defence 20% ability equipped.
Return to the red pillar and head west from it. Keep going to the far end of the lower ground and inspect the red crystal obscured by the top of the stairs to lower the red pillar. Now you can access the chest behind the red pillar, which contains a White Cape , helpful for magic-wielders.
Inspect the red crystal again to raise the red pillar to its original position, then climb up the nearby stairs, up to higher ground. Cross over the top of the raised red pillar and follow the path around until it forks. Go south-west first to pick up an Antarctic Wind from the chest, then exit to the east.
Central

The puzzles ramp up slightly in the second area, but nothing you can’t figure out. Begin by leisurely following the cavern path until you reach a fork, with stairs going up. Continue east on lower ground first, ignoring the lowered green pillar and stopping by the red pillar.
Inspect the red crystal to drop the red pillar, then head north-east under the overpass to collect 500 pg from the chest. Next, go back to the lowered red pillar and head directly south, under the next overpass. On the other side, head west for a blue locked chest and east for an Ether chest.
Return to the red pillar again and go north across it. Carry until you reach the green crystal–inspect it to raise the green pillar below. Now go backwards to before the red pillar and inspect the red crystal to push it back up to its original position.
With both pillars raised, return west to the first fork and ascend the stairs to the higher ground. Cross over the top of the green and red pillars, then carry onwards to the eastern side. Here, head north-east for a chest containing an Earth Drum , then follow the path opposite for a shiny Phoenix Down .
The exit to the next area is located beyond the south-east path.
East and Depths

There’s no orange exclamation mark to clue you in, but this is the final area of the dungeon, at least in terms of exploration. Begin by going east a few paces to reach the central hub. From here, head north and inspect the green crystal to raise the pillar ahead.
Cross over for a chest with a Zweihander inside, then go back to the central hub and poke the green crystal to lower the green pillar to its initial position. Next, head directly south across the red pillar; at the end is a chest with a pair of Thief Gloves that improve steal rate.
Back at the central hub, head north-east, down the stairs to lower ground. Follow the path to the east first to collect a Teleport Stone at the end, then backtrack and head west. After stepping over the lowered green pillar, go west for a chest containing 800 pg .
After that, head north and inspect the red crystal switch to lower the red pillar further south. Return to the central hub and head south-east down the stairs. Having lowered the red pillar, you can cross it west. On the other side, loot the chest to the south-west for a Remedy .
The next part is easy to miss. From the Remedy chest, head directly north, under the overpass. Touch the blue crystal switch on the other side to raise the blue pillar towards the east. Now go back to the central hub and head east over the raised blue pillar.
Soon, you’ll reach the exit to the final section: the Depths. Before going ahead, check in with the Adventurer and see that your party is fighting fit. If you haven’t done so already, give all four of your characters a Clothespin to ward off sleep.
Within the Depths, inspect the crystal switch ahead to raise the pillar, then cross over it. Was this really all that prevented intruders from getting their hands on the compass? In any case, a predicted guest arrives to claim the compass for the kaiser and a boss battle ensues.
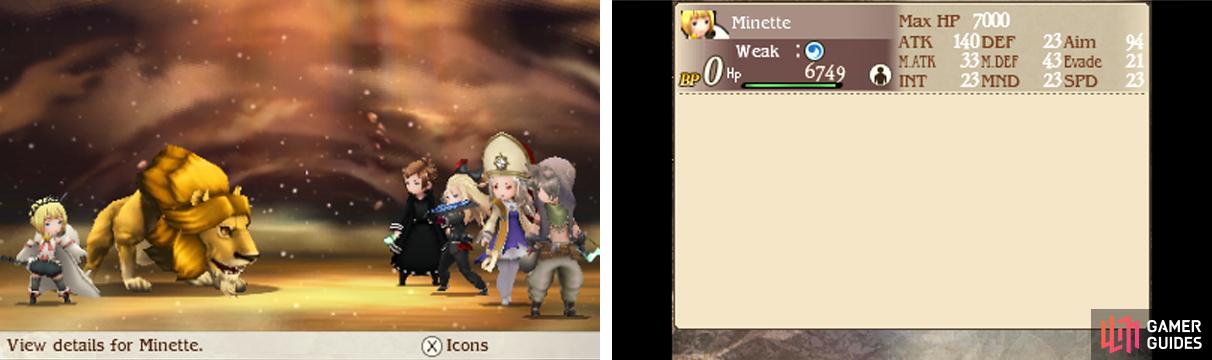
Boss: Minette and Bismarck
| Boss | Level | HP | Weakness |
|---|---|---|---|
| Minette | 23 | 7000 | Fire, Beast |
| Bismarck | 23 | 5000 | Water |
Minette looks petit and a tad daft, but she’s meowr than a match for you. For maximum annoyance, she uses Catnap to send your party to sleep, but this is easily remedied with a Clothespin or four. She also uses Sonic Boom to hit one and pierce physical defence.
Her pet “cat” Bismarck uses Dual Attack to deal two powerful hits, Chomp to try and reduce a character’s HP to one and Call of the Wild to try and inflict Dread on the party. Use a Remedy combined with Halfsies to cure Dread quick or your party will be severely hampered.
Of the two, Bismarck is the most dangerous, so focus your efforts on him (or her) first. Both cats are resistant to magic, but you can steal do a fair amount of damage if you target their elemental weaknesses. Otherwise, physical attacks are king, especially those from a Fencer.
If you have the Swordmaster job, use Nothing Ventured to counter single-target attacks and Catnap, as well as draw away some attention from your healer and/or mage.
After Bismarck bites the dust, the battle becomes a joke. Just watch your squishier characters don’t get KO’d by Sonic Boom; otherwise, unleash a physical onslaught and a torrent of water magic to send the Catmancer spinning.
No Comments