
To the Skyhold
After your fierce battle with Minette, exit the Harena Sea Caves, preferably using a Teleport Stone, then head all the way north towards the city of Ancheim. To save time, turn off encounters if you want. Inside the city, rest up in the inn and stock up on items and any equipment you had to skip over.
As soon as you’re ready to depart, enter the door to the left of the Magics store. If you did the Summoner vs Swordmaster sidequest (or you played Bravely Default), you’ll recognise this as the entrance to the Grand Mill Works. Inside the mill, head for the north-west to enter the dungeon.
Floors 2F and 3F


Another dungeon already? Thankfully, this one isn’t too long. Anyway, the gimmick of this dungeon is that you have to weave in and out between two floors. However it’s not nearly as complex as it may sound. If you played Bravely Default, you should be very familiar with the dungeon.
Elevator Switch 1
Floor 2F
From the entrance, head north, then around the corner to find stairs going up.
Floor 3F
Up on the next floor, carry on east to reach the Adventurer standing by the elevator. Right now the elevator door is locked, so you’ll need to explore the dungeon to unlock it. First, head south from the elevator and descend the stairs.
Floor 2F
To the right, the path splits towards the east and towards the south. We’ll call this the 2F T-junction ; remember this! You can go either way, but we’ll go east first and up the stairs.
Floor 3F
Back upstairs, head north; at the end is a lever on the left–inspect it to disengage the first lock on the door. So far, so easy.
Elevator Switch 2
If you somehow get lost, refer to our handy maps near the beginning!
Floor 2F
Back at the 2F T-Junction , head south. After a few paces, the path will fork. Follow the westward path first for a chest with a Zeus’s Wrath . If you’re in danger, have somebody with the Attack Item Amp (Catmancer) ability use it to fry the robots.
Next, take the eastward path and go up the stairs at the end.
Floor 3F
Head all the way west, ignoring the northward path for a moment. Pick up the Roc Fillet on the floor, then follow the path going north. After turning the corner, you’ll arrive at another fork. Head south first to find 800 pg lying on the ground.
Back at the fork, follow the path north where another fork awaits. For now, follow the northward path; at the end are stairs leading up. Back upstairs, flip open the nearby chest for a Remedy . Return to the previous fork and this time head south, then down the stairs.
Floor 2F
Make your way east to start with, then follow the path going south. When you reach a dead end, don’t worry and press onwards. You’ll pass straight through the wall, stopping after a few paces. From here, go west to emerge in the secret treasure room.
Annoyingly, there’s another blue locked chest to tempt you, but also a standard red chest that you can open now for a Courage Ring (negates Dread, which would have been useful in the previous boss battle…). Back on the main path, follow the passageway north.
When you reach the stairs, don’t go up just yet. Go right and through the north-east corridor to pick up a Teleport Stone . Now go up the stairs.
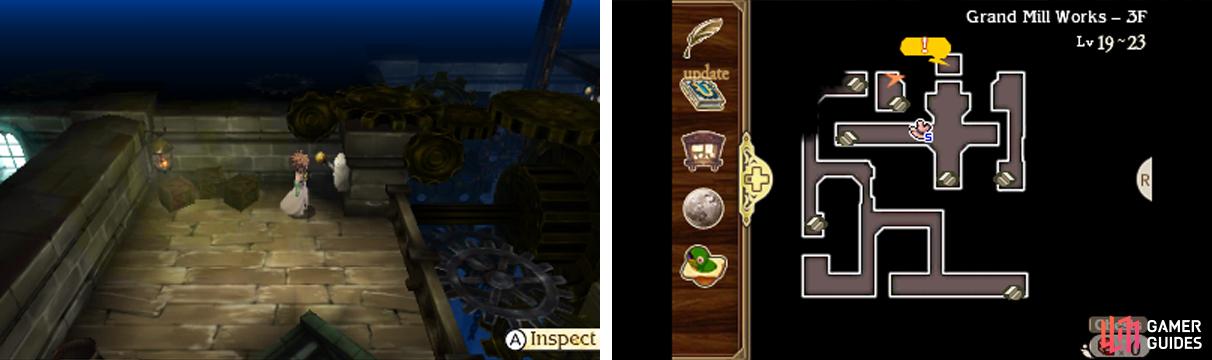
Floor 3F
Upstairs, give the lever ahead a good pull to disengage the second lock, which will unlock the elevator door. To save time, use the Teleport Stone you just picked up to leave the dungeon. Rest up and stock up in town if you need to because a boss battle is coming up shortly.
When you’re ready, return to the Adventurer at the centre of Floor 3F. As soon as you go upstairs, a corny cutscene will play, giving you a heads up that a boss battle is nigh. If you haven’t done so, give everybody a Star Pendant to ward off poison.
Once you’re ready for a brawling, approach Janne in front of the elevator. Despite appearances, you won’t be facing Janne again, but rather one of the empire’s freakish pets.
Amphisbaena
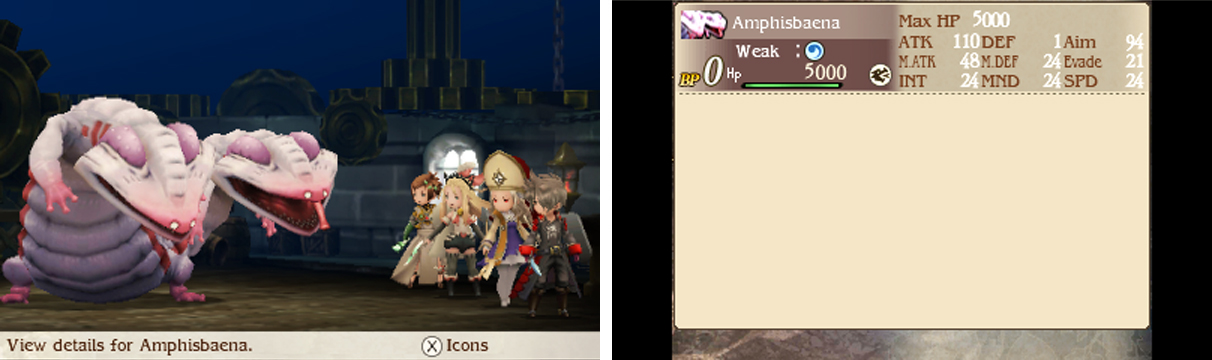
| Level | HP | Weakness |
|---|---|---|
| 24 | 5000 (x2) | Water, Dragon |
The gruesome Amphisbaena has two heads that attack independently. To make matters complicated, one head absorbs magic but has low physical defence, while the other head absorbs physical hits but has low magical defence.
As soon as it’s safe, use Examine or a Magnifying Glass to check at least one of the heads and determine which head is which. Otherwise you won’t get very far into the battle.
To wreck your party, the Amphisbaena has an assortment of deadly attacks. Rollover damages your party, Poison Breath poisons your party, Tounging inflicts two hits and Bite damages one and inflicts poison. Without Star Pendants, your party will get drained by the duo’s attacks and the poison.
To mix things up, one (or both) of the heads may use Spin Shuffle at the end of the turn to shuffle the positions of the two heads. When this happens, press Left on the Circle Pad to keep track of the heads, so long as you’ve examined one.
Unlike other battles with multiple bosses, you’ll want to attack both heads together. Even if you defeat one of Amphisbaena’s heads, after two turns, it will use Rebirth to resurrect and recover a quarter of its HP. But since Amphisbaena has poor defences, it won’t be long before you nail it.
Top of Ancheim
Having dealt with the nightmarish blockade, enter the elevator and pull the lever inside to ride it upwards. Outside of the elevator, you’ll be atop Ancheim. For now, head all the way to the west to confront the Skyhold and trigger the end of this chapter.
Later, when the dust has settled, you can come back here and inspect the west-most edge for a measily Hi-Potion . While you’re here, you can also head east to enter the top of Ancheim Palace. Inside, continue east to find a hidden Spider’s Web .
No Comments