
A Secret Passage
Back at the bridge, Aimee is still single-handedly holding off the Eisenberg army and getting past her looks all but impossible. Fortunately Danzaburo has a plan and that’s to cross using the abandoned aqueduct built underneath the bridge.
When you’re ready to enter the aqueduct, speak with Yoko.
West

In terms of navigation, this dungeon isn’t particularly challenging. Start by heading in a north-easterly direction from the entrance, until you reach stairs that lead to the top of the red pipe. Climb up the stairs and head right, then down the next set of stairs.
After picking up the shiny Hi-Potion on the floor, backtrack to before you went up the stairs. From here, go south-east through the broken pipes. When you reach the bottom-most pipe, keep close to the pipe and make your way for the south-west corner, past the gap in the floor.
Slam open the chest hiding at the end for an Antarctic Wind , then return to before the gap. Carry on in a north-easterly direction, through the doorway, and ascend the nearby stairs beyond. Next, run north-east across the top of the pipe, over the fiery chasm.
On the other side, descend the stairs back to lower ground and exit to the right. In the Interior section, open the chest ahead for 1200 pg . Back in the West section, return up the stairs and continue north-east towards the exit at the end of the pipe.
Interior

From the central entrance, head all the way across the top of the pipe, descending the stairs at the end. Back on lower ground, ignore the right-most stairs because it doesn’t lead anywhere and go across the middle set of stairs instead.
In the the area between the two pipes, go north-east towards the edge of the fiery chasm. It can be hard to notice, but in the furthest corner, just above the bottom pipe, is a Phoenix Down glowing on the floor. Next, head in the opposite direction (south-west) for a chest with a Remedy .
After that, ascend the stairs up to the top pipe and follow the top of the pipe south-west back to the West section. In the isolated corner, descend the nearby stairs and scoop up the shiny Enopu Mushroom on the floor.
Back in the Interior section, head north-east all the way across the top-most pipe. At the end, take the north-most exit to come face to face with the anchorite of fire. If you have the Summoner asterisk, you can acquire Promethean Fire by surviving a hit of the fiery summon.
As long as at least one character is wearing a Flame Robe, you should have no trouble taking a hit. If you somehow forgot to buy some, a Bishop will be fine too. Finally, return to the Interior section and take the exit on your right after going down the stairs.
East

Not long to go now! From the middle entrance, head north-east, past the gaping hole in the floor and through the doorway. If your party’s exhausted, continue north-east and along the top-most pipe to reach the Adventurer. Otherwise, head south-east across the stairs along the middle pipe.
In the area between the middle and bottom-most pipe, make your way north-east to pick up some Catnip lying on the floor. Next, head south from the Catnip so you’re standing between the two broken ends of the bottom-most pipe.
Now for the cool bit: go south-west and you’ll be able to walk inside the bottom-most pipe. At the end of the pipe, open the obscured chest for a powerful Ice Brand . After that excitement, return to where you found the Catnip and head south-west between the two pipes.
Beyond the doorway, ascend the stairs on your left and walk south-west across the top of the middle pipe. On the other side, exit to the south to return to the Interior section. Here, prise open the chest to discover a Smiley Badge . Give this to a fragile character if you want.
Return to the East section and head north-east, along the side of the bottom pipe, for another chest with a Magnifying Glass inside. Finally, retrace your steps to the point before you crossed over the middle pipe. From here, head north-east and up the stairs.
When you’re on top of the top-most pipe, travel south-west for a chest containing 900 pg , then go in the opposite direction (north-east). At the very end, descend the stairs to reach the Adventurer. You’ve got an appointment with Aimee coming up, so do whatever must be done.
Once you’re ready to continue, go across the stairs on the right, then exit via the stairway in the corner.
Boss: Aimee Matchlock
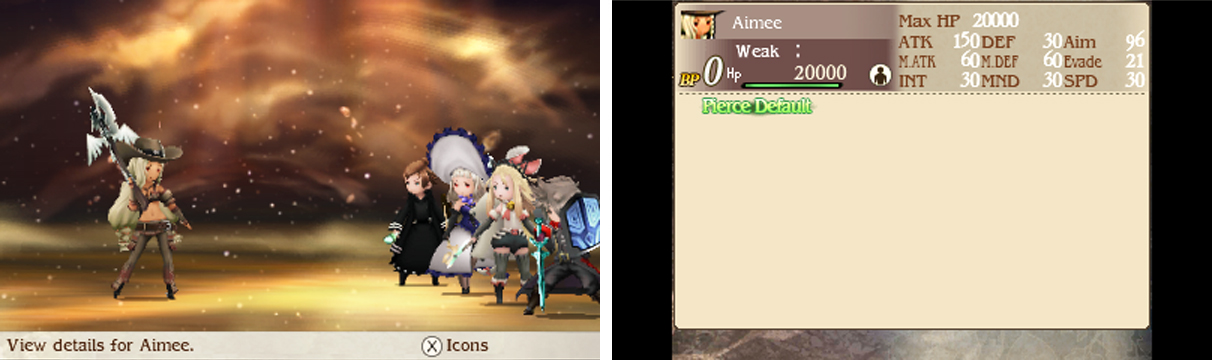
| Level | HP | Weakness |
|---|---|---|
| 30 | 20000 | Nothing |
The Silver Sniper usually starts by using Condor to add a Pierce Default effect to her attacks. As long as this effect is active, her attacks will not deal reduced damage when you Default. Don’t bother Defaulting to weaken Aimee’s attacks–do it to build up BP for a rainy day.
For attacks, she can use Sidewinder to hurt your party, dealing more damage the fewer party members standing. After that, she’ll go immobile for one turn. She may also use Maverick to target the weakest character at the end of the turn.
Aimee’s attacks all hurt hard , but you should be able to survive an attack so long as you’re at minimum level (24). For best results, make sure everybody is geared for physical defence–if anyone has two-handed weapons, switch to one-handed weapons and a shield.
In addition, have your Bishop or White Mage focus on healing to keep your party’s HP high. Aimee is fast so you’ll need to keep healthy to survive. If your healer falls to one of Aimee’s attacks, use Phoenix Downs and Hi-Potions to stay in the game.
Once you get to grips with Aimee’s attacks, it’s time for a counterattack. Aimee has decent magic defence, so physical attacks are your best assets. Fencers are great as always, plus they’ll survive for longer with the defence buff from Aurochs stance.
The safest opportunities to attack are when Aimee goes immobile after Sidewinder or when she needs to use Condor again. However since Aimee doesn’t Default and her attacks pierce Default, any time is a good time to attack (as long as you have high HP).
No Comments