

The final area covered in the Swamp Witch’s Hut Expedition, you can reach this area from the Monster Den area by following these directions:
- Southeast
- West
- North
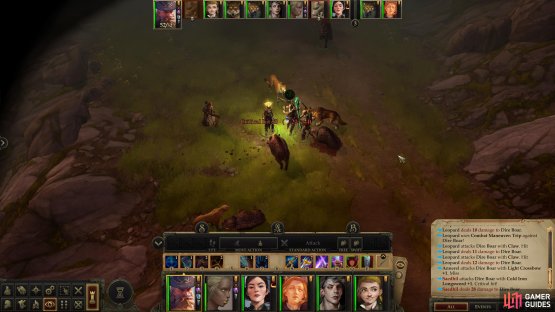

(1 of 2) Kill some boars,
Kill some boars, (left), then dispatch a pack of worgs. (right)
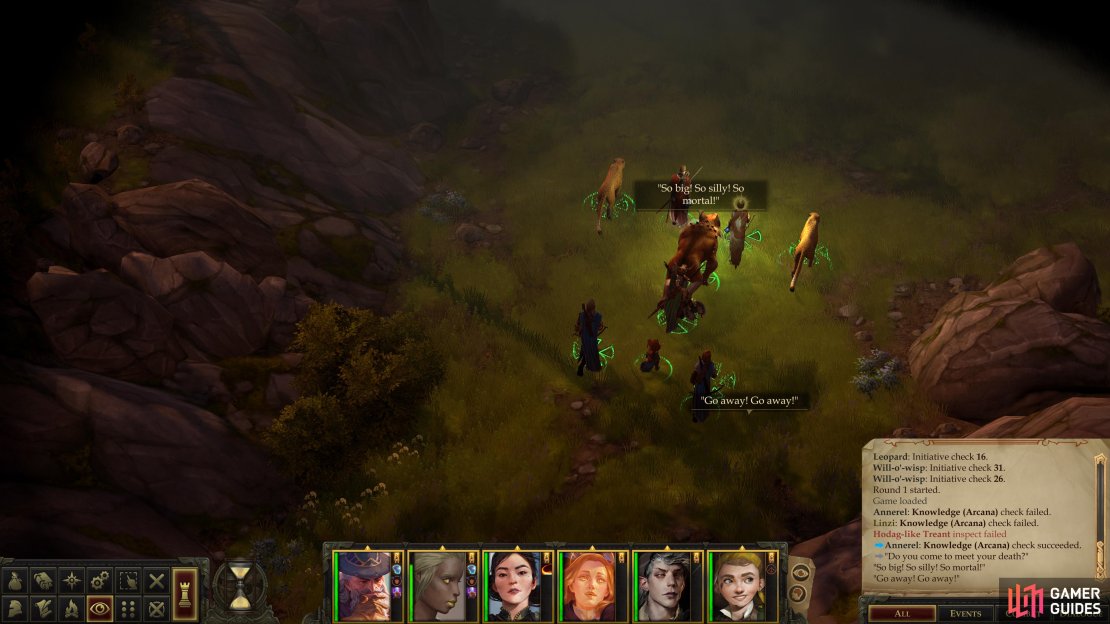
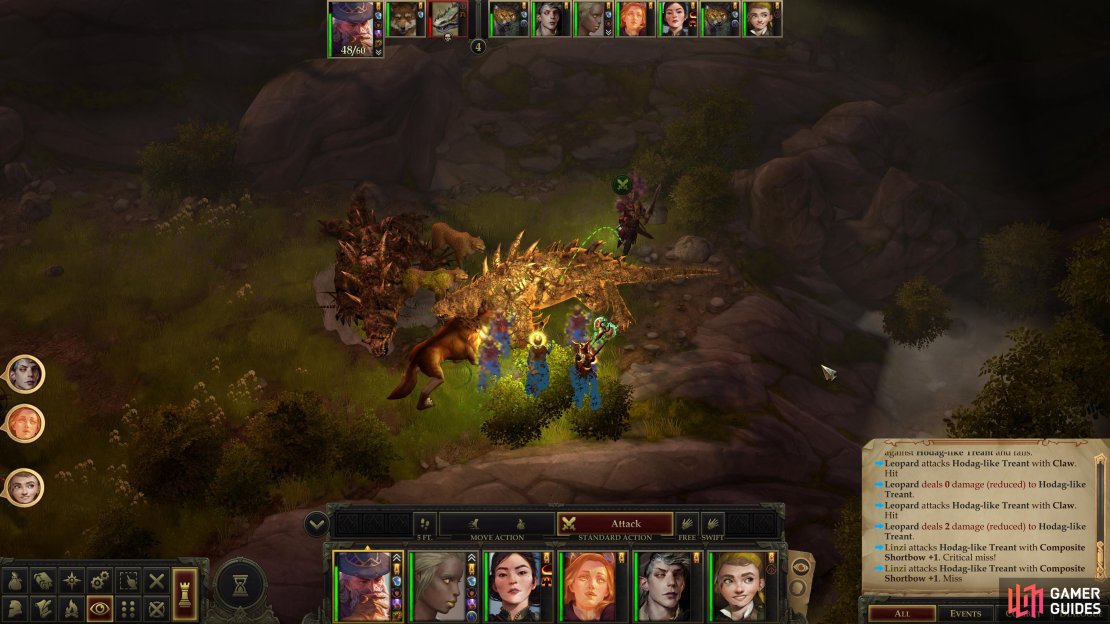
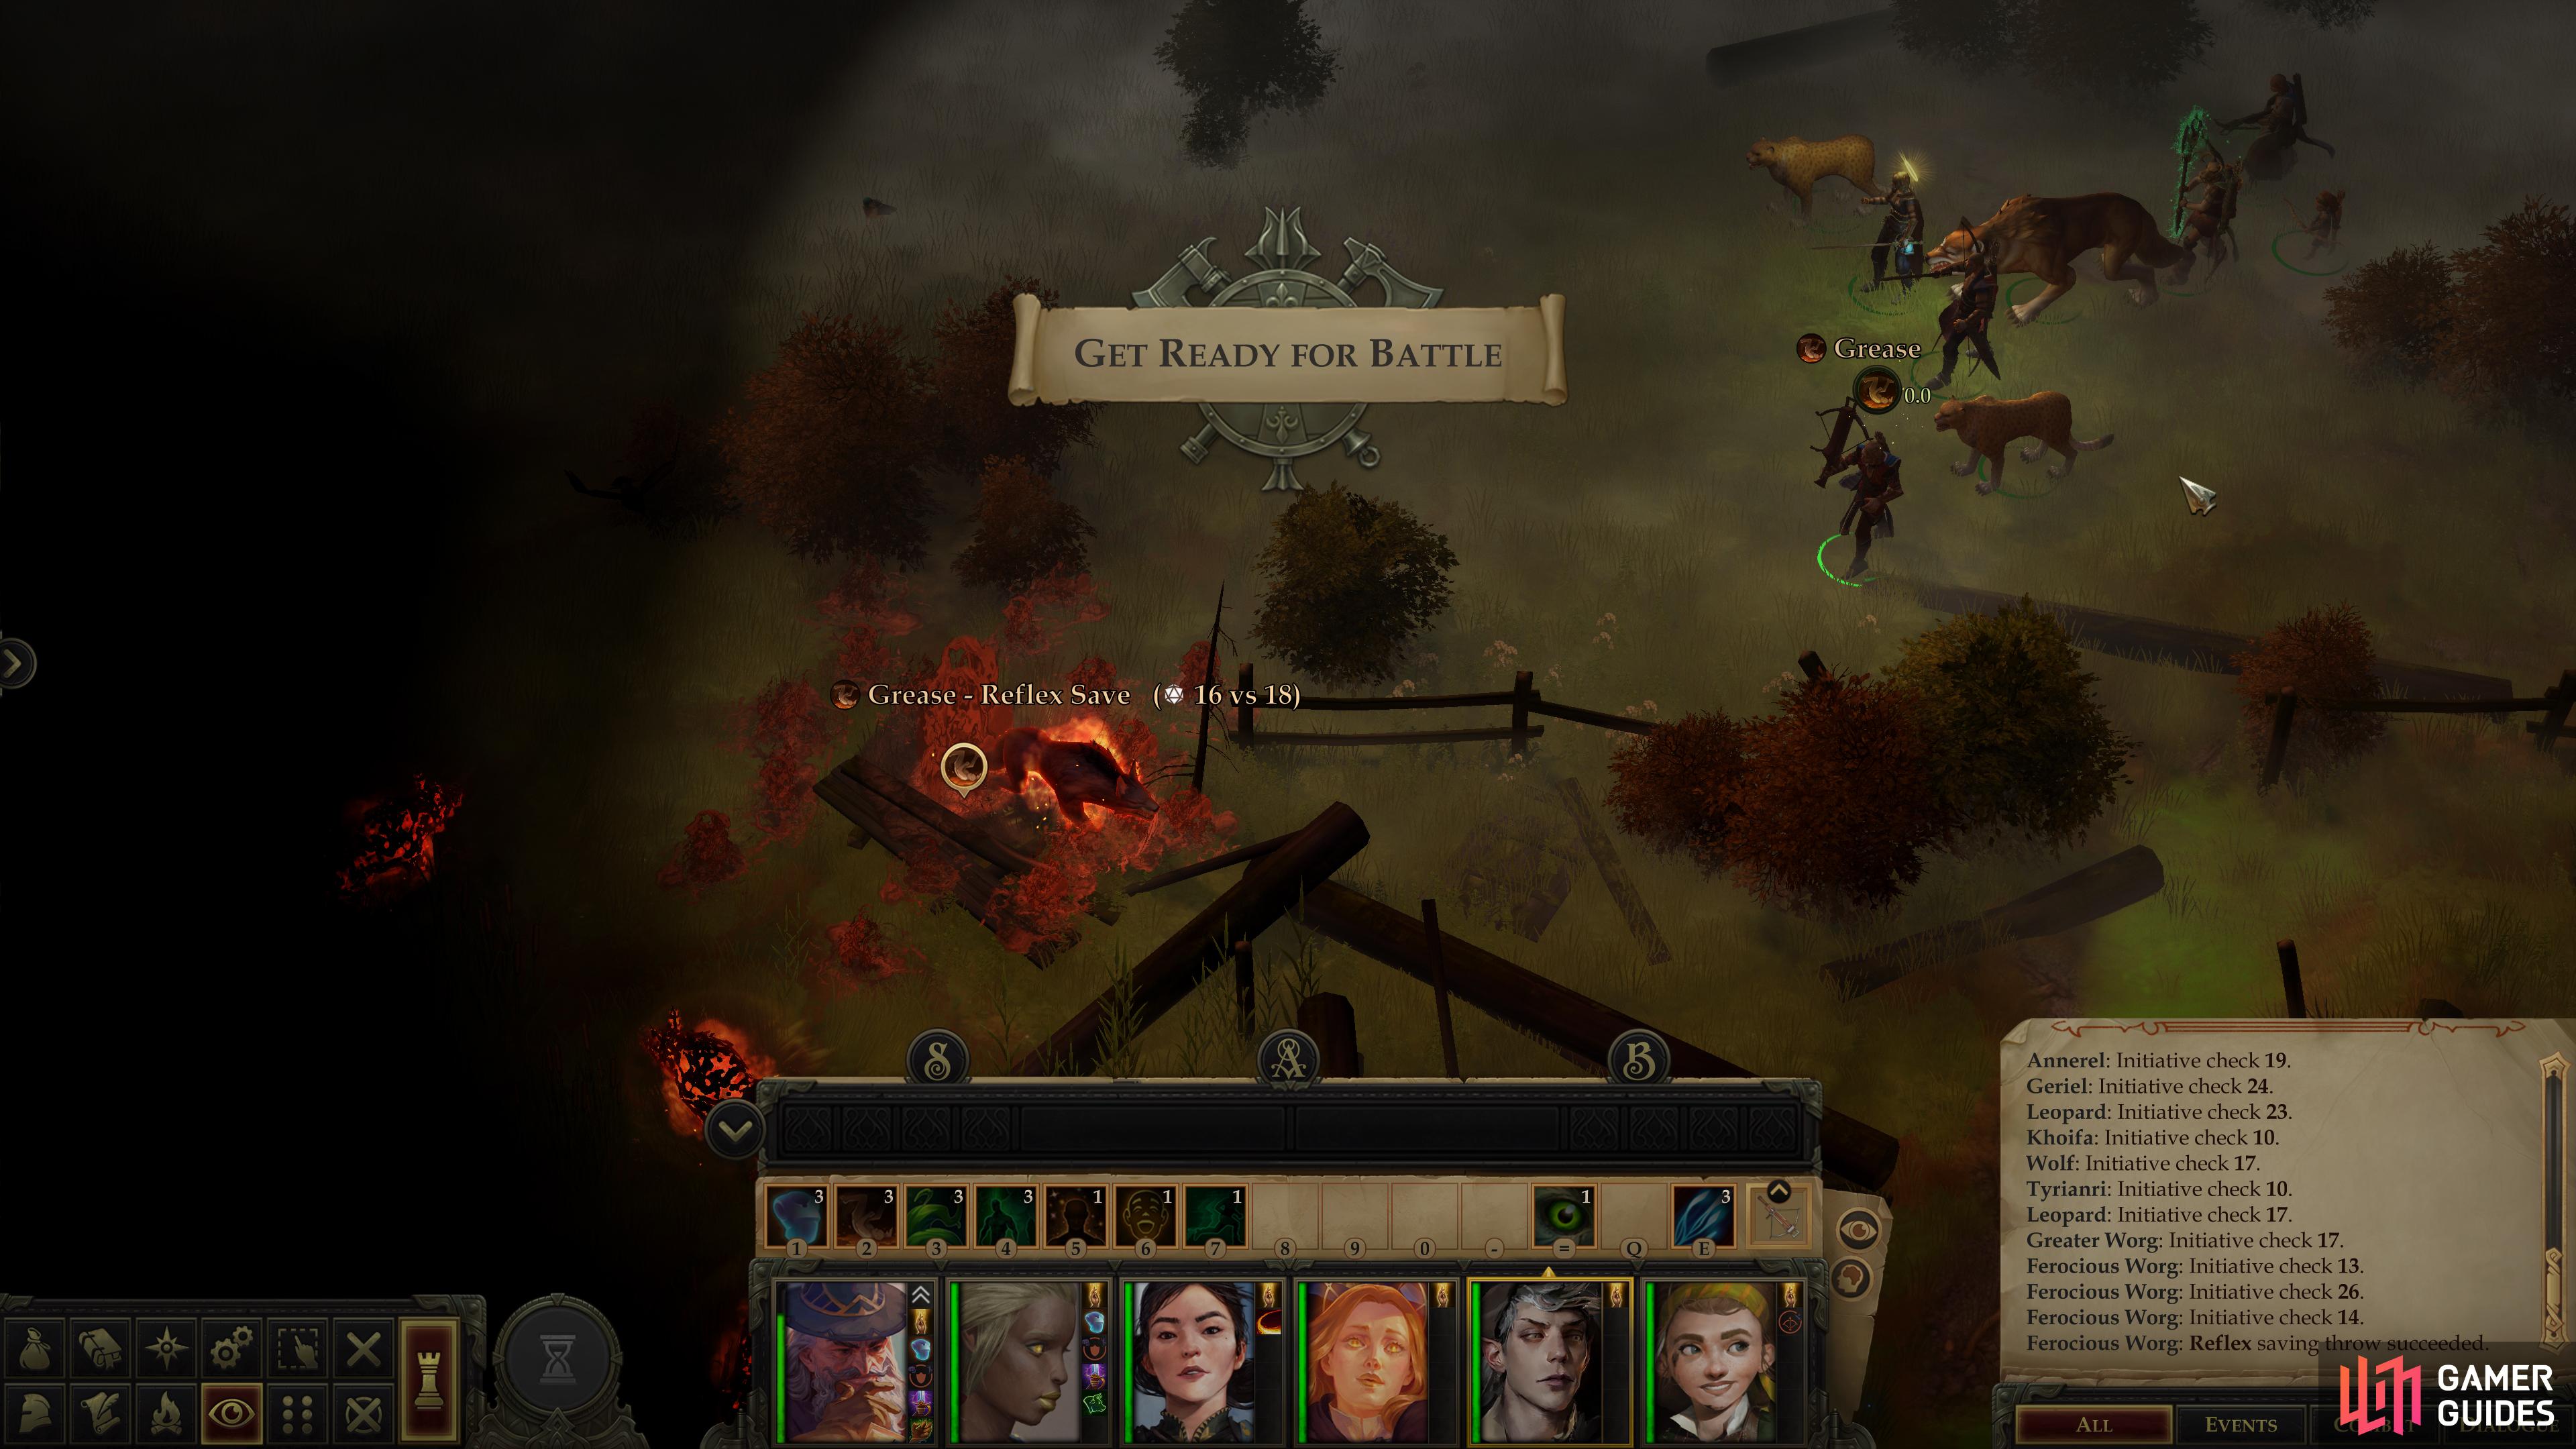
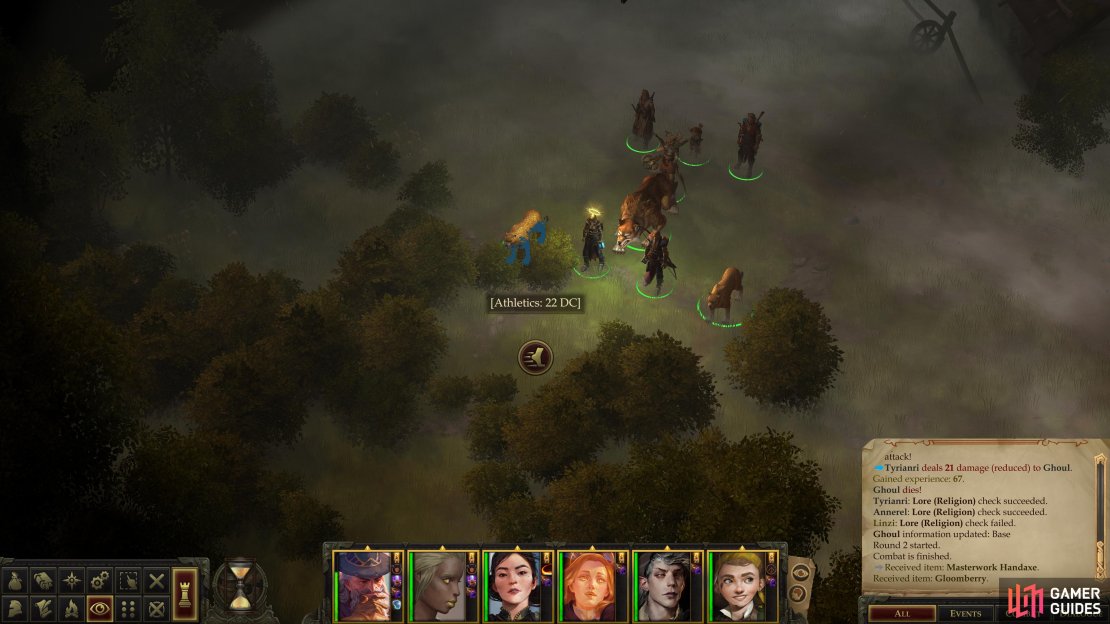
Battle: Dire Boars and Worgs
You’ll begin on the northern edge of the map, along a path that runs south through the area. Enough traffic here to justify the existence of this path, or is the witch who supposedly dwells here just kind enough to make travel easy, just in case? Whatever the reason, follow it south until you encounter a trio of Dire Boars, who should be easy meat at this point. Not that they can’t do damage if they hit, but your frontliners should have a high enough Armor Class by now to make that unlikely.
Carve up the boars, then abandon the road for a bit and head up to the northwest, where you’ll encounter a pack of Worgs, including a Ferocious Worg. Don’t fear these beasts, however - they’re nowhere near as strong as the ones in the Ruined Watchtower. Just ensure they don’t get around to your archers and casters and you shouldn’t have much trouble with these mutts. Continue northwest after putting the dogs down to find a corpse, on which you’ll find a Scroll of Cure Moderate Wounds, a Potion of Cure Light Wounds and a Scroll of Acid Arrow, among other goodies.

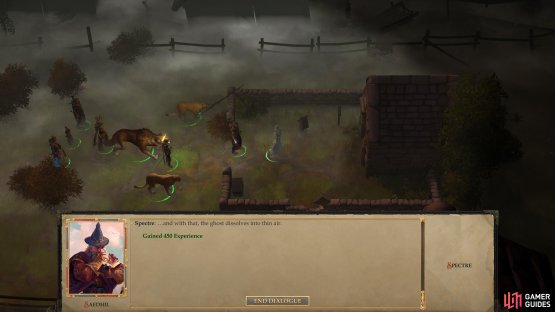
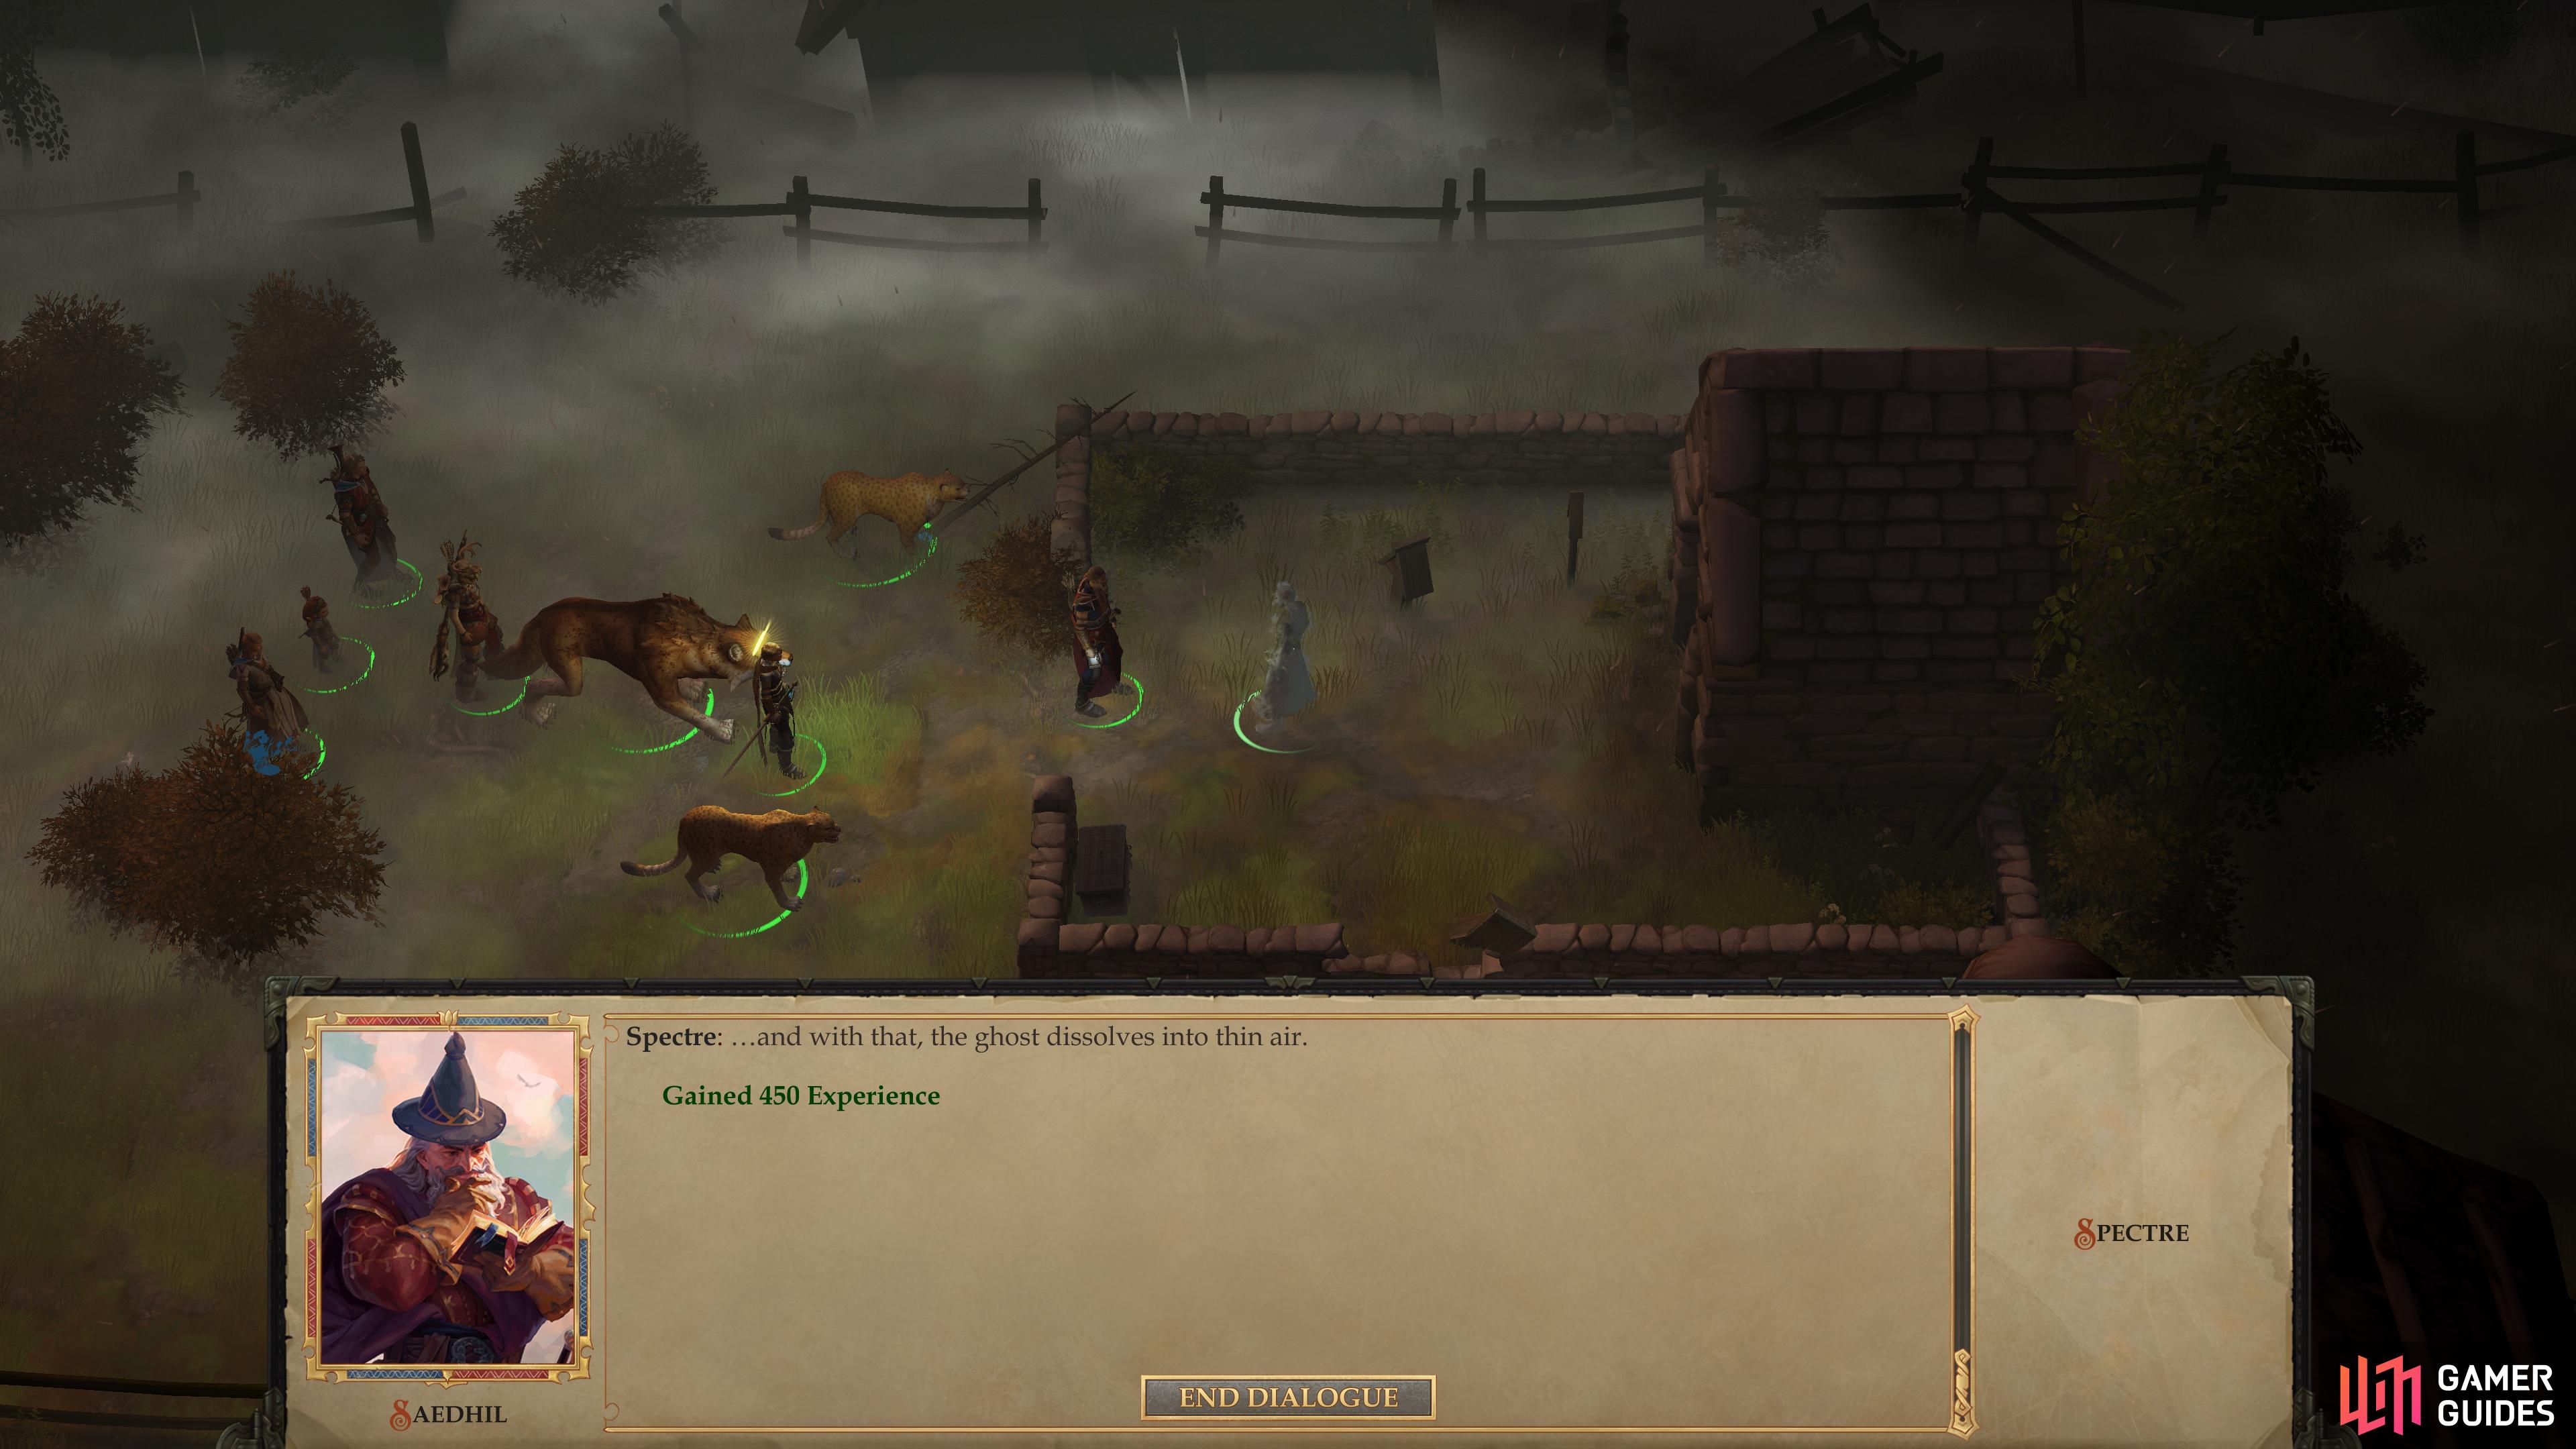
(1 of 3) As you move through a pass, you’ll hear disembodied voices.
Harvesting Mudleaves
Return back to the road and follow it south until you find a tiny branch veering off to the east. While the trail might not make it far before vanishing, it does point you towards a pass to the northeast. Proceed to the northeast a short distance and ignore the disembodied voices that taunt you as you go - you’ll get to them shortly - and keep your TAB button ready, as there are plenty of Mudleaf plants along the way. Save before interacting with one, as they’re surprisingly difficult [Knowledge (Nature) 27] to harvest, and you’ll want to harvest as many as you can. Yes, that means some save/loading is in order, but it’s worth your time. Be sure to obtain at least three of them for an upcoming quest.
Slowly pick Mudleaves and work your way to the northeast until the path opens up in front of a stream. Search the western edge of the stream and pass a [Perception 18] check to spot a locked [Trickery 20] chest, inside of which you’ll find a Potion of Cure Light Wounds, a Scroll of Cure Serious Wounds, a Scroll of Cure Moderate Wounds, a Potion of Enlarge Person, a Scroll of Cure Serious Wounds and a variety of trinkets.
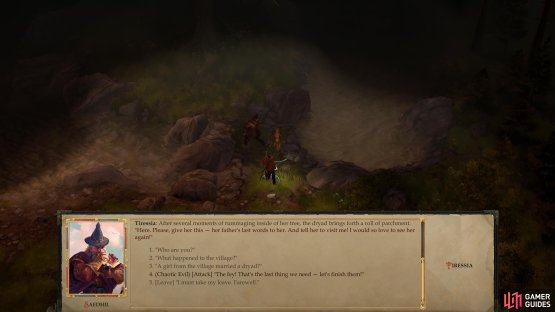
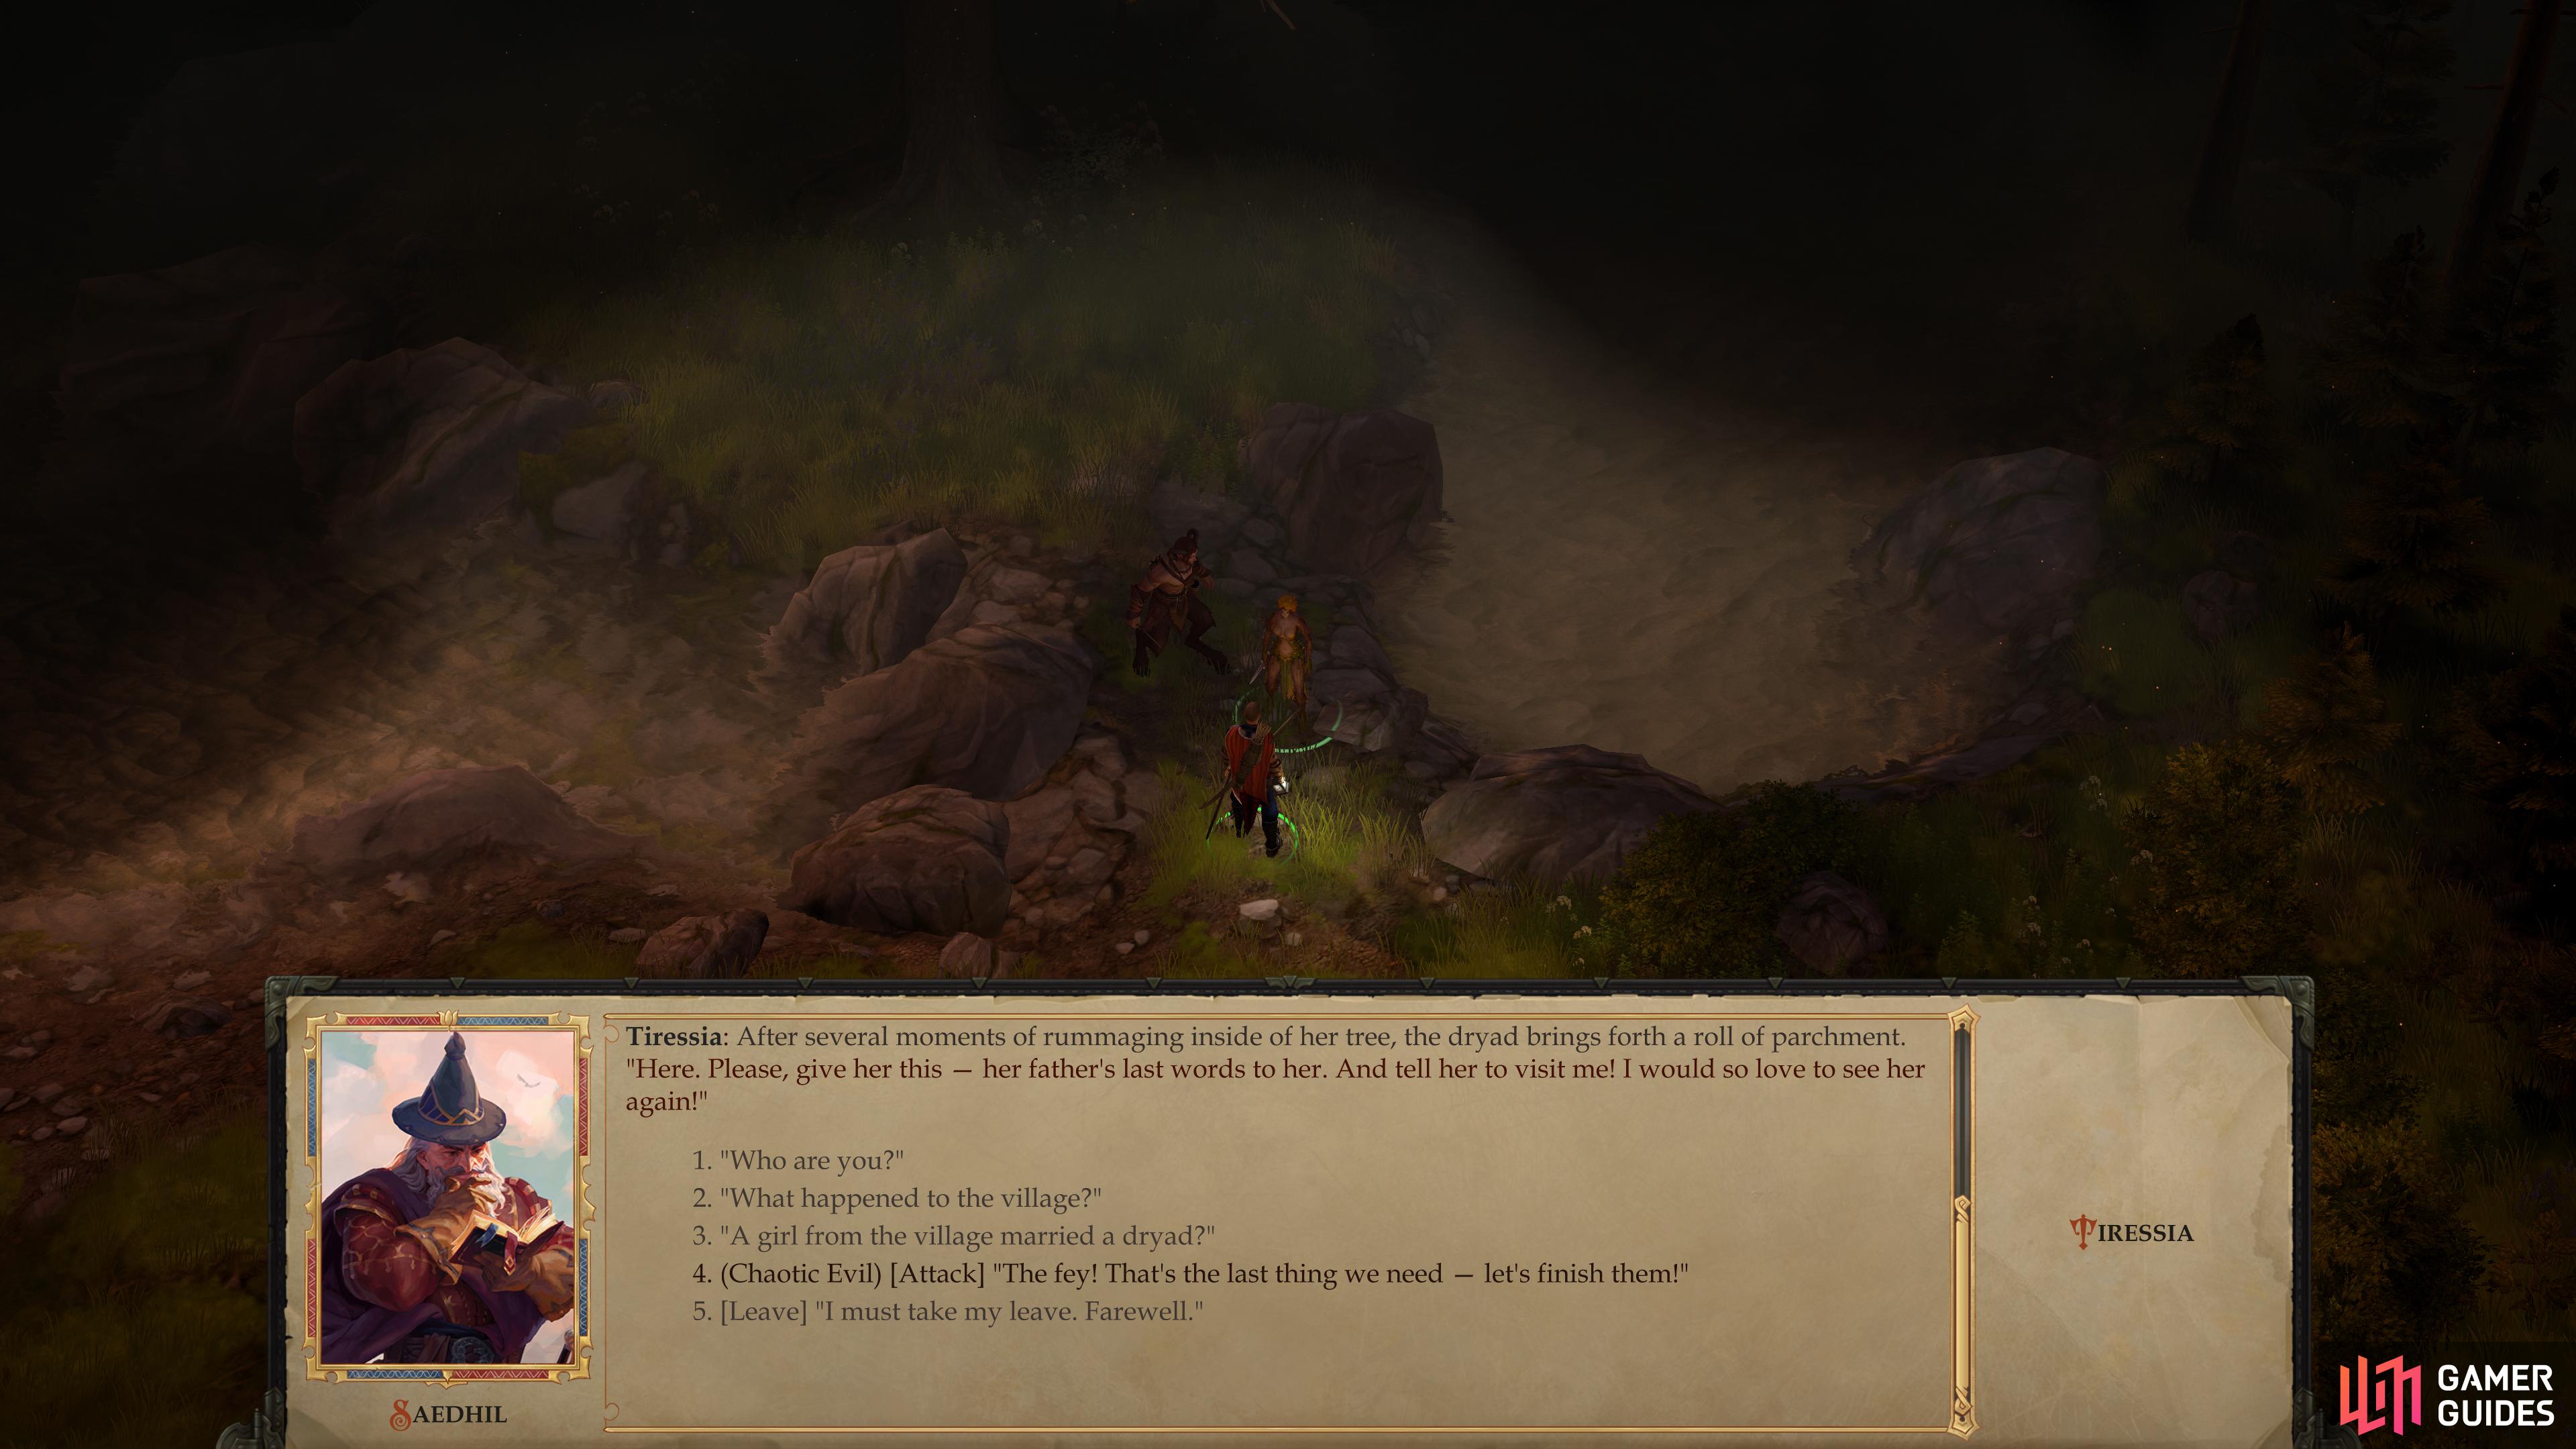
(1 of 3) Talk to Tiressia to start the quest “Gnarled Branches”.
Falchos and Tiressia
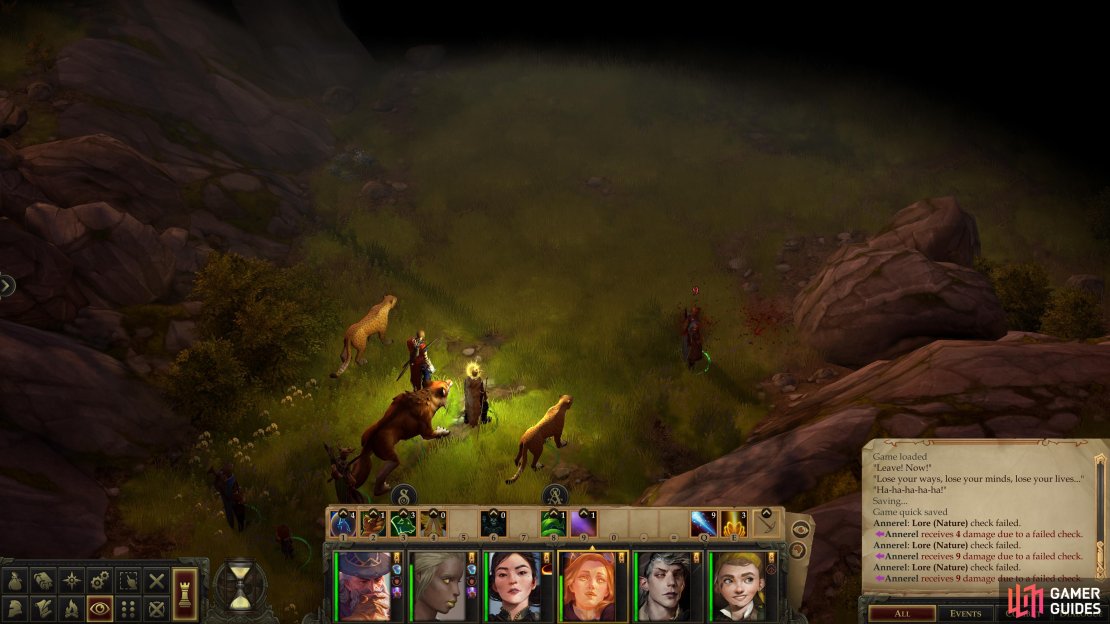
Follow the stream east and you’ll find a gathering of two fey lovers, the Satyr Falchos and the Dryad Tiressia - yes, the same Tiressia who is supposedly related to Melianse. Chat with them and you can learn some interesting things about the area, like the fate of the village that used to stand here… A good warning to avoid mingling with fey creatures, if the Guardian of the Bloom hadn’t already taught you that. Tiressia will also tell you about the daughter born by such a union, Elga Verniex. Something to keep in mind for later, no doubt.
Assuming you avoid the temptation to just murder these two fey outright (a [Chaotic Evil] act which will only net you some experience and a Chainshirt +1), engage in dialogue with them. Be sure to pick the dialogue options “What happened to the village?” followed by “A girl from the village married a dryad?”, as this will unlock more dialogue options later on. As for more immediate concerns, pick the dialogue option “What were you arguing about?” to pry into their business. Apparently the Scythe-Tree Tiressia mentioned earlier - the one that used to be Callistropsia before she turned on friend and fey alike - now threatens Tiressia. Falchos isn’t inclined to let this stand, but neither does he have the power to prevail. This is where you come in.
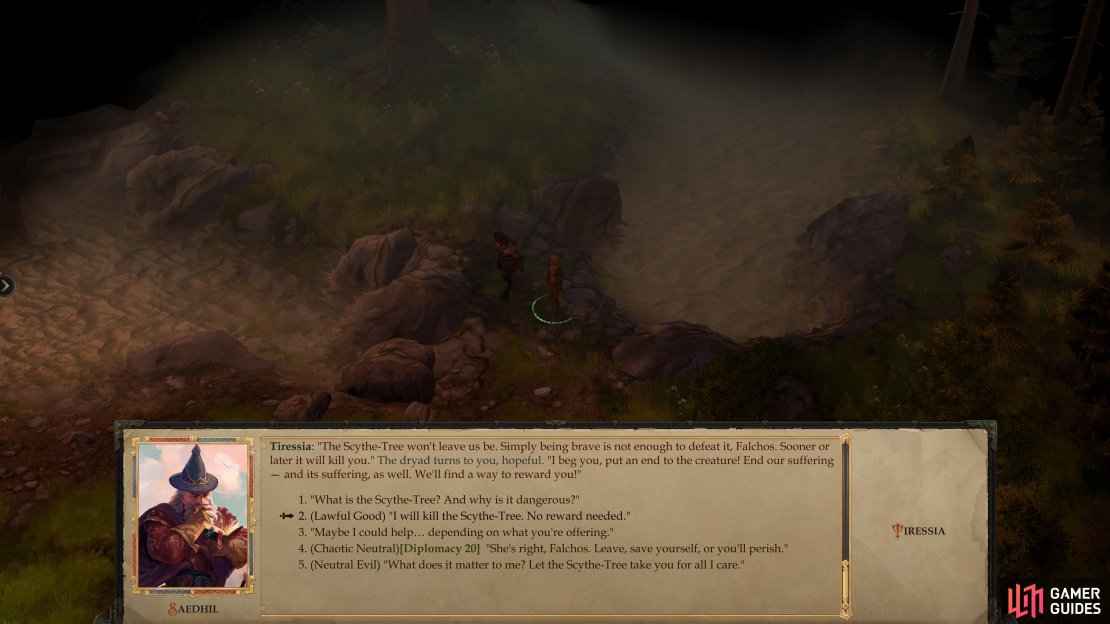
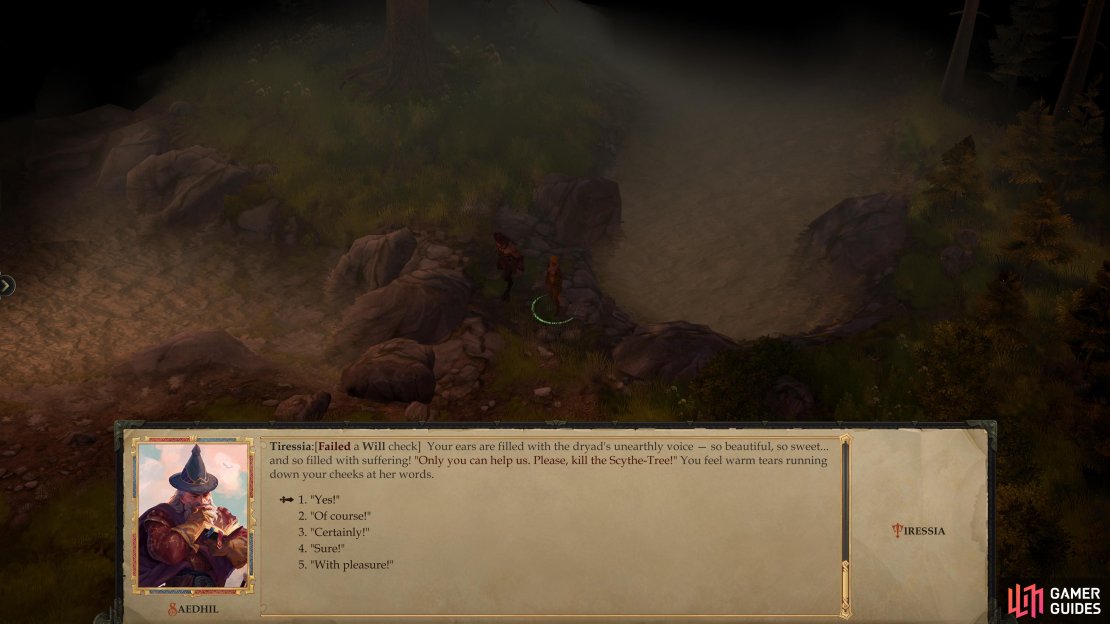
If you pick the [Neutral Evil] option, the untrustworthy fey will try to charm you [Will DC 26]. If you fail, you’ll be forced to pick one of several dialogue options agreeing to help them, after which you’ll be transported to the site of the Scythe-Tree and thrown into combat, while if you succeed, the miffed Satyr will attack. This is not a quest you want to miss out on, nor is the Scythe-Tree a foe you want to fight unprepared. The same outcome will occur if you pick the dialogue option “Maybe I could help… depending on what you’re offering” followed by “I won’t risk my life for such a meager reward.”
Opting out entirely isn’t ideal, but you can convince Falchos to abandon the Dryad by passing a [Diplomacy 20] check, which is also a [Chaotic Neutral] action. As a way of thanks the Dryad will give you 500 GP. Alternatively, you can either demand a reward (“Maybe I could help… depending on what you’re offering” followed by “Fine, I will help you.”) or be selfless and pick the [Lawful Good] option. These last two options start the quest Gnarled Branches.
Since the alternatives are ignoring Falchos/Tiressia, killing them, or getting forced into a fight with the Scythe-Tree unprepared, you might as well pick a course that accepts the quest and allows you to fight the Scythe-Tree on your own terms. Whether you pick the [Lawful Good] option or extort a reward from Tiressia is up to you.

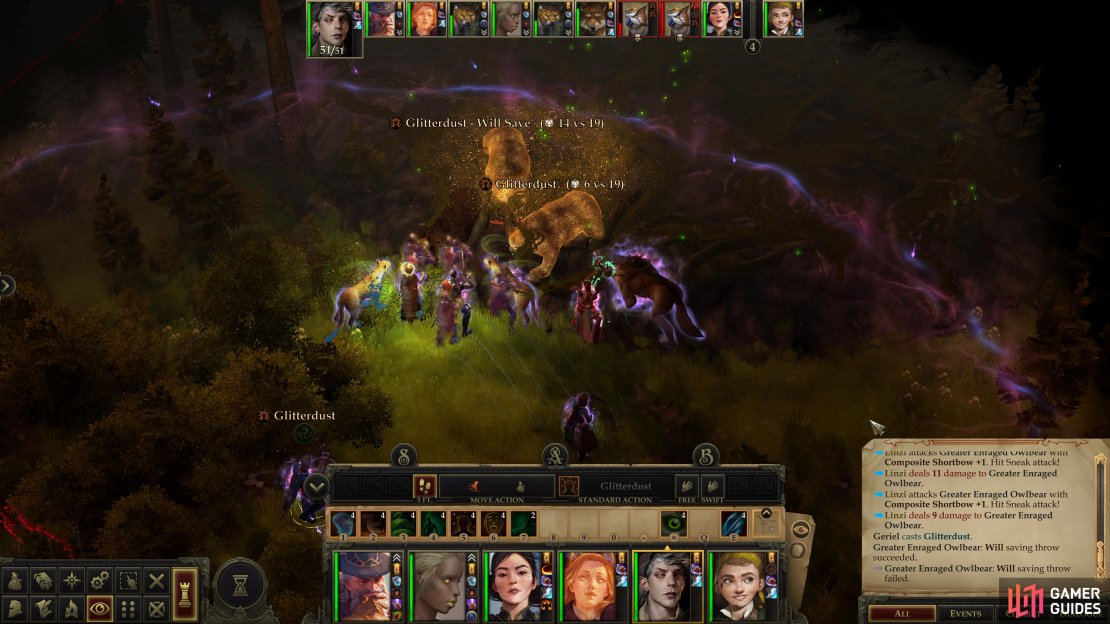

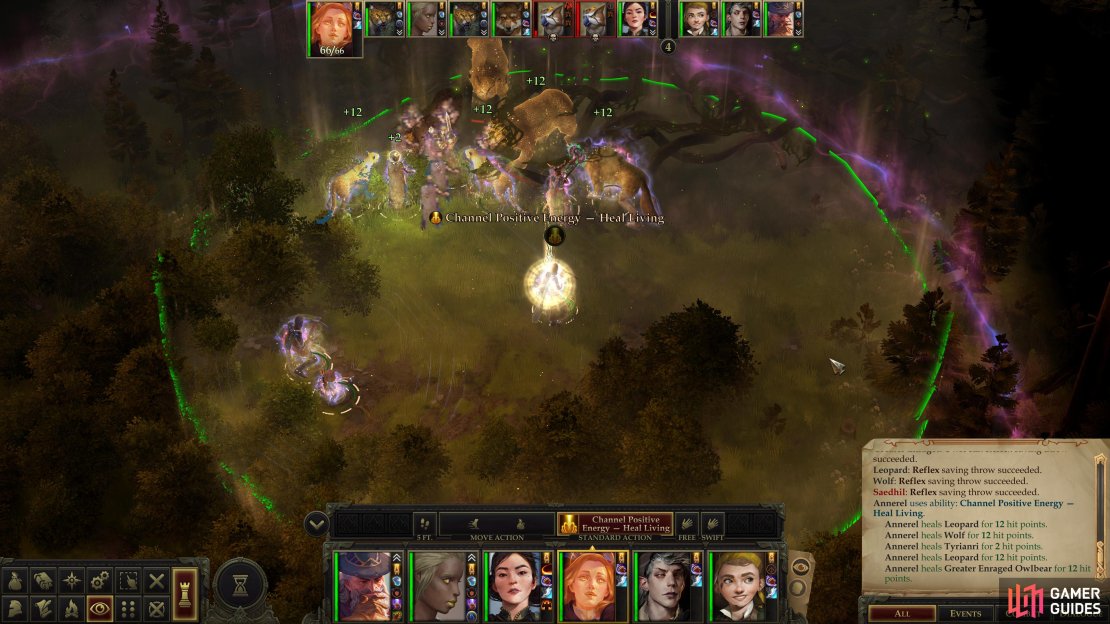

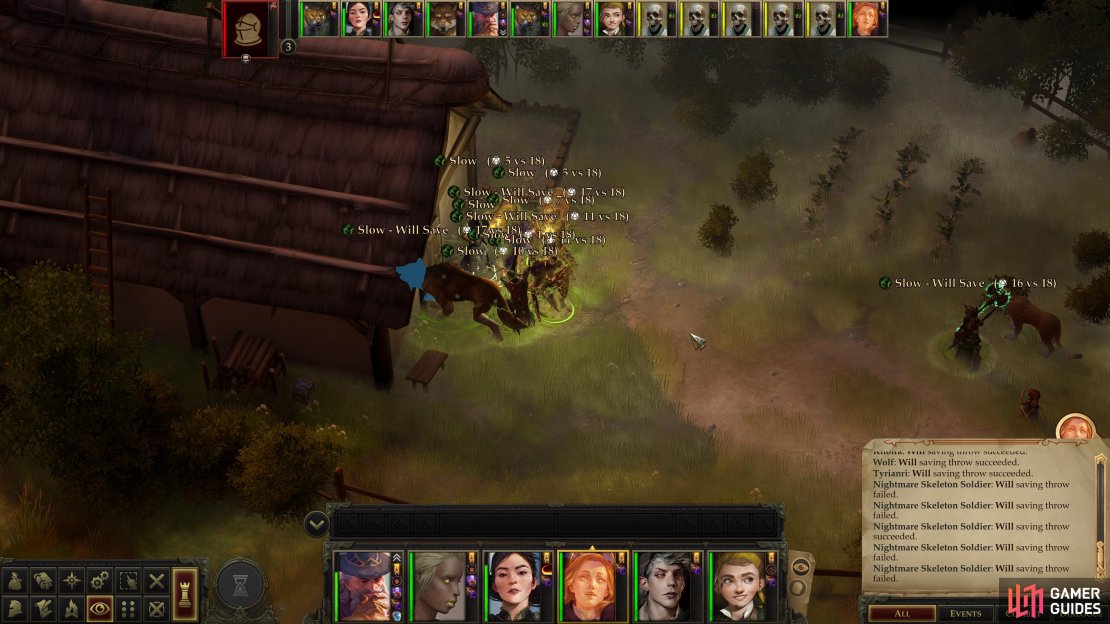
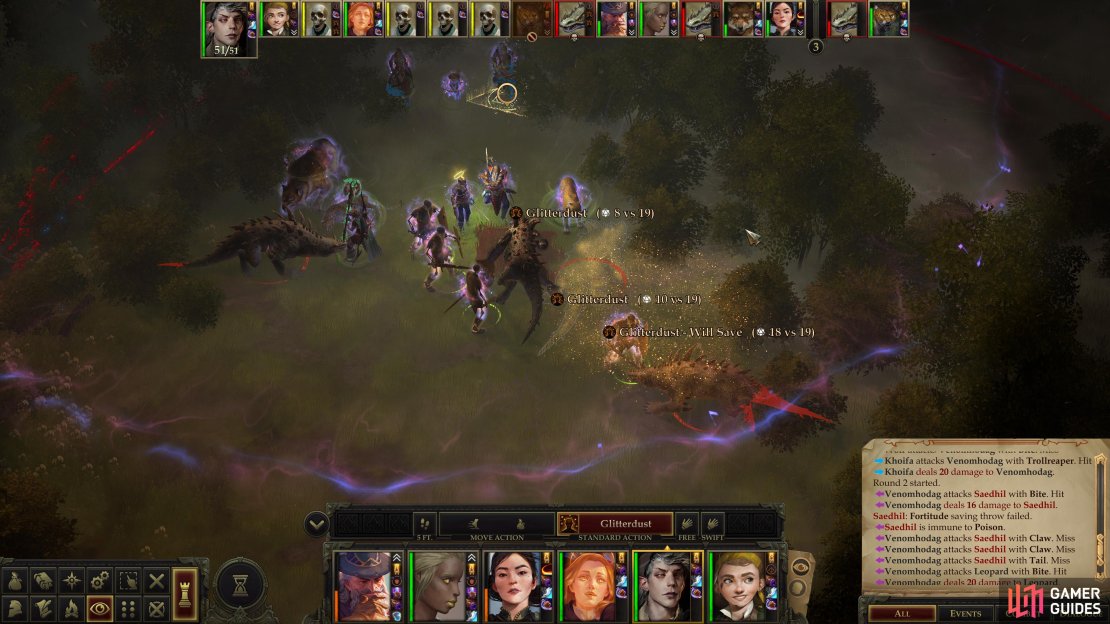
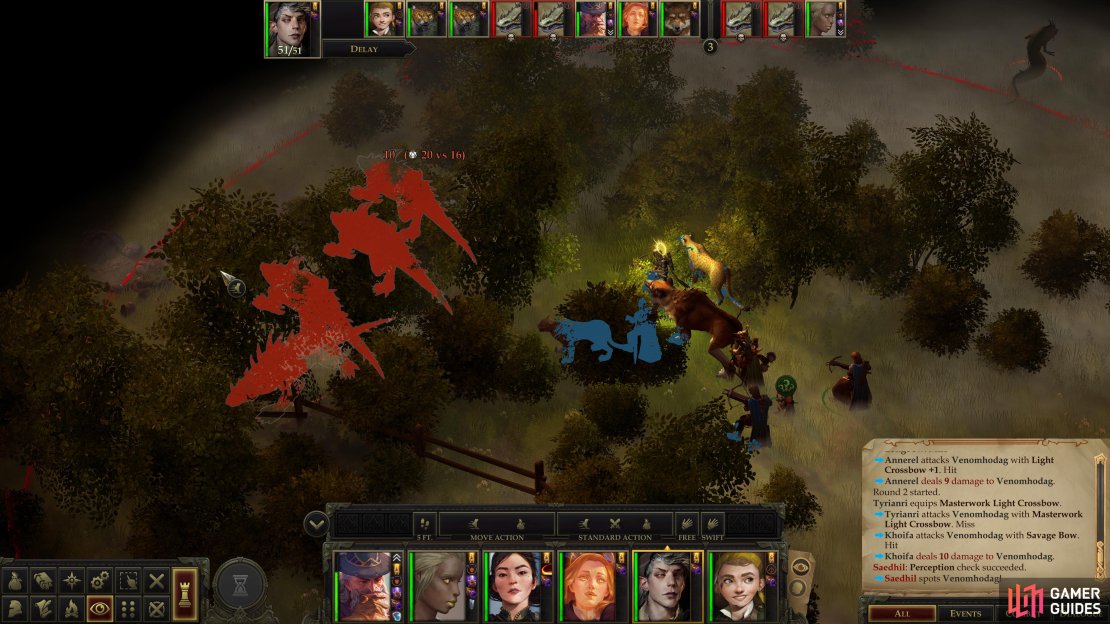
Battle: Greater Enraged Owlbears
Leave the two fey behind and continue east to find some foliage you can loot [Perception 0] to score a Narlbarb. Whatever else this plant is good for, it’ll sell for around 70 GP, so it’s well worth grabbing. Continue following the edge of the scrub to the southeast until you find a spot where you can attempt an [Athletics 26] check. Beyond this demanding Athletics check is an Owlbear den, where you’ll encounter three Greater Enraged Owlbears. The “Owlbear” part is bad enough, but when you start affixing adjectives like “greater” and “enraged”, it just gets worse, and against three such foes at once?
That said, a well-built, fully buffed party does stand a chance here despite the fact that the Owlbears have a decent Armor Class (24), an Attack bonus that only the most min-maxed tanks can withstand (and even then, only with buffs), and they can deal 30~ damage per hit. This fight is very much a measuring stick for how powerful your early-game party is - if you can win this fight, you can beat anything you’ll likely come up against throughout the rest of the chapter.
Start out by buffing like you’ve never buffed before, starting with the longer-lasting buffs like Blur, Shield of Faith and Bull’s Strength, if you have a Bard, start singing, then pass through the bushes via the Athletics check (failing will deal damage to your entire party - not a good way to start things out). Once through, combat should start - have your casters use buffs like Haste and Bless, send your tank forward, and let the owlbears come to you.
If you have the spell power, start the fight with the Greater Enraged Owlbears by casting Entangle or Web at them, aimed northeast so the edge of the Web spell still encompasses the closest owlbear (the other two should be obscured by the fog of war). Don’t expect this to hold them, as their Reflex Saves are awfully high. Instead, it’ll slow them down and hopefully buy you time - fighting multiple such foes at once is a recipe for disaster.
After the Web spell is cast and the owlbears are lumbering towards you with murderous intent, hit them with debuffs like Slow and Glitterdust - a slowed or blinded owlbear is much, much less dangerous. Keep pelting them with these spells the rest of the fight, as inflicting these debuffs are far more important than whatever chip damage your spells could otherwise deal. When the first owlbear crosses the Entangle/Web threshold, focus your fire on it and be sure to send a warrior around wide to flank them, then hope RNG is on your side. If you suffer a critical hit it could spoil the entire affair, while a fortuitous critical hit on your part might edge victory decidedly in your favor.
Feats like Precise Strike and Outflank can really shine here, if you have them, and as important as spell-buffs are to victory, flanking and positioning your warriors once the battle actually starts is important, as well. If you can engage with your tank(s) (the recipients of any Blur/Displacement spells you may have cast) you’ll increase your survivability, and flanking serves as a force multiplier.
Repeat this process on the next two owlbears and with any luck you might just emerge victorious, although don’t be surprised if you have to reload a time or two to get things right. Following the above strategy, we were successful in two out of five fights, and on each successful attempt nobody was brought to “Death’s Door”. It really all depends on which owlbears are affected by Web and Slow, when they reach you, if you or they score critical hits and if you can keep control of your Hasted warriors well enough.
If you defeat these foes you’ll be free to loot a corpse to the northeast. On this corpse you’ll find Swordsman’s Passion, a Dueling Sword +2 with the Agile property; something of a niche weapon, to be sure, but at the very least it can be sold to a merchant for 5,000 GP if you can’t find a home for it in your party. You can also find a stump [Perception 20] to the east of the corpse, wherein you’ll find a Potion of Cure Light Wounds, 2x Scrolls of Bless, a Scroll of Scorching Ray and a Scroll of Cure Light Wounds, along with some coins.

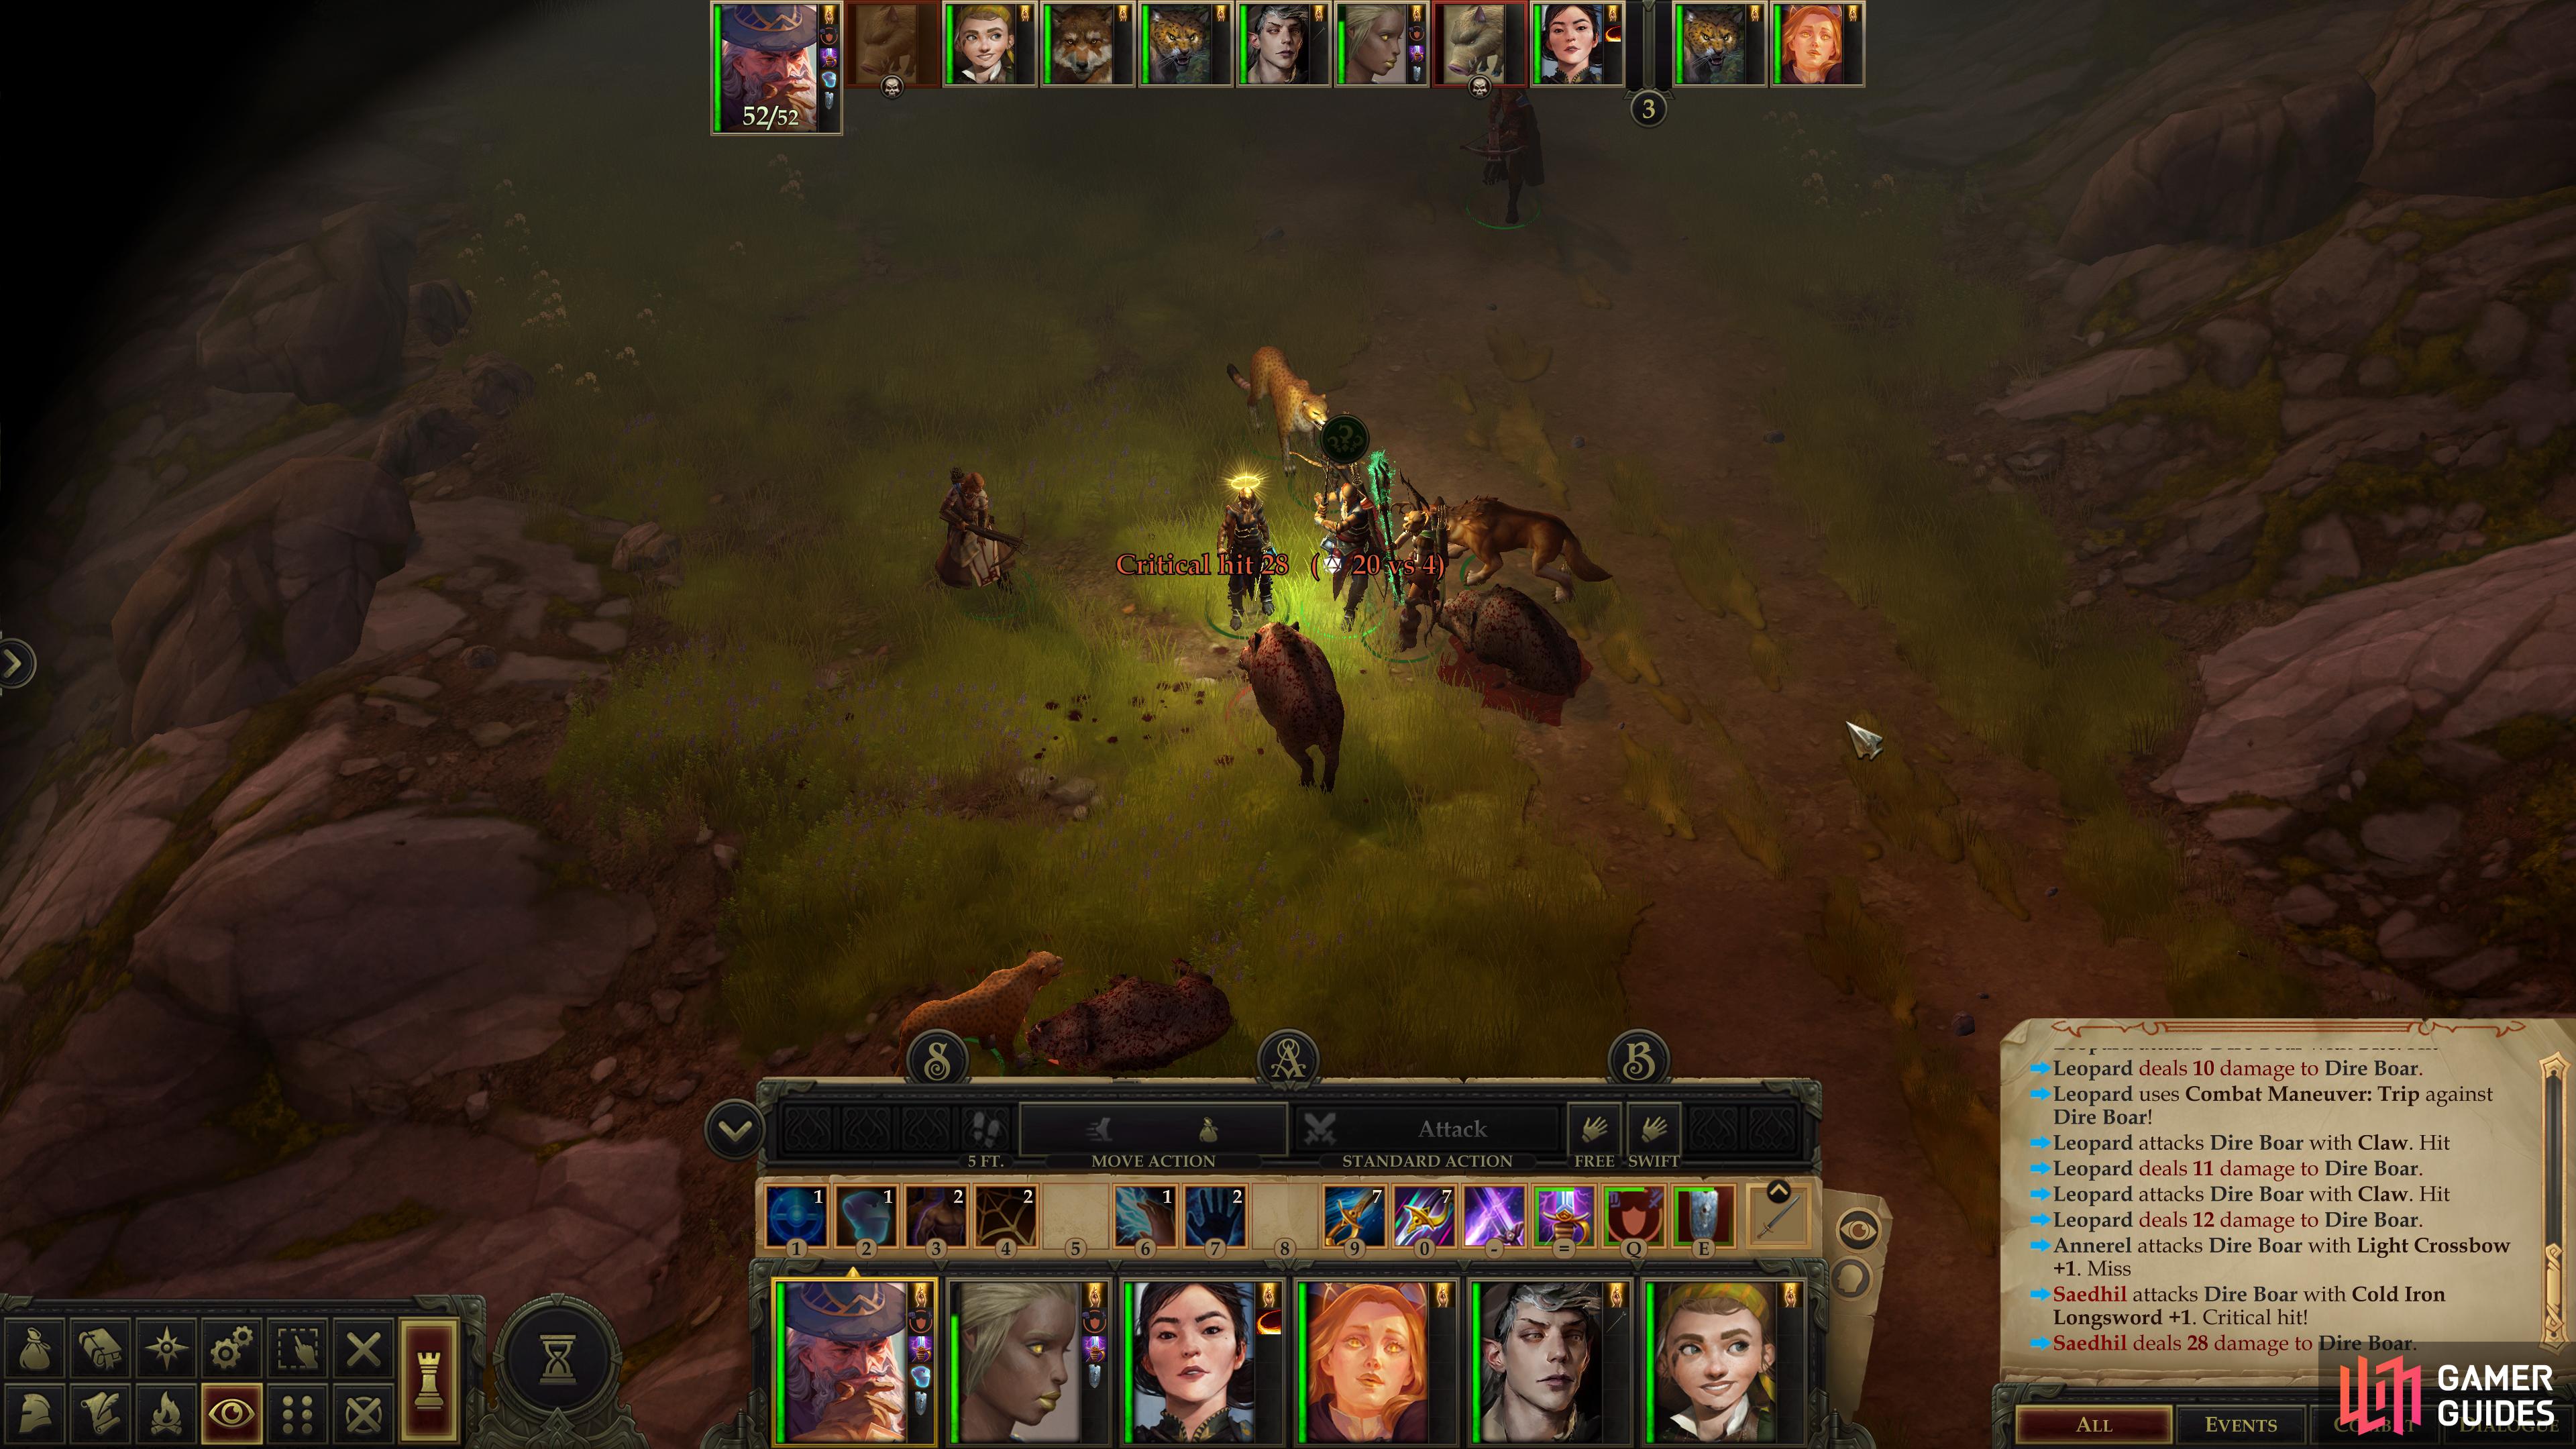
(1 of 3) If you don’t have silver weapons, try to overpower the werewolf’s damage reduction with sheer damage output.
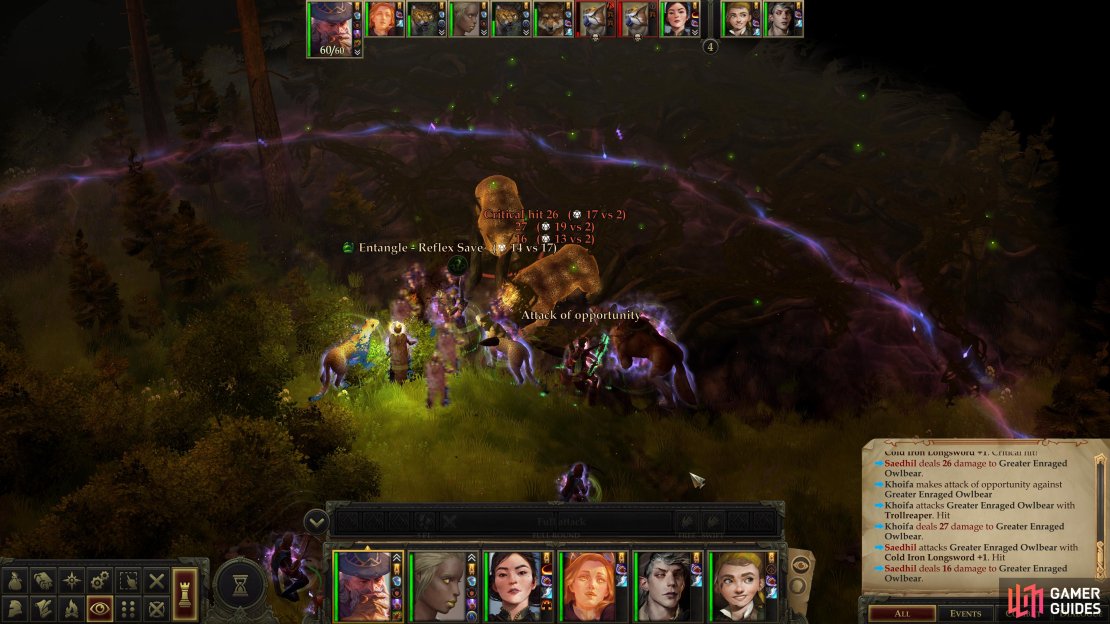
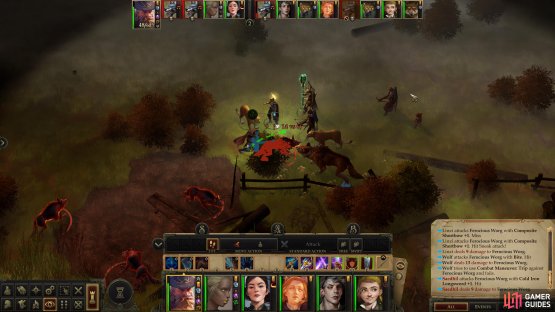
Battle: Worgs and the Werewolf
Leave the Owlbear clearing, heal or rest up if you need to, then continue following the eastern edge of the area south. Lead with your tank as you go, however, as there’s an ambush waiting not too far to the south. A pack of Ferocious Worgs lie hidden, and they’ll shortly be joined by a Greater Werewolf.
This time, the word “greater” is somewhat misplaced, as it doesn’t fare any better in combat than the Werewolf you slew in the Old Mesa area. Indeed, only this monster’s DR 10/silver should give you any worry, a damage threshold you should be easily capable of battering through. The Ferocious Worgs will prove more troublesome, so concentrate your attention on them to eliminate them one at a time and consider throwing out a Bless or Prayer to put a thumb on the scales. After they’re dead, loot the Greater Werewolf for a Masterwork Longsword and a Breastplate.
From this ambush, continue south a short distance to find a log you can search. Don’t disparage this humble log, however, as it hides a great treasure, including 1,011 GP, twenty-two Pearls, six Exquisite Pearls and a Taldan Warrior’s Dog Tag. If that’s not enough treasure, pass a [Perception 24] check to spot another generous log to the west, under which lies a Ring of Protection +1.


(1 of 2) The Will-o’-Wisps only need a touch attack to deal damage, making them somewhat difficult to tank.

The Will-o’-Wisps only need a touch attack to deal damage, making them somewhat difficult to tank. (left), Still, their offense isn’t terribly impressive - in a straight slug-fest, you should win handily. (right)
Battle: Will-o-Wisps on the Road
With that, the northeastern edge of the map has been explored, but there’s still a lot of fighting left in this area. Backtrack southwest down the Mudleaf pass and return to the road, and once there continue following it south. When the road bends southwest you should encounter a new foe, the Will-o-Wisp. While appearing similar to the wisp you encountered earlier at Old Sycamore these ethereal creatures are nowhere near as dangerous. In fact, you shouldn’t need any special strategy to defeat them, although they are noteworthy for having a high Armor Class and only needing a touch attack to hit your own warriors - and with an Attack bonus as high as theirs, they’re going to hit every time they try, unless you have a very specifically designed tank (our Scaled Fist/Eldritch Scion was, as usual, nearly untouchable once he wasn’t flat-footed). Still, they don’t have a ton of HP and deal little damage, making this a slug-fest you’re bound to win.

(1 of 3) While not as dangerous as the owlbears earlier, hitting the Hodag-like Treants with debuffs like Glitterdust won’t hurt.
Battle: Hodag-Like Treants
While you could continue following the road southwest, there are areas of interest to the south and east that should be explored, first. Venture down south and you’ll find the ruins of a village - most likely the village mentioned by Tiressia, which was destroyed by the Scythe-Tree. You’ll need to circumvent these ruins by continuing west for a bit, but before that, let’s clear up a small encounter to the east.
Follow the ruins to the east, turning northeast when some rocks force you to do so. This path eventually will terminate at a rocky cubby, where a pair of Hodag-Like Treants dwell. These are more oddly overpowered beasts, but they’re still nowhere near as powerful as any one of the Greater Enraged Owlbears was, so if you were able to defeat them, you’re gold.
That’s not to say these Hodag-Like Treants are push-overs: they’ve got a lot of Hit Points, a problem which is exacerbated by their Damage Reduction 10/Cold Iron. Like with the Greater Werewolf you fought earlier, you can just overwhelm this Damage Reduction with sheer power (Sneak Attacks work well) or elemental damage. Their Armor Class (20) is fairly low, so you shouldn’t have much trouble hitting them, for what that’s worth. Their offense is a bit of a mixed bag, as they get a lot of attacks per round (4), but their Attack Bonus (+12) is somewhat mediocre. Their use of Power Attack compromises their Attack further, but ensures they’ll deal heavy damage if they hit, and for some reason they have access to Stunning Blow. Using Glitterdust to blind them isn’t a bad idea, although a well-built tank should be able to dodge most of their attacks.
Put down these beasts and you’ll be free to search their lair for… a Token of the Dryad stashed in some branches.

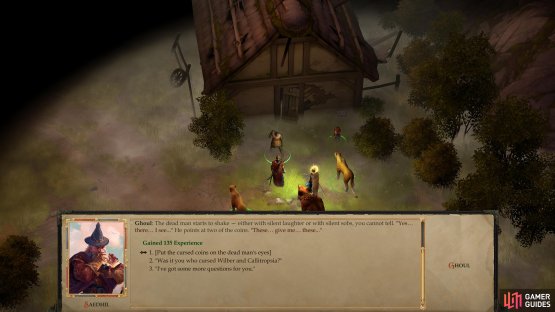
(1 of 2) Talk to the forgetful ghost to start the quest “Coins for a Dead Man’s Eyes”,
Talk to the forgetful ghost to start the quest “Coins for a Dead Man’s Eyes”, (left), then loot some nearby rubble for a “Taldan Warrior’s Dog Tag”. (right)
Speak to the Forgetful Specter
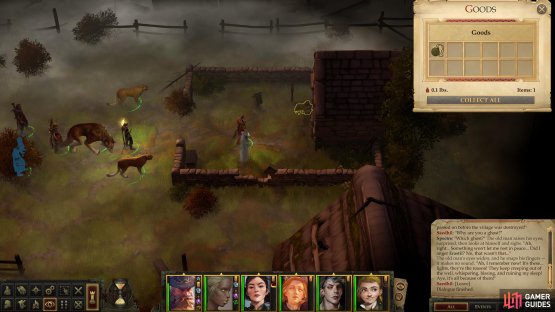
Return southwest to the ruins and make your way west along their northern edge, then turn south around the western-most house. As you turn south, however, note the cluster of trees further west. Along the western edge of this group of trees you can find a chest [Perception 20]. Unlock [Trickery 18] this chest and nab the loot inside, including a Potion of Cure Moderate Wounds, a Potion of Shield of Faith, a Scroll of Bless and a Scroll of Cure Moderate Wounds, among other baubles.
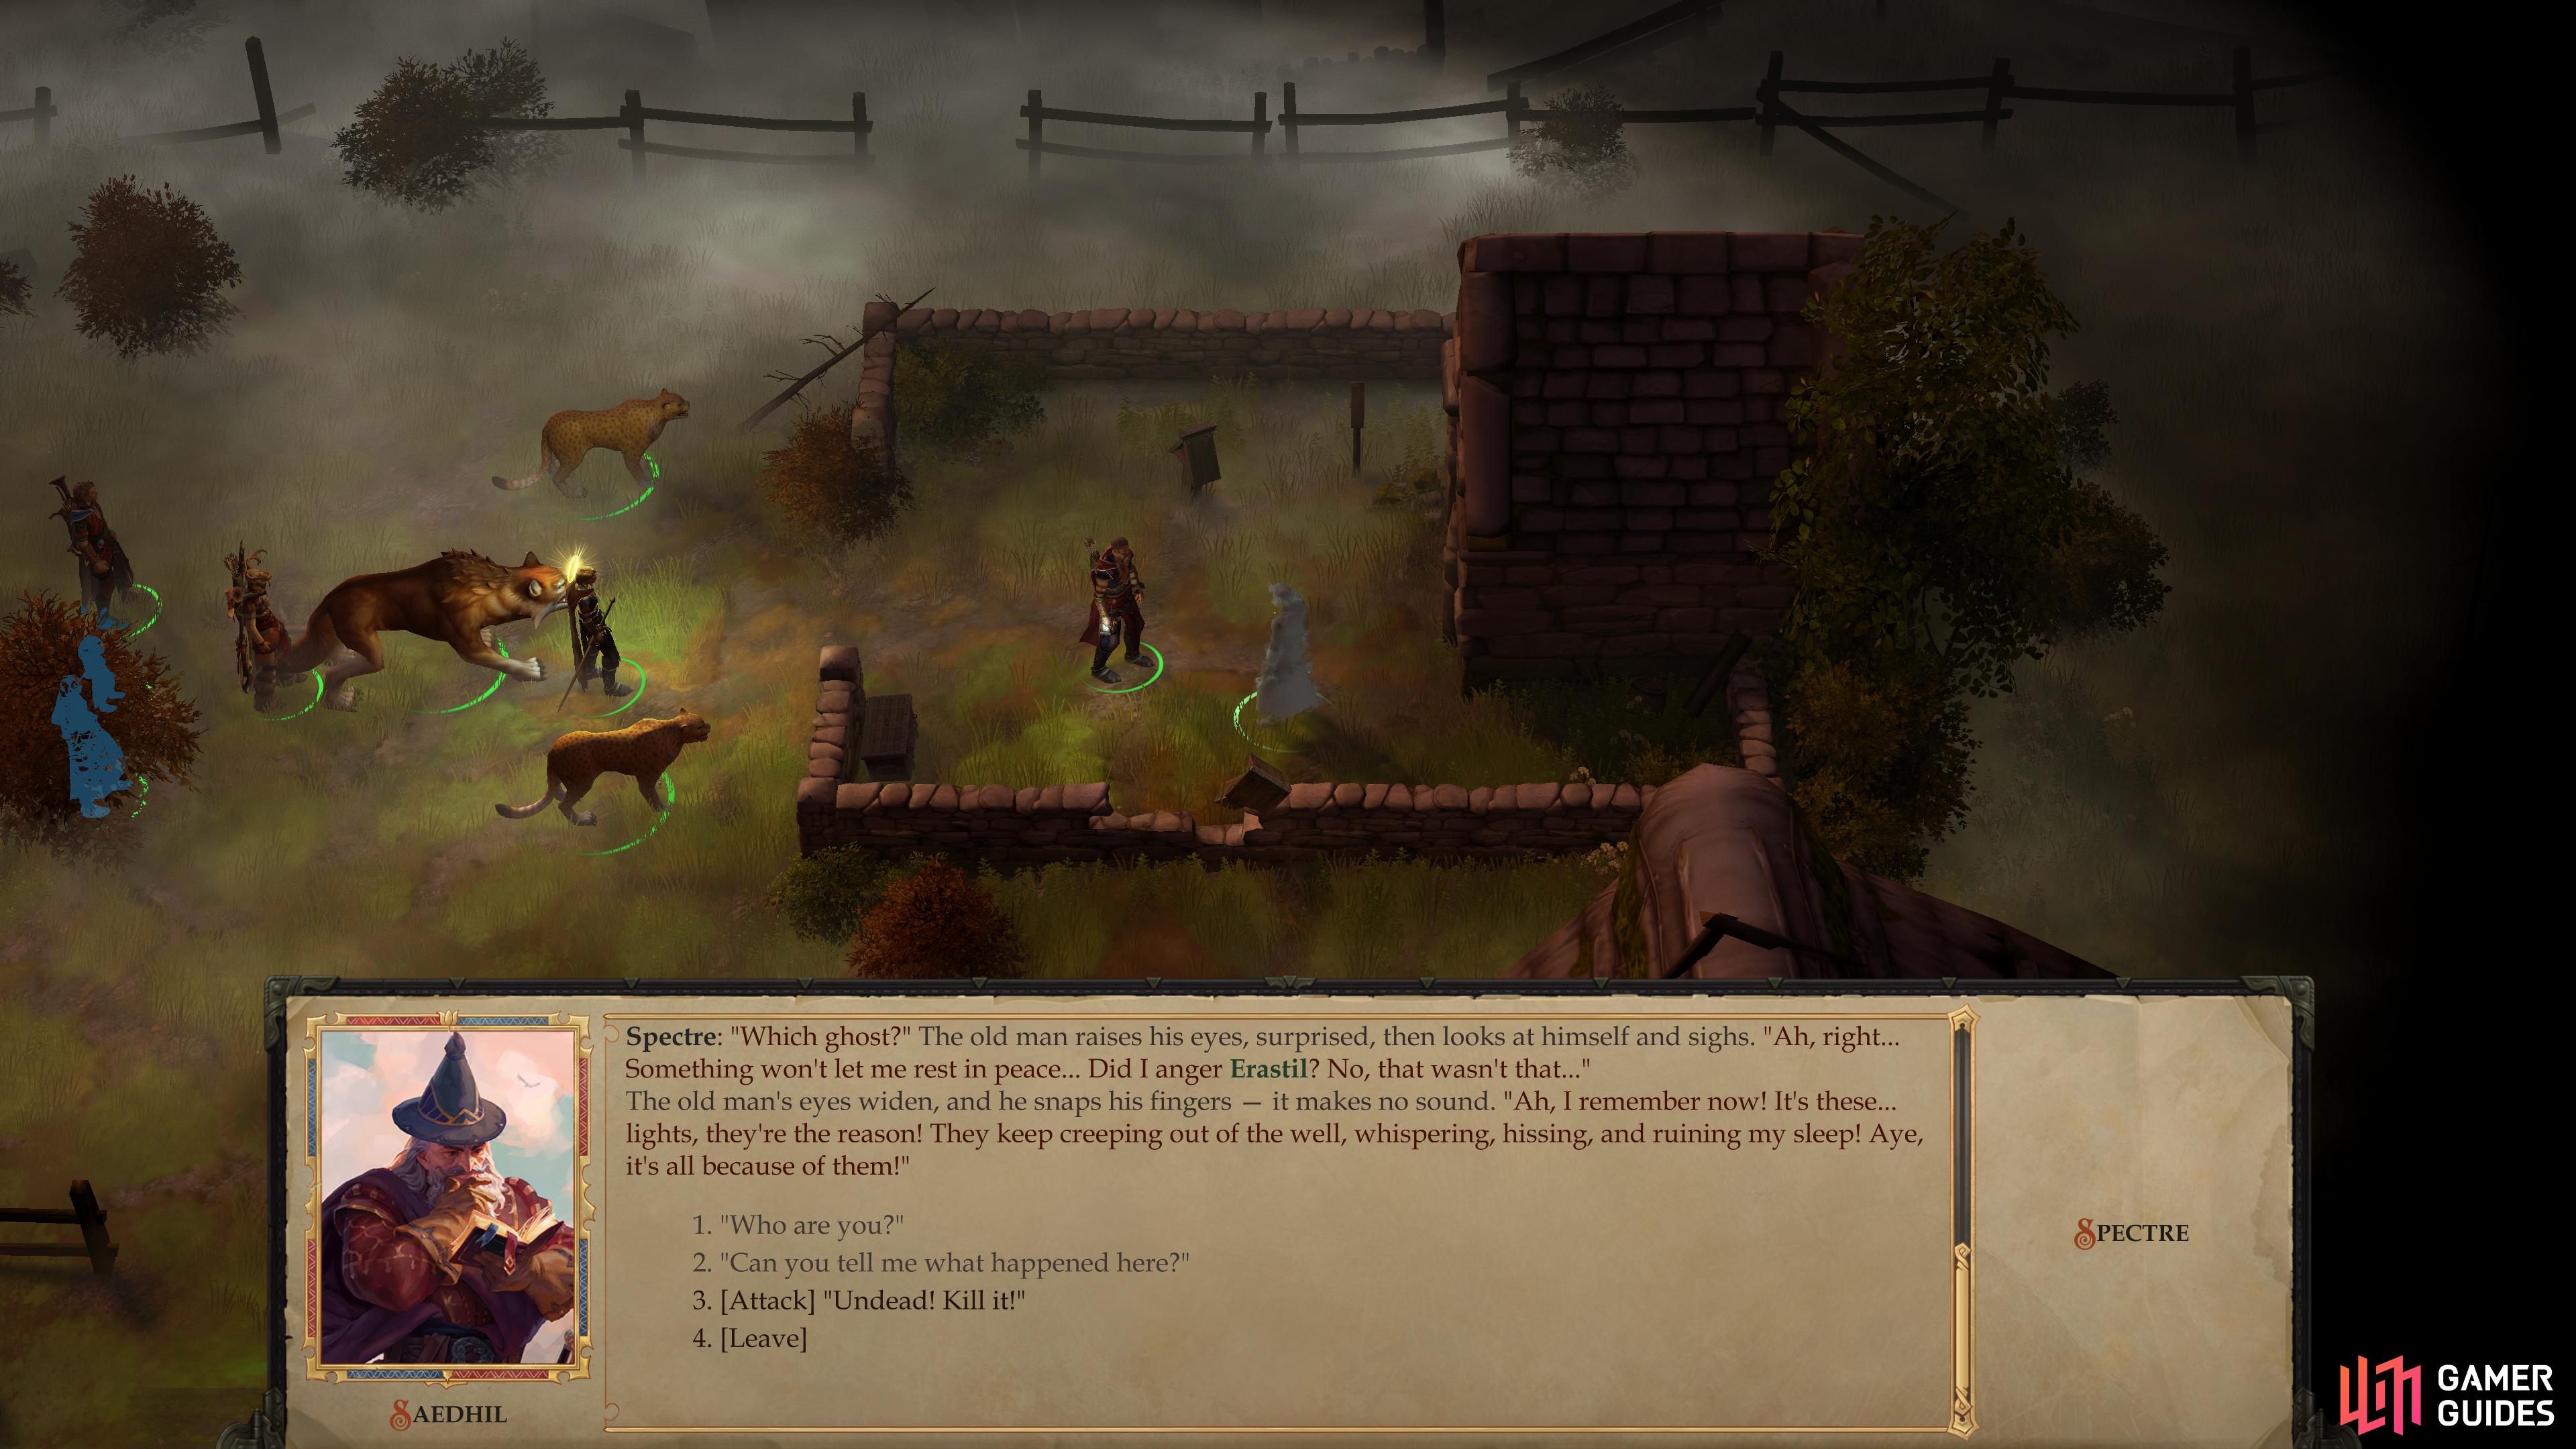
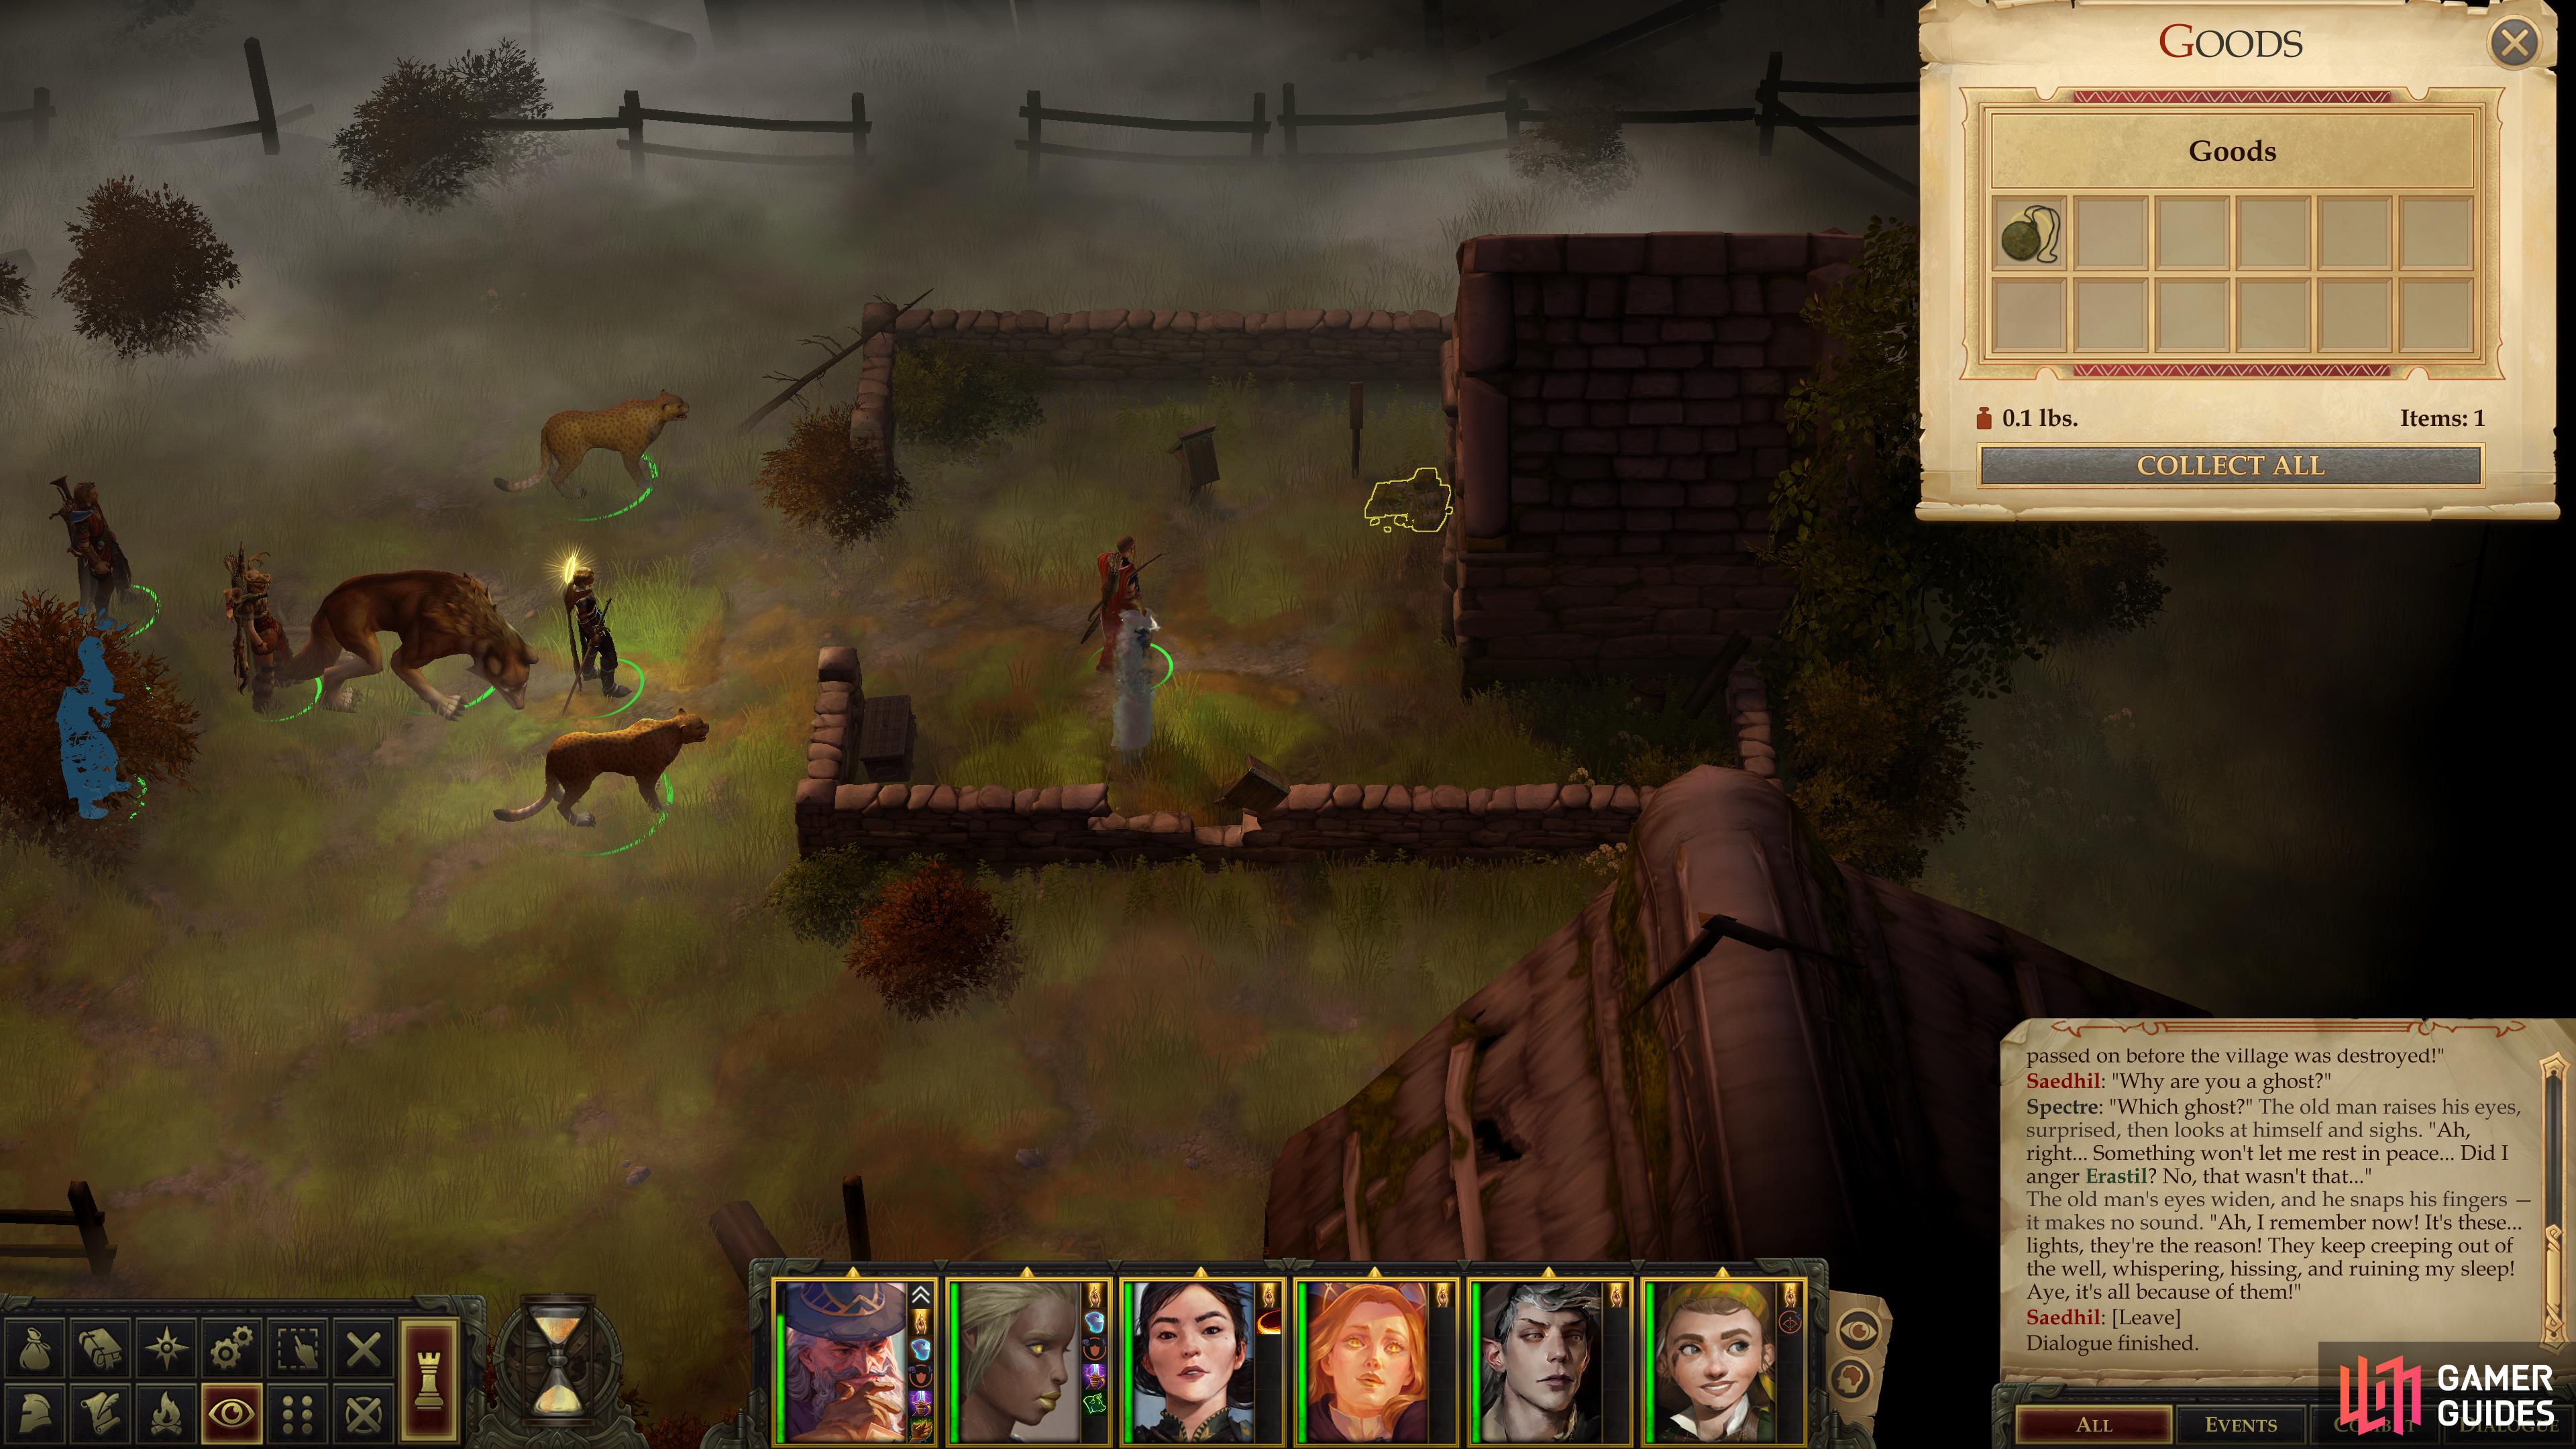
Plunder the chest, then return back east to the western-most ruined house, from which continue south, then turn east once you clear the house. You should locate a small stone shrine enclosed by a short stone fence, inside of which you’ll spot a Specter. Talk to the forgetful ghost and he’ll provide very little useful information save that he used to be the village Headman, and has been denied his rightful rest by some malevolent “lights” in the village well. Whispering, hissing lights. This will start the quest Coins for a Dead Man’s Eyes, which we’ll see to shortly.
While the Scythe-Tree lurks to the east, you might as well be kind to this old specter and deal with whatever lurks in the well, which is to the west. Ignore the urge to attack the Specter and instead pass a [Perception 19] check to pry a Taldan Warrior’s Dog Tag from some rubble near the specter, then loot a chest [Trickery 18] near the fence to score two Scrolls of Scorching Ray, a Scroll of Cure Light Wounds, a Potion of Cure Light Wounds and a Scroll of Bless.

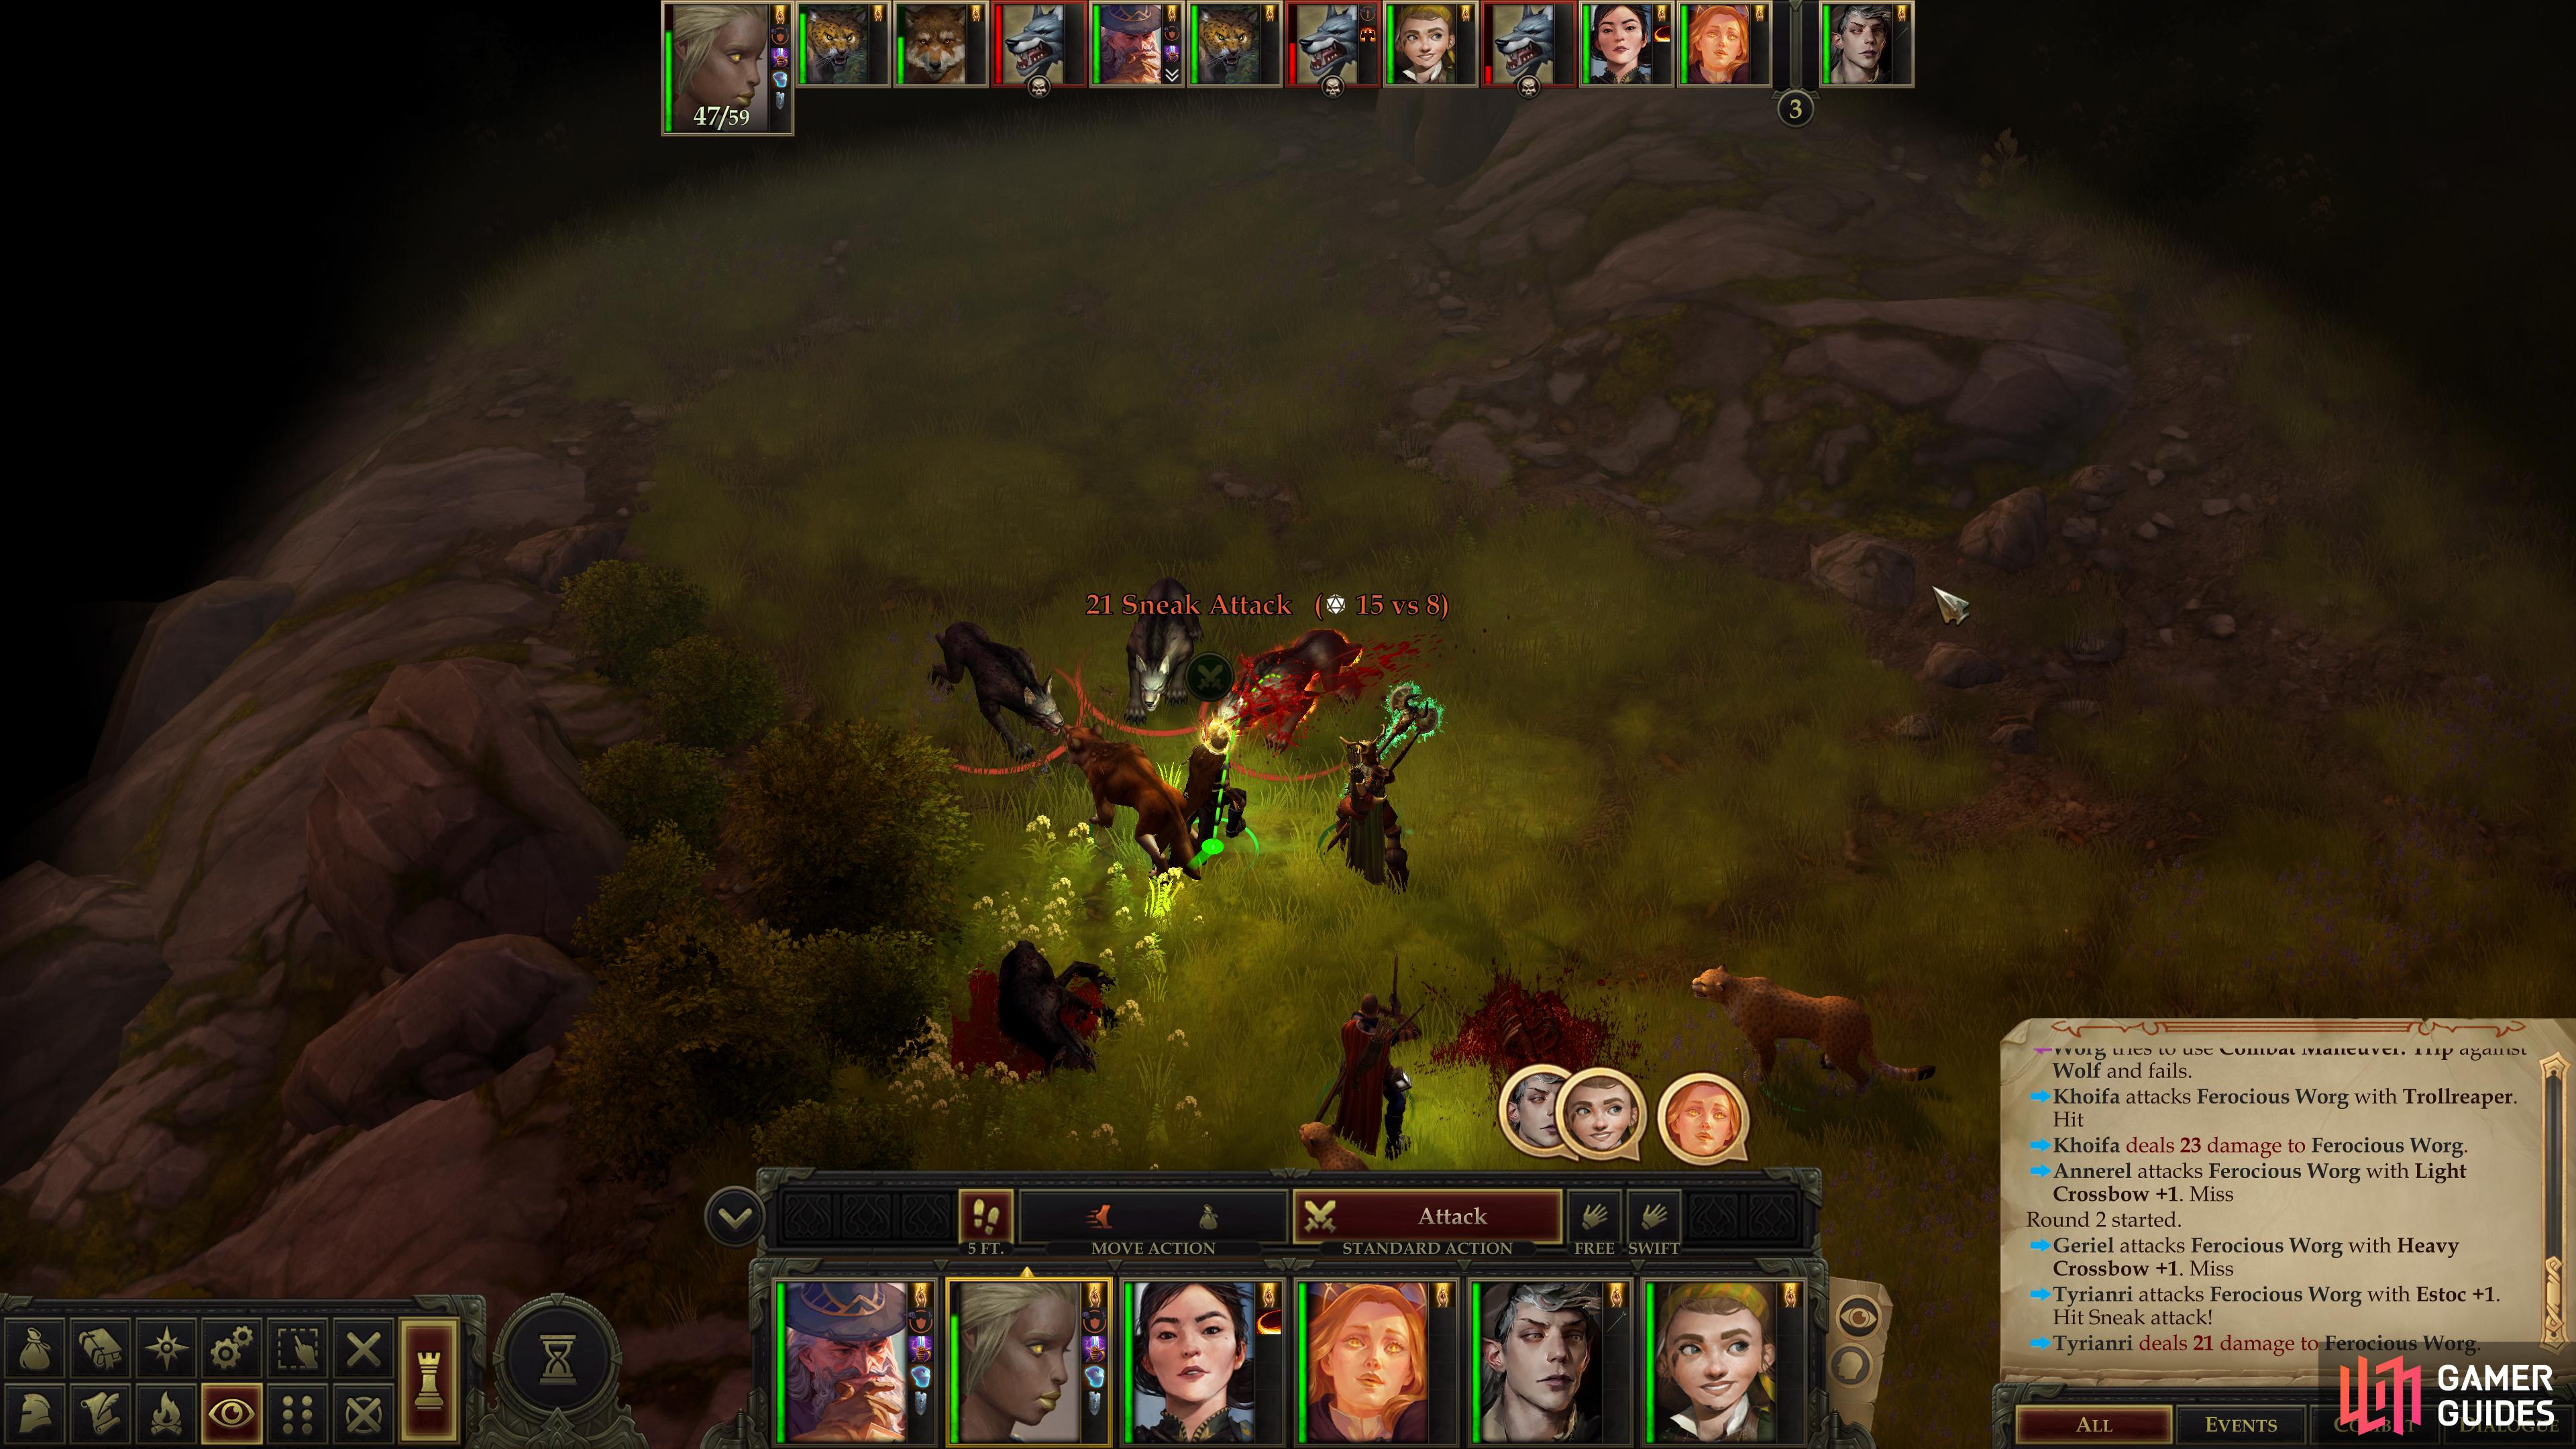
(1 of 2) Start out the fight with the worgs in the ruins by hitting them with Grease or Web,
Start out the fight with the worgs in the ruins by hitting them with Grease or Web, (left), which will slow them down and allow you to pick them off piecemeal. (right)
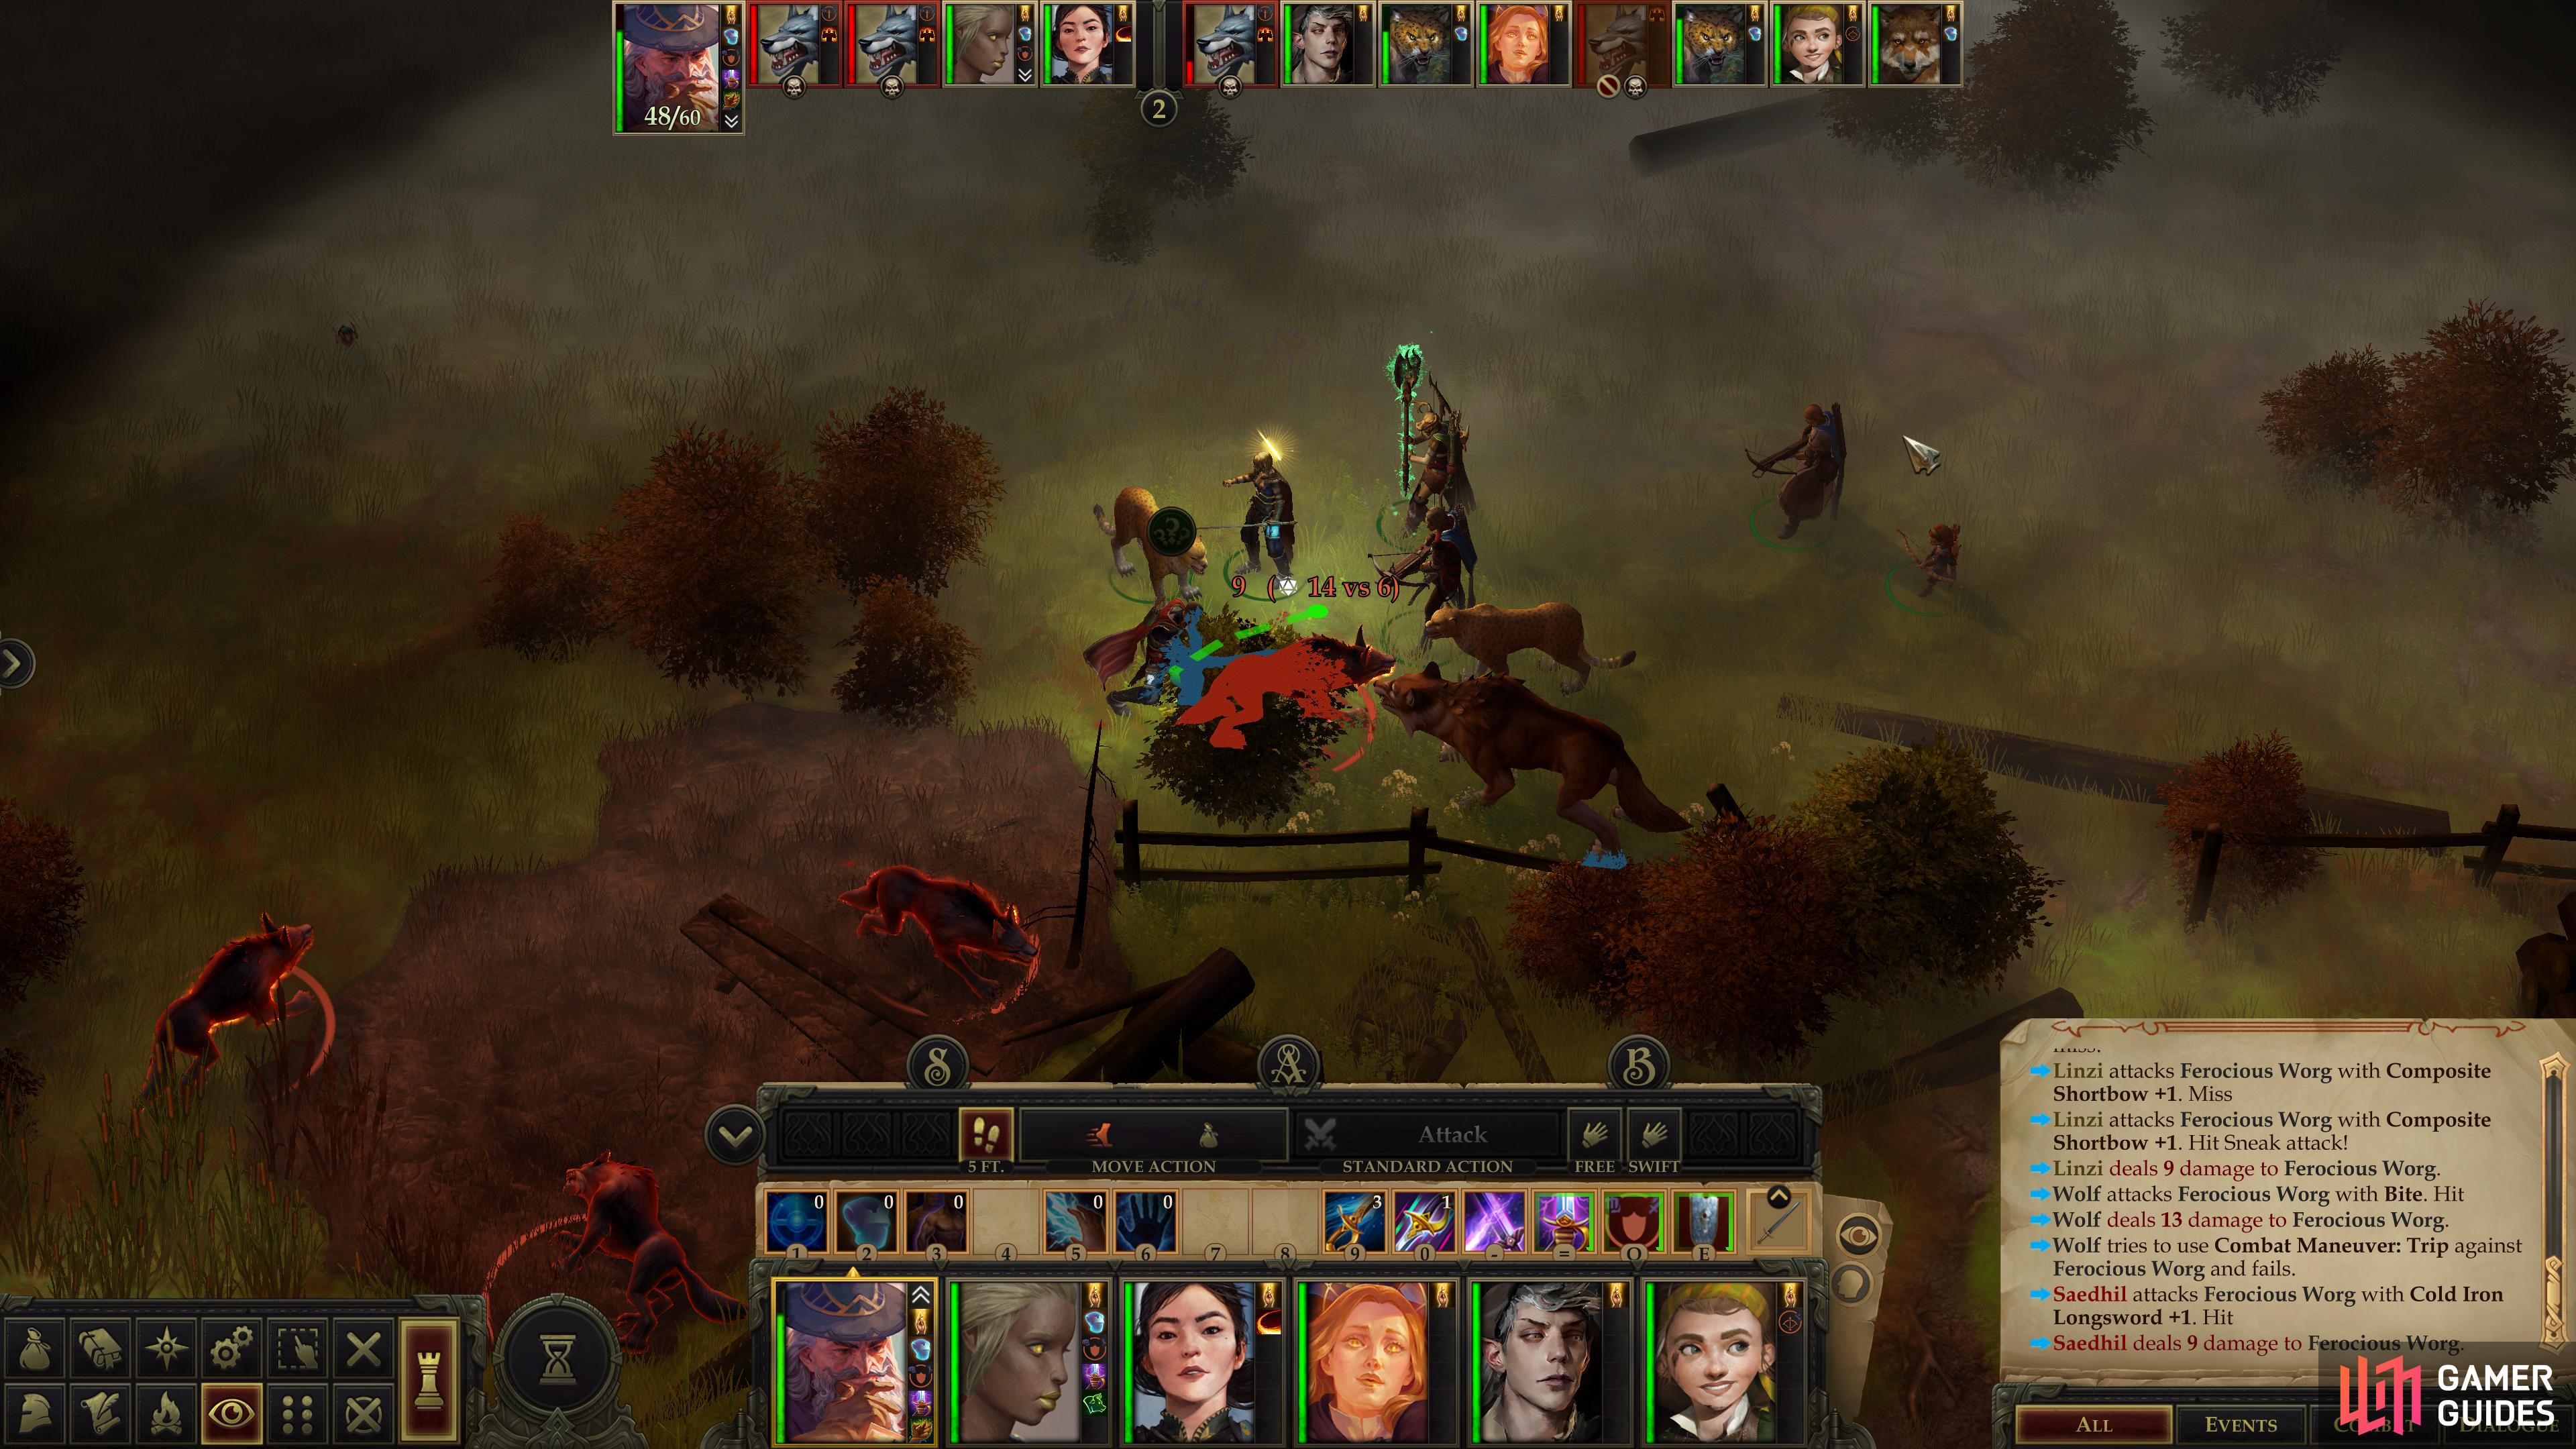
Battle: Worgs in the Ruins
Unfortunately, the way to the well isn’t without peril. Note the ruins to the south of the shrine the specter haunts and approach them. Head west along the edge of these ruins to spot some Ferocious Worgs behind a fence. There are in fact three such beasts, led by a Greater Worg. While they’re nowhere near as dangerous as the ones in the Ruined Watchtower area (leveling up saw to that), they’re not push-overs, either.
When you spot them, cast Web or Grease to the west of your location, aiming the spell so at least one of the Ferocious Worgs is immediately affected by the edge of the spell. The real goal of the spell isn’t to catch them behind the fence however, but rather to slow them down as they run around said fence and approach from the west. Keep your tank ahead (west of) the rest of your party and intercept the worgs as they arrive, their Reflex Saves are high enough to give them a good shot at getting through the Grease/Web, but unless your luck is horrid at least some of them will be stopped, and all of them will be slowed. Defeating them piecemeal is considerably easier than defeating them all at once, and a single Grease or Web spell achieves this admirably. If you can engage them at the edge of the effects of the Grease/Web spell, so much the better, as they’ll have to save against its effects every turn.
Defeat the worgs and strip them of their hides, then continue west to the edge of the ruins whence they prowled. In some bushes to the west of said ruins you can find a hidden [Perception 19] Token of the Dryad. Other than that, the only bit of loot to be had is a chest [Trickery 20] amidst the ruins, just south of the specter-haunted shrine. Inside this chest you’ll find a Scroll of Bless and a Potion of Bull’s Strength along with a trivial amount of coins.

(1 of 4) If you fail to properly buff, the wisps will deal grievous damage with their Lightning Form attacks.
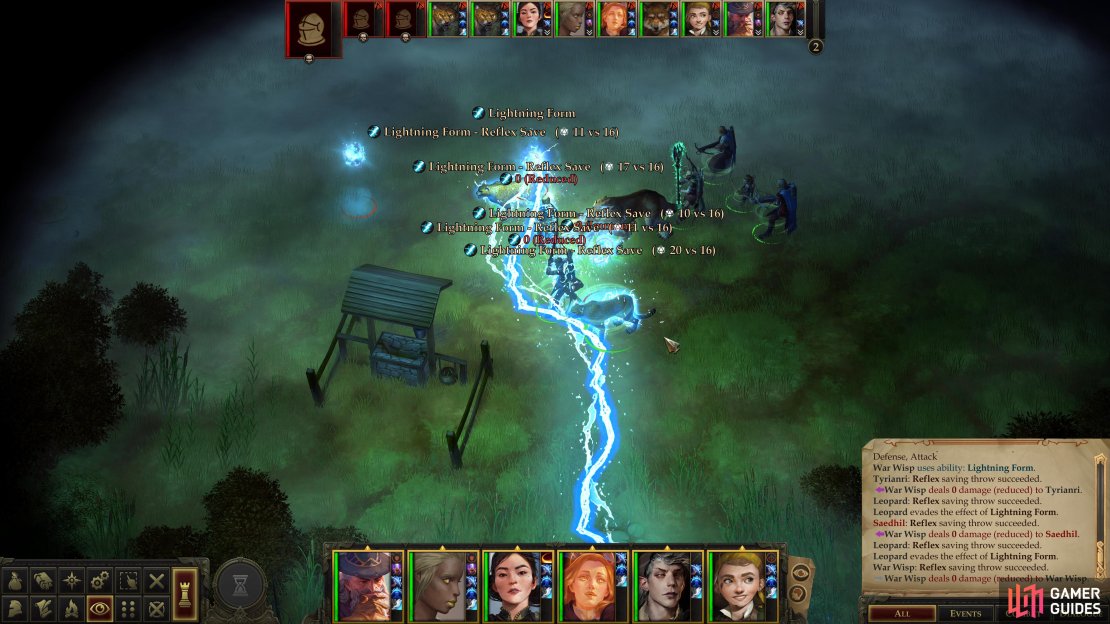
Battle: Wisps in the Well
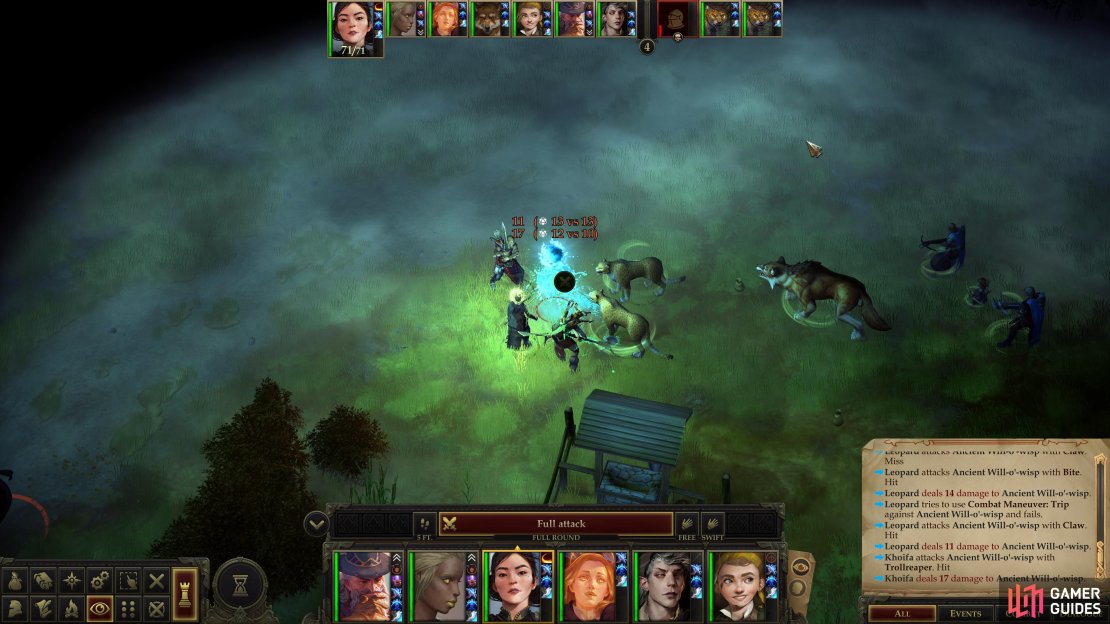
Continue west from the ruins and you’ll find the village well. Don’t foolishly go opening it without prior preparation, however, as the specter wasn’t lying about what lurks within. Once the well is opened (you’ll get the option to perform a [Detect Magic] and [Will 20] check at the well, but they don’t really achieve much) you’ll be confronted by two War Wisps and an Ancient Will-o-Wisp.
These foes are superficially similar to Will-o-Wisps in that they are spectral foes with a high Armor Class (a problem exacerbated by their 50% concealment) but there the similarities end. Will-o-Wisps didn’t have much damage potential, but these Wisps will readily assume a “Lightning Form”, dealing heavy (don’t be surprised to see 20-30 damage) electrical damage to all opponents in a line, essentially functioning as a Lightning Bolt spell. This damage is mitigated by a Reflex Save, not Armor Class, so your warriors will be particularly susceptible to it. Fortunately the Reflex Saves required are pretty low, and if you succeed you’ll only take half damage. If engaged in melee, the wisps are likely to resort to single-target attacks. These attacks also deal electrical damage, and only require a touch attack to hit. Thankfully they deal much less damage, but taking 15~ damage per hit on top of the Lightning Form strikes will quickly dispatch your warriors if they don’t have some aid.
Speaking of aid, two spells will largely guide you to victory here: Haste (as usual) and Resist Energy, Communal. The latter is a 3rd level Divine spell which either Harrim or Tristian (or any mercenary Cleric of 5th-level or higher) should have access to by now. Just be sure to cast the electrical variant to give all your characters Electrical Resistance 10/-. It’ll take the sting out of the wisps’ attacks, and every little bit will help. If you have access to 4th-level divine spells, stacking Protection from Energy, Communal will also help, but it’s not strictly necessary.
After those preparations have been made, situate your party north and slightly west of the well (be wary of the Greater Tatzlwrym and its lesser Tatzlwyrm buddies to the west - it may be a nuisance you need to get rid of, first). The Ancient Will-o-Wisp will spawn here, and since it’s the greatest threat, you should focus on it first. Not only will starting out near it allow you to surround it and cut it down quickly, but proximity may also induce the Ancient Will-o-Wisp to use its less dangerous melee attack. When it’s dead, move east to the War Wisps and cut them down one at a time. Other than endeavoring to ensure your characters don’t form an attractive line, there’s little you can do but hope RNG is on your side. With those preparations, however, you should emerge victorious.
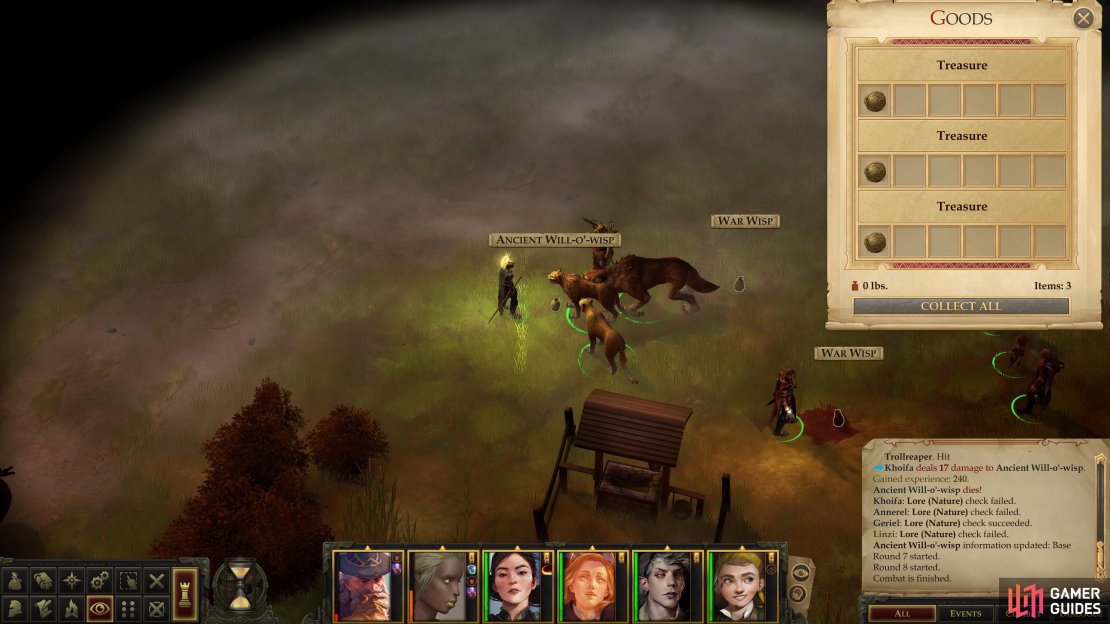
Banish the wisps, then loot them for a pair of Coins with Wilber’s Name (War Wisps) and a Coin with Callistropsia’s Name (Ancient Will-o-Wisp). These are probably significant, so you should hold onto them.
Battle: Tatzlwyrms
Before returning to the specter back east, first head west and dispatch the Tatzlwyrms, in case you didn’t do so already. The Greater Tatzlwrym is another abuse of the word “greater”, and while it is indeed more formidable than the lesser Tatzlwyrms around it, it’s nothing compared to most of the critters you’ve fought in this area. Once the Tatzlwyrms are dead, loot them, then search a log south of them [Perception 18] to find a Scroll of Cure Light Wounds, a Potion of Enlarge Person, a Scroll of Scorching Ray and numerous less interesting trinkets.


(1 of 4) Defeat the Will-o’-Wisps on Nyta’s isle,
Nyta’s Repose
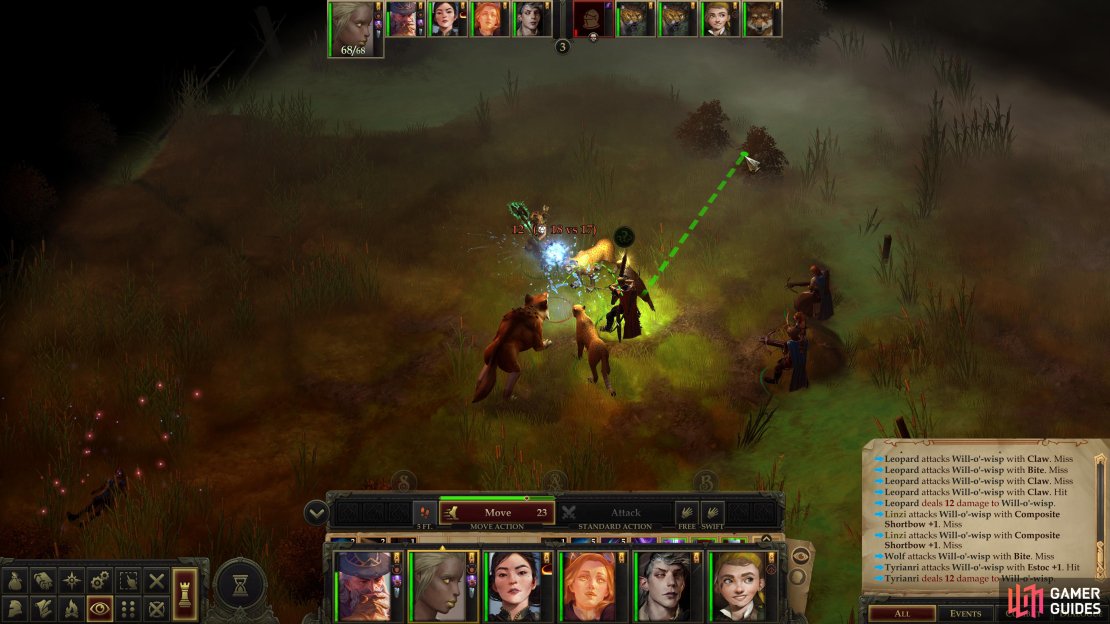
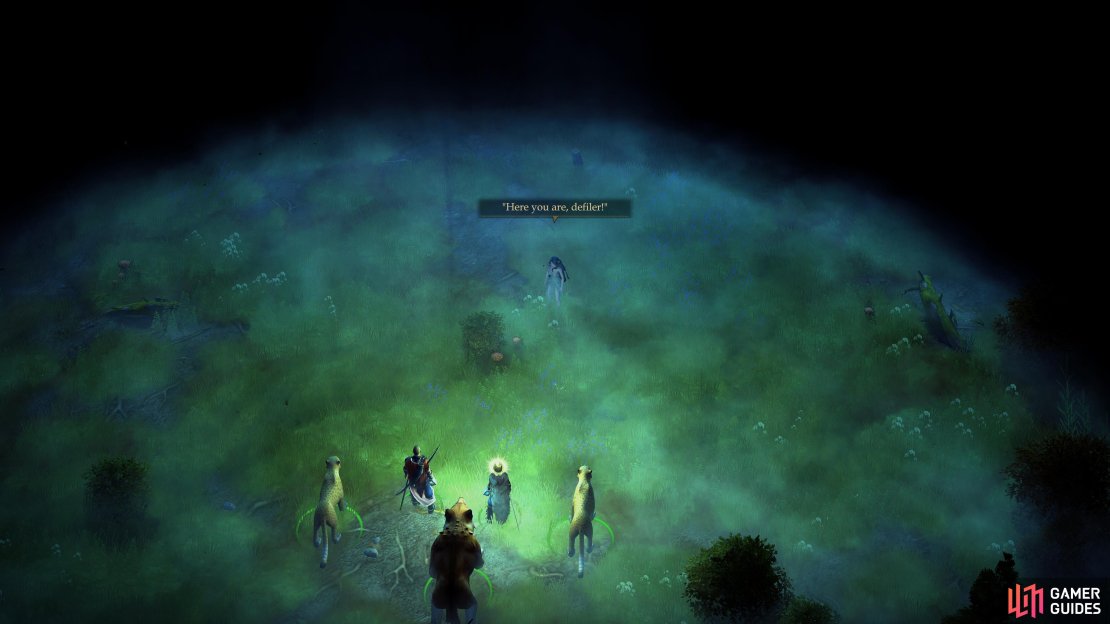
South of the Tatzlwyrms you’ll find an area transition - potentially useful if you need to retreat and rest. More interesting, however, is a rancid-looking stream to the east, which you can cross via a [Mobility 20] check. Do so to reach a small island, where you’ll immediately be accosted by another pair of Will-o’-Wisps. They start out invisible, which will likely get a surprise round, and their high Initiative checks will almost certainly give them a good chance of going first next round, too. Otherwise, you know what to expect - they only need to succeed at a touch attack to hit and will constantly have concealment, making them nuisance foes.
Defeat them, then search the eastern end of which you’ll find a corpse and a chest, both of which you can loot. Investigate the corpse first and when you interact with it you’ll notice it’s remarkably well preserved. This isn’t an accident, as the voices surrounding you will attest to. If you pick the dialogue option “Who is there? Show yourselves!” one of your companions will helpfully suggest that the voices probably belong to some of the fey creatures that inhabit the area, and given the story of the corpse - Nyta - that seems to be a pretty good guess. If you choose the [Detect Magic] option, you’ll confirm that enchantments are at work keeping the corpse from rotting; quite possibly a labor of love on the part of the fey that now threaten you.
Once those options are stripped away, you’re left with a rare case of moral duality. Pick the [Neutral Good] option to honor the corpse by putting some flowers nearby and the fey will leave you be. On the other hand, you can pick the [Neutral Evil] option to loot the corpse, in the process obtaining a Gold Ring, a Ring of Protection +1 and an Emerald. Not a bad haul. The penalty for this act of desecration? Threats. Threats that aren’t immediately fulfilled, mind you, but threats nonetheless.
The nearby chest is less of a hassle, just walk up and loot it to gather a Potion of Enlarge Person, a Scroll of Cure Moderate Wounds and a Scroll of Bless, among other treasures. No fey, no threats, no desecration.
(1 of 2) Bring the coins back to Wilber and you can free him from his curse.
Bring the coins back to Wilber and you can free him from his curse. (left), You’ll earn a Phylactery of Positive Channeling for your trouble. (right)
Wilber’s Release
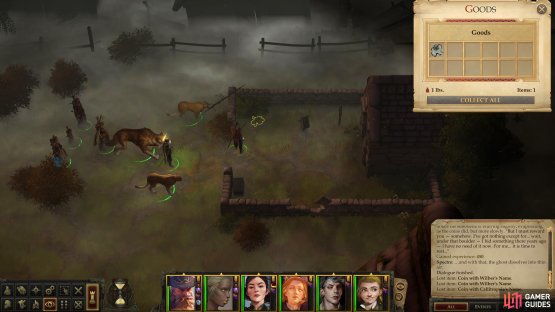
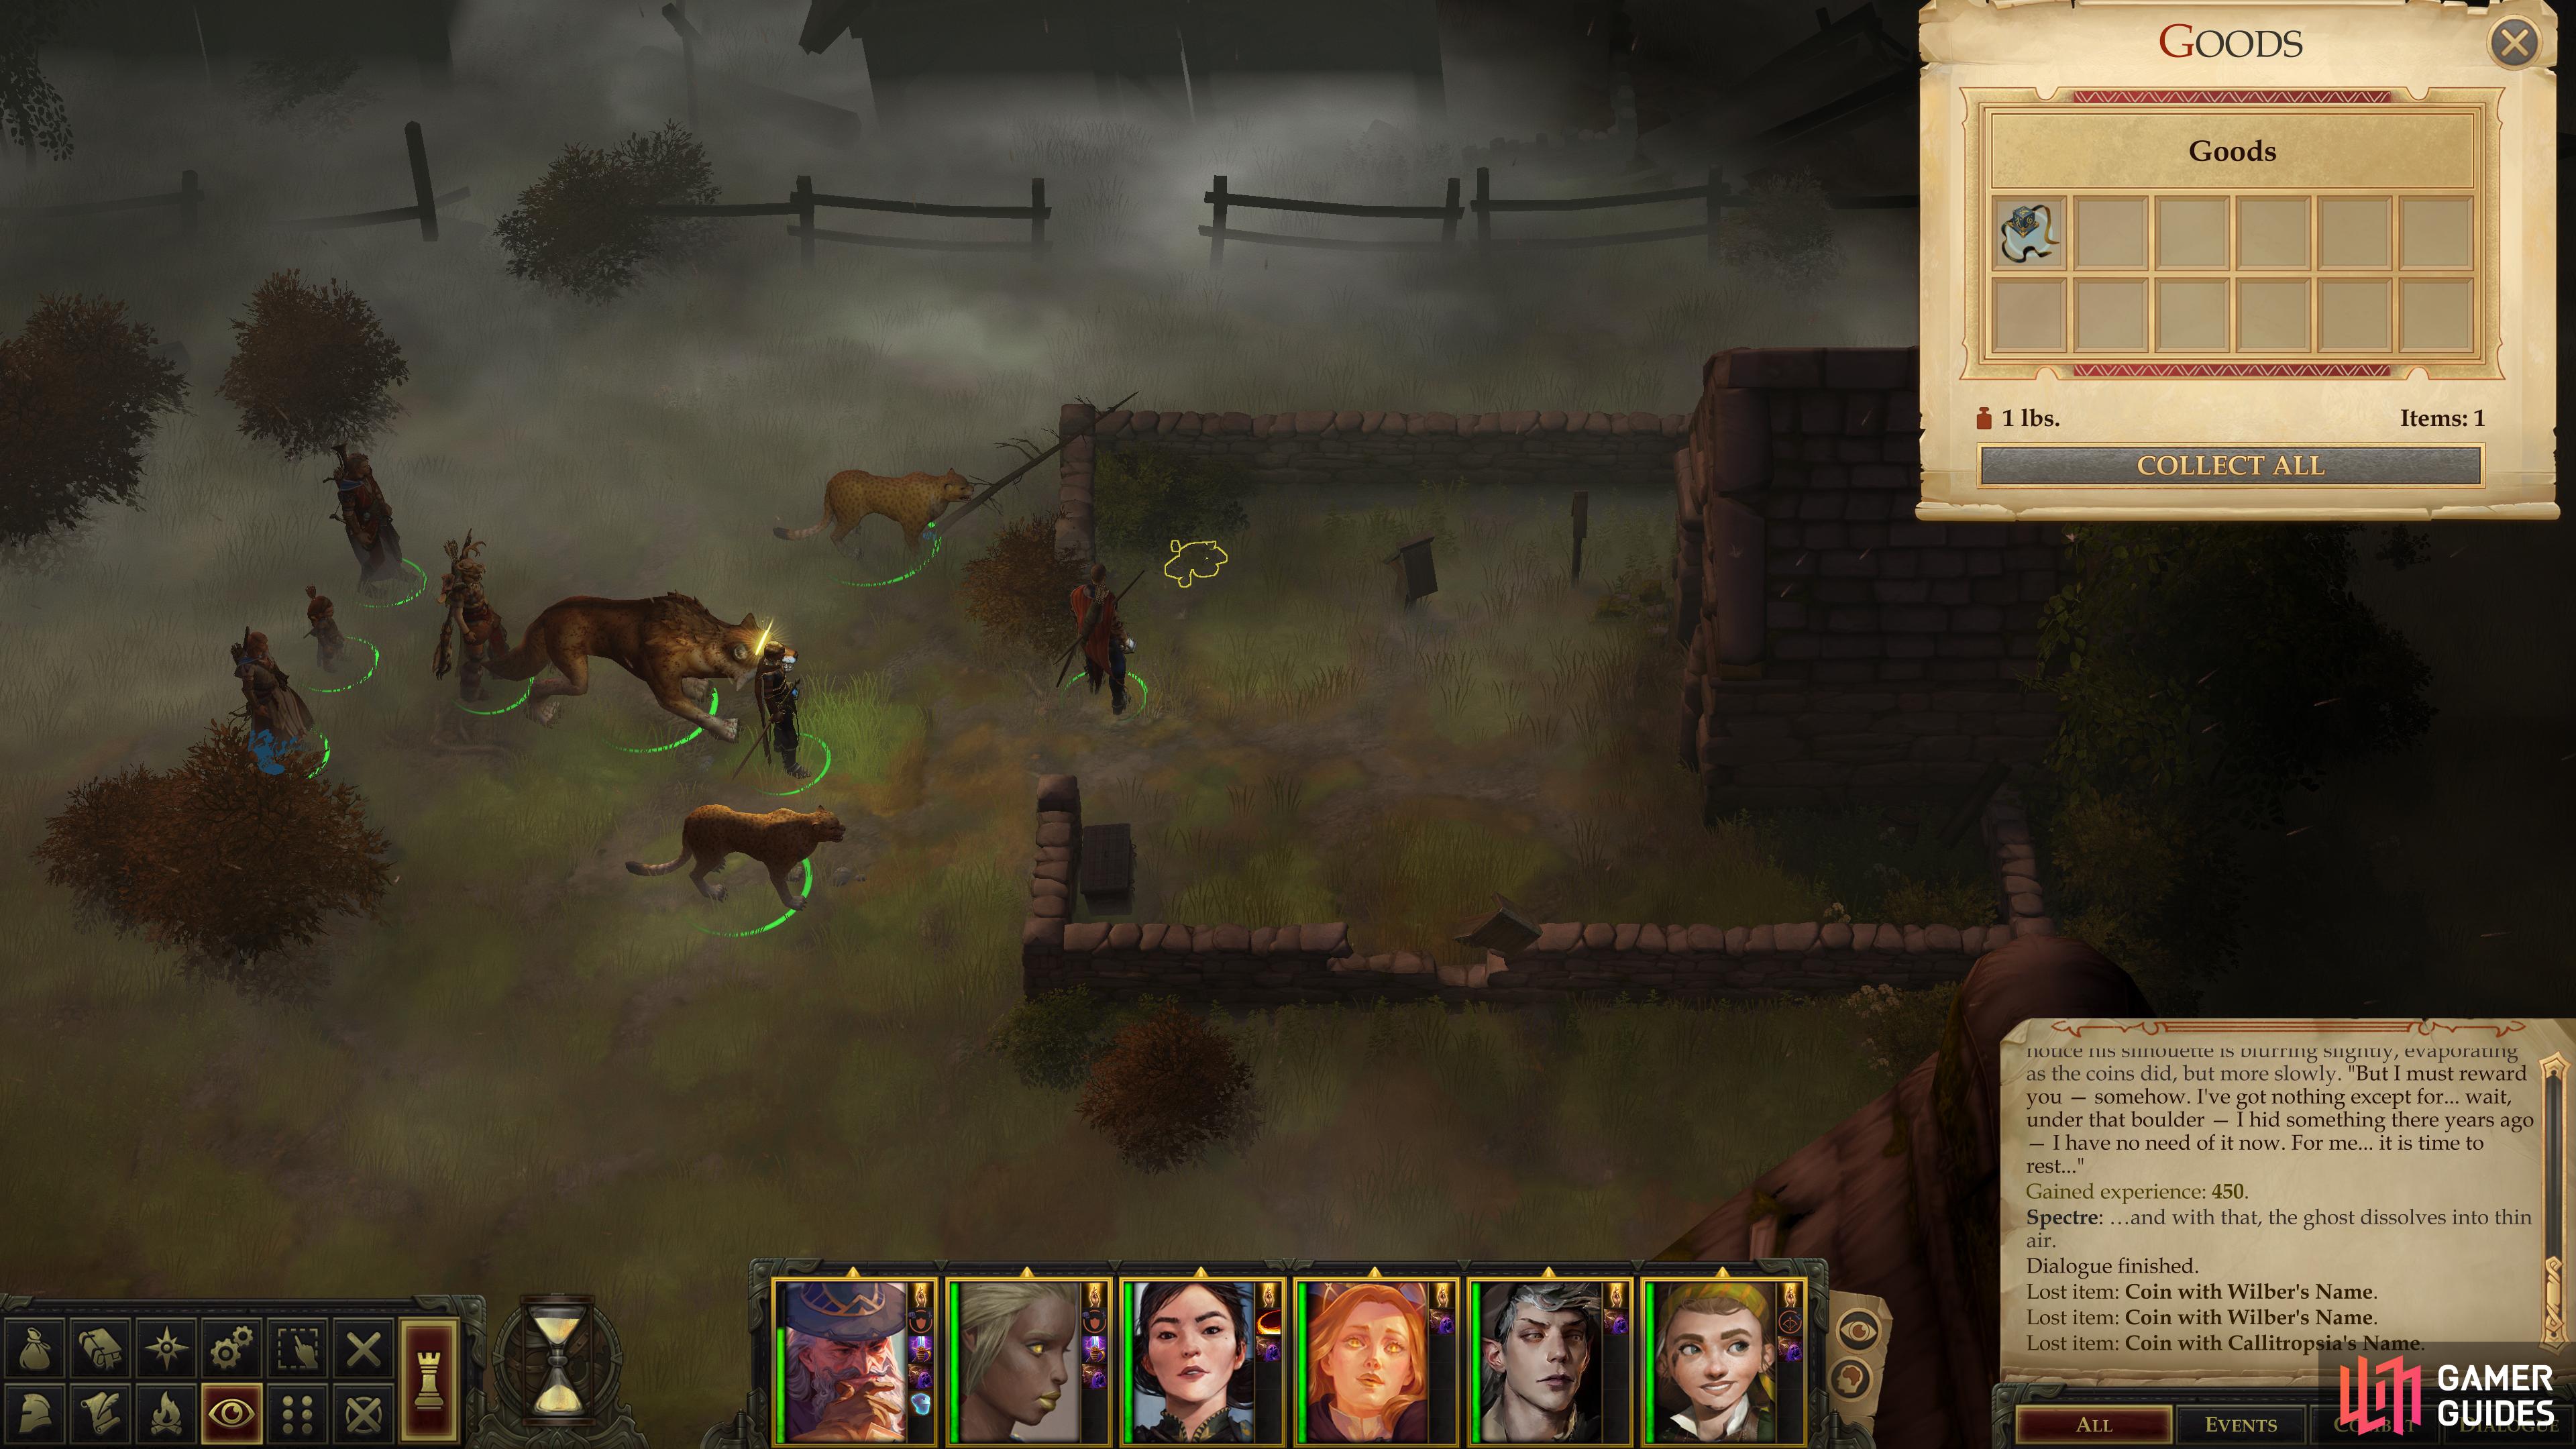
Return east to the specter near the shrine and inform it that you’ve cleared the well. Unfortunately that act alone wasn’t sufficient to rid him of whatever bonds tie him to this world, so show him the coins you found. The coins, it turns out, are the clue you were looking for, as they’re more than humble currency - they’re the tools of a curse. Not only was poor Wilber twice-cursed, but so was Callistropsia, Nyta’s bride which became the Scythe Tree. Seems the whole affair was caused by hatred and jealousy.
There’s little you can do for Callistropsia now besides rid the world of the monster she’s become, but there may yet be the possibility of salvation for Wilber. Pick the dialogue option [Put the coins on Erastil’s altar] to free the tormented spirit, and in return it’ll reward you by telling you of a trinket it hid under a boulder. No need to search far, just hit the TAB key to spot some rocks nearby, under which you’ll find a Phylactery of Positive Channeling.
| Reward |
|---|
| 450 XP |
| Phylactery of Positive Channeling |
This useful device (which takes up the helmet slot) will boost a Cleric’s positive energy damage and healing by +2d6. Both Harrim and Tristian can benefit from this greatly, since they both channel positive energy, and it constitutes a massive boost to their ability to heal the party. For a 5th level Cleric, it’ll boost their healing from 3d6 damage to 5d6, which basically counters a Fireball spell, or deals considerable damage to undead, should you find yourself confronted with a group large enough to use this on. Worst case scenario, if you can’t find a use for it, the phylactery will sell for 3,000 GP.
Note: There’s another being in these swamps who can also be freed by gifting them these coins. If you’re not completely sold on the Phylactery of Positive Channeling or just wish to test all your options, consider holding off on returning to Wilber’s specter for the time being.


Battle: Scythe-Tree
You either have freed, or at least have the means to free Wilber’s specter, but there’s at least one more tormented soul left to liberate: Callistropsia. Make your way around the shrine by heading north, then east, stopping to loot a chest near a house to the north. This chest will leave you richer by one Scroll of Cure Light Wounds, a Scroll of Hold Person and some gold coins. Head south from the shrine and you’ll find another chest near a fence, in which you can discover a Potion of Barkskin, a Scroll of Bless and two Scrolls of Cure Light Wounds.
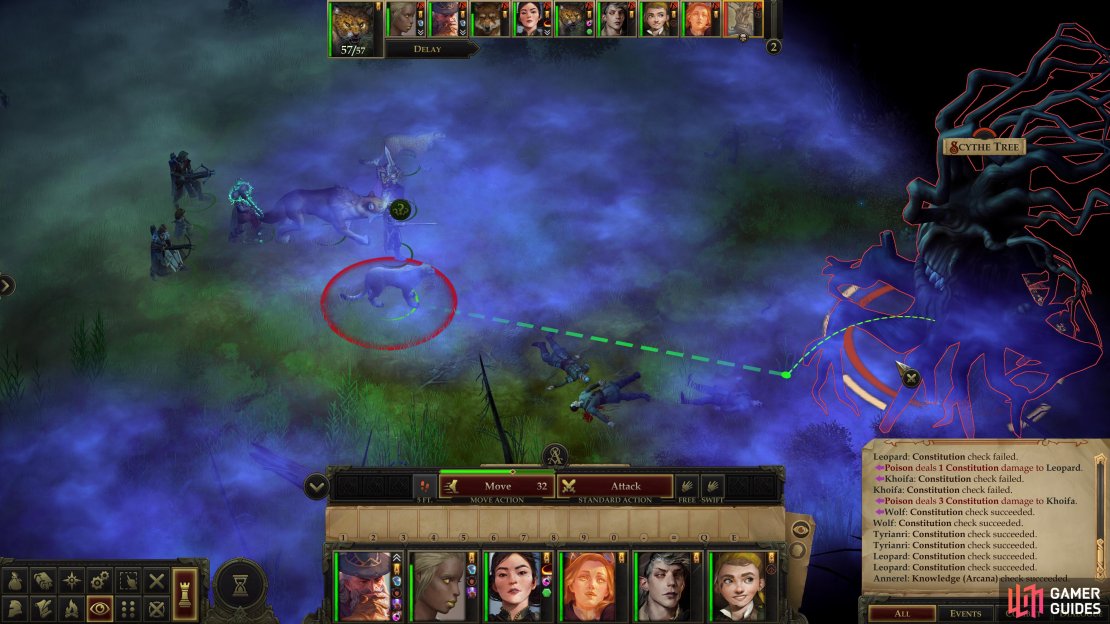
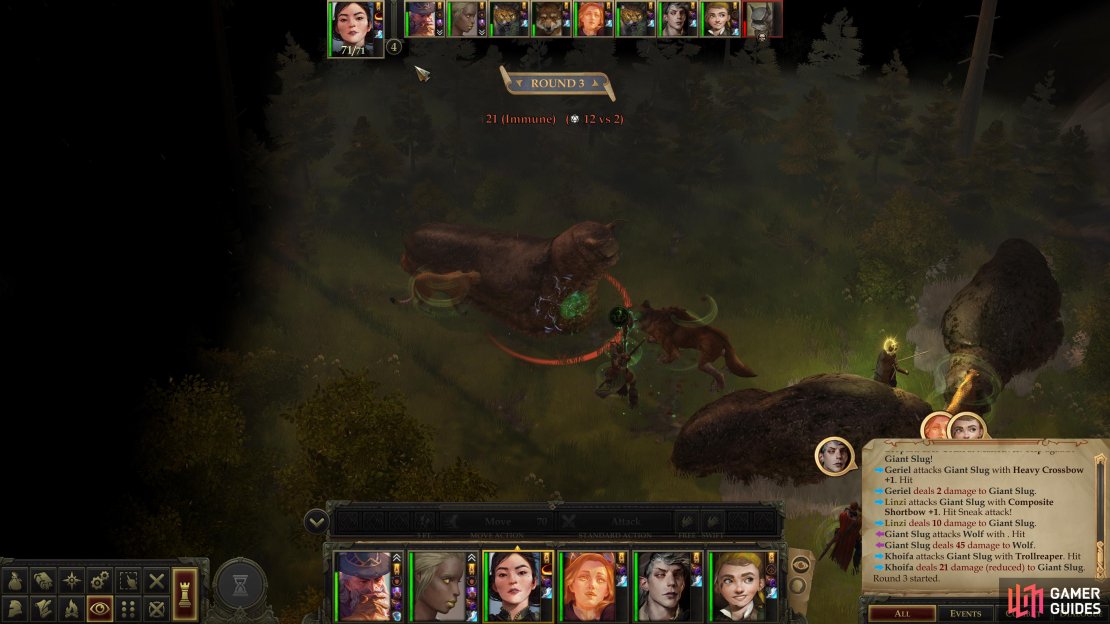
East of the shrine you’ll find some ominous purple mist. Sure enough, it’s poisonous, so you’ll want to stay out of it lest you suffer damage from exposure. You’ll take damage each round you remain in the mist and for a few rounds thereafter, making it a significant hindrance to further exploration. The poison mist’s coverage isn’t complete, however, and you should be able to spot three distinct paths through the mist which you can navigate single-file. Suffice to say, this isn’t an ideal formation for combat, which is a shame, because you’ll find a pair of Giant Slugs to the northeast, and the Scythe-Tree to the southeast.
Ignore the Giant Slugs for now, the Scythe-Tree is a more important objective, and you can focus on slugs later. Best to go after the Scythe-Tree while in tip-top form. Charging through poison to engage the tree probably isn’t the wisest idea, and again it’ll be buffs that turn this from a challenging fight to an utter rout - that and perhaps a bit of strategy on your part. There are two ways of going about this, either lure the Scythe-Tree to you, or protect yourself from the poison.
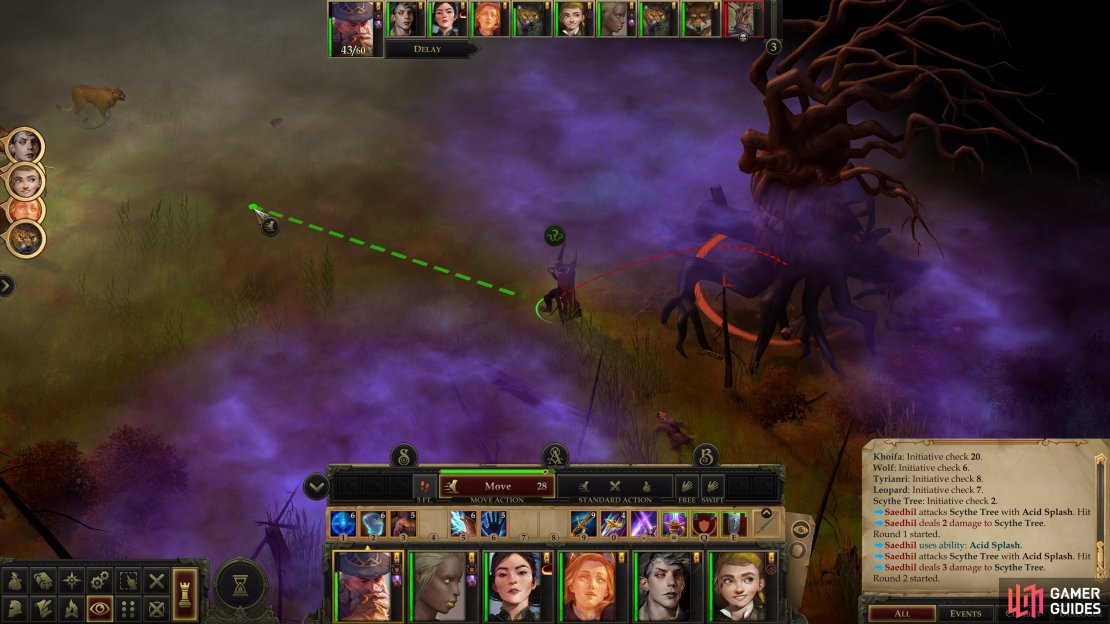
In the former case, this can be done by taking Octavia (or any other mage) and heading through the southeastern fog-free path until you spot the Scythe-Tree. Keep the rest of your party well back, with plenty of room between them and the fog. When your mage spots the Scythe-Tree, hit it with Acid Splash, and when it advances, retreat. Continue pelting it with Acid Splash until it’s been lured clear of the fog, then surround it and cut it down.
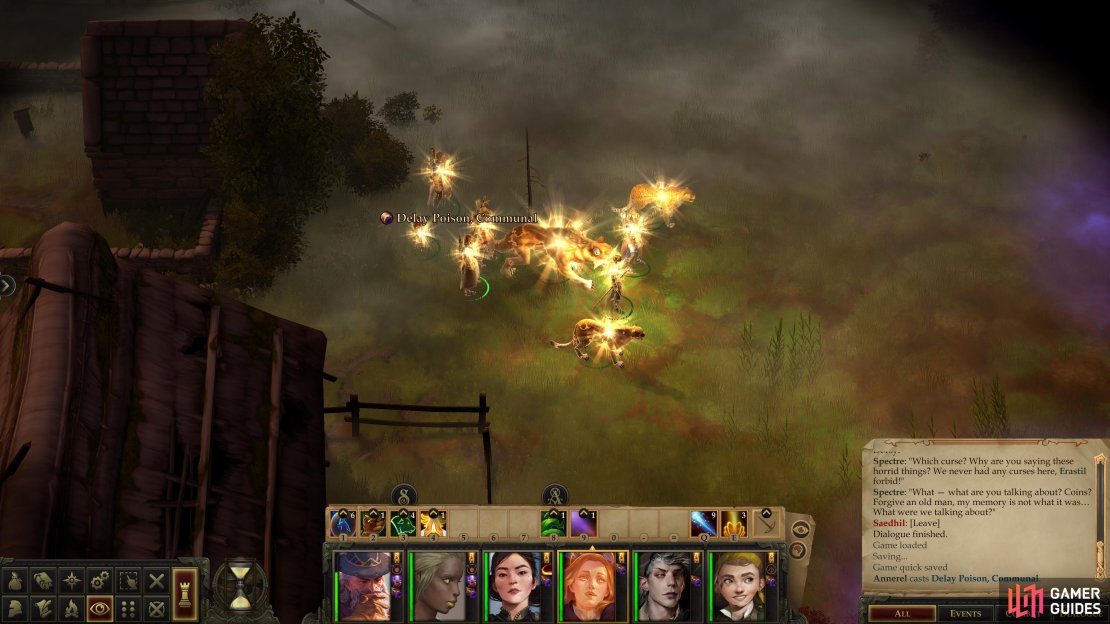
If you prefer a more aggressive approach, have your Cleric prepare several Delay Poison spells (or Delay Poison, Communal) - one for each warrior you plan to send into the mist. This 2nd level spell will mitigate the effects of poison for the spell’s duration, and since that duration is measured in hours, you’ll be well clear of the poison mist before the effects kick in. Simply buff up your party and send them on the attack.
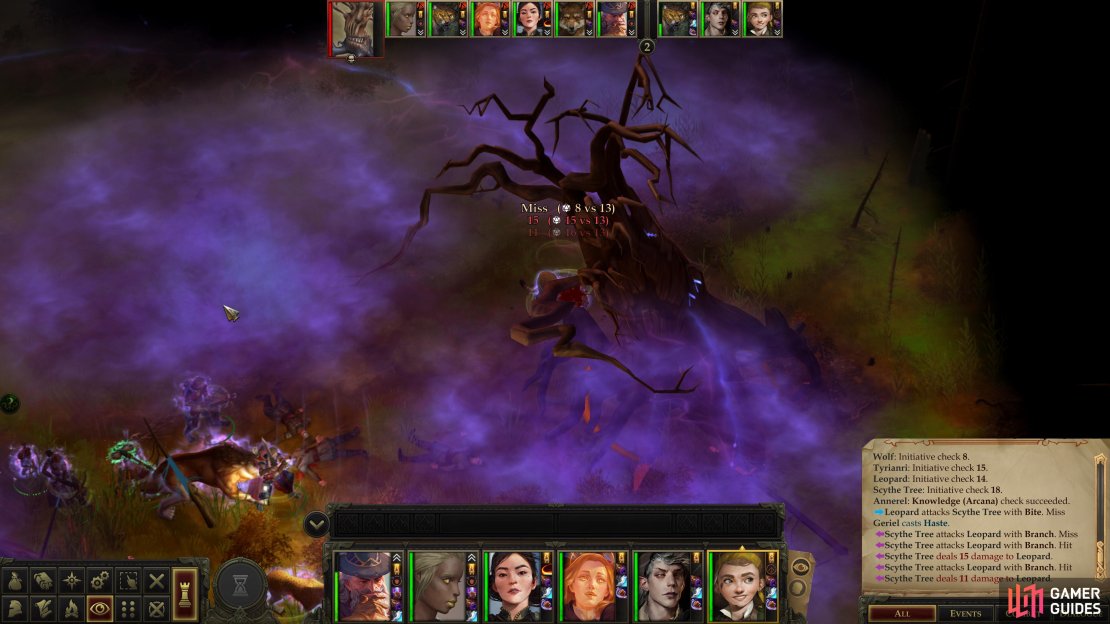
Either way you go about engaging the Scythe-Tree, the normal buffs work fine here, and with the fog neutralized, the Scythe-Tree isn’t too terrible of an opponent. It attacks fast and hits hard, but its Attack bonus isn’t high enough to render your tanks moot, like the Greater Enraged Owlbears. It can inflict Negative Energy Levels when it hits, however, which is a status effect whose antiquity is rivaled only by how obnoxious it is. Still, if you buff with Blur, Shield of Faith, Delay Poison and Haste, then start the fight out by hitting the Scythe Tree with a Slow spell, you should chop it down with terrifying speed.
Speaking of chopping the Scythe-Tree down, one last note - the Scythe Tree has Damage Reduction against piercing and bludgeoning attacks, so be sure you’re using slashing weapons. This should pretty much be the default for Amiri, Valerie and Jaethal if you kept them with their default weapons, but if not… well, Trollreaper will work just as well against this tree as it will against Trolls. Bows are right out, of course, even though the double Web strategy otherwise shows some promise.
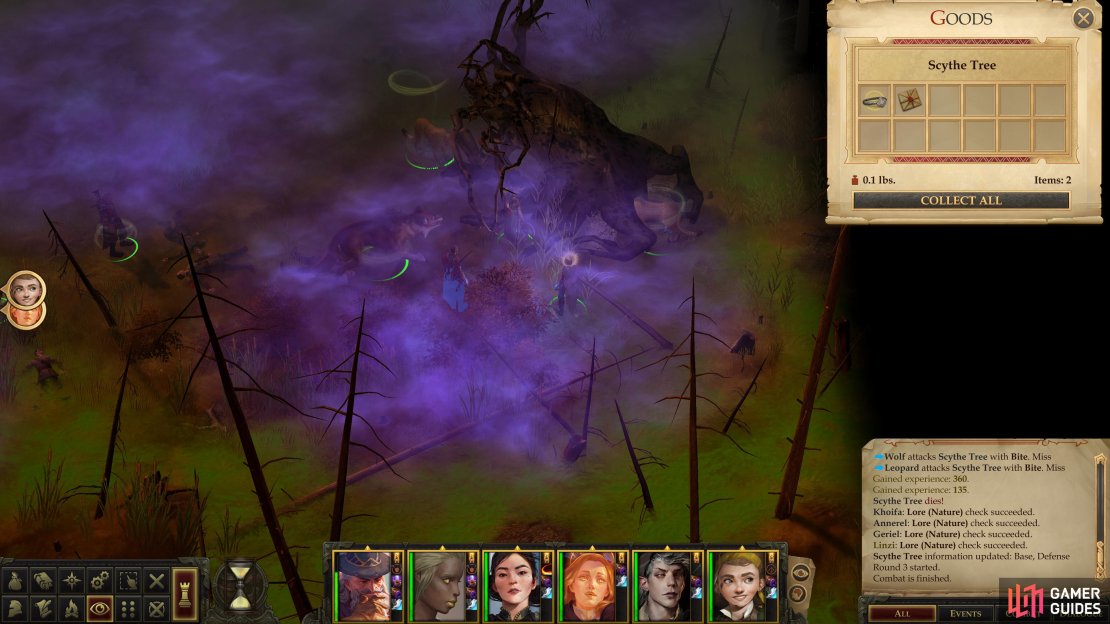
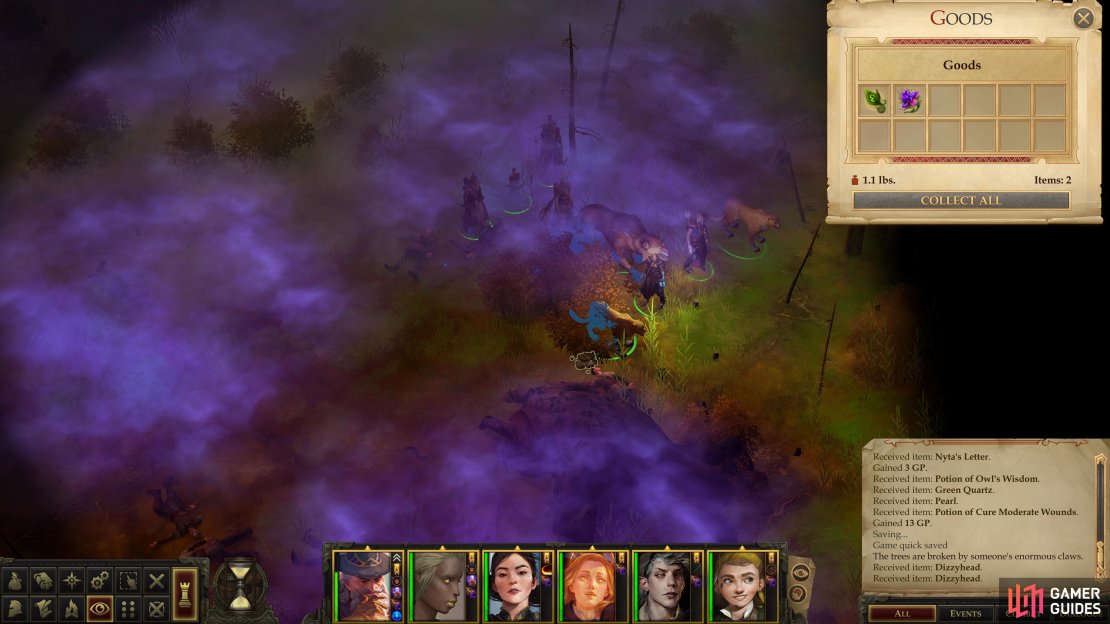
Cut down the Scythe-Tree, then loot it to obtain an Ancient Wedding Ring and Nyta’s Letter, the last remnants of what should have been a merry occasion gone horribly wrong. More treasure awaits on various corpses in the mist, but aside from a Potion of Owl’s Wisdom, a Potion of Cure Moderate Wounds and a Wand of Burning Arc, there’s very little noteworthy loot. Finally, loot a pile of rocks near one of the corpses (the one with the wand) to obtain a Token of the Dryad and the Cypress Queen’s Flower.
Note: If you don’t interact with Nyta’s corpse until after you have the Ancient Wedding Ring you can dispose of this ring at her corpse, but the end effect is functionally identical to just putting flowers near the corpse.


(1 of 3) and a variety of Dizzyhead plants.
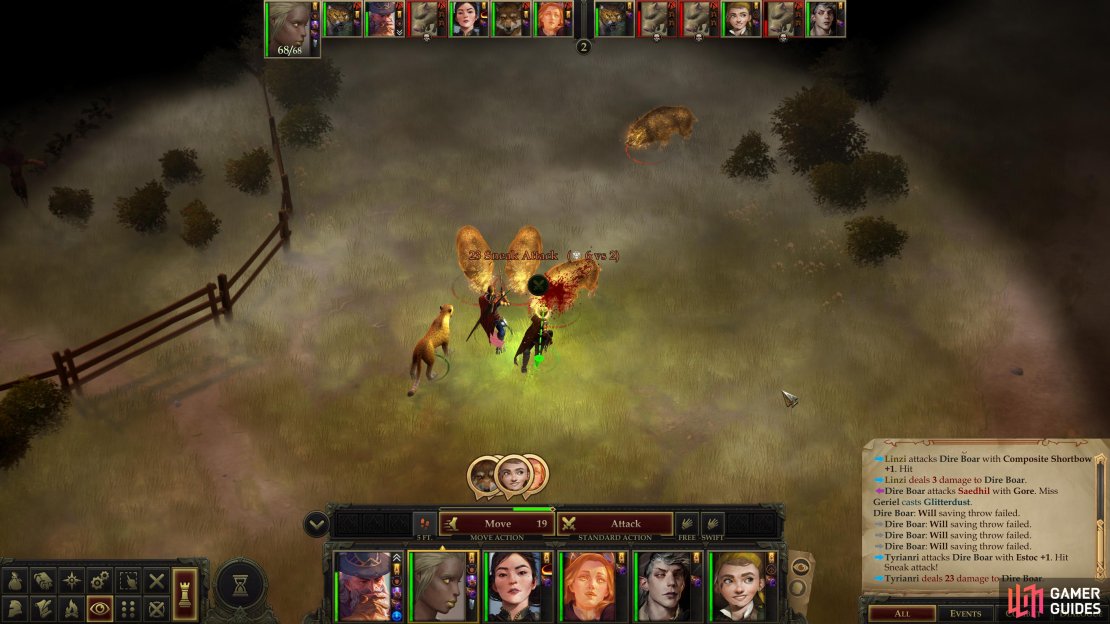
Battle: Giant Slug Duo
While your buffs are active, consider shifting your party to the north to encounter the Giant Slugs lurking in the poison mist. If you used Delay Poison, you should be able to navigate the mist just fine, but if not, luring the Giant Slugs out is possible, but dangerous. Unlike the Scythe-Tree, Giant Slugs have a tendency to spit acid, which can deal an obscene amount of damage (30+ damage!) if it hits, and it only requires a ranged touch attack, giving your warriors precious little defense. They’re no less dangerous in melee, having a high Attack bonus, but fortunately their Armor Class is laughably low. Protect yourself as best you can and either lure them, or charge through the poisonous fog and cut them down before they can do too much damage to your warriors. As usual, Haste will help immensely.
Your reward for this display of slug-smashing prowess? Well, you can find a Dizzyhead along the eastern end of the eastern-most house [Perception 22]. There’s also a more obscure Dizzyhead [Perception 27] just east of the shrine, or a short distance southwest of the one near the Giant Slugs. A third, difficult to find [Perception 27] Dizzyhead plant can be found near some bushes southeast of the Giant Slugs. A fourth and fifth Dizzyhead are easier to find [Perception 18], one being located north of the Giant Slugs near some trees, while another can be found along the eastern edge of the map just east of the Giant Slugs. They’re needed for an upcoming quest, so be sure to grab at least three, should your Perception checks be up to the task. There’s also a Token of the Dryad hiding under some branches [Perception 19].
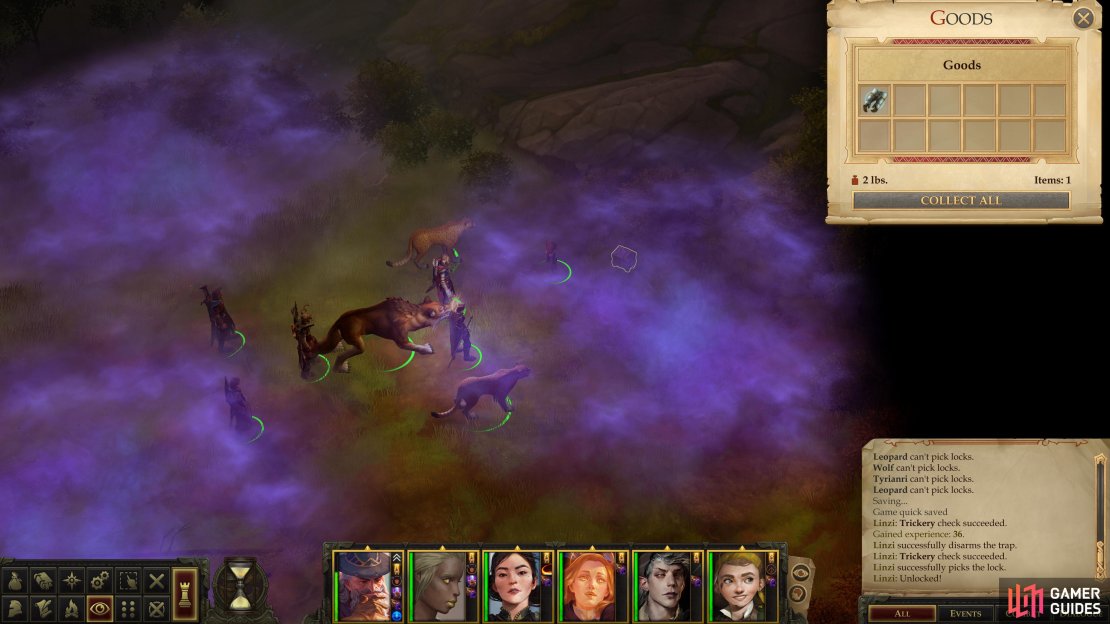
You can also find a chest east of where you encountered the Giant Slugs. It is hidden [Perception 26], trapped [Perception 22], [Trickery 22] and locked [Trickery 25], making it somewhat difficult to get into even if you can find it. Inside you’ll find Gloves of Dueling, which gives their wearer a +4 bonus on CMD checks to resist being disarmed. Should you not find that appealing, it’ll sell for 3,750 gold.
Return to Falchos and Tiressia
With that, your business with the Scythe-Tree should be finished so simply return to Falchos and Tiressia and tell them the news. If you didn’t ask for a reward, you’ll merely get experience, but if you did request a reward, you’ll earn 800 GP as well.
| Reward |
|---|
| 450 XP |
| 800 gold |
*Only if you demanded a reward for defeating the Scythe-Tree.
Show them the coin with Callitropsia’s name on it and you’ll also unlock the project Research into the Nature of Curses: The Scythe Tree. Something to keep in mind when you’re back in your own territory.
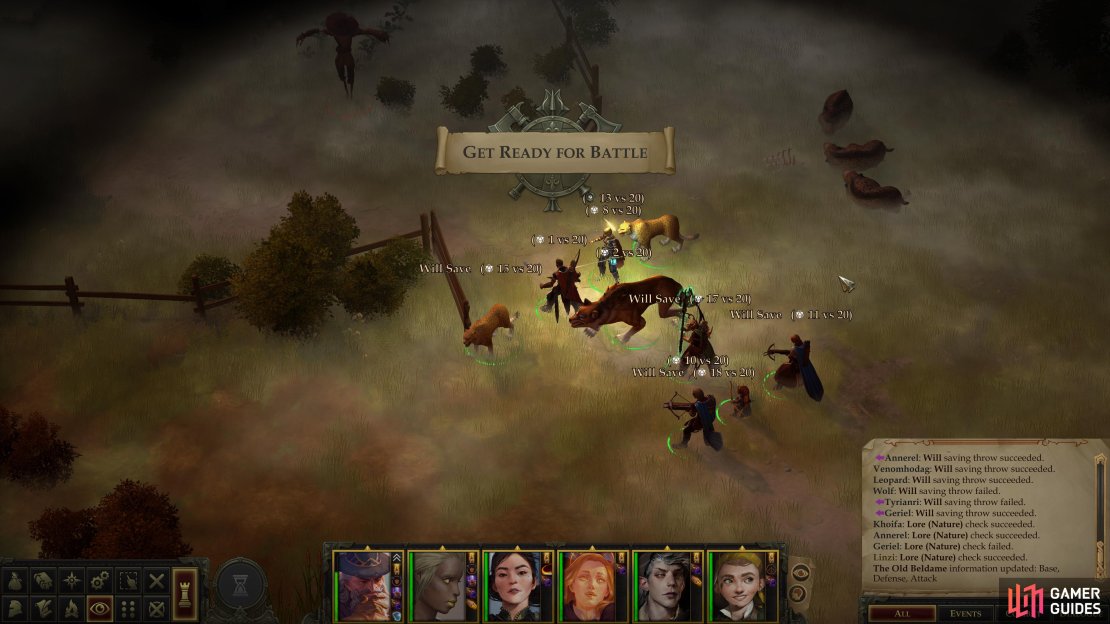
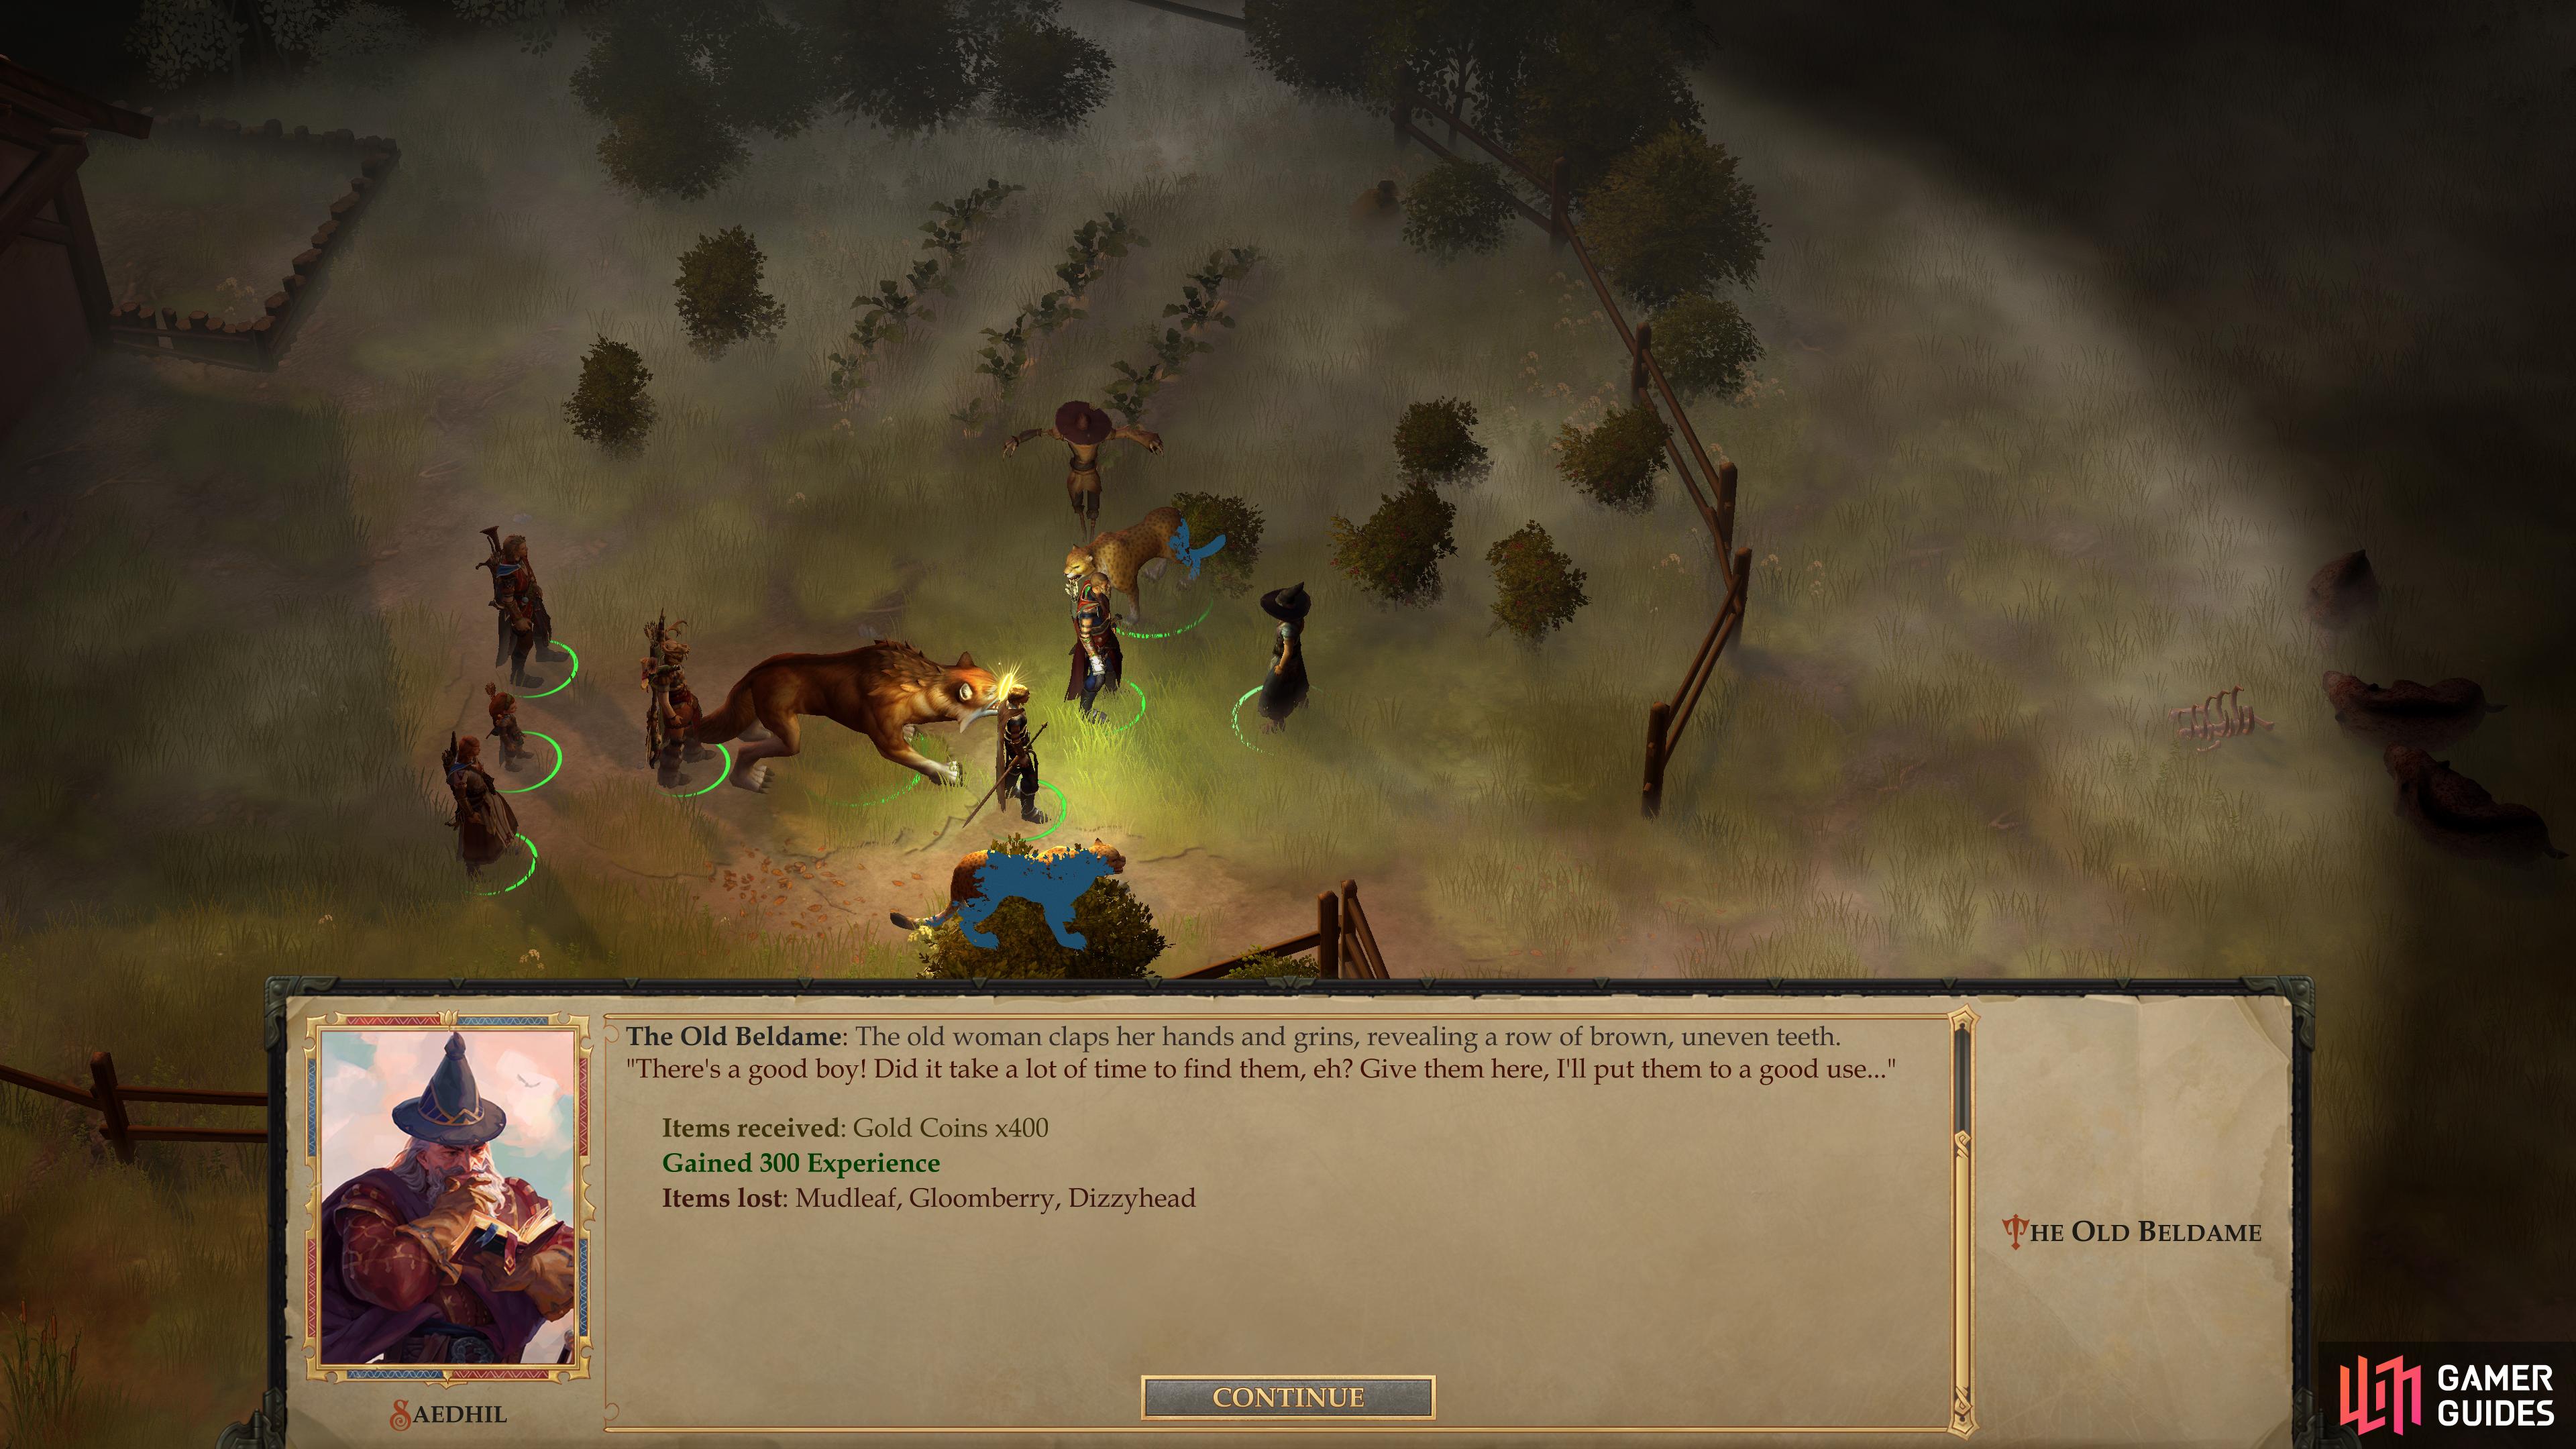
(1 of 3) Defeat several Dire Boars so you can reach the Old Beldame’s hut.
Meeting the Old Beldame
The mystery behind the village’s destruction and Callistropsia’s transformation into the Scythe-Tree has been more or less resolved. Falchos and Tiressia can continue living in sin, and Wilber can rest in peace. That said, there’s still more left to explore in this area.
Return to the southern area transition near which you slew a group of Tatzlwyrms and from there head north to find a pack of Dire Boars near a wooden fence. Defeat these relatively mundane foes, then turn your attention to the fence to the east. You’ve explored this area quite a bit, but thus far haven’t stumbled upon the “witch hut” after which the area is named. Of all the structures you’ve found thus far, this is the most promising to fit such a description.
Interact with the gate and you’ll get a variety of options, including two [Detect Magic] checks, one for the gate itself, and one for the ominous scarecrow in the front yard - both of which are confirmed to be more than they appear. After that, you really have only four options for proceeding: calling out to the hut’s inhabitant, throwing a pebble at the window [Dexterity 15], ringing the bell near the gate, or rudely opening the gate. Throwing a rock can come with a bit of unintended vandalism followed by the hostility of the hut’s owner, making it a less than ideal approach, while simply opening the gate will end with a similar result.
This can be a somewhat tricky fight, since the inhabitant of the hut - The Old Beldame - and her Scarecrow will use some of the same tricks you’ve been employing to secure victory. The Old Beldame will start out by protecting herself with Mirror Image, followed by two bouts of Slow before using a Fear spell. After that, she might resort to melee combat (of all things!) but she’s still capable of throwing out the odd Fear and Blindness spells.
The Scarecrow will Haste itself and immediately leap to the attack, where it excels. Not only does it have a high Attack bonus (high enough to reliably hit a well-buffed tank) but it deals a hefty bit of damage per attack, too. Defensively, it’s not that impressive - it’s HP are merely decent, its Armor Class is poor and while it has Damage Reduction 10/slashing and magic, for the most part your attacks will be fairly effective. The real trouble with this foe is its hallucination gaze, which will transfix characters should they fail a Will DC 21 save, keeping them from acting unless the Scarecrow attacks them. Speaking of which, it’ll inflict fear (Will DC 21) on hit, making it something of a nuisance foe that can pick apart your party one character at a time.
Provided you can get past these impediments, however, you can simply buff your way to victory so long as you rush the Scarecrow and cut it down while hasted. The Witch on her own isn’t fearsome enough to hinder the ambitions of several violence-minded warriors. Your reward for murdering this old recluse? Some paltry experience and the Recipe: Shepherd’s Pie which you can pull off her corpse.
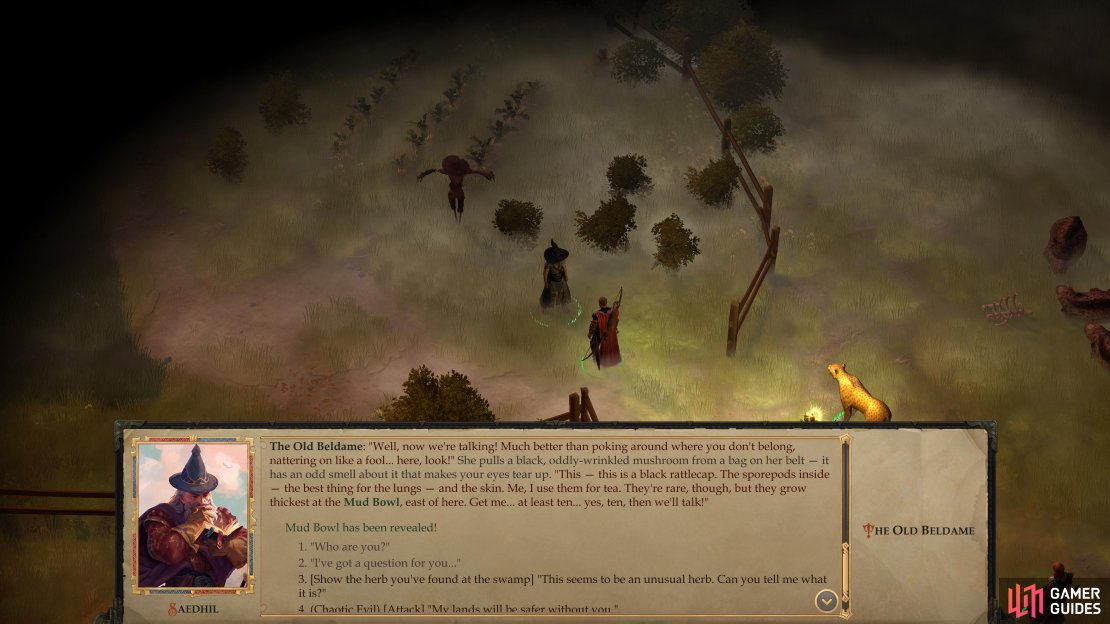
(1 of 3) Talking to the Old Beldame is arguably more lucrative than fighting her, as you can pick up the quests “Mushrooms from the Mud Bowl”,
Fighting the Old Beldame isn’t terribly rewarding, nor is it ideal from a story perspective. That being the case, just ring the bell on the gate (or if you must test your luck, throw pebbles at the window) to draw the witch’s attention in a more cordial manner. When she arrives, chat with her as there are by now numerous things you can ask her given your previous exploits in the swamp.
Pick the dialogue option “I’ve got a question for you…” and after her sharp retort respond with “How can I help you, good woman?” to start the quest Mushrooms from the Mud Bowl.
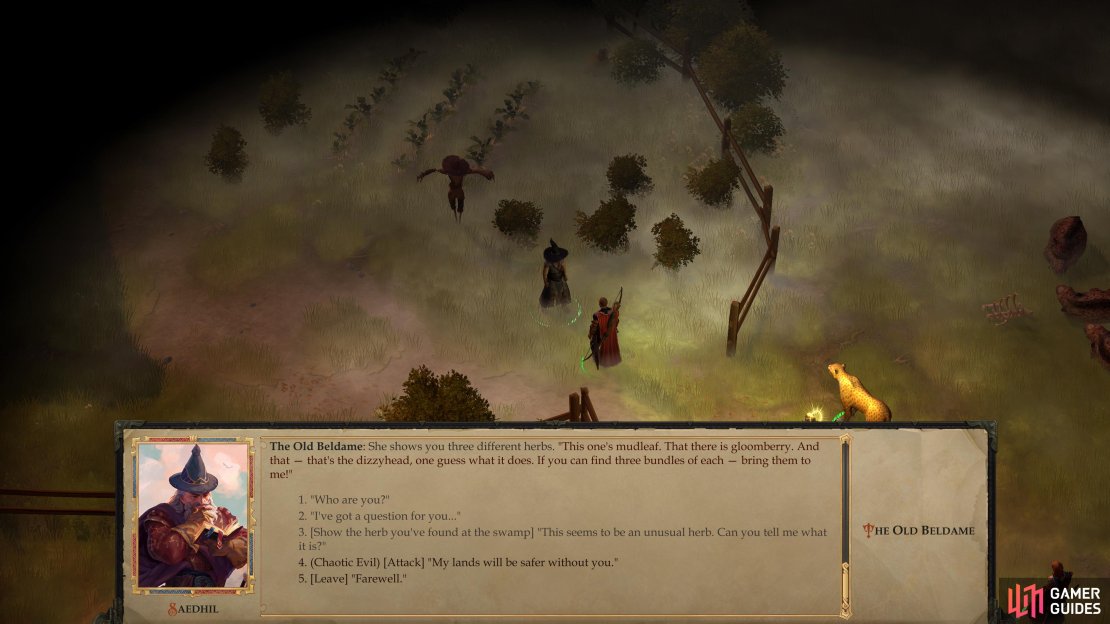
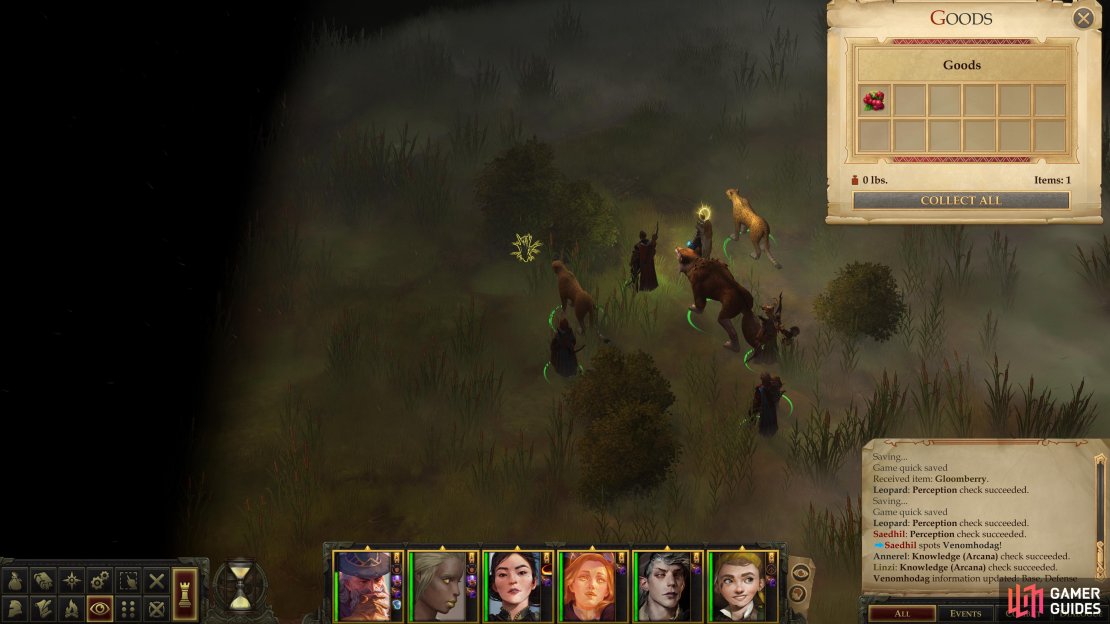
If you grabbed the Dizzyhead plant earlier near the Giant Slugs, pick the dialogue option [Show the herb you’ve found at the swamp] “This seems to be an unusual herb. Can you tell me what it is?” and she’ll instruct you to find three Mudleaf, Gloomberry and Dizzyhead samples for her. This starts the quest Swamp Bouquet. By now you should have found enough Mudleaf (if you save/loaded to ensure you get the number of plants you need at least) and as many as five Dizzyhead plants if you explored near the poison mist along the southeastern edge of the level - provided your Perception skill score was high enough. This should only leave the Gloomberries, which you’ll get to shortly.
Finally, if you pick [Tell her about the coins.] “I’ve learned what happened to the village, slain the monster, and freed a cursed soul…” you can muse about where guilt lies with the whole affair, but it ultimately goes nowhere.
Make it through those dialogue options to pick up the two aforementioned quests. Looks like if you want to get anything more out of the Old Beldame, you’ll need to take care of her errand, first. You’ll find this Mud Bowl area - the source of the Black Rattlecaps she wants - just east of Candlemere Tower, in fact, which might be worth hitting on your way back to Tuskdale.
Now’s not the time to worry about heading home just yet. First you need to finish up this area, which you can progress towards by plundering the Old Beldame’s yard. In some crops near the Scarecrow you should find a Token of the Dryad in some foliage, and in a chest near the eponymous hut you’ll find some food and a Fish-on-a-Stick Recipe.
Be wary as you explore near the northern fence, however, as four Venomhodags prowl up there, and you can’t easily reach them from the swamp witch’s hut. Although if you don’t mind spending time or have good archers, you can always just take pot-shots at them with ranged weapons - they can’t reach you, either. We’ll deal with them later, when we can reach them, but for now let’s continue exploring this area.
(1 of 2) Give the coins to Dorsy to free him from his curse for a Cloak of Resistance +2.


Give the coins to Dorsy to free him from his curse for a Cloak of Resistance +2. (left), Search a hidden, locked and trapped chest near Dorsy’s hut to obtain the “Demolisher” weapon. (right)
Dorsy’s Release
Leave the witch’s house and venture east past where the Dire Boars were to reunite with the road. Follow it north to reach a fork, at which venture northwest to find the path forward guarded by another nest of Tatzlwyrms, led by a Greater Tatzlwyrm. Exterminate them, then search around for some plants growing nearby, including a Shambeltus mushroom to the east, for what that’s worth.
Continue north and you’ll find another intact hut, the inhabitant of which - a Ghoul named Dorsy - is even more unsavory than the witch to the south! Despite being quite dead, this corpse insists it doesn’t want to fight, and is capable of engaging in halting speech. Ask who it is to learn its name, while further questions will confirm its role in the events that transpired at the village long ago. Seems Dorsy loved Nyta, and cast cursed coins into the well - symbols of his hatred - and he can only be freed from his undeath “when two coins serve as his eyelids”.
If you already gave the coins you got from the wisps to Wilber you won’t be able to give them to Dorsy and vice-versa, meaning one of these two souls is doomed to remain in the land of the living. Telling Dorsy you used the coins will provoke it to attack, but if there’s still a choice to be made, you can let morality or practicality guide you; in the former case Wilber is an innocent, but he hardly seems aware enough to be suffering, unlike Dorsy, although Dorsy kind of deserves it for cursing Callistropsia. In the latter case, Dorsy will reward you with a Cloak of Resistance +2, which you may prefer to the phylactery that Wilber will give you. Killing either of the undead the old fashioned way will not get you either of these rewards, but you can loot Dorsy for a Masterwork Handaxe.
| Reward |
|---|
| 450 XP |
| Cloak of Resistance +2 |
Whatever fate Dorsy is due to suffer, loot the chest by his house ([Trickery 20]) to score two Scrolls of Bless, a Potion of Cure Light Wounds, three Scrolls of Cure Light Wounds and a Scroll of Acid Arrow. You can also find a hidden [Perception 24], trapped [Perception 22] [Trickery 22] and locked [Trickery 25] chest near some lumber to the west of the house. If you can get into it, you’ll score the Demolisher, a Heavy Pick +1 that’s adamantine and has the “Construct Bane” property, which collectively makes it very strong against golems. Even if it’s not your ideal weapon type, you should keep it handy, as it’ll likely prove more effective than other weapons against a narrow selection of powerful foes.

(1 of 3) Dispatch a trio of Giant Slugs,
Battle: Giant Slugs Trio
Head northwest from Dorsy’s house until you find another area transition. Ignore it for now and head northeast instead, stopping to pick some of the Gloomberries that grow around here. This should be the third and final ingredient you need to recover for the quest Swamp Bouquet. Before you return to the Old Beldame, however, note the Giant Slugs further north. You’ve fought two of these monsters earlier, so you know how hard they can hit. Even though they’re individually pretty easy to cut down, it’ll take time, and while you work on one of the slugs, the other two will be punishing you. Haste will, as always, help, as will buffs like Blur and Displacement.
Your reward for besting these beasts? You can loot two Gloomberry bushes unopposed, getting you up to the three Gloomberries you need. If that’s not good enough, you can search a log for a Token of the Dryad and a Shard of a Knight’s Bracers.

(1 of 4) To reach the Venomhodags safely you’ll need to pass an Athletics check.
Battle: Venomhodags
You should hopefully have obtained enough plants to return to the Old Beldame and complete Swamp Bouquet, but before that, there’s one more encounter in this area you can attend to along the way. From the area transition in the northwestern corner of the map, follow the edge of the map south to find a thicket of trees. With some searching you should find a spot where you can pass via an [Athletics 22] check, but before you pass through, save your game and spellbuff, as a significant fight awaits you beyond the foliage.
Pass through the thicket (if you fail the [Athletics 22] check you’ll take damage) and you’ll find yourself in a fight with four Venomhodags. Compared to the three Greater Enraged Owlbears, they’re relatively weak, but they’re not push-overs by any means. Their HP are decent (84) and their Armor Class is good (25), and despite it not making any sense, they have the ability to go invisible on a whim, which will give them concealment and allow to attack while your own characters are flat-footed. Deprived of this advantage, their Attack Bonus (+14) is fairly mediocre and while their damage per hit is high (1d8+14) as they get plenty of attacks per round (4), they’re not offensively impressive. If they do land a hit, the struck character will have to make a Fortitude Save or sustain Constitution damage, hence the “venom” in their name.
A decent tank should be able to laugh off their attacks, but with four enemies, you’ll probably need to spread out the buffs so more than one character is protected. Haste is a must-have, as always, and the humble Glitterdust spell will help keep them from going invisible, which will significantly hinder your foes both offensively and defensively.
It’s also worth noting again that, if you want, you can provoke them from outside the thicket and just shoot them down with ranged attacks. How much of a bother this is will depend on how competent your archers are.
However you go about it, defeat the Venomhodags, then loot their lair to find a branch [Perception 19] hiding some baubles to the west, and a corpse near which you’ll find a suit of Leather Armor +2, along with some less-interesting items to the southeast.

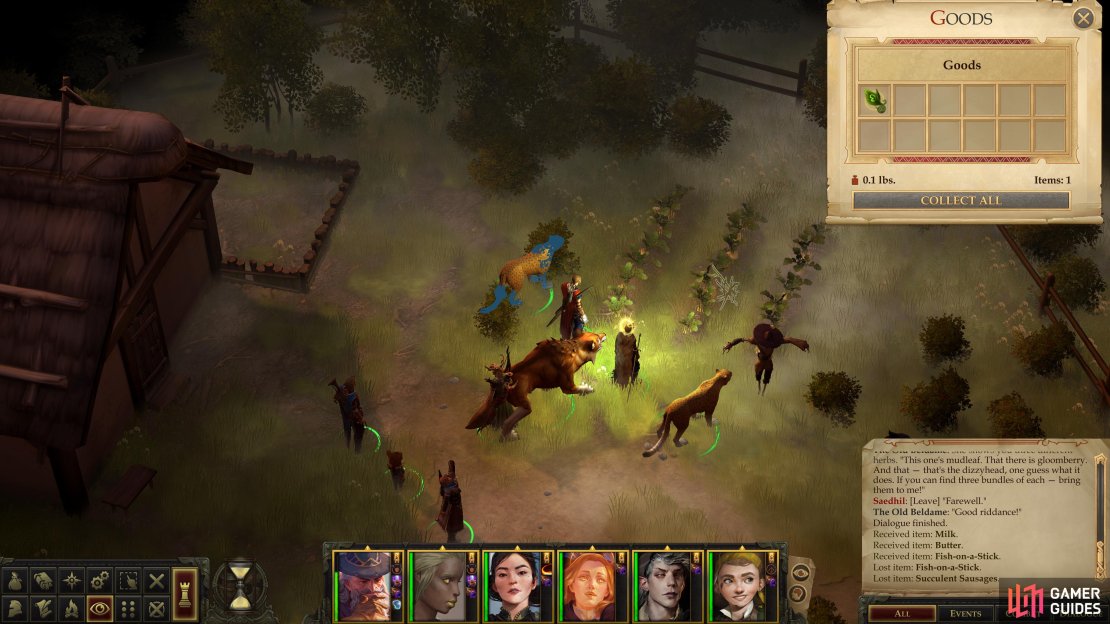
(1 of 2) If you acquired three Mudleaf, Dizzyhead and Gloomberry plants you can complete the quest “Swamp Bouquet” without even leaving the area.
If you acquired three Mudleaf, Dizzyhead and Gloomberry plants you can complete the quest “Swamp Bouquet” without even leaving the area. (left), You can also return to Tiressia to pass on some correspondence between the dryad and the Old Beldame. (right)
Swamp Bouquet
With that you should be done in this area… at least as far as fighting goes. If you followed this guide through the area you should have found three Mudleaf plants (along the pass that connected the road to where you found Falchos and Tiressia), Dizzyhead plants (near the Giant Slug duo in the poison mist along the southeastern corner of the map) and Gloomberries (northwest of Dorsy’s house, near the Giant Slug trio). If that’s the case, you can return to the Old Beldame and give her the herbs for some experience and gold.
| Reward |
|---|
| 300 XP |
| 400 gold |
Reunite Elga Verniex and Tiressia
After completing this quest for the Old Beldame, she’ll be ever-so-slightly more favorably disposed towards you, allowing you to ask a few more questions. Be sure to ask “What happened here?” and “As far as I’ve heard, a daughter of a human and a fey used to live here. Her name was Elga Verniex. Are you her?”. You might not get the conclusive answers you were hoping for, but asking the latter question will allow you to complete another task before leaving.
You’ll also be able to trade with the Old Beldame now, who sells a variety of potions, scrolls, and miscellaneous magical items. Of particular note she sells an Amulet of Natural Armor +1, a Belt of Mighty Constitution +2 and some Scrolls of Greater Invisibility. The latter spell is a helpful buff, albeit a bit out of your league right now, being a 4th level arcane spell. Still, consider picking it up if you have the coin. Better to have it early than need it late. You also may as well sell off any junk you don’t need or want, so it doesn’t end up burdening you later. Most importantly, you can buy a copy of Of Transmutations and Bodily Poisons, Part I if you didn’t get one in the Abandoned Hut area or buy one from Bartholomew earlier, as it’s part of the quest An Ancient Formula. You only need one copy, but be sure to get at least one from one source or another.
When you’re done dealing with The Old Beldame, return to Tiressia. If you asked The Old Beldame if she was Elga Verniex you’ll be able to report to the Dryad about the location of the missing half-breed fey. Pick the dialogue option “Elga Verniex is back. She lives in a house outside the village.” and Tiressia will give you A Letter from Settrex to His Daughter to deliver to Elga. Yeah, this sort of thing is beneath you, but it can’t hurt to appease them. Return to The Old Beldame and pick the dialogue option [Give her the letter.] “A dryad named Tiressia remembers you and would be glad to see you again. She asked me to give you this letter.” to put her and Tiressia back in contact.
With any luck, your schmoozing - or genuine acts of goodwill, if that’s how you prefer to play it - will pay off later. For now, however, you’re finally done with the Swamp Witch’s Hut area, and you should start planning your trip back to Tuskdale. If the event card “Troll Trouble” hasn’t appeared yet, or if you feel comfortable in letting it sit for a day or two longer, you should consider taking a different route on your return trip. After all, there’s no gain in heading back the way you came, and since you’ll get back to Tuskdale just as well by heading east and north through the Kamelands (as opposed to backtracking through the Narlmarches), you ought to consider it.
Way to Cheese Owlbears; the bushes to the left of the glade they are in is big enough for them to try to path through but too small for them to actually go through. Thus have you archers dead left of the most visible one, and tank/distraction up north. doesn't matter which one they aggro on, as long as they don't get that there is a way around (which I believe might happen if they are too downwards, thus why I focus on having aggro be as northward as I can). So they cant get to you due to the area they are pathing through being too big for them to actually get to you, thus have ranged characters pelt from safety
ok i know this is very late from when this guide was made but i found a SUPER HYPER EXTRA CHEESY CHEESE for that fight with the owlbears
Are you tired of getting claped by those bears? Did you reset 20 times and still lost 1 member when the 2 bears were dead? Did you i dunno got them all to like 20% with spells and such and then got 1 unlucky crit and had to restart?
WELL here is the sollution those idiots are quite close for u to see big mistake so what u want to do is take out a bow (that lucky bow maybe from the guide) or that awsome javelin from the dungeon dlc (shock +1 javeling amiri love that) and fire away u gonna have to move a bit becouse they are huge and have reach but once they are all close start atking them they just stand there being like fine u win and this is what i found out made my life easier have fun :)