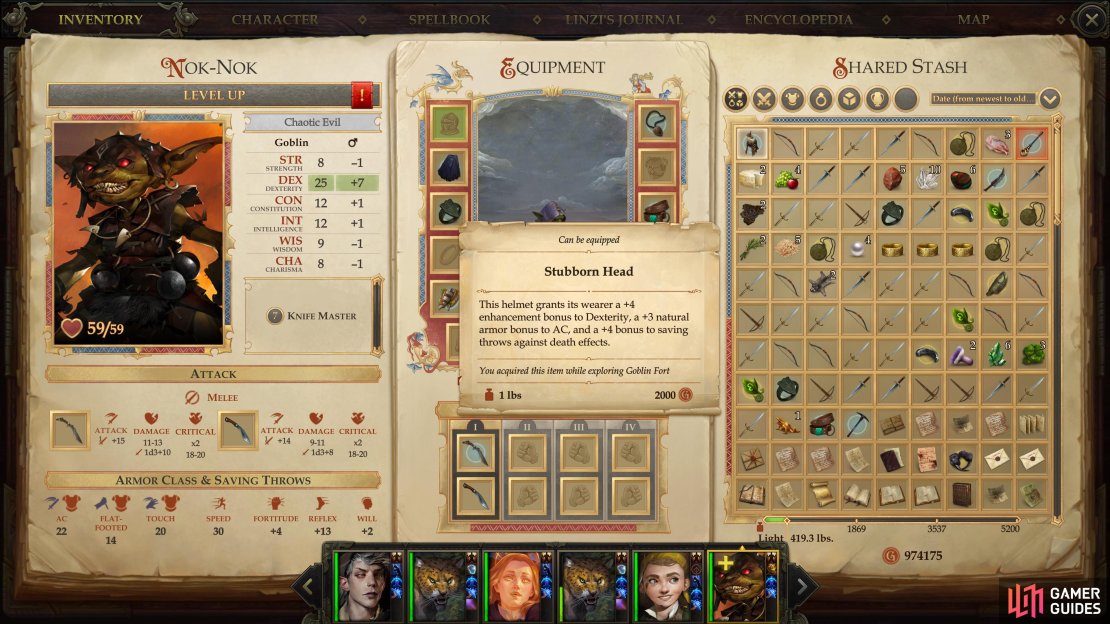
After fighting your way through the Goblin Fort you’ll eventually reach the inner fortifications in which the Goblin King and Goblin Shaman lurk. If you have Nok-Nok with you, check out the header Nok-Nok Versus the Goblin King, below, otherwise continue with Battle: Goblin Shaman. There’s serious incentive for bringing Nok-Nok along and having him confront the Goblin King, namely the Stubborn Head item the Goblin King wears as a crown. The only way you’ll get this is by successfully navigating the encounter between Nok-Nok and the Goblin King.
Guide Nok-Nok to victory against the Goblin King and you’ll obtain the “Stubborn Head” helmet.
Nok-Nok Versus the Goblin King
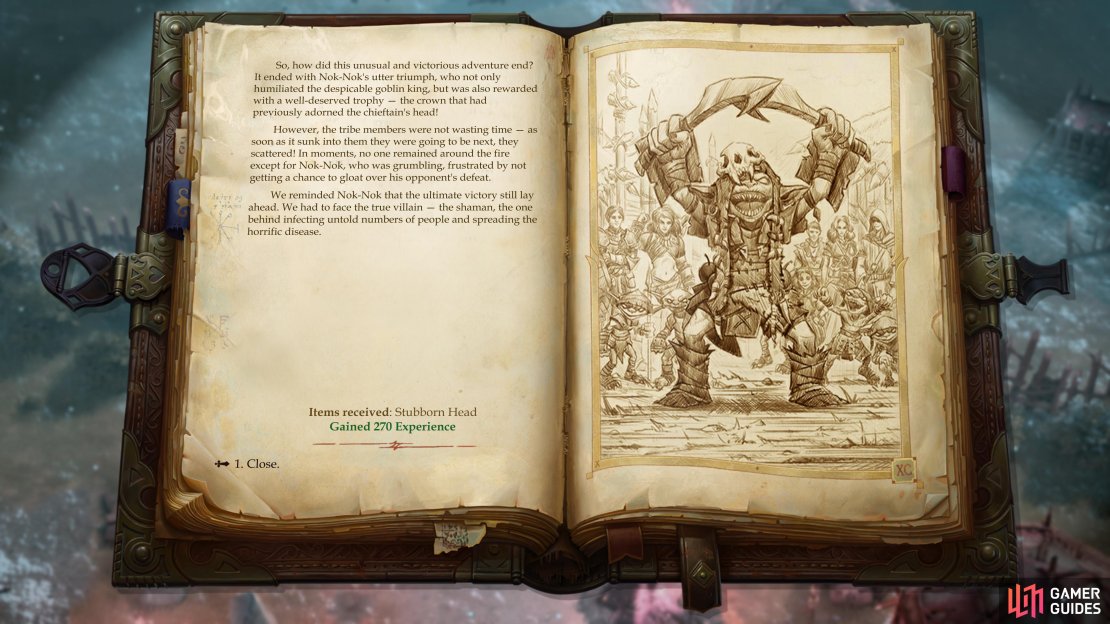
Make your way south into the fortifications atop the hill in the midst of the goblin fort - the inner defenses in which you’ll find the Goblin King. The Goblin King, despite his pretensions, is not a major player in the battle ahead, being a relatively weak combatant dealing at best moderate damage and possessing an Attack bonus low enough to struggle against even a mediocre tank. That said, if you have Nok-Nok in your party, you can remove the Goblin King from the equation entirely, as Nok-Nok will chomp at the bit to challenge the Goblin King in single combat, which takes the form of an Illustrated Book Episode! There are quite a number of ways to ensure victory in this event:
- [Diplomacy 18] or [Bluff 18]
- [Stealth 13] …Nok-Nok climbed on the roof of the nearest hut.
- a wasp nest!
If you pick the [Diplomacy 10] or [Bluff 10] responses to start (both of which use your protagonist’s Persuasion skill score - a restriction that won’t be kept for later checks) and pass, you’ll then get to choose between two different [Stealth 10] checks. If you pick [Stealth 10] …Nok-Nok climbed on the roof of the nearest hut. you’ll then get three more options. Be sure to pick …a wasp nest! here and pass the hidden [Dexterity 10] check to win the encounter.
| Reward: |
|---|
| 270+ XP |
- [Diplomacy 18] or [Bluff 18]
- [Stealth 13] …Nok-Nok hid right behind the king’s back!
- a wasp nest!
On the other hand, if you pick the other stealth option, [Stealth 13] …Nok-Nok hid right behind the king’s back! you’ll get to choose between a [Trickery 12] and an [Intimidate 11] check, both of which will end the encounter successfully and unlike the first two Persuasion checks, this one uses the party’s highest skill.
| Reward: |
|---|
| 270+ XP |
- After any one sub-optimal choice: [Mobility 12] or [Dexterity 12].
- [Intimidate 12] or [Bluff 11] or [Bluff 11].
If you started this Illustrated Book Episode out by picking The baron(ess) did not deign to speak to the assembled goblins, demonstrating his/her contempt of the undersized vermin, or if you failed any checks or picked the wrong dialogue option (assume any options not mentioned above are “wrong”) you’ll be presented with a [Mobility 12] or a [Dexterity 12] check. Failing another check at this point or picking something silly like …fall to his knees and beg for mercy. the encounter will end and you’ll have to fight the Goblin King and the rest of the enemies in the fort (which you’ll have to face anyways).
Should you pass either of the two aforementioned checks you’ll get three more, an [Intimidate 12] check and two [Bluff 11] checks. Pass any one of these checks to end the encounter. While doing this will run off the Goblin King, his crown will be lost in the aftermath, making it the least appealing of the options available.
| Reward: |
|---|
| 270+ XP |
While driving off the Goblin King doesn’t yield much benefit in the upcoming battle, the “Stubborn Head” helmet is a fine prize.
Of the three ways of navigating this encounter, only the first two should be seriously considered, as those are the only options that’ll get you the Stubborn Head. This means you have to get through the Illustrated Book Episode without botching any responses or associated skill checks - an easy enough feat, considering the low difficulty of most of the checks. You’ll also get around 270 XP for driving off the Goblin King, whether you get his crown or not - the actual XP will vary depending on the difficulty of the skill checks you choose.
There is a downside, however - for participating in the Illustrated Book Episode (regardless of the outcome) Nok-Nok will find himself deep within the Goblin King’s fortification, far removed from your party. This is a precarious position, to say the least, and Nok-Nok will probably want to retreat rather than face off against the goblins and the Winter Wolf - the Goblin Shaman’s pet - alone. He’ll have a far better chance of surviving this retreat if he starts the encounter with Haste and Resist Energy (Cold).
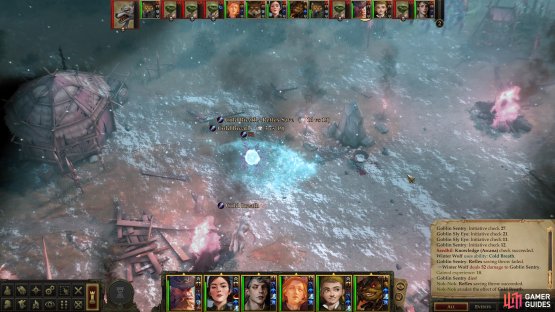
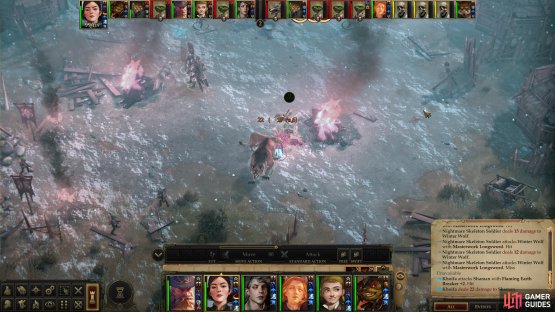
(1 of 2) The Winter Wolf’s breath weapon can deal heavy damage.
The Winter Wolf’s breath weapon can deal heavy damage. (left), Despite the Winter Wolf’s lethality, however, you should try to occupy it with summons. (right)
Battle: Goblin Shaman
Whether you confronted the Goblin King with Nok-Nok or not (and indeed, regardless of whether Nok-Nok succeeded or not) you’ll inevitably end up having to fight the Goblin Shaman. If you brought Nok-Nok along, the Goblin King will hopefully be out of the fight, but Nok-Nok - succeed or fail - will start combat located deep in the Goblin King’s fort, southwest of where your party will start (at the gate). The Goblin King isn’t much of a threat, so his participation is relatively unimportant, and ideally you buffed your party with Haste and Protection from Energy (Cold) before picking a fight, which will make it much easier for Nok-Nok to withdraw to the relative safety of your party, which in turn should advance on the Goblin Shaman.
There are other enemies on the field, including three Goblin Sly Eyes, two Goblin Sentries, the Goblin Shaman’s pet Winter Wolf, and perhaps the Goblin King. Aside from the Winter Wolf, none of them are particularly threatening. The Winter Wolf has a high Armor class and decent Hit Points, and its Attack Bonus is almost as high as some of the Ferocious Owlbears you’ve been fighting. Worse yet is its breath, which can inflict 14d6 cold damage in a cone - you can expect around 50~ damage on average from this attack, and while the beast can’t use it every round, the damage output is high enough that even one such attack can prove troublesome.
(1 of 2) Focus on the Goblin Shaman,
Focus on the Goblin Shaman, (left), otherwise he’ll spend his time summoning enemies. (right)
Despite the danger the Winter Wolf presents, the Goblin Shaman is, if left unattended, even more dangerous. It’ll start out slow with Divine Power, after which it’ll spam summoning spells, first conjuring up several Redcaps, then it’ll spend the next three rounds summoning Dire Wolves. While none of these foes are individually all that powerful, Red Caps have decent staying power due to their Damage Reduction and Dire Wolves can trip. The most dangerous aspect of these summons, however, isn’t their quality - quantity has a quality all its own, and if you’re in doubt of this maxim, a dozen or so Dire Wolves might change your mind.
It’s in your best interest to prevent having to test your mettle against so many foes, so rush the Goblin Shaman, surround him, and strive to bring him down as quickly as possible. The Winter Wolf can be distracted with summons, or you can endure its attacks until the Goblin Shaman falls (Protection from Energy, Communal helps with this). The Goblin Shaman has a high Armor Class (mostly due to its gear), but it’s comparable to Tartuk’s Armor Class, and you’ve certainly put on some levels since then. A round or two of attention and the Goblin Shaman should fall, after which turn your attention to the Winter Wolf, then mop up the peons.
| Reward: For defeating the Goblin Shaman |
|---|
| 270 XP |
(1 of 4) Loot the Goblin Shaman for a variety of treasures, including the “Longshank Spear”, the “Paragon of Virtue” and the “Taldan Spur”.
Shortly after his defeat, the Goblin Shaman will utter some last words, revealing the location of the Womb of Lamashtu - presumably the source of this plague. Before you go run off on some new bout of heroics, loot the area, as there’s plenty of worthwhile treasure to be had. First, of course, you should loot the Goblin Shaman, who will leave behind Longshank Bane, a Breastplate +2, a Belt of Physical Form +4, the Paragon of Virtue ring and a Taldan Spur. Longshank Bane is a Spear +1 with the “Bane” property, acting as a +3 weapon and dealing an additional +2d6 damage against “longshanks”, a category which apparently includes Giants, Humans, Elves and Orcs. The Paragon of Winter Ring will give the wearer (and its summons) cold resistance 30, but will make the wearer vulnerable to fire, taking more damage from that source of damage. A sensible bit of jewelry for a goblin who associates with a Winter Wolf to have.
Next it’s time to loot the area in general. There are five goblin hovels in the area, two to the west (including the king’s hut) and three to the east. Near the northern of the two western huts you’ll find a crate containing 96 GP and some gems. Along the southern side of the king’s hut you’ll find a crate, which is trapped [Perception 22]. Disarm [Trickery 22] the crate and unlock [Trickery 25] it to find a variety of masterwork weapons and a Vest of Hundred Pockets (Studded Leather +2, +5 Trickery). Near the center of the three eastern huts you can find a chest containing a Torag’s Pendant, while near a southern hut you’ll find [Perception 26] a locked [Trickery 24] chest containing Mother’s Care (Kukri +2, +1d6 cold damage, expanded critical threat range), an excellent new weapon for Nok-Nok
The Bloom Begins
Gather your battle-won spoils, then return to Kesten’s camp. Or rather, to the Goblin palisade just east of it (you can use the slope near the escaped prisoners to get there faster). Do yourself a favor and stock your spellbooks in a way that favors amplifying brute force, which, by necessity, includes survivability. All the standard personal buffs should be duplicated enough to protect all your front-liners, including, perhaps the unusual step of stocking up on Stoneskins and Haste. You’ll be fighting a host of nasty critters soon, and you’ll need the force multiplier these spells grant. Glitterdust will also once again prove its worth, as well.
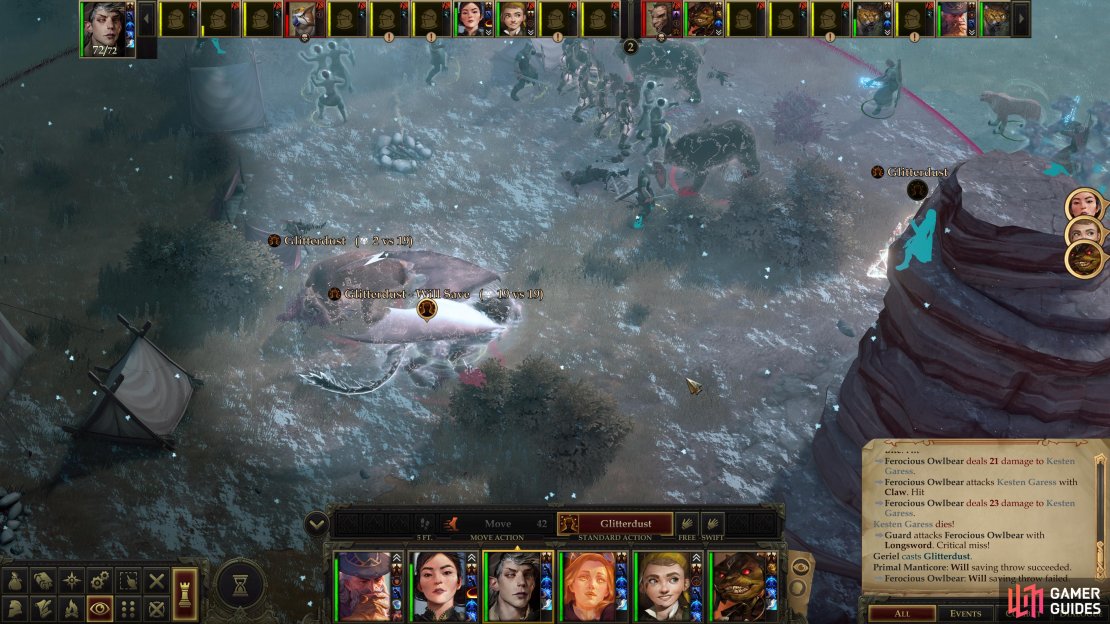
(1 of 3) Spells like Glitterdust will help blunt the beast’s offense.
Once you’re rested up, make your way to the camp, where the prisoners you saved from the goblins will start to… bloom. The seeds in them will summon a variety of randomly generated monsters, possibly including Primal Manticores, Ferocious Owlbears and/or Ferocious Wyverns. All beasts you’ve fought before, and ones that can do a bit of damage if you’re sloppy or unlucky. Fortunately for this fight you have plenty of guards and prisoners to distract them, which should limit the amount of punishment you endure, especially if you are patient and ensure the monsters engage NPCs before you attack them yourself.
This fight can be brutal, or merely somewhat more difficult than average, depending on your actions in this area. If you didn’t gawk as captives were force-fed potentially plague-bearing water, you may only have to fight three Ferocious Owlbears and a Primal Manticore. Sturdy foes, but with Kesten’s guards around to draw their attention (and perhaps a few batches of summoned skeletons and the odd Glitterdust) you should prevail with some ease. If, on the other hand, you allowed people to get infested, you’ll have considerably more monsters Bloom into existence. It might seem like a minor change, but with heavy-hitters like Ferocious Owlbears, an additional enemy or two can have a massive impact on the difficulty of the battle.
If you end up fighting more foes, the same strategies largely apply - use Glitterdust to make your foes less dangerous, and summon disposable critters to occupy them while you concentrate your fire on as few targets as possible to thin the enemy numbers. If that doesn’t suffice, debuffs like Grease, Hold Monster and Constricting Coils may prove useful, as the enemies you’ll be facing have relatively low Will Saves and, to a lesser extent, Reflex Saves. Anything that challenges Fortitude Saves, however, are likely to be less effective. One exception is Stinking Cloud, which can inflict nausea; it’s not likely to work often, but summoned skeletons are immune to it, and if they can hold enemies in the spell’s effect for a while, your chances of debilitating those enemies will increase.
| Reward: For rescuing Kesten… again. |
|---|
| 180 XP |
Win the fight then talk to Kesten who will give you more bad news. Normally the disease - the Bloom - progresses in a predictable manner, but this time the infected triggered simultaneously. It wasn’t all that long since you saw the goblins forcing the prisoners to drink, after all. If the Season of Bloom began, as the Goblin Shaman claimed, then the scene at this camp possibly may repeat at every concentrated pocket of civilization in your barony, including your capital. Tuskdale is in danger, and specifically Jhod, who directly deals with the infected at his clinic, but you can’t just ignore the source of this infection - the Womb of Lamashtu, which can be found upriver.
Kesten will insist on searching for this “Lamashtu’s Womb” once he hears about it, suggesting you return to the capital and save the people - including Jhod - who may be dealing with a nightmare scenario. He will not be dissuaded from this task, and left alone, Jhod and Kesten are both in mortal peril. The only way you can save both characters is if your protagonist is some variety of Lawful, you can pick the corresponding [Lawful] dialog option to restrain him and convince him to help relieve the capital.
If you can’t manage this, Kesten will leave to go deal with the monsters at the Womb of Lamashtu, even though he acknowledges that Jhod is likely dead if you follow him. On the other hand, if you leave Kesten alone with whatever dwells in the Womb of Lamashtu, his odds of survival are grim, too. Yes, he’s being an idiot, and forcing you to choose between returning to the capital and helping Jhod fend off the monsters that certainly erupted due to the Bloom, and immediately traveling to the Womb of Lamashtu to ensure Kesten survives.
Make what choice you will, if indeed you must make such a choice at all. We’ll cover the events at the capital in the following page, The Bloom in Tuskdale, which is where you’ll need to go if you want to save Jhod or you convinced Kesten to return there. After that we’ll discuss the Womb of Lamashtu, where you should head first if you prefer to keep Kesten alive.





I don't know if it was changed or if I had some bug or whatnot but I did not kill any of the prisonner and only had to fight 3 wyverns and 1 manticore, no owlbears at the end.