
Basically a “how-to” quest for kingdom management, it’ll start at the beginning of Chapter 2 and update as you reach various kingdom-related milestones. You won’t really actively attempt to complete most of these objectives, as they should happen organically, as you do other, more important quests, but it’s still informative to go over the objectives as they appear:
Assign characters to various advisor positions.
Appoint an advisor to a public post
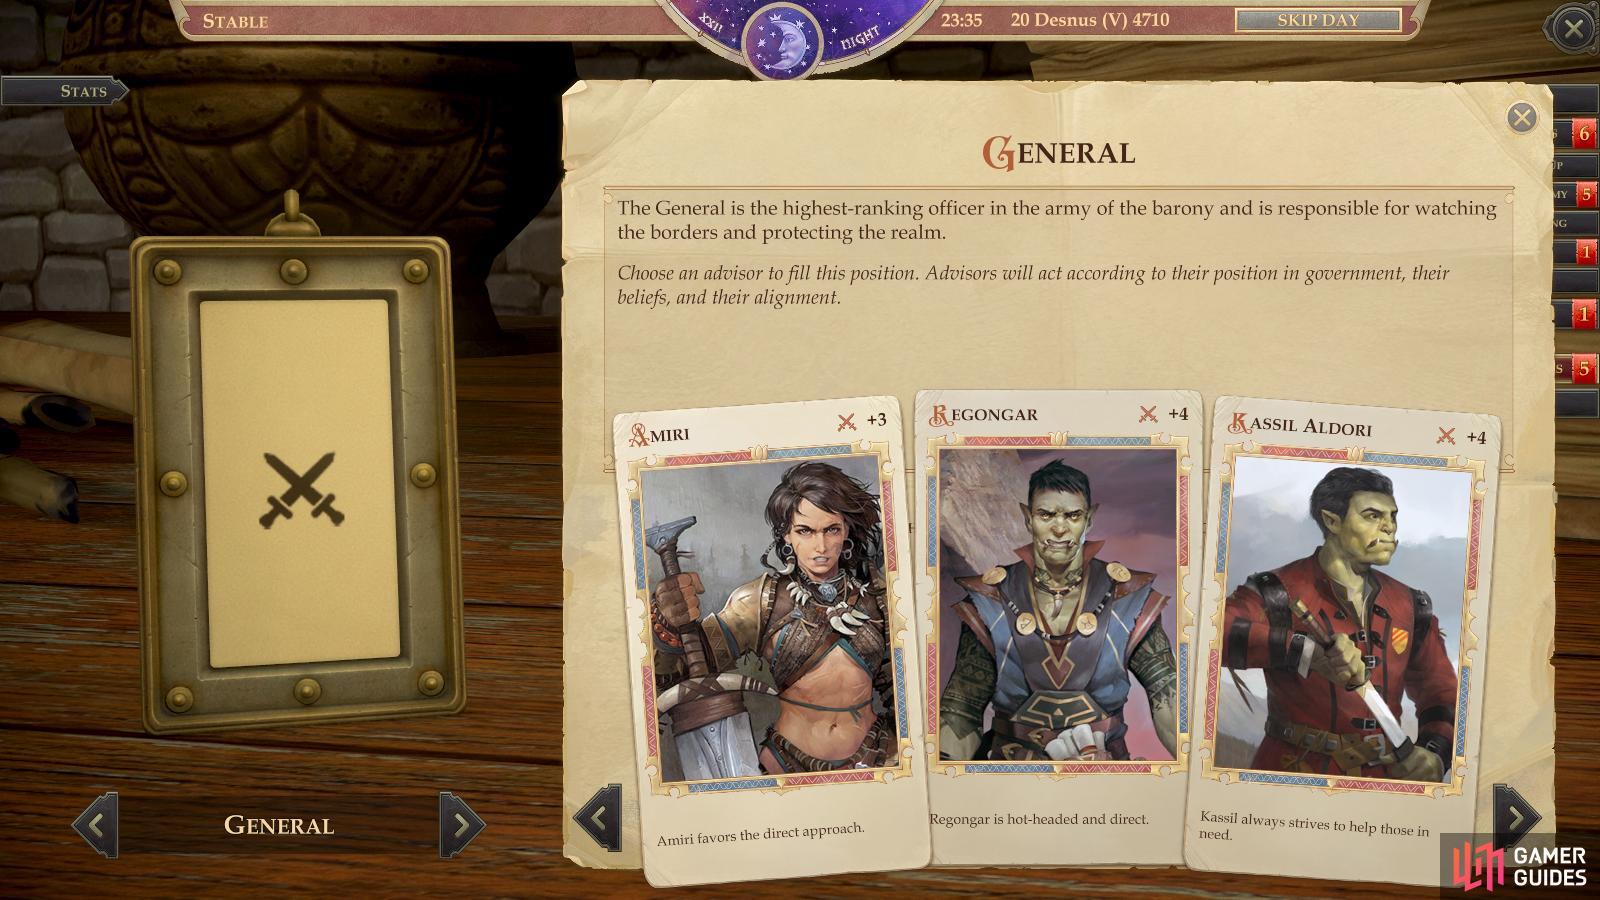
You’ll start out with five primary advisor positions when your barony is founded in Chapter 2 (although you may not have enough qualified advisors to fill them all yet). Each advisor represents a different Kingdom Stat: Regent (Community), Councilor (Loyalty), General (Military), Treasurer (Economy) and High Priest (Divine).
To assign an advisor, open up your kingdom map, click on the “Advisors” tab, then click on one of the portraits to bring up a list of characters you can assign to that role. Assigned advisors will be responsible for carrying out projects and dealing with events related to their position. Different characters are capable of serving various roles in your barony:
| Character | Advisoral Roles |
|---|---|
| Amiri | General |
| Bartholomew | Diplomat, Treasurer |
| Ekundayo | Minister, Warden |
| Harrim | High Priest |
| Jaethal | Curator, Minister |
| Jhod | High Priest |
| Jubilost | Minster, Treasurer |
| Kanerah | Treasurer |
| Kassil | General |
| Kesten | Warden |
| Lander | Regent |
| Linzi | Curator, Diplomat |
| Maegar | Treasurer |
| Octavia | Magister, Regent |
| Regongar | General, Warden |
| Shandra | Councilor |
| The Storyteller | Curator, Magister |
| Tristian | Councilor |
| Tsanna | Councilor, High Priest |
| Valerie | Diplomat, Regent |
| Vordakai | Magister |
Increase the Rank of any Barony’s stat
As events and projects are successfully completed, your Kingdom Stats will improve (failure and complacency can also lead to decreases in Kingdom Stats!). Typically the advisor assigned to deal with an event will determine the outcome - if you assign your General to deal with a problem, you can expect to gain Military from it, while the Regent would gain Community.
All Kingdom Stats start out at Rank I, but every time the stat gains 20 Kingdom Points, they’ll be eligible for a rank up (Rank II at 20 points, Rank III at 40 points, etc.). Once you’re eligible for a rank up, you’ll get a Support the [Advisor]’s Endeavors project in the “Rank Up” tab of your kingdom management screen. This will take your protagonist and the chosen advisor two weeks to complete, during which time will skip forward and you won’t be able to engage in any other business. Once the time is up, however, that Kingdom Stat will have ranked up, increasing the advisor’s proficiency at resolving events, and potentially unlocking new advisor positions…
Rank up your Kingdom Stats and eventually your advisors will ask you to delegate some of their responsibilities to others.
Unlock any Secondary Stat of your Barony
In addition to the five primary advisor positions, there are an additional five positions that will unlock as you rank up your Kingdom Stats:
| Advisoral Role | Kingdom Stat | Governing Attribute | Unlocked By |
|---|---|---|---|
| Regent | Community | Charisma | Chapter 2 Start |
| Councilor | Loyalty | Wisdom | Chapter 2 Start |
| General | Military | Strength | Chapter 2 Start |
| Treasurer | Economy | Intelligence | Chapter 2 Start |
| High Priest | Divine | Wisdom | Chapter 2 Start |
| Magister | Arcane | Intelligence | Divine Rank IV |
| Warden | Stability | Constitution | Military Rank IV |
| Curator | Culture | Charisma | Loyalty Rank IV |
| Minister | Espionage | Dexterity | Relations Rank IV |
| Grand Diplomat | Relations | Charisma | Community Rank IV |
Hitting Rank IV in Community, Loyalty, Military and Divine will unlock the Grand Diplomat, Curator, Warden and Magister advisor roles. The Minister is the sole third-tier advisor role in the game, requiring you to hit Rank IV in Relations (Grand Diplomat). Suffice to say, you probably won’t be unlocking any secondary roles until midway through Chapter 2, at the earliest.
Select your capital on the kingdom map,
and enter the settlement overview screen, from which you can build new structures.
Begin construction of a new building in the capital
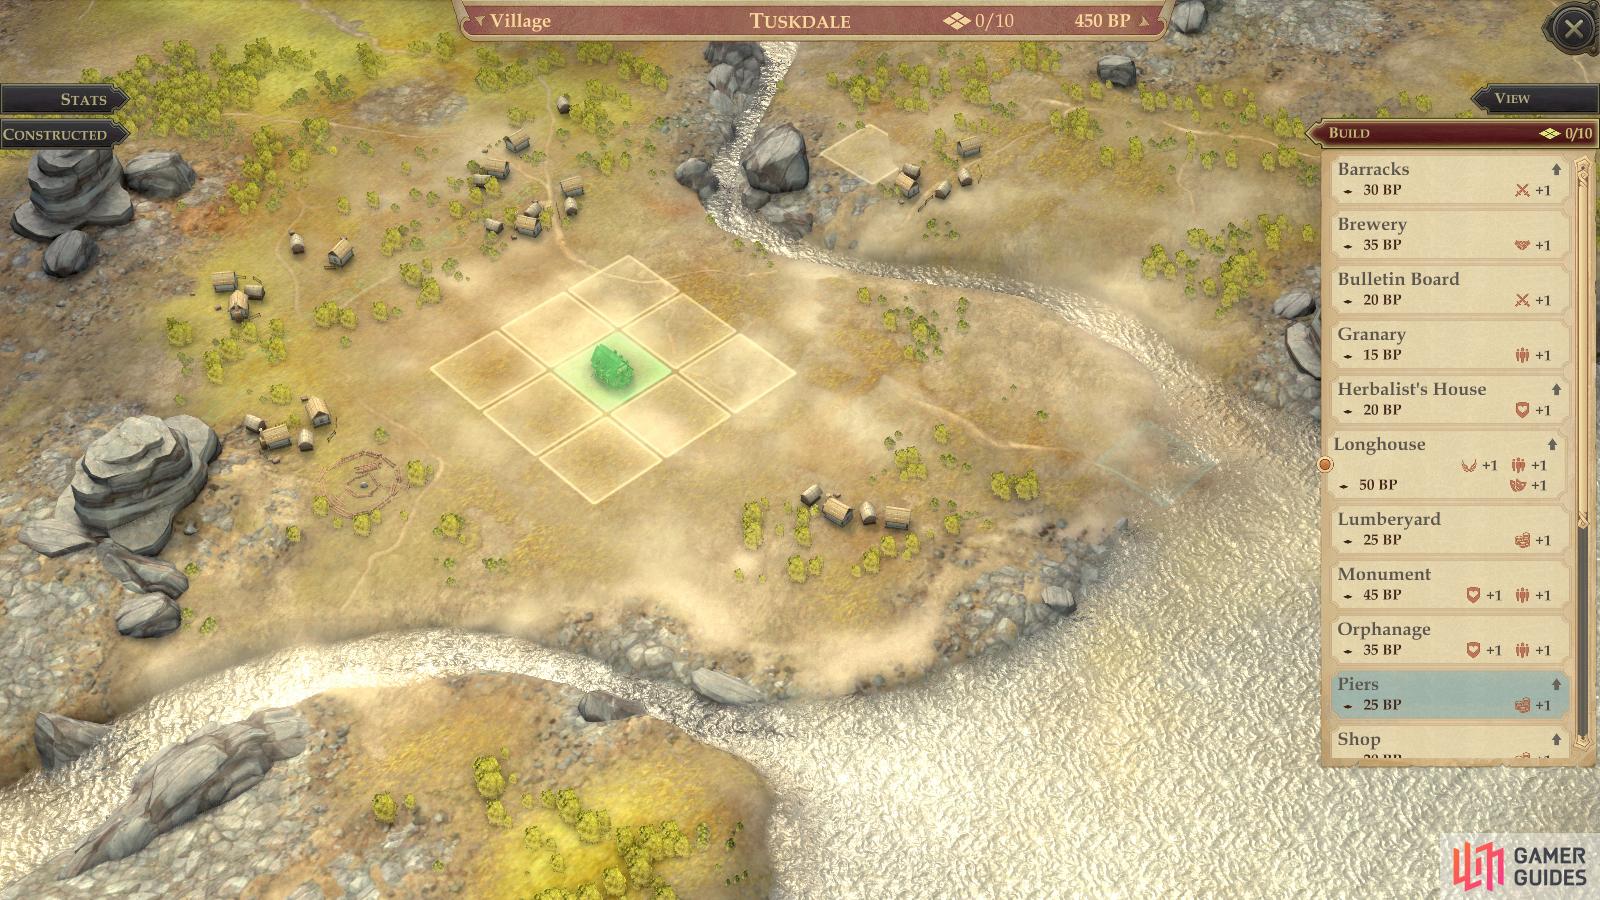
To construct a building in your capital, bring up your kingdom map, click on the icon for your capital, then select the “enter” option. This will bring up the building overview of your capital, and building structures in any settlement works the same way - you just click on the selected village to enter it.
Once on the building overview screen you’ll see a grid where you can place buildings. Pick the “Build” option on the upper right of the screen to expand a list of buildings that you can construct in this settlement, pick one, and place it on any open space in the grid.
Occupy eight slots on the capital grid
Same as above, save you need to construct eight buildings… or rather, construct enough buildings to fill up eight building slots (some higher-tier buildings require one than one open grid square).
Assign and advisor and expend the time and resources,
to claim the Outskirts region.
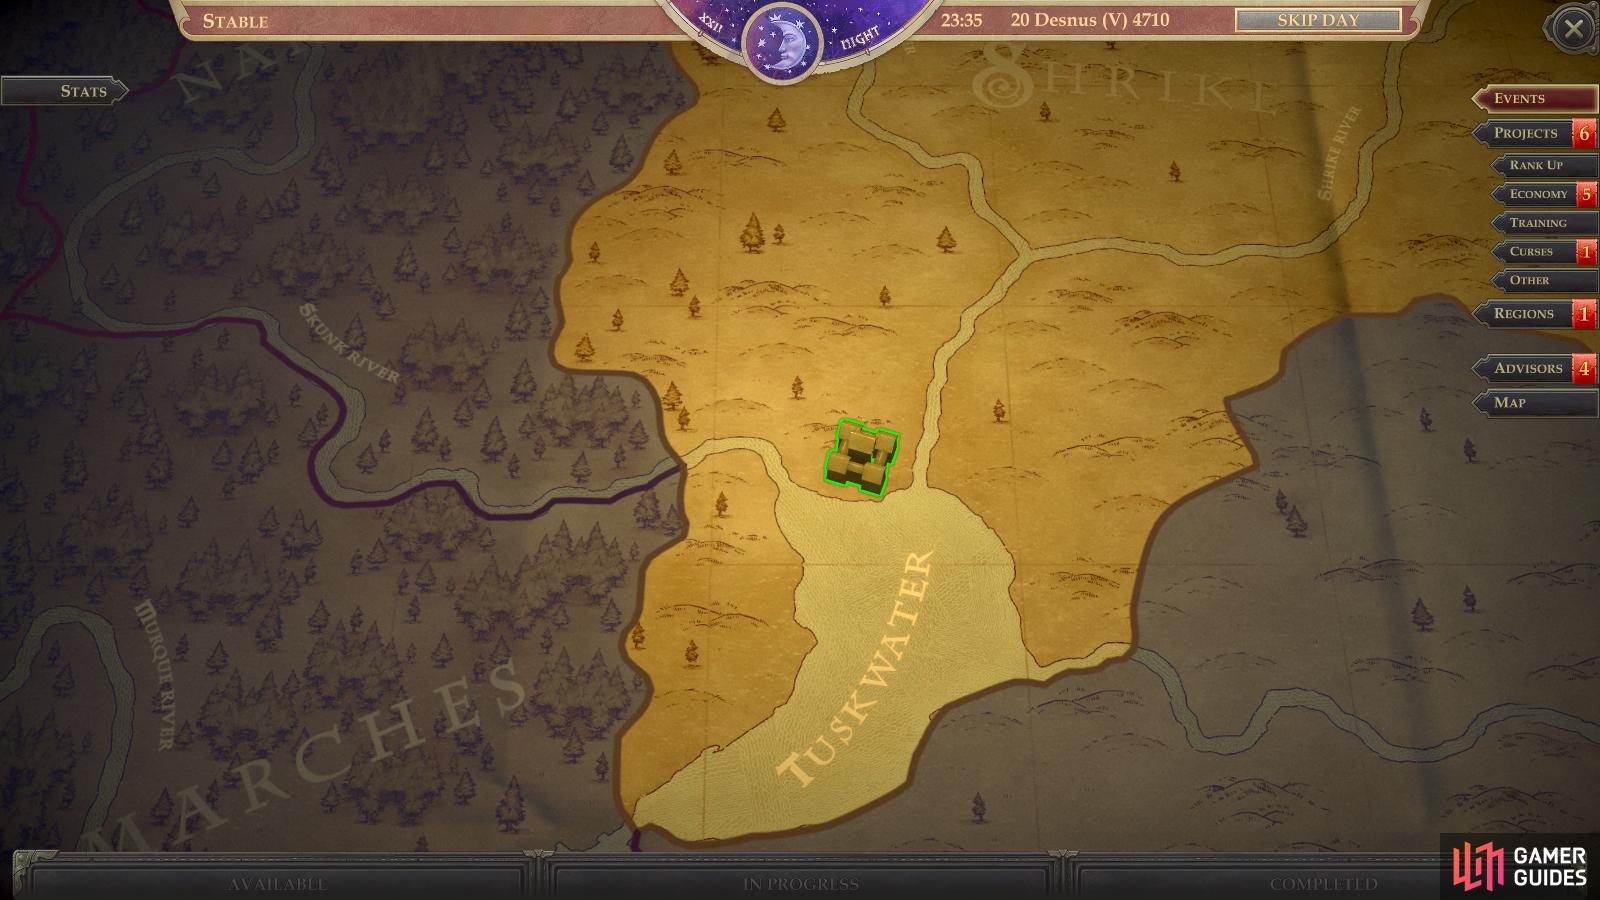
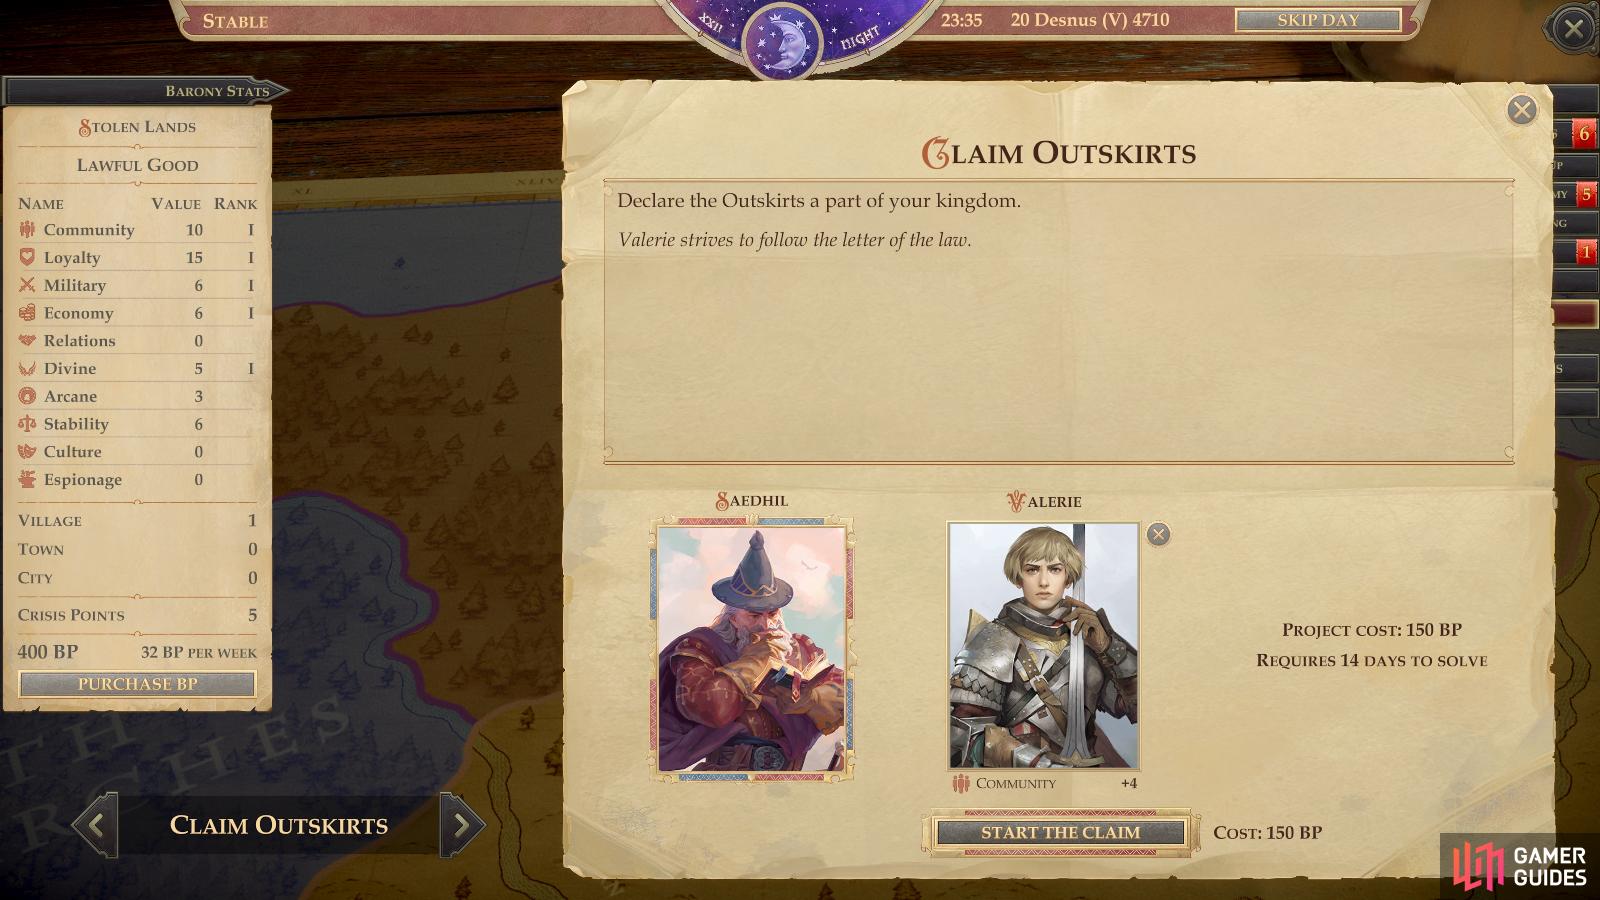
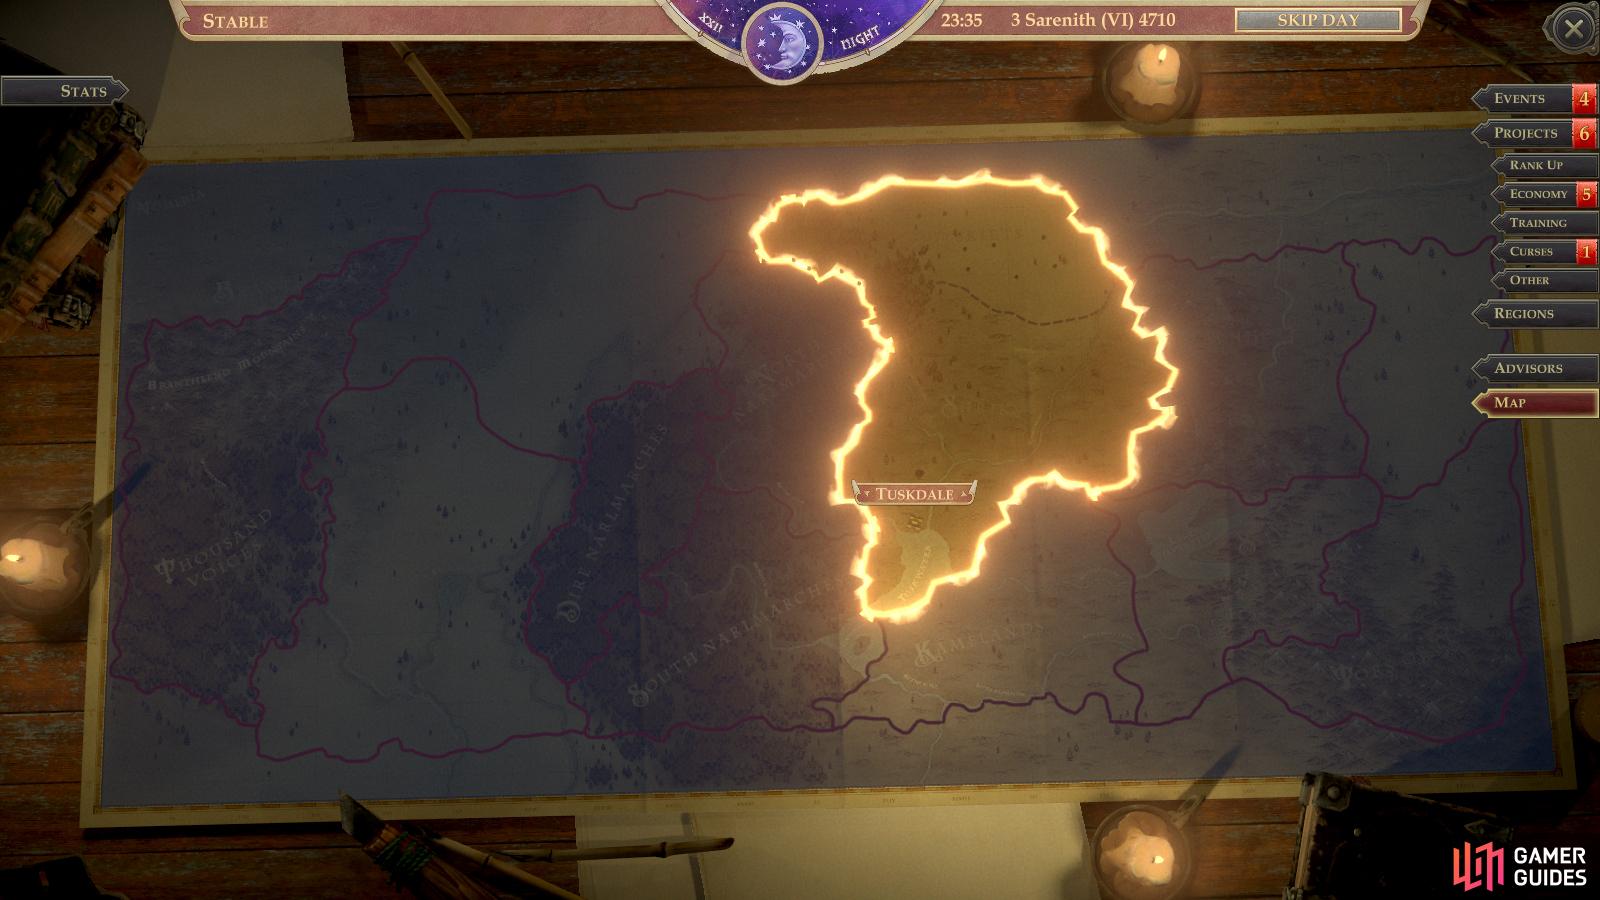
Add the Outskirts to the barony
Near the start of Chapter 2 you’ll unlock the “Claim the Outskirts” project, which you can find under the “Regions” tab of your kingdom map. This will set you back 150 BP (Build Points) and take your protagonist and another advisor two weeks of time to resolve. Just like with rank up events, time will skip forward while you’re claiming a region, preventing you from engaging in any other activities.
Claiming new regions will give you access to events (Problems and Opportunities) in those regions, which you can use to gain Kingdom Stats faster. You can also build one settlement per region, which can attract artisans to your service, not to mention allow you to construct buildings which will directly boost your Kingdom Stats. You also gain a permanent boost to the amount of Build Points you accrue each week every time you claim a new region.
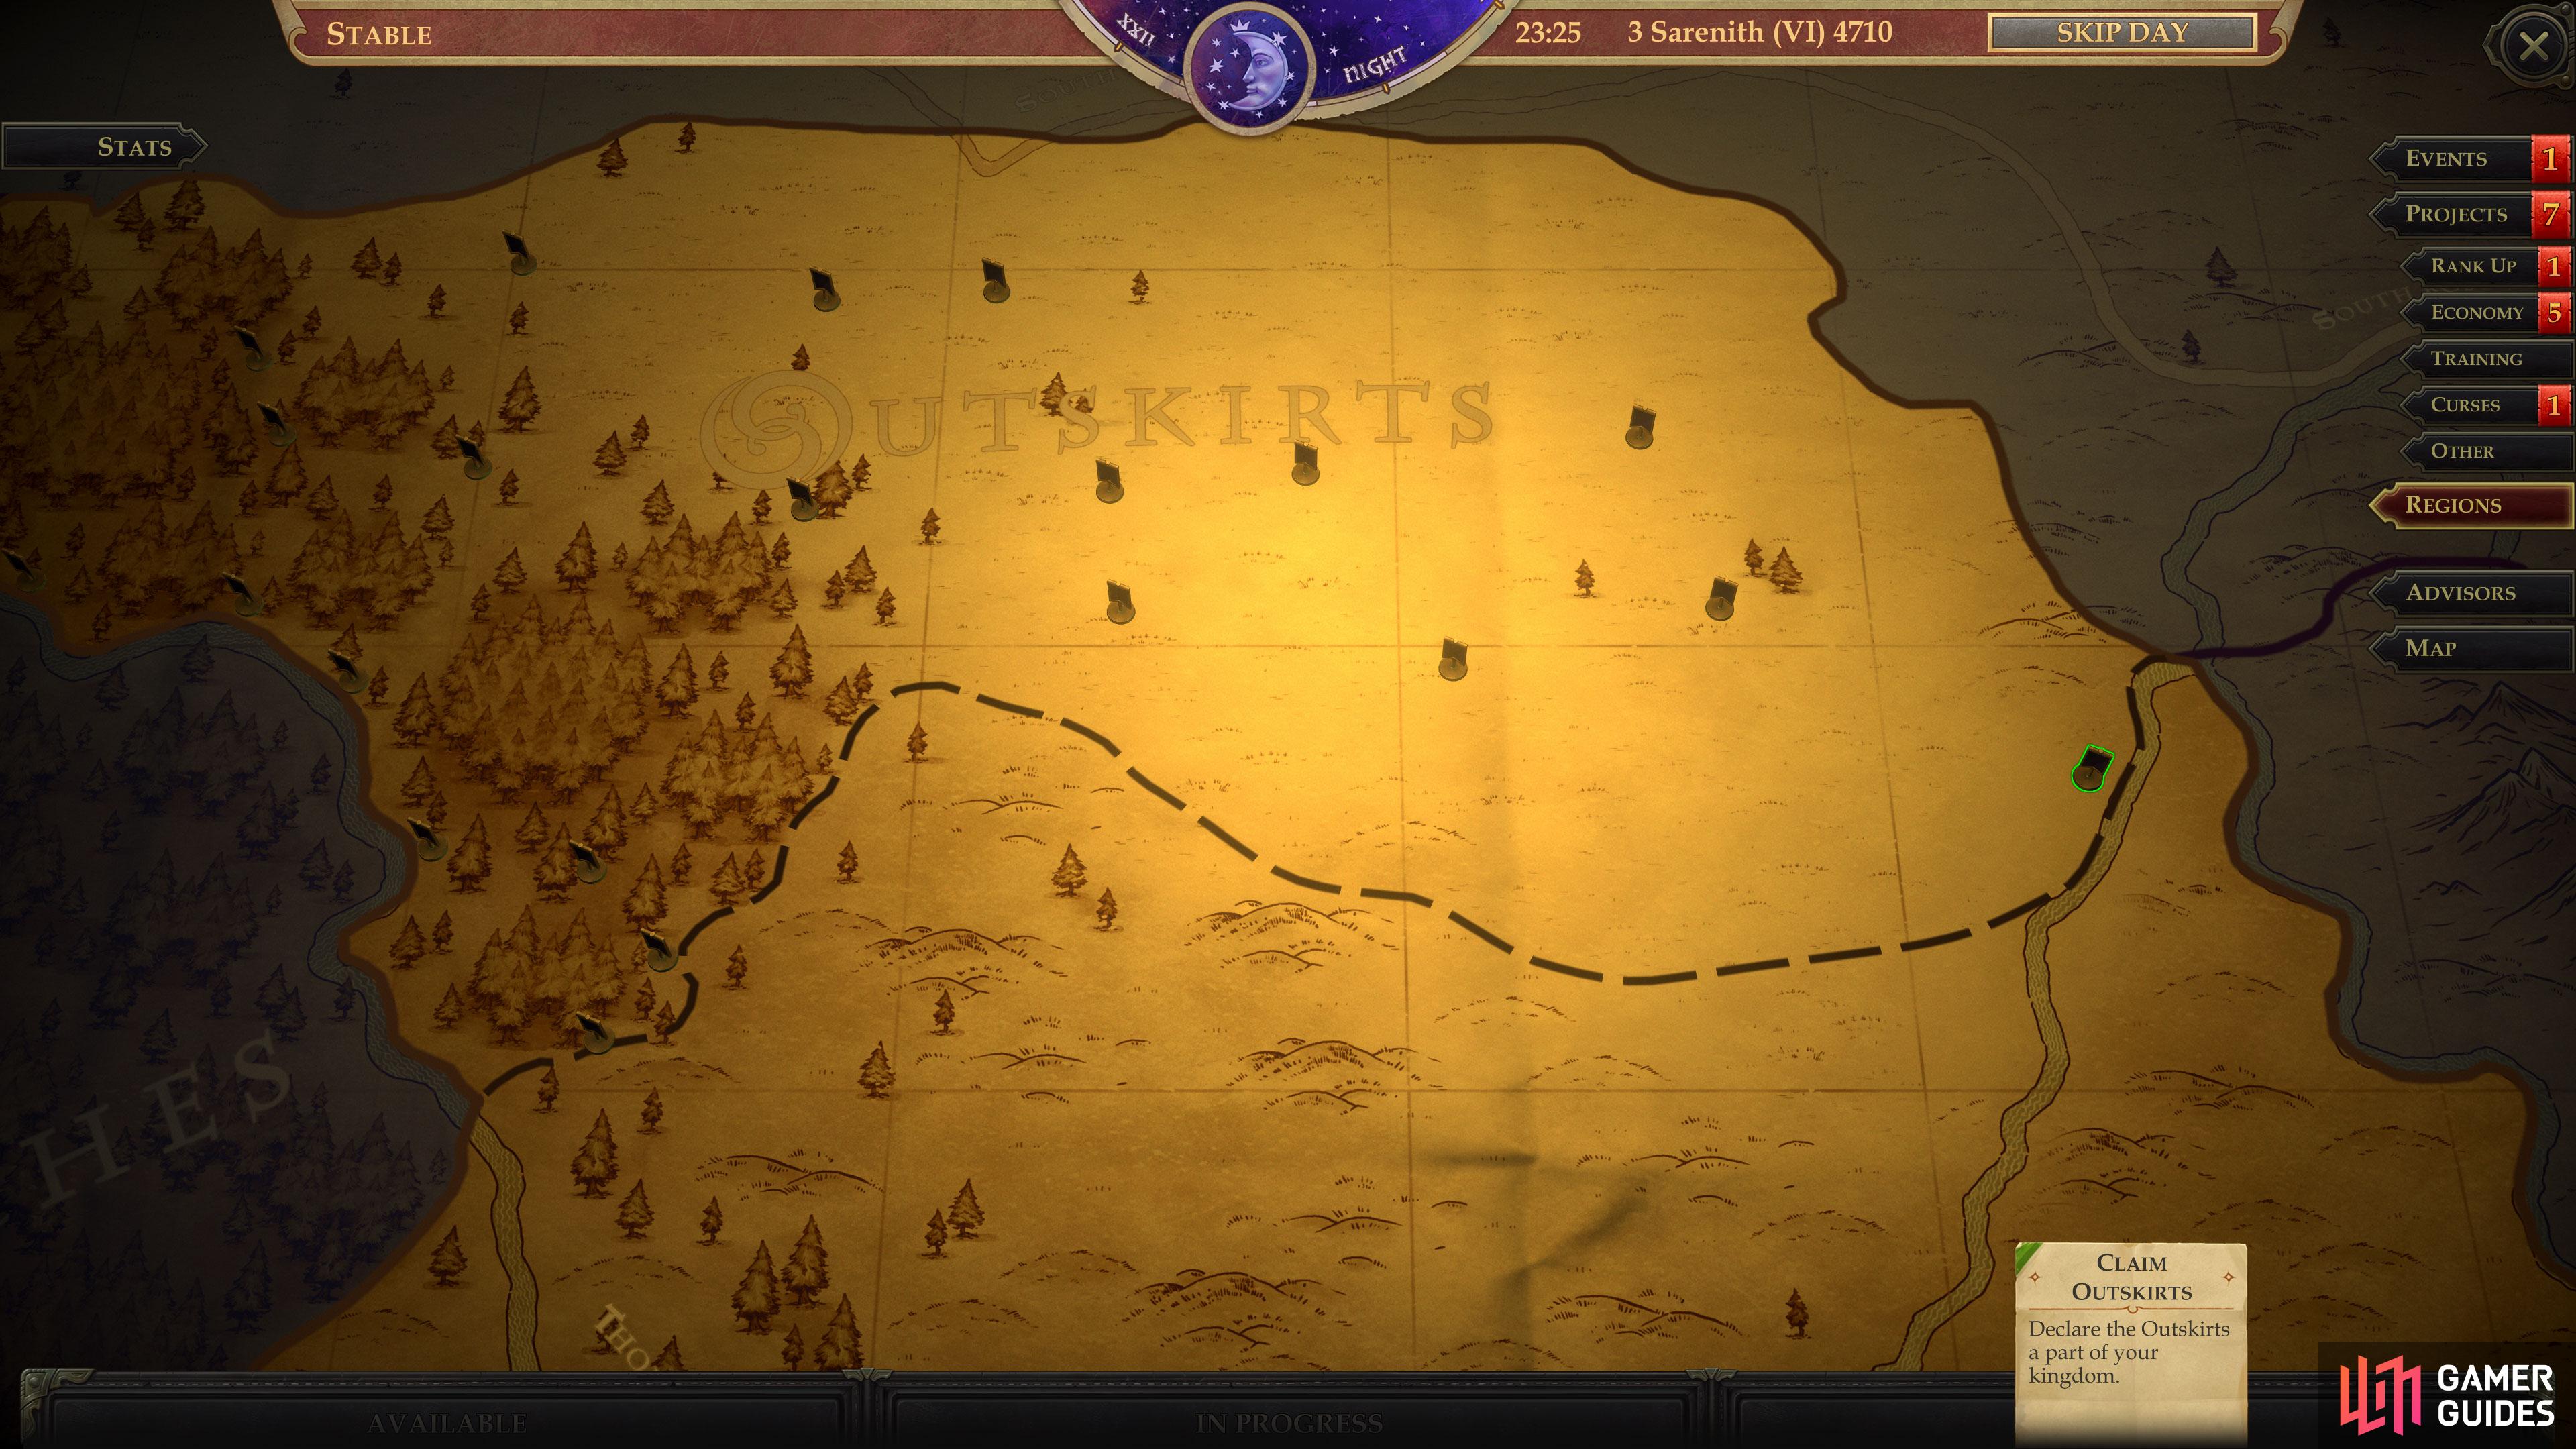
On your kingdom map you’ll find icons indicating where you can found new settlements.
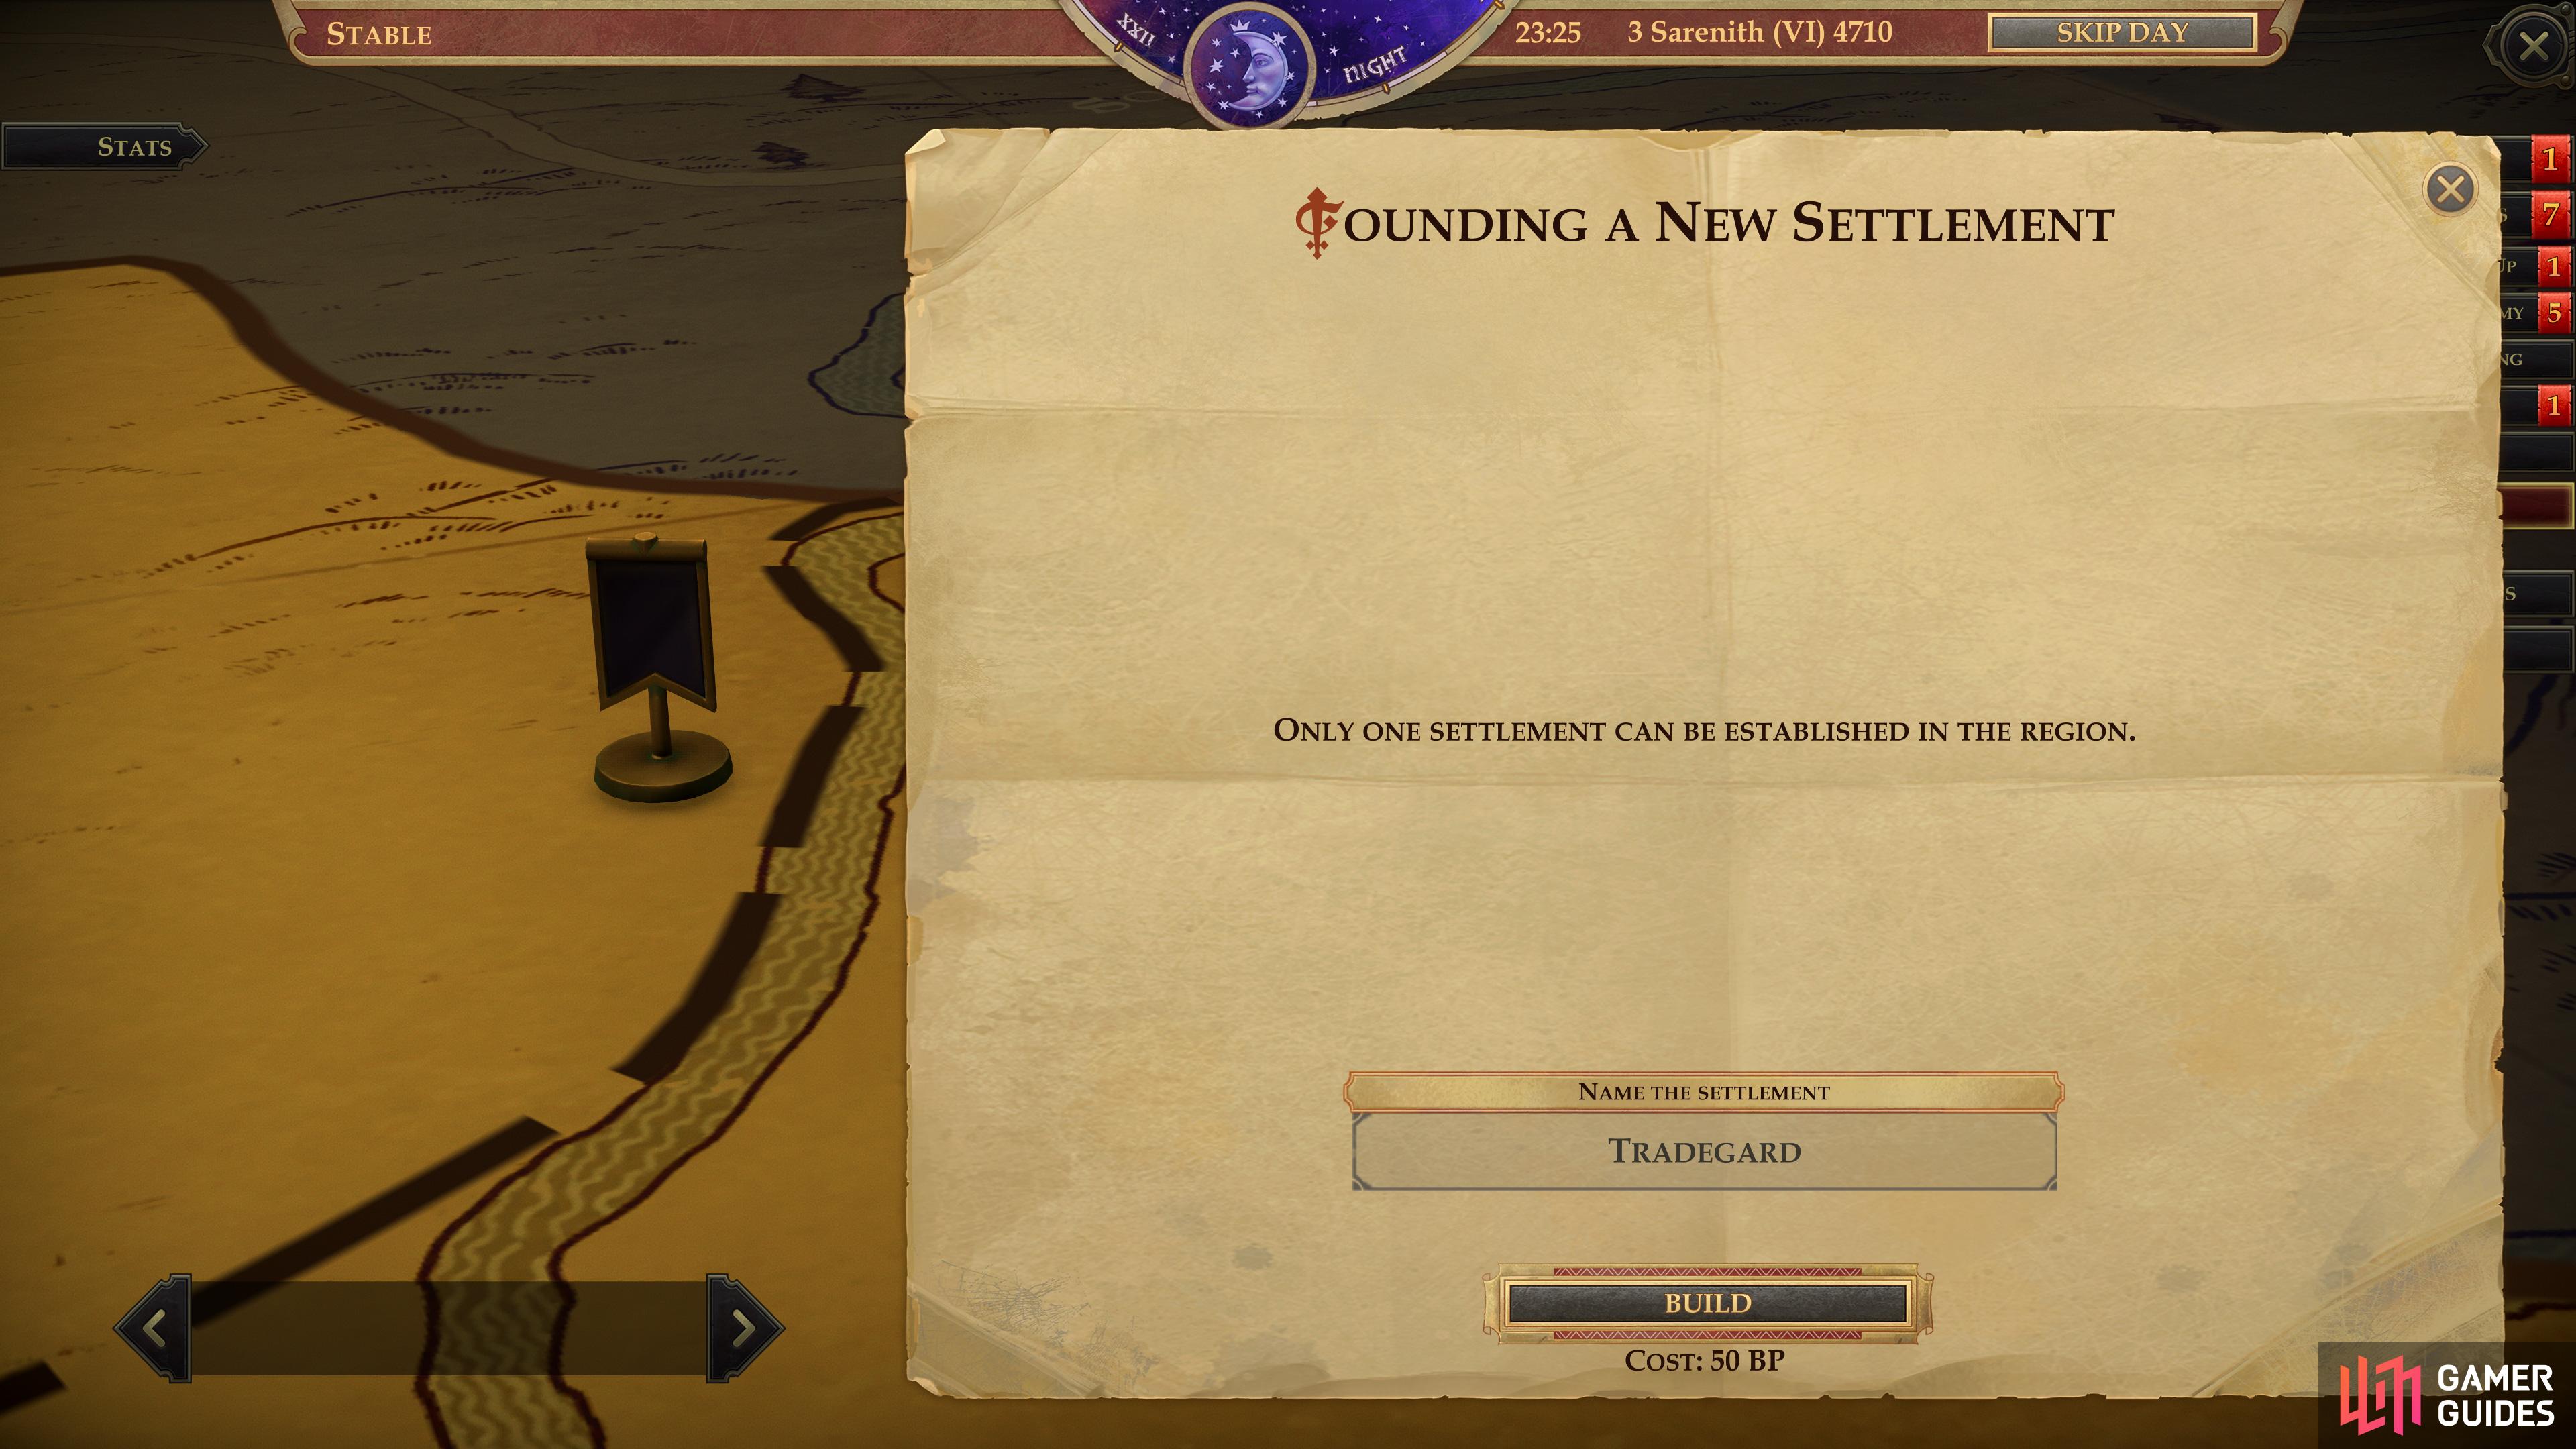
Pick one such icon and you’ll be prompted to name your new village.
Found a new village on the Outskirts
After you claim the Outskirts (see above) you can found a village in that territory. Just go to your kingdom map and scroll up to the Outskirts region and you should see numerous icons scattered across the map, showing potential sites for your village. The geography of your village will change somewhat trivially depending on where you place it (settlements near rivers and lakes have building spots for water specific structures, inland settlements may have more normal building spots), but it really doesn’t matter too much where you found your village. Pay the 50 BP to found a village to satisfy this objective - any other building is extraneous to it.
Found a new village
Same as above, save you’ll have to wait until you claim a new region. The first new region you’ll claim is the Southern Narlmarches, which will become available after finishing the Troll Trouble main questline. The process is otherwise identical to claiming and founding a new village in the Outskirts.
Resolve ten events
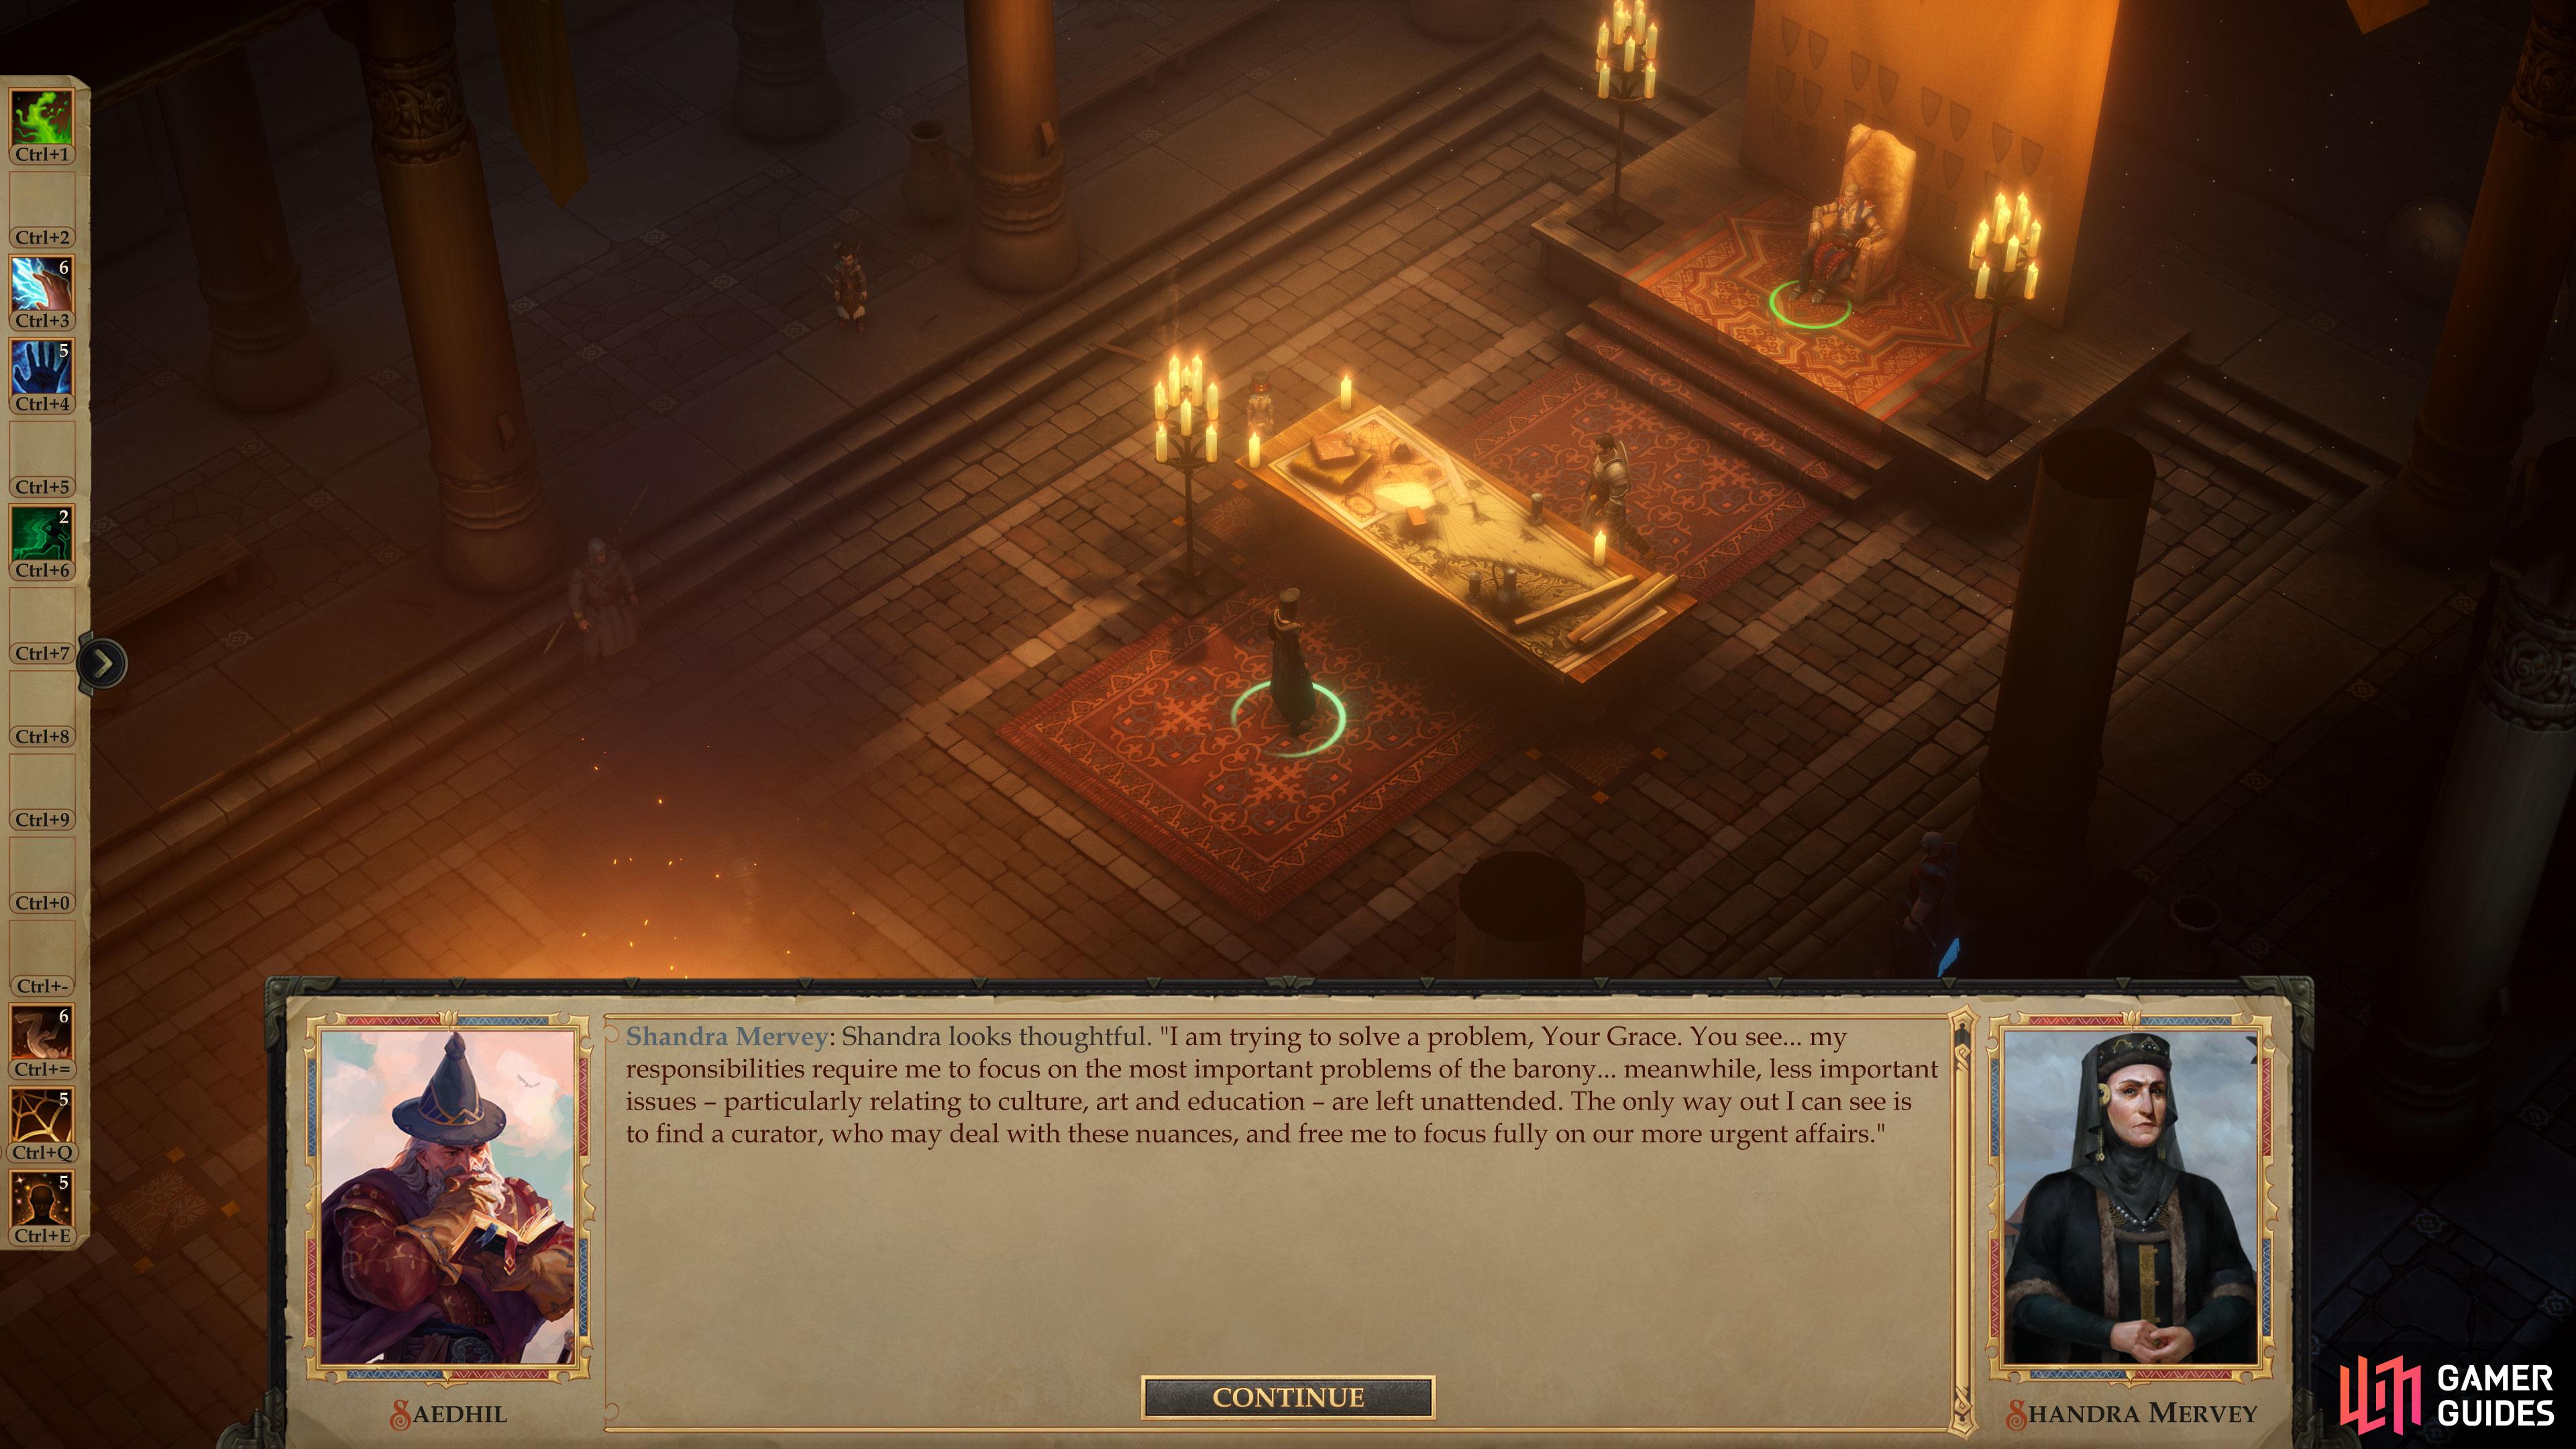
Events come in two forms, “Problems” and “Opportunities”, and a random number of them will pop up at irregular intervals as time passes. You can find all currently active events in the aptly named “Events” tab on your kingdom management screen. If neglected too long, Events will expire, typically at the end of each month. Not surprisingly new Events tend to pop up at the start of each month. Generally you should just check your kingdom management map every few in-game days if possible to see if any new Events are available.
Ignoring Opportunities will only deprive you of the benefit you’d otherwise gain from resolving said Opportunity, but if you neglect a Problem you may lose Kingdom Stat points, so if you have to choose between the two, favor resolving Problems.
Regardless of which you resolve, once you complete ten Events you’ll complete this objective, which will probably occur naturally after 3-4 in-game months.
After founding three villages, your capital will be able to expand to a town.
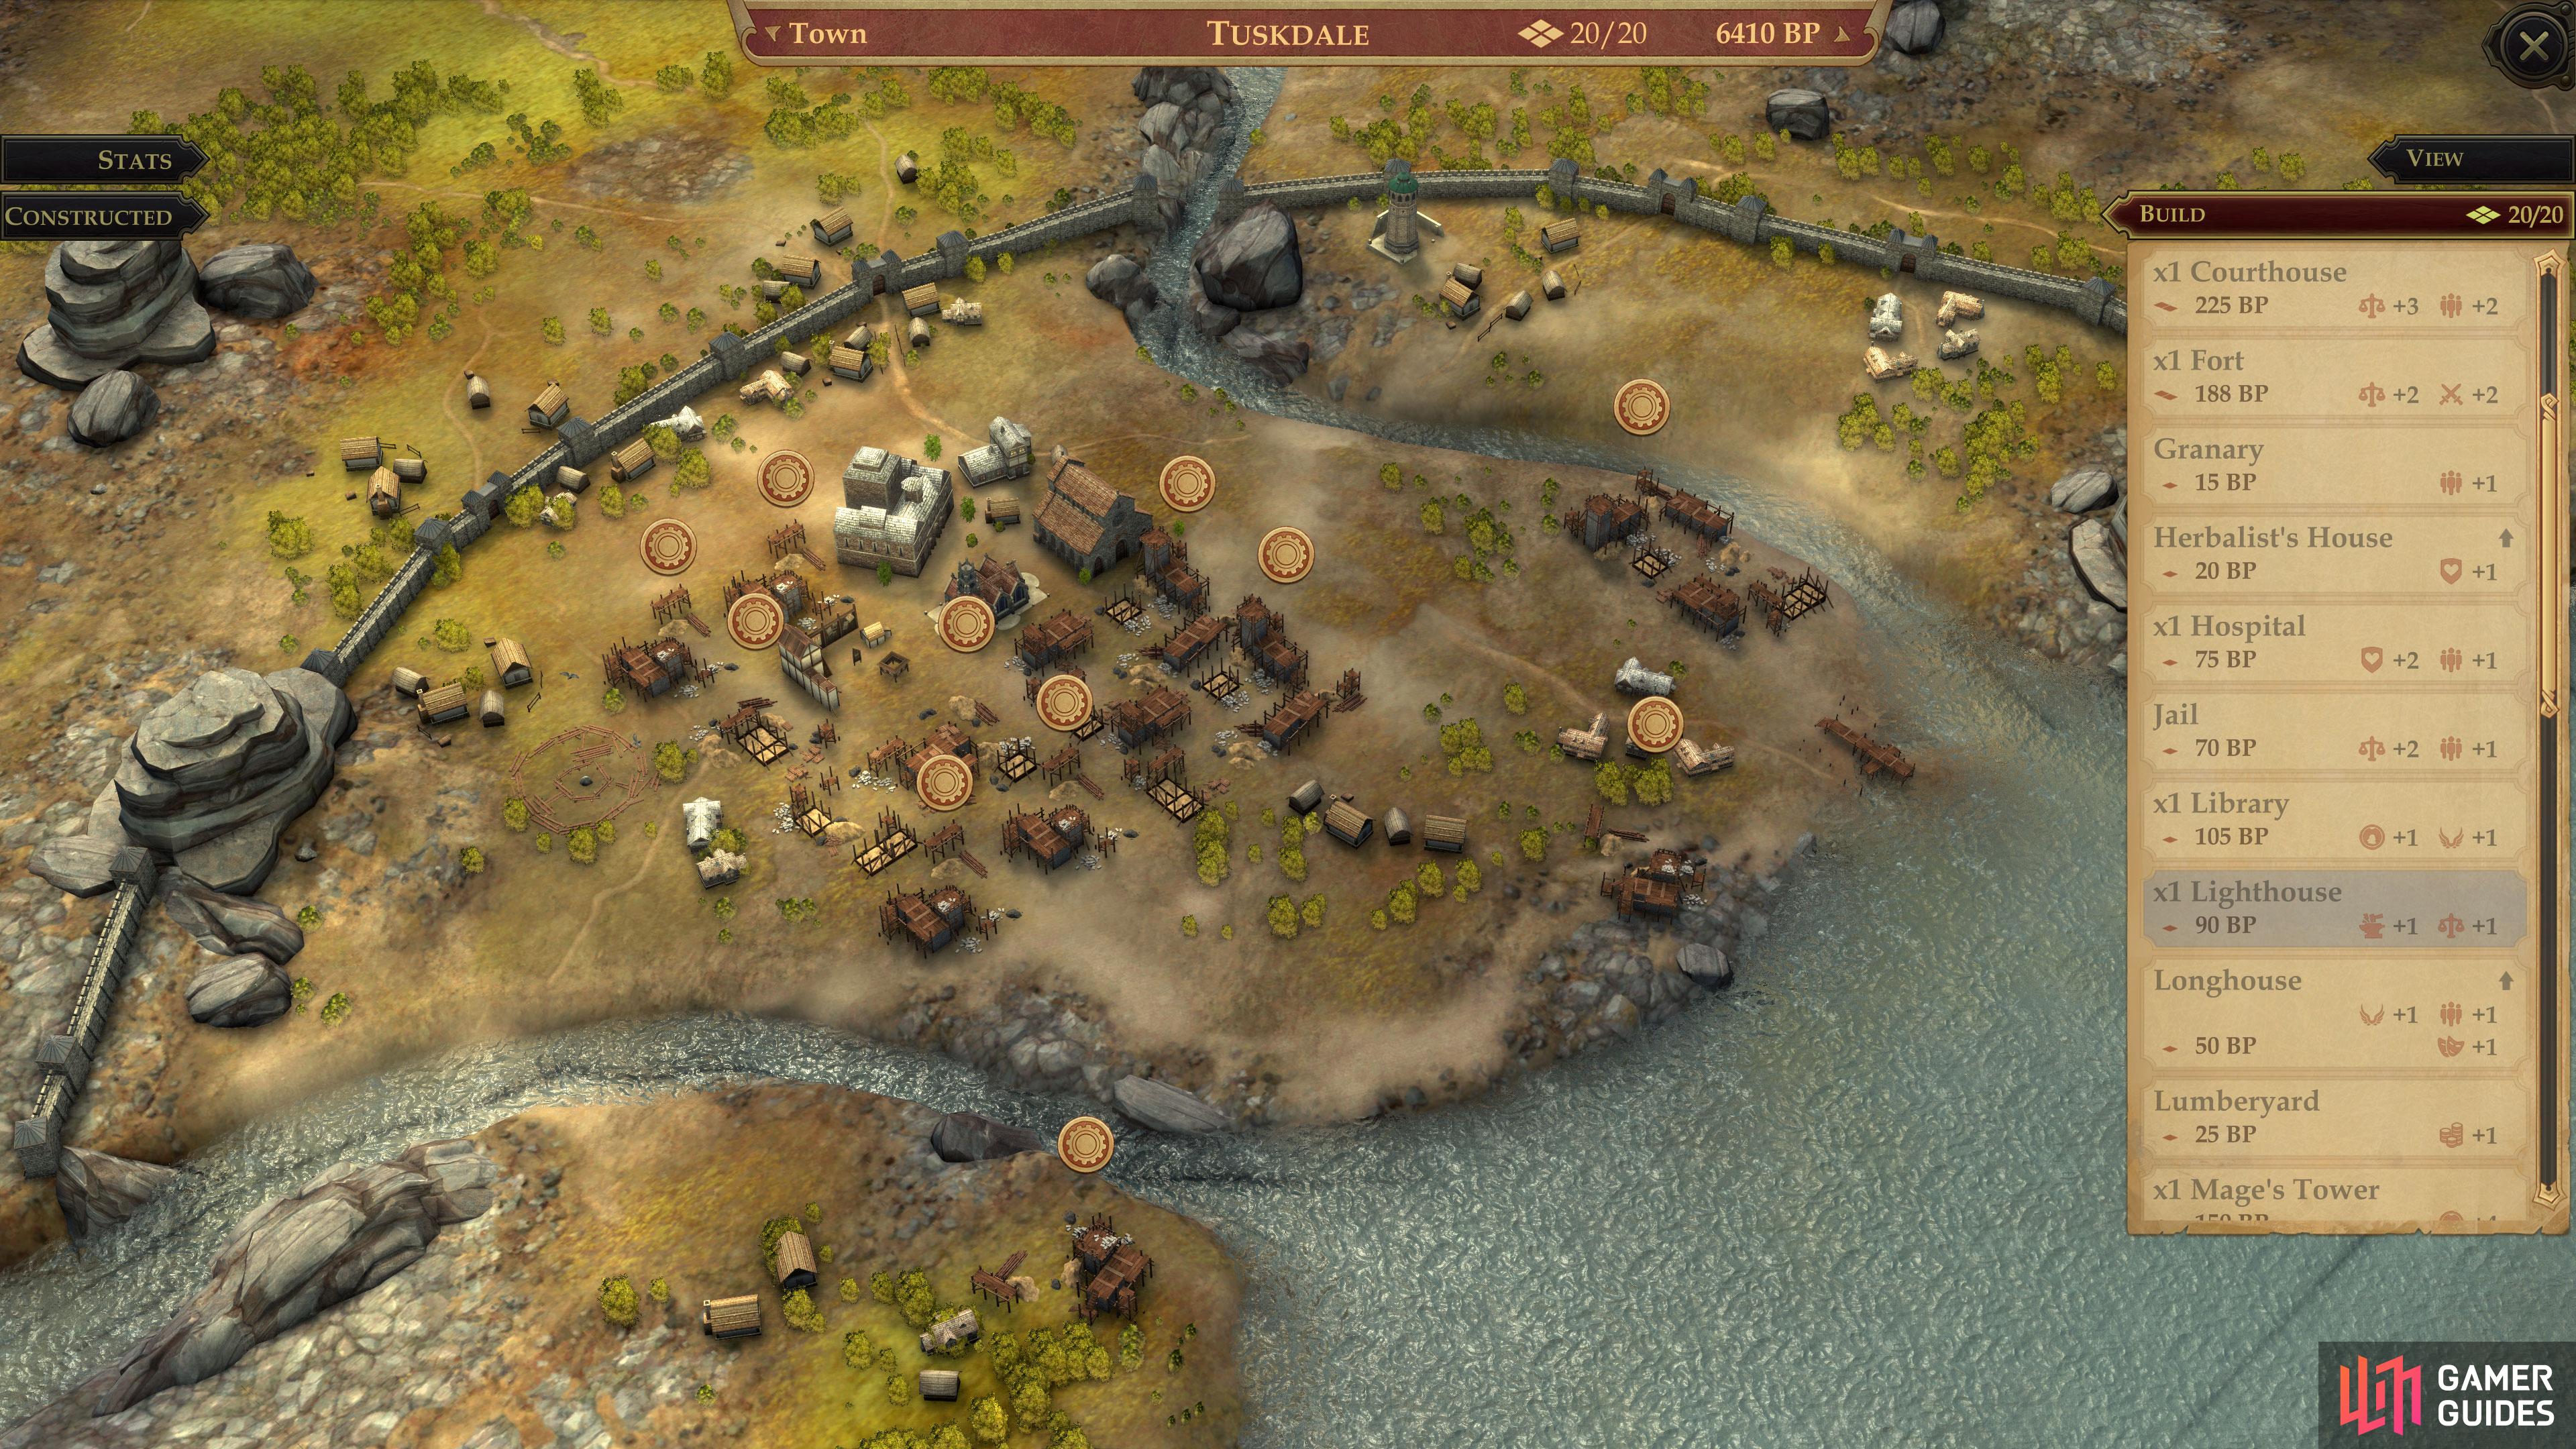
This gives you new building slots, and more advanced buildings to construct.
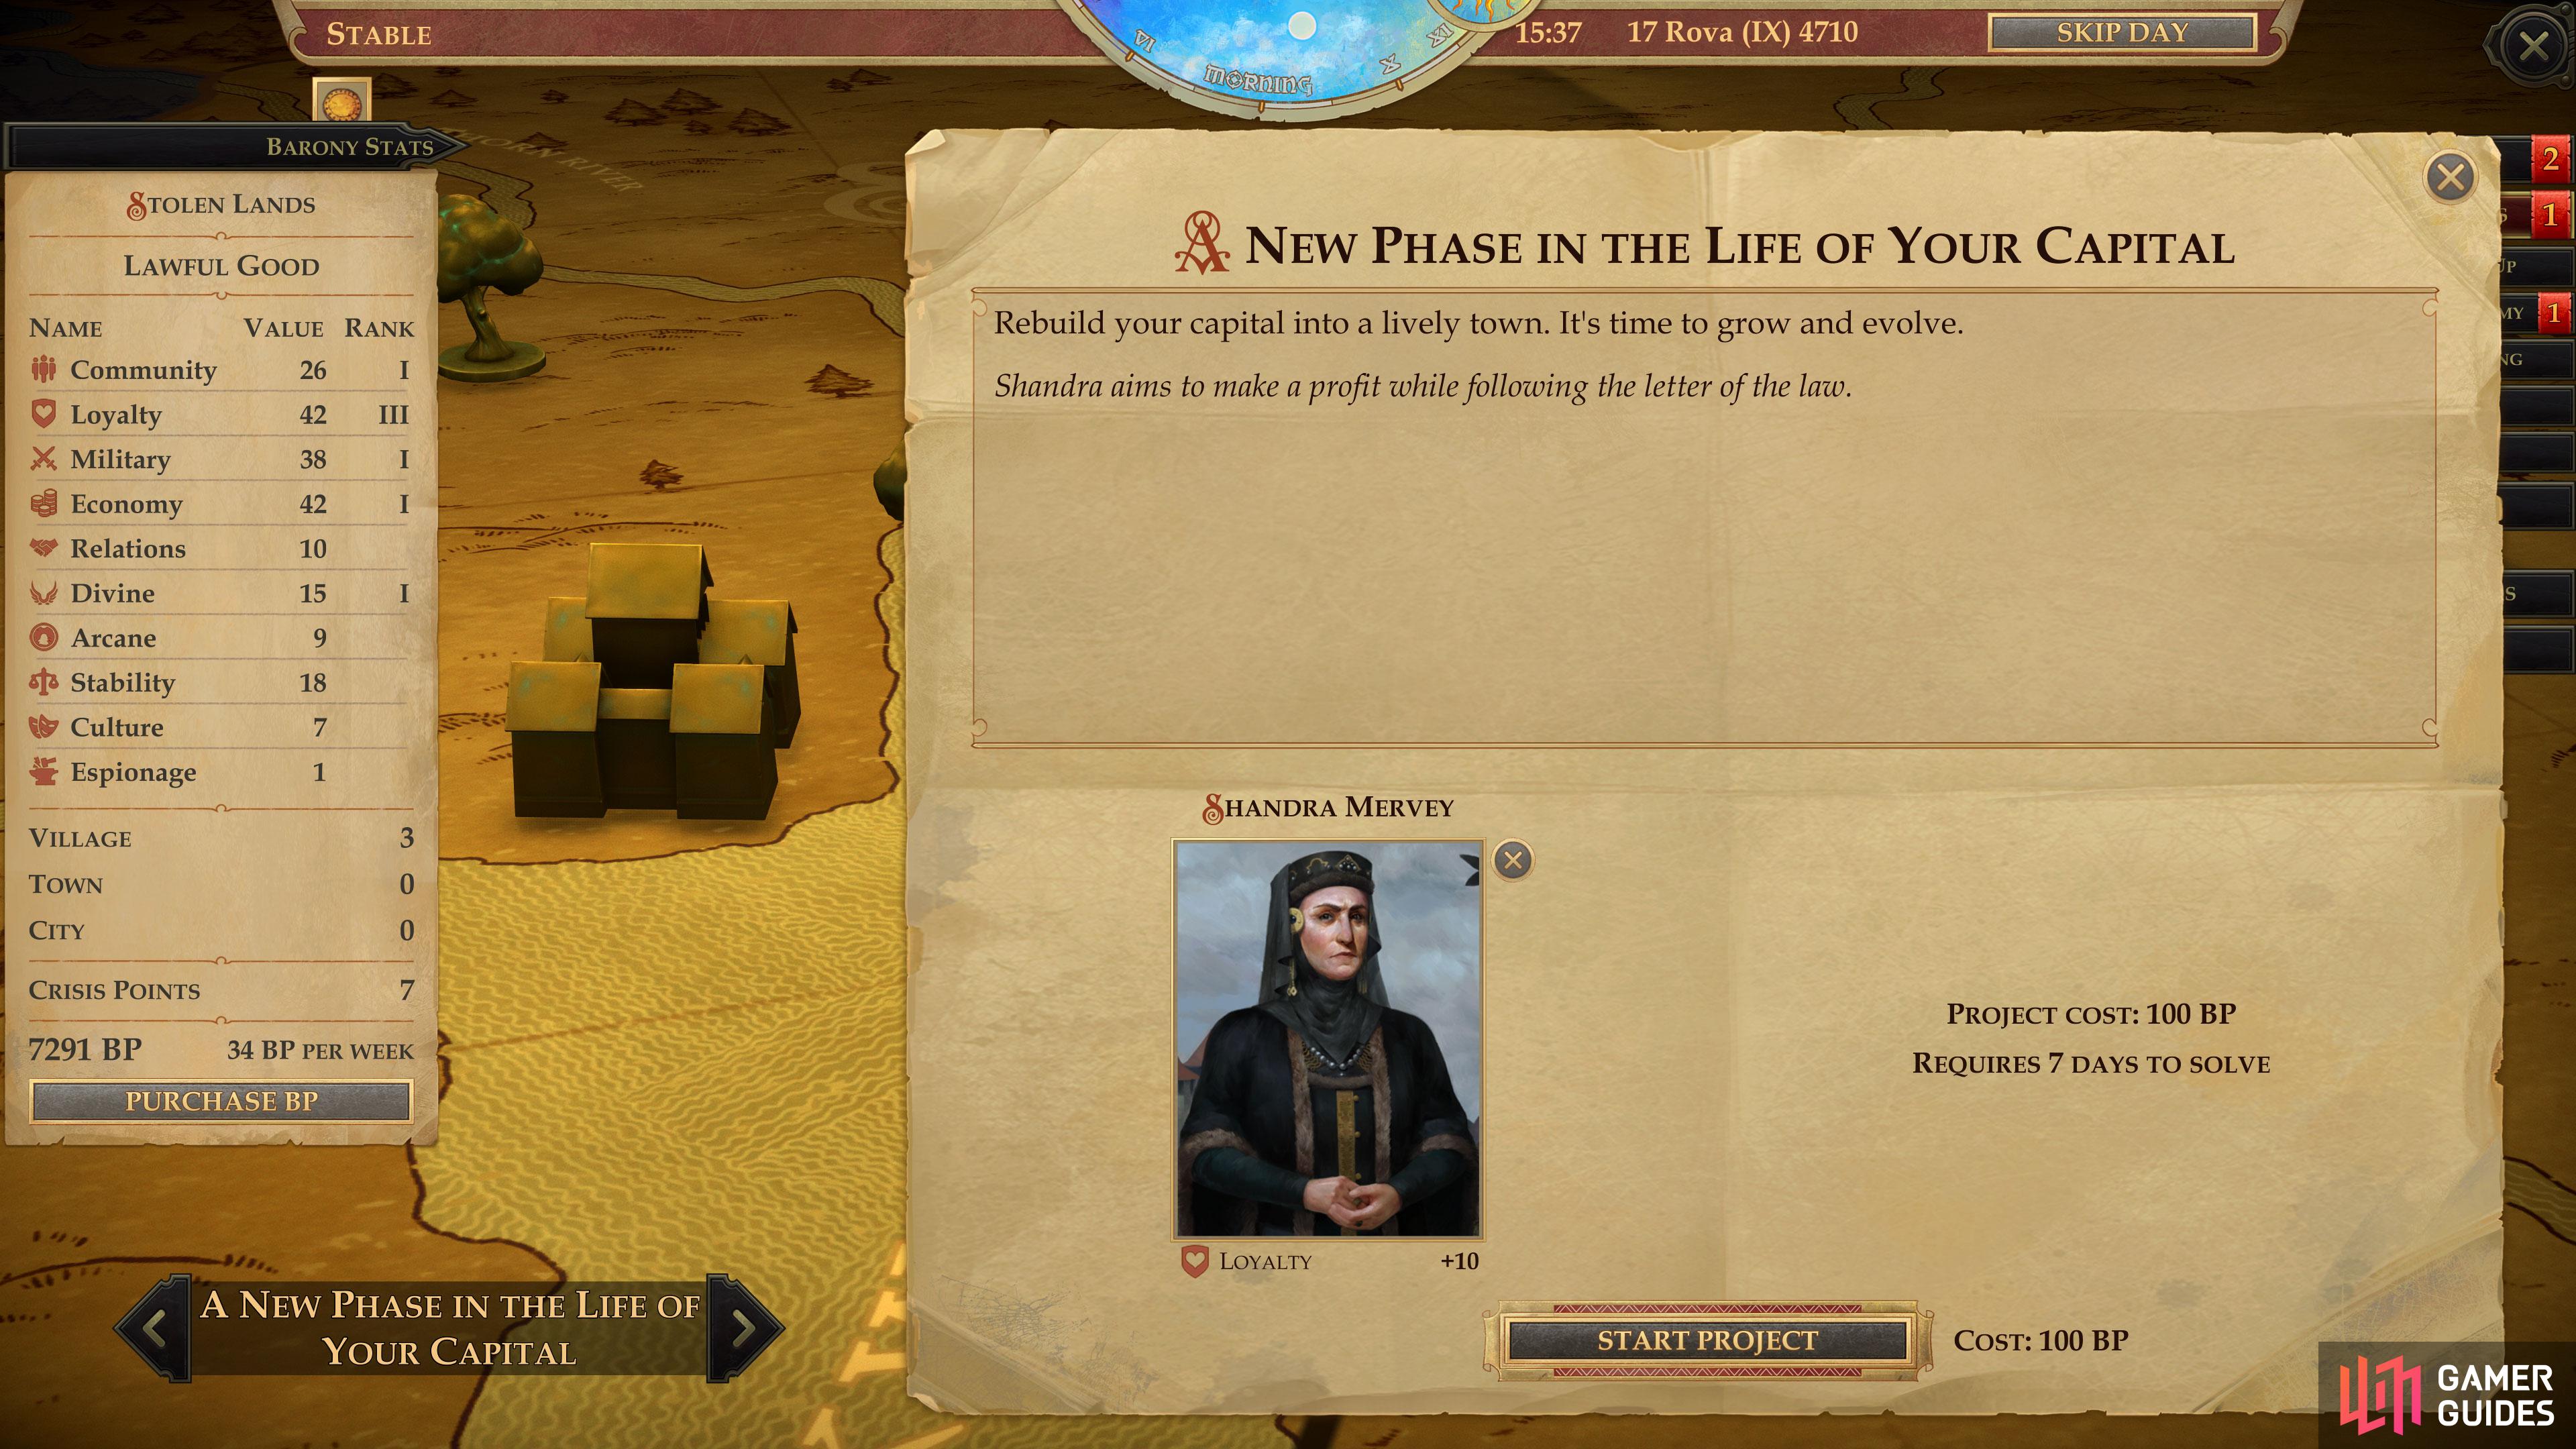
Upgrade your capital to the town
A fairly long-term objective, an upgrade for your capital will become available (via a “New Phase in the Life of Your Capital” project) when you’ve founded three settlements. This of course requires you to annex three regions, and the first three regions you’ll claim are Shrike (your capital’s territory), the Outskirts and the Southern Narlmarches. All you have to do is complete this event when it appears, which will set you back 7 days and cost you 100 BP.
No Comments