

Travel: Thorn Ford
This location is more or less along the way to the Ancient Tomb, and distance (along with another significant factor) make the Ancient Tomb a more promising first target. In any event, to reach this location take the following steps from Oleg’s Trading Post:
- South
- Southeast
- West
- South
- South, southwest to reach landmark: empty node north of Ancient Tomb
- Southwest
- Southwest
- Southwest
- Northwest
Alternatively, if you’re traveling right from the Pine Patch area, follow these directions:
- Northwest
- Southwest (to reach the edge of Thorn River)
- Northwest
- Northwest
The Stag Lord’s Right Hand Man
You’ll arrive along the northern end of the map, from which you should immediately head east to find an Ancient Rostlandic Coin hidden in a tree stump should you pass a [Perception 6] check. Return back west, then head southeast across a river, immediately after which head east along the southern end of the river until you reach the eastern edge of the area. At this point, turn south to find a sack you can loot.
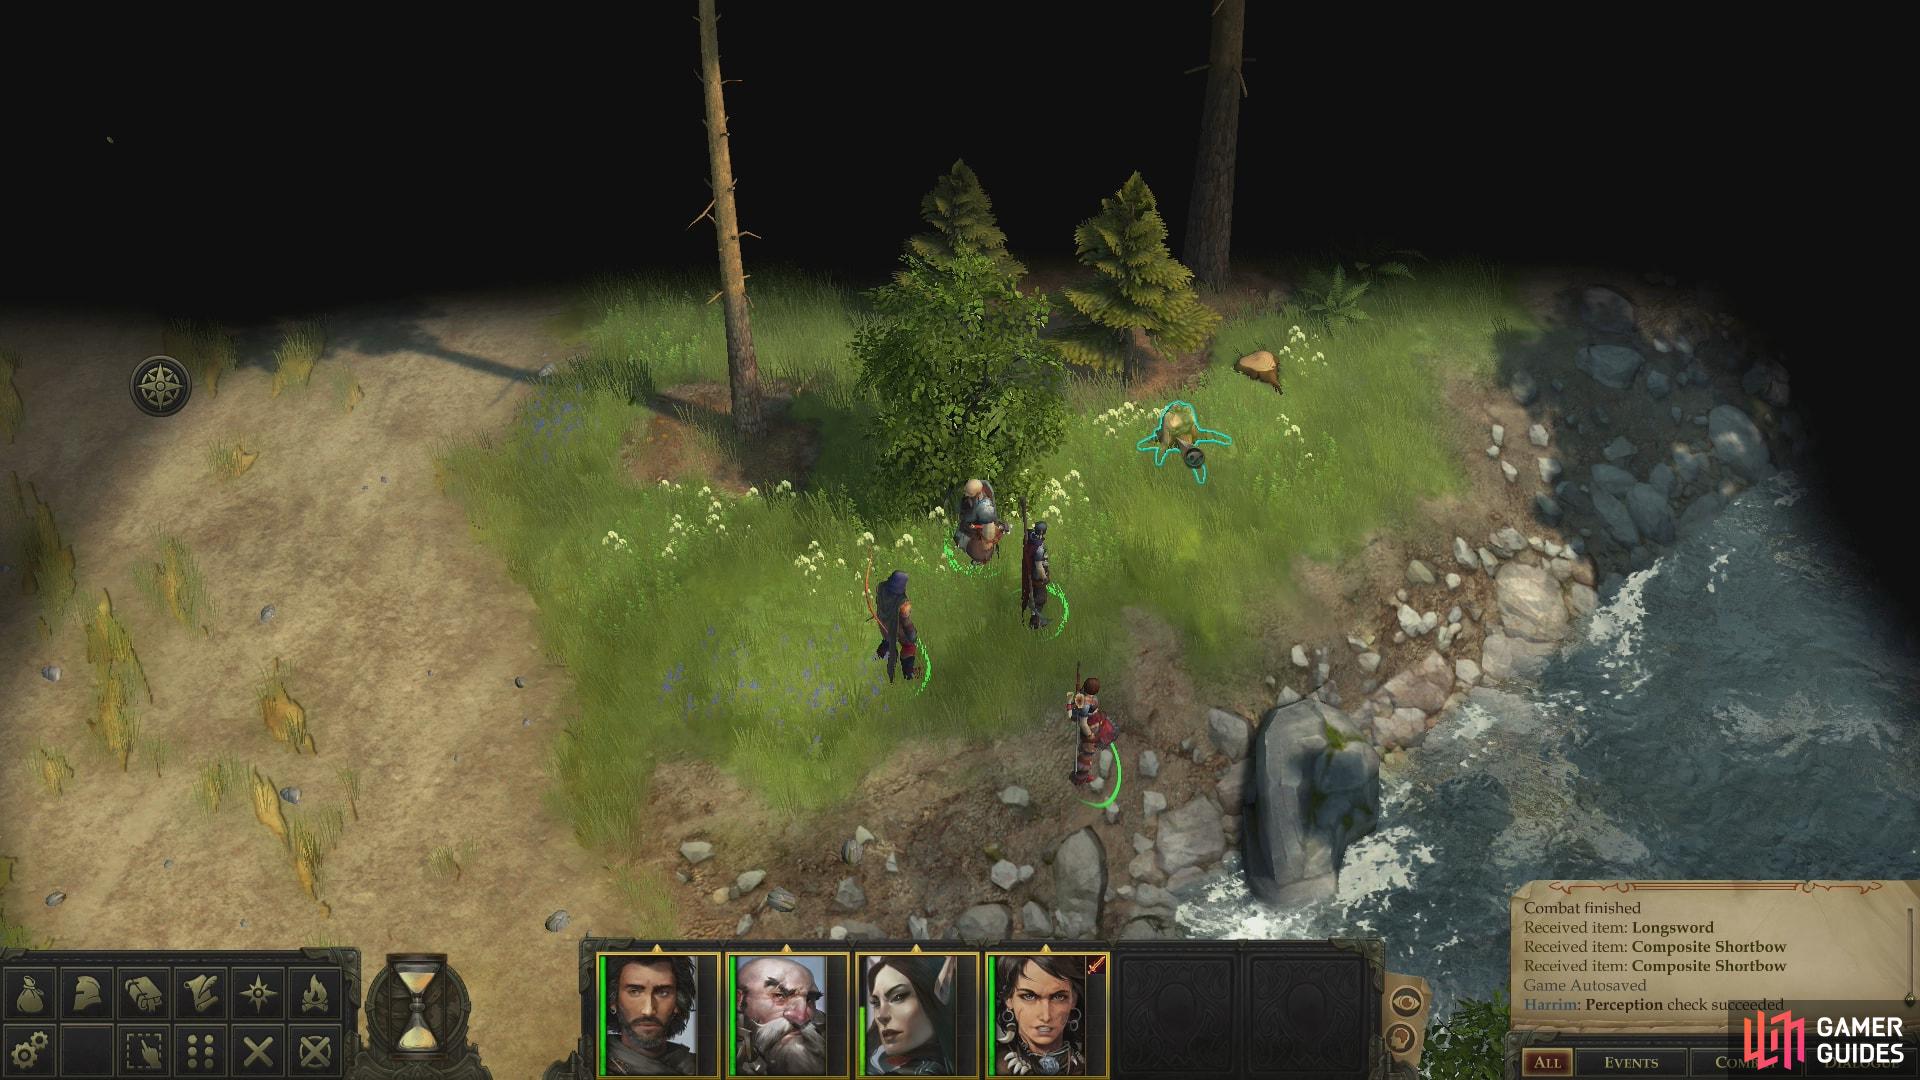
Search for Ancient Rostland Coin

and a sack of loot
From here, just head south along the eastern edge of the area until you reach the bandit camp. If you came here before entering the Ancient Tomb you’ll find a rather dignified man named Akiros Insmort. He’s obviously a higher-ranking lieutenant of the Stag Lord who seems to have a variety of traits the crude ruffians you’ve encountered thus far don’t: composure, intelligence, diplomatic acumen, and possibly some genuine competence.
He’ll start out admonishing Kressle for her failures before turning his attention onto you. You can skip the chatter by attacking outright, but if you want to make some moral choices, respond with “And just what do you want to talk about?”, at which Akiros will attempt to discourage you from your current task while also arguing for the Stag Lord’s legitimacy. He might have a point, too, but regardless of your alignment, you’ve got counter arguments. For a good party, the Stag Lord and his gang have committed their share of dastardly deeds - enough to cede the moral high ground and deserve to be deposed. For an evil party… well, might makes right, and the Stag Lord is only the rightful ruler of these lands so long as he can keep you from ripping the title - and his last breath - from him.
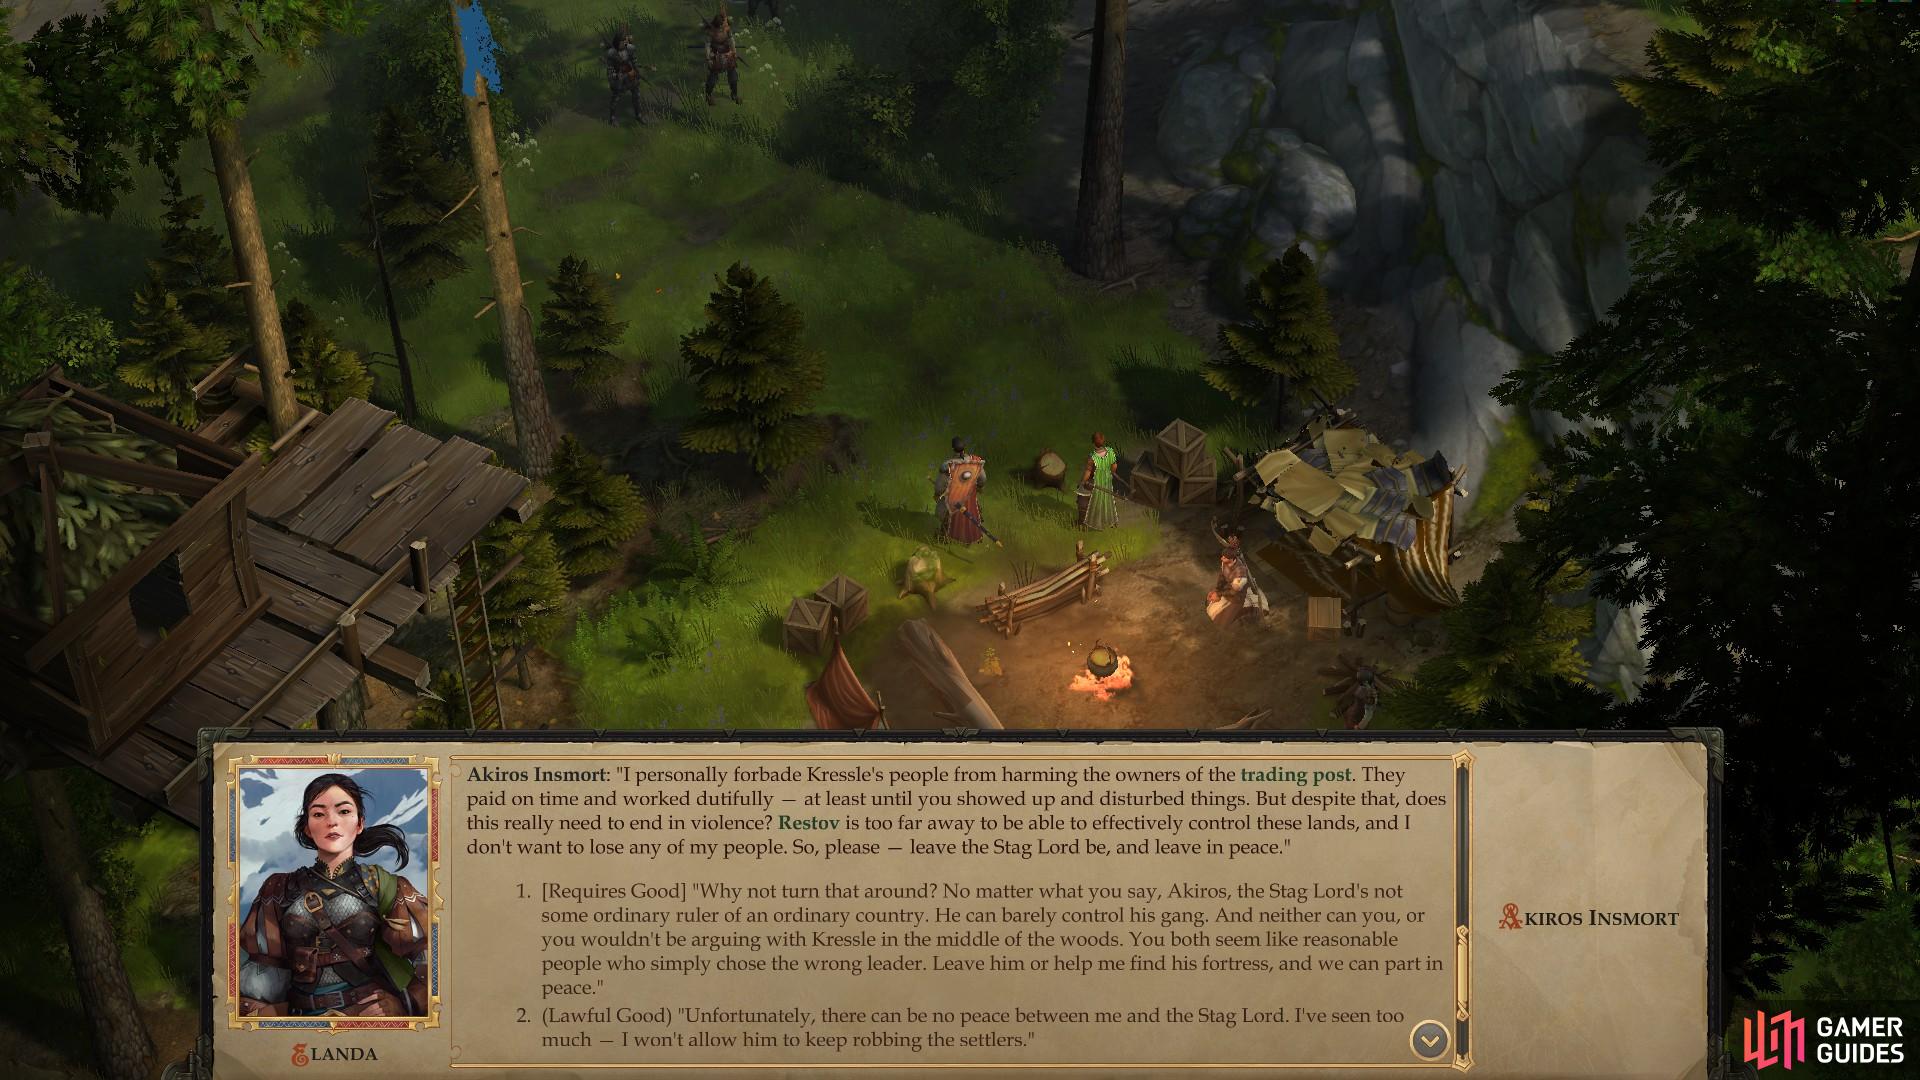
If you traveled to Thorn Ford before the Ancient Tomb, you’ll meet the Stag Lord’s right-hand man, Akiros.

You’ll get a variety of dialogue options for Kressle, but only Good-aligned characters can talk their way out of a fight.
The following responses - [Lawful Good], [Chaotic Good], [Neutral] and [Neutral Evil] - all have the same outcome: Akiros flees, and Kressle picks the fight she neglected to have back at Oleg’s Trading Post. Only if your protagonist is Good-aligned can you pick the [Requires Good] response, which seems to succeed because it points out the Stag Lord is the “wrong leader” for these lands.
Akiros will still flee, showing admirable loyalty for a bandit, after which Kressle attempts to come to an understanding with you. Whatever moral choice you pick here has the same result (yes, even the [Neutral Evil] one): Kressle abandons the Stag Lord while refusing to come over to your side. As a parting gift she gives you Svetlana’s Ring and asks you to return it to her. That’s right, Kressle is the “dark-haired woman who wields dual axes” Svetlana asked you to spare, and you can only do so with a Good-aligned protagonist.
| Reward: For resolving your encounter with Kressle peacefully |
|---|
| 189 XP / Svetlana’s Wedding Ring |
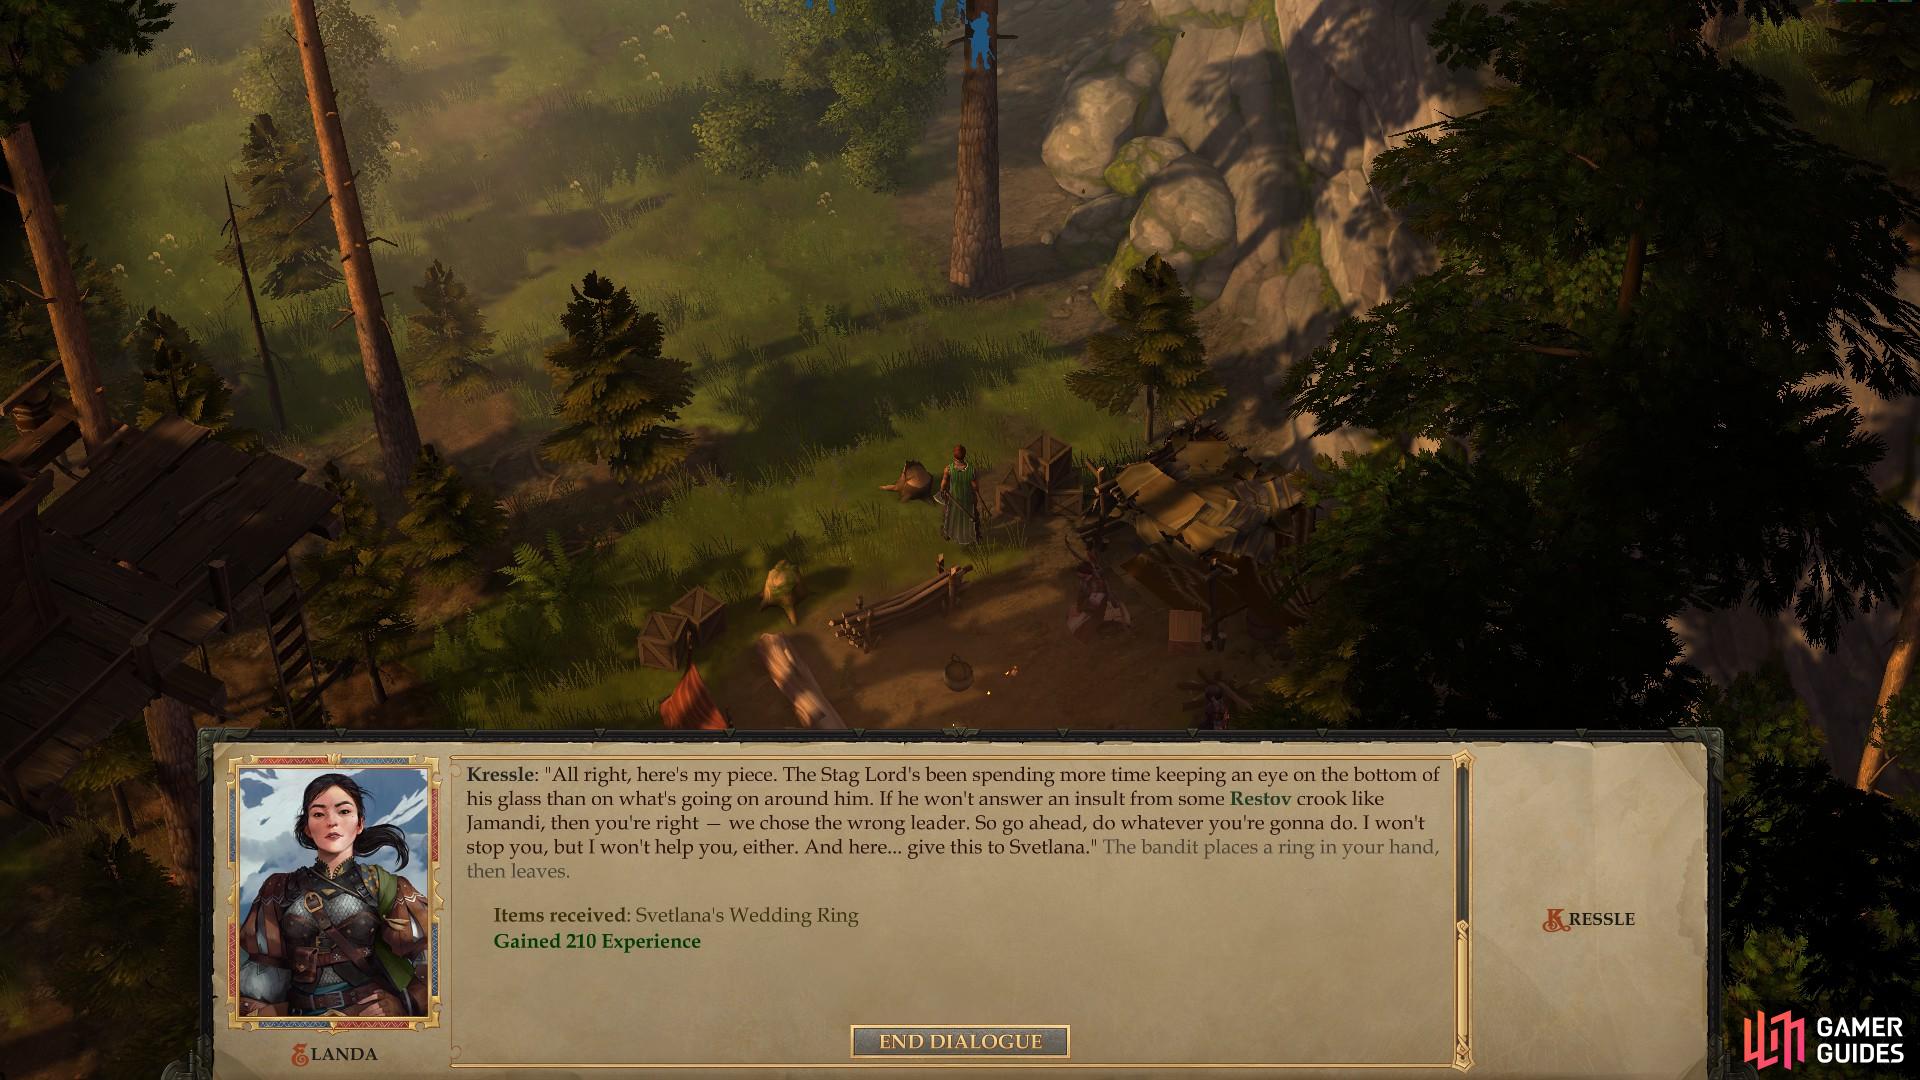
You can get Svetlana’s Wedding Ring via diplomacy
or through violence.
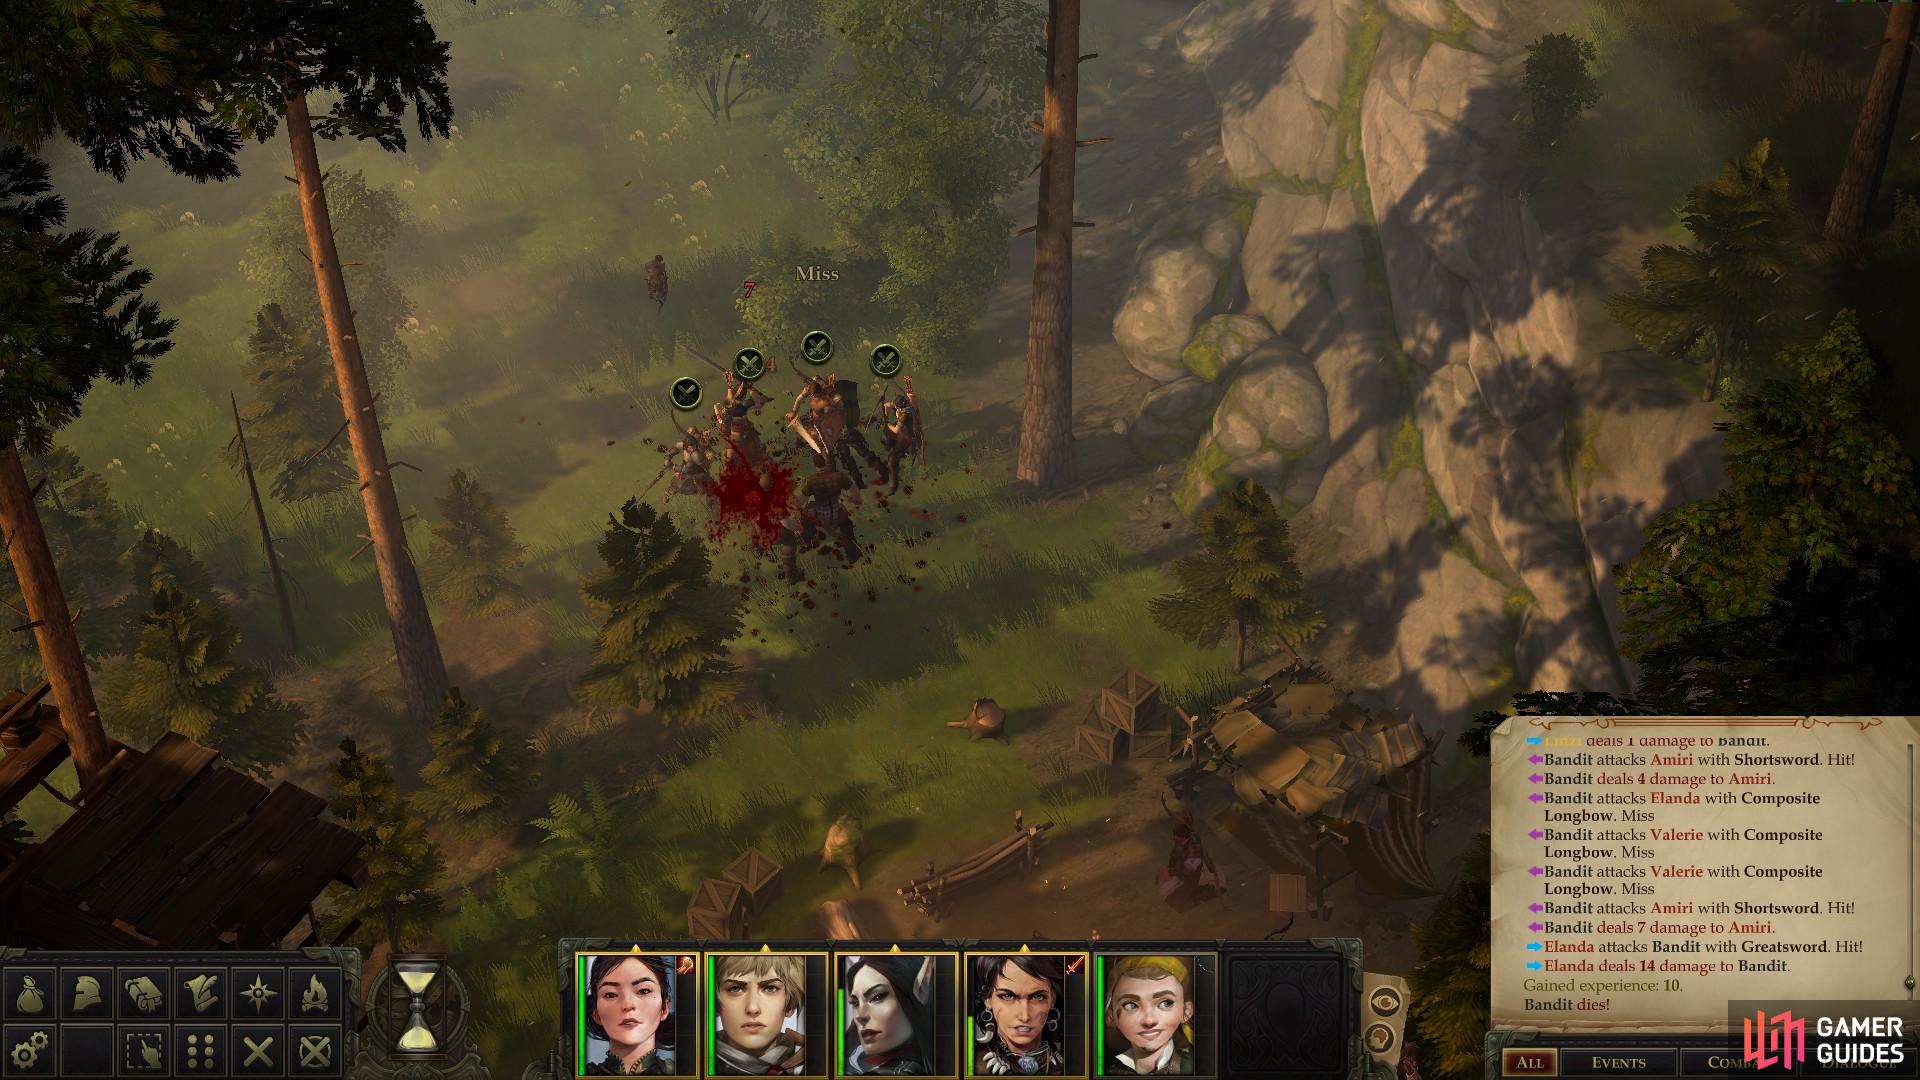
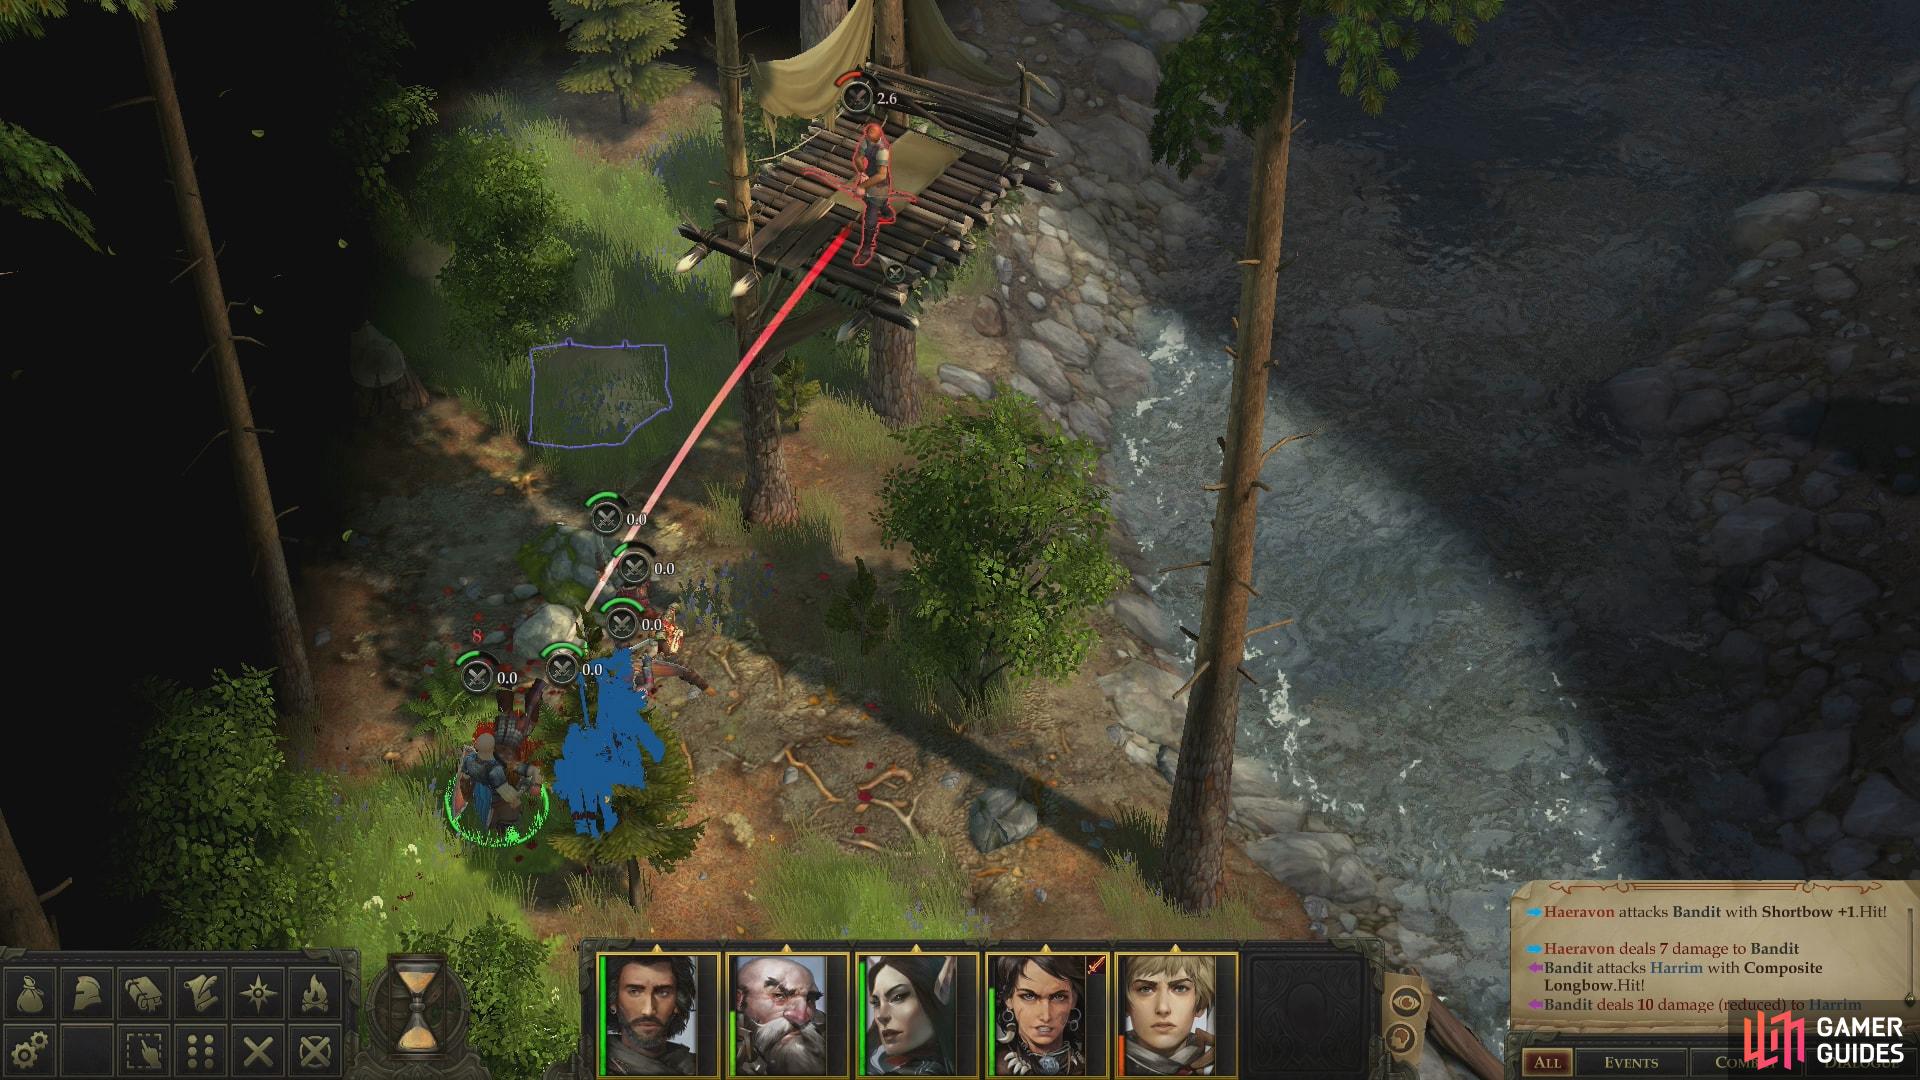
Battle: Kressle’s and Bandits
If your protagonist is not Good-aligned or if you simply didn’t choose the [Requires Good] response, a fight with Kressle will ensue. She’s got a lot of archers backing her up, and is rather fearsome with those dual axes of hers, which are of masterwork quality. She’s by far the most dangerous target, and you should focus your sole attention on her in an attempt to take her down quickly. If you’ve got debilitating spells, target her with Color Spray or Hideous Laughter, while saving Sleep for an opportunity to disable several of the other Bandits if they bunch up invitingly.
Looting Kressle’s Camp
After you emerge victorious (or avoided combat), loot Kressle and her fellow Bandits and nab their weapons. Kressle in particular is well-equipped, having a pair of Masterwork Hand Axes, a suit of Studded Leather +1 along with Svetlana’s Wedding Ring. Once done, loot a crate in the camp to obtain some Written Orders and the Recipe: Sweet Pancakes. The former mentions an abandoned house in the woods the Stag Lord wanted his goons to burn down, which is the next objective in the quest Stolen Land, while the latter will allow you to cook different food while you camp. Just go into your inventory, right-click on the recipe, then pick the “Copy Recipe” option. Provided you have the proper ingredients, you should be able to attempt to cook this meal.
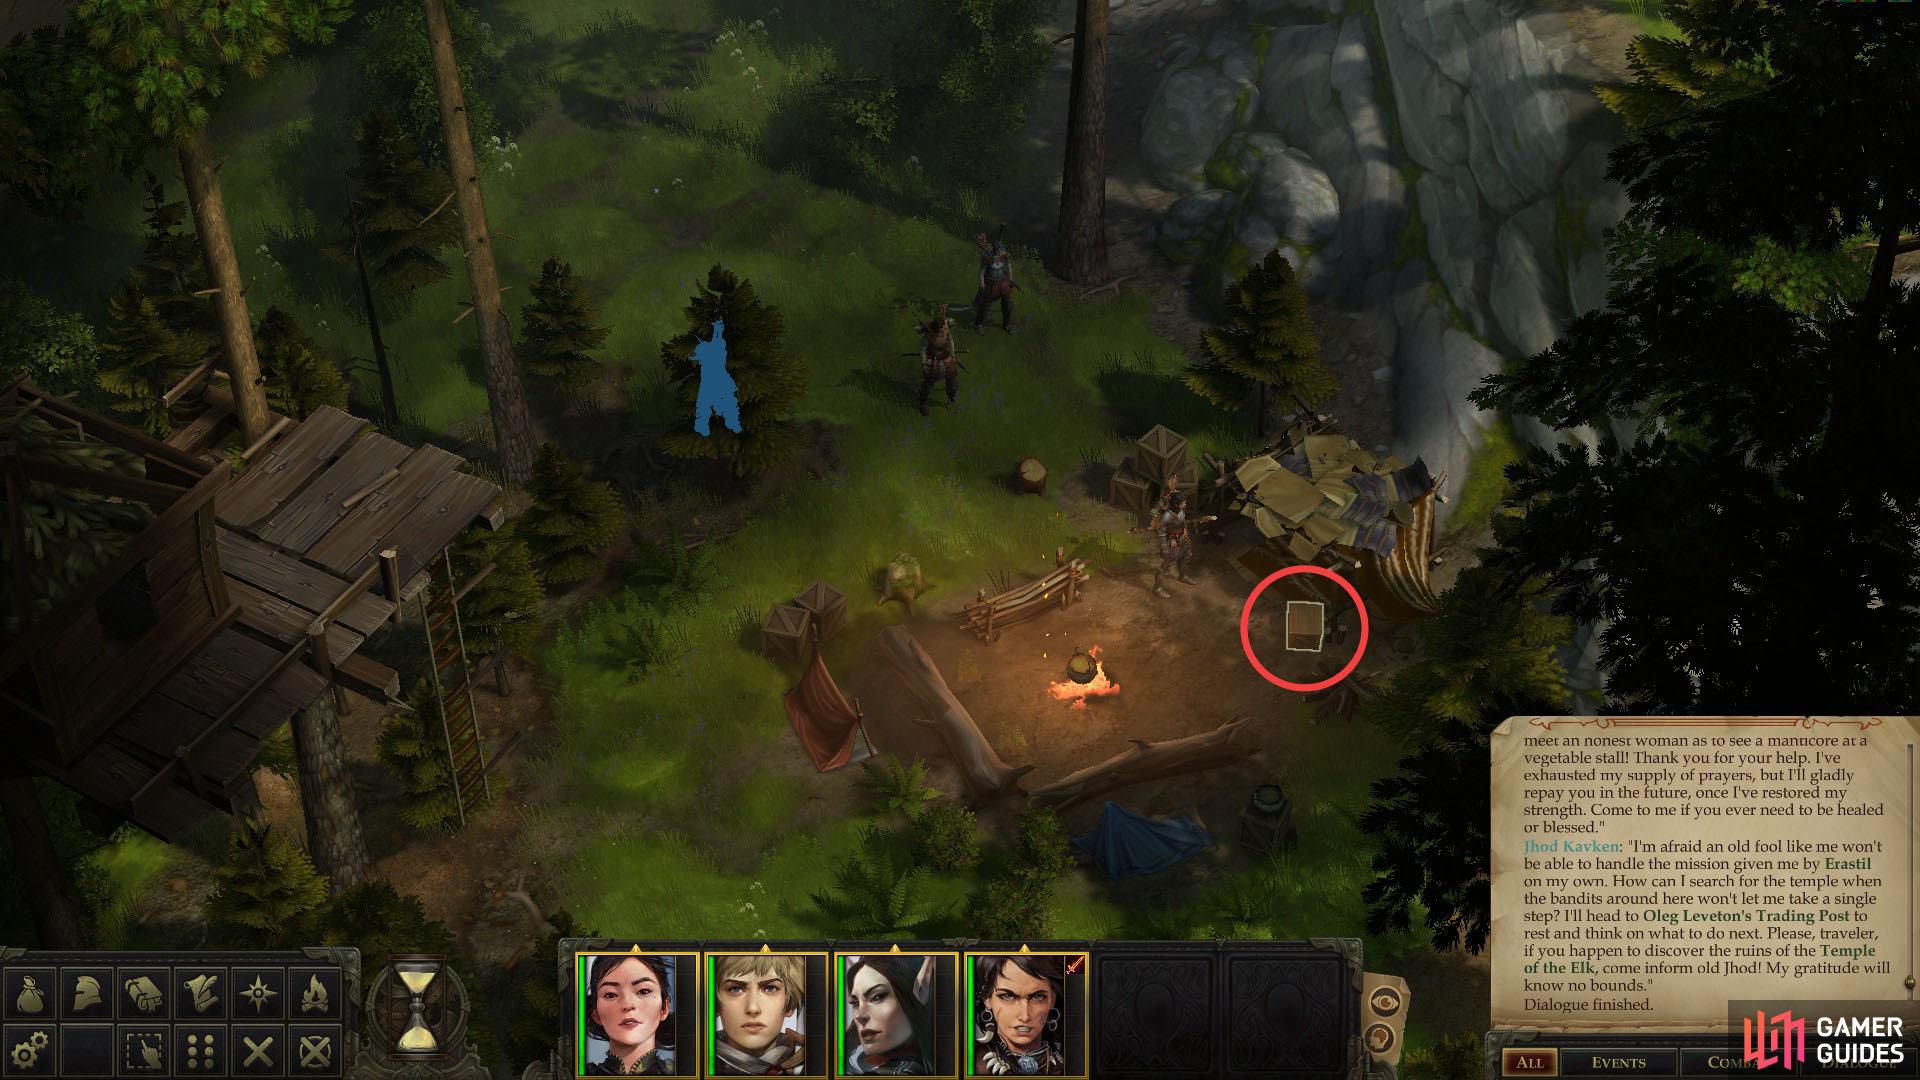
Loot Kressle’s Camp to find the Stag Lord’s orders, giving you a new objective.
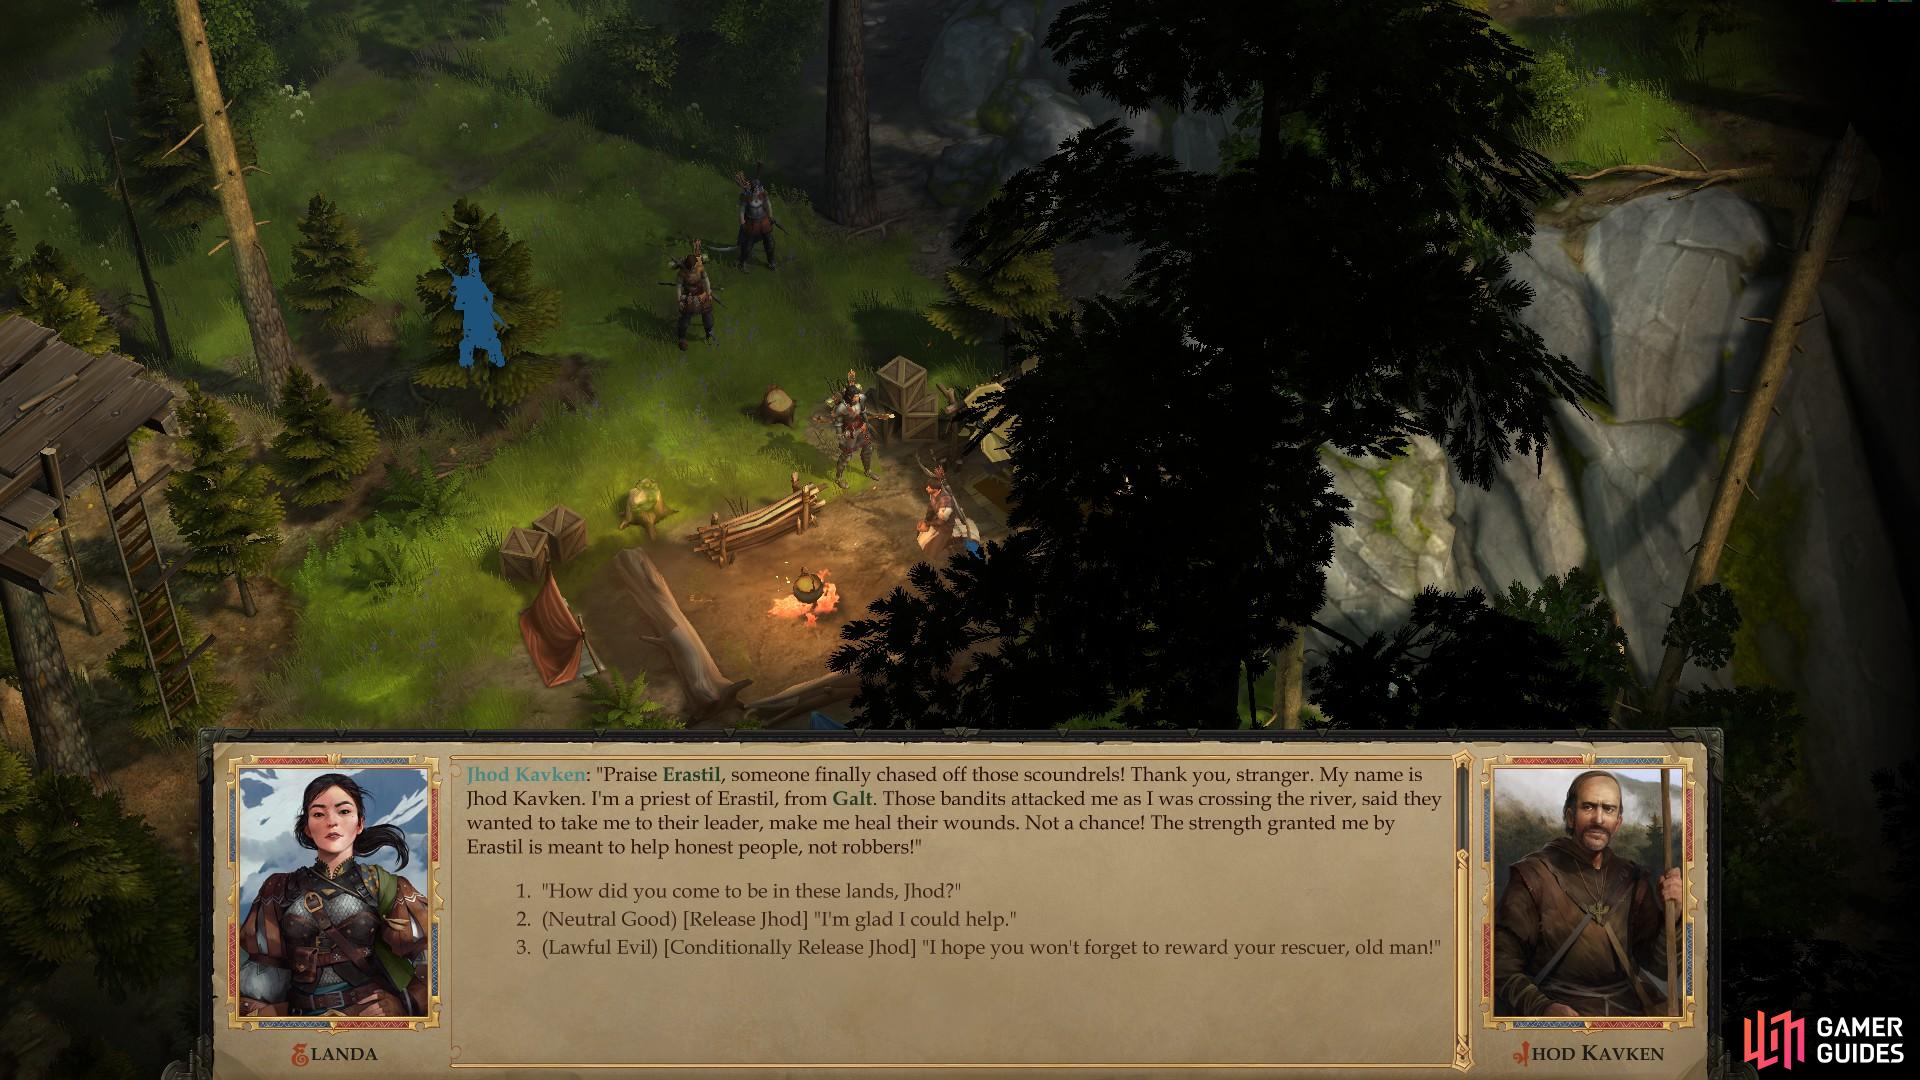
Be sure to talk to - and free - Jhod before you go to learn about the Temple of the Elk.
Pocket these papers and your attention will be directed to one Jhod Kavken, who remains bound throughout your interaction with Kressle and company. This priest of Erastil will tell you of how he came to be in the position you currently find him in, and will mention a place called the Temple of the Elk. Recognizing that the task of discovering this temple is currently beyond him, he’ll opt to lick his wounds back at Oleg’s Trading Post, where he’ll offer his clerical services, should you need them. Talking to Jhod about the Temple of the Elk will start the rather bluntly-named errand Find the Temple of the Elk.
Next send your character with the highest Trickery score to the southeast to locate a locked chest [Trickery 15]. Save/load until you open it up if you wish, then loot it for a Scroll of Doom, a Scroll of Shocking Grasp and a bunch of other, mundane goodies. Another chest - not locked - can be found to the west, inside of which you’ll find a Scroll of Corrosive Touch and some baubles.
Locate the Stag Lord’s wine west of Kressle’s camp
where you’ll get the option to steal, destroy, or poison it.
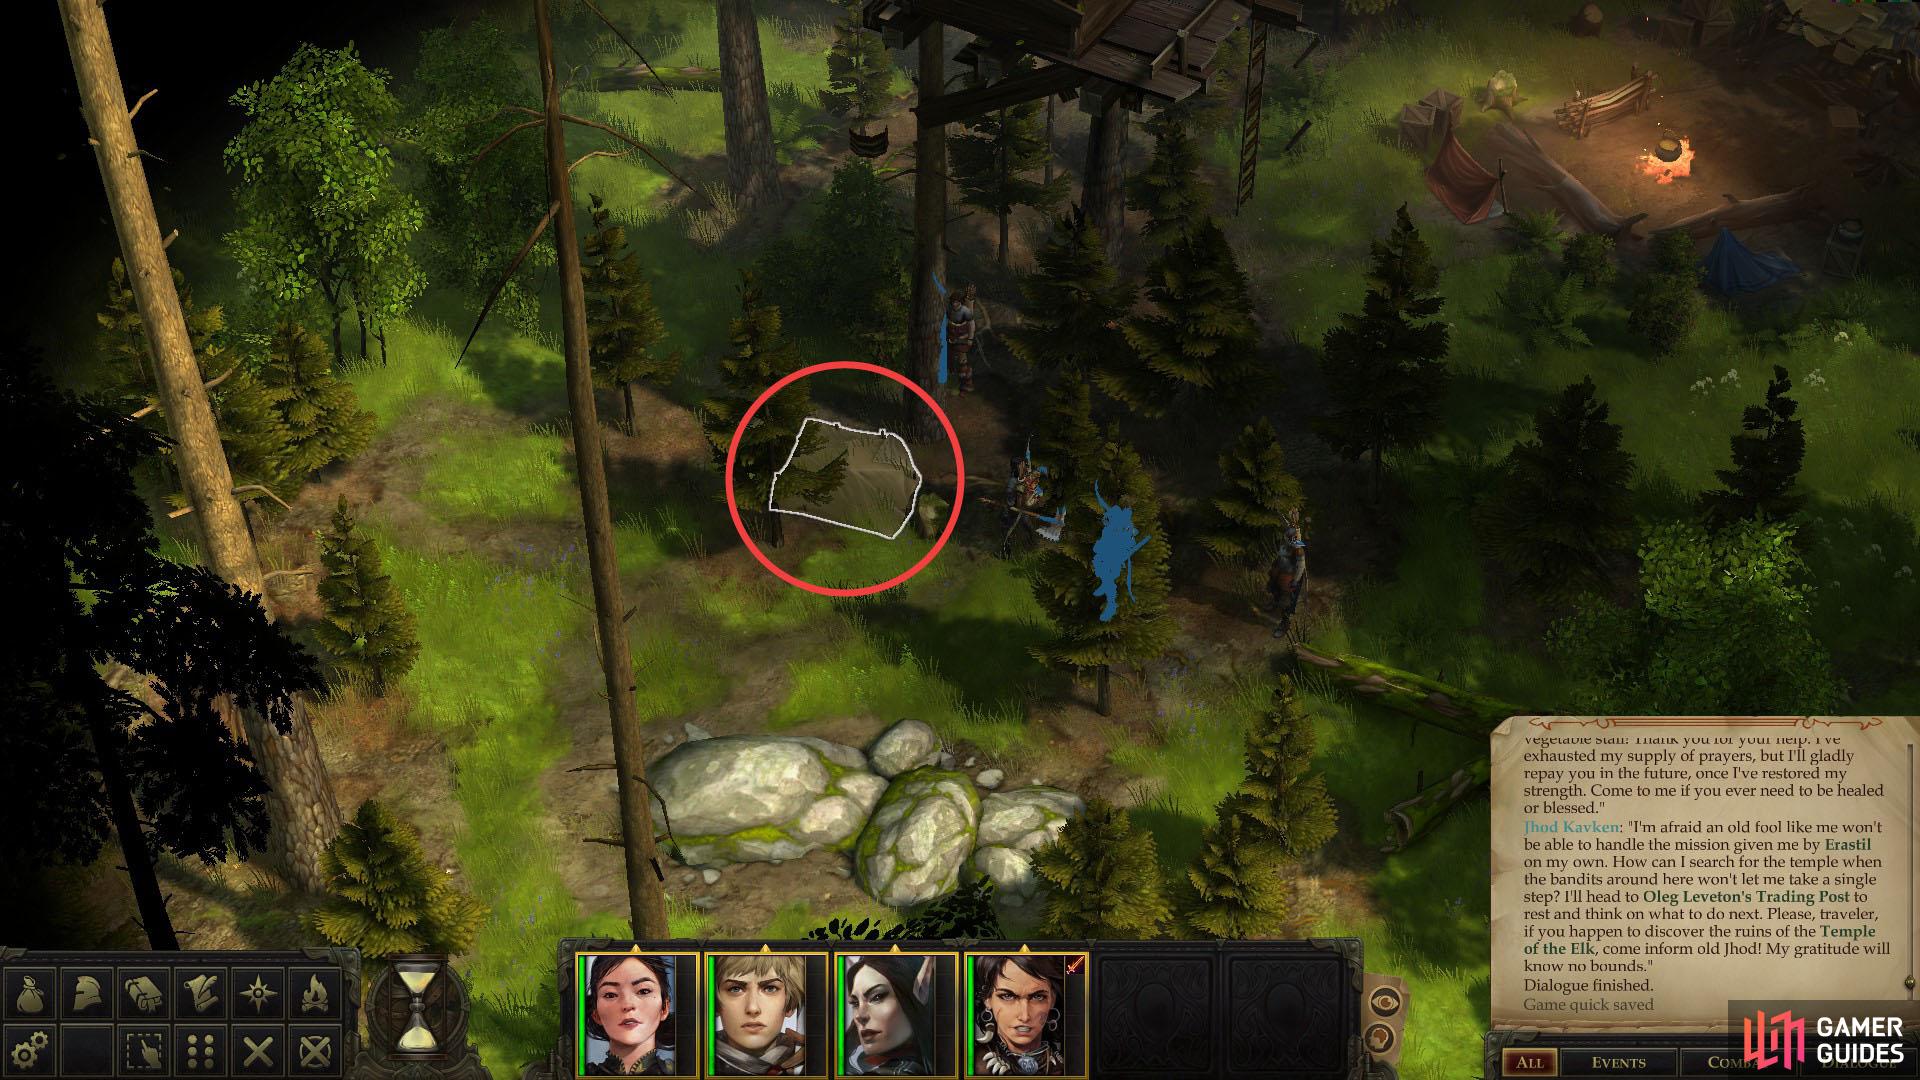
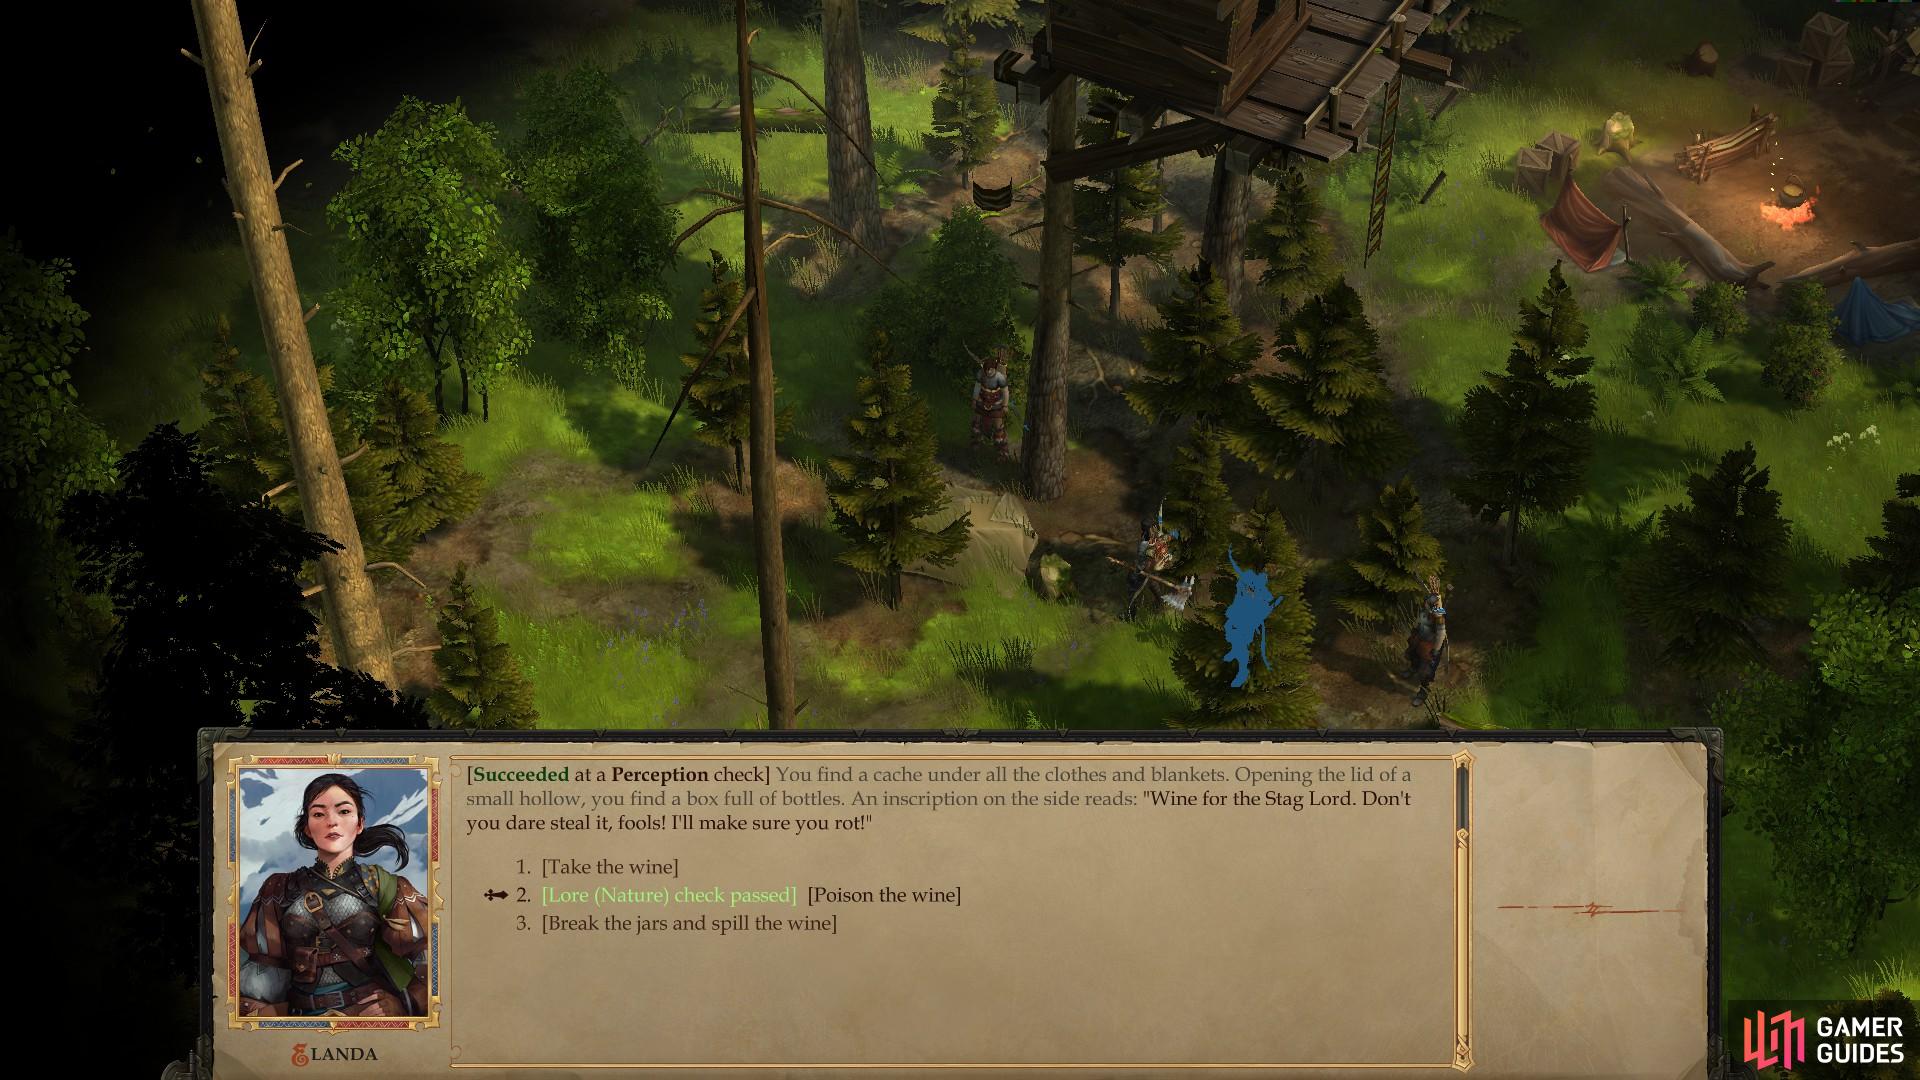
The Stag Lord’s Wine
Up until now you’ve been able to do relatively little harm to the Stag Lord, but now you’ve caused Kressle’s defection or destruction, another opportunity to diminish your foe can be found west of the bandit watchtower, but more checks must be made, so save your game if you wish to try your luck. Investigate the stash and succeed at a [Perception 18] check, then a [Lore (Nature) 15] check. The latter check will only appear if you succeed at it, so if you don’t see it, reload and try again. The alternatives range from petty (smashing the Stag Lord’s wine) to profitable (stealing said wine), but poisoning it is a far, far better alternative. You can sell the stolen wine for 125 GP, while destroying the wine will net you some experience, so if you feel poisoning an enemy is beneath the good party, at least you won’t have to leave empty-handed.
| Reward: For destroying the Stag Lord’s wine |
|---|
| 72 XP |
Bandit Booty
You’ve completed your main objective here, but there’s still some treasure worth getting before you leave. Search along the river to the west to find an Herb, some Edible Moss and another Scorched Fragment of a Necklace hidden away. Once that’s yours cross the river at a fordable spot west of Kressle’s Camp, being wary of the traps [Perception 17] [Trickery 17] on the road near the river. Once across, travel north along the river to find two more Bandits lurking in the woods, one of which is content to stay on its watchtower, safely out of the range of your melee characters.
Kill the two bandits west of the river
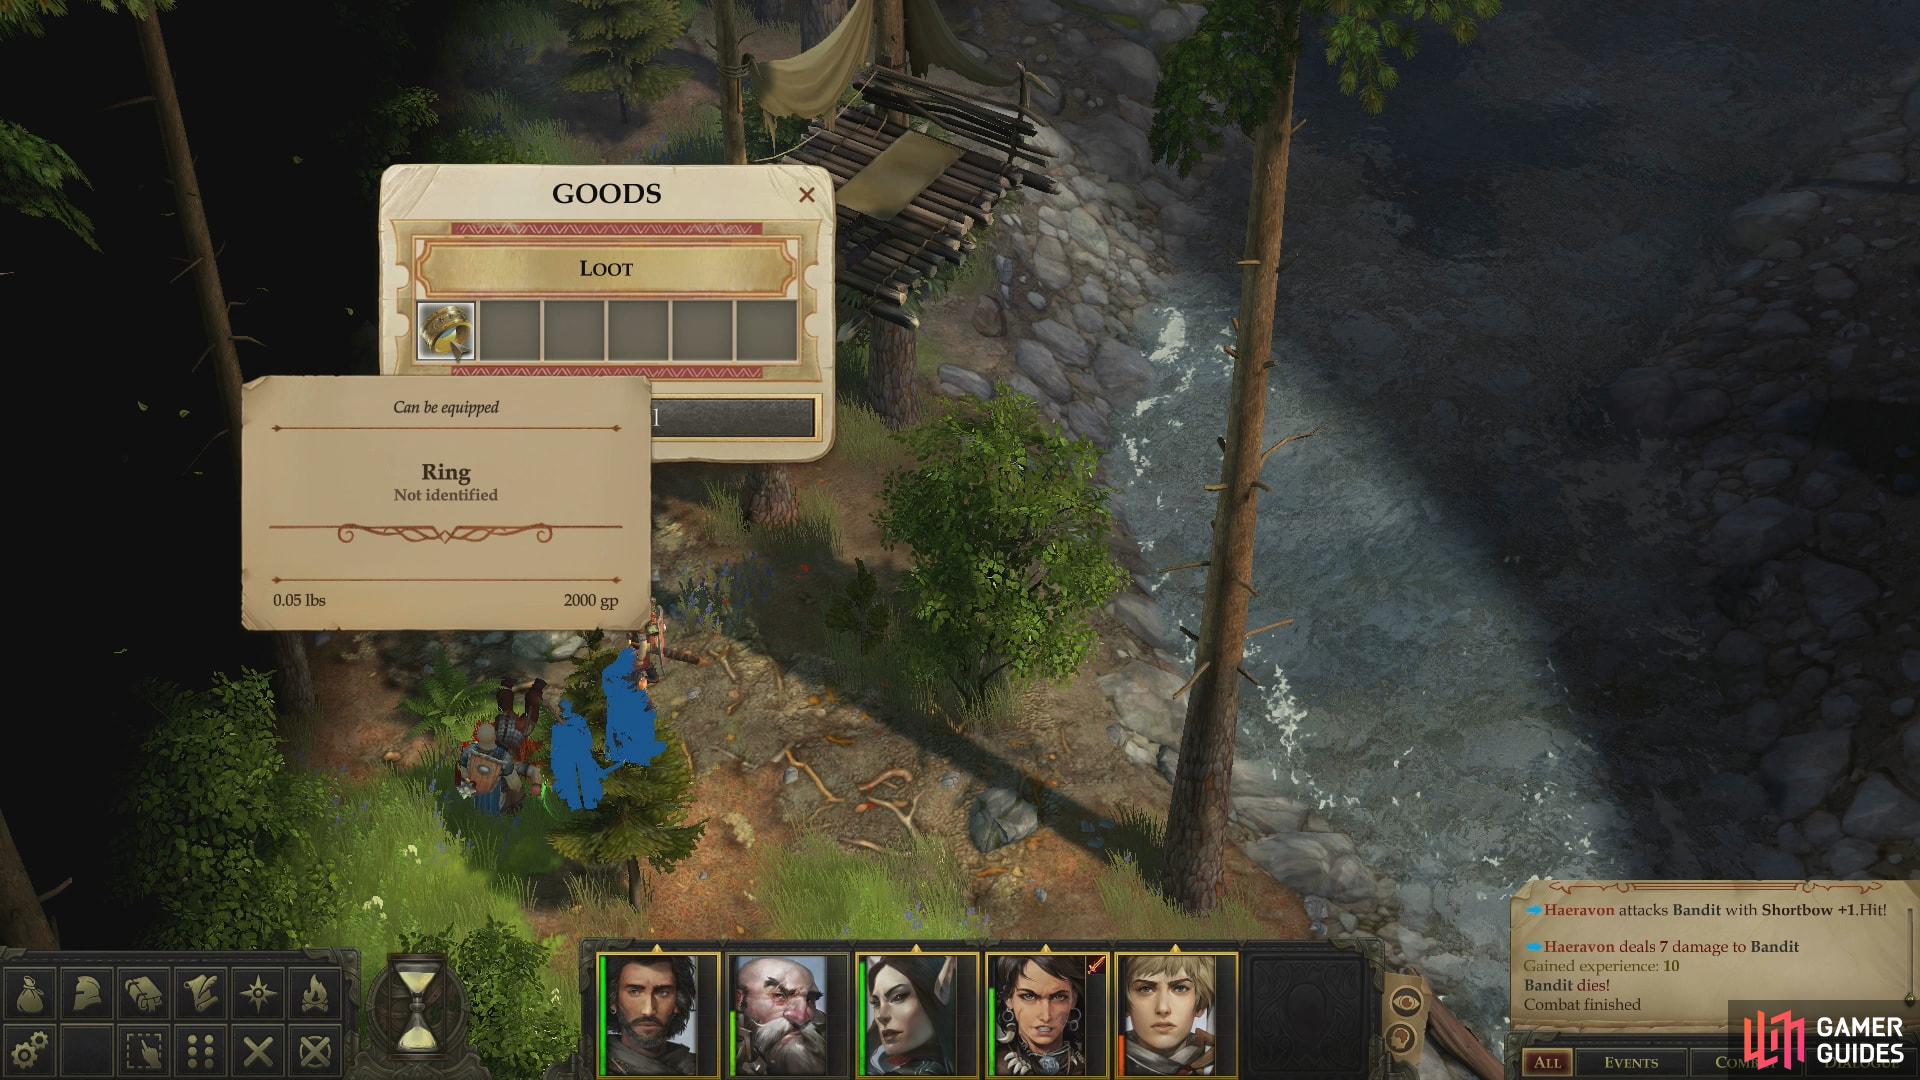
and search a stash nearby to find a Ring of Protection +1
This is a good time to point out that you should endeavor to keep a ranged weapon equipped on all your characters, within reason. You don’t need to be an expert archer to perform well with a Composite Longbow provided your Dexterity isn’t abysmal. At the very least, it’ll allow you to operate with more tactical flexibility and keep you from being useless when faced with an opponent you can’t reach in melee. You can switch weapon sets by clicking on the arrow above the right-most hotkey slot. This will bring up the weapon sets menu, where you can switch between your equipped weapons by clicking on the Roman numeral above the desired weapon set. It’s also not a bad idea to give your archers a melee weapon, so they’re not constantly provoking Attacks of Opportunity if they get cornered in melee combat.
Shoot down the sneaky bandits, if they were there, then loot a stash near the watchtower to find a Ring of Protection. Give it to your front-liner who needs it the most - a very useful trinket, indeed.
A Boar Chore
With that done you should be ready to move on. Once you’re back on the world map, look to the northwest, following the Thorn River, to find the Abandoned Hut location marked on your map. Before you go there, however, you should return to Oleg’s Trading Post to claim your reward from Svetlana, and check on any new developments there.
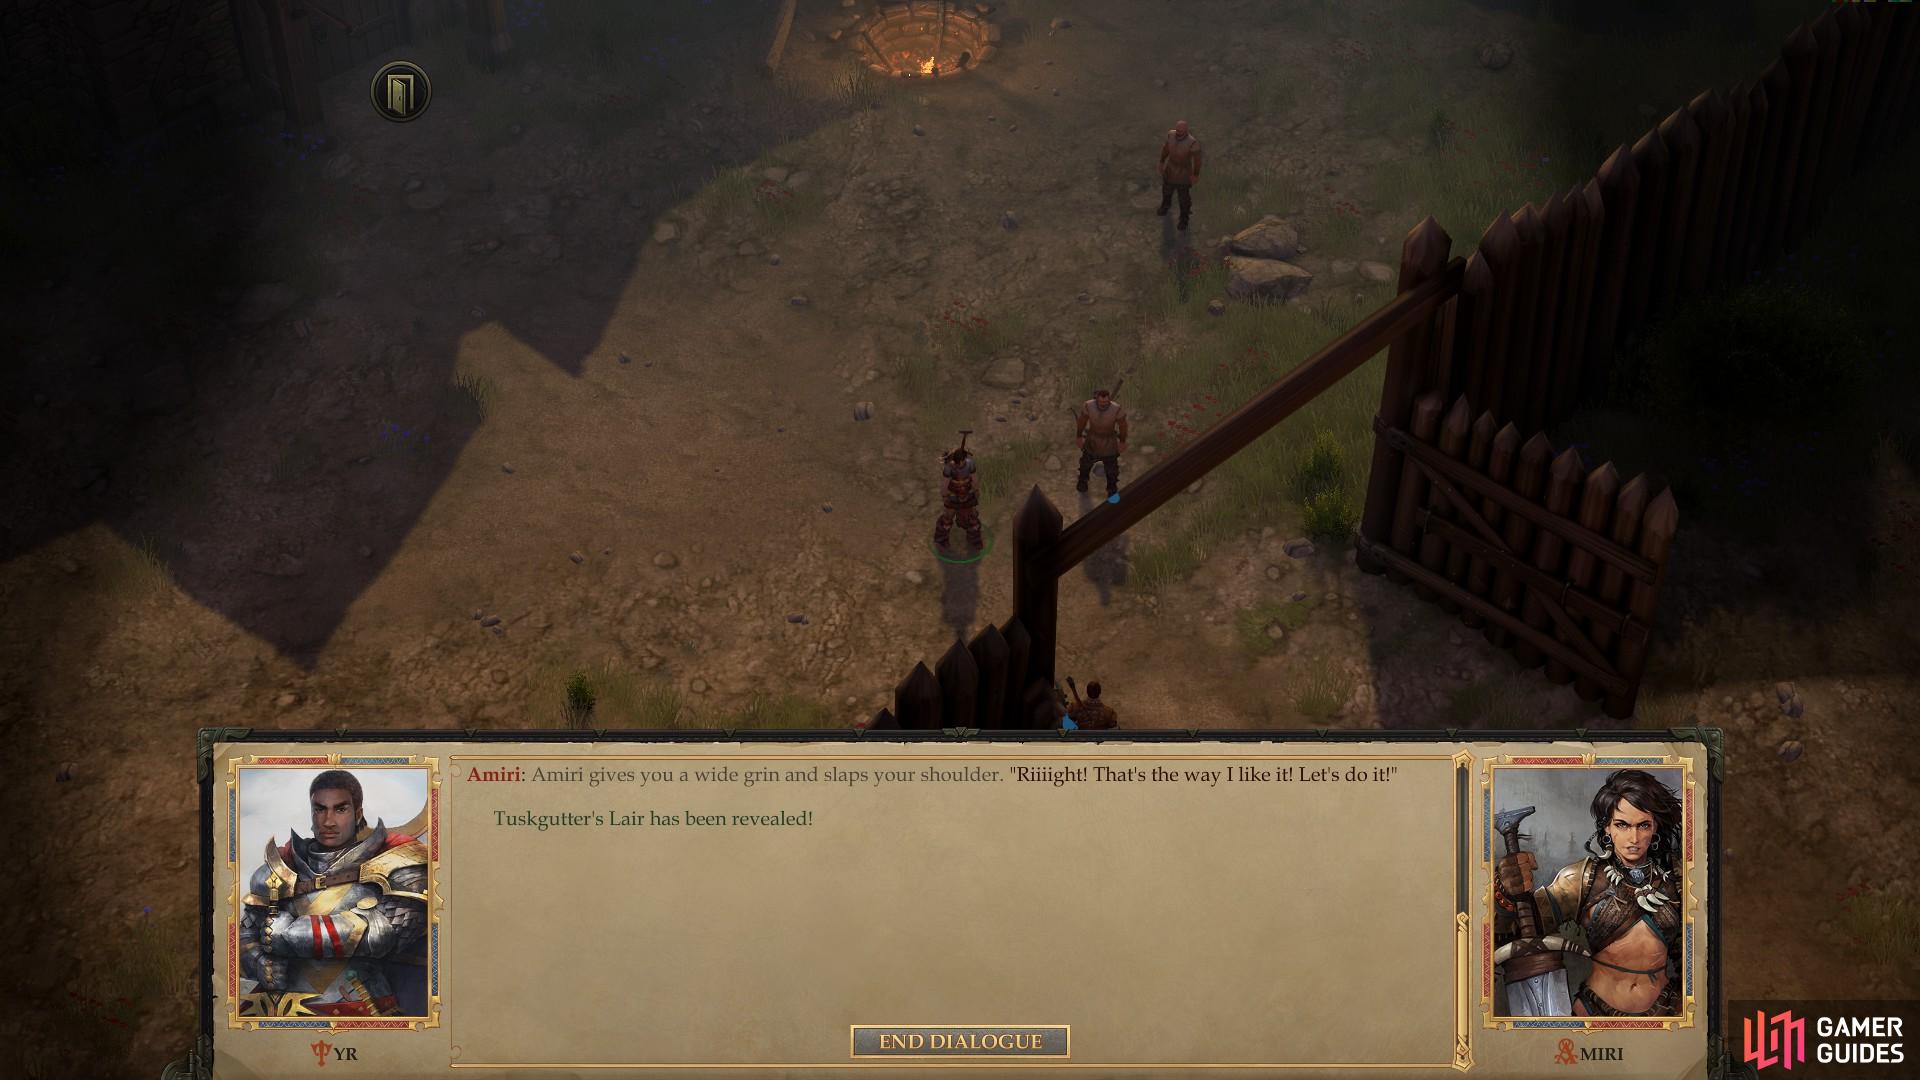
When you return to Oleg’s Trading Post, Oleg will warn you of a mighty beast named Tuskgutter and Amiri wishes to hunt it herself
When you return to Oleg’s Trading Post, Oleg will decide to impose another task upon you, since you so ably handled those bandits. Seems darker things trouble the Stolen Lands than mere bandits, in this case “a vicious boar, as big as a bear and wicked as the devil!”. Some pig, and with a name like Tuskgutter… well, no need to risk getting Baratheon’d by the thing! T’would be a terrible end to your barony. Fortunately, Amiri is keen to challe-nge herself by battling the beast. Agree to do so, but you really shouldn’t intend to go there anytime soon - it’s a powerful beast that may be beyond your means to easily deal with right now, especially since Amiri entertains the desire of fighting it by herself.
Talk inside the Trading Post
Next up, head inside the Trading Post and tell Svetlana the news about Kressle, after which she’ll open up about Kressle and reward you according to your actions.
| Reward: For returning Svetlana’s Wedding Ring and Sparing Kressle |
|---|
| 214 XP / Camping Supplies and Rations x10 |
You can also find Jhod loitering around outside now, if you wish to learn more about him, his faith, and this Temple of the Elk he seeks. More importantly you can use his services as a cleric, which takes the form of him selling you a variety of clerical spell scrolls and the odd spell component, like Diamond Dust. If you’ve got a nasty ailment and no way to rid yourself of it, it may be worth checking out, but the prices can be painful (a Scroll of Raise Dead costs a prohibitive 6,000 GP!). Suffice to say that if you have to buy anything from Jhod, it’ll certainly set back your attempt at hiring a custom companion from Anoriel. It’s a good incentive to keep your characters alive and well… or to change the difficulty to “Remove Negative Effects on Rest”, even if just temporarily.
After getting your well-earned reward from Svetlana, it’s time to finish up any mundane chores left at Oleg’s Trading Post - buy/sell items, talk to companions, and most importantly, sleep. The next part of the quest Stolen Lands requires you to venture a ways to the west, through the heavily wooded northern reaches of the North Narlmarches. Travel will be slow through such terrain, and hazards abound - and as usual, an opportunistic stop or two will be made along the way, RNG willing, of course.
There are a few places to explore along the way, one of which is the static Oak-That-Strayed area, which your characters might just be strong enough to handle. In addition, you may run across the Technic League in a random encounter. While both are technically optional, the latter encounter can benefit you so greatly that it (and its follow-up) will be included in the walkthrough for you to peruse when you stumble upon the encounter. This will almost certainly occur on your way to - or back from - the Abandoned Hut, which is the next area you’ll want to explore as far as the main story is concerned.
No Comments