Traps in the Kobold Tunnels
Make your way to the southeastern corner of the Old Sycamore area and search for some mines, where the Kobolds dwell. Like Fangberry Cave, this place is quite dark, so make sure your lanterns are equipped and/or get your casters to use Light spells to help you see your way around.
The darkness is the least of your problems, however, as these caves are, of course, inhabited. Depending on your reaction to the Kobolds earlier, you may have to clear out the guards in front of the mine before entering. Once inside you’ll be confronted by more Kobolds, namely a foursome on some abandoned mining platforms to the east. Kill them if you must, ignore them if you can, but either way search the southeastern end of this cavern to find a crate [Perception 12] you can loot.
If you’re friendly with the Kobolds (or at least, non-hostile), approach a Kobold Gatekeeper to the west, who will offer to lead you to the chief. He’ll also divulge some other useful information, like the fact that a passage linking the Kobold caves to the Mite caves which was destroyed during the fighting, at the expense of some treasure located there. Also, there are some “angry mite bugs” and “wild bugs” that dwell below. Good to know.
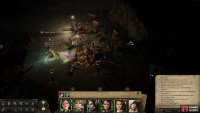
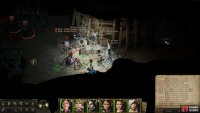
(1 of 2) Traps line the tunnel the Kobold Gatekeeper guards,
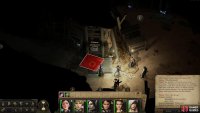
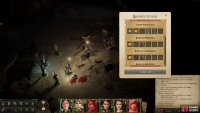
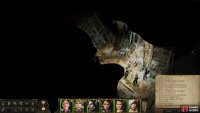
Traps line the tunnel the Kobold Gatekeeper guards, (left), and beyond that you’ll need to navigate a trapdoor via an Illustrated Book Episode. (right)
Watch the route the Kobold takes closely down the tunnel, as he’s not winding his way down the tunnel for his amusement. There are, in fact, quite a few traps down this tunnel that he’s avoiding, traps you’d be better off disarming. After all, why bother with such traps every time you want to go down this tunnel? Plus, they’re worth experience to disarm. You know the drill, save your game, spot the traps [Perception 18] and disarm them [Trickery 18], saving after every success.
Navigate the Hatch
Clear several traps, after which the Kobold - if you had him as an escort - will leave you to navigate the rest of the tunnel on your own. No more traps stand between you and the depths of the kobold caves although another hazard awaits. Continue down the tunnel until you find another obstacle, a hatch on the floor, beyond which a Kobold Archer paces, cryptically talking to itself.
Interact with the hatch to bring up an Illustrated Book episode! This one is rather simple, as you only have three options: pass a [Trickery 14] check to make it across safely, pick “…surged forward, paying no heed to the dangers surrounding us!“ to stupidly fall through the hatch, or “…decided not to push our luck and retreated.“ to pointlessly delay the decision. Save and attempt the [Trickery] check, as there’s nothing to gain by turning back, and even less by falling into the lower level. In the latter case, you’ll have to fight through several encounters without being able to rest and with no clear route to safety, which is a complication nobody needs. Don’t worry, you’ll get down to the next level soon enough, but via a safer, more lucrative route.
| Reward: For making it across the hatch safely |
|---|
| 90 XP |
Search for Sootscale
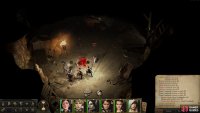
Make it across the hatch, earning an experience reward in the process. Once in the cavern beyond, turn north to confront an old, familiar foe - Giant Spiders. Eradicate the pests and push forward to the north, disarming some more traps [Perception 18] [Trickery 18] as you go. Also, be sure to search some scaffolding to the west the find a pile of rocks [Perception 6] hiding An Ancient Rostlandic Coin.
(1 of 2) While your relationship with the Kobolds may vary, Giant Centipedes
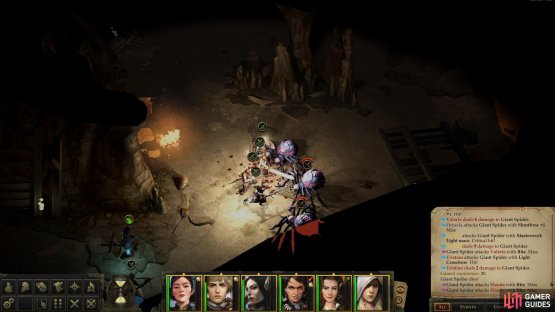
While your relationship with the Kobolds may vary, Giant Centipedes (left), and Giant Spiders will pester you, regardless. (right)
Continue north until the path splits into three directions, with west leading up a wooden ramp onto the nearby scaffolding, east leading downhill and north leading into another chamber. Head north first to reach a chamber occupied by several Giant Centipedes. Crush these unworthy insectoid foes, loot a sack, then admire a chasm to the northwest. This was the simplest fork, the other two are a bit more involved.
Backtrack south to where you fought the Giant Spiders, and this time head down a ramp to the east, being wary of a trap [Perception 18] near the bottom of the ramp. Disarm the trap [Trickery 18], then continue into a cavern where another group of Giant Spiders lurk.
Exterminate them, then continue into a large chamber to the north, which is crawling with Kobolds. If you’re at war with the Kobolds, good news! They’re just far enough apart that you shouldn’t have to fight the whole lot of them at once, which would be a tremendous struggle, indeed. Instead, you can usually get by with confronting small groups of four or so. Whenever possible, try to rush the more annoying Kobolds (Alchemists, Bone Shaman, Flame Shaman), even if it means provoking an Attack of Opportunity from their Sentinels - it’s usually a worthwhile trade for ganking the more troublesome Kobolds, first.
If the Kobolds are your allies - or once they’ve been dealt with - you can get to looting. There’s a crate and a sack you can loot near a Kobold shrine (look for the large, reptilian skull along the eastern wall), and a rather less lucrative sack against the western wall.
Return to the southern edge of the cavern and continue down a tunnel to the east, which terminates in yet another fork guarded by another trio of Giant Spiders. Exterminate them, then continue east to find a dead-end where you can loot a sack containing meager treasures.
Backtrack to the fork, and this time head north, stopping when you spot some familiar foliage on the ground. Sure enough, traps abound, so carefully search for them [Perception 15], then disarm them [Trickery 12]. There are three in total. Once past the traps, enter a cavern to the north and note that there’s an area transition leading to the lower level to the southwest. Otherwise, the only object of note here is a Kobold Alchemist grilling another Kobold for a password, which seems patently absurd in a race war. Fortunately, no such test hinders you. Go through the doorway the Kobolds guard and continue north to find Chief Sootscale.
If you’re hostile to the Kobolds, read the text under the header Battle: Chief Sootscale, if not, skip ahead to the text under the header Speak with Sootscale.
Battle: Chief Sootscale
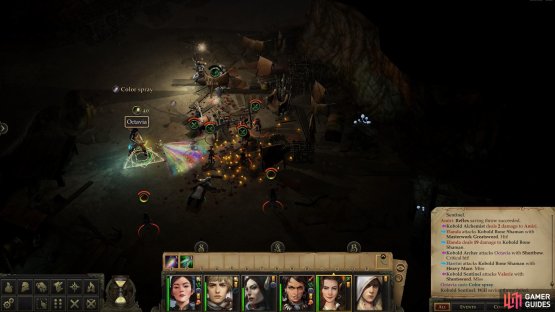
If you’re hostile to the Kobolds, this ensuing fight is an easy one, despite the opposition you face. An Alchemist, a Bone Shaman, several Archers on a ridge to the west, a pair of Sentinels and the Crier accompany Sootscale, and fortunately they’ll all too dumb to avoid making a severe tactical error.
Assemble your party outside the door to the south, so that they’re protected by the wall and not standing opposite the doorway. With one well-protected, sturdy character, head north to provoke the Kobolds, then lure them south through the door. Once they start coming through the door, attack with your entire party, effectively bottle-necking them in the doorway. Pelt them with Sleep spells, if you’ve got them and be wary of allowing their mages and archers to pelt you from afar. Simply repositioning to use the wall as cover should force them to come close, and all in all, the terrain here makes this fight much easier than it otherwise could be.
(1 of 2) When fighting Chief Sootscale, be wary of reinforcements appearing behind you.
When fighting Chief Sootscale, be wary of reinforcements appearing behind you. (left), Chief Sootscale’s gear is well worth killing for. (right)
Strike down Chief Sootscale and you’ll get an opportunity to spare [Chaotic Good] or finish off your foe. You’re making a significant sacrifice for morality if you spare him, however, as it deprives you of his loot, which includes a Masterwork Light Mace and a Belt of Incredible Dexterity +2, the latter which will improve any character’s Dexterity score by two points. There’s no shortage of characters who can benefit from such a device, as most warriors will enjoy the Armor Class boost, archers will enjoy the Attack boost, and everybody will gain from the higher Reflex Save. You’ll also need to claim the Mites’ Relic from his corpse, which you’ll need to chase down Tartuccio. If you spare him, the fight will immediately end, and you’ll be given the Mites’ Relic.
Speak with Sootscale
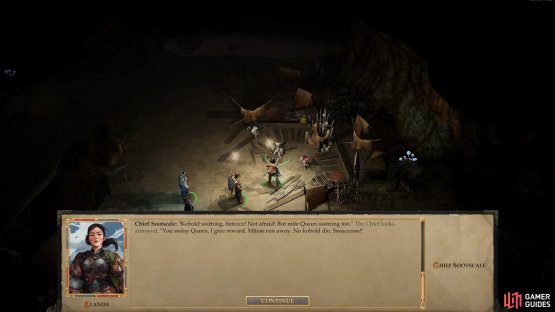
If you’re not at war with the Kobolds, you have more options for handling this encounter. Talk to Chief Sootscale and be sure to pick the dialogue option “I may need the relic to enter the hall, if Tartuk is already there.”, which will cause Sootscale to simply hand over the stolen Mites’ Relic. If you also ask “How can I help you in your war?”, he’ll ask you to kill the Mite Queen, promising a reward. Accepting will start the quest Death to Queen Bdaah!. Don’t worry, accepting this quest doesn’t lock you into an alliance with the Kobolds, nor does it provoke the Mites.
Next pick the option “There is someone in your dungeon I wish to discuss.” If you’re observant, you may have noticed that the companion(s) that accompanied Tartuccio can be found to the northwest, locked in a crude cage. Tartuccio rewards loyalty about as well as expected. Fortunately, in his absence his dim-witted Kobold associates are easily manipulated, and you can free your former companion(s) by picking the dialogue option “What need have you of this ‘dumbhead’, Chief? They’re just taking up space in your dungeon.” or “Release them, Chief. How does holding a ‘dumbhead’ prisoner serve you?”. Afterwards, talk to your companion and welcome them into your party - even if you don’t add them immediately, just bringing up the party select menu should suffice. If you didn’t add them, you can find them at Oleg’s Trading Post later.
(1 of 2) You can conspire with Chief Sootscale to take down the Mite Queen
You can conspire with Chief Sootscale to take down the Mite Queen (left), and also negotiate for the release of your final companion. (right)
Finally, if you wish to use your neutrality with both factions as a means to safely reach one leader or another, you can do that, as well. Simply pick the dialogue option [Attack] “I need our alliance no more!” to open hostilities with Sootscale at your leisure. In this case, read the text under the header Battle: Chief Sootscale above, as events will play out identically.
Loot Sootscale’s Lair
After vanquishing or talking to Sootscale (or both!), you’ll be free to loot his lair. Succeed at a [Perception 12] check to loot a bag of food behind the chief, while another [Perception 12] check will reveal another, more lucrative bag of goodies to the southwest. Search under a shelter west of the archers to find a Taldan Warrior’s Dog Tag. Finally, head into a chamber to the north to find a sack to the east, and a hidden crate [Perception 10] to the northwest.
Whew. With all that done, it’s time to backtrack to where you first encountered the Giant Spiders. If you want to side with the Mites, you’ve got plenty of incentive to leave these caves and claim your reward from the queen. Then again, there’s still exploration left to be done, and at the very least, you might as well finish the southwestern part of this area, as there’s experience to earn, loot to gain and another route to the lower levels to secure.
(1 of 2) Don’t be overly eager to engage a pack of Giant Spiders, lest you fall into their trap
Don’t be overly eager to engage a pack of Giant Spiders, lest you fall into their trap (left), Vanquish the arachnids, then search a pile of rocks for a Taldan Warrior’s Dog Tag. (right)
Finish Up the Kobold Cave
From where the first group of Giant Spiders lurked, turn west and climb a ramp - the only direction of the fork you’ve yet to explore. At the top of the woodwork turn west and enter some caves, where you’ll find another pair of Giant Spiders. Further down the tunnel to the west is another cavern, where a larger pack of Giant Spiders lurk. Lure them east to you, as there’s a web trap [Perception 18] [Trickery 18] that will hinder you if you charge at them.
Once all the spiders are dead, continue west and investigate a wooden cart at the top of a slope, a slope which leads to a rag-tag - yet effective - barricade. Nothing you can do about it yet, so loot a crate for some minor treasure, disarm another trap [Perception 18] [Trickery 18] then succeed at a [Perception 17] check at the end of these caves to find a Taldan Warrior’s Dog Tag.
Finally, note the area transition south of the cart, which leads to the Old Sycamore Depths. This area transition correlates to an area transition in the southwestern corner of the Old Sycamore Depths. Something to keep in mind when exploring that area, but for now, it’s time to leave these caves, travel across the surface to the eponymous old sycamore tree and enter the Mite section of the caves, which is where the walkthrough will pick up.









No Comments